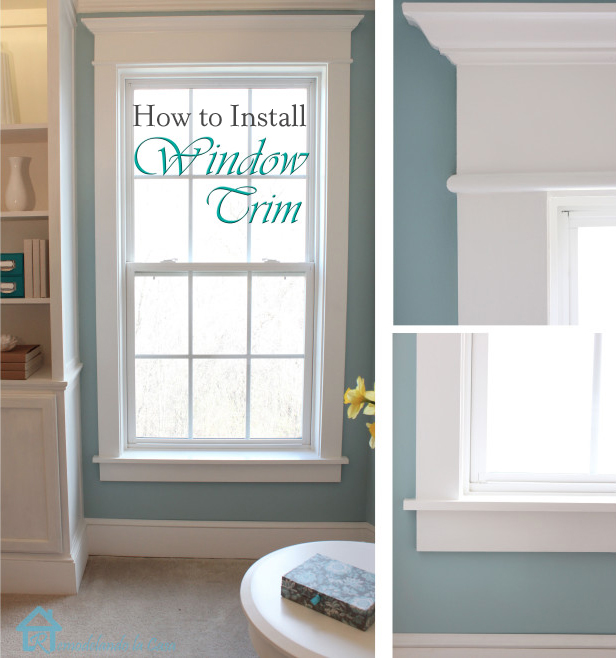
How to Install Window Trim
Hi everyone, I’m Cristina from Remodelando la Casa, and I’m beyond excited to join the team of Pretty Handy gals and guys! I’m still pinching myself at such a wonderful opportunity.
Today I’m going to show you a fairly easy way to transform your builder grade windows from plain and boring to beautiful with loads of character and with a more finished appearance.
Right now I’m working on updating my bedroom, where I have a couple of these windows.
They look like they are wearing skirts, but forgot to put on the tops! 🙂 Yeap, naked!

Let’s change that by dressing up those windows!
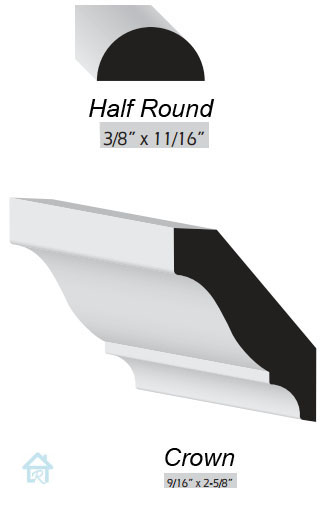
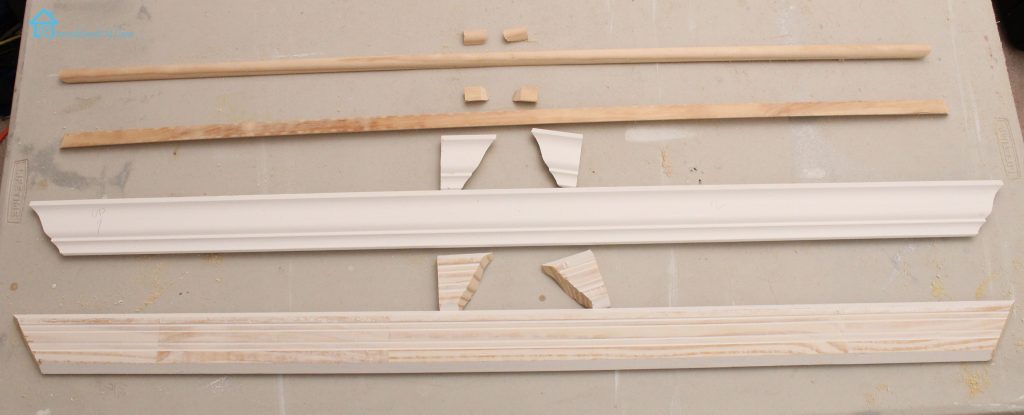
This is only a decorative treatment. All the wooden material (Poplar or Pine), can be found at your local home center.
(Affiliate links are included for your convenience. Brittany earns a small percentage from a purchase using these links. There is no additional cost to you. You can read more about affiliate links here.)
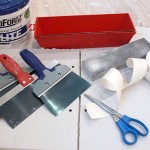
Tools:
- Miter saw (but you can use a Miter box and hand saw)
- Jig saw
- Sander
- Pneumatic nail gun
- Pry bar
- Utility knife
How much material you need depends on the size of your window, but this is what I used:
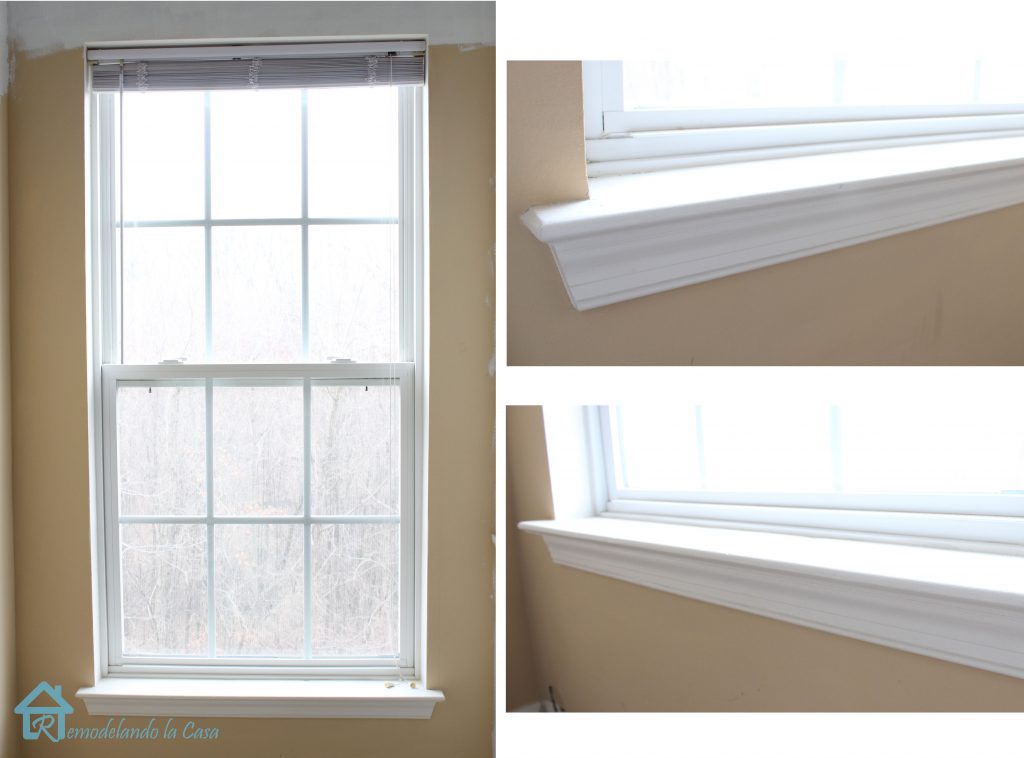
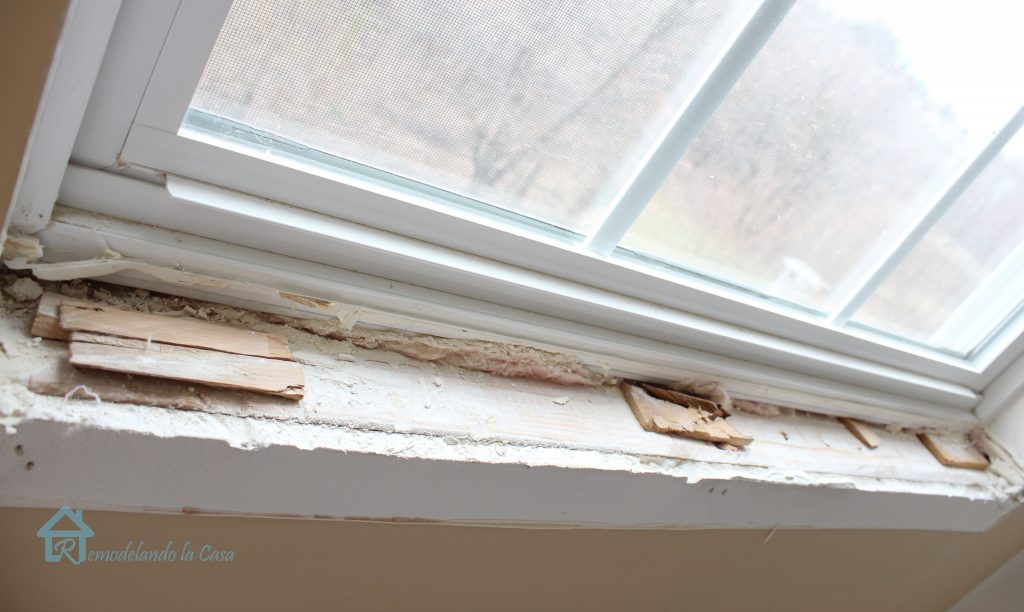
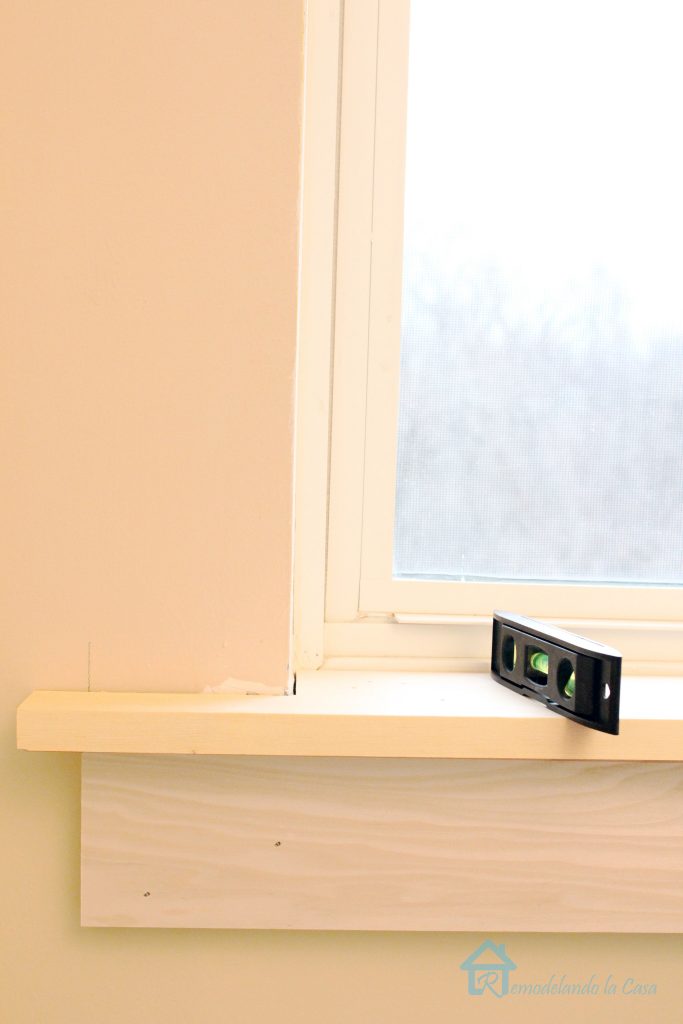
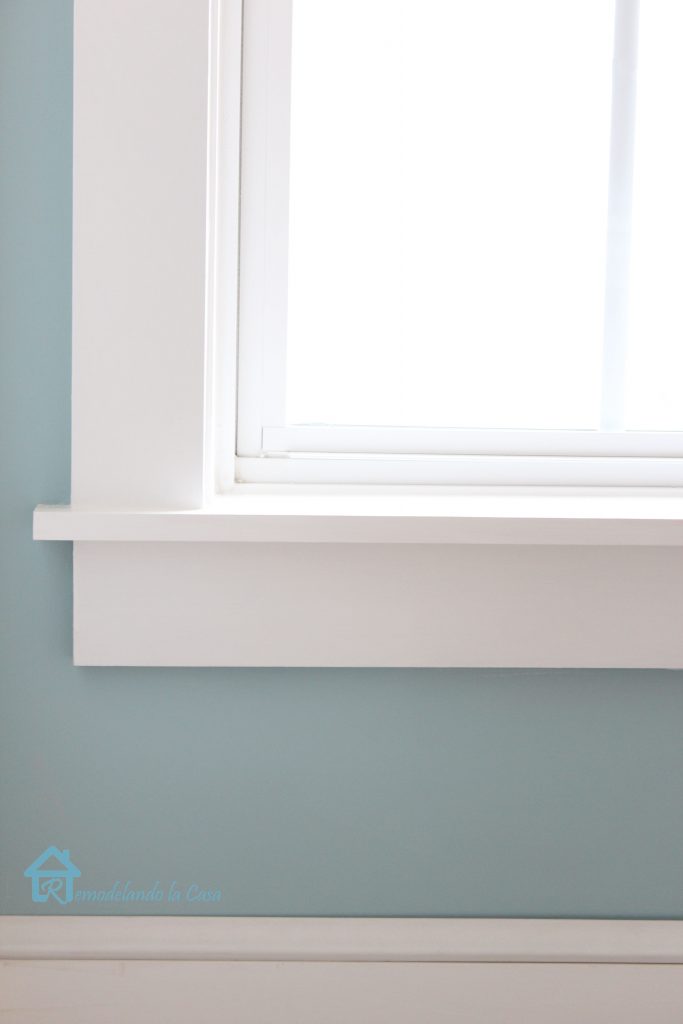
The first thing to do is getting rid of the old window stool and apron.
Using the utility knife, score around the window cutting the caulking. This is very important to prevent rips in the drywall.
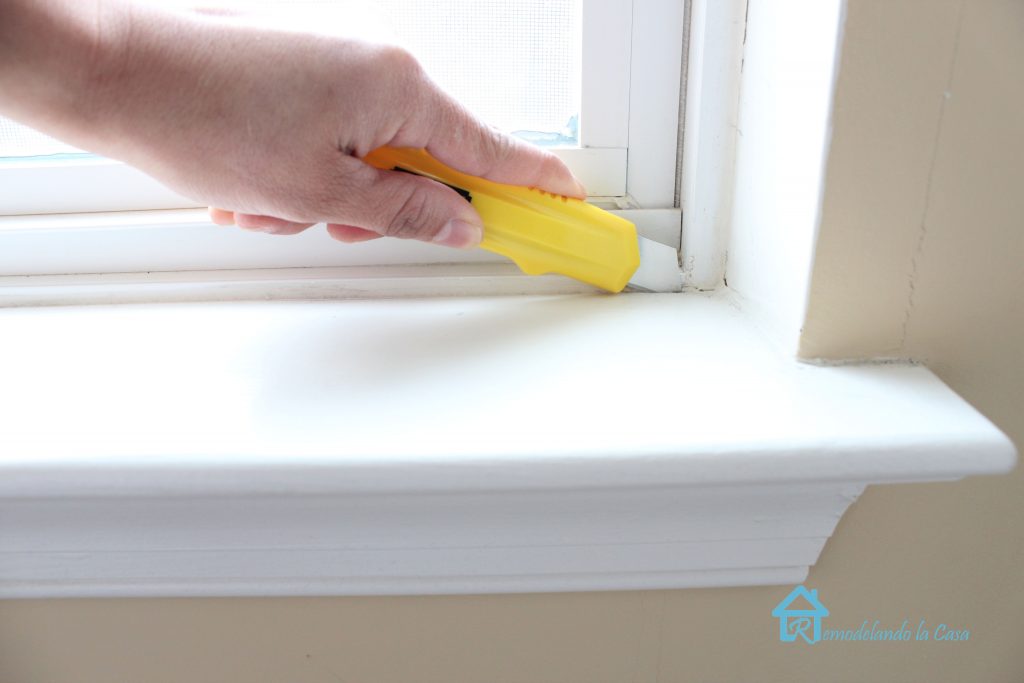
Using the pry bar begin lifting the apron, use a wood shim as support to prevent damage to the wall.
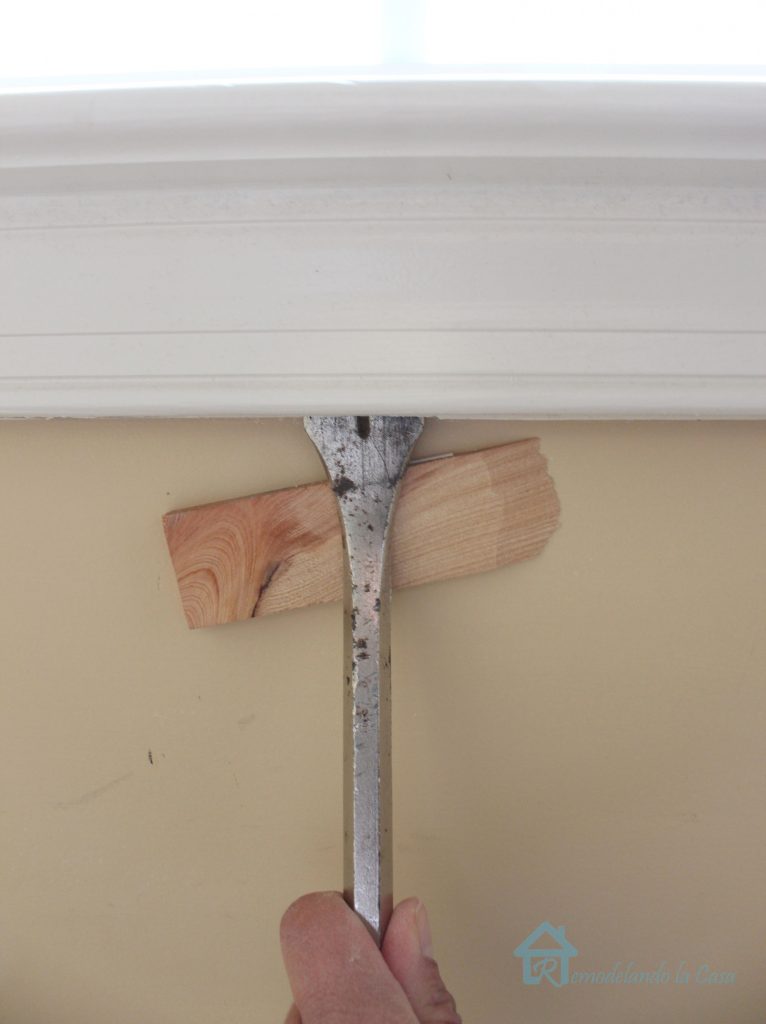
Once the apron is off, you can begin lifting the stool.
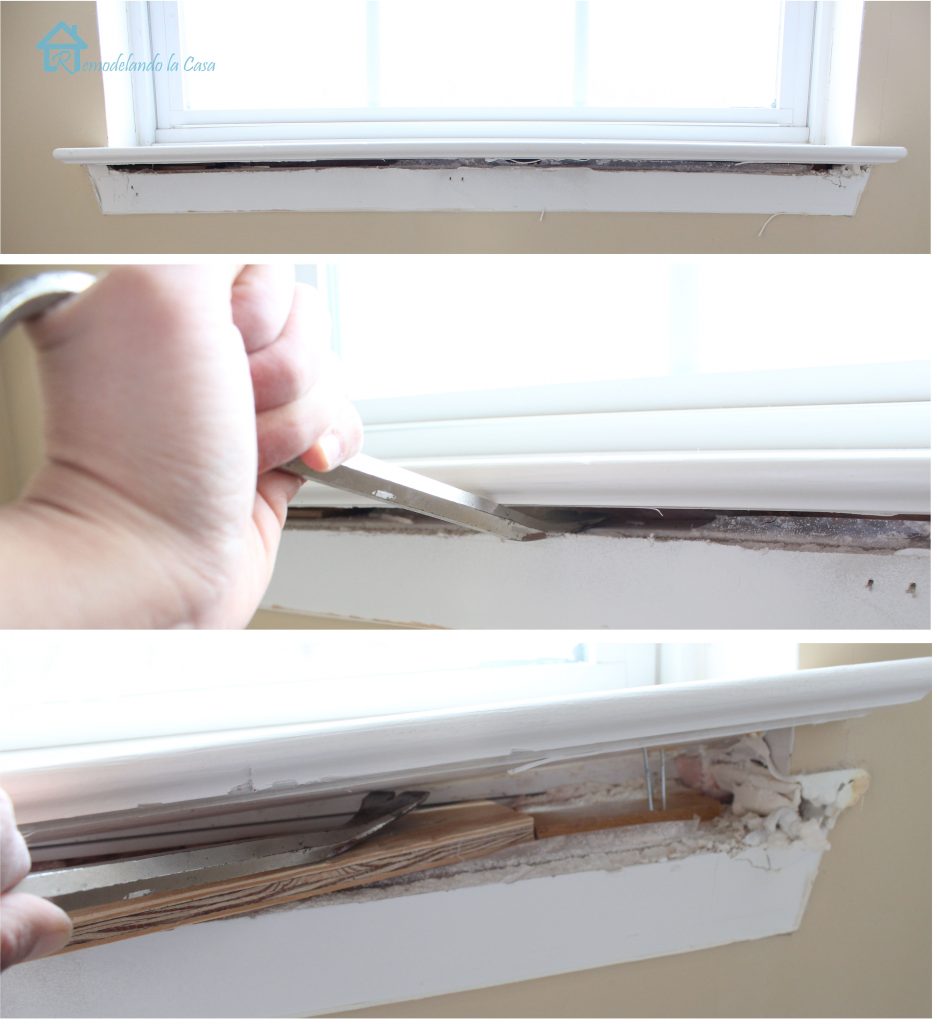
Underneath I found lots of wood shims that were used to level the stool. They were left in place. Scrape the old caulking from the window and wall.
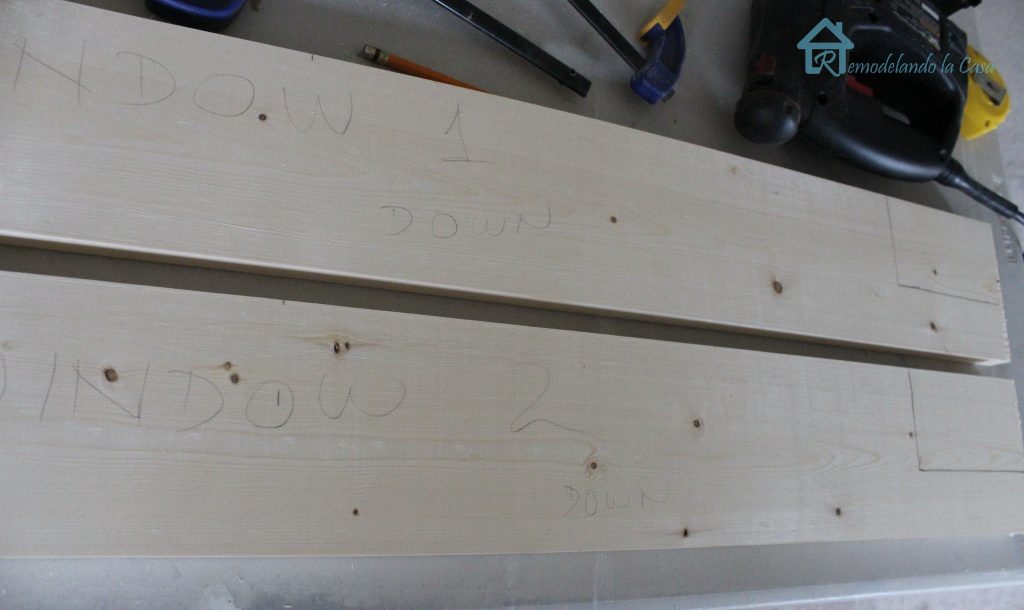
Don’t throw away the old window stool, you can use it to trace the pattern onto your new stool. Measure the width of your window, add the width of both side casings: 7 inches, add 1/2″ for reveals (1/4″ on each side) and add 2 more inches for the “horns” (The horns are those extra parts on the window stool that go beyond the apron. Allow one inch on each side of the stool.)
Mark the center on the old and new stool boards, align those centers and trace the new pattern.

If you are working on more than one window, it is a good idea to mark each board, even though they look pretty much the same, their measurements can vary.
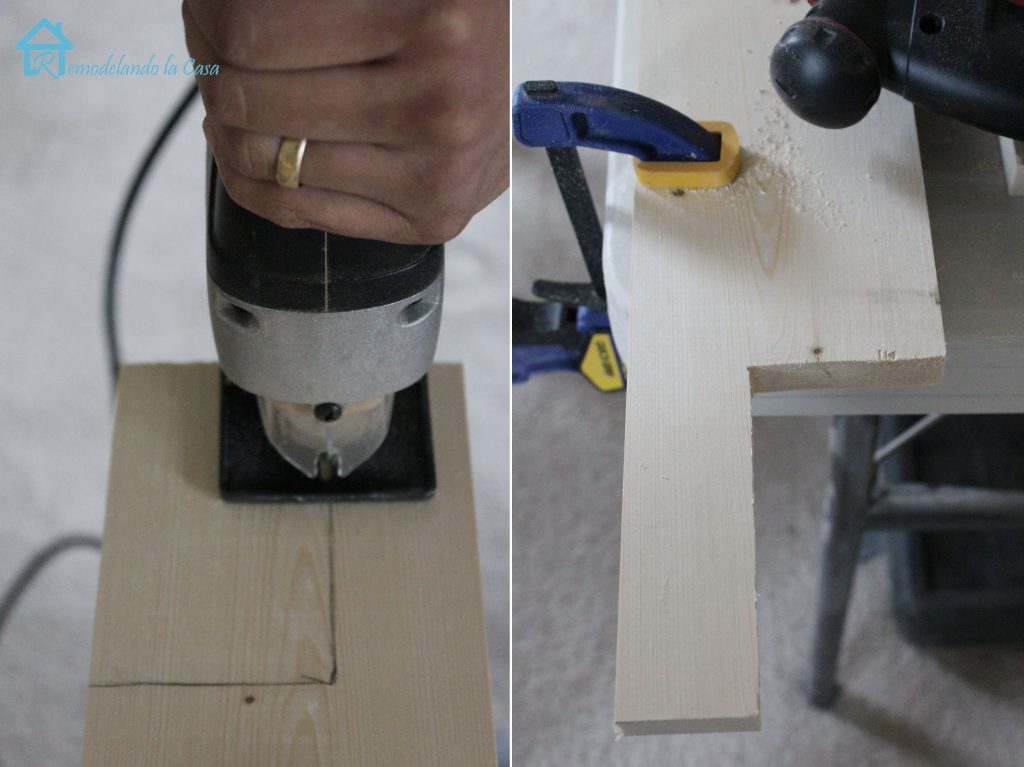
Use your jig saw to cut away those marked ends.
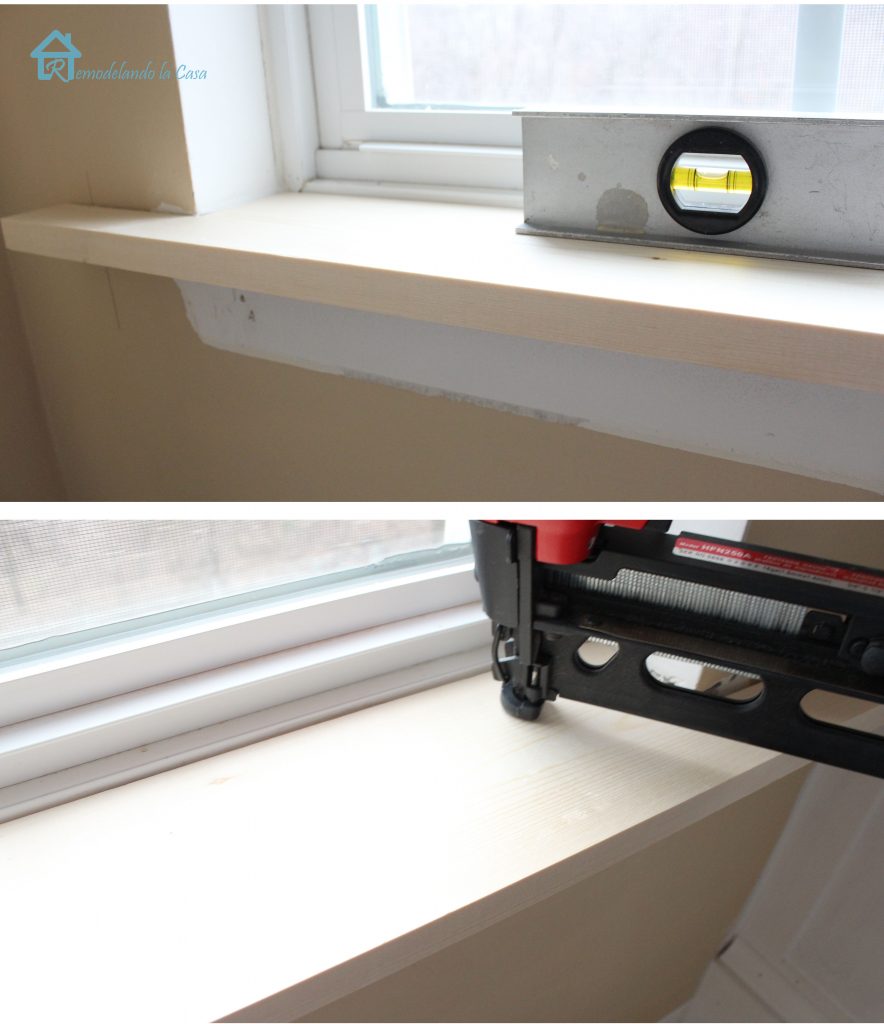
Place it on the window and make sure the new stool is level. Nail it in place.
The apron can be installed by centering it underneath the stool. The dimensions are the same as for the stool, but without the horns (2″). As shown below, the horns protrude an inch on each side beyond the apron.
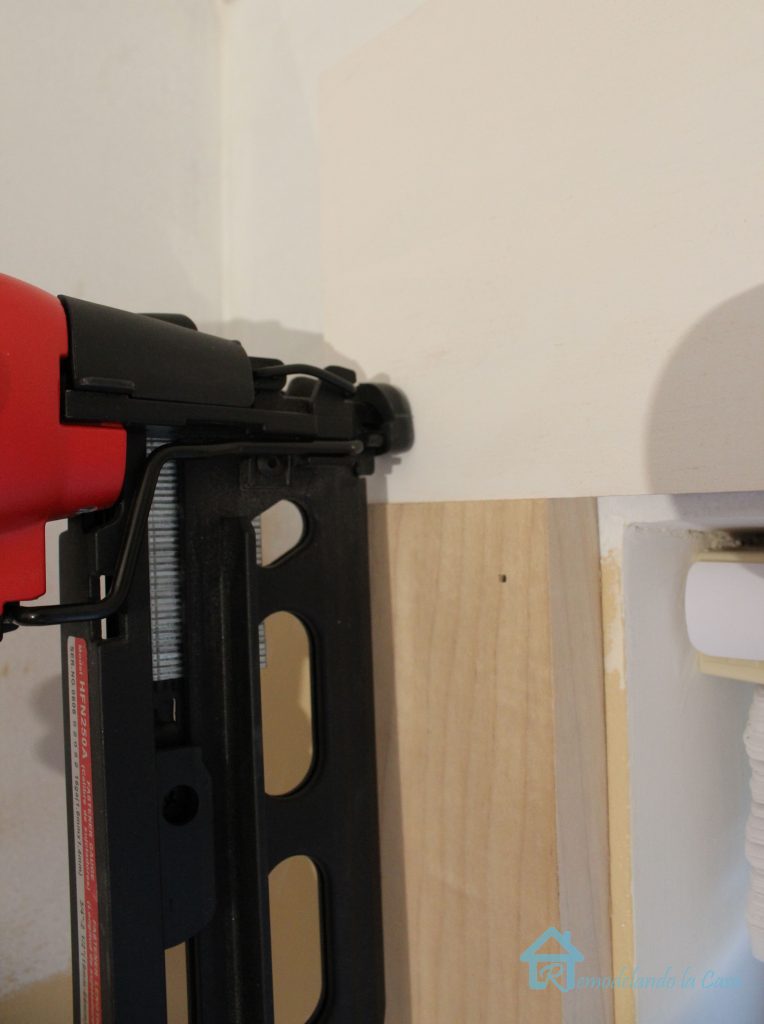
The side casings can be installed now. To figure the length of the side casings, measure the distance from the stool to the top of the opening of the window, add 1/4″ for reveal line. Secure the side casings with nails.
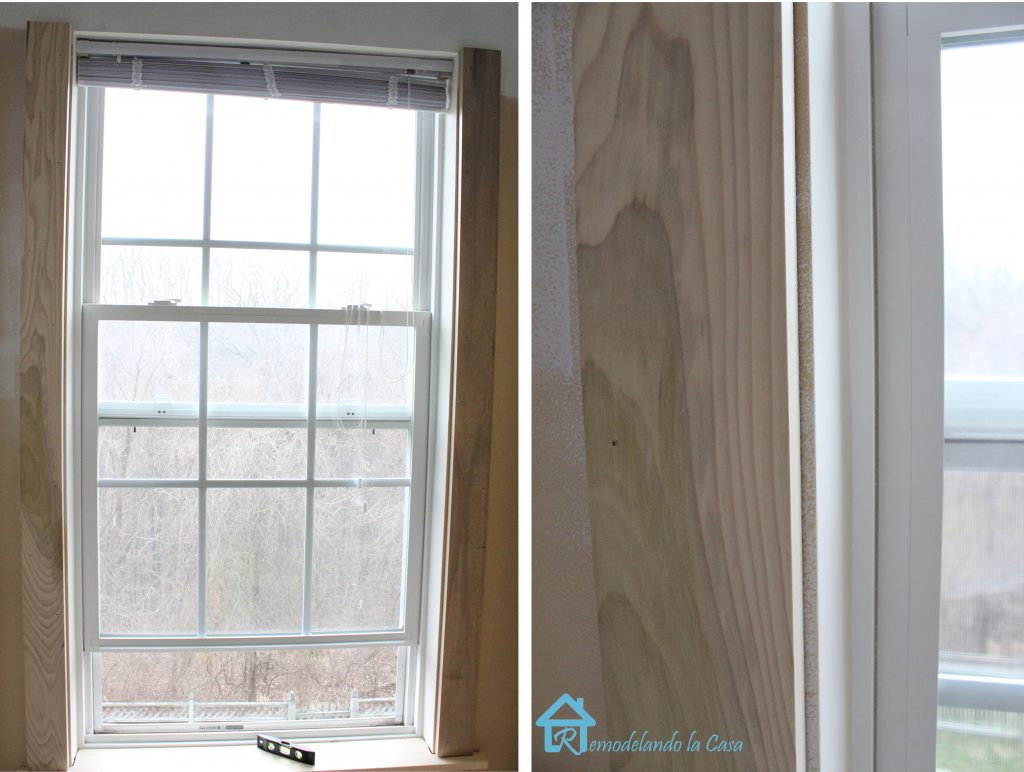
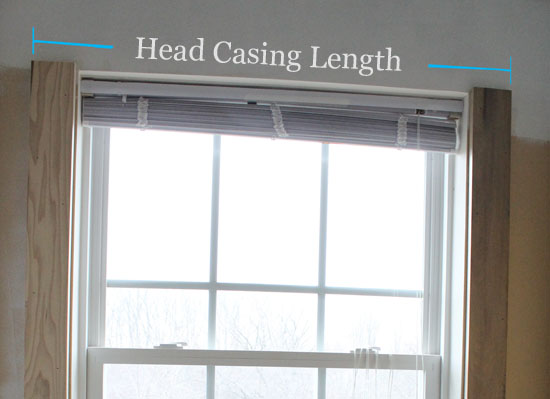
After the side casings are installed, measure the distance from the outer edges of the side casings. That will give you the head casing length.
Nail the head casing in place.
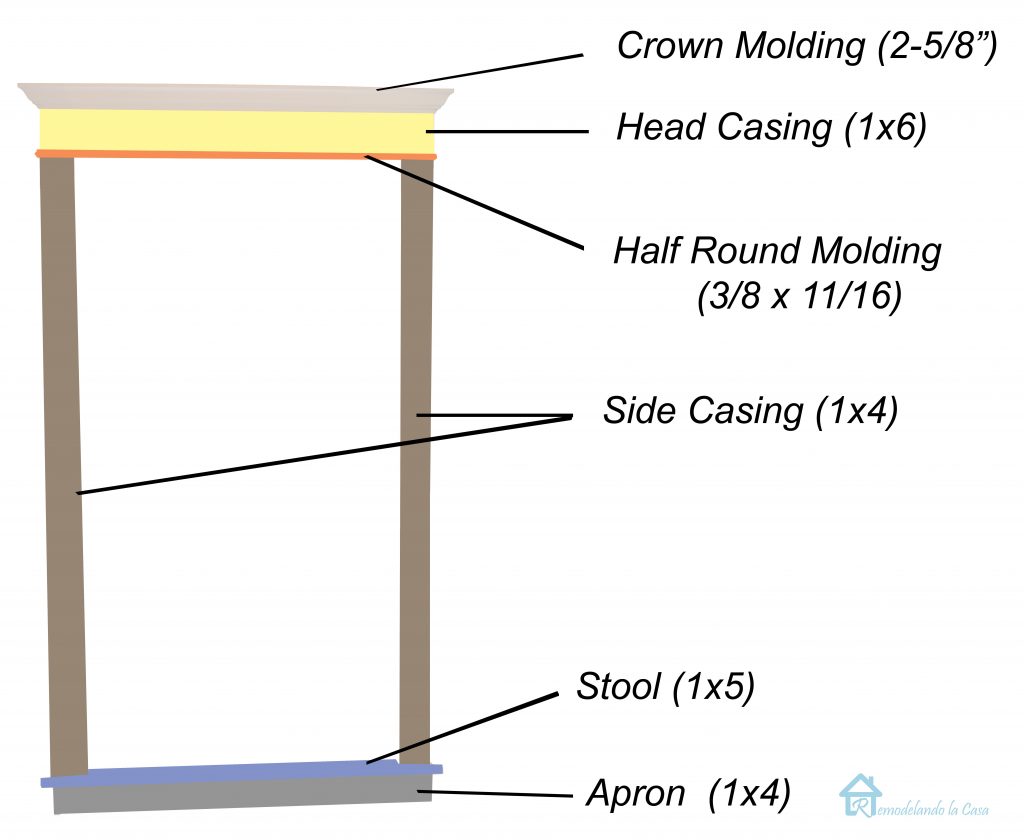
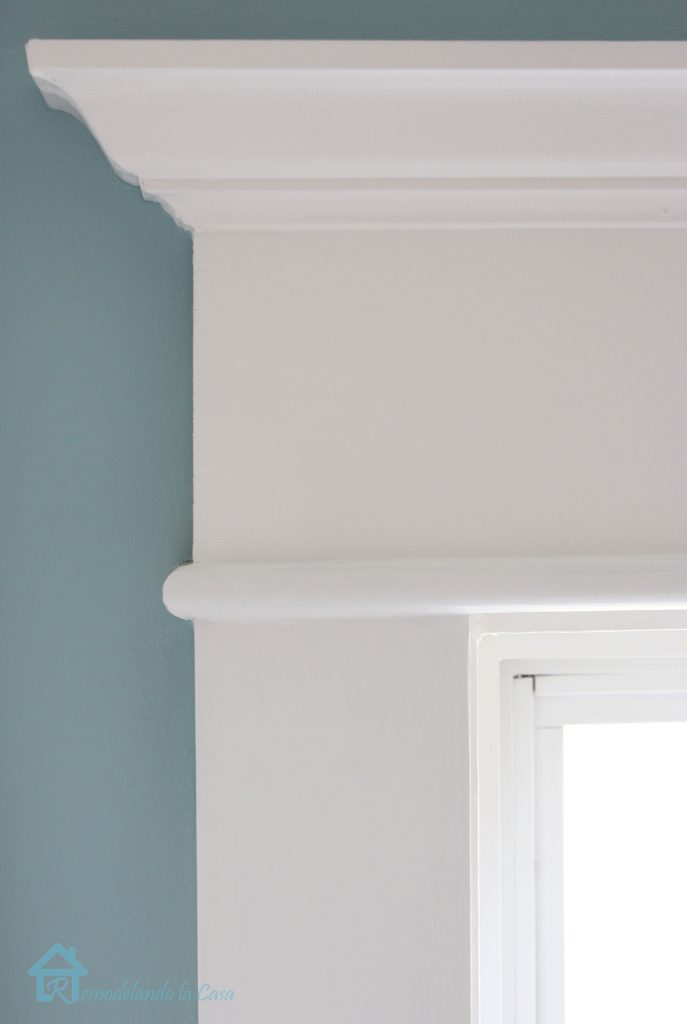
Cut the decorative molding, crown and half round.
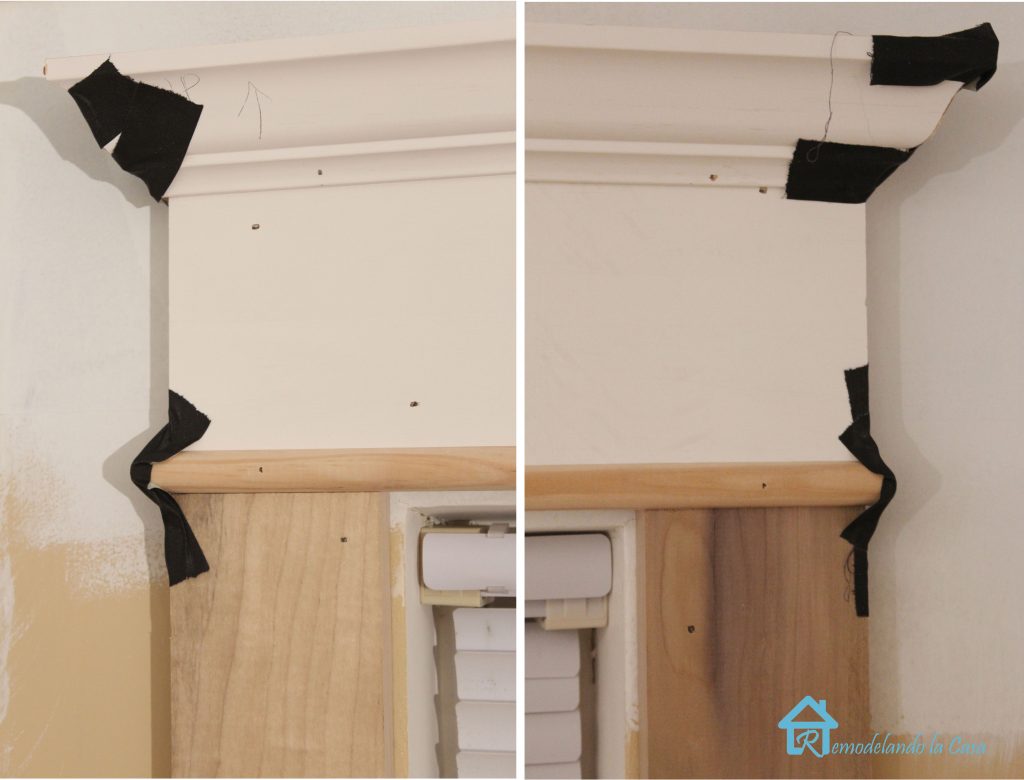
When cutting the decorative molding, miter the ends (cut at a 45 degree angle as shown below.) Remember to cut the molding upside down.

The crown is installed at the very top of the head casing and the half round is attached to the bottom of the head casing.

The returns (side pieces of the decorative molding) are glued in place and held overnight with tape.
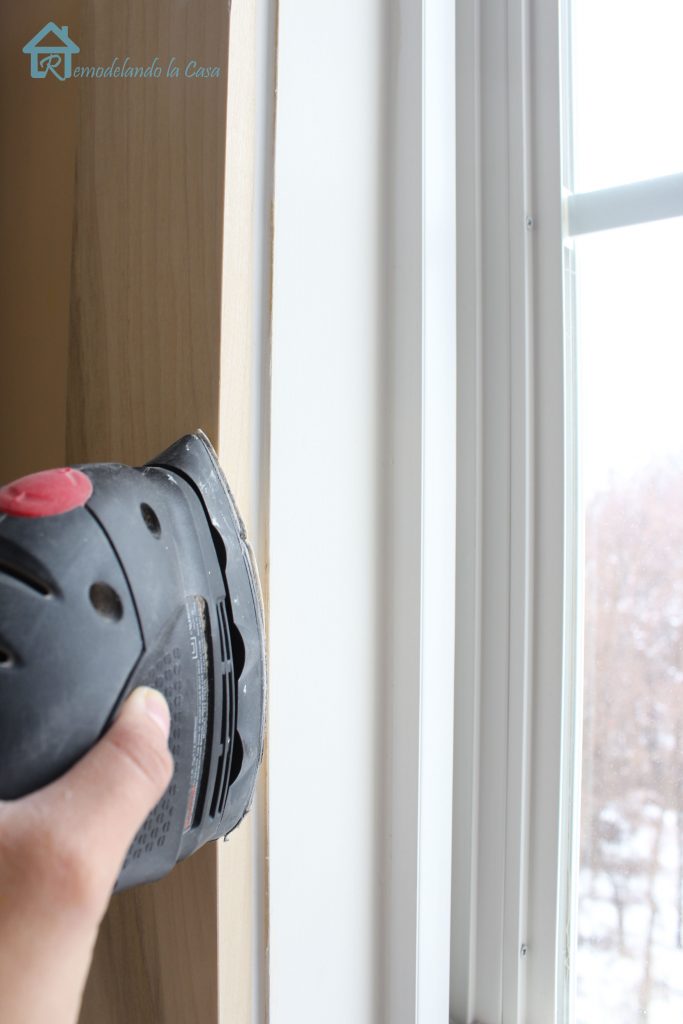
Fill the nail holes and gaps with caulking. After the caulk is dry, a good sanding is a necessity. Don’t forget to sand those sharp edges too.
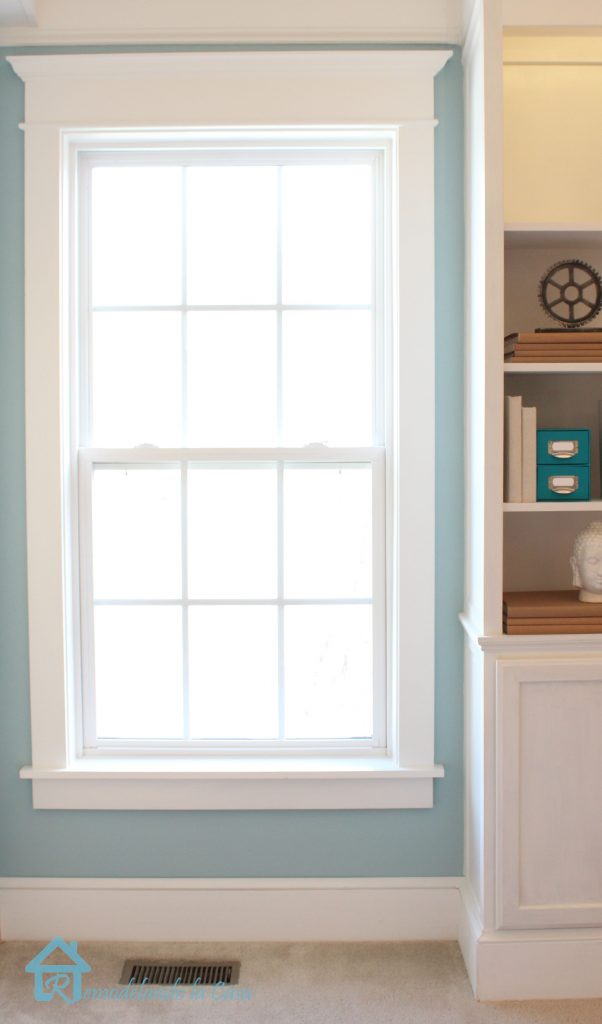
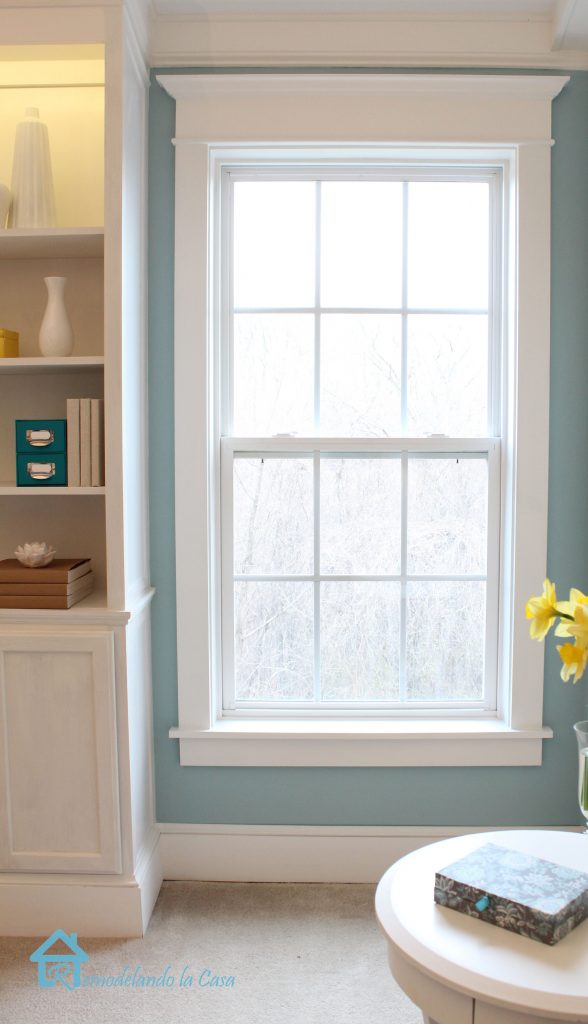
Paint the trim with one coat of primer and two coats of paint. Then you’ll have good looking windows in your room!
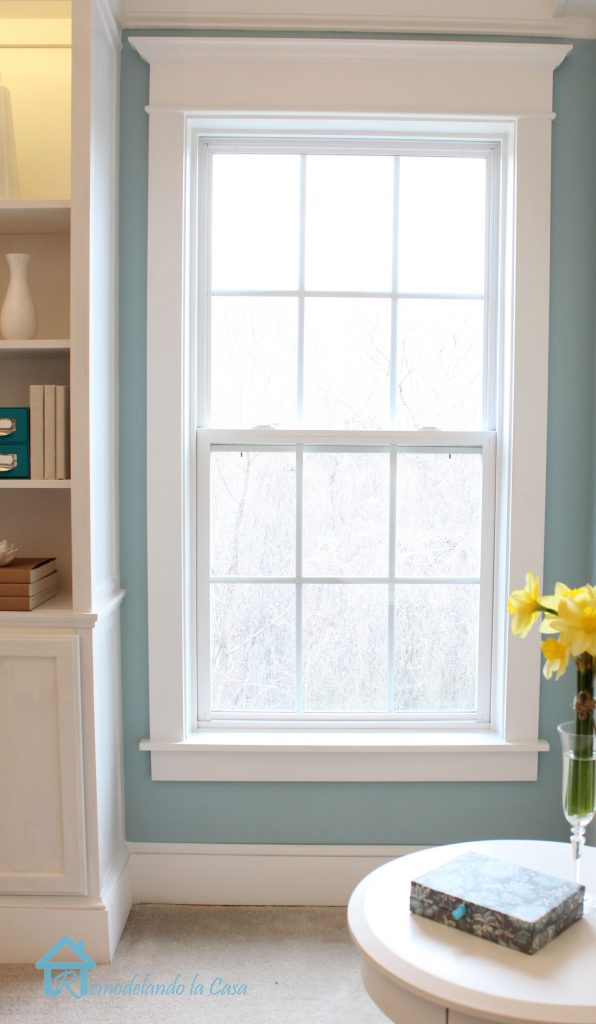
Add new paint in a contrasting color on the walls and the room is almost ready!
I had some leftover paint that I mixed to achieve this hue.
These twin windows really add a lot of character to the room.

The trim makes a big difference, wouldn’t you agree?
Thank you so much for having me here at Pretty Handy Girl! I can’t wait to share more with you!
Don’t miss Brittany’s great tutorial for trimming a casement window: How to Install Trim and Casing Moulding on a Casement Window by PrettyHandyGirl


Christina, THANK YOU FOR THIS AMAZING TUTORIAL. We have the exact same windows wearing the exact same skirt, but not tops, lol. We have been thinking of doing the very same thing to our windows, and seeing what you’ve done makes me know it’s totally DOable!!
Hugs,
Betty
absolutely amazingly beautiful!! Nice job on dressing up the window. Love the extra height
The trim looks so simple to put on but what a dramatic change it makes to the window. could this be done on windows that hav a bull-nose (rounded) edge, to you think? How would you deal with the gap of the vertical pieces? Thank you
Thanks Tracie! I think you might need to install a jamb around the frame of the opening first, then it can be trimmed. Be aware that window hardware can interfere with jamb installation.
I couldn’t tell from the pictures. Is there a jamb installed on your windows? If not, are the insides of the windows textured? Ours have an orange peel texture and I am trying to decide if it would look awkward not being a flat surface?
Julie, I’m replying for Cristina. Since you have orange peel, I do think it would look a little funny. But, you can buy a small tub of joint compound and apply a layer to smooth that area. After the joint compound dries give it a light sanding. The other option would be to buy thin plywood or pine molding stock (sometimes called hobby stock) and glue that to the sides of the window opening.
The trim looks great and the explanation was perfect but I really enjoyed the paint color you used to contrast the trim.
Awesome tutorial Cristina with stunning results. You will bring so much to Brittany’s team! …. And to Brittany…. Excellent choice! Cheers.
Thanks Gal! I love having Cristina on board! She rocks!
THANK YOU for posting these clear instructions. When I shared them with my husband he went into a panic over the possibility that HE may be asked to follow the instructions! When I said a woman did this, he relaxed and said, “There you go! Do it!” He may not have allowed me to start without your proof! Thanks again!
Thanks Barb! That’s a similar reason why I got into this kind of projects! My husband wasn’t that helpful and was very scare of doing more bad than good! 🙂
Really interesting tutorial. For my skill level (and tool collection) it seems challenging but not completely beyond me. I like the final outcome (it would have been nice to see the before and after side by side). As someone who scours ReStore for windows rather than buying the custom made ones I’d need for our old house’s odd window sizes, I can see a use for this treatment. When you buy thrift windows, you take what you can get, whether it’s the right size or not. (If the window’s $18, I’ll buy it and deal with it!) This kind of treatment could cover up a gap at the top nicely. Thanks.
The trim looks amazing! Thanks so much for taking the time to write a tutorial to share with us! 🙂
Thanks Janet!
Why was it necessary to remove the original stool and apron?
It would’ve been to short with the added side casings.
Me encanto ese tutorial Cristina , Ese borde de la ventana le da mas elegancia a la ventana
cariños
Muchas gracias, Angelica! Que bien que te haya gustado!
I’ve been doing lots of trim and crown molding lately but I have to say yours looks amazing! A couple questions…
-Do you ever do any of the priming/painting before installing the pieces?
-And how do you get your cut lines against the blue so exceptional with 3 passes of white (primer/paint)?
Thanks!
Thanks Andrew! As soon as I began painting the trim I knew I should have done it before it was installed. It was hard to paint the trim sides, on one side I had the wall and on the other the bookcase!
The trim was painted first, a coat of primer and two of paint was all it needed, the wall got a good share of trim paint, that’s why I had to reach into my left over paint to create a striking hue for the trim to pop up! That’s not going to be the final color in that room.
Beautiful!!! Do you mind sharing the color of paint?
Thank you so much, Donna! That’s a custom color created by mixing left over paints from past projects. Sorry about that.
Its amazing how a little trim can really totally change the look of a window! I think I may have added a few new items to our to-do list!
Thanks Jacque! It is indeed a great change, I still need to do some more.
This is an awesome tutorial and totally inspiring, I think I could do this! Thank you so much Cristina! And I am excited for your awesome team Brittany!
Thanks Mindi! Good wood working skills is what you have, you can totally do this and lots more! 😉