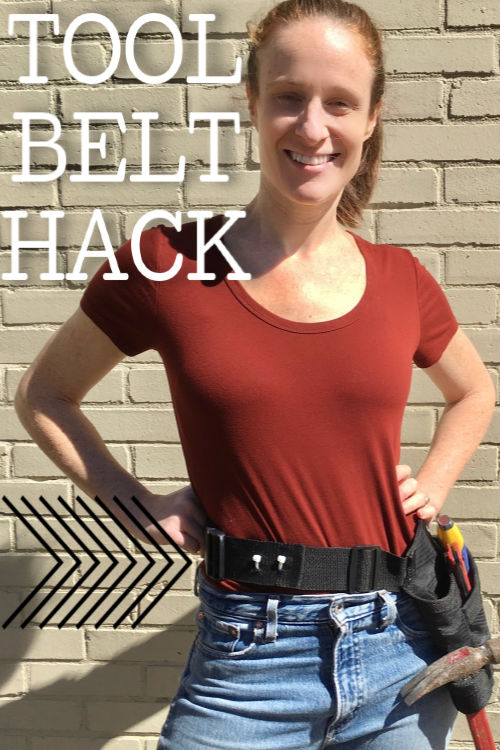
Tool Belt Hack for Petite Builders or Kids
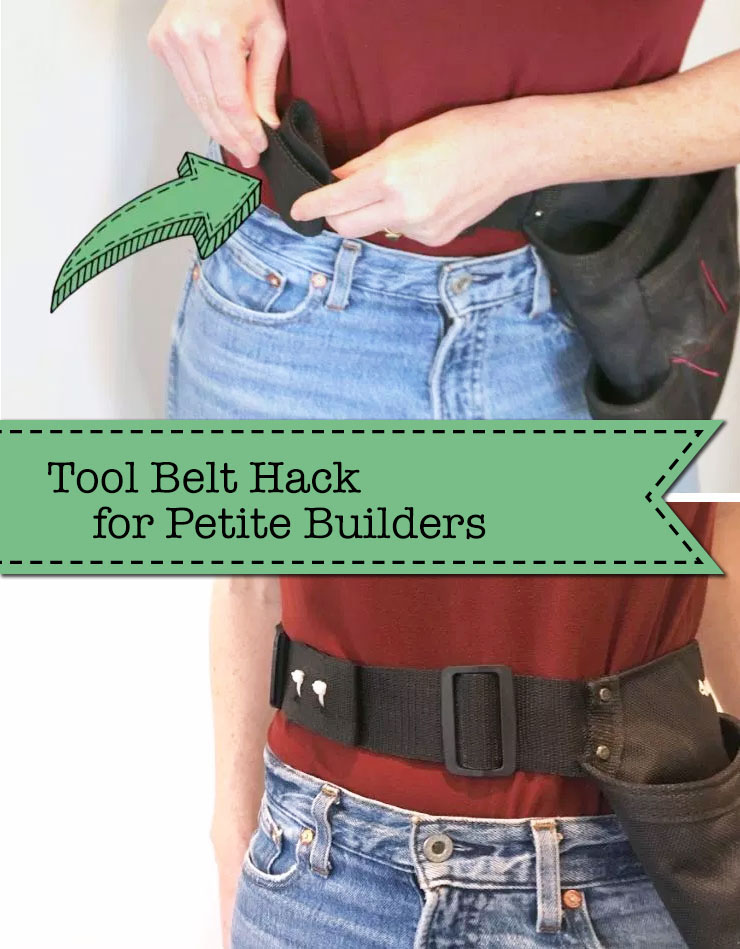 Tool Belt Hack for Petite Builders or Kids
If you are serious about DIYing, then a tool belt is a necessity. Unfortunately, tool belts are not exactly one-size-fits-all. If you are on the puny side of the size spectrum, you will be hard-pressed to find a belt that hangs where it is suppose to; around your waist, not sagging on your hips.
There are options out there, but talk about pink tax! Tool belts for women are rare and run $40 or more for almost the same belt, just a little smaller. You can buy belts for kids, but often they aren’t made to withstand the abuse a true DIYer will put a tool belt through. Instead, I prefer the cheap $15 Home Depot canvas variety that can withstand drywall mud and being left out in the rain from time to time.
The solution to the tool belt conundrum for petite builders
Use two zip ties, a couple of spring clamps, and a drill to hack your tool belt in less than a half hour.
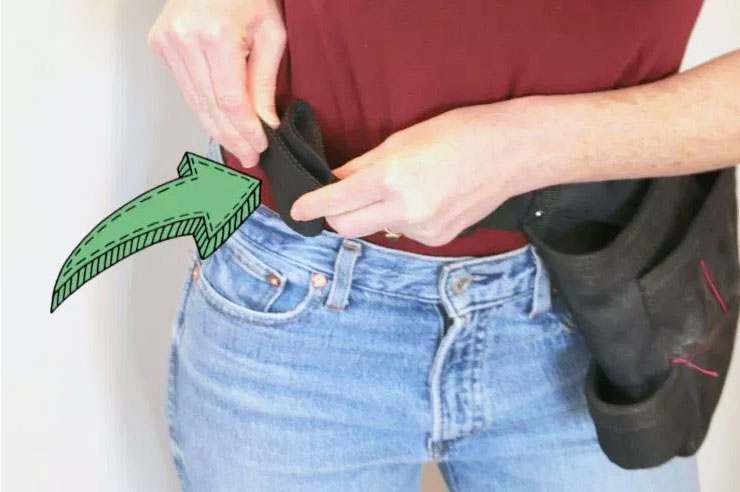
Step 1:
Put your tool belt on at the smallest setting and determine how much tighter you need it to be. With the belt on and fastened, double the canvas over and secure it with a spring clamp.


Remove the belt and attach it to a piece of scrap wood (using another spring clamp being careful not to lose your sizing). With a white crayon, draw two sets of dots on the portion that is folded over. Make your dots approximately ¾ of an inch apart.

Step 2:
Clamp the scrap wood and belt to a secure surface like a work bench so the doubled over canvas belt can’t move. Select a very sharp 7/32 or 1/4 drill bit and drill through the white dots. It’s ok if it frays a little, but the holes must go all the way through into to the wood behind it.

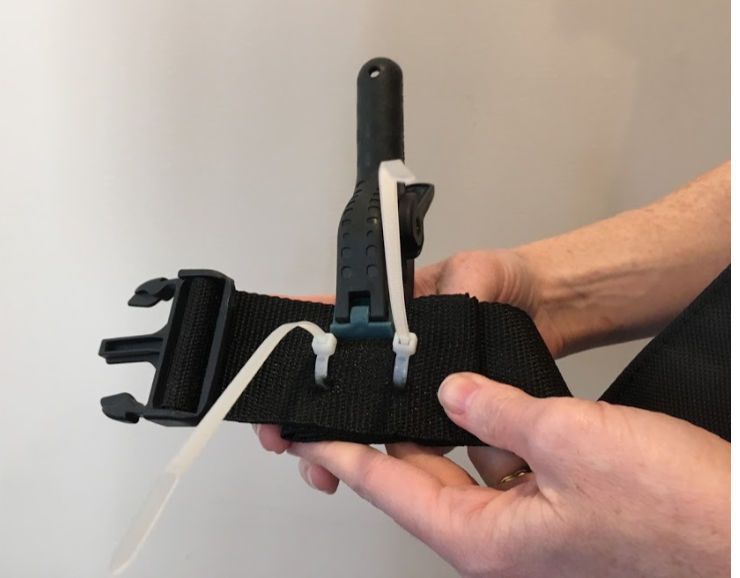
Step 3:
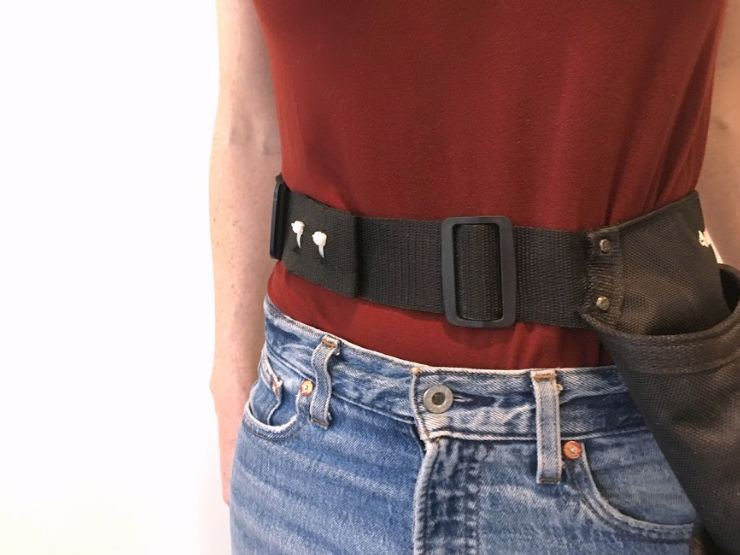
Remove the wood from behind the belt but keep one of the spring clamps attached to the doubled canvas to keep the holes aligned. Thread a zip tie through two of the holes. Make sure the square fastener of the zip tie is on the outside of the belt, not the part that touches your waist.

Add a zip tie to both sets of holes. Tighten the zip ties enough to hold the belt fold, but not so much that it cinches the webbing.
The back side of your tool belt should look like this:
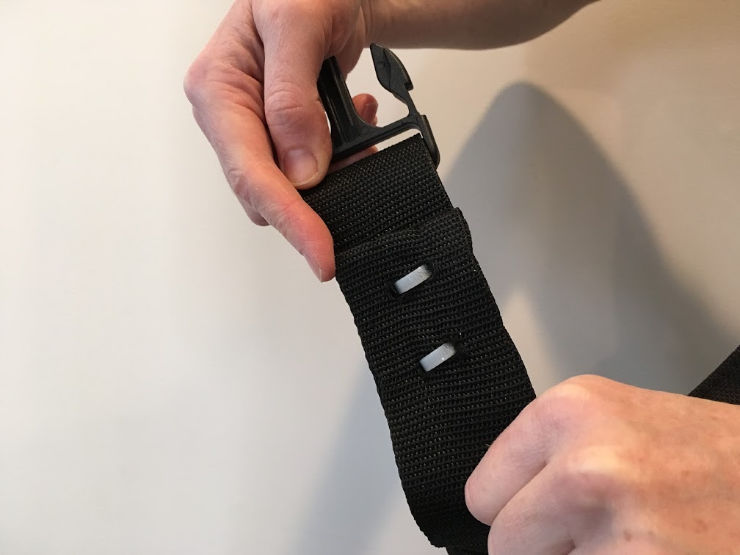
Cut the extra zip tie ends and you’re done. Go ahead and fill your belt with tools and get building!
 ~ Discover more Tutorials from Lara ~
Help a fellow petite builder by pinning this image:
![]()
 Hi! I’m Lara, the creator of The Unprofessional blog and YouTube channel. I am an aspiring handy-woman with little to no experience building, tiling, landscaping, demolishing, and what have you. I’ve drilled holes in the wrong places, cut on the wrong lines and stripped more screws than I care to count. And yet, I’m on my way to customizing my home, project by project. I believe you can do pretty much anything with a few good tools, a stack of wood and a half-baked
idea.
I like to find challenges and solve them with my miter saw. When my 3-year-old son complained that he couldn’t reach the picnic table, I designed an easy-to-build folding booster seat perfect for camping trips and beer gardens. When the low ceilings in my cape cod wouldn’t accommodate a bulky barn door, I found an alternative approach to turn any interior door into a space-saving barn door. I love to share these solutions with others in hopes that the empowerment and love of power
tools spreads.
You can connect with me on Instagram, YouTube and Pinterest.
Thaaank you!