How to Tile a Backsplash – Part 2: Grouting and Sealing a Backsplash
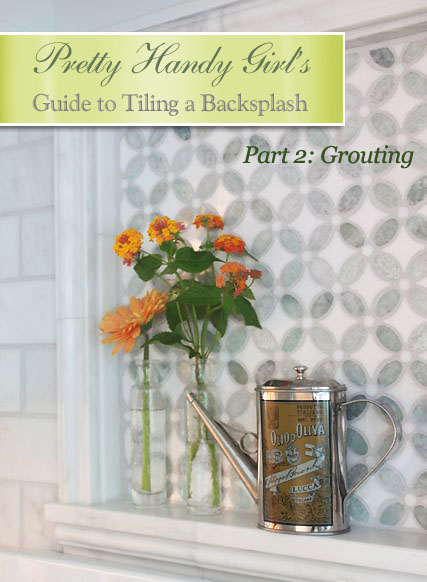
How did you do yesterday with the How to Tile a Backsplash: Tile Setting tutorial? Not too bad, right? Well, today will be a very gratifying day. Today I’m going to show you how to grout (and seal) your tiles and finish off your kitchen backsplash. You are going to love the end result.
(I’ve included affiliate links for your convenience. I earn a small percentage from a purchase using these links. There is no additional cost to you. You can read more about affiliate links here.)
Materials:
- Grout (Used: Mapei UltraColor Plus Rapid-Setting Sanded Grout color: Frost)
- VanHearron’s Grout Once
- Two buckets (same size or one larger)
- Water
- Ice
- Grout Float
- Spatula
- Rag
- Buffing pad
- Sponge
- Basin filled with clean water
Prep work: If you are working with a natural stone tile, you may want to seal the tiles before grouting. I sprayed StainGuard5000 on a dry clean rag and wiped it onto all the tiles. Then buffed it off after five minutes.
Instructions:
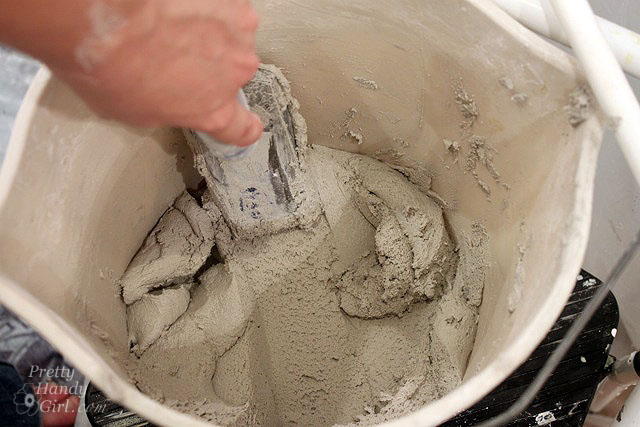
If you are using a rapid setting grout, you might want to slow the “setting” process slightly. I learned this trick from our local tile shop: Start by filling one bucket with ice water. Nest the second bucket inside the first.

Mix your grout according the package directions. Mix as much as you can spread in about 15-20 minutes. If you want to save yourself the extra step of sealing your grout later, you should use Grout Once (or another sealer additive) instead of water when mixing your grout.

Mix until you have a thick consistency, like smooth peanut butter.
Watch this video to learn the techniques for spreading the grout and how to clean after grouting:
Use the spatula to load the grout float with grout.
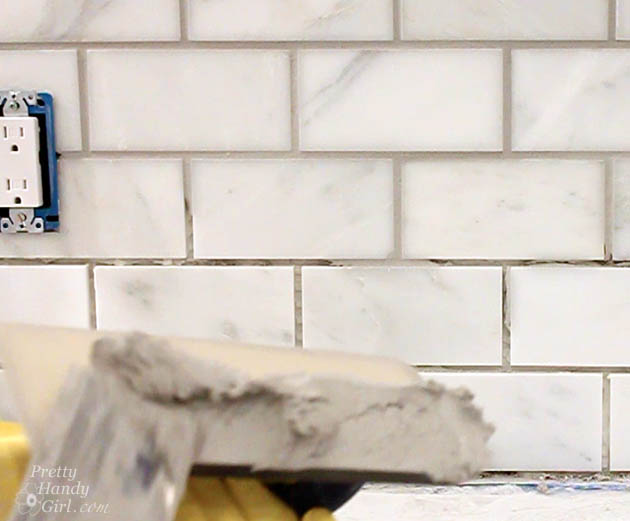
Spread the grout onto the tile by dragging the float across the tile at a 45 degree angle and along the wall at an angle. Then drag the float in the opposite direction (imagine creating an “X” on the wall. Push firmly to force the grout into the spaces between tiles.
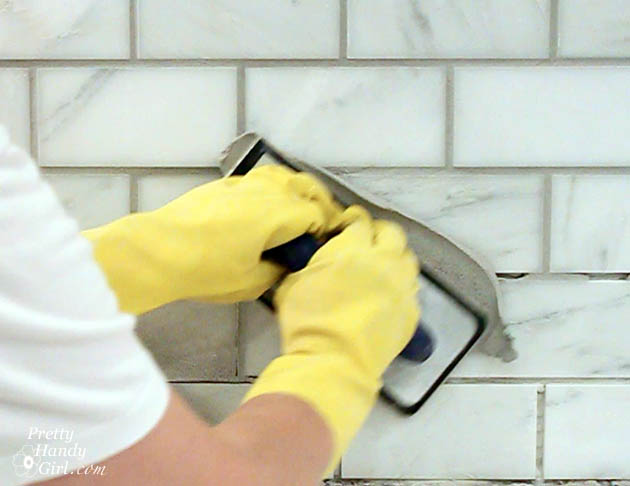
Scrape off excess grout from the float and use it to squeegee off any excess grout from the tiles.

As the grout starts to firm, sponge off your tiles with a very damp sponge. Remove any excess grout from the tiles by frequently flipping the sponge to a clean side and rinsing the sponge in water.
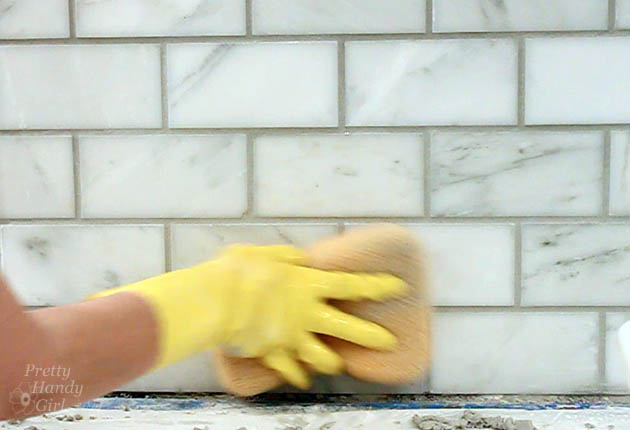
After the tiles dry, you will have a slight haze left on the tiles. Buff them with a clean dry rag and/or a buffing pad (check automotive stores.)

When your wall has been grouted and has dried, you need to fill the space between the tiles and the countertop with caulk. I used Mapei’s Keracolor unsanded caulk that matches the grout (Frost color.)
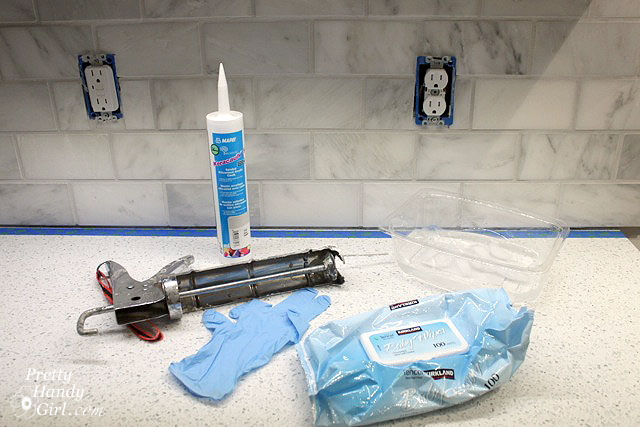
Follow this tutorial to learn how to caulk with a caulking gun. To get a smooth caulk line, I like to use my finger dipped in ice water. I follow up with a baby wipe on my finger to smooth and get rid of excess caulk.

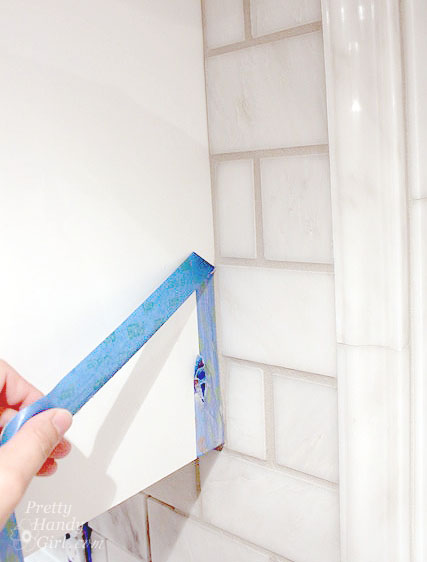
Before the caulk dries, remove any painter’s tape (put up before you tiled) to reveal a clean line.
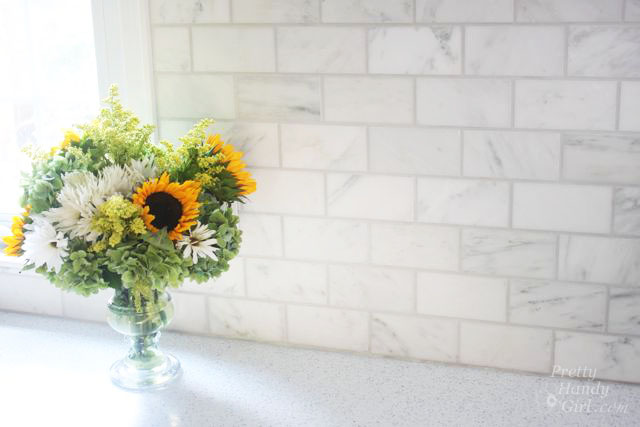
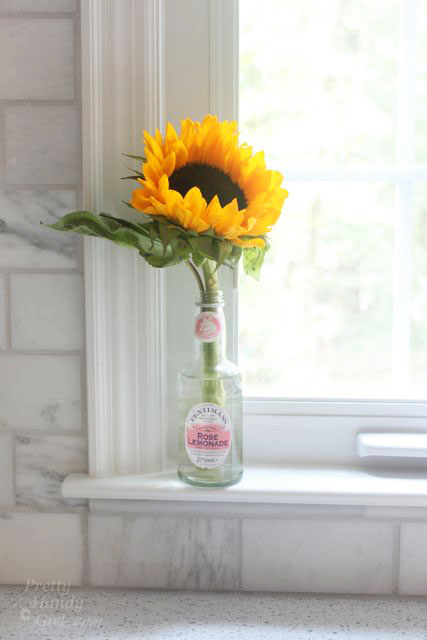
That’s it! Enjoy your newly finished kitchen backsplash!
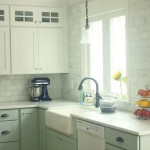
I am in LOVE with our backsplash. I was talking to my friend and told her that it was amazing how much more “finished” the kitchen feels now that the backsplash is done.

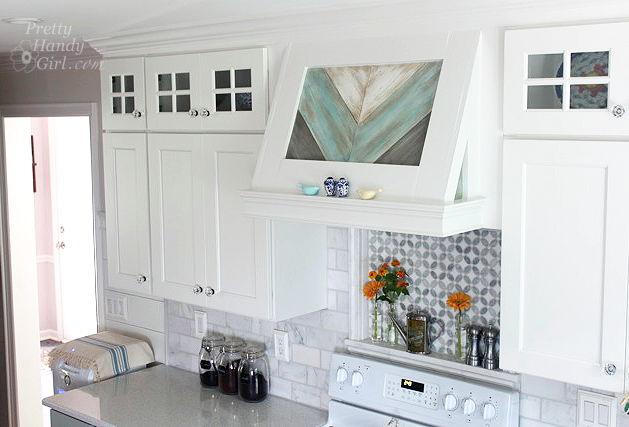
I have one more project before I’m ready to call the kitchen officially DONE. It involves something awesome on this wall:
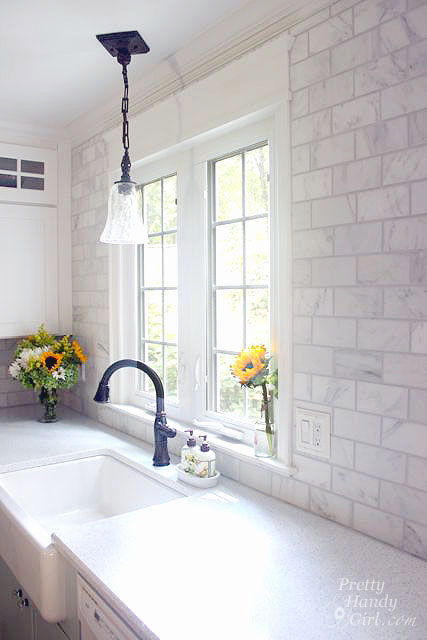
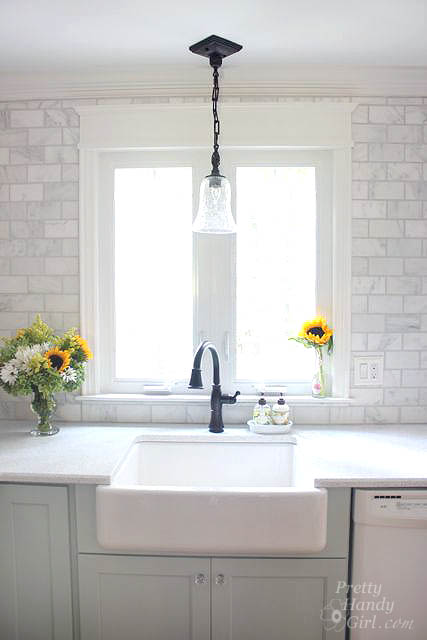
The tiles I used are Venato Marble 3″ x 6″ honed subway tiles from TheBuilderDepot.com. If you are looking for a good source for tiles, check out TheBuilderDepot.com. Their prices are fantastic! Plus, you can use this coupon code to save even more money!

Now, I hope you’ll excuse me as I enjoy my new view while cooking.
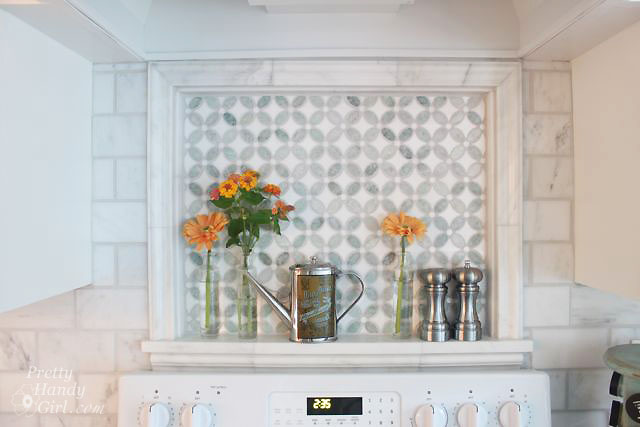
I will put together a tutorial later on how I built the tiled niche above the stove.
Feel free to leave me questions if you have any about tiling and grouting. This is definitely a task any DIYer can accomplish!

Here are some other helpful tiling tutorials:
White Subway Tile Backsplash Tutorial using Simple Mat by Remodelaholic
How to Tile Subway Tile Backsplash using Bondera by Southern Hospitality
Garden Stone Kitchen Backsplash Tutorial by Home Stories A to Z
Installing the Tile Backsplash by Miss Mustard Seed
How to Install a Tiled Backsplash using OmniGrip Adhesive by The DIY Showoff
Subway Tile Backsplash by Infarrantly Creative
Installing a Split Travertine Backsplash
Disclosure: I was provided with complimentary tiles from TheBuilderDepot in exchange for mentioning them in this post. As with all the companies I mention, I have thoroughly researched the company and I share these resources with you because I believe in the quality of their products at an affordable price. I was not told what to say or write. All words and ideas are my own.

Did you bud your tile to your framed window trim?
Yes, but slid it behind the window sill.
Single female here. Your blog is amazing for DIY ladies! I have to rely on myself as folks are quoting an arm and a leg to replace some of my kitchen counter top tile. I am researching DIY to remove and replace cracked/broken ceramic kitchen counter tile that surrounds my sink and the bordering edges. I assume this process of installing the new tile is the same for countertops as it is depicted here for backsplashes. Is that correct? Also, I am leaning towards epoxy grout due to heavy kitchen sink and water usage. I hand wash all dishes. I don’t have a dishwasher machine. Any feedback on epoxy is appreciated.
I’ve never used epoxy grout. Are you looking to replace the entire countertop or just the broken and cracked tiles? If the entire thing, I’d use a waterproof membrane under the tiles, like Kerdi Board on top of plywood.
The frost grout looks great in pics and I have been considering it but would like to know if in person it looks like a white or a light gray like it is suppose to as I’ve read many reviews that say it dried white.
It’s a very light gray and compliments our marble tile beautifully. I suspect if you use dark tile it will look more white.
Love this! Where did you get the tile for the niche? It is gorgeous.
Brittany you always knock it out of the park. I love it! Beautiful job, well done.
I have a question, did you ever do a tutorial on hoe to pull electrical outlet so they will become flushed with the new wall tile?
I love your backsplash. I did a lot of research and purchased the same tile you did from the same vendor. In your video, it sounded like you said you used 1/4 inch spacers. Is that correct? I know it’s a matter of personal preference but I’m trying to decide. Our installer was planning to go really thin (maybe 1/16th) but I want larger. Did you use 1/4? After a few years have passed, are you happy with 1/4? The pictures look beautiful.
Dont put tape in your cabinets like this guy. You can rip the paint or finish off I made that mistake
Tape shouldn’t remove factory painted cabinets. If the cabinets were painted after market, you might have this issue (especially if the cabinets weren’t primed and the paint wasn’t allowed to cure.)
You had mentioned doing a tutorial on your tile niche above the stove. I have not been able to find it. Can you point me in the right direction? Beautiful kitchen. So looking forward to begin working on mine.
Question? Have been grouting backsplash and getting tired. Can I rest and add more grout later? I know the grout will have dried and hardened. 75 and tuckered. (pt2 how to ).
Yes, you should be able to stop and come back to the grouting another day. Just make sure you finish the area you start by wiping off the grout on the tiles and buff off the haze or it will be difficult to clean later.
Your tutorials are some of the best out there. I am in the process of doing a marble backsplash in the kitchen and just finished the tiling, and will grout tomorrow. Thanks for your great instructions and videos; I’ve referred back them many times!
Love the tile work you did! Fantastic! I have a quick question. Do I need to grout the tile where the tile meets at the cabinets, window trim, and the ceiling? We just did a tile project and we carried the tile up to the ceiling. I have heard conflicting advice online about using caulk or grout. Thank you in advance!
You should caulk anytime your tile meets a surface on a different plane. For example where the tile meets the ceiling (or crown moulding.) And where the tile meets the countertop. These areas need to be able to flex. Grout should just go between tiles. Be sure to check to see if you can buy caulk the same color as your grout.
Thank you so much!!! I was getting so confused on my research! ?
What color white paint did u use?
Oxford White by Benjamin Moore
Morestone Granite & Marble Limited is able to supply natural stone
marble White Oak. It is a greyish color marble with
unique horizontal wood veining.
We are available to offer cut to size tile of marble
White Oak for flooring and wall covering
Find us more
http://www.woodengreymarble.com
We just had backsplash installed in our new kitchen. It looks identical to what you have installed. We love it. I have been told we do not need to seal the tiles. However I am concerned about the grout. It’s white and I don’t believe a sealer was added to the grout. If tomato sauce or red wine spatters against the backsplash will it stain the grout. Do we need to seal it? If so what method would you suggest?
I would definitely seal the grout. Any place that sells tile should sell grout sealant. Also, if your marble tiles aren’t polished, I’d seal them too.
Hi Brittany, great and very inspiring post. I really like your tip about bucket and ice water. I tested it and it really works! Just one thing. You mentioned that people can seal the tiles before grouting. This is O.K. if you have porous tiles or natural stone ones, as you said. However, I would personally seal grout also. It will keep all protected from moisture or stains for a long time. Your kitchen is breathtaking, by the way.
Jason, I added a Grout Once a sealant that is mixed into the grout. After over a year it seems to be working fine. Thanks for your comment.
Hi there,
I am in love with your kitchen! Maybe I’m blind but I couldn’t find a name / link for the accent tiles and border used above your stove. I am planning to put a backsplash up in my kitchen and I would love to know where to get the materials to create the same statement. I would really appreciate your help! Thanks and have a great weekend!
I just put beautiful glass mosaic tile on our backsplash. we went all the way to the ceiling, around our pretty oak windows. it’s spectacular. we will grout tomorrow, but I am wondering about that. We did a small out of the way section last week, and my husband took the grout all the way to the countertop and the cabinets which means that there’s really no place for caulk.
So, for the rest, should we stay a quarter to three-eighths inch away from the countertop and cabinets and caulk? Say go to the edge of the tile and stop? Is it difficult to stay away?
Also, our grout is the Alabaster color from Home Depot. Kind of sand-colored. I wonder if we can find caulk that color.
Typically you’d want to use caulk where the tile meets the countertop. The caulk is flexible and will flex if there is any shifting or movement in your home. But, if you don’t have any movement you will be fine. If you do, you might seem some cracks forming, but you could caulk them later. If you used Mapei grout, they sell caulk to match their grout. I’m not sure about other brands, but I would suspect they would.
We are using a honed marble backsplash and understand it is best to seal it once before grouting and then again a day after grouting. When I seal it prior to grouting do I do this after its on the wall or even before placing it on the wall? Do I need to seal the back and edges too?
You only need to seal the areas that are exposed and could get hit by splashes.
I happened to use the exact same tiles on my backsplash. I have all the tiles up and am about ready to grout. I am hesitating because I feel like I left too much space between my top layer of tiles and the bottom of my upper cabinets. It’s nearly 1/2 inch thick. Do you think I could grout that space, or is it too thick?
be careful with grout additives. I used Vanhearron Grout Once with mapei keracolor it was recommended by best tile, it ruined the grout and the recommended fix, another vanhearron product, haze away made the grout lighter and botchier. do some research, there are numerous posts on the web in professional tile forums that describe similar experiences with blotchy and ruined grout. be very careful with grout additives that the grout manufacturer doesn’t recommend.
[email protected]
mike dean
Mike, wow, I hadn’t heard of that. Luckily I didn’t have any issues, but thanks for pointing that out.
Is it better to have the counter in before you do the backsplash or have the backsplash done before the counter goes in?
Great tutorial by the way and your timing is perfect!
Definitely a counter in first! In my opinion. Because hopefully your counter is level and you can work off of that line.
Good point! Excellent. I get to do a backsplash in about two weeks. Wheeeee!
This is a great tutorial! I really appreciate the details you gave about prepping the space properly with cardboard, painters tape, and drop cloth. Do you apply anymore sealer once all the tiling is complete and dry?
LaTonya,
Nope! I didn’t need to because I sealed the tiles before grouting (Sorry if you missed it, I just added a Prep Work section this morning under the materials) and the grout has sealer in it! YEAH!
I just love your tile. It is so timeless!! I am not so in love with Mapei’s Keracolor caulk. I have found it shrinks and comes away from the wall after a while. I will just be using regular silicone on my next tile job.
Feral Turtle, thanks for letting me know! I’ll have to keep an eye on the caulk and report back if I do have issues. It was nice that it matches the grout perfectly, but I will be frustrated if it shrinks.
I’m definitely going to refer back to this Brittany. I dislike our tile backsplash in the kitchen that was the former owners taste. Haven’t had the time to tackle that just yet but it’s on my list. Thanks for this awesome visual tutorial.
You’re welcome Colleen. It will make a huge difference when you do take on the project ;-).
What a coincidence! I just finished my tiling job and grouting yesterday in my own kitchen. I used a premixed grout and it worked great! Love the my new backsplash and the pride that came with doing it myself. 🙂
Leilani, YEAH!!! So glad to hear that you took on tiling your own backsplash. I’d love to see picture if you ever get a chance.
Will do! Hopefully will post a kitchen update on the blog soon.
I am going to be doing some tiling in a few months and I read several places that the best grout is 100% epoxy grout. Did you consider using that? If so can you share your opinion.
thanks- (I love your blog!!)
Maggie, I hadn’t read about epoxy grout until just now that you mentioned it. If I were doing a floor in the bathroom or entryway or kitchen I think I’d consider an epoxy grout. For this project I worked with what our local tile shop recommended. Thanks for bringing this to my attention though!