Tag Archive for: wood

50 plus pallet wood projects you can make Pinterest Image

50 plus pallet wood projects you can make Pinterest Image
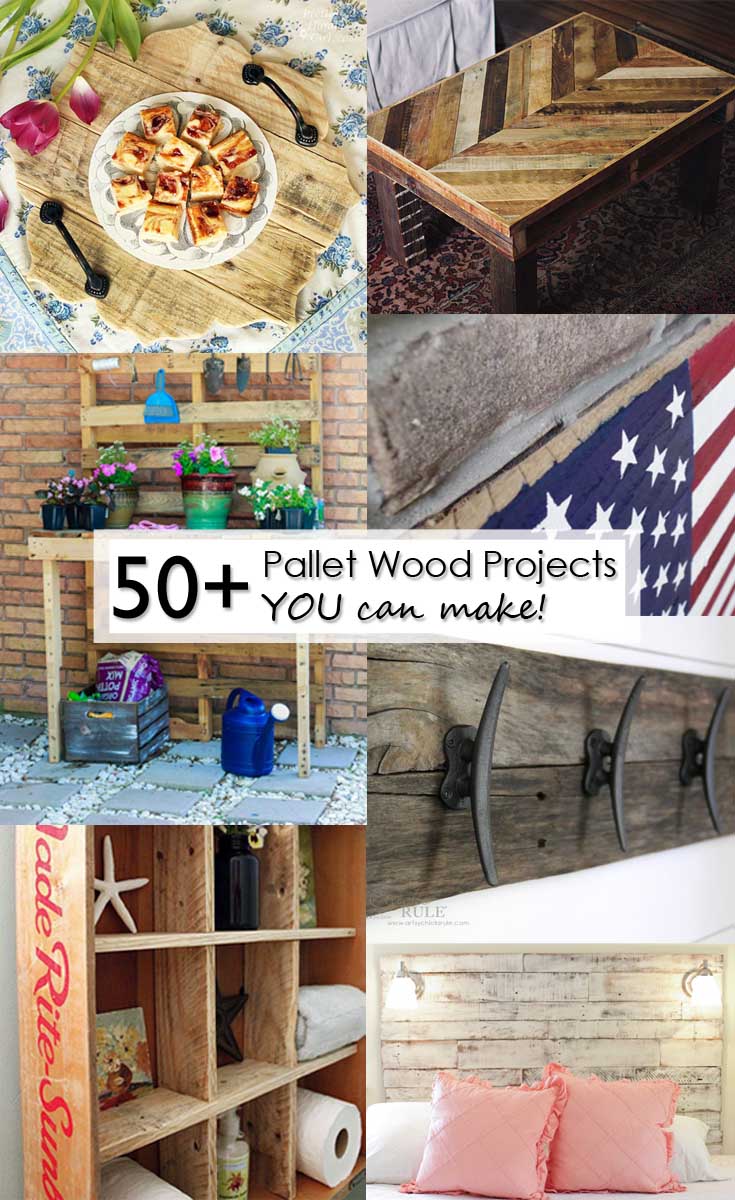
50+ Pallet Wood Projects You Can Make!

Do you have a spare pallet lying around from that last large shipment? Or maybe you know somewhere to get free or inexpensive pallets? If you do, here are more than 50 Pallet Wood Projects that you can make with your own two hands!


Bread Crate Cubby Display Shelves

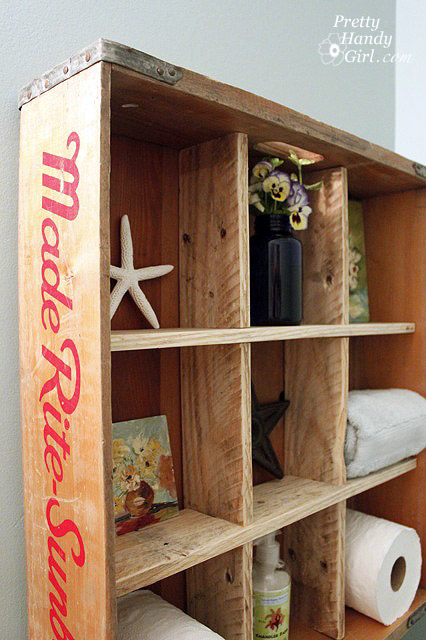
Create Bread Crate Cubby Display Shelves for any room in the house.


How to Create a New Tabletop from Pallet Wood by Shoppe No 5

How To Create A New Table Top instead of throwing out a table.


DIY Pallet Bookshelf by LollyJane

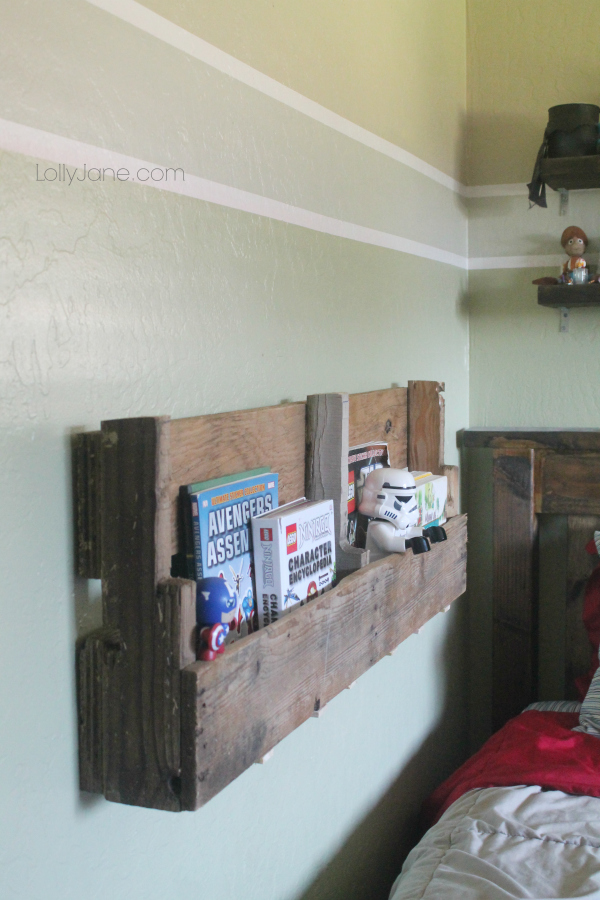
Make a DIY Pallet Bookshelf for your kids’ bedroom or an office.


DIY Wine Glass Carrier by Art is Beauty

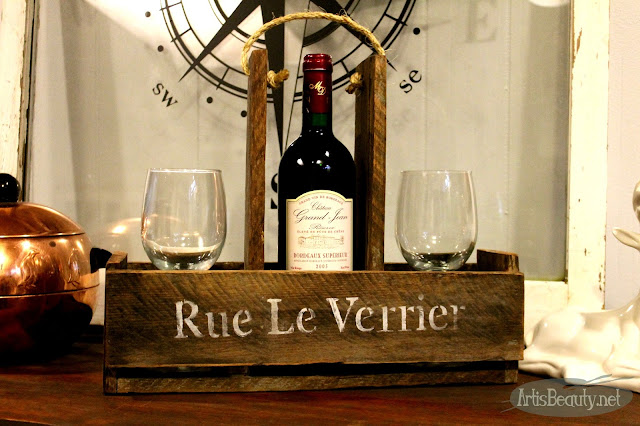
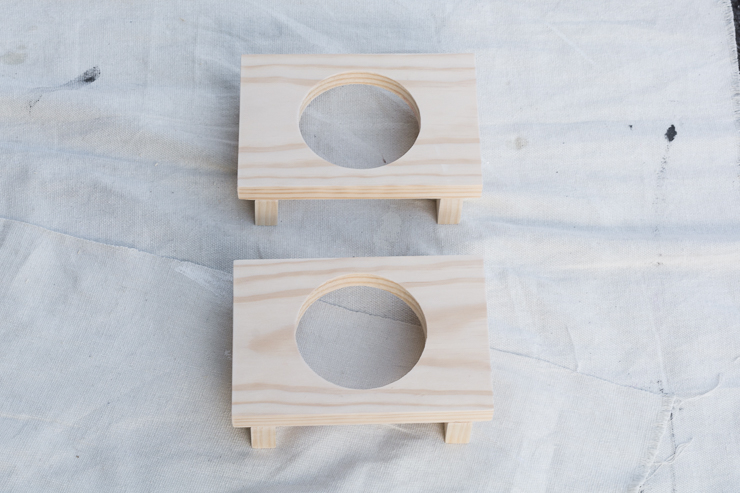
Make this gorgeous rustic DIY Wine Glass Carrier to use when serving your guest a glass.


DIY Worm Compost Bin by Sweethings
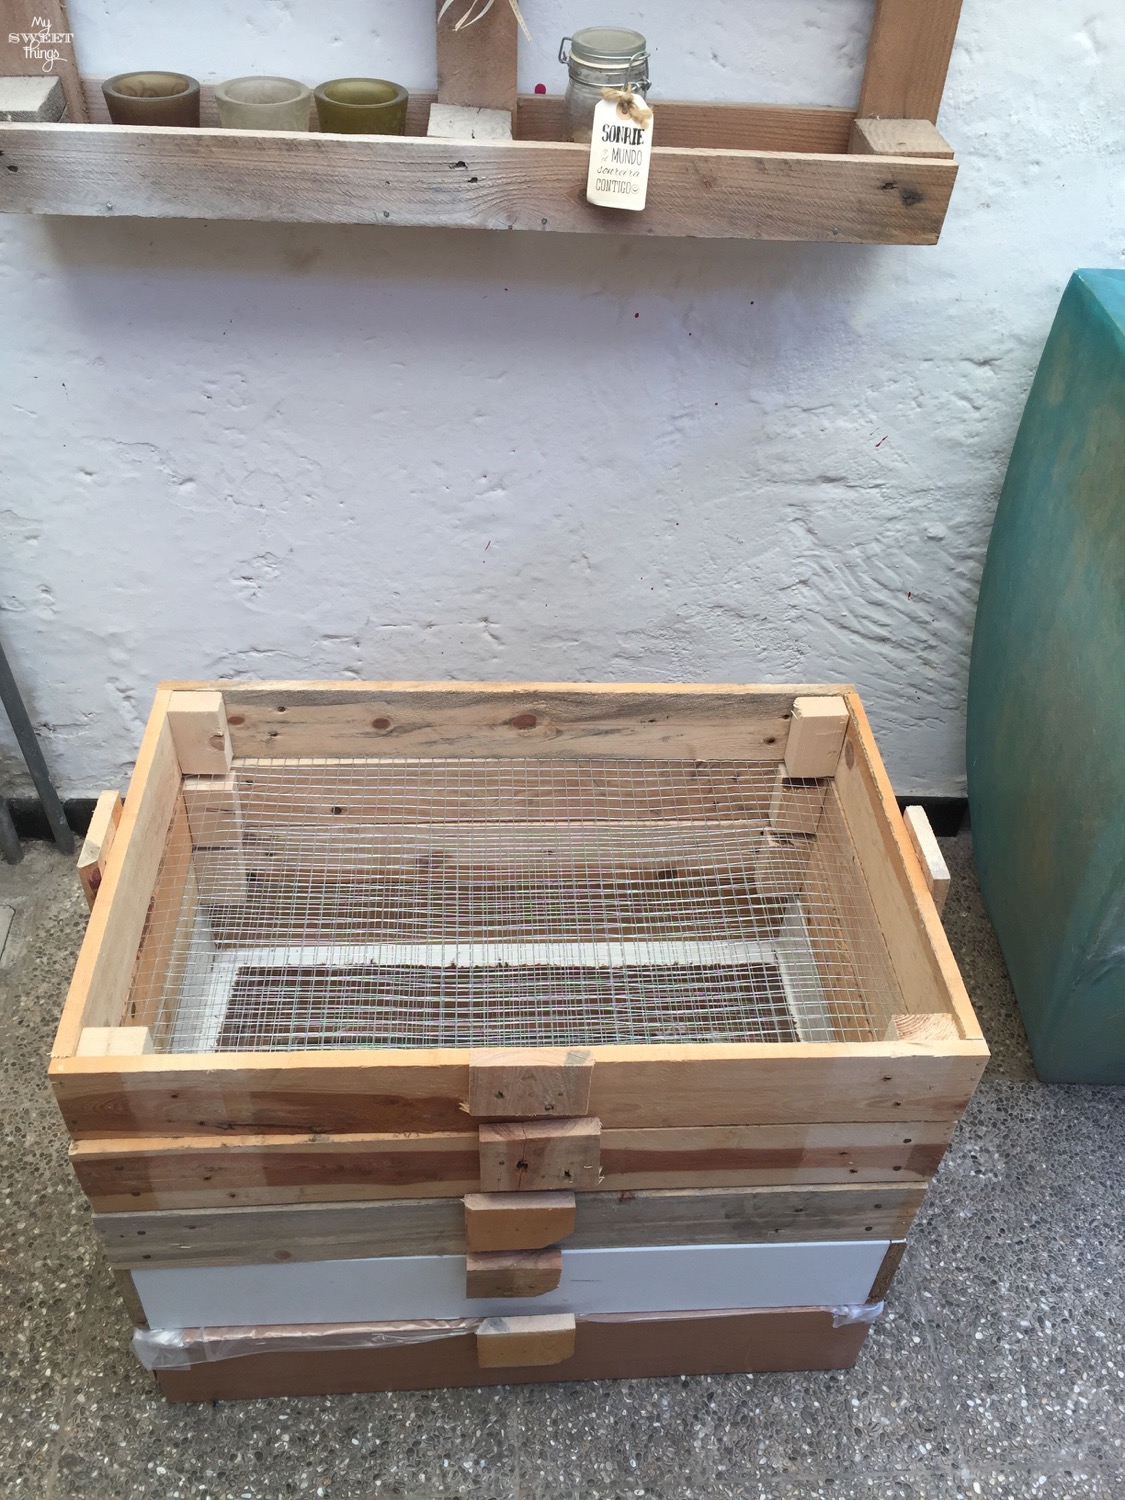
Have you ever tried composting? This DIY Worm Compost Bin For Vermicomposting is an awesome idea.


Pallet Potting Table by Refresh Restyle
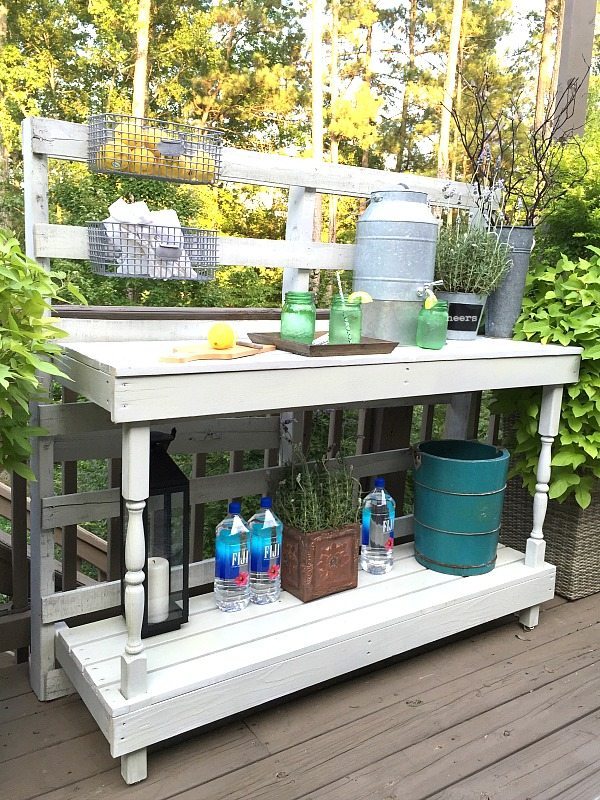
Build this Pallet Potting Table to help you complete your gardening goals this year.


How to Build a Wood Deck Cooler by Fox Hollow Cottage
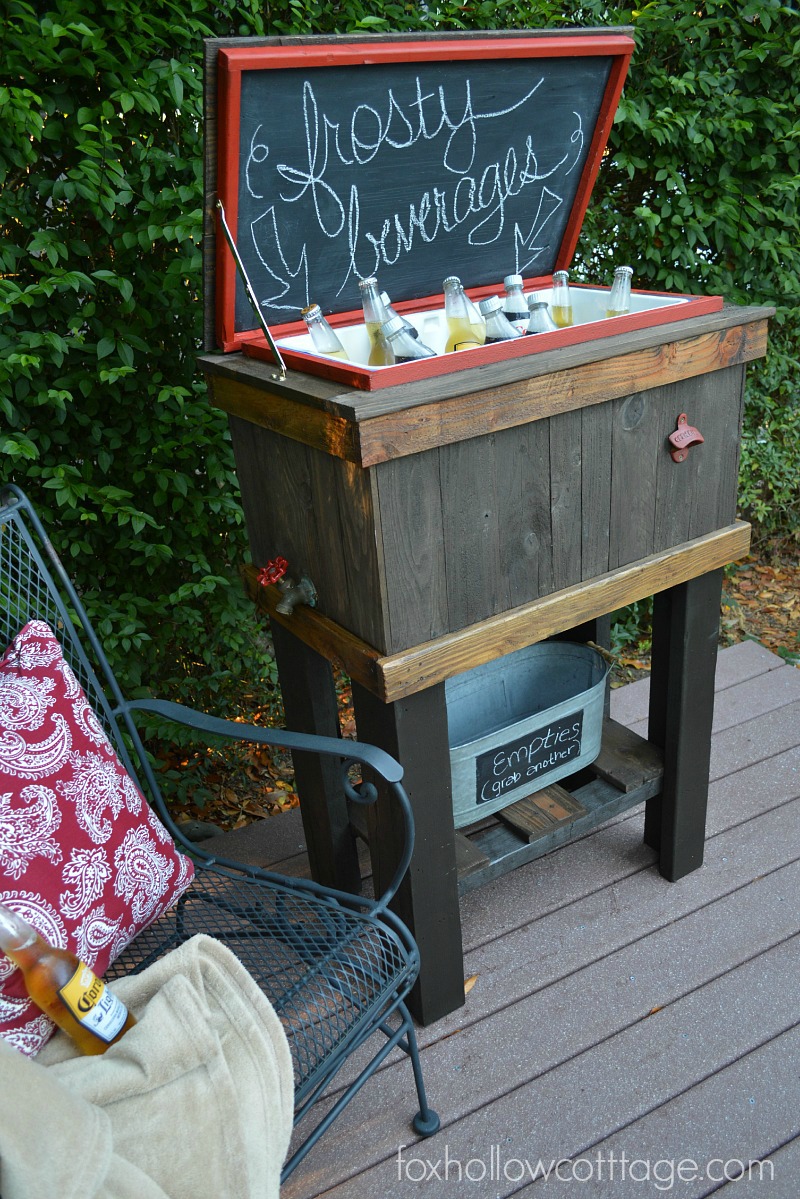
Make a Wood Deck Cooler before your next outdoor party.


Super Easy Pallet Couch DIY by Boondocks BlogKeep your pallets mostly intact and make this Super Easy Pallet Couch for some cozy outdoor lounging.


How to Make a Pallet into a Round Circle Shape by Fox Hollow Cottage
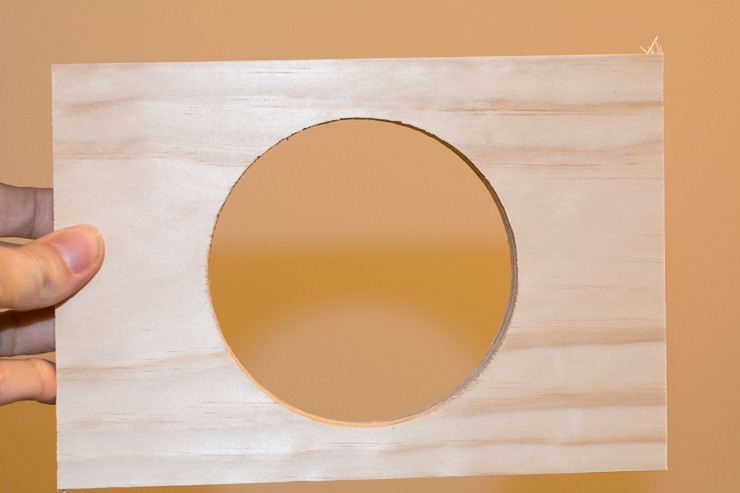
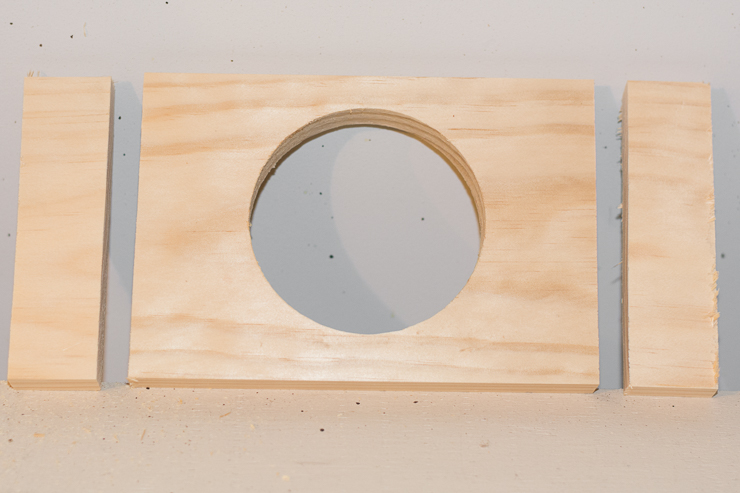
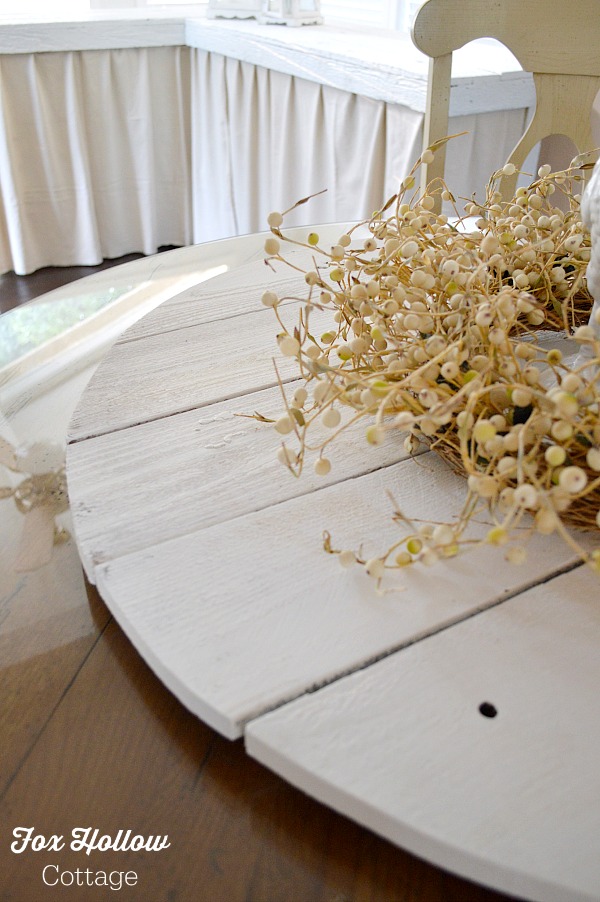
Learn how to Make Pallet Wood Into A Round Circle Shape that can be used to decorate any room.


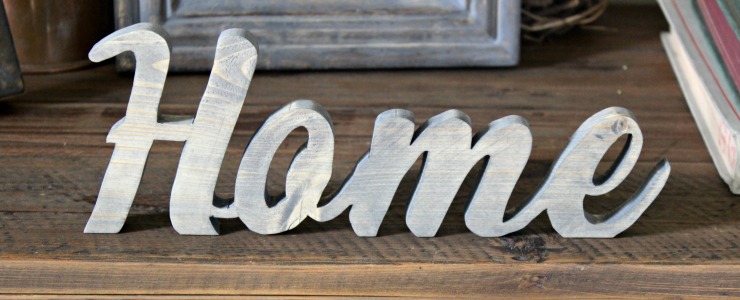
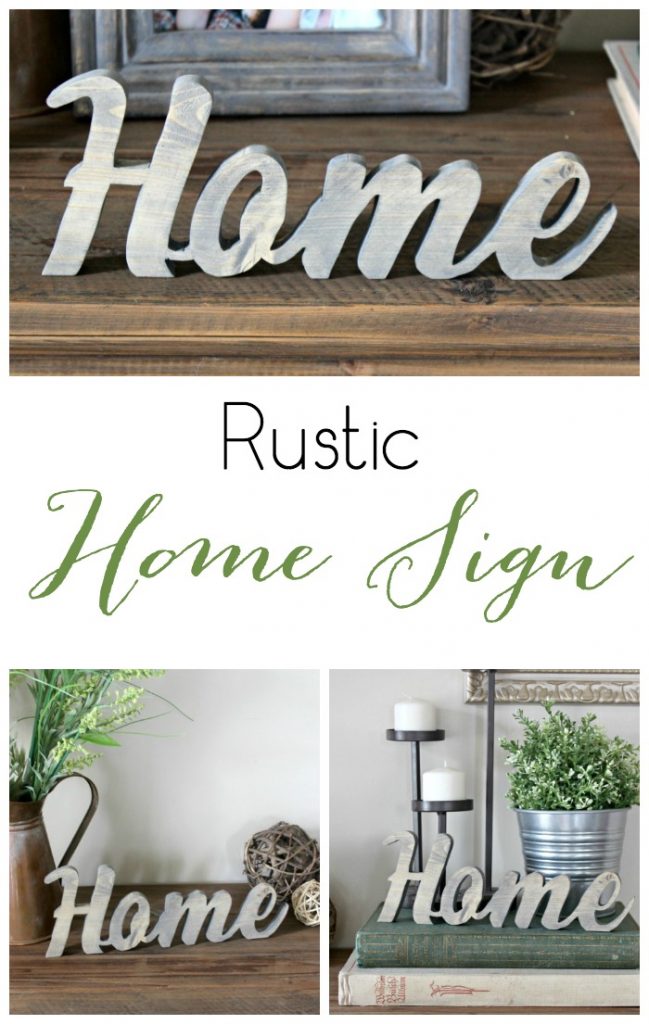
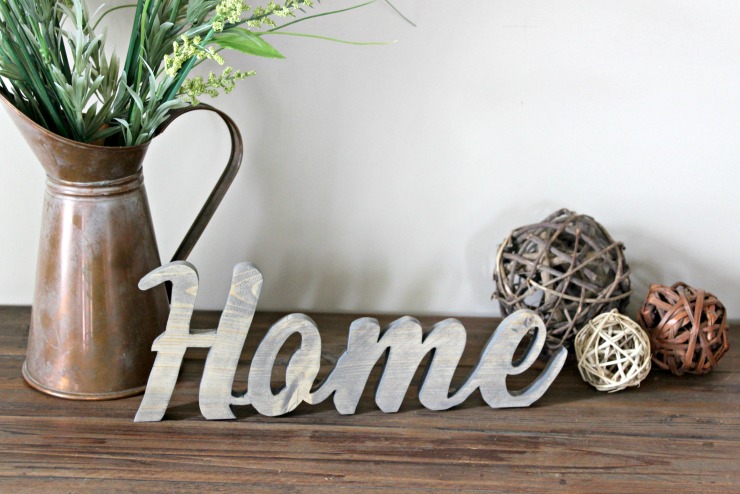
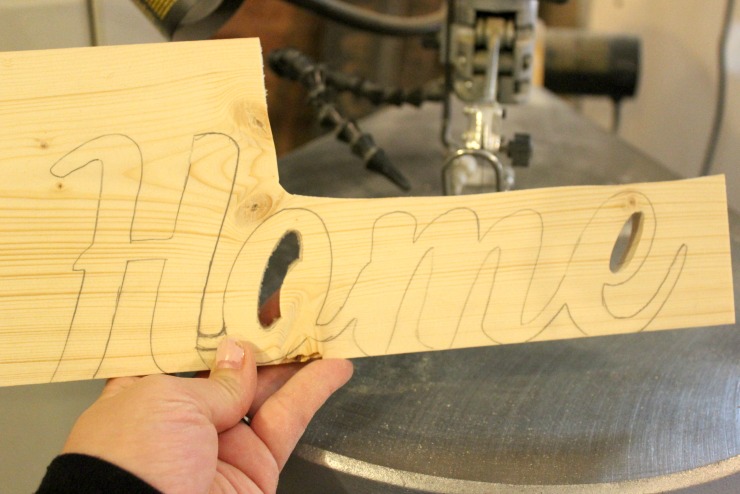
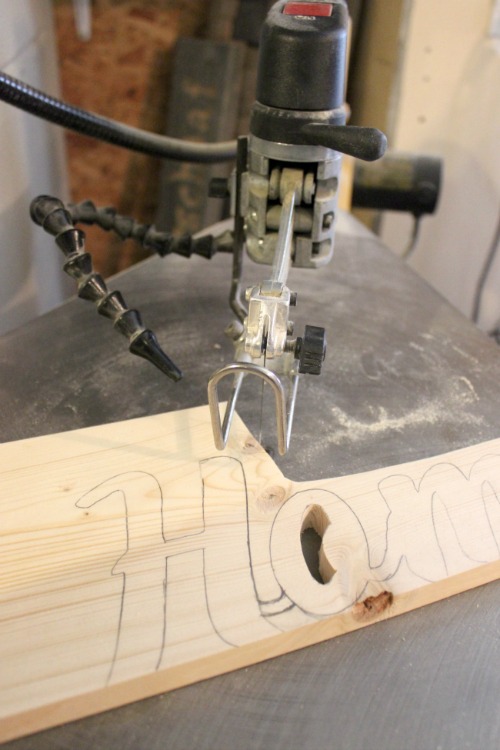
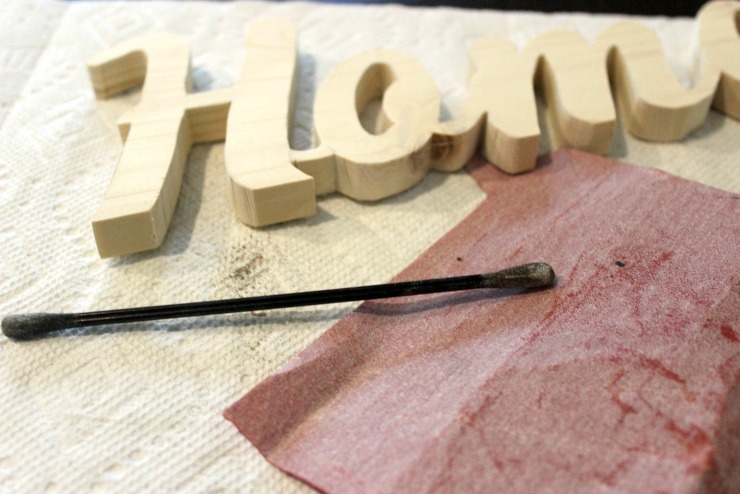
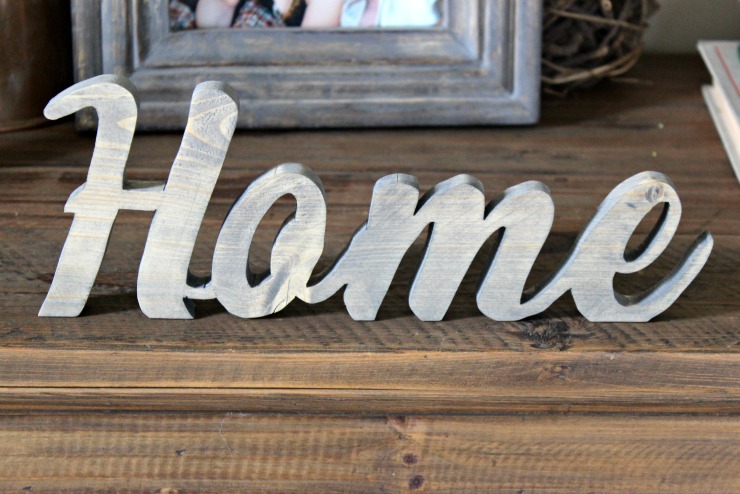
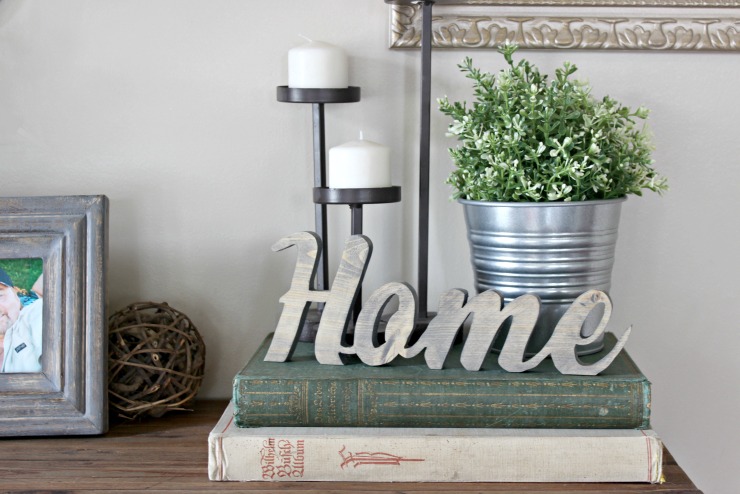
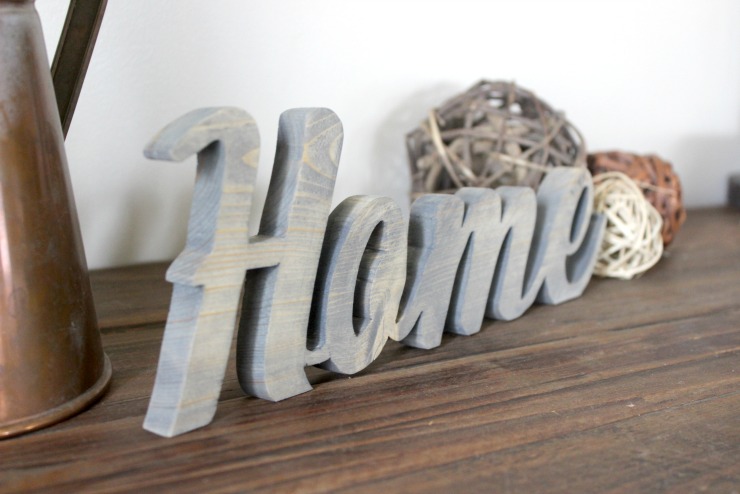
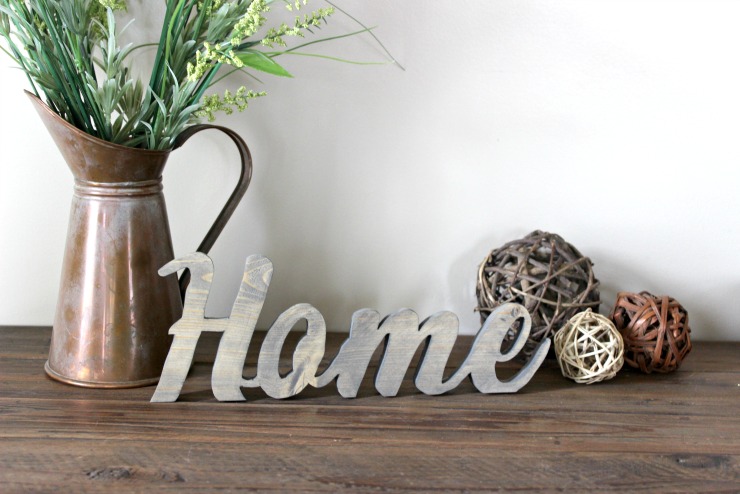
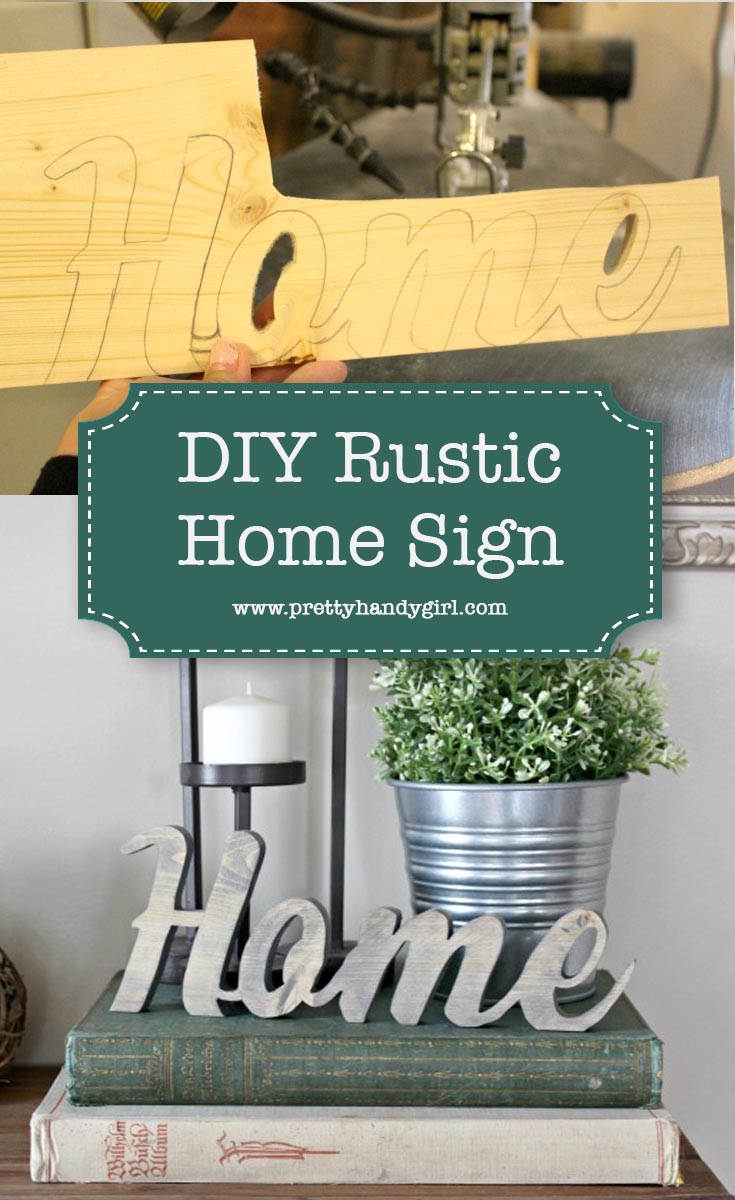
Build this clever DIY Pallet Shelf to help turn your house into a HOME.


Coastal Whale Palette Art by Fox Hollow Cottage
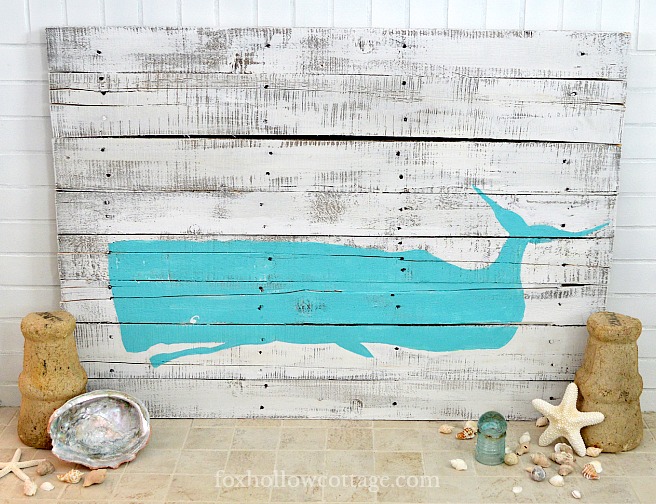
Create this DIY Whale Silhouette Coastal Pallet Art if you love bringing the feel of the beach into your home.


Before December arrives make this festive Scrap Wood Christmas Tree.


Start Being Awesome Typography Art by House of Hepworths
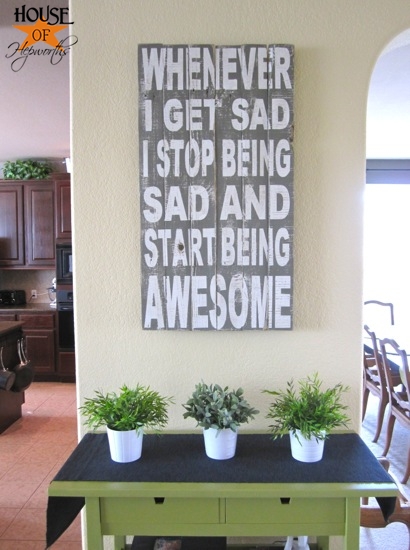
Create a “Start Being Awesome” Typography Art for your home as a motivating reminder to all.


DIY Coastal Whale Coat Rack
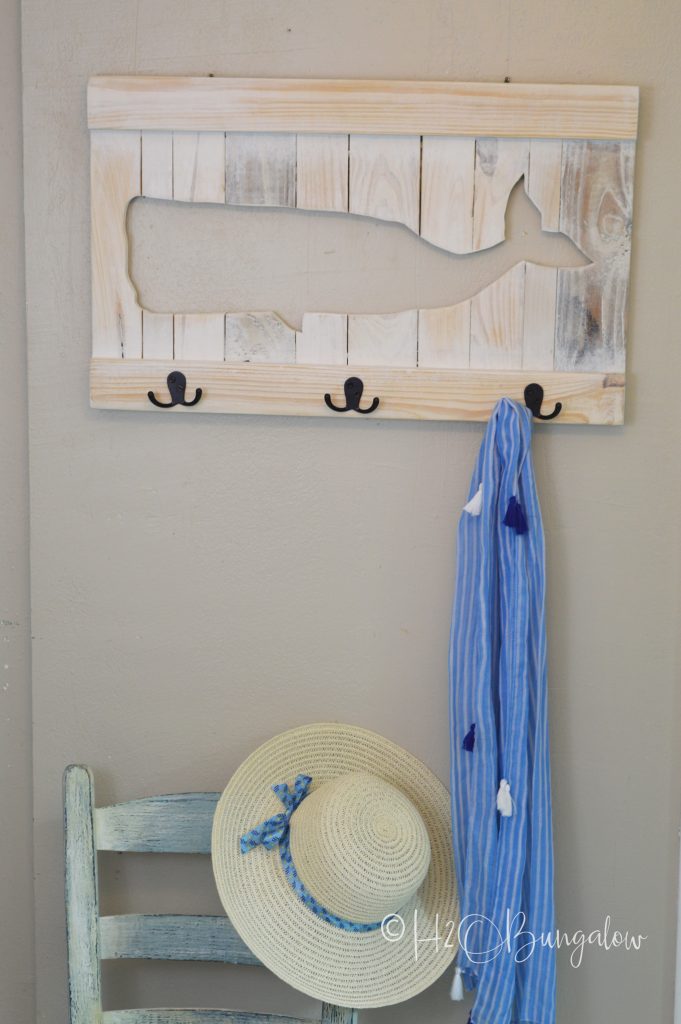
This DIY Coastal Whale Coat Rack would be perfect for a beach home.


DIY Nautical Pallet Wood Coat Rack by Artsy Chicks Rule
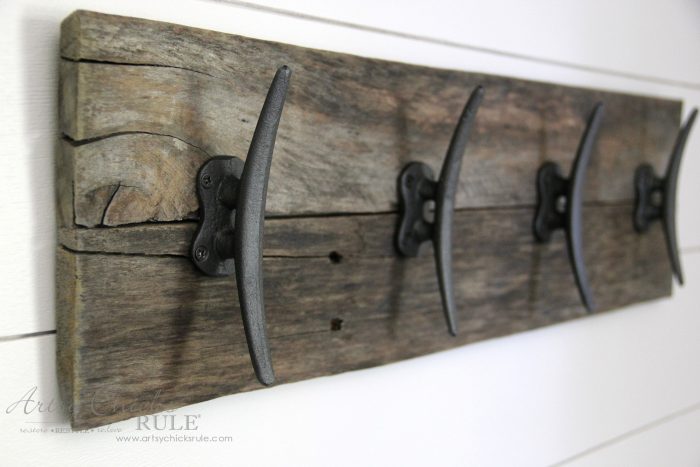
An alternative option for a beach-themed home would be this gorgeous DIY Nautical Pallet Wood Coat Rack.


DIY Rustic Pallet Frames by Little House of Four
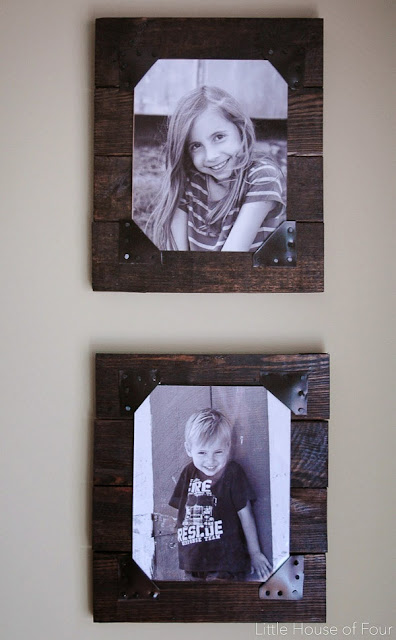
Display your favorite photos with these beautiful DIY Rustic Pallet Frames.


Rustic Wooden Advent Calendar made from Pallets by Hazel + Gold Designs

Another holiday project, this Customizable Rustic Wooden Advent Calendar is a great way to countdown in December.


Reclaimed Wood Wall Hook Vase by Pretty Handy Girl
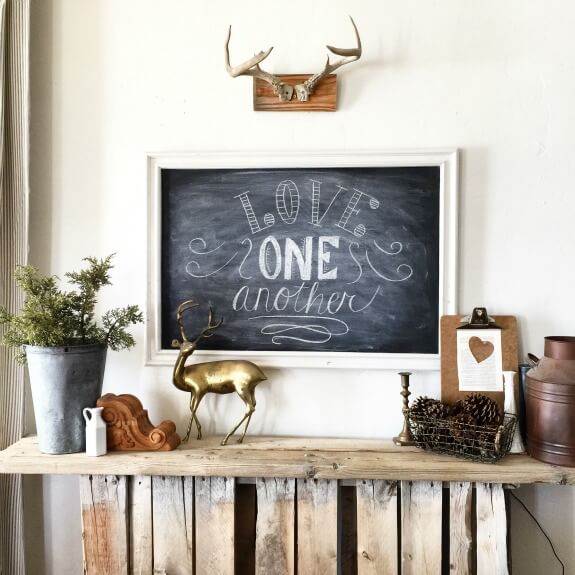
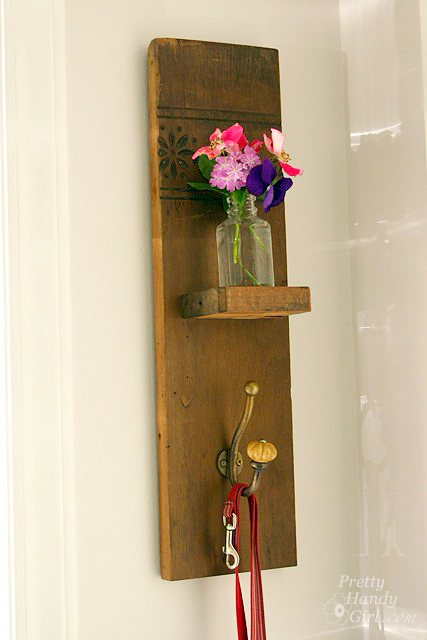
Build this Reclaimed Wood Wall Hook & Vase to add some functional beauty near your door.


Rustic Wood Bathtub Tray by Pretty Handy Girl
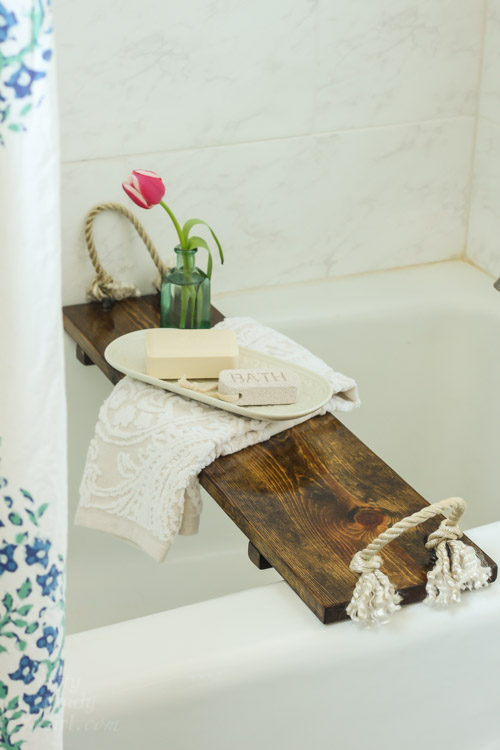
A Rustic Wood Bathtub Tray would be the perfect luxurious addition to your bathroom.


How to Make a Vintage Rustic Sleigh Ride Sign by Pretty Handy GirlDecorate your holiday mantle with a DIY Vintage Rustic Sleigh Ride Sign.


DIY Farmhouse Sign by Making ManzanitaDIY Farmhouse Sign With Pallet Wood And Repurposed Lug Wrench


Build a Vintage Produce Crate Centerpiece without Power Tools by Pretty Handy Girl
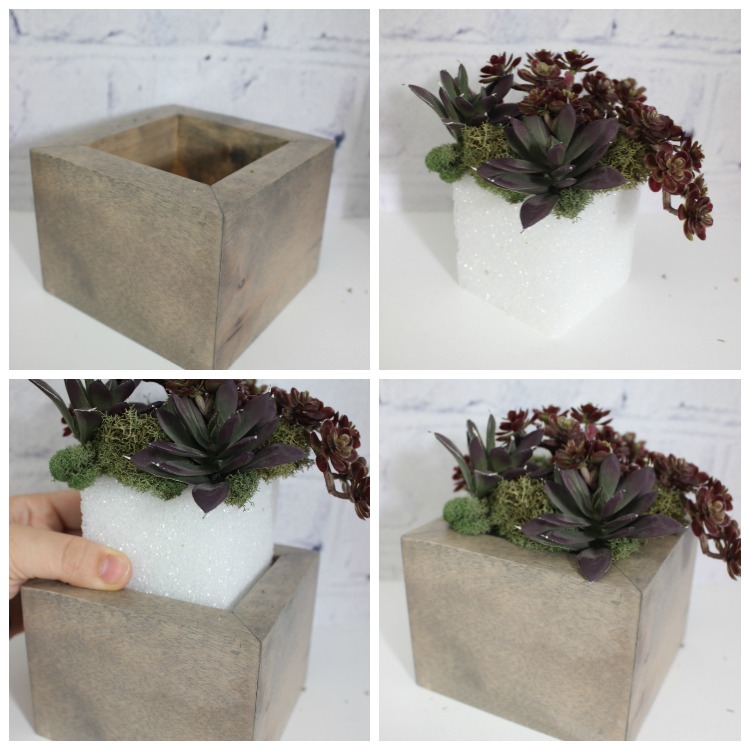
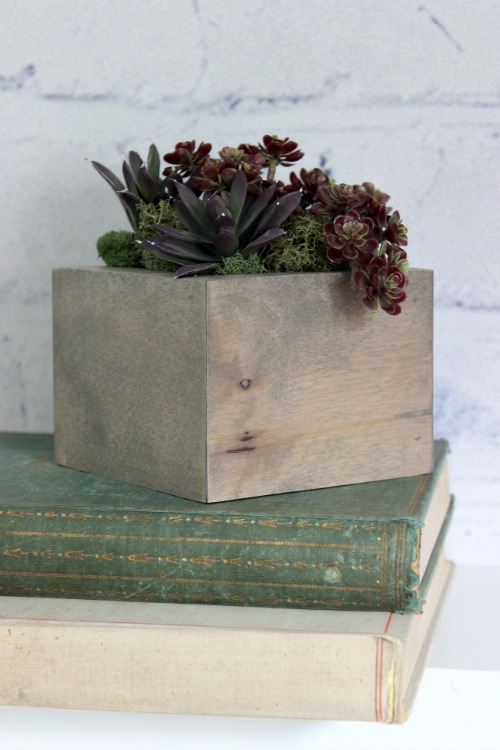
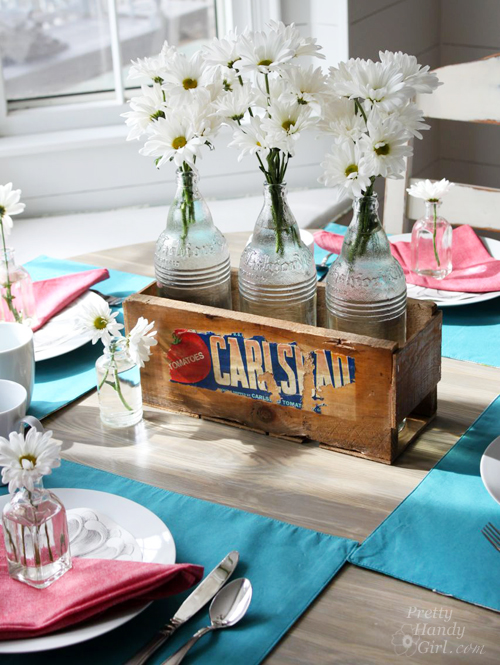
Learn how to Build A Vintage Produce Crate Centerpiece full of rustic beauty for your tablescape.


How to Make a Driftwood Gift Crate by Pretty Handy Girl
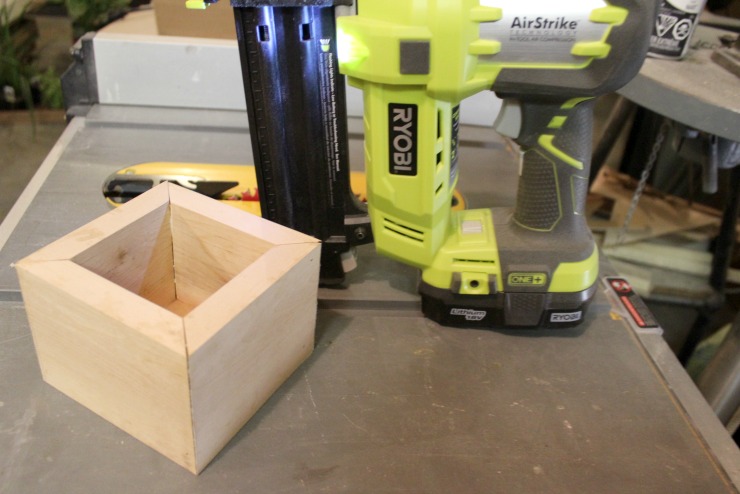
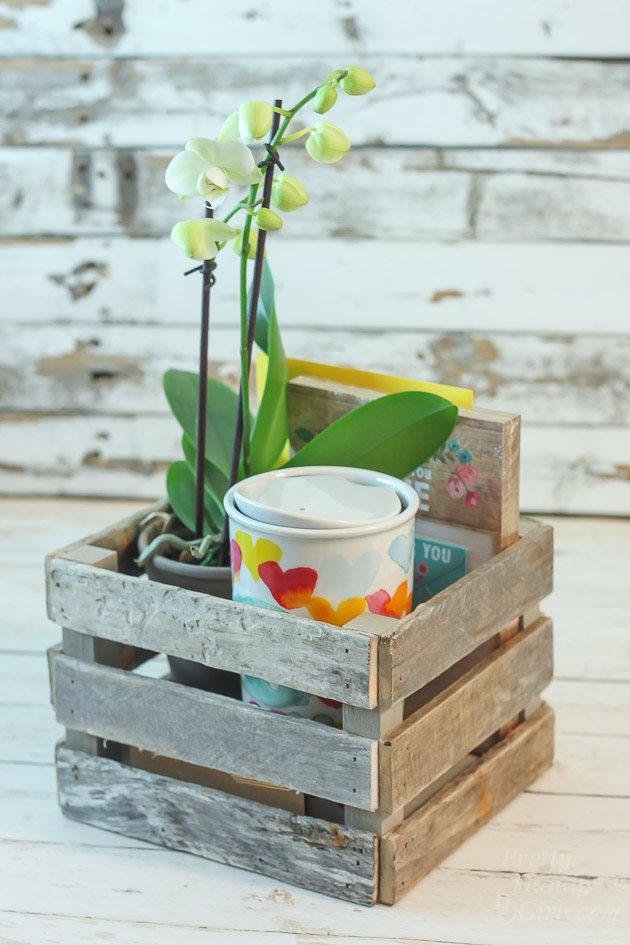
Make A Driftwood Gift Crate to take your next gift to a whole new level.


Painted Wood Pallet Garden by Pillar Box Blue
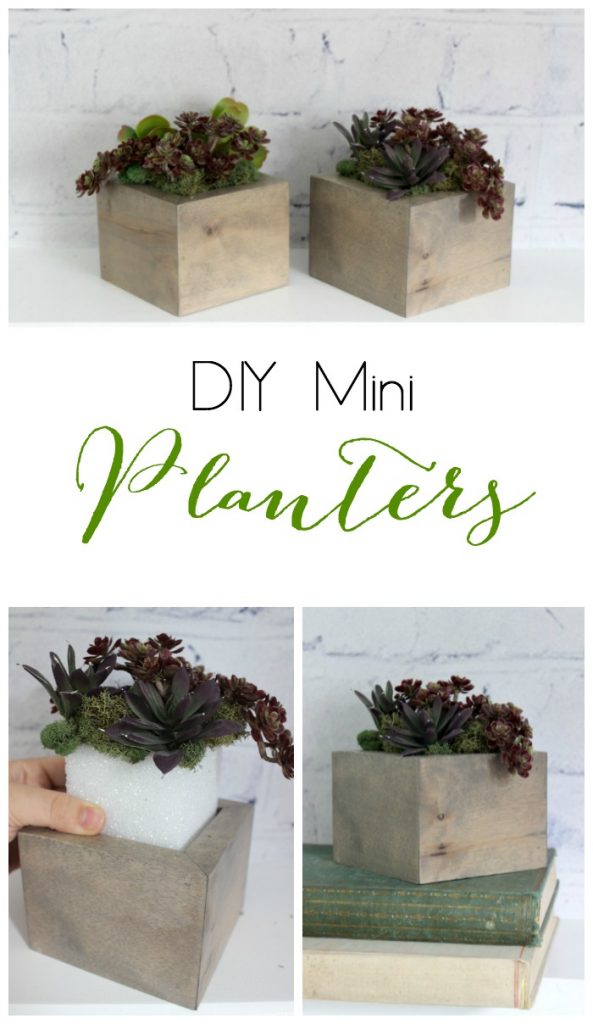
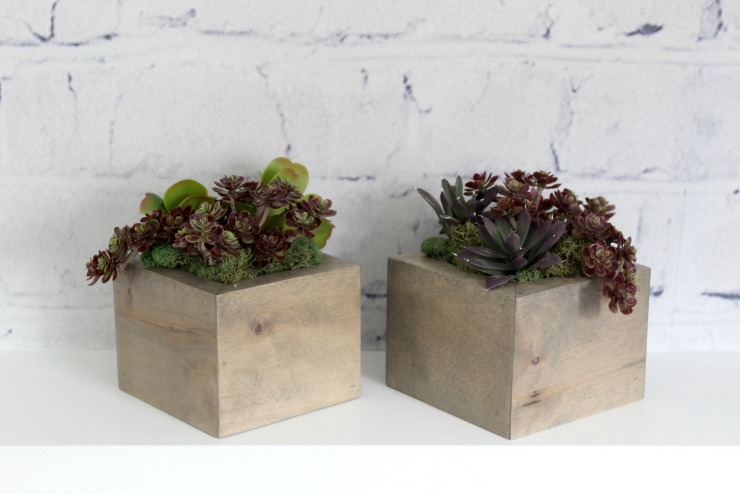
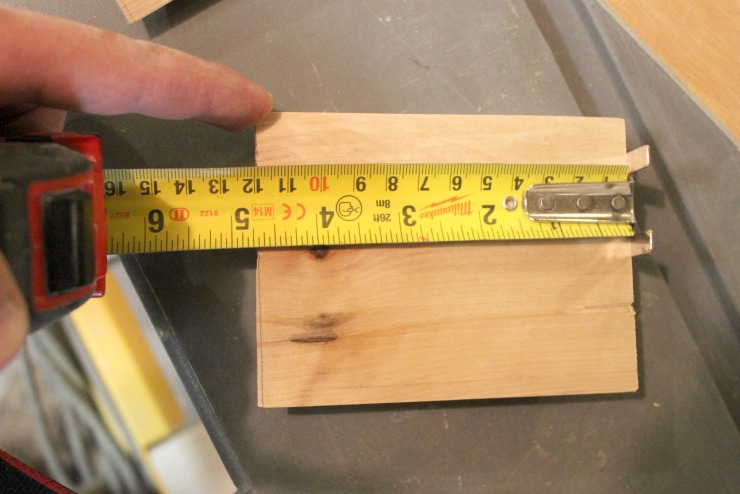
How To Make A Beautiful Painted Wood Pallet Planter for your yard or porch.


Install Pallet Bookshelves by Where the Smiles Have BeenHow To Make And Install Pallet Bookshelves With Knobs to organize your kids’ books and toys.


Pallet Art Shark by Sand and Sisal
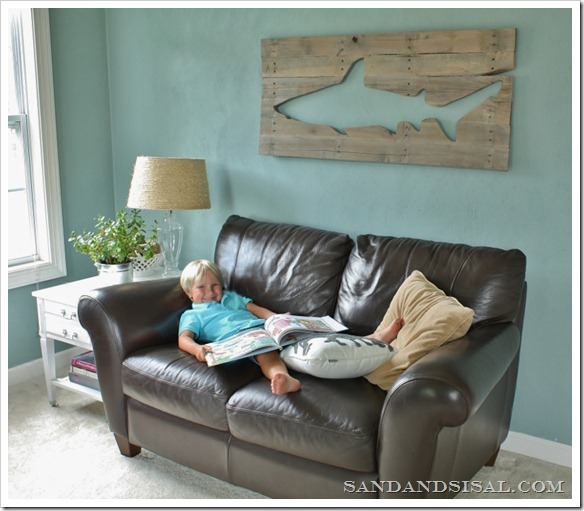
Add some edgy Shark Pallet Art to your wall.


Printed Map Pallet Frame
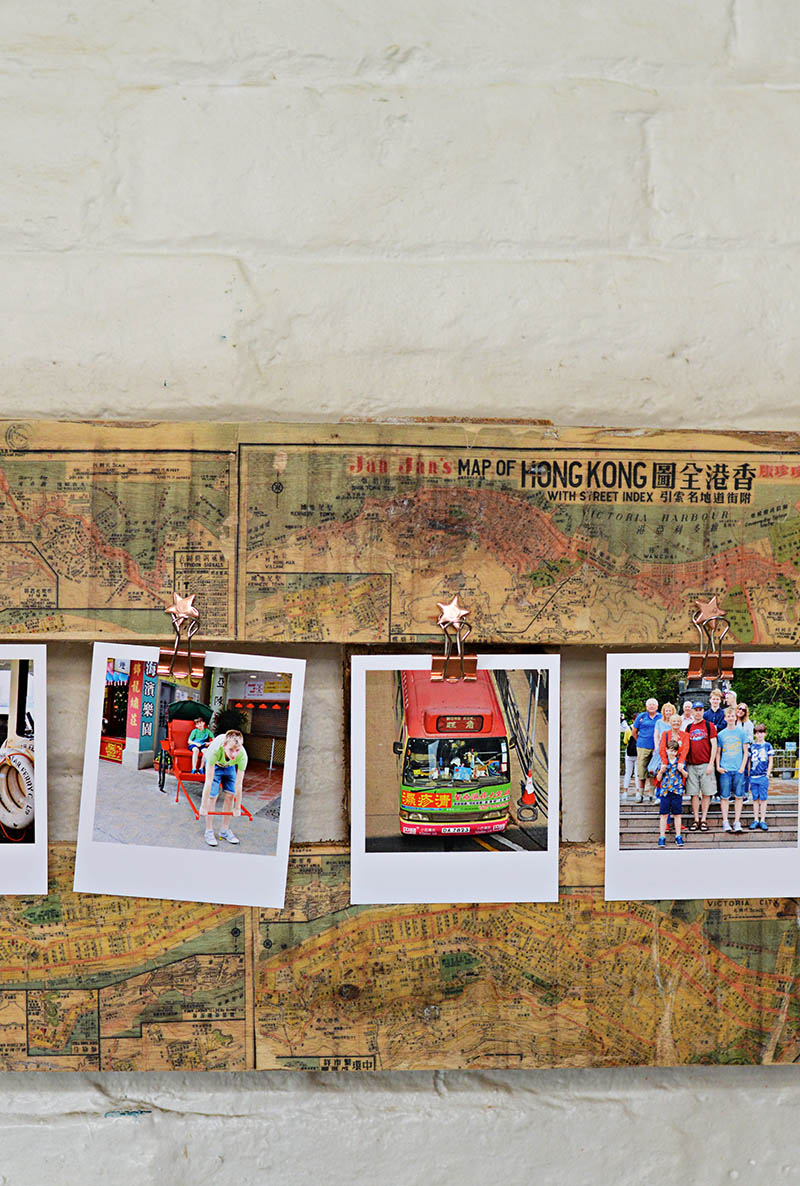
Make A Stunning Printed Map Picture Frame to display your ever-changing family photos.


Pallet Blanket Ladder by Farmhouse Made Store and display your favorite blankets on this Easy Pallet Blanket Ladder.


DIY Potting Bench by Amber OliverCreate an amazing DIY Potting Bench like this to work at every year when springtime arrives.


Pallet Planter Privacy Screen by Designers Sweet Spot
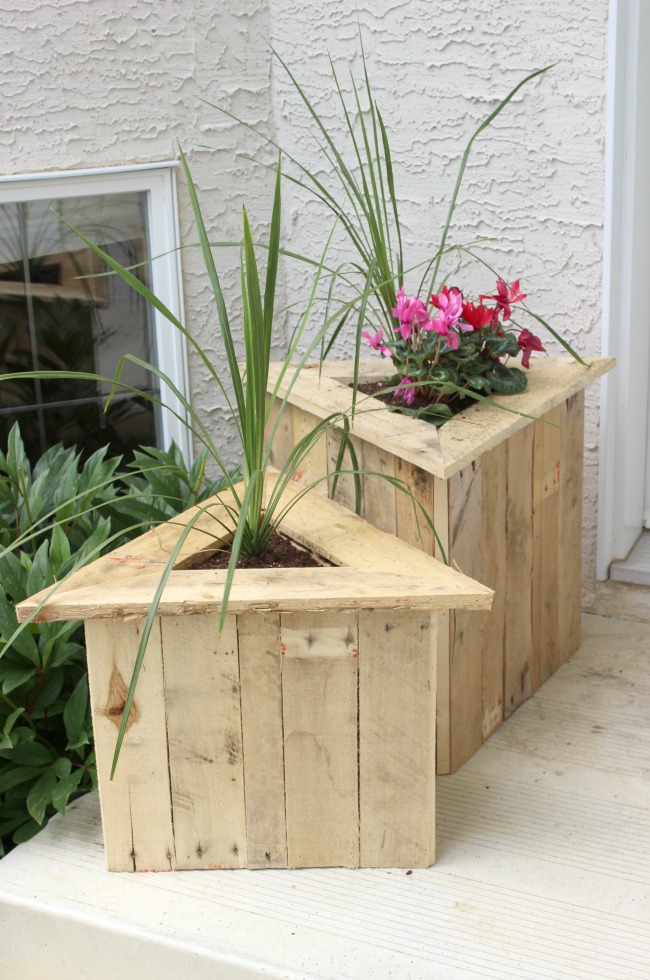
A Pallet Planter And Privacy Screen is a fun way to block others’ view to your patio.


How to Make Farmhouse Style Pallet Wood Frames by Create and BabbleHow To Make Farmhouse Style Pallet Wood Frames for a rustic and colorful touch to your decor.


DIY Outdoor Couch Pallet Project by Amber OliverAdd some comfort to your patio with this modern style DIY Outdoor Couch.


Flower Planter Box from Pallets by A Turtle's Life for MeMake a huge statement on your front porch with these Flower Planters using Free Pallets.


Create Rustic Wood King Headboard by Pretty Handy GirlUse a few pallets to Create A Rustic Wood King Headboard for your bedroom.


DIY Nautical Towel Rack by Pretty Handy Girl
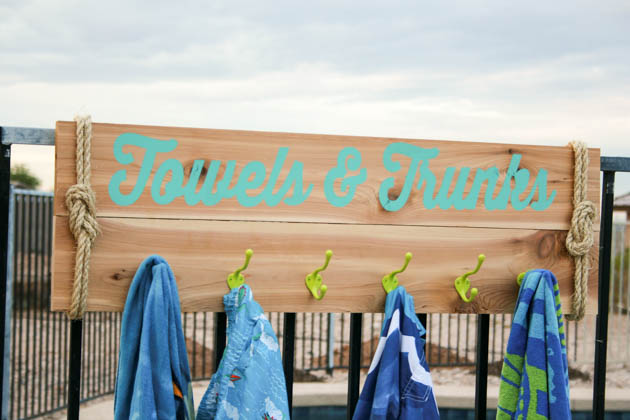
If you have a pool, make this DIY Nautical Towel Rack to keep things organized poolside.


DIY Feather Art by Pretty Handy Girl
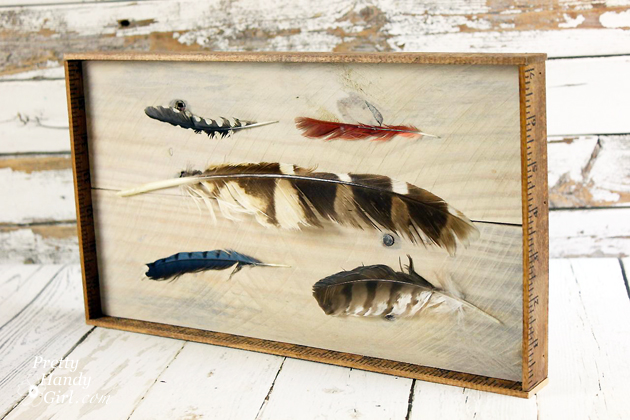
Create some rustic and beautiful DIY Feather Art. 


DIY Framed Pumpkins by Pretty Handy Girl

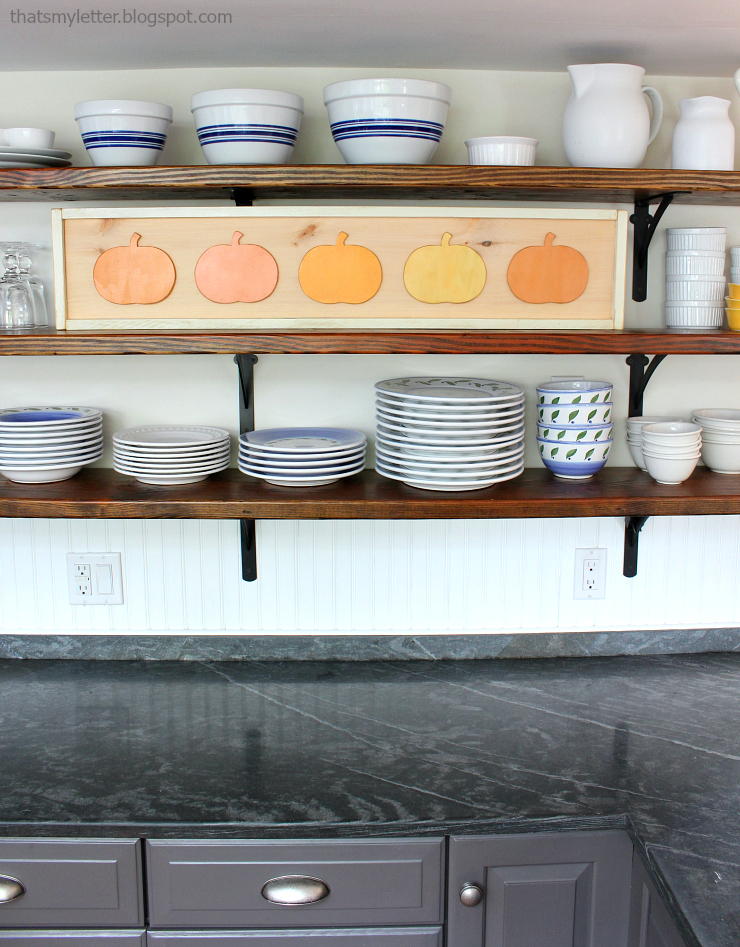
Make these DIY Framed Pumpkins, perfect for Halloween and Thanksgiving!


How to Install a Scrap Wood Wall by Pretty Handy Girl
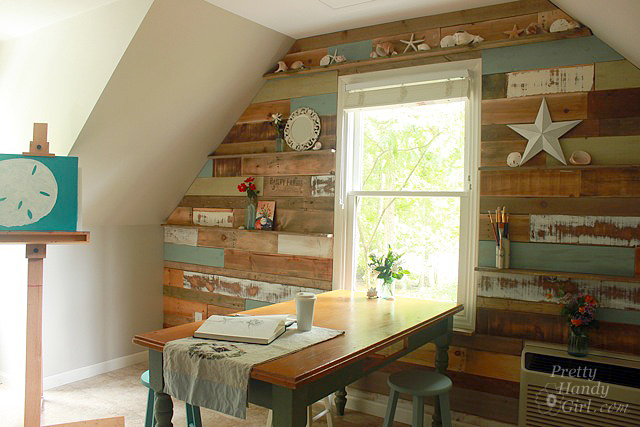
Learn How To Install A Scrap Wood Wall to create a gorgeous accent wall in your home.


pallet love - pallet wood ideasHere are a bunch of DIY Pallet Projects By East Coast Creative.


Building Porch Swing with Pallet Wood by Pretty Handy Girl
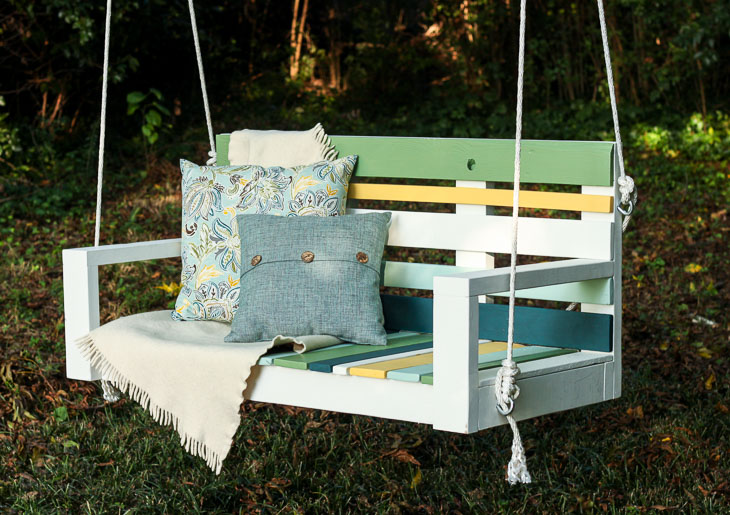
Create a DIY Porch Swing Using Pallet Wood for your outdoor oasis.


DIY Pallet Slat Bin by Pretty Handy Girl
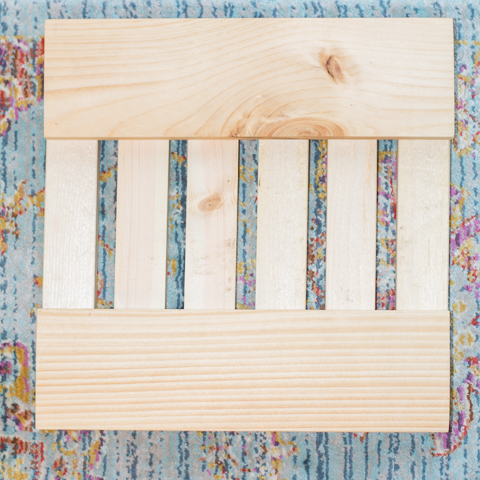
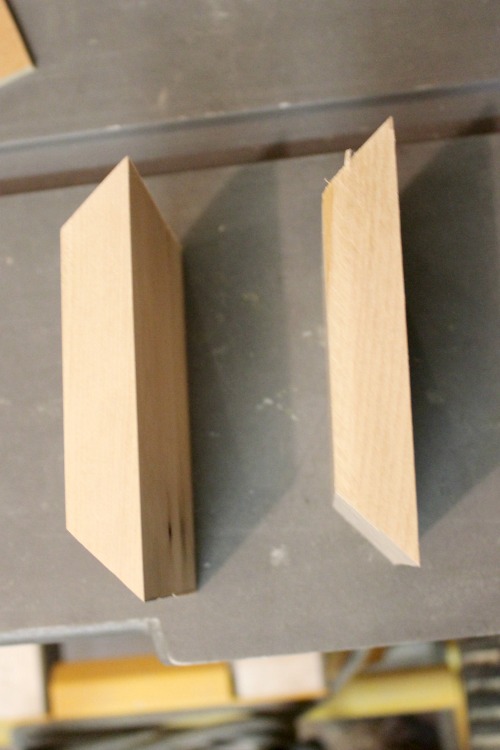
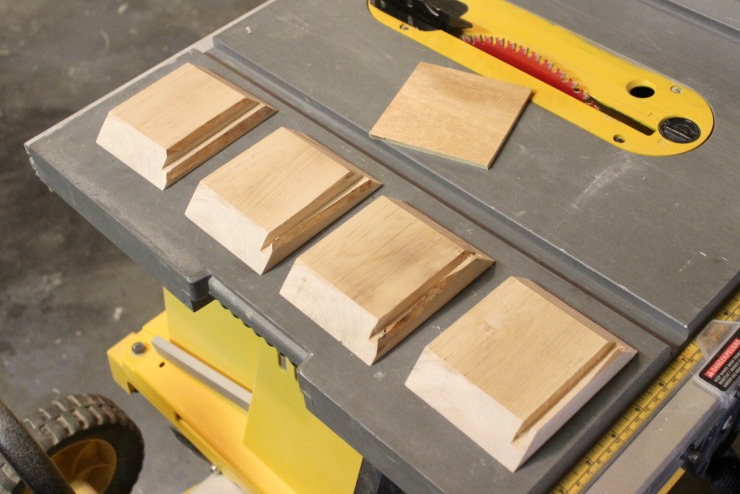
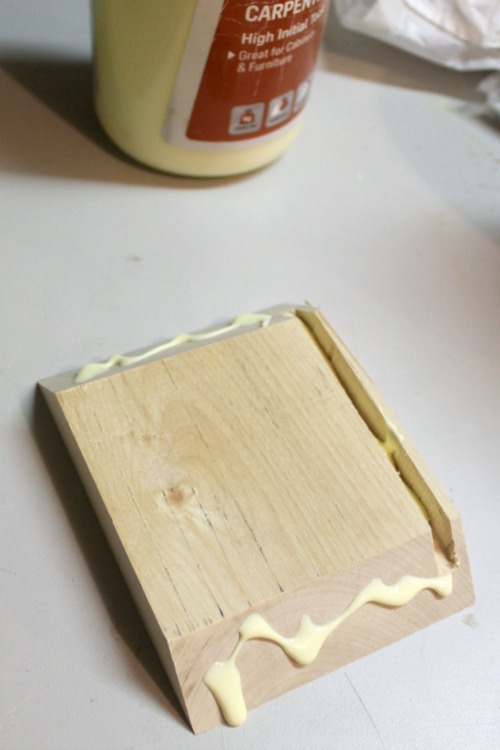
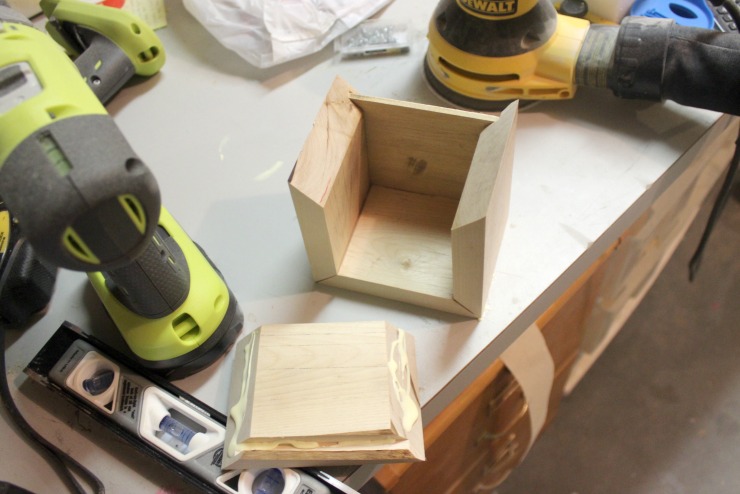
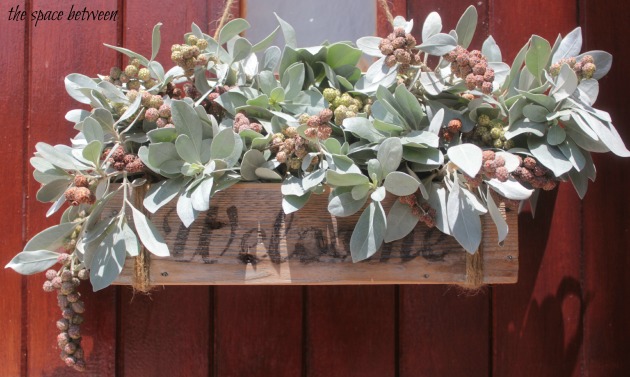
Create a DIY Pallet Slat Bin to hang on your door or use as a centerpiece.


rustic pallet serving tray by pretty handy girl
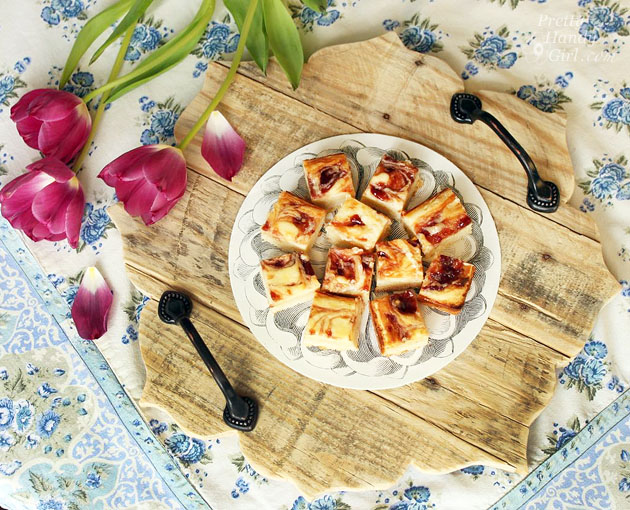
Create this gorgeous Rustic Pallet Serving Tray for your next brunch or party.


Make an Air Conditioner Screen with Pallets by Pretty Handy Girl
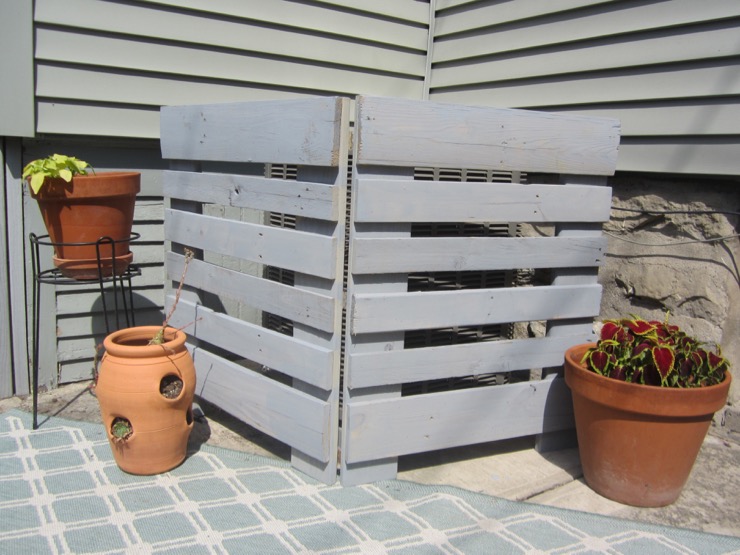
Make An Air Conditioner Screen From Pallets to hide that ugly beast of an appliance.


DIY Pallet Plaques by Oh My CreativeThese cute DIY Pallet Plaques are perfect for displaying photos.


DIY Pallet Coffee Table by The Merry Thought
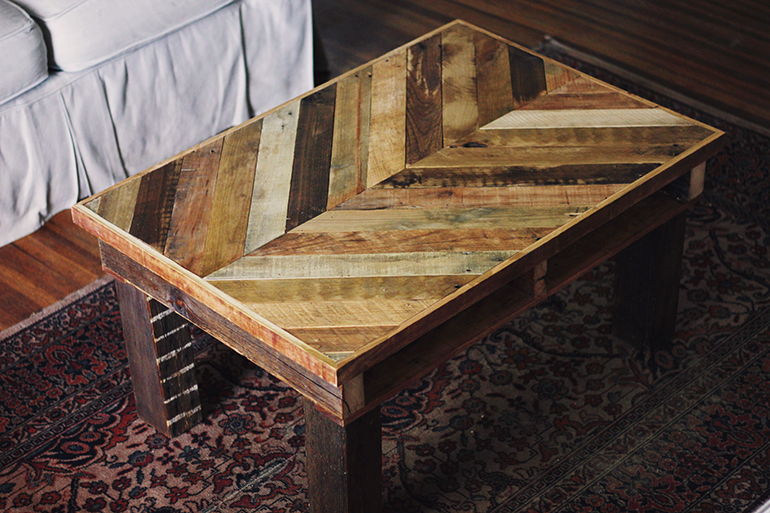
Build this stunning and rustic DIY Pallet Coffee Table for your living room.


Tropical Pallet Living Wall by A Piece of Rainbow
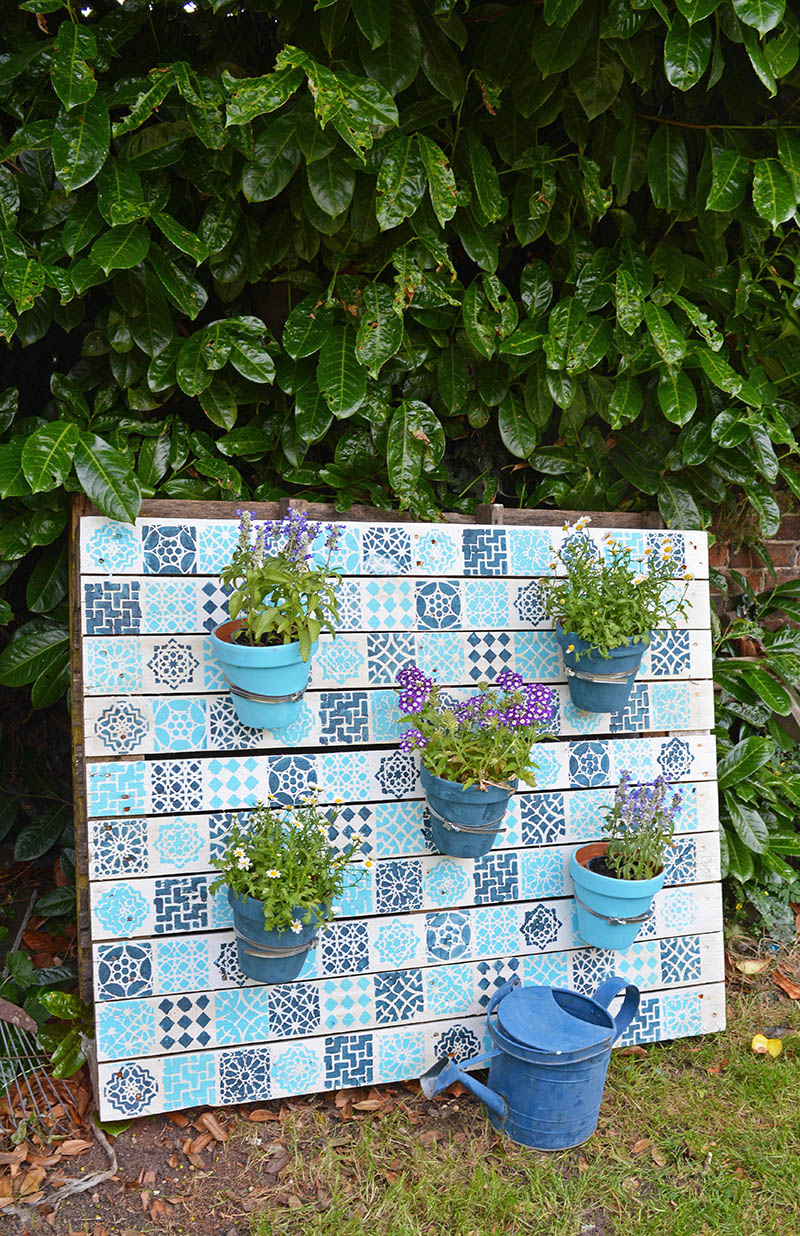
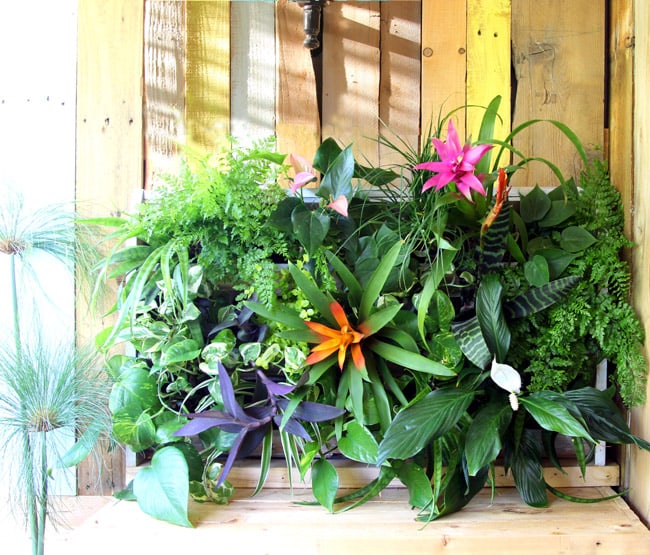
Love vertical planters? Make this DIY Tropical Pallet Living Wall.


DIY Pallet Wood Hose Holder with Planter by DIY Candy
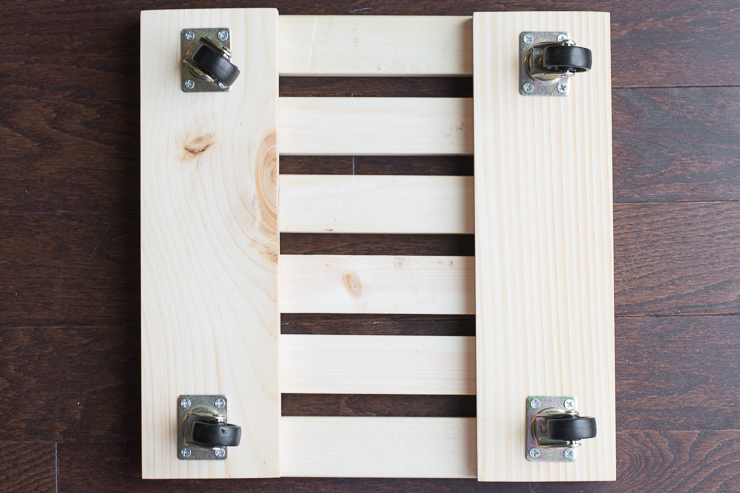
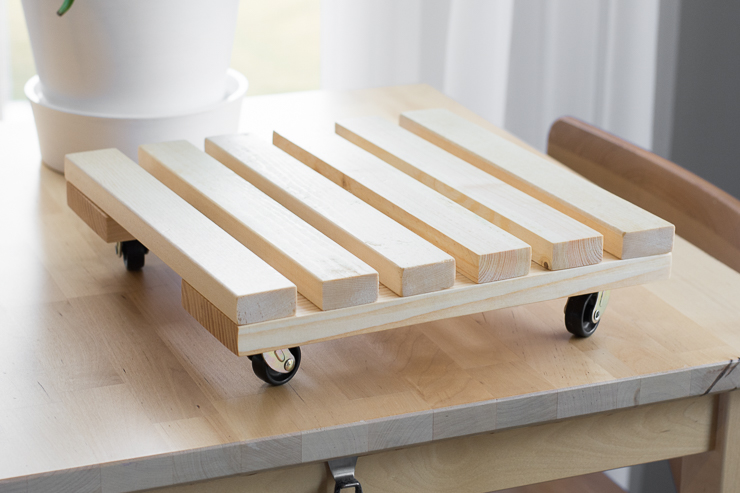
Build some beautiful storage with this DIY Pallet Wood Hose Holder With Planter.

DIY Distressed Headboard 
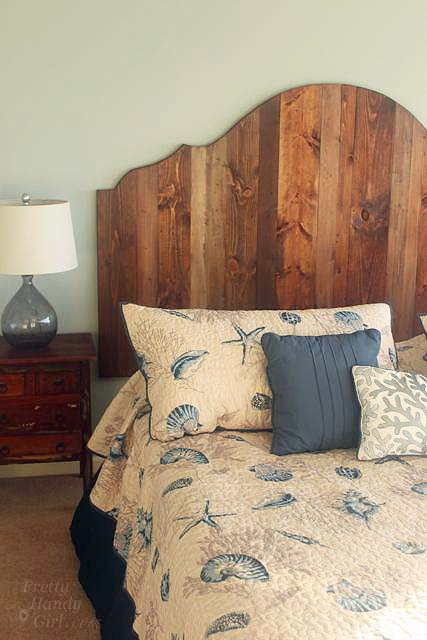
How To Make A DIY Distressed Headboard for a beautiful rustic addition to your bedroom.


Super Easy Pallet Sofa Table by Twelve on Main
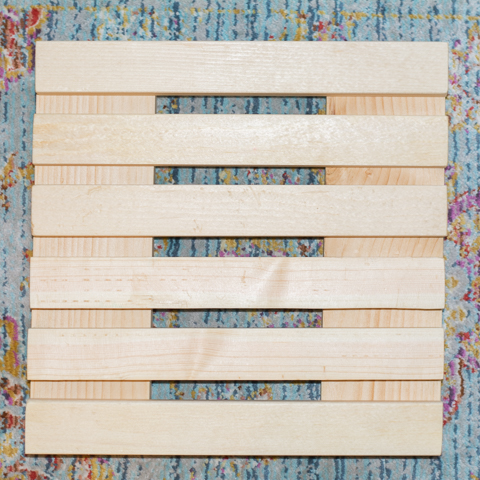
Make A Super Easy Pallet Table for a huge conversation piece in your living space.


Pallet Wood Wall Hooks by Love and Renovations
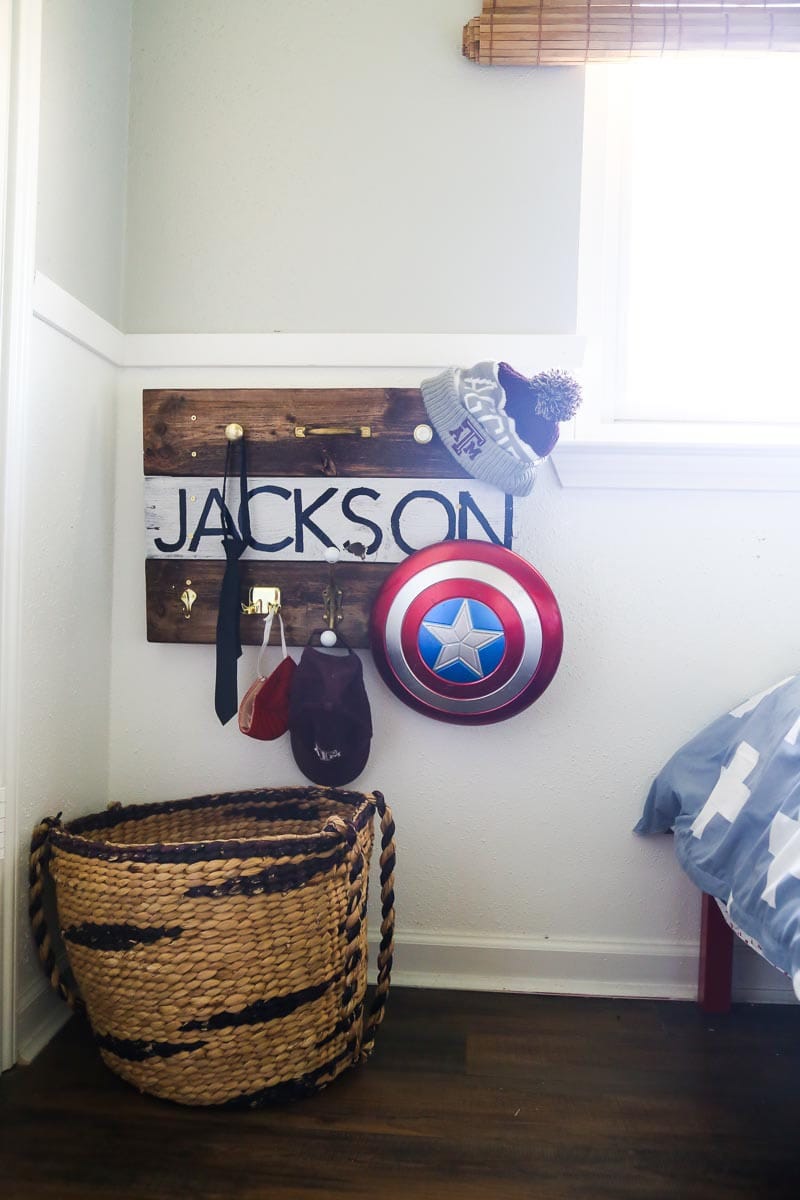
This DIY Kids Wall Hooks From Pallet Wood would be great, much-needed storage for any kids room!


DIY Rustic Pallet Wood Flag

Show your patriotism this July by making a DIY Rustic Pallet Wood Flag.

Now that you’ve been inspired, here’s how to harvest that pallet wood:

How to Salvage Wood From Pallets 
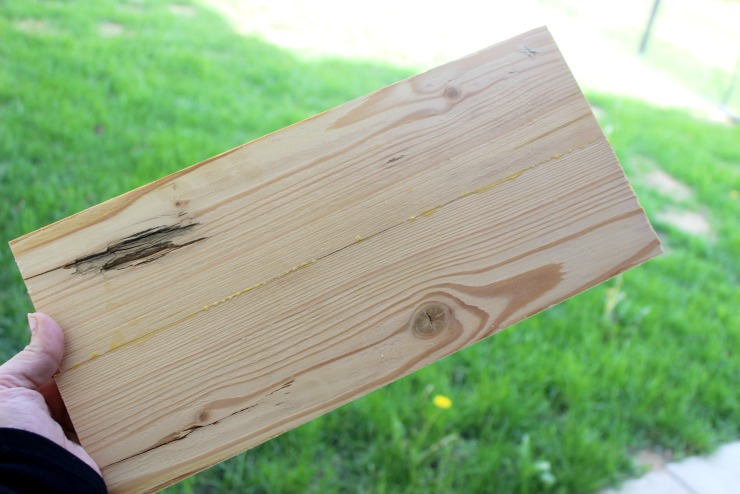
How To Salvage Wood From Shipping Pallets.

I hope you got some great inspiration from all of these pallet wood creations. Re-using pallet wood is a great way to save money and get a unique rustic feature for your home that you built yourself! Which is your favorite? I’d love to hear in the comments. Thank you for reading and feel free to share this post! Pin this image so you can refer back to this post!

50 plus pallet wood projects you can make Pinterest Image

Liked this collection of ideas? If so, you’ll love this round up of Scrap Wood Projects:

71 Practically FREE Scrap Wood Projects

DIY Wooden Raised Pet Feeder

Learn how to make a wooden raised pet feeder.

Hello Pretty Handy Girl readers! It’s Brittany from by Brittany Goldwyn popping in today to share a pretty simple woodworking project for you: a raised pet feeder!

I made a pet feeder around this time last year. However—without thinking—I made it with spots for two bowls: one for each of our kitties. A few months ago, we noticed that Blanche wouldn’t eat her food until Henry had finished, but it was clear she was hungry because she’d scarf her food down when Henry was finally done. We got into the habit of taking one bowl out and putting it on the counter so that they could eat at the same time.

DIY Wooden Raised Pet Feeder

See? Food hog hogging all the food.

This solution was problematic for three reasons:

  1. I don’t want to encourage them to get on the counters, even though they are cats and they are going to do whatever they want.
  2. Blanche sometimes pushes her bowl off the counter by accident and spills her food everywhere.
  3. They weren’t even using the double feeder for its intended purpose.

Back to the drawing board! I decided to replicate the tutorial for a smaller, single-bowl raised feeder for each of them. We’ll separate them and hope all goes well at feeding time.

Want to make one for your pet? Read on.

Note: This tutorial is based on a bowl with a circumference of 4 3/8. If your bowl is larger or smaller, you’ll need to adjust the measurement for your hole size accordingly.
Materials:

(I’ve included affiliate links for your convenience. I earn a small percentage from a purchase using these links. There is no additional cost to you. You can read more about affiliate links here.)

Tools:

Cut list:

  • (1) 8-inch piece of 1″ x 6″
  • (2) 1 ½ inch pieces of 1″ x 6″

Instructions:

Step 1: Cut your pieces according to the cut list above. Use a tape measure and pencil to mark the center point on the 8-inch piece of wood. Clamp the wood to your work surface.

DIY Wooden Raised Pet Feeder

Step 2: Use your drill and 4-inch hole saw attachment to drill a hole.

DIY Wooden Raised Pet Feeder

Step 3: Use medium-grit sandpaper to sand down any rough areas on the main piece and two leg pieces. You can also gently smooth over the edges to give the piece a sleek look.

The leg on the left below has been sanded, the one on the right has not. See the difference?

DIY Wooden Raised Pet Feeder

Step 4: Spread wood glue onto the top of each leg. Gently place the top down onto the legs.

DIY Wooden Raised Pet Feeder

Step 5: Apply pressure from above with clamps or something heavy you have on hand. The key is to apply even pressure as the wood glue dries. (I used a weight from the garage gym!) If some of your glue bleeds out, don’t worry. You can use medium-grit sandpaper to sand down those areas. If you don’t sand off the dried glue, the area will not take a wood stain.

DIY Wooden Raised Pet Feeder

Step 6: Your single bowl raised pet feeder is built! Stain and finish according to your preferences.

DIY Wooden Raised Pet Feeder

(My raised feeder was finished with Minwax wood stain in Espresso and two coats of Minwax polyurethane in semigloss. For tips on staining and finishing wood, see this post!)

Once the feeder has dried completely, pop your bowls in and fill them with food. These bowls fit perfectly because their circumference is slightly bigger than 4 inches, meaning they won’t fall through the 4-inch hole. Best of all, Blanche and Henry can happily eat at the same time. 🙂

DIY Wooden Raised Pet Feeder

DIY Wooden Raised Pet Feeder

I’ll see you next month on Pretty Handy Girl! In the meantime, if you love your pets, check out my DIY cat tree using real branches, my Ikea cat condo hack, and my Petcube camera review!

Also make sure to check out the industrial dog bowl feeder stand and the vintage coca cola bowl feeder tutorials on Pretty Handy Girl!

DIY Rolling Plant Caddy by Brittany Goldwyn-1

DIY Rolling Plant Caddy by Brittany Goldwyn-1

Hello everyone! I’m Brittany from by Brittany Goldwyn, and I’m back to bring you another easy and stylish tutorial! Last month I shared a tutorial on how to frame out a mirror using wood. This month I’m working with wood again to build a plant caddy.

One look at my Instagram feed and you’ll see that we probably have too many plants for our house, but plants make me happy, and I find that they are just the easiest way to decorate without spending a ton of money. We have quite a few big plants and moving them can be a beast. That’s where a rolling plant caddy comes in handy. Luckily, they are pretty easy to make. I made mine out of scrap wood that was left over from previous projects. I hate letting things go to waste, so I love a good scrap wood project!

If you’d like to learn how to make a rolling plant caddy, read on.

Materials

(I’ve included affiliate links for your convenience. I earn a small percentage from a purchase using these links. There is no additional cost to you. You can read more about affiliate links here.)

Lumber:

  • (6) 1×2 pieces cut to 12 inches each
  • (2) 1×4 pieces cut to 12 inches each

Tools and hardware:

Other:

Instructions:

Step 1: Cut and polish your pieces.

Use your saw to cut (8) pieces of lumber: (6) pieces of 1″ x 2″ cut to 12 inches each and (2) pieces of 1″ x 4″ cut to 12 inches each. I used pine for my plant caddy, but you can use any type of lumber you like. Cedar would be a good option if you plan to use your plant caddy outdoors.

DIY Rolling Plant Caddy by Brittany Goldwyn-1

Use medium or fine grit sandpaper to smooth out any rough edges on your pieces. Give each piece a good sanding to ensure it is polished.

Step 2: Stain the wood.

I have a lot of unfinished pine furniture and decor in my house, so I chose Minwax “Natural” stain. Feel free to choose the stain color you like. (For great instructions on how to stain and finish wood, check out this detailed post.)

Step 3: Assemble the caddy.

Once the pieces are dry, use wood glue to glue the 1″ x 2″ pieces to the 1″ x 4″ pieces as shown below.

View of the top:

DIY Rolling Plant Caddy by Brittany Goldwyn-1

View of the bottom (the side you’ll attach the caster wheels to):

DIY Rolling Plant Caddy by Brittany Goldwyn-1

Add just a bit of glue for the side of each piece. Don’t use too much glue, or it will ooze out the sides when you assemble the caddy. Allow the glue to dry completely.

Step 4: Attach caster wheels. 

Flip the caddy over and screw a caster wheel in each corner. Make sure to buy caster wheels that are graded for the weight you’ll need. (I used (4) casters rated at 20 lbs each.)

DIY Rolling Plant Caddy by Brittany Goldwyn-1

Step 5: Finish with polyurethane spray.

Use Minwax polyurethane spray to finish off the caddy and protect the wood from any water spills. This is actually my first time using an aerosol can of polyurethane, it’s much easier than brushing on the polyurethane and worrying about getting into the nooks and crannies of the caddy.

You can see the bit of added sheen in this photo:

DIY Rolling Plant Caddy by Brittany Goldwyn-1

After the polyurethane is completely dry, place your plant on the caddy and enjoy being able to move your plant easily!

DIY Rolling Plant Caddy by Brittany Goldwyn-1

DIY Rolling Plant Caddy by Brittany Goldwyn-1

If you liked this project, you might like my tree stump side table, my indoor succulent care tips, my teacup planters, and my hanging indoor garden! I’ll see you next month but in the meantime, you can always visit  me on my blog to see what I’m up to. Until next time!

~ Read More of Brittany Goldwyn’s Tutorials ~


Pin for later!

DIY Rolling Plant Caddy Tutorial | Pretty Handy Girl

DIY Mini Planters I Pretty Handy Girl

Hi everyone! This is Lindi, visiting again from Love Create Celebrate. I’m really excited to show you how to make your own mini planters. Tis the season for filling up our homes with garden plants (or faux plants if you lack a green thumb!) With only a few tools and a couple hours you can make your own simple DIY Mini Planters.

DIY Mini Planters I Pretty Handy Girl

I LOVE these planters! They are the perfect mix of chic and rustic. I actually made them from maple, although any wood will work. The wood from this project came from an old pallet! Most pallets in Canada are made with cheap pine, but we lucked out. Lesson learned: always check your pallets! Now let’s get busy and make a few DIY Mini Planters.

Materials:

  • 1″ x 6″ x 4′ board
  • 4″ x 4″ ¼” plywood piece (per planter)
  • Wood glue
  • Wood stain of your choice
  • Styrofoam square (optional)
  • Faux florals (optional)

Tools: 

  • Speed square
  • Measuring tape
  • Miter saw
  • Table saw or router table
  • Nail gun
  • Sander
  • Clamps

Instructions: 

Use your miter saw to cut your 1″ x 6″ board into four 54 3/4″ long pieces. Then use the table saw to cut all four of those pieces to 3.5″ wide (these will be your sides.) Cut your plywood into a 4″ by 4″ square.

DIY Mini Planters I Pretty Handy Girl

Use your speed square to mark a 45º angle on both edges of your 4 side boards. Cut along those marks with your miter saw. You will have four boards measuring 4 3/4″ x 3.5″ on the outside edge, with 45º cuts on both sides.

DIY Mini Planters I Pretty Handy Girl

Next use your table saw or router table to make a 1/4″ groove about 1/4″ inch above the bottom of your 4 3/4″ x 3.5″ boards.

DIY Mini Planters I Pretty Handy Girl

When all of your pieces are cut and grooved, it’s time to assemble them.

DIY Mini Planters I Pretty Handy Girl

Put wood glue on the edges of the first piece, fit the two edges of either side of it and use your nail gun to attach these three sides.

DIY Mini Planters I Pretty Handy Girl

When three sides are attached, slide your plywood into the groove you created. Add more wood glue and nail the last piece in place.

DIY Mini Planters I Pretty Handy Girl DIY Mini Planters I Pretty Handy Girl

Once the glue is dry, give the planter a quick sand and stain it whatever color you would choose.  Add a styrofoam block with some faux florals! If you want to add real plants, line the planter with plastic and add soil and plants.

DIY Mini Planters I Pretty Handy Girl

I LOVE these planters!

DIY Mini Planters I Pretty Handy Girl

I made them in no time at all and they look amazing in my living room!

DIY Mini Planters I Pretty Handy Girl

If you like planters, you’re in luck! I’m sharing these Triangle Planters from Pallets over at Love Create Celebrate!

planters build plans

For more DIY decor inspiration visit Love Create Celebrate.

Lindi Signature


Pin for later!

With only a few tools and a couple hours you can make your own simple DIY Mini Planters | Pretty Handy Girl #prettyhandygirl #DIY #planter

Rustic Home Sign I Pretty Handy Girl

Hi everyone! This is Lindi, visiting again from Love Create Celebrate! I’m really excited to show you how you can make your own Rustic Home Sign. You’ve probably seen something similar in a home decor store, but didn’t want to pay big bucks for one. You’re in luck, I’m going to show you how to make your own Rustic Home Sign using a scrap of wood you might have sitting around. If your scrap wood isn’t wide enough, you can glue two pieces together.

Rustic Home Sign I Pretty Handy Girl

Materials: 

  • 1×6″ wood board (as big as you want your sign to be)
  • Pencil or stencil
  • Drill
  • Scroll Saw
  • Sandpaper
  • Wood Stain

Instructions: 

Cut your wood board down to the approximate size that you want your sign to be. Mine was about 12″ long. Make sure the edge that the sign will sit on is flat. If not, sand down that edge. Sand the front and back of the board (especially if you glued two boards together.)

Rustic Home Sign I Pretty Handy Girl

Trace the word “Home” on your board. Draw it by hand or transfer from a print out. Make sure that all of your letters are connected and that the bottom of the letters run off the bottom of the board (this way it will sit flat).

Rustic Home Sign I Pretty Handy Girl

Using your drill, drill holes into the centers of the “o” and “e” that are enclosed. Use a scroll saw to cut around the word and within the letters. Use a very thin blade to allow you to navigate the edges and curves.

Rustic Home Sign I Pretty Handy Girl

When you are done cutting, double check that your piece sits flat. Use your sandpaper to sand all edges. (Folded up sandpaper and a nail file will help you get into the curves.)

Rustic Home Sign I Pretty Handy Girl

Stain your pieces using your favorite wood stain. (I used my well-loved can of grey.)

Rustic Home Sign I Pretty Handy Girl

Let it dry, and display it proudly in your home!

Rustic Home Sign I Pretty Handy Girl

I love how this piece turned out.

Rustic Home Sign I Pretty Handy Girl

I can see myself using this piece on my mantle or any of the many shelves in my home!

Rustic Home Sign I Pretty Handy Girl

I may have to make a few more or make some with different words.

Rustic Home Sign I Pretty Handy Girl

For more DIY decor inspiration visit Love Create Celebrate.

Lindi Signature

~ view more projects by Lindi ~


Pin for later!

How to make your own Rustic Home Sign using a scrap of wood you might have sitting around. | DIY wooden home sign | Pretty Handy Girl | #prettyhandygirl #rusticsign #woodsign #DIYtutorial