Tag Archive for: decor

9 holiday storage hacks social media image

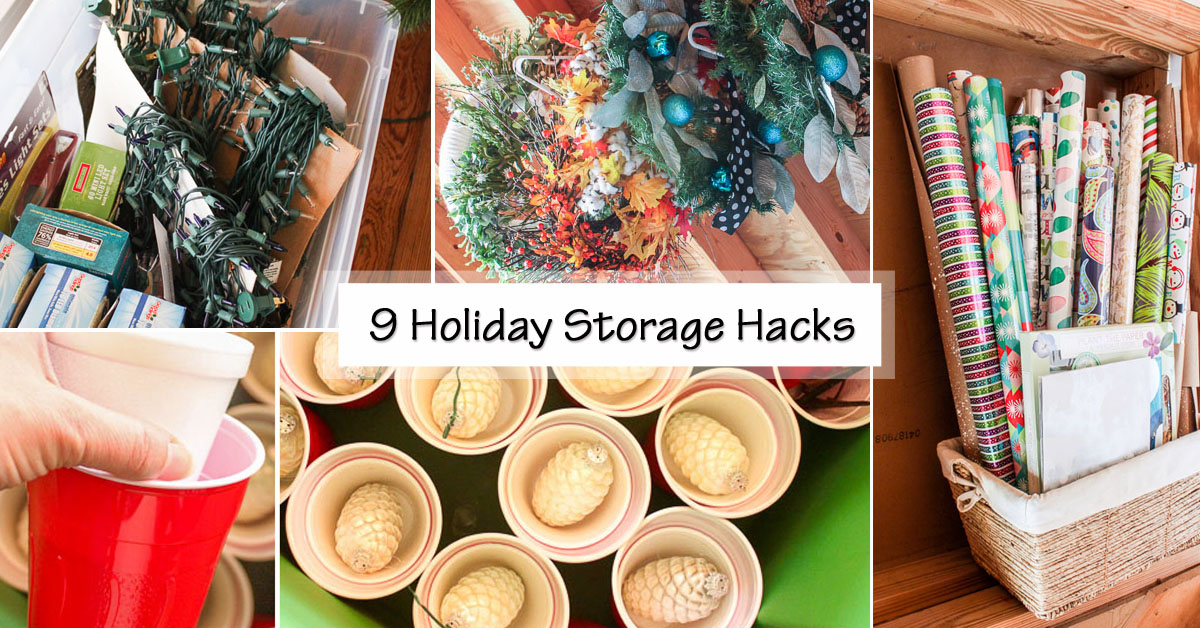
9 Holiday Storage Hacks

Now that Christmas is over, you’re probably in one of these two camps.

  • Camp #1: Christmas is over, time to pack everything away pronto.
  • Camp #2: Christmas is over, but I want to enjoy the decorations for a while longer. I’ll put them away in the new year.

Regardless of which camp you belong to, I have several Holiday Storage Hacks to help you store the holiday items for next year!

Plastic and Foam Cups:

There will always be ornaments to pack away after the holidays. Protect them from getting crushed or breaking by storing them inside individual disposable cups. For fragile ornaments, insert a foam cup inside the larger plastic cup before placing the breakable ornament inside. This gives a nice cushion around the ornament and creates a nice even layer in the bottom of your storage bin, which is helpful for the next hack.
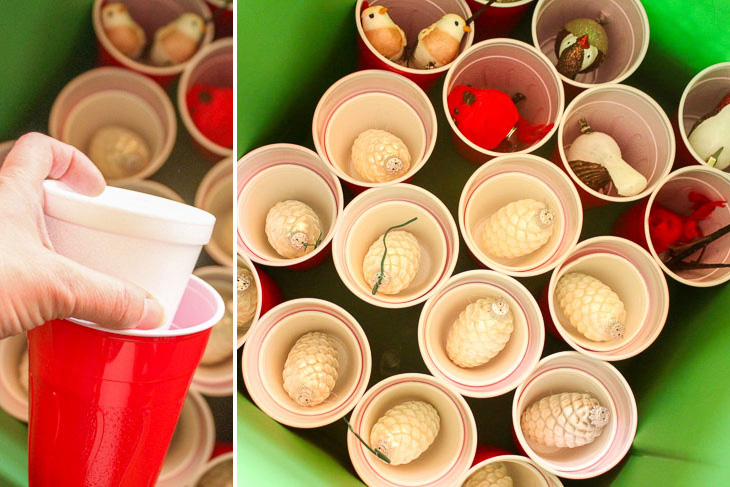
Storage Hacks for Holiday Decorations | Pretty Handy Girl

Lasagna Method:

Don’t just throw your ornaments in the bin. Start at the bottom of your bin and place a layer of ornaments stored in cups. (Easy to do if you use the first hack above!) Place a piece of foam over the cups and continue with a second layer of ornaments. Again, add another piece of foam, then place ornaments that lay flat or are very thin on top of that last layer of foam. They will be protected and ready to go for decorating next year.
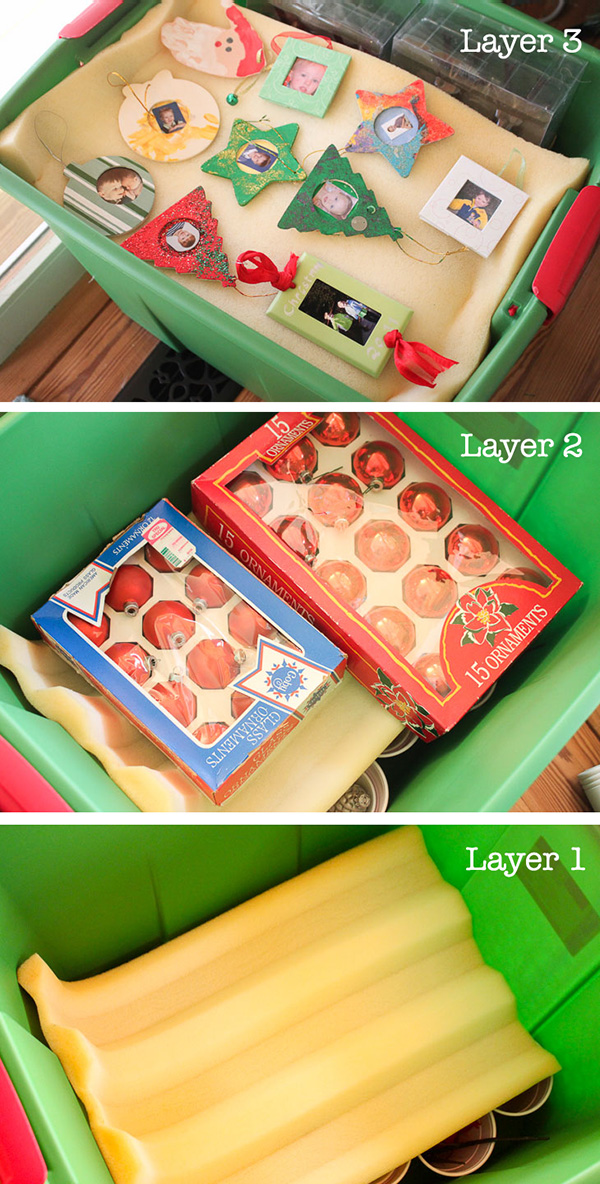
Storage Hacks for Holiday Decorations | Pretty Handy Girl

Saran Wrap the Tree:

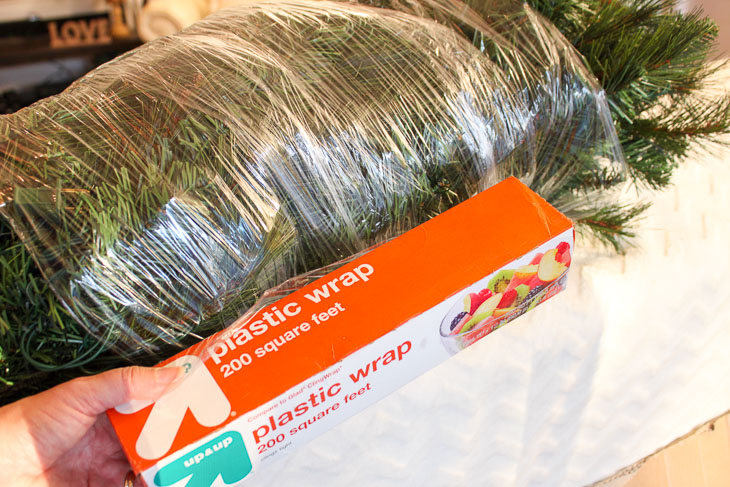
Artificial trees can be cumbersome and messy when store them away. To neatly pack your artificial trees use a roll of plastic wrap to secure the branches together, making it easier to carry and store. Bonus, you might actually be able to get that tree back in the box you bought it in!

Storage Hacks for Holiday Decorations | Pretty Handy Girl

Linen Zipper Pouches:

If you have a collection of small tea lights and candles, use an old linen zippered pouch from your last blanket purchase. These are perfect for storing your tea lights, batteries, and other similar items until next year. The clear bag also lets you see exactly what’s inside.
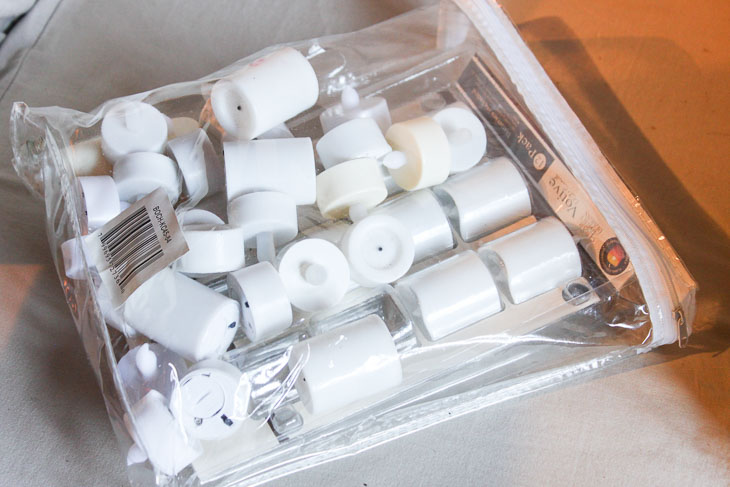
Storage Hacks for Holiday Decorations | Pretty Handy Girl

Cardboard Light Holder:

Do your lights get tangled up by the following year? This year put an end to the frustration by cutting out a large rectangular section of cardboard (shipping boxes or cereal boxes work great.) Make a small slit on one end to hold the end plug of your light strand. Wrap the lights around the cardboard to keep them secure and organized and ready to put up next year. This hack also allows you to store the strands upright to save on space. It may take a bit of extra time now, but will save you time (and curse words) next year!
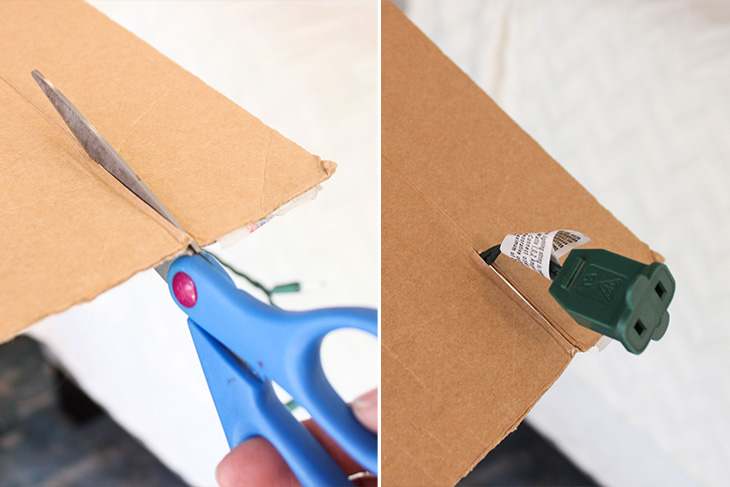
Storage Hacks for Holiday Decorations | Pretty Handy Girl

Store Like Items Together:

I don’t know about you, but in the past my bins were filled with random holiday items. I struggled to find a particular item. To solve this issue, put similar items into one bin. Next year you’ll know exactly where all of the lights are in an instant. Label the outside of each bin to help speed through the decorating process.
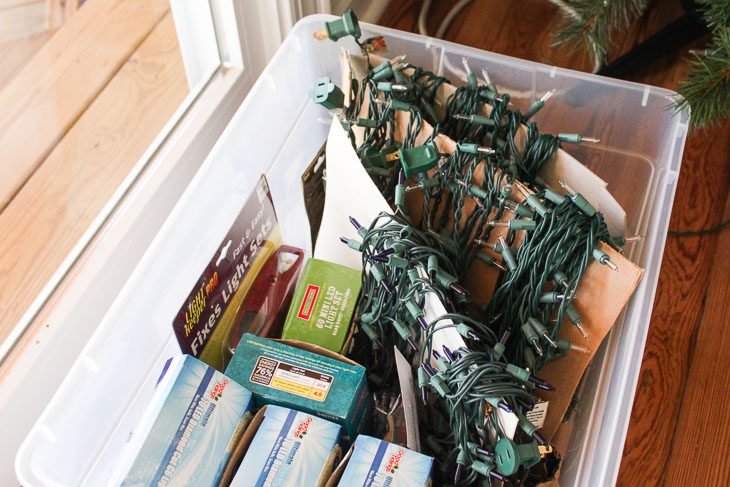
Storage Hacks for Holiday Decorations | Pretty Handy Girl

Hang Wreaths:

Wreaths are large and take up a lot of bin space. To store your wreaths, put them on hangers in an extra closet. If you don’t have closet space, nail a horizontal board to the rafters in your attic or garage and hang them there.
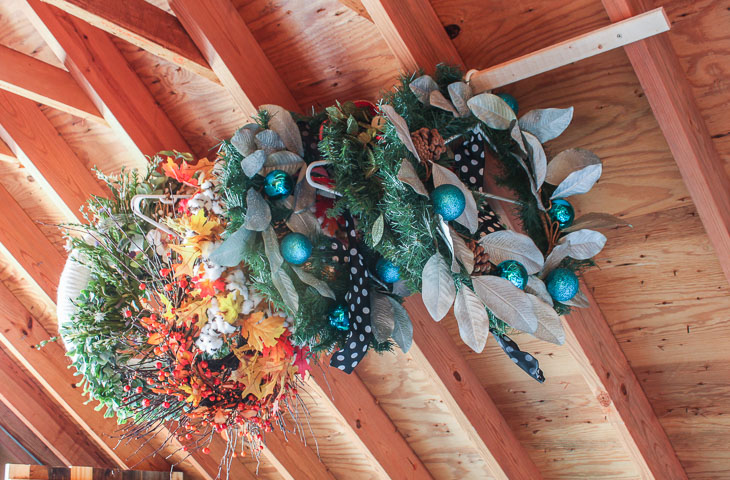
Storage Hacks for Holiday Decorations | Pretty Handy Girl

Gift Wrap Storage:

Gift wrap rolls are long and can be difficult to store. Use a bin or basket in the corner and store your gift wrap upright. This prevents the rolls from getting crushed and they are easy to grab next time you need to wrap a present. Feel free to store birthday and other holiday wraps as well.
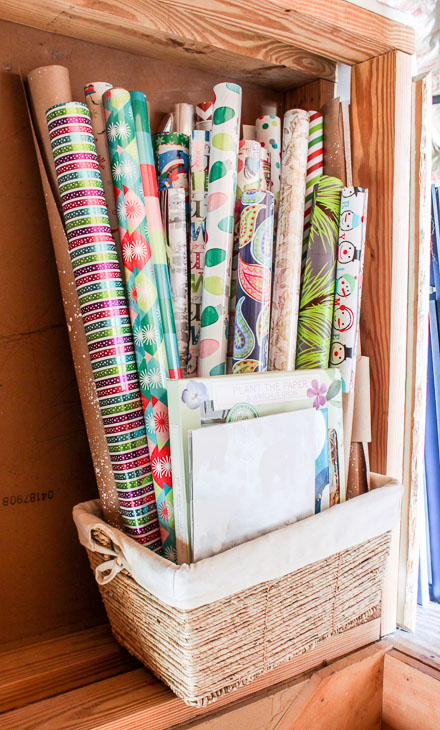
Storage Hacks for Holiday Decorations | Pretty Handy Girl

Or, create this under the bed gift wrap station like Her Toolbelt made:

Bins for Gift Bags, Ribbons, & Tissue Paper:

Fold your gift bags neatly and place them inside clear storage bins. Organize by size or celebration and you’ll have a great place to go whenever you need to quickly wrap a gift. Use another bin for ribbon spools and yet another for scrap ribbons (never let those scraps go to waste.) The clear bins make it easy to grab the correct bin, no matter how last minute you’re putting the gift together.
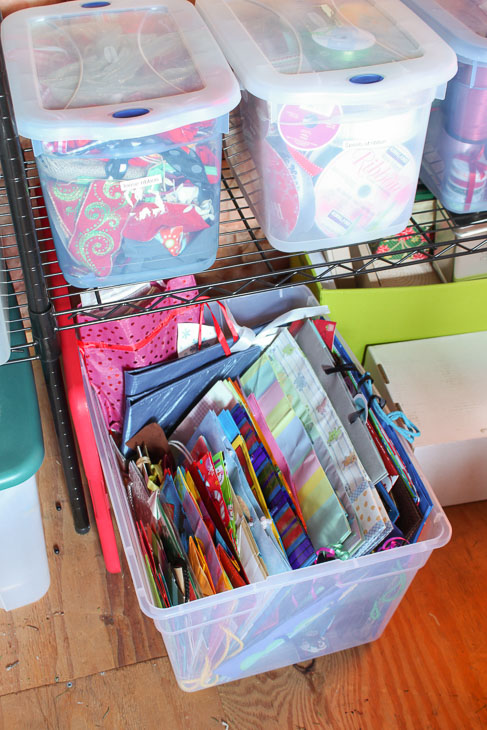
Storage Hacks for Holiday Decorations | Pretty Handy Girl

There you have it! Holiday clean up doesn’t have to be stressful, just keep it organized and use these hacks to make your holiday decor last for years to come. Do you have any storage hacks for holiday decorations that you would add to this list? Please share them in the comments!

8. Complete with "L" brackets on corners. Add gifts and deliver!

DIY Sheet Metal Gift TraysDIY Sheet Metal Gift Trays

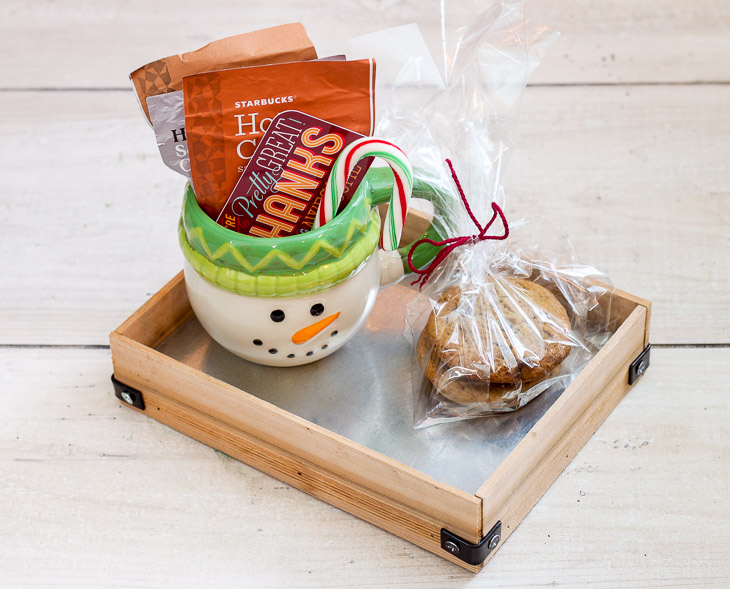
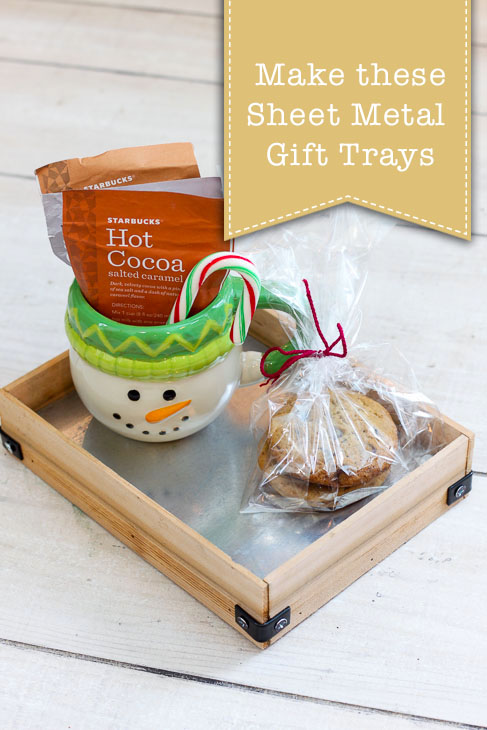
The holidays are fast approaching and it’s time to start thinking about gift giving ideas! Gift trays are a great way deliver gifts to your friends, neighbors or teachers. The best part of a gift tray is it can be reused for anything they want and nothing goes to waste! Follow along with this tutorial to see how to make these DIY Sheet Metal Gift Trays.

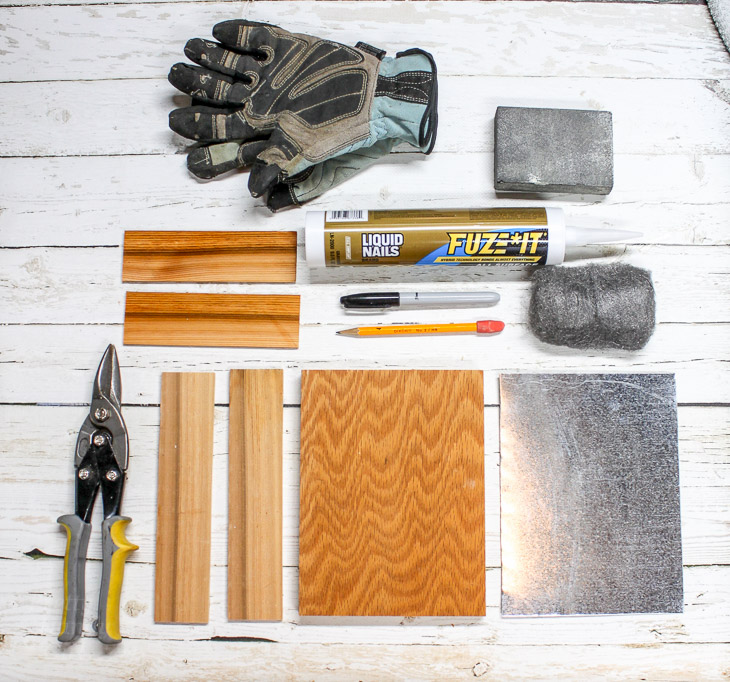
Materials:

(I’ve included affiliate links for your convenience. I earn a small percentage from a purchase using these links. There is no additional cost to you. You can read more about affiliate links here.)

Materials: Sheet Metal Gift Tray

  • 1/2″ or 3/4″ Plywood scrap wood
  • 2″ pieces of lathe or scrap moulding
  • [amazon_textlink asin=’B000W49NPC’ text=’Sheet metal scrap’ template=’ProductLink’ store=’prett-wp-001-20′ marketplace=’US’ link_id=’4f103892-cbe2-11e7-a00c-3fda84932599′] (large enough to cover plywood base)
  • [amazon_textlink asin=’B00009OYFY’ text=’Sheet metal snips’ template=’ProductLink’ store=’prett-wp-001-20′ marketplace=’US’ link_id=’56db011a-cbe2-11e7-88c9-230adf5bdb2c’]
  • [amazon_textlink asin=’B000S7ZSTS’ text=’Construction adhesive’ template=’ProductLink’ store=’prett-wp-001-20′ marketplace=’US’ link_id=’65c9549d-cbe2-11e7-8619-39ed35fc6585′]
  • [amazon_textlink asin=’B000DZF2Q4′ text=’Caulk gun’ template=’ProductLink’ store=’prett-wp-001-20′ marketplace=’US’ link_id=’6d3fe28c-cbe2-11e7-bb25-e144f3be5a89′]
  • [amazon_textlink asin=’B00125NQBC’ text=’Sandpaper’ template=’ProductLink’ store=’prett-wp-001-20′ marketplace=’US’ link_id=’7f0ff979-cbe2-11e7-b34f-fb2f071c5869′]
  • [amazon_textlink asin=’B001JYVDSE’ text=’Steel wool’ template=’ProductLink’ store=’prett-wp-001-20′ marketplace=’US’ link_id=’8e654c5e-cbe2-11e7-b495-0ffc93a9294c’]
  • [amazon_textlink asin=’B01I7DNOYA’ text=’Gloves’ template=’ProductLink’ store=’prett-wp-001-20′ marketplace=’US’ link_id=’b09e21ba-cbe2-11e7-91af-d908a698cd02′]
  • Drill
  • Pencil or Marker
  • 4 – [amazon_textlink asin=’B01N6NID4X’ text=’L brackets’ template=’ProductLink’ store=’prett-wp-001-20′ marketplace=’US’ link_id=’de9d5670-cbe2-11e7-84b2-2f143e838863′] and 1/2″ wood screws
  • [amazon_textlink asin=’B001PNH8D8′ text=’Brad nails ‘ template=’ProductLink’ store=’prett-wp-001-20′ marketplace=’US’ link_id=’0337c2d4-cbe3-11e7-b1d7-3dfa06c67bf1′]Nail gun

Instructions:

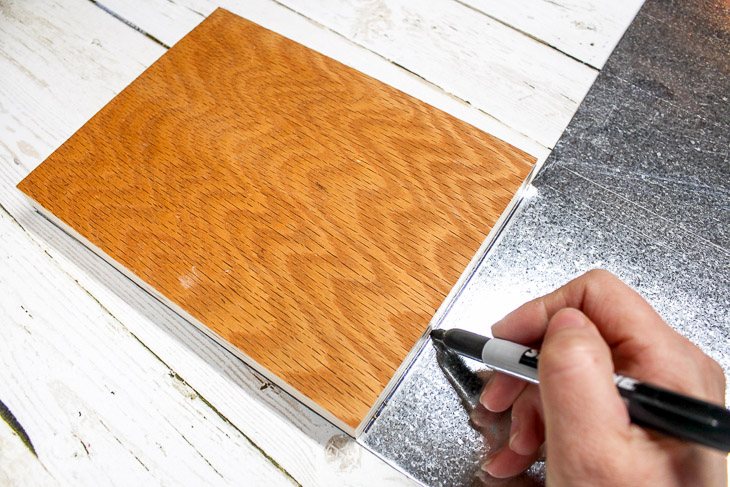
Cut your piece of plywood to the desired size for the tray base. Lay the plywood base on top of the sheet metal and trace with a permanent marker. Use tin snips to cut the metal to size.

1. Cut base and mark sheet metal size.

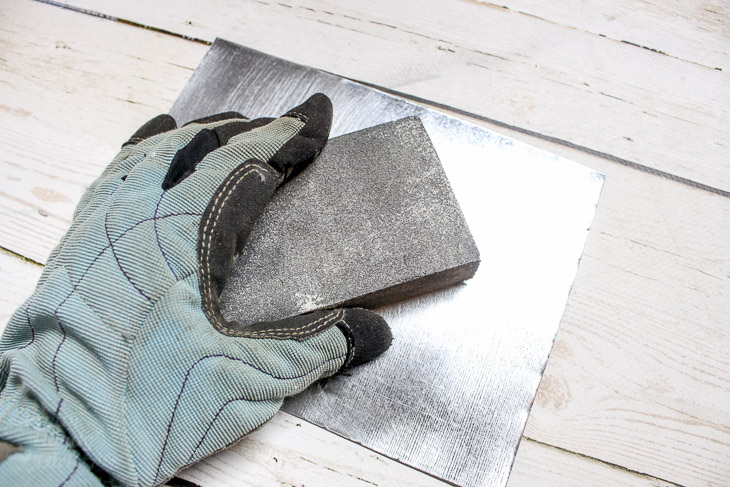
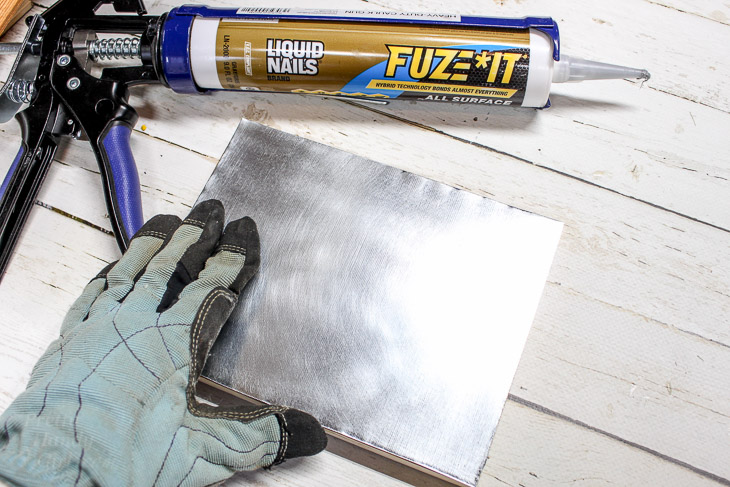
Put on your safety gloves and use the sanding block to remove some of the shine from the sheet metal. Smooth over any sharp edges.

2. Sand Sheet metal edges and base.

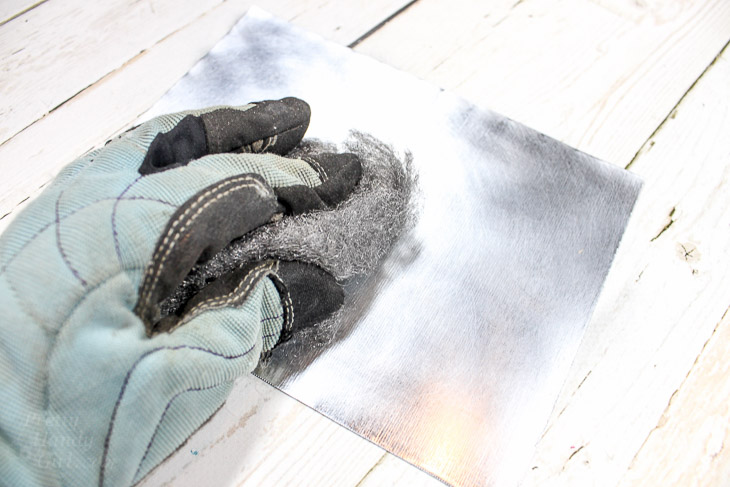
Rub the steel wool over the entire sheet metal piece to give it a soft polished finish.

4. Use steel wool to dull sheet metal surface.

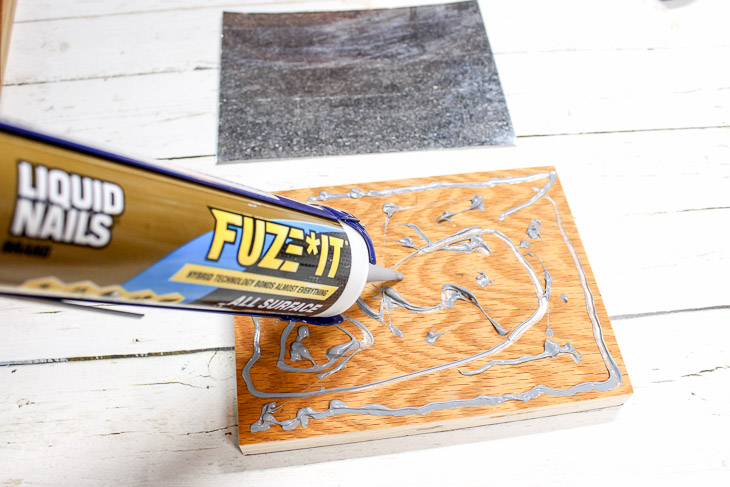
Load a tube of construction adhesive into your caulk gun. Apply a fair amount of adhesive to the plywood. Glue the sheet metal to the top of the plywood.

5. Add Construction Adhesive to wood base

Press the sheet metal down evenly on top of the adhesive. Wipe off any excess if needed with a paper towel.

6. Press sheet metal on top of wood base.

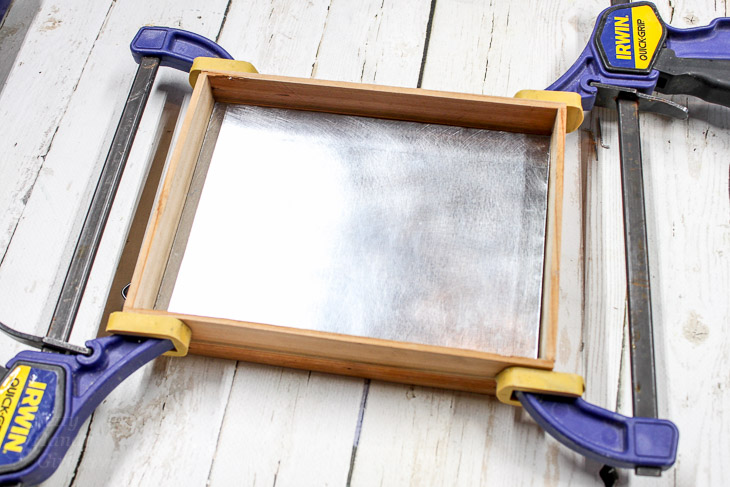
Cut the 2″ pieces of lathe or scrap moulding to the length of the two shorter sides. Next, measure and cut two pieces of lathe for the long ends. (Be sure to allow extra length to overlap the short pieces of lathe/moulding.  Use the construction adhesive and brads to secure the lathe to the sides of the plywood. Clamp the sides until the adhesive cures.

8. Clamp sides while glue cures.

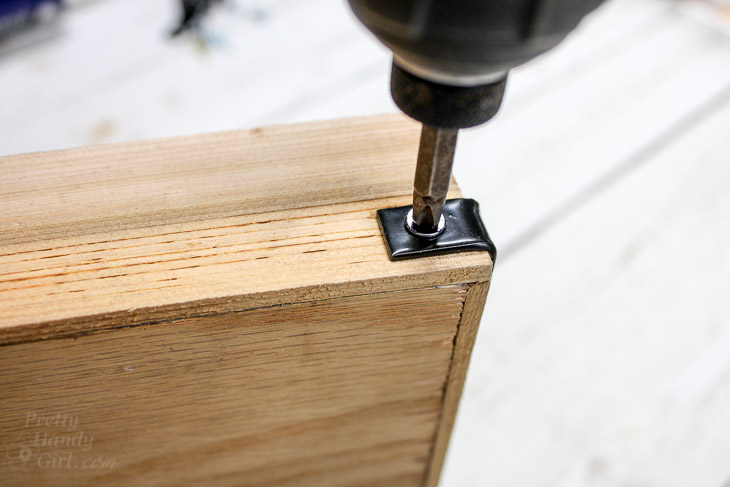
Once the adhesive is cured, remove your clamps. Attach the L brackets on the lower half of each corner using 1/2″ wood screws. The L brackets will reinforce the sides and add an industrial look.

9. Add corner brackets for extra support and decoration.

There you have it! These DIY Sheet Metal Gift Trays are easy to make, look great, and are an extra special and environmentally-friendly way to give gifts!
10. Add gifts and deliver!

I hope you love this project. Do you have other ideas for quick gift giving? Please share!

Want some more gift giving inspiration?

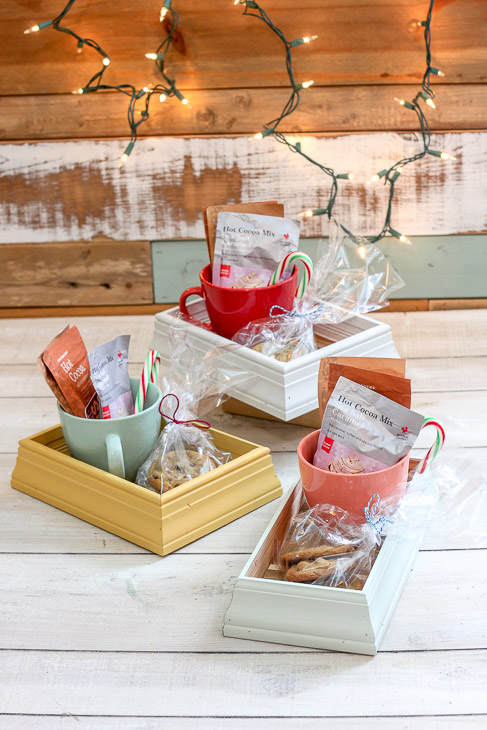
DIY Scrap Moulding Trays

scrap-moulding-trays

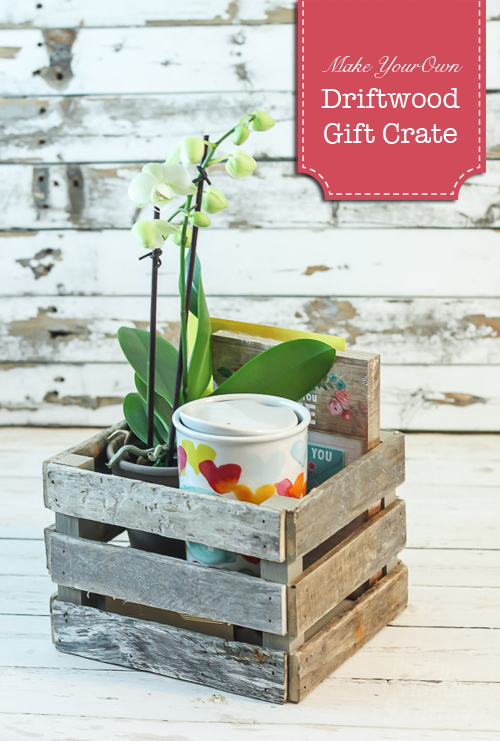
Make a Driftwood Gift Crate

Make a Driftwood Gift Crate | Pretty Handy Girl

Beautiful rustic DIY decor for any room in your home!

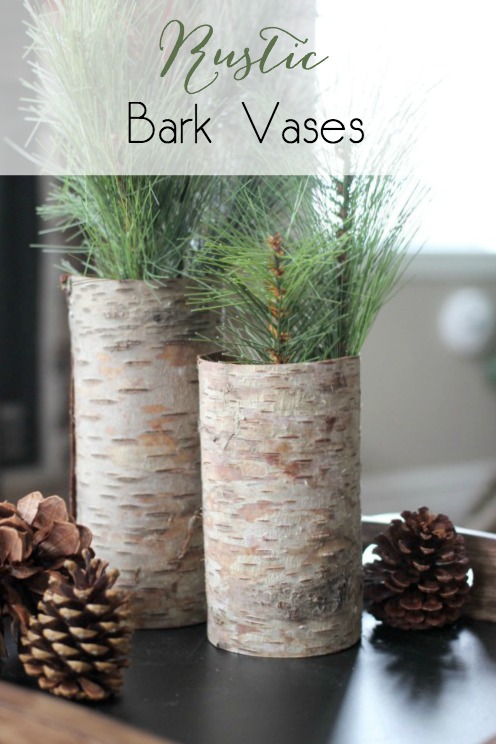
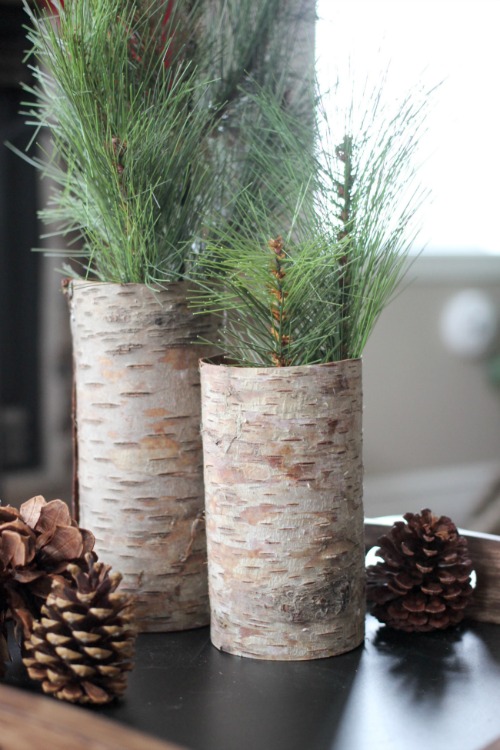
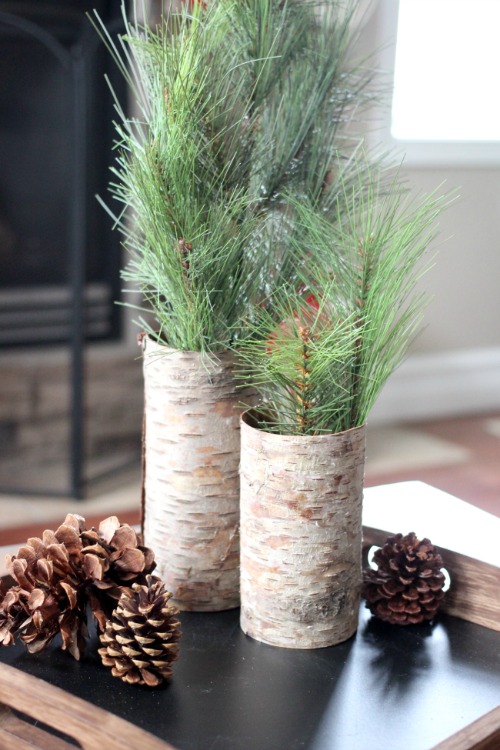
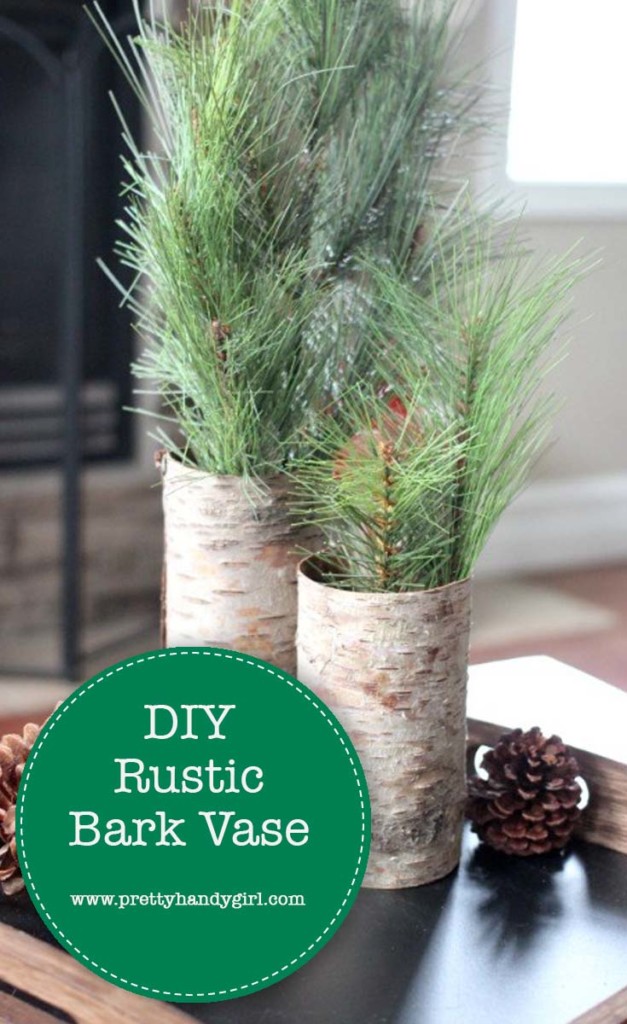
Hi everyone! This is Lindi, visiting again from Love Create Celebrate. We are in the thick of winter here, which means I spend my evening curled up under a blanket reading or dreaming up new DIYs. That’s where the idea for these simple Rustic Bark Vases came from. I love DIY decor that I can use all year long. Wouldn’t these be great with some fresh string flowers in them? I can’t wait to show you how easy they are to make!

Beautiful rustic DIY decor for any room in your home!

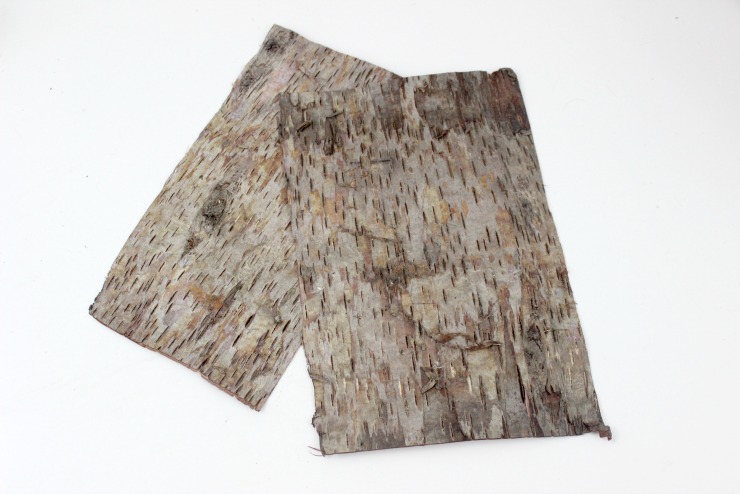
The hardest part of this tutorial is getting the bark. If you are collecting it off of fallen trees or tree branches, you can soak the bark in shallow, luke warm water to make it pliable, and then flatten it between cardboard sheets. Alternatively, you can buy sheets online through sites such as Ebay and Etsy. Soak those sheets for a little while if they are too stiff to bend too. 

Beautiful rustic DIY decor for any room in your home!

Materials: 

(I’ve included affiliate links for your convenience. I earn a small percentage from a purchase using these links. There is no additional cost to you. You can read more about affiliate links here.)

Instructions: 

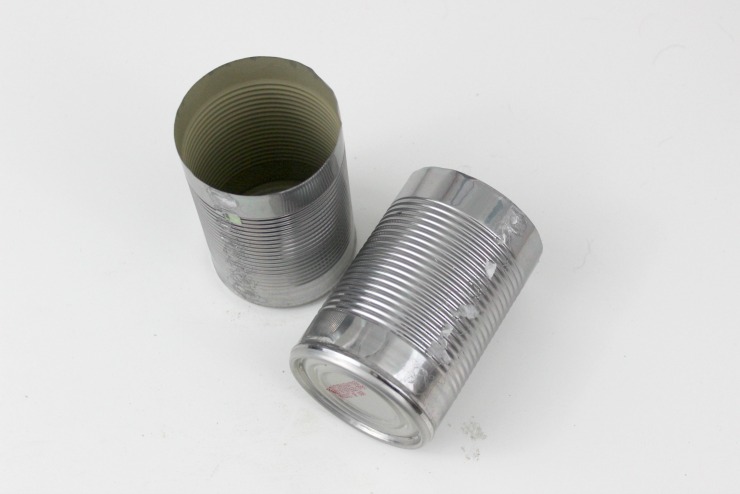
Be gentle when handling the bark at first. You don’t want it to split. I would recommend a tin can being the smallest size vase you use to wrap the bark around – if you try to wrap it around something smaller, the bark may split. You can cut the bark with a good pair of scissors if needed. I wanted mine taller than the tin cans, but you can cut it to any height. The best way to attach your bark to your tin cans or glass vases with this a two-part epoxy. This stuff is like magic! It sets in five minutes and holds forever.

Beautiful rustic DIY decor for any room in your home!

The tutorial is SO easy and since I’m a visual learner, I made a quick DIY video to show you how to do it yourself:

Don’t forget to subscribe to my channel on YouTube!

Beautiful rustic DIY decor for any room in your home!

What do you think of these vase?

Beautiful rustic DIY decor for any room in your home!

Once you collect or buy the bark sheets, you will immediately think of a million DIY uses for them! I hope you like the tutorial. Beautiful rustic DIY decor for any room in your home!

Beautiful rustic DIY decor for any room in your home!

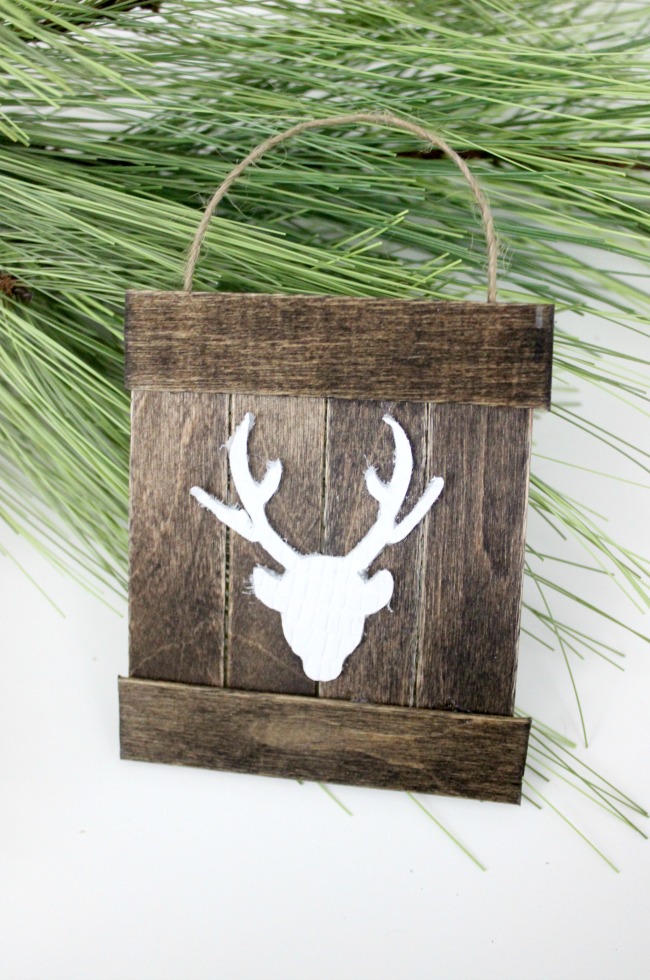
If you love simple Christmas decor, you’ll love making these mini pallet ornaments!

Pretty Handy Girl I Rustic Bark Vases

For more Rustic DIY inspiration visit Love Create Celebrate.

Lindi Signature~ view more projects by Lindi ~


Pin for later!

Rustic Home Sign I Pretty Handy Girl

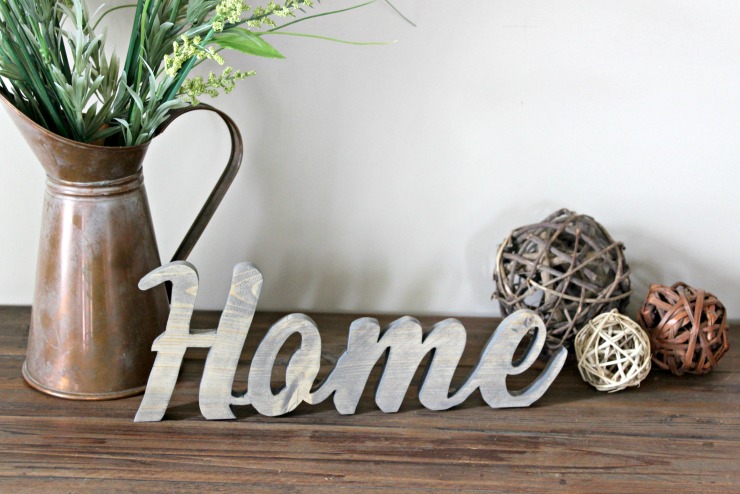
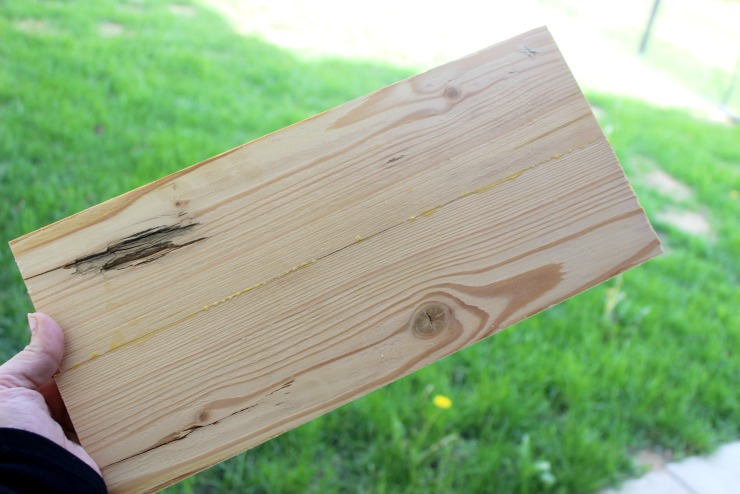
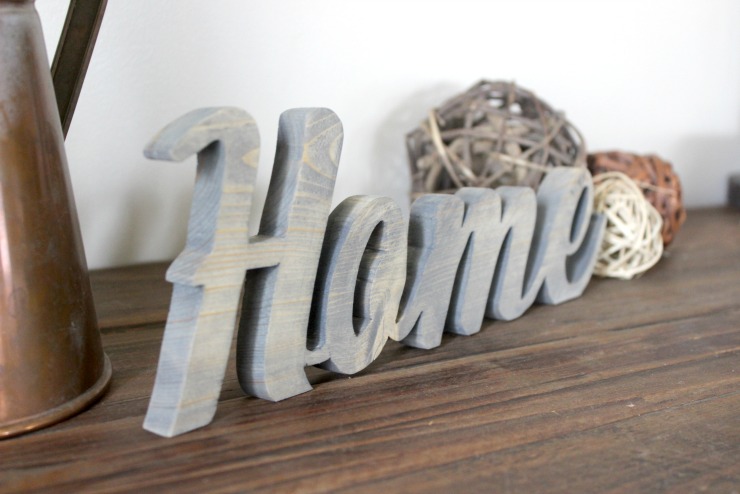
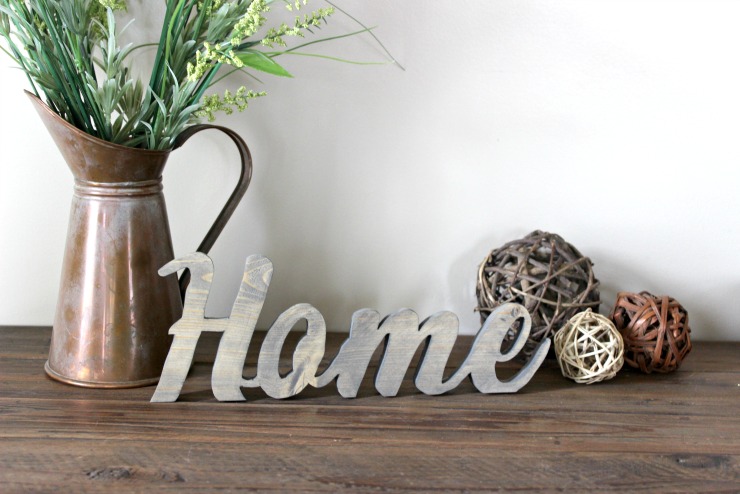
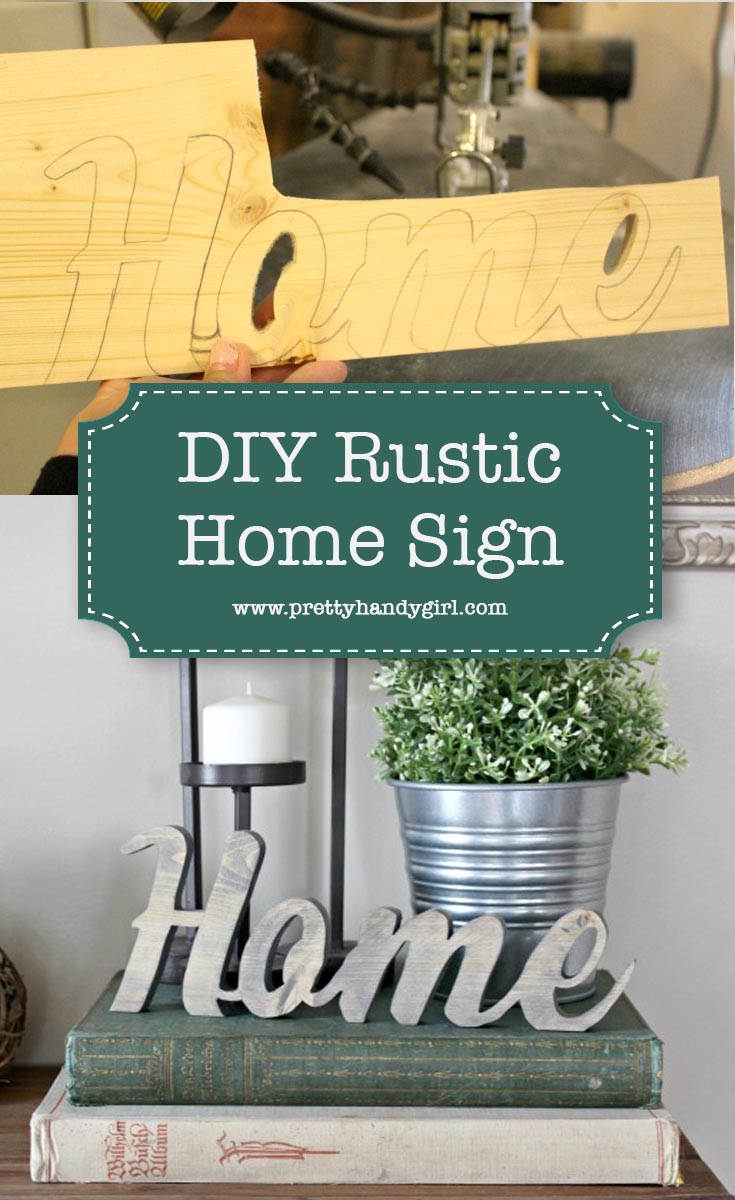
Hi everyone! This is Lindi, visiting again from Love Create Celebrate! I’m really excited to show you how you can make your own Rustic Home Sign. You’ve probably seen something similar in a home decor store, but didn’t want to pay big bucks for one. You’re in luck, I’m going to show you how to make your own Rustic Home Sign using a scrap of wood you might have sitting around. If your scrap wood isn’t wide enough, you can glue two pieces together.

Rustic Home Sign I Pretty Handy Girl

Materials: 

  • 1×6″ wood board (as big as you want your sign to be)
  • Pencil or stencil
  • Drill
  • Scroll Saw
  • Sandpaper
  • Wood Stain

Instructions: 

Cut your wood board down to the approximate size that you want your sign to be. Mine was about 12″ long. Make sure the edge that the sign will sit on is flat. If not, sand down that edge. Sand the front and back of the board (especially if you glued two boards together.)

Rustic Home Sign I Pretty Handy Girl

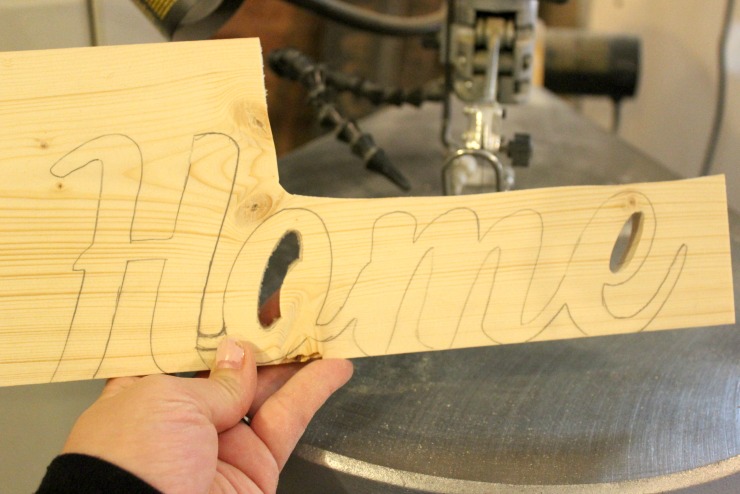
Trace the word “Home” on your board. Draw it by hand or transfer from a print out. Make sure that all of your letters are connected and that the bottom of the letters run off the bottom of the board (this way it will sit flat).

Rustic Home Sign I Pretty Handy Girl

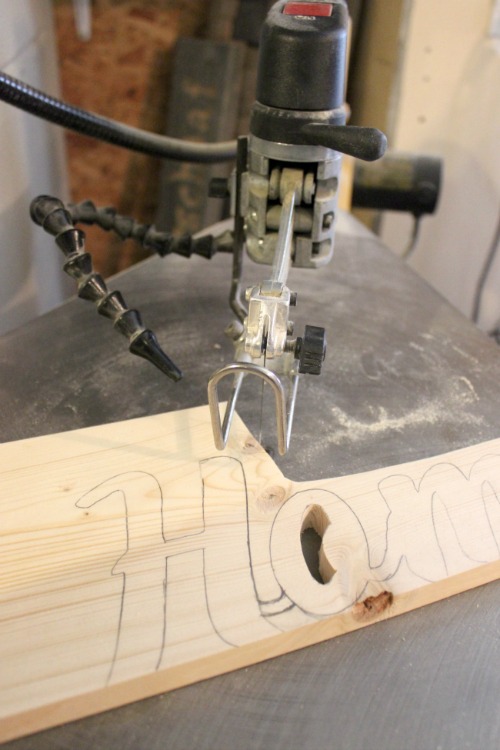
Using your drill, drill holes into the centers of the “o” and “e” that are enclosed. Use a scroll saw to cut around the word and within the letters. Use a very thin blade to allow you to navigate the edges and curves.

Rustic Home Sign I Pretty Handy Girl

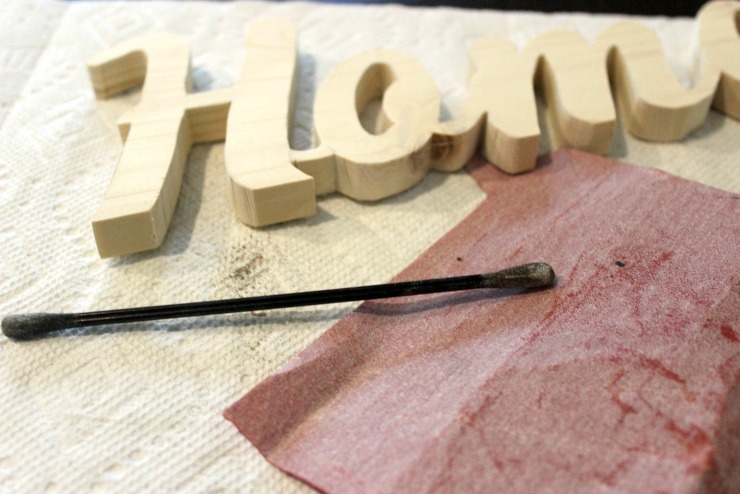
When you are done cutting, double check that your piece sits flat. Use your sandpaper to sand all edges. (Folded up sandpaper and a nail file will help you get into the curves.)

Rustic Home Sign I Pretty Handy Girl

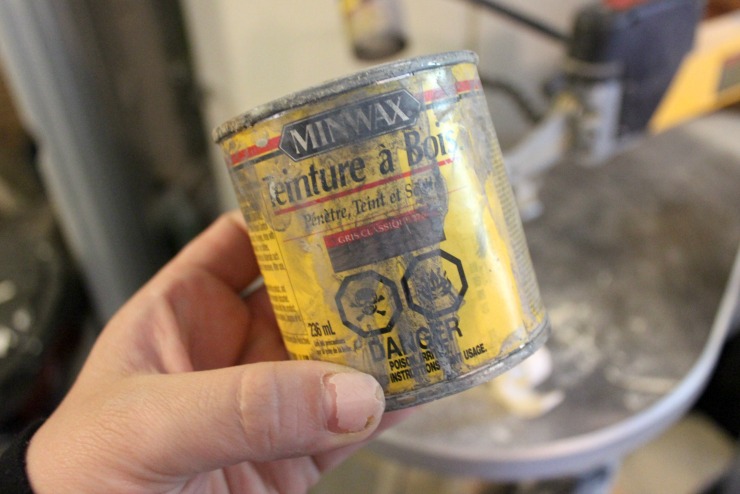
Stain your pieces using your favorite wood stain. (I used my well-loved can of grey.)

Rustic Home Sign I Pretty Handy Girl

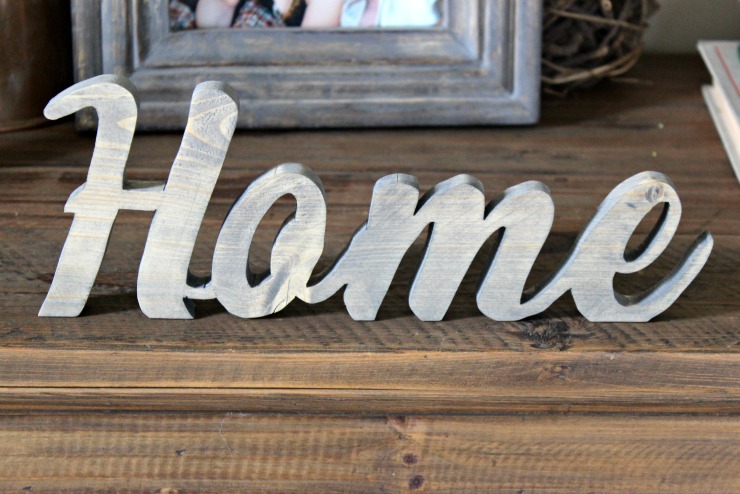
Let it dry, and display it proudly in your home!

Rustic Home Sign I Pretty Handy Girl

I love how this piece turned out.

Rustic Home Sign I Pretty Handy Girl

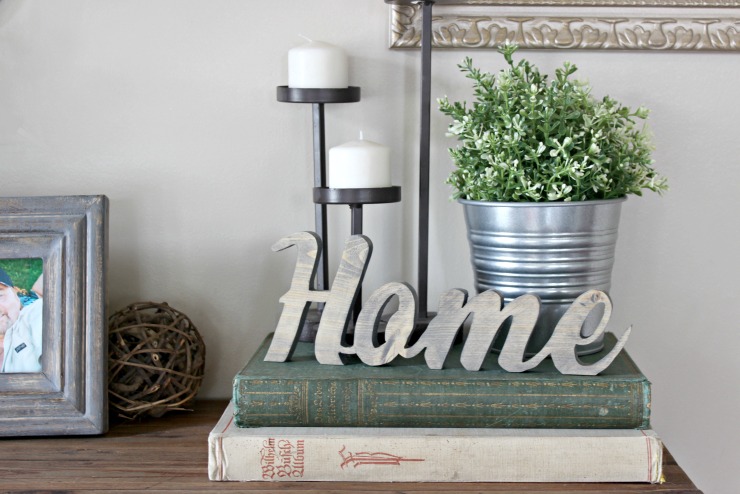
I can see myself using this piece on my mantle or any of the many shelves in my home!

Rustic Home Sign I Pretty Handy Girl

I may have to make a few more or make some with different words.

Rustic Home Sign I Pretty Handy Girl

For more DIY decor inspiration visit Love Create Celebrate.

Lindi Signature

~ view more projects by Lindi ~


Pin for later!

How to make your own Rustic Home Sign using a scrap of wood you might have sitting around. | DIY wooden home sign | Pretty Handy Girl | #prettyhandygirl #rusticsign #woodsign #DIYtutorial

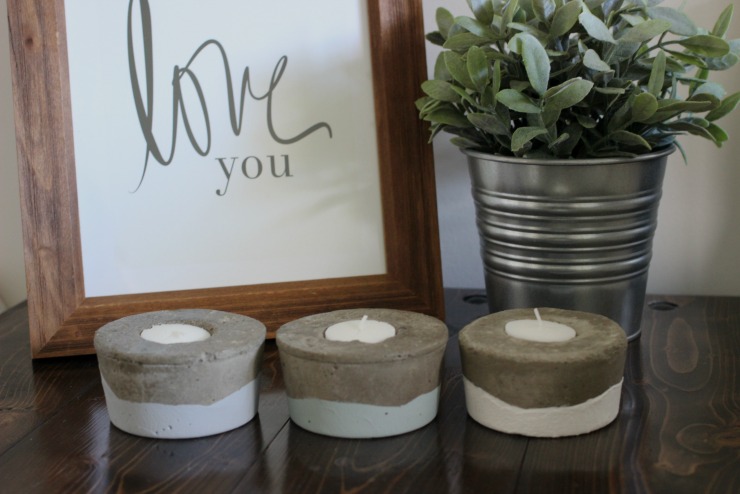
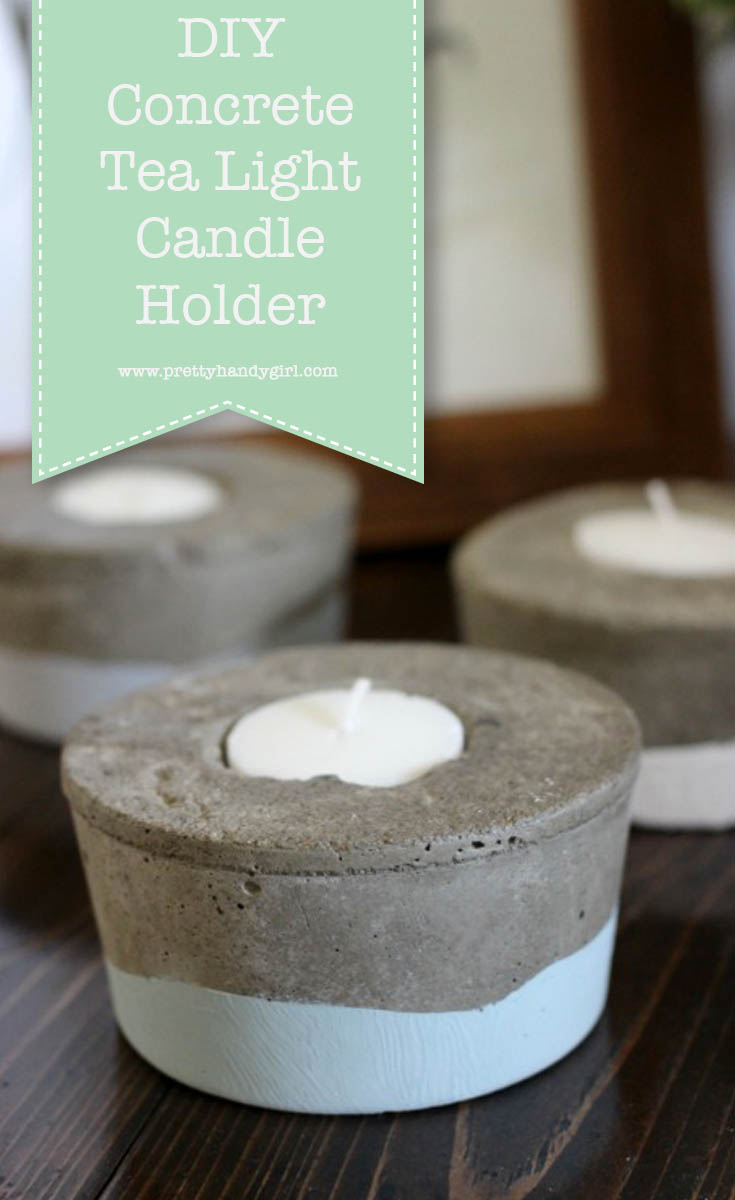
Concrete Tea Light Candle Holders | Pretty Handy Girl

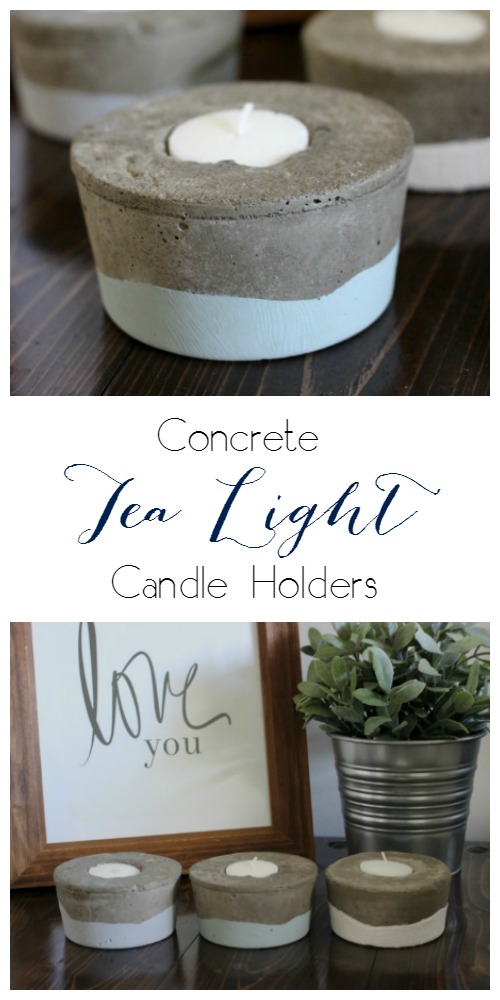
Hi everyone! This is Lindi, visiting again from Love Create Celebrate! Have you ever made anything with concrete? I’m not just talking about the patio outside! I’ve noticed concrete projects slowly making their way indoors and I’m loving it! The sleek industrial feel of concrete projects makes for some beautiful and unique home decor projects. If you haven’t tried it yet, these DIY Concrete Tea Light Candle Holders are the perfect project to start with!

Concrete Tea Light Candle Holders | Pretty Handy Girl

Materials: 

  • Concrete mix (buy a whole bag for less than $10!)
  • Plastic container
  • Tea light
  • WD-40
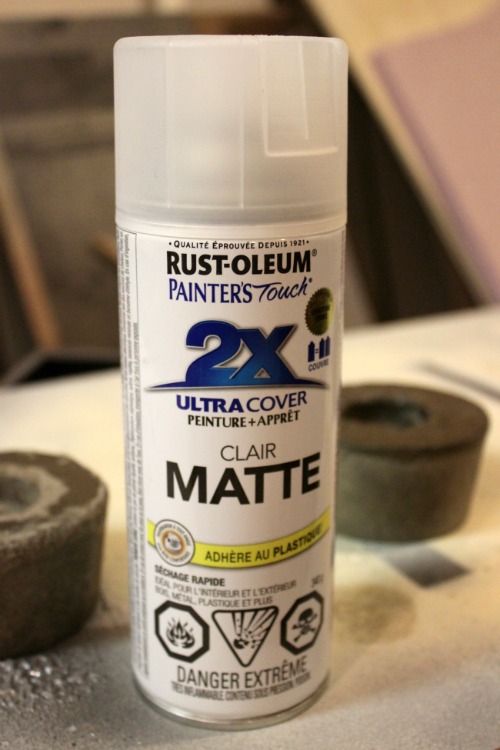
  • Clear Matte Spray Paint
  • Paint (optional)

Instructions: 

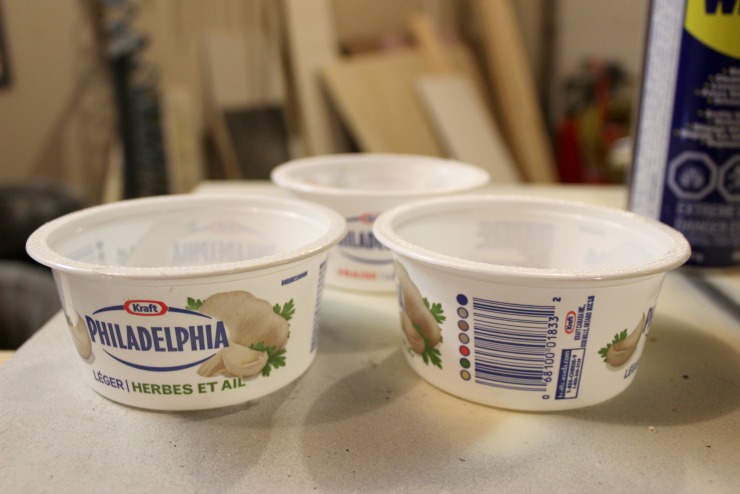
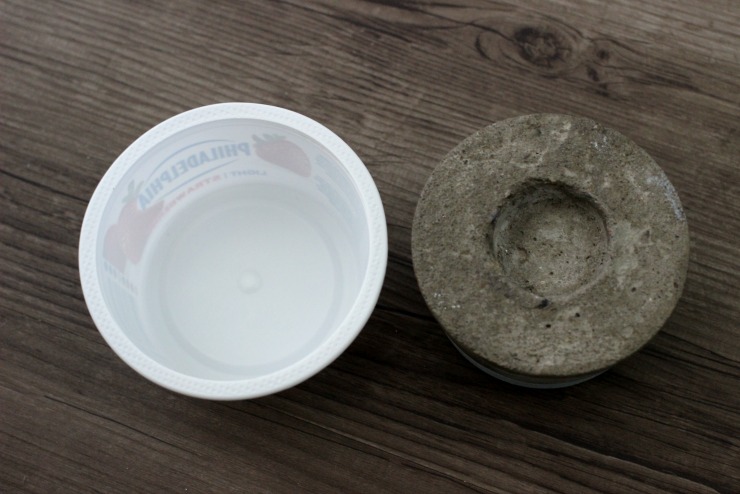
Chose some plastic containers from around your home to pour the concrete into. I used old cream cheese containers and they were the perfect size, but you can definitely chose larger containers too!

Concrete Tea Light Candle Holders | Pretty Handy Girl

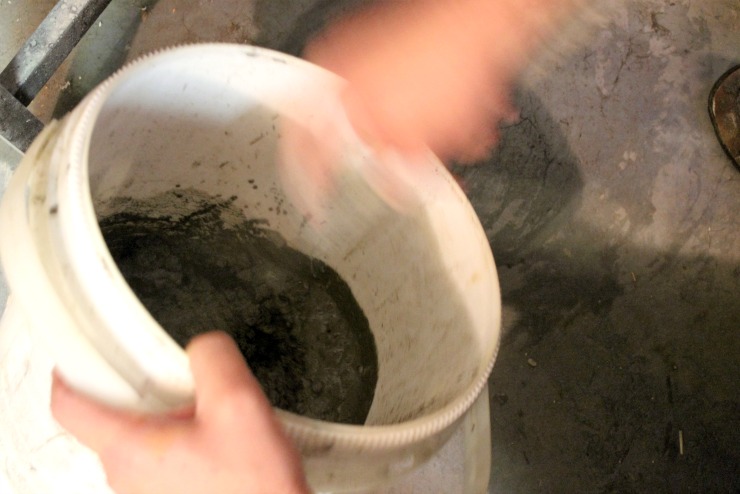
Mix your concrete according to the instructions on the bag. I made three little candle holders, so I used just over 3 scoops of concrete (same size as my containers). Wear gloves when working with concrete. Mix in a bucket or a plastic containers. Mix well until all chunks are gone. When you are done, simply water down any concrete that remains and dump it – this will keep your container clean.

Concrete Tea Light Candle Holders | Pretty Handy Girl

Give your plastic containers a good spray with WD-40 to ensure that the concrete doesn’t stick to the plastic.

Concrete Tea Light Candle Holders | Pretty Handy Girl

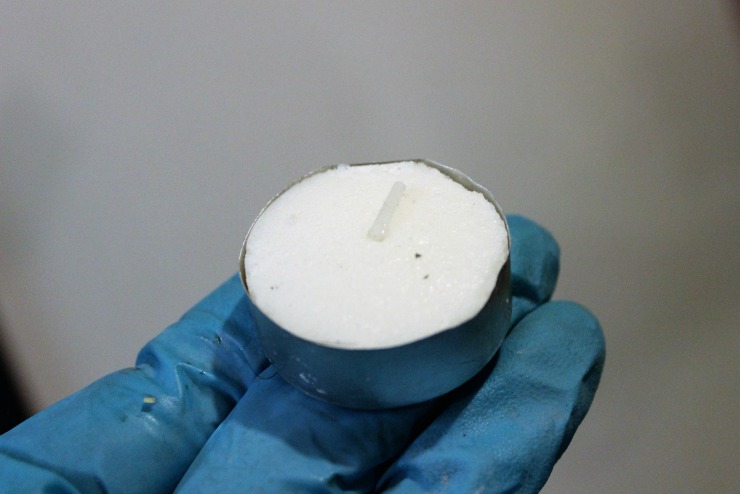
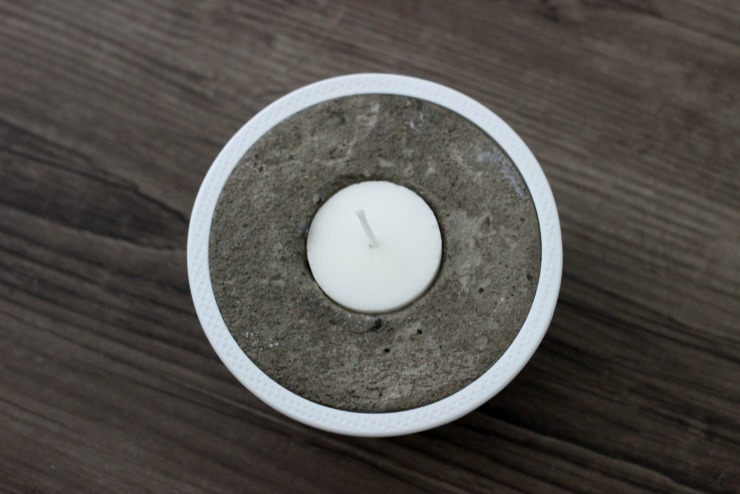
Fill your containers with the concrete mix and tap your container against your table or surface a few times. This will level out the concrete and remove any air bubbles. Grab your tea light and place it in the center. Push the tea light down until level with the concrete. Go back in five to ten minutes and push the tea light down if it has popped out of the concrete a bit.

Concrete Tea Light Candle Holders | Pretty Handy Girl Concrete Tea Light Candle Holders | Pretty Handy Girl

Leave your candle holder to set for up to a week. When it is hardened, pull out your tea light, and gently lift out the tea light backing. You may have to fold and pry a little to get it out. Then, slide the entire candle out of the plastic container.

Concrete Tea Light Candle Holders | Pretty Handy Girl

Grab your clear spray paint and spray your candle holders to protect and seal them. The concrete will soak up a lot, so don’t worry about overspray!

Concrete Tea Light Candle Holders | Pretty Handy Girl

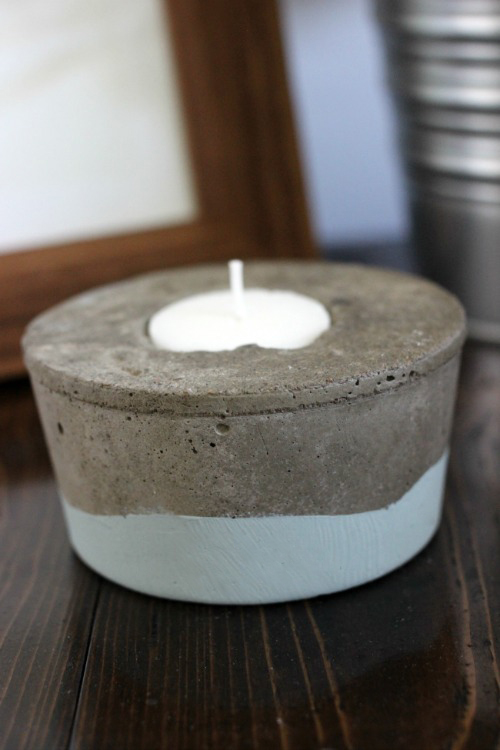
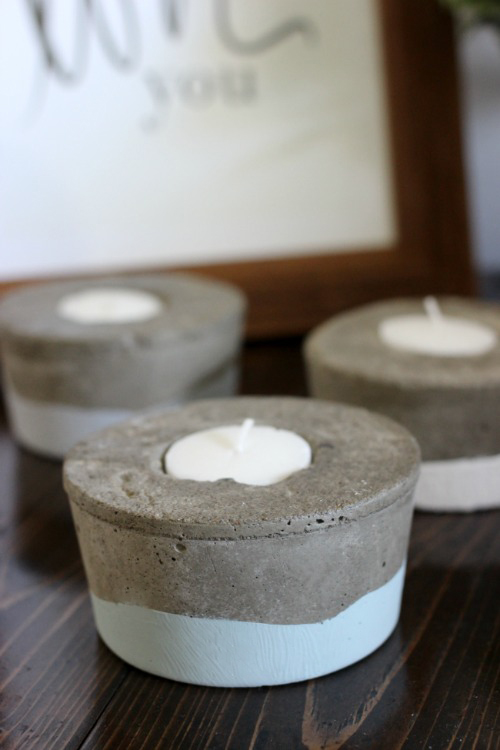
If you like, you can paint your candle holders. I dipped mine in three different colours of paint. I love the dipped paint effect!

Concrete Tea Light Candle Holders | Pretty Handy Girl

Set them up outside on a patio table or on your coffee table in the living room.

Concrete Tea Light Candle Holders | Pretty Handy Girl

I love how versatile and unique these candle holders are! You are guaranteed to have a guest comment on them. 😉

Concrete Tea Light Candle Holders | Pretty Handy Girl

For more DIY decor inspiration visit Love Create Celebrate.

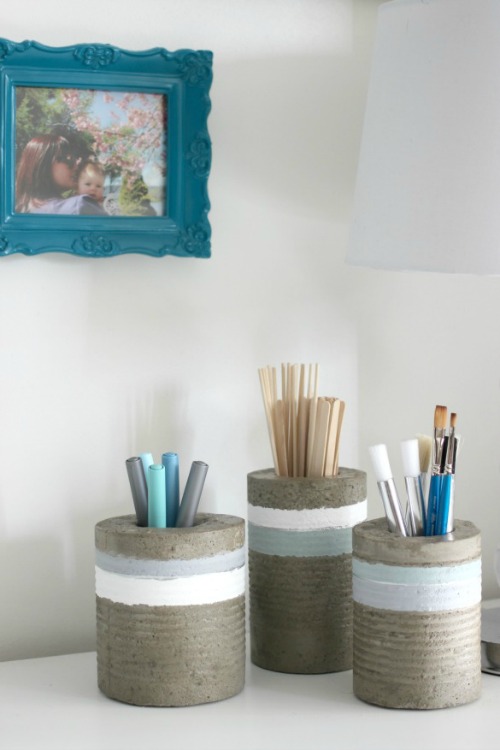
If you love the modern industrial look of concrete, you will love these simple DIY Concrete Vases!

Concrete Vases for PHG

Lindi Signature

~ view more projects by Lindi ~


Pin for later!