
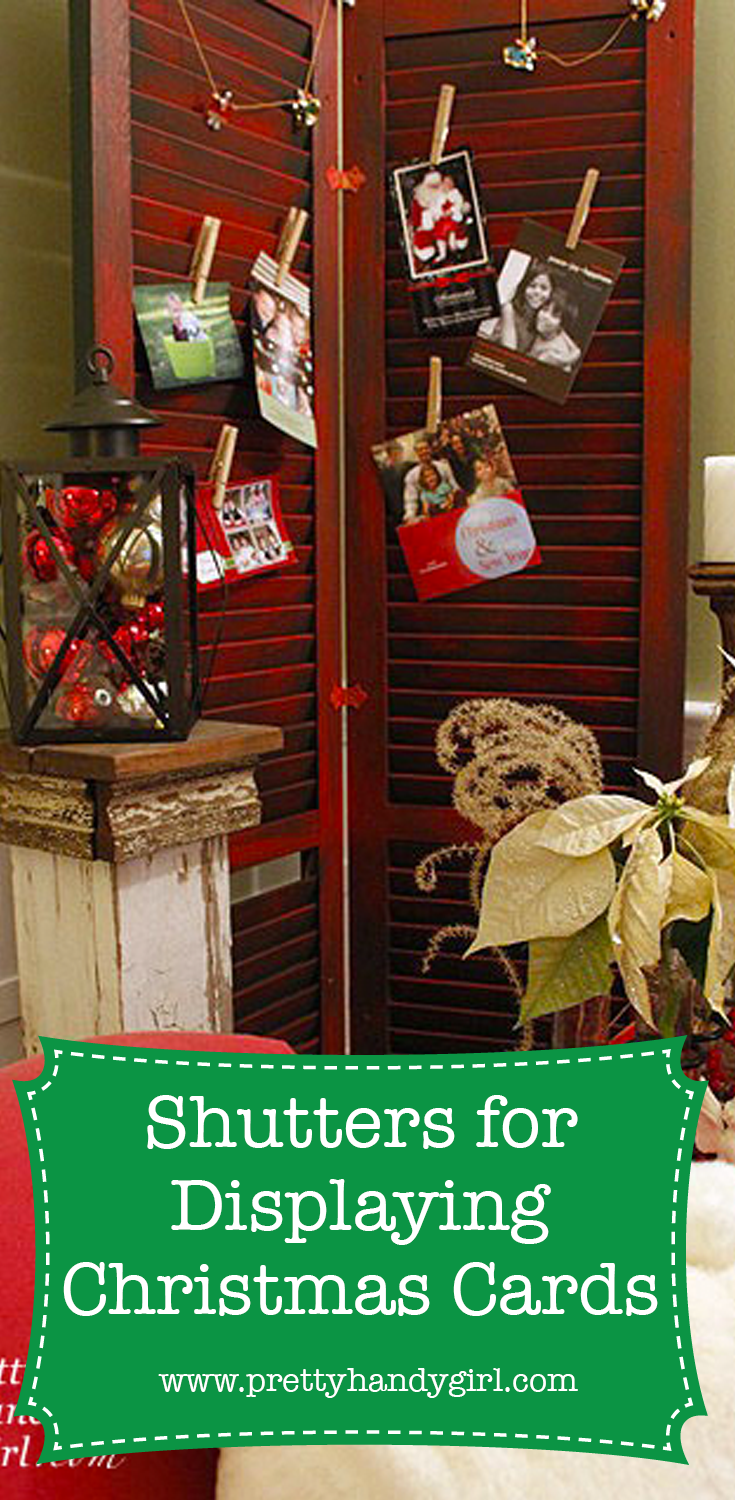
Shutters for Displaying Christmas Cards
Thank you to everyone who left me such wonderful comments on my rustic Christmas décor! I may not have been able to reply to all of you, but I DID read each and every comment! And thank you to the rest of you who took time out of your day to look at my post.
As promised, I am sharing with you the tutorial for creating the shutter screens that I display my Christmas cards on.
I am completely obsessed with decorating my home using shutters (only I use them on the inside instead of the outside!) I have one hanging in our half bathroom and two more in our upstairs hallway dressing up a dormer window. Luckily I still had two pairs laying around.

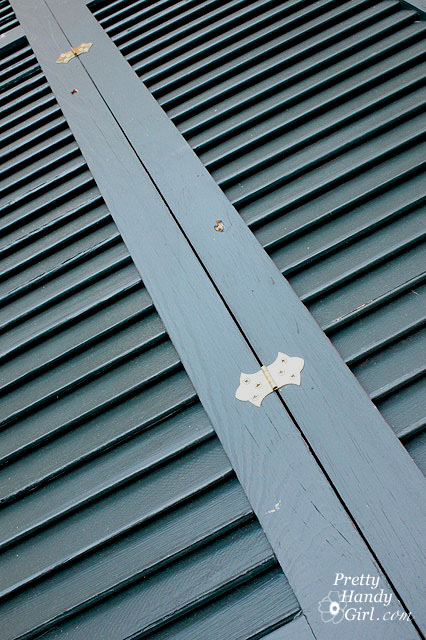
I began by attaching three hinges to hold a pair of shutters together.
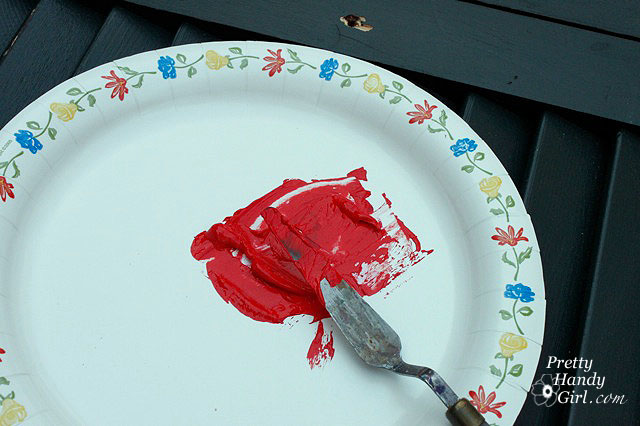
I mixed two colors of red acrylic paint together (cadmium red medium & Lucas madder red) to get the perfect Christmasy red.

A perfect Christmas red is neither too orange nor too cranberry. It is very similar to Coca-Cola red.
Factoid: Did you know that Coca-cola red is so special that the company does not share the formula for the color?
Using a 2″ Purdy paint brush, I dabbed the brush into the paint and then wiped it off on the plate. Then dry brushed the paint onto the shutters, letting the bristles skip over the slats.
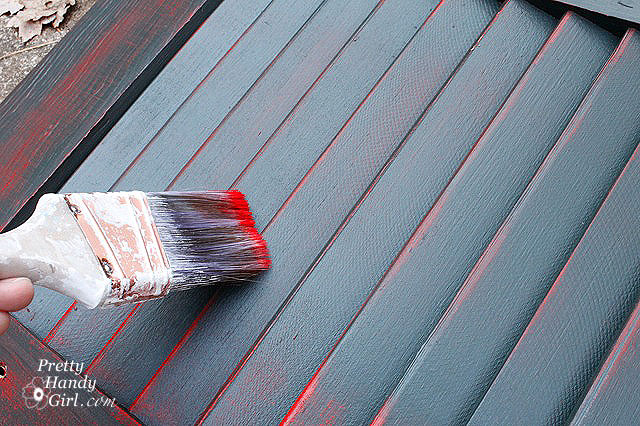
I kept dry brushing the shutter until I had enough paint for it to appear red, and yet some of the dark green color still peeked through.

Here is a close up of the green paint showing through:
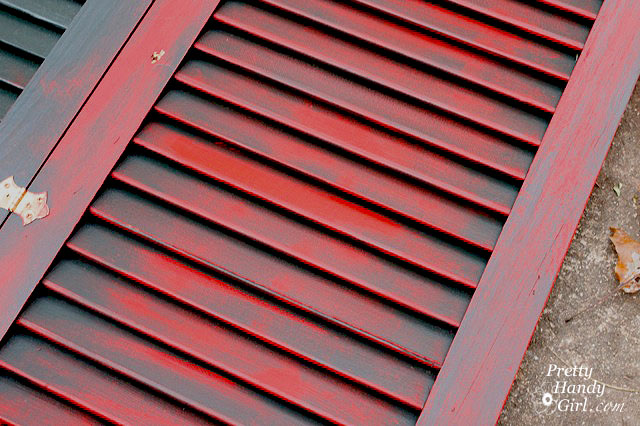

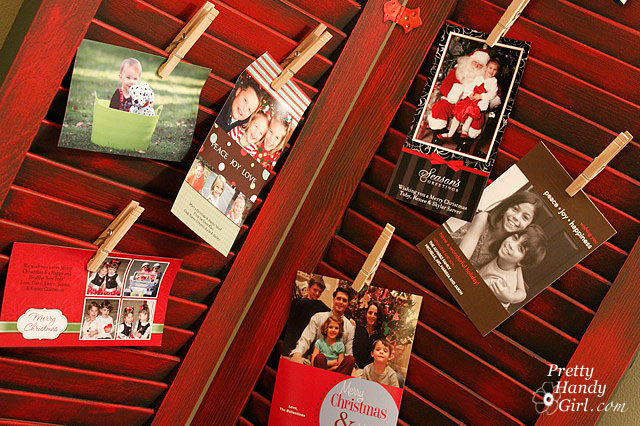
Then I set each screen up in the corners of our living room and used clothespins to attach the cards.

The red shutters really bring in the holiday spirit!
I’m curious, how do you display your cards each year?

Did you like this post? Want to be notified when there are more fantastic tutorials by Pretty Handy Girl? Sign up to receive emails in your inbox:
Or follow me on Twitter or Facebook so you can be the first to know!
Pin for later!

What a fab Idea, great for kids birthday cards too ! and many other uses. Regards
Susan U.K.
I absolutely LOVE the red color on the blinds…it is exactly the color I have been in search of for a project I’m thinking of trying, and I was wondering if you might be able to provide me with any tips/advice since I am a total craft novice. This is my idea:
I found this really cool wood and glass tray at my local Habitat ReStore. The actual tray part is a rectangular peice of glass, and the lip/edges of the tray look sort like a fancy antique wood picture frame. My idea is to build a shallow box that I can attach one side of the wooden fram to with hinges so that the tray will become a shallow display case of sorts, and inside I can put different holiday themed pictures or knicknacks according to the season. I can visualize the concept in my head but have absolutely no idea how to go about executing it. Here are some of the things I could use tips on:
1. I want to mix the same two colors of red you used for these shutters, but I’m not sure I want green to be the base color underneath since I would be using the tray for all holidays (halloween/valentine’s, etc). I was thinking of maybe putting black, dark brown, white or grey as the base…any suggestions about color/paint/stain for this?
2. What is the best way to prepare the wood part of the tray before painting? It has lots of curved edges and narrow crevices (like an antique picture frame would). Should I use stain remover and/or sand it to get rid of the existing finish?
3. Do you have any tips for building the shallow box and attaching the tray to it to make a display case (and also how to secure the side that opens when on display)?
Thanks!!!
Peach27, whew. Those are some good questions. I’ll try to answer you as best as I can.
1. The red I used was Liquitex Cadmium Red Medium and & Lucas madder red from an art supplies store. But, you might have better luck finding a swatch of red you like and having Lowe’s make you a sample pot in that color. I think brown, black, dark brown or white underneath would be very pretty. Be careful of the gray, just make sure you have enough of a contrast with the red.
2. I’d prime the wood part with a gray or brown spray primer. Or just use whatever you have on hand. It wouldn’t hurt to rough up the surface a little with a fine grit sandpaper first.
3. Check in on Friday, I have a tutorial for building a wooden frame/shadow box. Then you could attach the glass frame with hinges. And maybe add a little latch.
Where did you find the paint? Love it!
Patty, the paint is just artist’s acrylic paint. You can buy it at an art store. Or online.
I absolutely love this idea! I’ll be doing this for Christmas this year for sure. May I ask what do you use the shutters for in your half bath? Are they just hung on the wall for decoration?
Amy, thanks! Yes, the shutter is just screwed onto the wall for decoration and it holds some of my favorite vacation destination cards and a quote. You can see it in this post: https://prettyhandygirl.com/2011/04/painting-like-a-pro-step-3-painting-and-touch-ups.html