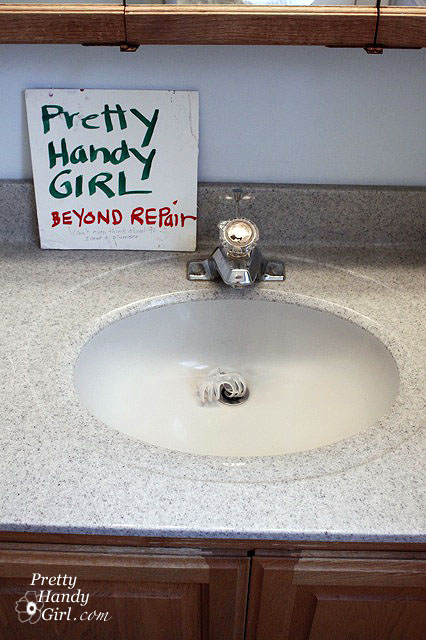
We just got back from a short trip to Vienna, Virginia to visit my family for the holidays. When we arrived, my mom had left me a note in the bathroom we were using.
Here it is:
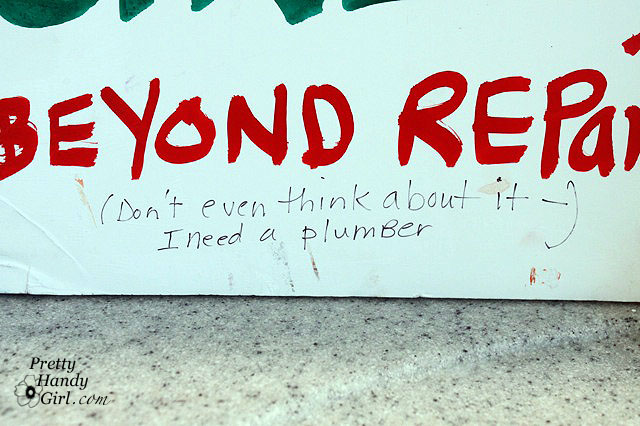
My mom, she’s so cute, doesn’t she know that this sign taunted me the whole visit?
Besides, what kind of daughter would I be if I left this minor repair to a plumber? Puh-lease!
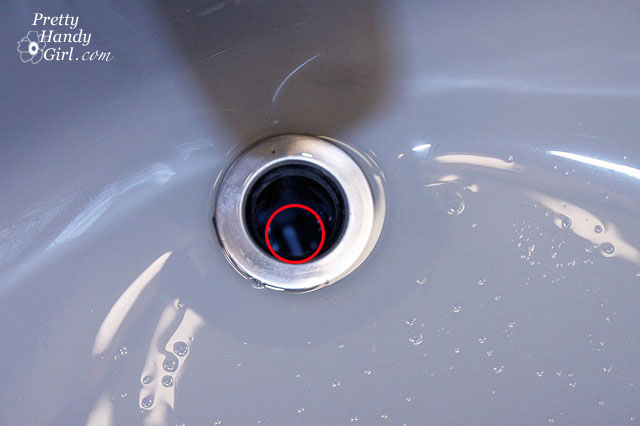
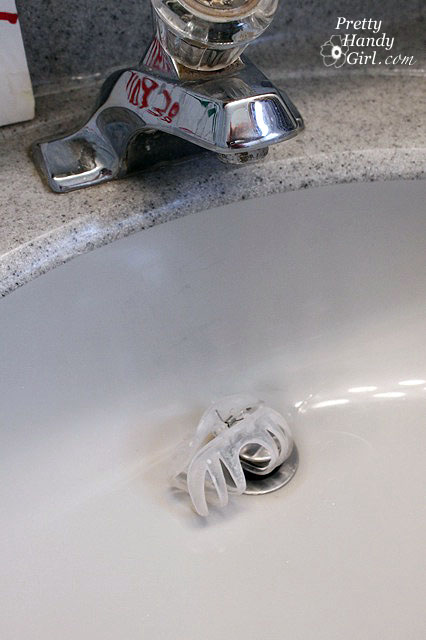
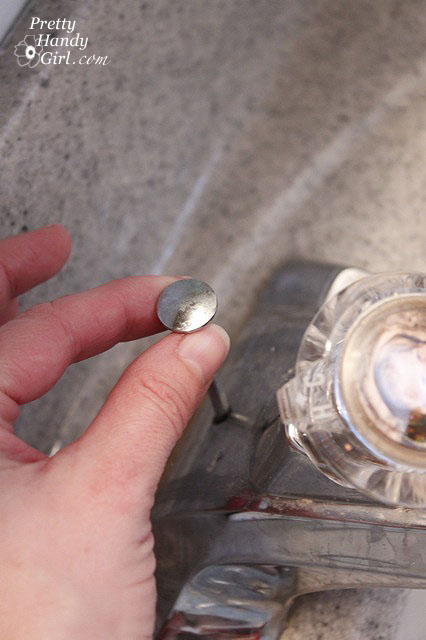
So, here was the deal with the hair clip in the sink. It was her way of holding the stopper up because the rod inside the sink had rusted and broken off. (Pretty creative in my opinion.)
But not the real fix for a sink stopper that would not stay up.
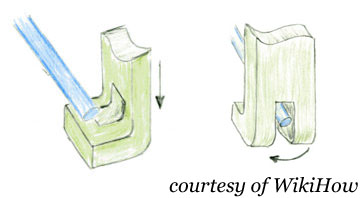
Let’s back up before I show you how to repair the stopper. Thank you to Dvorty Girl for the excellent illustration above that she posted on WikiHow.com.
Sink parts:
- Drain Down Rod
- Joint Clamp Clip
- Horizontal Rod
- Nut
- Ball, Rod, Nut & Gasket
- Stopper Notch
- Pop Up Drain Stopper
Materials:
(I’ve included affiliate links for your convenience. I earn a small percentage from a purchase using these links. There is no additional cost to you. You can read more about affiliate links here.)
Universal Pivot Ball Replacement Kit
Pliers (maybe)
Repairing a Pop Up Sink Drain Instructions:
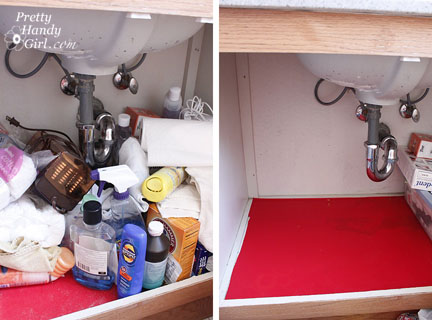
1. Clear out enough room so you can work under the sink. (Okay, my mom is going to kill me for showing you her cluttered sink vanity. But, who’s sink vanity doesn’t look like this?! Please leave a comment and tell her that she’s not the only one!)
2. Lay down some towels to cushion the edge of the vanity (or your back, rib cage or hips will be in screaming pain.)
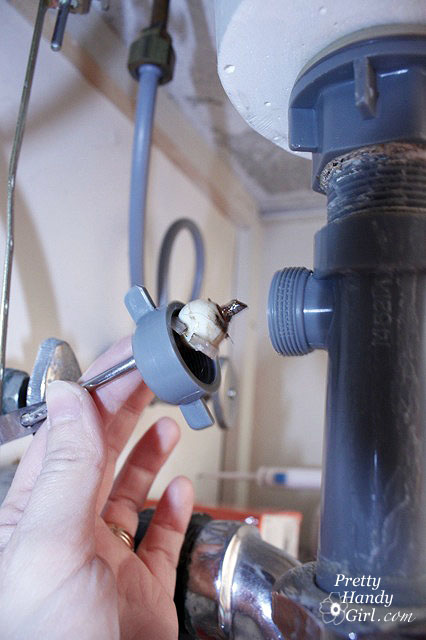
3. Locate the (3)horizontal rod and (5) nut at the back of your drain that holds the (5) ball, rod & gasket.
4. Unscrew the (5) nut with your fingers or use pliers if it is really tight. Pull out the ball and gasket.
5. To release the (3) horizontal rod from the (1) down rod, squeeze the (2) joint clamp clip between your fingers and slide it off the end of the horizontal rod.
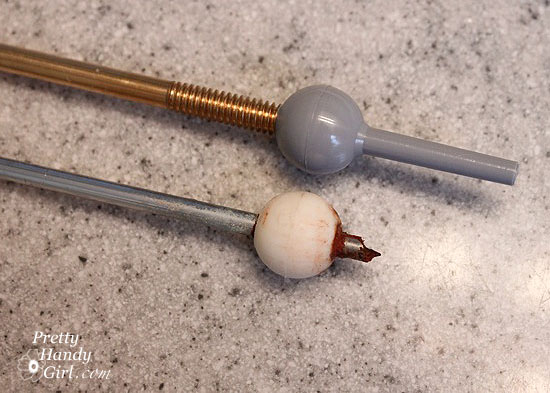
6. Lay out your old pieces to assess the damage. You may or may not need a new gasket (which is sold separately.) This one was broken and needed replacing.
7. Match the old pivot ball with the new ones in the kit. Be sure to choose the one that is exactly the same size. Thread the (5) new ball onto the new (3) horizontal rod.
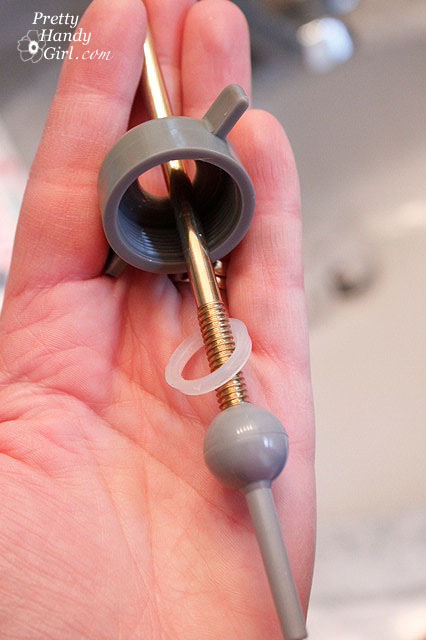
8. Next thread the new gasket onto the horizontal rod and then the nut.
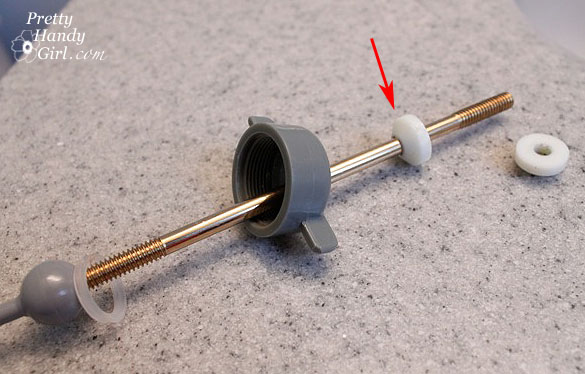
9. Next feed one end of the (2) joint clip clamp (the kit I bought contained two white stoppers instead of a joint clip clamp). Only add one side or one stopper at this point.)
10. Feed the (3) horizontal rod into the (1) down rod.
11. Line the other end of the (3) horizontal bar up and slip the ball joint into the hole at the back of the drain. Ideally the horizontal bar will be parallel to the floor, but you may have to make some minor adjustments at the end.
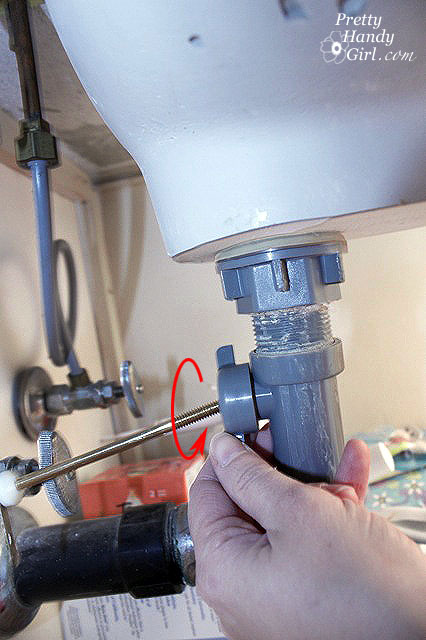
12. Screw the nut back onto the drain making sure the ball joint and gasket are lined up properly.
13. Now add the second stopper or the other end of the (2) joint clamp clip to the back of the (3) horizontal rod.
14. Look inside the drain, and notice the post end of the (5) ball joint inside the drain.
Pull up on the (1) down drain rod and make sure that it moves up and down freely and the post in the drain moves as well.
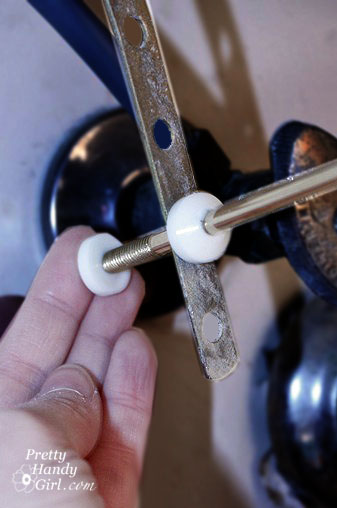
15. This next step requires a little patience, so put your patience cap on. Feed the drain stopper back into the drain. You want the end of the stopper to be at a 90 degree angle from the ball joint post as show below.
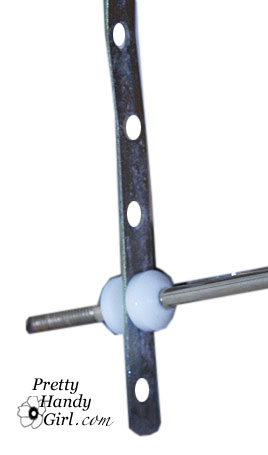
Gently rotate the stopper 90 degrees until the end of the stopper hooks the post.
16. Once the stopper has been properly rotated and hooked onto the ball joint post, test your sink by pulling up and own on the (1) drain down rod.
And you are done!
Pretty Handsome Guy thought it would be funny to re-arrange the letters in the sign.
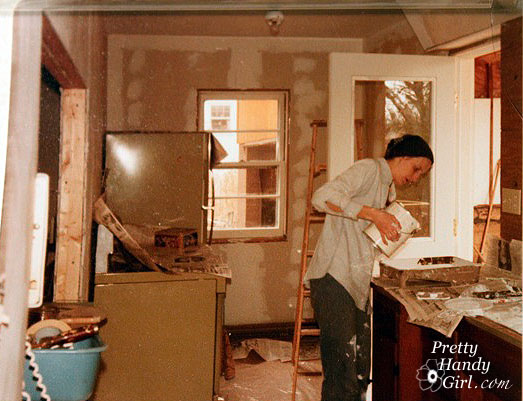
And just to prove to you that my Mom can also be handy, this is a photo I found of her from the 1970’s when my parents were building my childhood home.
Next time your drain stopper is broken, I hope you will put off calling a plumber and fix it yourself!
You might also like:


I accidentally pulled the drain stopper out of our sink. It came out very easily! Our stopper has a hole at the end of it. When I pull the up on the drain rod from the faucet, you can see the rod moving in the drain. It seems like it will be so easy to hook the hole onto the rod. But, it isn’t easy. Two of us tried without success! Is there a way to hook the hole onto the rod by inserting the stopper into the sink and pulling up on the drain rod from the faucet? Is there a way to do this without going underneath the sink and disconnecting things down there? It came out so easily. And I’d like to repair this without calling a plumber or taking anything apart under the sink. I know I couldn’t do that! Thank you for your advice!
Lara, yes, it takes a lot of patience sometimes. I’ve been guilty of just setting the pop-up on top of the rod and trying another day ;-).
What simple and great working instructions with pictures! I was blank in pluming but I fix my drain stopper in 15 minutes. Thanks for saving my money and trouble. I love.
What great and simple instructions with pictures to follow! Just for not handy man. Thanks for making it and saving my money in fixing drain stoper. I love you.
Thank you so much for this post! The photos and clear instructions were very helpful in my first bathroom sink drain stopper repair. Thank you again!!!
Thank you! I loved the clear and thorough directions. Many diy sites assume you know things and skip over details. This was great and my sink drain is fixed. I never imagined it would be that simple! Thanks again!
Thanks! Now I can fix mine real easy. Pictures really help.
Thank you so much! My sink stopper was stuck in the plugged position for a week and your tutorial helped me to finally fix it! I’m bookmarking this for future reference.
Thanks! My fix wasn’t that complicated but just looking at the diagram made me realize I should at least take a look before dumping money on a rubber stopper. (Although I did find a cool one that looks like a fish!)
Oooo, a fish stopper! Sounds like a keeper. 😉
Appreciated the how-to, I had exactly the same problem and I liked that you had a picture of a broken pivot rod because when I pulled mine out I wasn’t sure if it was supposed to be that way or not. Also that the name of it is ‘pivot rod’ and not ‘doohickey thing’ so I looked like I knew what I was doing when I asked the guy at the hardware store for a new one.
Great instructions and drawings. Thanks to this site I was able to fix it perfectly. Our sink which we have not used for months is now ready for our guests. Please keep up the helpful repairs. You are my go to girl!
Hi there,
I have a somewhat weird problem. The hole that the pivot rod goes through is big causing water to leak into my cabinet. Anyway to fix this problem?
Thanks,
GiGi
Sounds like you need a new gasket around the ball joint. Have you replaced the part as shown in this post?
Thank you! I am an extremely clumsy guy, and most of DIY works I reluctantly did were unsatisfactory. This one seems to be in working order thanks to your detailed instructions.
Your picture shows the Universal Fit Ball Rod Assembly, Dunco #88532. I think the one I got at Home Depot, Universal Lavatory Pop-Up Ball Rod, Partsmaster Pro 58423, is exactly the same thing.
I have a question: What if I did not insert the gasket? Does that affect the longevity of this fix? The old broken system did not contain it anyway.
The gasket is necessary to keep water from running out around the ball joint. I wouldn’t remove it unless it doesn’t fit with it on. Good luck.
Thank you. It was your hand-drawn diagram that led me to this site. I’ve spent more time than I should have on this bathroom sink job, as I couldn’t get the rod into the hole in the bottom of the pop top stopper. So, I got out some thread and looped it through the hole and voila! Thank you for your detailed instructions!