Mousetrap Memo Pad
I’ve been dying to show you this project, but didn’t want to give away any secrets. You see, I made them for a few bloggers out there in the home décor blogland. And as luck would have it, most of these special women are here at Blissdom! As a tiny token of my appreciation for their inspirational blogs, I put together a little gift bag. Inside (among other things) was this one-of-a-kind memo pad.

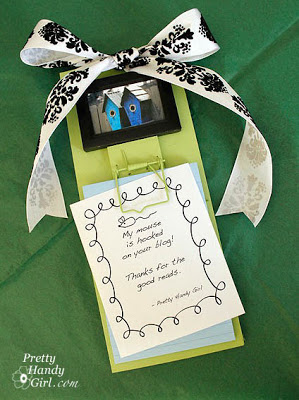
With a note attached.

“My mouse is hooked on your blog!”
Get it? The notepad holder is a mousetrap and I was playing on the word, mouse (the one for your computer). Corny, I know.
So, you want one for yourself? I’m happy to share with you the tutorial.

The memo pad started life as a mousetrap (4 for $1) and a mini picture frame also $1 at the Dollar Store!
Materials:
Wooden mousetrap
Small picture frame
Cabinet Toe kick boards or other thin scrap wood (1 – 4.5″ x 4.5″, 1 – 4.5″ x 10″)
Wire
Ribbon
Notepad
Corrugated cardboard
Small 2″ x 3″ picture
E-6000 glue (optional)
Gorilla glue
Primer
Paint
Sandpaper
Needle-nosed pliers
Saw (hand saw is fine)
Drill and bit (for hole)
Start by removing the hook and trap hold parts with pliers. Then remove the bait hook.
All that will remain is the spring and snapping bar.
All that will remain is the spring and snapping bar.

Cut the excess wood from your mousetrap with a handsaw.
(I used mine in a miter box for a straight cut.)
(I used mine in a miter box for a straight cut.)

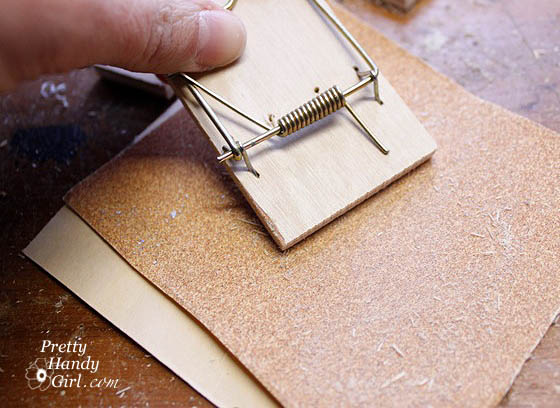
Sand down the rough edges.
You will need to cut down your scrap wood to the dimensions below.
The 4.5″ square piece is the same thickness as the mousetrap.
This insures an even surface for the memo pad to rest on.
The 4.5″ square piece is the same thickness as the mousetrap.
This insures an even surface for the memo pad to rest on.

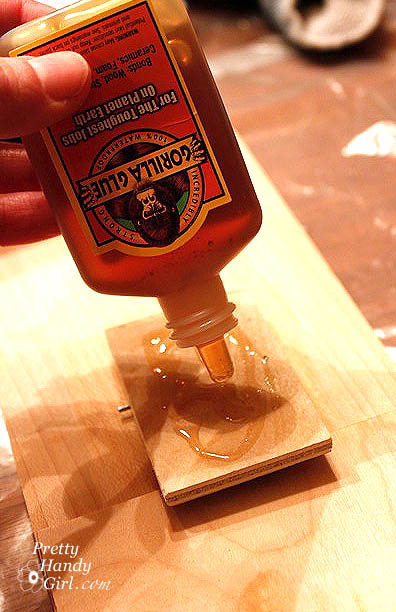
Following the directions for the Gorilla Glue,
I wet each piece of wood and then added the glue.
I wet each piece of wood and then added the glue.
Glue the 4.5″ square piece to the bottom of the larger piece of wood. Then glue the mouse trap right above the square piece. Make sure your snapping bar is facing down, as shown below.

Set a weight on top of the wood to “clamp” it while the glue dries. (About an hour or so.)

Anyone know what these hand weights are good for?
Beats me, I only use them to weigh down projects.
Beats me, I only use them to weigh down projects.
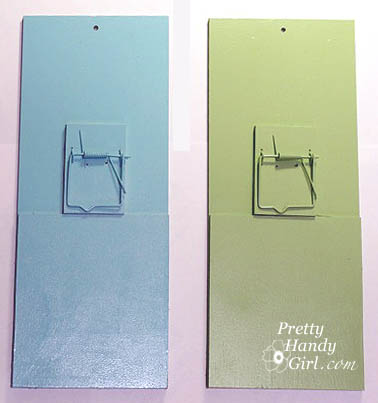
After the trap is dry, spray your boards with 1 or 2 coats of primer.
Then follow up with your favorite color paint.

At this point, you will want to drill a hole through the top of your board.
Take apart your picture frame and discard the backing.
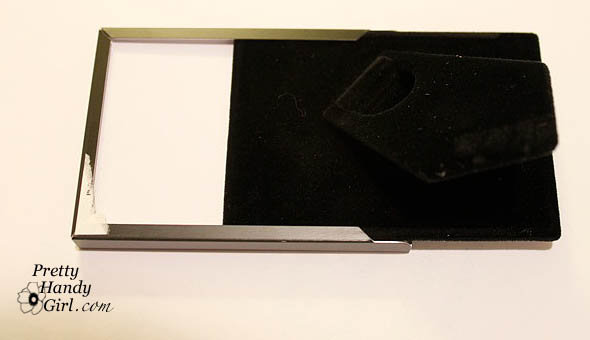
Replace it with a piece of corrugated cardboard cut to size. Slide in your picture.

Carefully add a small line of E-6000 glue* to the back of the frame and glue it just above the mouse trap. If you use too much glue, it will glue the cardboard to the frame and you won’t be able to switch out your picture from time to time.
*You could use Gorilla glue for this step, but the glue expands and might glue your frame shut so you can’t change the pictures.

Create a bow with the ribbon and slide a piece of wire through the bow knot.

Secure the bow by threading both ends of the wire through the hole at the top of your mouse trap memo holder. Twist the wires together to make a loop for hanging.

Add your memo pad and you have a unique little note center.

So do you think those wonderful bloggy ladies will like it?
It isn’t too cheesy is it? (Pun definitely intended!)

I love these! I am a fan of office supplies, thank your for cutify-ing them!
Debbie
That is just adorable. I am addicted to notepads. My friend Megan from Honey We're Home said she loved meeting you and all the girls! So envious of your fun trip!
Soooo clever! And no, I can't think of any other use for those weights….
Were it not for hanging notepads, I would never get my brood to put their grocery needs on a list. This would look much more attractive than the big, generic, magnetic clip presently in use. Thanks for the tutorial
That is so creative and it looks so pretty. BTW you have an award on my blog.
That is ingenius. I must make some of these for gifts. I have been looking for a unique note holder for my front door area and this is it. You're the greatest. Keep on Funky Junking because we love it. HGTV should have you on their channel with your own show "Funky Junk Decor" Keeping it in the "Green" movement.
Cute! Saw ur on Twitter #Blissdom
So cute! and such a sweet note 🙂
Jeez, I feel really dumb after reading this post. I would never, EVER, think of this. How many did you make, and who did you give them to? If you can't tell, can you hint? Sounds like you all had fun. You are so crafty! Did you ever hear that White Stripes, or whatever song – She's crafty!? I made a video once for a show tryout and my cute young video guy dubbed that song in. I want a DIY or Crafty Camp! I want you, Marian, Funky Junk, and Freckled Laundry. Could you arrange this please? Ann PS I have thought of maybe making a rusty round spiky mirror out of some sheep shearers that I have.
A lovely gift for lovely friends… Thanks for sharing your inspiration. ¿Maybe not painting the bigger piece but covering with a vintage textile…? I have to try!
Love it…maybe you should change your name to Pretty CLEVER Girl!!!!!
Thanks for sharing!!
♥'s
Sherry
Adorable!
Very creative, but my favorite part is your cutting box. I used to use my late grandpa's homemade cutting box at my parents' house. Just yesterday I bought my own little plastic one from the Depot. I'm looking forward to using it this weekend as I power through the to-do list.
xo
How cute! That is such a unique and an adorable pun 🙂
Oh my gaawwwsh! That is just too cute, Brittany! It's such a unique idea — and turned out so cute you'd think you bought it at a boutique store! LOVE this! BTW – I have a hand weight in the garage for my projects too! 🙂