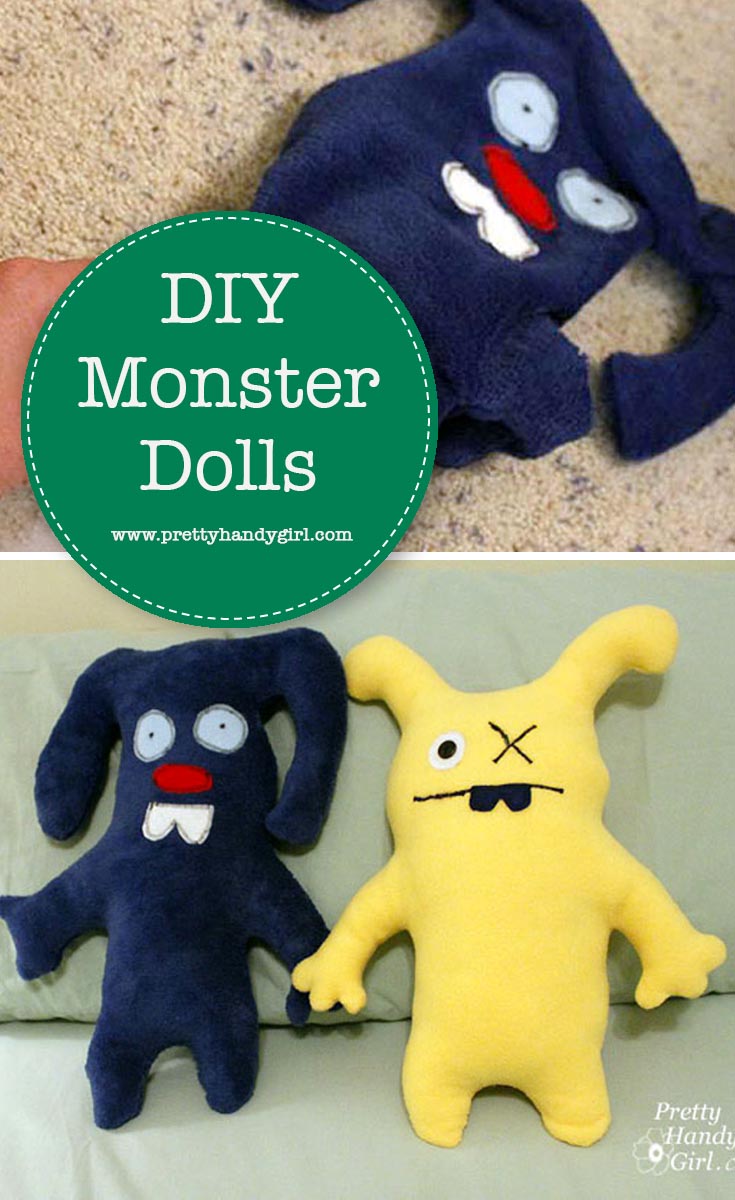
Make Your Own Monster Dolls
Teaching children to sew can be a fun and rewarding lesson if you let them take the lead and design their own monster dolls.
Make Your Own Monster Dolls
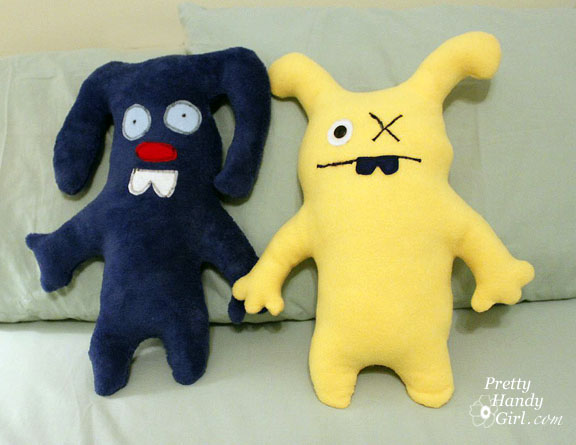
Aren’t they cute?! Okay, they may have a few imperfections, but I don’t want to hear about it because my boys made them! That’s right my 4 and 7-year-old sons made their own Monster Dolls (with a little help from me). It was a perfect way to spend a summer afternoon together. And as a bonus they learned some basic sewing skills.
My 7 year old really dove in and enjoyed every aspect of making his monster. He used the sewing machine with my help. My 4 year old needed a bit more guidance and help. He was very tentative about the sewing machine, but I convinced him to push the pedal. After one time pushing it, he was LOVING puttin’ the pedal to the metal! LOL!
Materials:
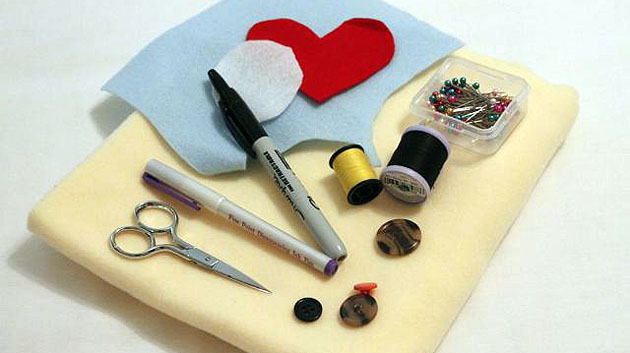
- Fleece
- Colored felt
- Scissors
- Vanishing ink sewing pen
- Buttons
- Colored thread matching the fleece
- Polyfill stuffing
- Needles
- Sharpie marker
- Paper and pencil
Instructions:
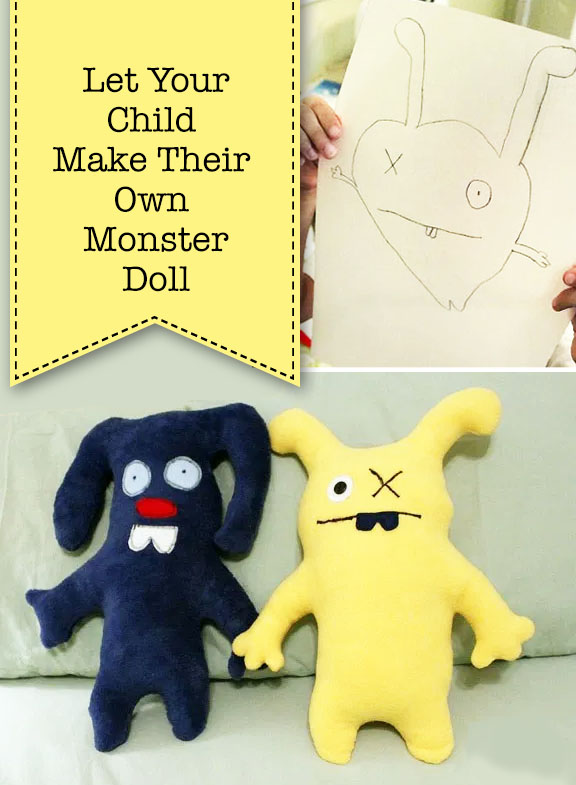
Let your child draw their monster on a piece of paper.
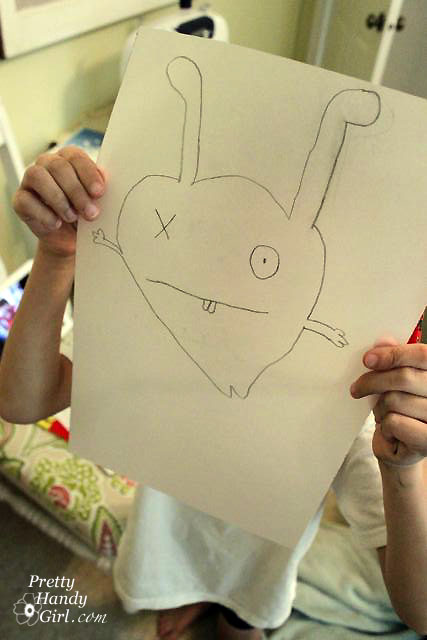
Help your child draw the outline of the monster onto the backside of the fleece. Explain that you might need to fatten up any skinny appendages so you can turn the monster right side out and stuff (him or her) after sewing.
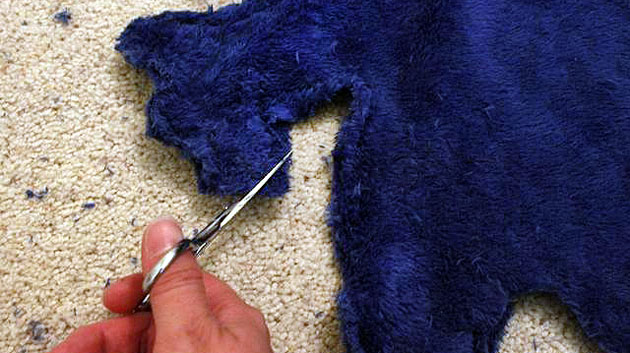
Pin two pieces of fleece together (right sides together.) Help your child cut out around the outline of the monster’s body. This will give you two identical pieces for the monster doll body.
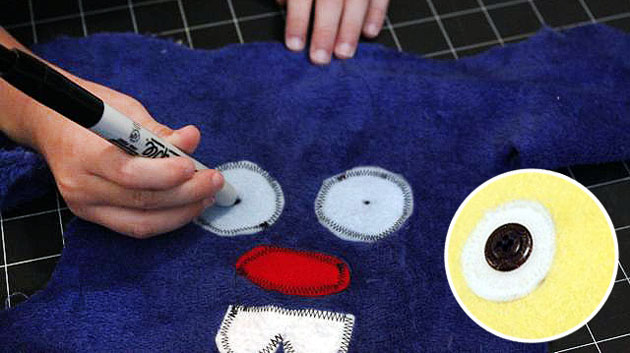
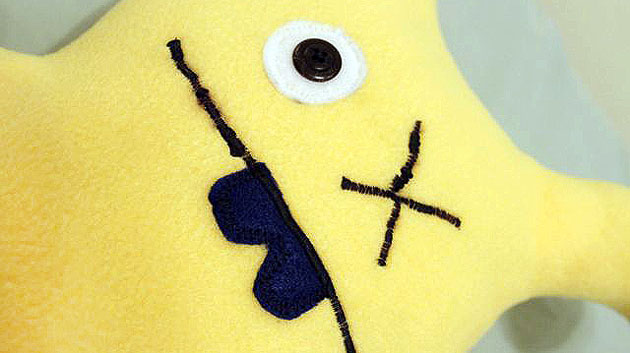
Cut eyes, nose, and mouthparts out of colored felt. Pin the facial features to the right side of one of the body cut-outs. Let your child use the vanishing marker to mark other facial features that will be stitched.
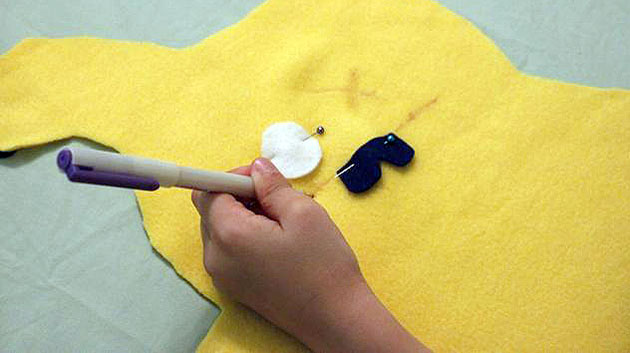
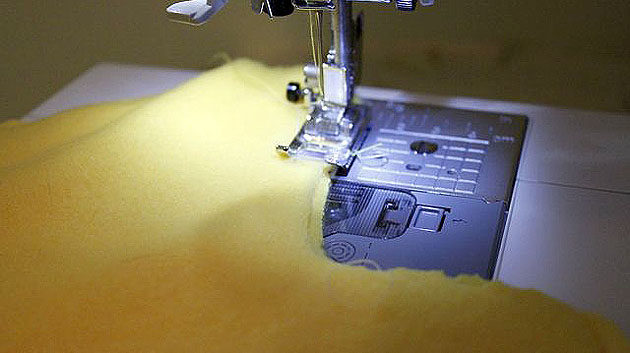
Using the sewing machine, stitch the facial features and attach the felt pieces.
Helping Children Learn to Use a Sewing Machine:
To help my boys learn to sew, I let them depress the pedal on the sewing machine. We focus on light pressure, slowing down, and stopping. Meanwhile, I guide the fabric through the foot.
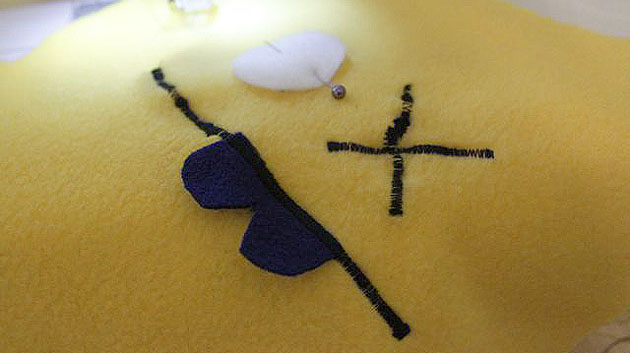
To emphasize the features we drew over the stitching with the Sharpie marker.
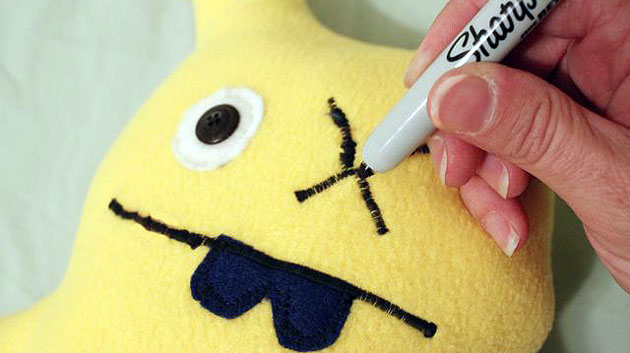
Use buttons or the Sharpie to create pupils for your monster doll.
Pin the right sides together (facial features inside) of the doll. Stitch around the edge, leaving a small three-inch opening for stuffing.
Trim any excess fabric away from the edges before turning the doll right sides out.
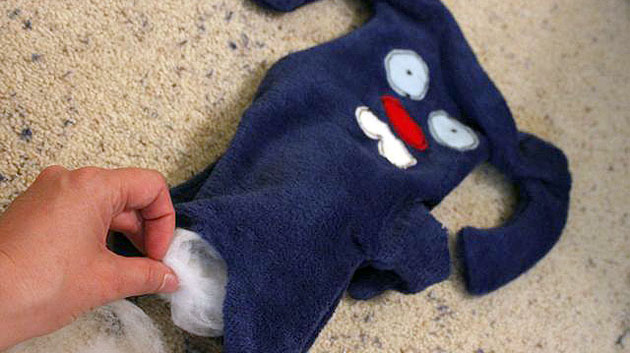
Turn the monster doll right sides out. Use a pencil’s eraser side to poke out any corners and turns. Stuff the monster with polyfill stuffing. Use the pencil to push filling into small areas.
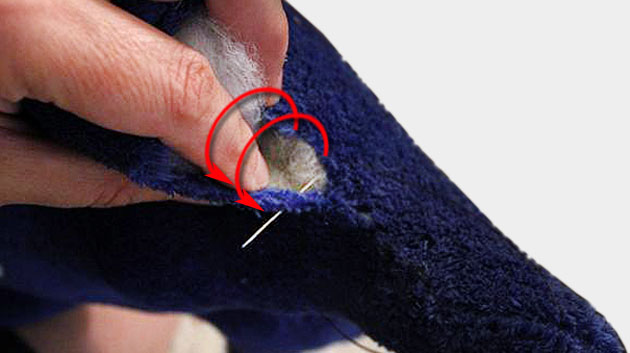
Whipstitch the opening closed after the doll has been fully stuffed.
Your child’s monster doll is complete!
Ugly Monsters or Adorable Monsters? What do you think?

Your child will surely love his creation and will definitely feel a huge sense of pride that he (or she) designed it themselves!
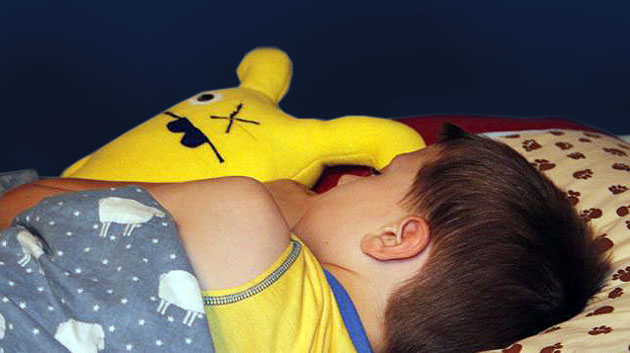
I let my boys do as much as possible so they could feel a HUGE sense of accomplishment when they were done. They both were so proud of their monsters. They tote their monster dolls everywhere and tell friends and family, “I made it!”

Pin for later!

Excellent! The sewing machine is most *definitely* a power tool! (As is the serger. And the iron. And the hand needles are just like hand-tools in the wood-working world….) I don’t have my own kids, but have worked with quite a number of kids thru events put on by my local sewing guild chapter. (There are definitely women in the chapter that love their routers as much as their sewing machines! I hope to become one when I get my own router some day. 🙂 )
One great way to get kids used to ‘driving’ a sewing machine (or serger) is to just have them practice sewing on paper with no thread (and an old needle in the machine or one that is already dull). That really helps those that are apprehensive. You can even start them without any needle in there if you’re working with a kid that needs to be eased into it.
You can later put a colored piece of paper/construction paper behind the paper they sewed on so their work shows up better when it’s displayed on the refrigerator.
Most kids have a blast playing with the different stitches and love to see how the stitches change when they play with the stitch length and width. Even if your machine only has a straight stitch and a zig-zag, kids love it. They love being able to control the settings — and who can blame them? Some really get into making a whole picture using different stitches. Those can later be used as a pocket or part of a pillow cover or a ‘blanket’ for a favorite toy or just displayed as a picture.
Those kids are excellent Makers already! They did a fantastic job and so did you!
Ashley, those are some great ideas! Thanks for sharing.
These are adorable & oh so sweet. I’d love to make some of these for my little granddaughters, thanks for the tutorial
Those are just adorable, you are a cool mom!
No matter if some one searches for his essential thing,
so he/she wants to be available that in detail, thus that thing
is maintained over here.
So cute! I sell the real thing and could hardly tell the difference. You (and your kids) are so crafty! Love!
Those are awesome! PHB’s #1&2 are definitely talented! And great job, Mom, on such a cool project with your kids! I’ll have to do this with my kids…I just wonder what a Jedi monster and a princess monster will look like.
Maddie will love making one of these.
You better send me pics of Maddie’s monster doll! It is great tapping into a child’s creativity! They have the best ideas (sometimes.)
I HAVE to make this with my 4 year old. She will absolutely love it! Thank you so much for posting this project, your blog is wonderful. I read it every day.
I’d love to see pictures if you do make one ;-).
You are so good! and pretty handy also. I never thought of making those with my kids. However when they were sick I did teach them how to make flannel drawstring pajama bottoms. They liked operating the serger. Ann
Oooo. Good for you for teaching your kids how to sew! I bet my boys would love making their own pajamas. I’ll have to put that on my to do list 😉
Thank you so much for stopping by my blog today! I am SO happy to be a new follower
Stacy
Welcome Stacy! Glad to meet you.