
How to Make a Super Simple Bar Stool
 How to Make a Super Simple Bar Stool
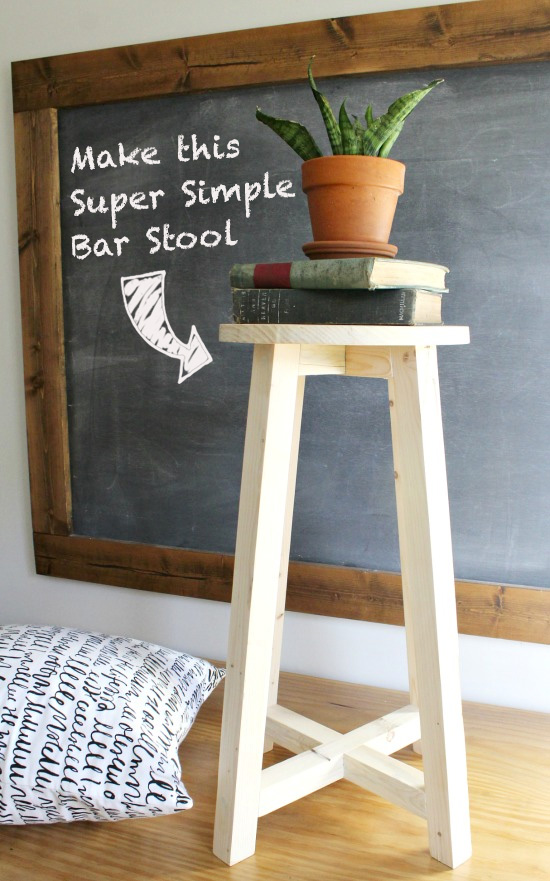
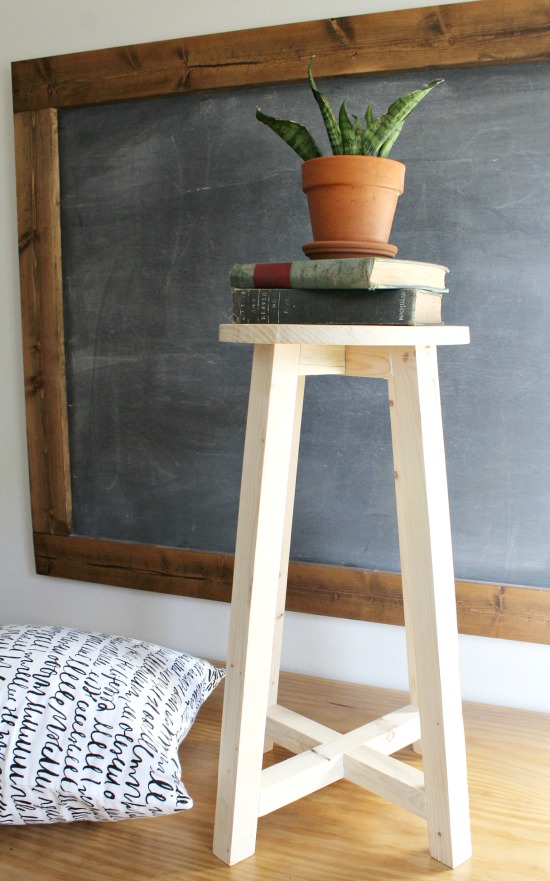
Have you ever wanted a bar stool that is a specific height or stain color? I bet you thought you’d have to search all over town for just the right bar stool, right? Well today, I’m back again from Woodshop Diaries and I am excited to show you how to build this super simple DIY bar stool! Yes, you can do this. . . I’ll show you how!
I built this stool to go with my large craft desk when I remodeled my home office space and I’ve had lots of questions on how I made it. Unfortunately, at the time, I didn’t take any photos for a tutorial. But after so many questions, I decided to make another one just so I could show you how to make your own!

Ready to get started?
Materials:
(I’ve included affiliate links for your convenience. I earn a small percentage from a purchase using these links. There is no additional cost to you. You can read more about affiliate links here.)
- Miter Saw
- Drill
- Measuring Tape
- Wood Chisel
- Hammer
- Speed Square
- Jig Saw
- 2 ½” wood screws
- 2″ wood screws
- 1 ¼” wood screws
- Wood Glue
- (2) 2″ x 2″x 8′ boards
- (1) scrap piece of ¾” plywood (11″ square or larger) or 1″ x 1″2 board (for the seat)
Cut List:
- (4) 1 ½” x 1 ½” x 24″ with 7 degree mitered ends parallel
- (2) 1 ½” x 1 ½” x 7″ with 7 degree mitered ends NOT parallel
- (2) 1 ½” x 1 ½” x 12 ¼” with 7 degree mitered ends NOT parallel
- (1) 11″ diameter round seat
Step 1: Cut Pieces
Start out by cutting all your stool pieces using the cut list above. Miter all the 24″ legs at 7 degrees (parallel to each other.)
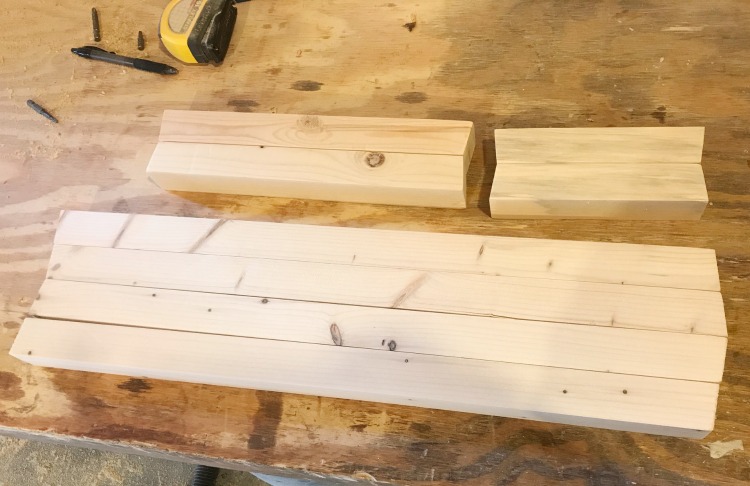
Then you will miter cut the 7″ and the 12 ¼” pieces NOT parallel to each other. (One edge of these pieces will be shorter than the other side as shown in the picture above.)
Step 2: Mark and Trim Notches
Grab the shorter pieces (they will become your braces.) Lay them out as shown below and use a speed square to measure and mark a center line and ¾” to each side of the center line. Next, mark ¾” down from the top and bottom edge to find the horizontal center as well. Make an X mark on the part you will be removing. You need to remove one “chunk” from the top on one piece and one “chunk” from the bottom on the other piece so they will fit together. Do this for both the short and the long brace pieces.

Using a jig saw, make several cuts both along the outside lines and between them. Make sure to only cut on the side where you marked your Xs, not all the way through the board.
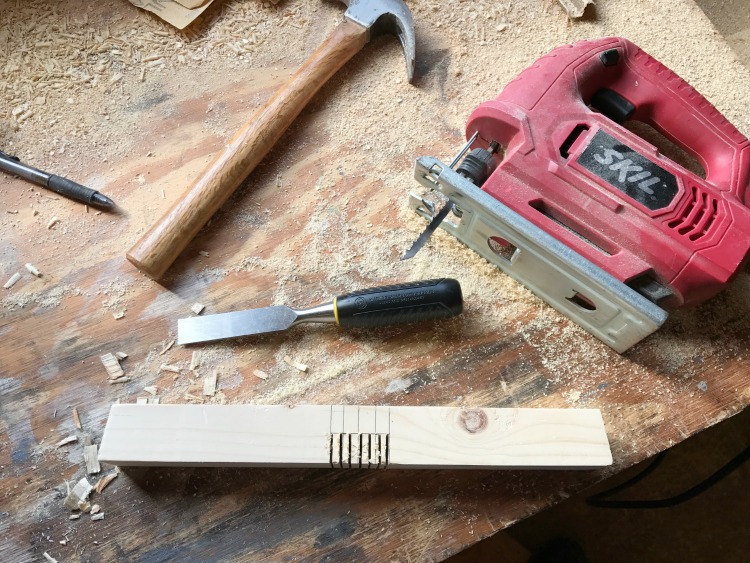
Ignore the extra lines in the photo above. I accidentally marked 3/8″ on each side of the center instead of the ¾” I was supposed to. Whoops!
Use your hammer and chisel to knock out the “chunk” pieces. Do this for all four of 2×2 braces.
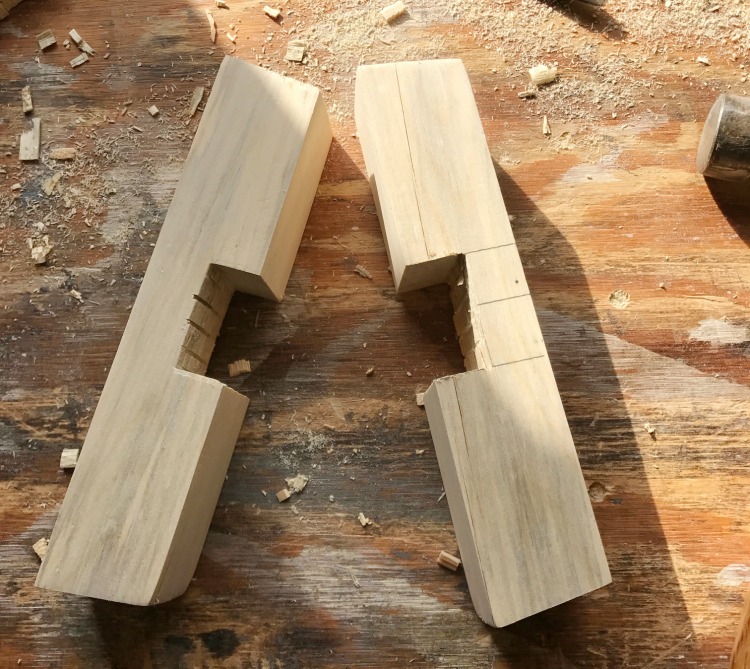
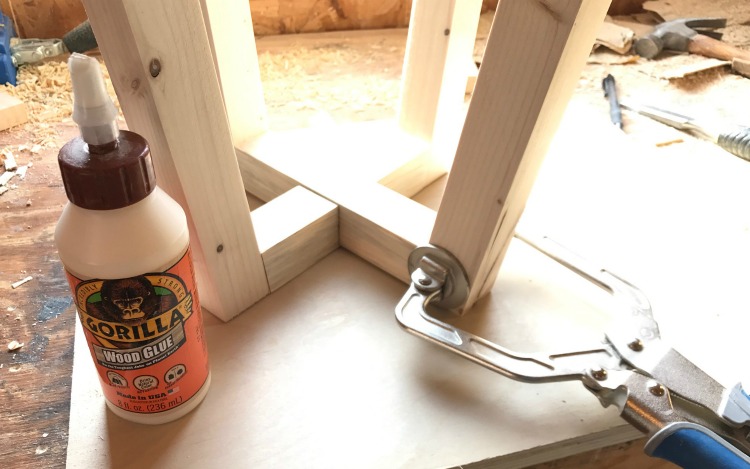
Make sure the braces fit together nicely. Chisel out anything that keeps them from fitting together. Once you get them to fit, put a little glue in the notches; fit the brace together; and add a 1 ¼” screw. Repeat for the second brace.

Step 3: Attach Legs To Center “X” Braces
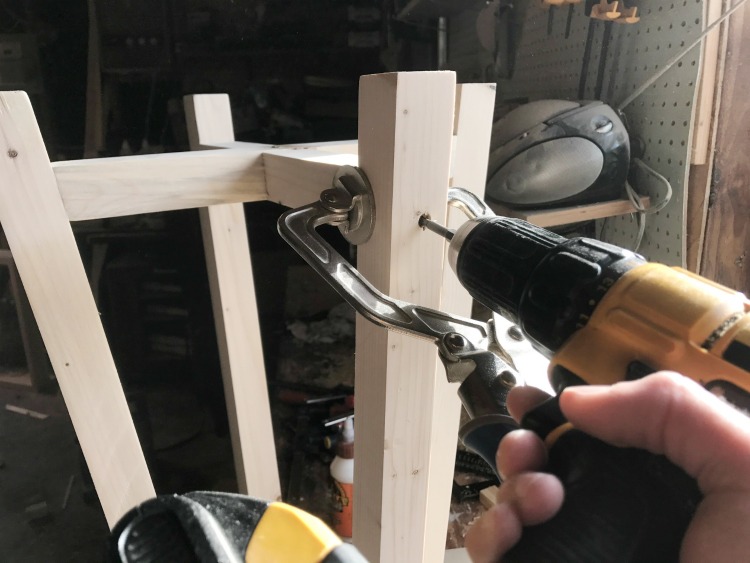
Place your small “X” brace upside down (longest side up) on your work surface. Add glue to all the ends and place a leg on each one. Attach the legs with a 2 ½” wood screw.
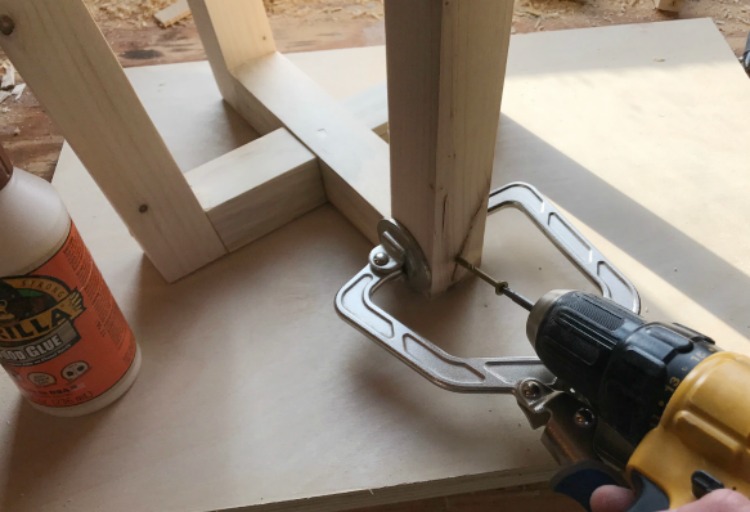
Once all four legs are screwed into the small “X”, place the big “X” between the legs toward the bottom of the legs. Make sure the longest side of the “X” faces the bottom of the legs. Position the “X” so that it is about 1 ¾” from the bottom (or top since it is upside down) of each leg. Glue and screw in place just like with the small “X”.
Step 4: Add the Seat
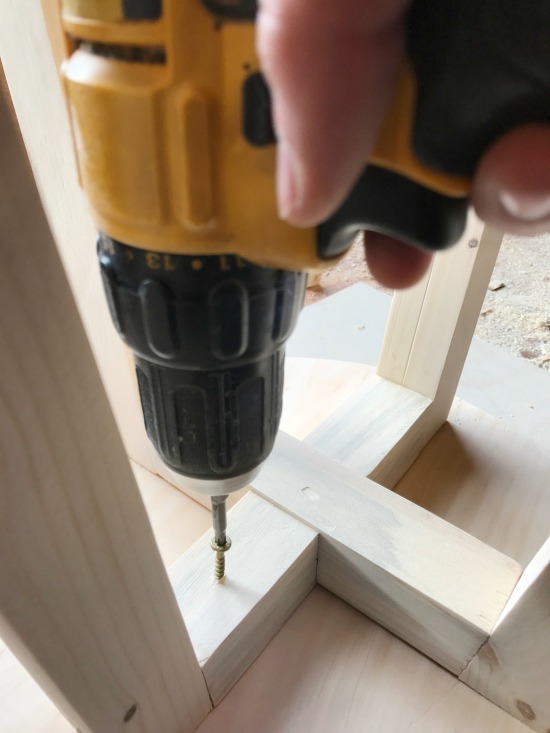
Take a piece of scrap ¾” plywood or 1×12 (anything that is at least 11″ square or larger.) Cut out a circle about 11″ in diameter. You can find a large round object to trace the shape if you wish. Use a jig saw to cut out the circle. Place it upside down on your work surface and center your stool legs and brace on top. Use 2″ wood screws to attach through the small “X” as shown below.

Step 5: Finish the Stool
Putty the screw holes and sand. Paint or stain your stool as desired. I left my new stool natural but I stained the top of my office stool using Minwax Puritan Pine, and painted the bottom Sherwin Williams Naval. Then, I used some masking tape, and taped off my legs to spray with gold spray paint for a gold dipped look. Be careful if you try this that you have the top of your legs covered completely so you don’t overspray onto them!
And that’s it! You now have your own super simple customized bar stool!
What color would you make your bar stool?

~Read more of Shara’s Tutorials~
If you liked this tutorial, I know you’ll love:

Hello, Brittany!
My wife asked me to search for DIY decors for our home improvement project before the year ends. Glad to have found this bar stool. You did such an amazing job! 🙂
Regards,
Sam
I just tried this. But I made a square top. I’m a newby to this woodworking stuff. I think my first attempt came out fairly well.
As usual, you nailed it again. Fabulous job.
It seems easy, I would like to make it for my books
thank you for sharing