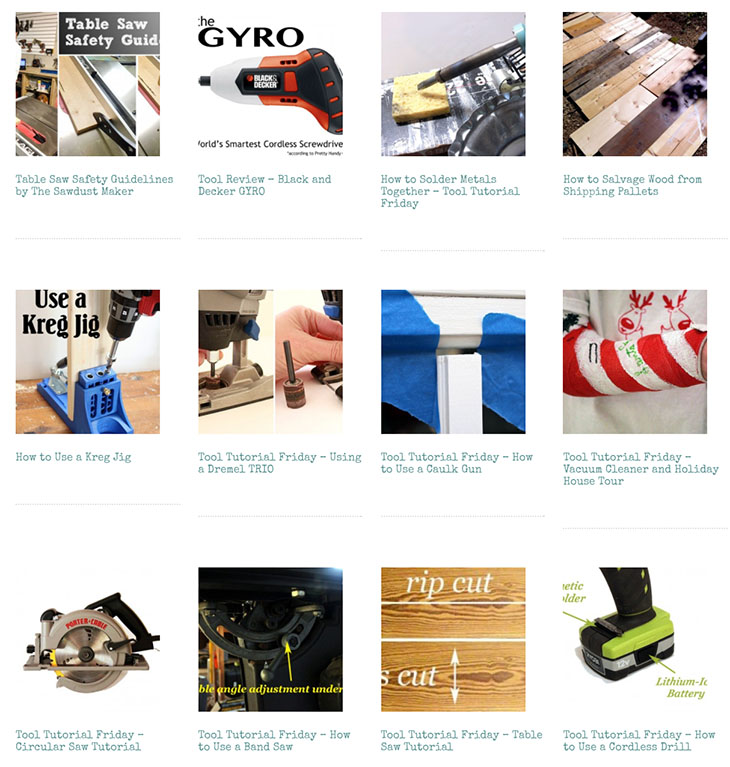
How to Use a Kreg Jig

Hey, look at this! Tool Tutorial Friday is back! Today I have a great tool for creating strong joints when building with wood and furniture construction. Today I’m going to show you the simple tutorial for How to Use a Kreg Jig. If you don’t have one yet, you need to purchase one ASAP! This little tool is my go to for for building furniture, frames and just about anything that needs a tight joint.
(I’ve included affiliate links in this post for your convenience. I earn a small percentage from a purchase using these links. There is no additional cost to you. You can read more about affiliate links here.)
I use the K4 Kreg Jig It didn’t take me long to figure out how to use it, but I know it would have been helpful to have a step-by-step tutorial when I was first learning how to use a Kreg Jig. For your convenience, this is a quick tutorial.
I was first introduced to the Kreg Jig by my friends Ana White and Rayan with The Design Confidential. These two DIY ladies opened my eyes to pocket screw joints. Be sure to check out their blogs for more tips from the masters!
The Basics on How To Use a Kreg Jig
First you will need to measure the thickness of your board. The wood I used was 3/4″ thick. It is important to actually measure your stock because what is sold as a 1″ thick board is usually about 3/4″ thick. You should always measure any wood you buy regardless of how it is labeled. The wood may shrink or deviate from the standard size.
Use that measurement to set the depth collar on your Kreg drill bit. The Kreg Jig I have has this handy guide built into the base. Simply set the drill bit into the groove and line up the step (the spot where the drill bit goes from wide to narr0w) with the measurement that corresponds to the thickness of your wood. The depth collar is adjustable with a hex bit.

Next you want to set the jig placement, also based on the thickness of your wood. You’ll notice the numbers on the side of the jig. Loosen the gold thumb screw and raise or lower the hole guide until it corresponds to your wood measurements. Re-tighten the thumb screw.

If you are joining two different thicknesses of wood, use the thinner board to set your measurements. You may want to vary your screw size. Kreg Jig has this handy chart to find the correct screw lengths (the left vertical side in the chart is the thickness of the board receiving the pocket holes. The horizontal top edge is for the thickness of the board that is being screwed into.)
The next thing I do is clamp the jig to my workbench. This isn’t absolutely necessary, but it helps hold things steady.

Set your wood into the jig, line up the end you want to drill holes in at the bottom of the jig. Then press the clamp lever towards the board to clamp it in place. You may need to turn the clamp screw to tighten or loosen it for a secure hold.

Insert the Kreg Jig drill bit into your drill. Start your drill in the forward motion. Drive the bit into the pocket hole guide. Stop at the depth collar on the bit.
For strong joints always use at least two pocket holes. One will only act like a pivot point for the joints to twist and turn.

Remove the drill bit and unclamp the wood.
To complete your joint, clamp the pieces together and drive pocket hole screws into the pocket holes and into the second piece of wood. Choose the screw that is recommended for your material thickness:
1/2″ material = 1″ screws
3/4″ material = 1 ¼” screws
1 1/2″ material = 2 ½” screws
There is a clamp that comes with the K4 Kreg Jig (you can use it to clamp on top and bottom of the joint), but I prefer a larger clamp like this 24″ IRWIN clamp so that the wood doesn’t get marred.

To conceal the pocket holes after your joint is completed, purchase the Kreg plugs. Or you can fill them with Bondo (Yes! Bondo works great as a strong wood putty! Just remember to allow for drying time and sanding when using Bondo.)
And that’s the basics for using a Kreg Jig! You can save some money if you want to purchase the Kreg Jig Jr., but if you plan to do a lot of building, I recommend the Kreg Jig K4 for easier joinery. It has the removable pocket hole guide. The price usually runs just under $100.
Want to learn how to use more tools? Grab a tool and learn now:
Check out these projects using a Kreg Jig:
DIY Open Frame Radiator Screen Cabinet Doors:


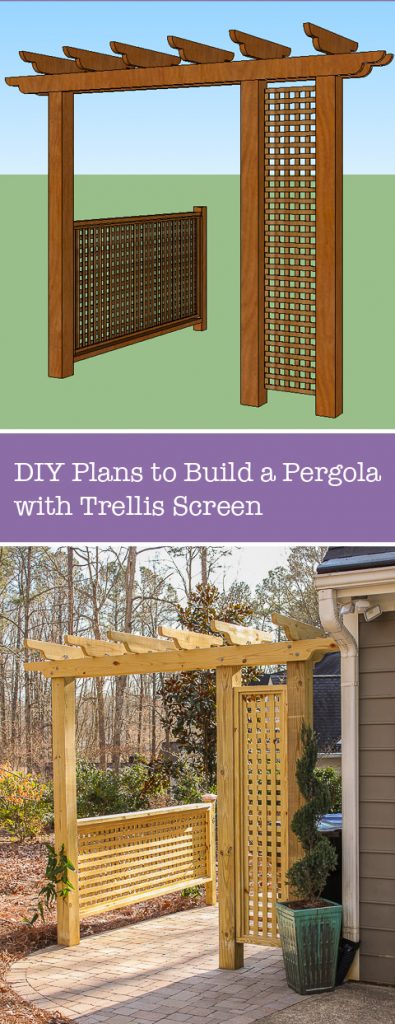
Pergola with Trellis Trash Can Screen:
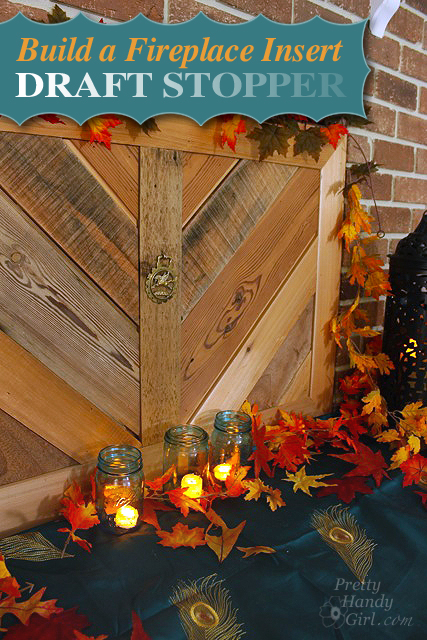
Fireplace Insert Draft Stopper:

Disclosure: I was not paid to endorse Kreg Jig. I purchased the jig with my own money and wrote this tutorial to give my readers the basic tips for using one. As with all tools, be sure to read your owners manual and familiarize yourself with your tools. I am not responsible for any errors or omissions in this tutorial. This post contains affiliate links.
Trackbacks & Pingbacks
-
Final Networked Learning Project – Keriann Ford says:
June 19, 2017 at 10:00 am
-
Networked Learning Project #2 Update – Keriann Ford says:
June 12, 2017 at 12:09 am
-
How to Make a Folding Guitar Stand - Pretty Handy Girl says:
March 29, 2017 at 5:44 pm
-
Aprende todo sobre el uso de un Kreg Jig como lo hacen los expertos ¡Aquí! – manos a la obra says:
February 28, 2017 at 1:28 pm
-
Pocket Hole Screw Guide - Free Printable! - Uncookie Cutter says:
February 28, 2017 at 8:10 am
-
My Top 10 Must-Have Tool Picks for Beginner Builders - Shark Tails says:
February 11, 2017 at 9:23 am
-
How to Build a Lost and Found Center - Pretty Handy Girl says:
February 10, 2017 at 7:00 am
-
My Review on the Kreg Jig - DIY HOME GODDESS BLOG says:
February 7, 2017 at 6:38 pm
-
How to Use a Kreg Jig - Pretty Handy Girl - Woodwork Cafe says:
January 20, 2017 at 11:20 pm
-
DIY Wood-Framed Mirror Tutorial says:
January 18, 2017 at 7:01 am
-
Reclaimed Wood Home Improvement Projects | DIY Projects says:
January 13, 2017 at 1:49 pm
-
Furniture Plans Kreg Jig | Sheds Building Blog says:
November 9, 2016 at 4:03 pm
-
furniture plans for kreg jig | Diy Woodworking Web says:
November 8, 2016 at 11:02 am
-
Sports Gear Storage Shelves in a Small Space - Pretty Handy Girl says:
September 22, 2016 at 10:40 am
-
20 Must Know Woodworking Tips - DIY Joy says:
September 14, 2016 at 10:47 am
« Older CommentsNewer Comments »[…] https://prettyhandygirl.com/how-to-use-a-kreg-jig/ […]
[…] reference back to various sites to make sure I was doing things correctly. I found guidance in this site for many unanswered questions along the way. This was a fabulous site that showed exactly how to […]
[…] Next, glue up the two boards and secure using pocket hole screws. (Unclear how to use pocket holes and a Kreg Jig? Check out my instructions for using a Kreg Jig.) […]
[…] Fuente: prettyhandygirl […]
[…] you are new to building and want to learn how to use a pocket hole jig, check out this post from my friend Brittany over at Pretty Handy Girl. Pocket holes give you a super secure […]
[…] power tool, but it’s used in conjunction with a power drill so I think it fits in this list. Learning joinery with the Kreg Jig has been the best investment of my time thus far. I have used it for almost every build I’ve […]
[…] Then drill pocket holes, using a Kreg Jig, into both ends of your 2″ x 4″ x 53″ boards. Never used a Kreg Jig? Here’s a simple tutorial. […]
[…] It is a great tool for a diy home goddess who wants to put a few rustic things together herself. Like my bookshelves. I saw a lot of reviews saying it’s perfect for a diy’er, and I agree. I think it is a must for anyone who wants to build simple stuff. It’s amazing how it makes you feel when you can say you built this item. Another diy’er who shows you how to use it, with a great tutorial and pictures, is here. […]
[…] Source […]
[…] This is how you’ll join the frame pieces and finish your frame. If you’ve never used a pocket hole jig before, check out Brittany’s tutorial for how to use a Kreg Jig. […]
[…] Image via prettyhandygirl […]
[…] How to Use a Kreg Jig […]
[…] How to Use a Kreg Jig […]
[…] Stain or paint the shelves. Add pocket holes to the underside of the shelves to prepare for attaching to the side frame support. Drill the holes at 1.5″ and 8.5″ from the back edge of the shelf. This should center the holes on the side frame support pieces. (Need help using a Kreg Jig? Here’s a tutorial to help you learn how to use a Kreg Jig.) […]
[…] prettyhandygirl […]
Leave a Reply
Want to join the discussion?Feel free to contribute!