How to Use a Kreg Jig

Hey, look at this! Tool Tutorial Friday is back! Today I have a great tool for creating strong joints when building with wood and furniture construction. Today I’m going to show you the simple tutorial for How to Use a Kreg Jig. If you don’t have one yet, you need to purchase one ASAP! This little tool is my go to for for building furniture, frames and just about anything that needs a tight joint.
(I’ve included affiliate links in this post for your convenience. I earn a small percentage from a purchase using these links. There is no additional cost to you. You can read more about affiliate links here.)
I use the K4 Kreg Jig It didn’t take me long to figure out how to use it, but I know it would have been helpful to have a step-by-step tutorial when I was first learning how to use a Kreg Jig. For your convenience, this is a quick tutorial.
I was first introduced to the Kreg Jig by my friends Ana White and Rayan with The Design Confidential. These two DIY ladies opened my eyes to pocket screw joints. Be sure to check out their blogs for more tips from the masters!
The Basics on How To Use a Kreg Jig
First you will need to measure the thickness of your board. The wood I used was 3/4″ thick. It is important to actually measure your stock because what is sold as a 1″ thick board is usually about 3/4″ thick. You should always measure any wood you buy regardless of how it is labeled. The wood may shrink or deviate from the standard size.
Use that measurement to set the depth collar on your Kreg drill bit. The Kreg Jig I have has this handy guide built into the base. Simply set the drill bit into the groove and line up the step (the spot where the drill bit goes from wide to narr0w) with the measurement that corresponds to the thickness of your wood. The depth collar is adjustable with a hex bit.

Next you want to set the jig placement, also based on the thickness of your wood. You’ll notice the numbers on the side of the jig. Loosen the gold thumb screw and raise or lower the hole guide until it corresponds to your wood measurements. Re-tighten the thumb screw.

If you are joining two different thicknesses of wood, use the thinner board to set your measurements. You may want to vary your screw size. Kreg Jig has this handy chart to find the correct screw lengths (the left vertical side in the chart is the thickness of the board receiving the pocket holes. The horizontal top edge is for the thickness of the board that is being screwed into.)
The next thing I do is clamp the jig to my workbench. This isn’t absolutely necessary, but it helps hold things steady.

Set your wood into the jig, line up the end you want to drill holes in at the bottom of the jig. Then press the clamp lever towards the board to clamp it in place. You may need to turn the clamp screw to tighten or loosen it for a secure hold.

Insert the Kreg Jig drill bit into your drill. Start your drill in the forward motion. Drive the bit into the pocket hole guide. Stop at the depth collar on the bit.
For strong joints always use at least two pocket holes. One will only act like a pivot point for the joints to twist and turn.

Remove the drill bit and unclamp the wood.
To complete your joint, clamp the pieces together and drive pocket hole screws into the pocket holes and into the second piece of wood. Choose the screw that is recommended for your material thickness:
1/2″ material = 1″ screws
3/4″ material = 1 ¼” screws
1 1/2″ material = 2 ½” screws
There is a clamp that comes with the K4 Kreg Jig (you can use it to clamp on top and bottom of the joint), but I prefer a larger clamp like this 24″ IRWIN clamp so that the wood doesn’t get marred.

To conceal the pocket holes after your joint is completed, purchase the Kreg plugs. Or you can fill them with Bondo (Yes! Bondo works great as a strong wood putty! Just remember to allow for drying time and sanding when using Bondo.)
And that’s the basics for using a Kreg Jig! You can save some money if you want to purchase the Kreg Jig Jr., but if you plan to do a lot of building, I recommend the Kreg Jig K4 for easier joinery. It has the removable pocket hole guide. The price usually runs just under $100.
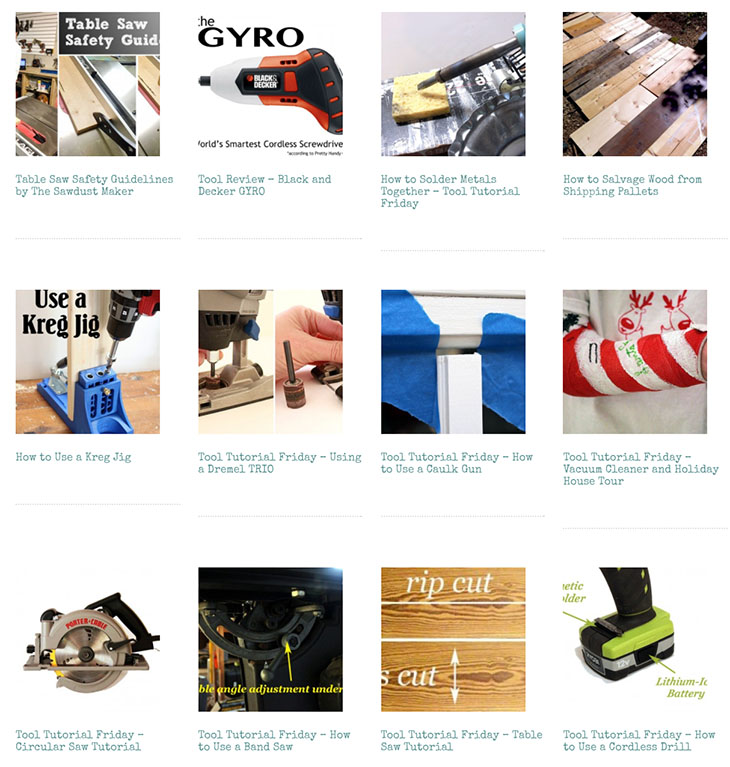
Want to learn how to use more tools? Grab a tool and learn now:
Check out these projects using a Kreg Jig:
DIY Open Frame Radiator Screen Cabinet Doors:


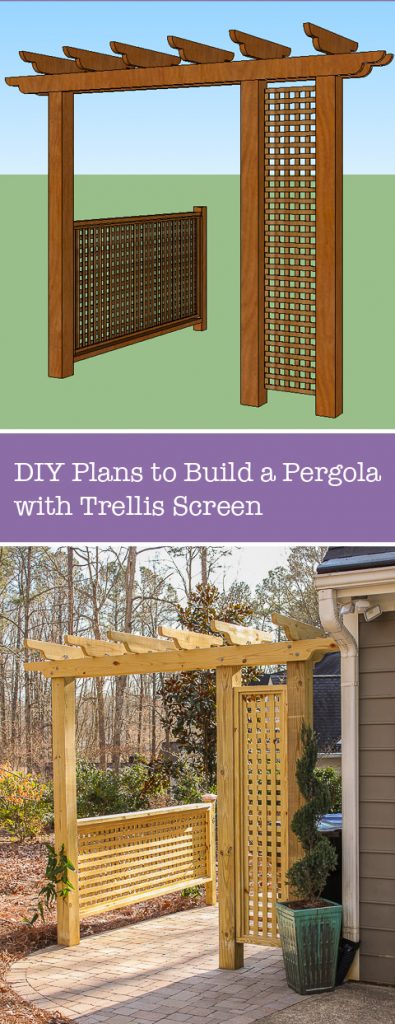
Pergola with Trellis Trash Can Screen:
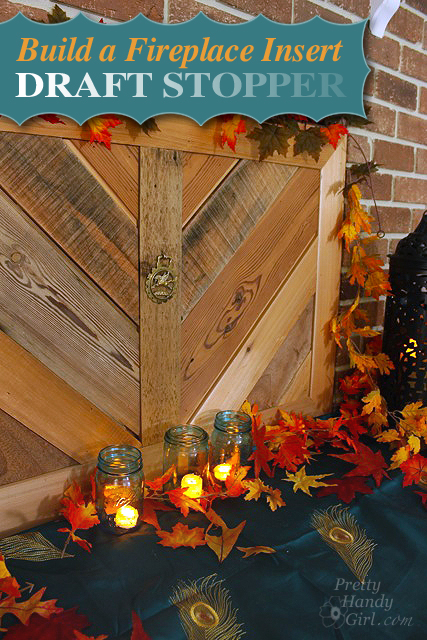
Fireplace Insert Draft Stopper:

Disclosure: I was not paid to endorse Kreg Jig. I purchased the jig with my own money and wrote this tutorial to give my readers the basic tips for using one. As with all tools, be sure to read your owners manual and familiarize yourself with your tools. I am not responsible for any errors or omissions in this tutorial. This post contains affiliate links.
Thank you for this post! I am trying to start some of my own building projects (aka, not requiring the assistance of my hubbie) and this was one of the first things I wanted to learn about. Can’t wait to explore your blog more!
Hi Brittany…I just got the Kreg M4 and was wondering if you could help me out a little. First off, I’ve never used one, so have lots of questions. I watched the video and it shows putting the spacer bar under the thing that slides up and down. Does this stay there? What is it for and what happens if you don’t put it there? I have written to Kreg, and did look in the FAQ section, but I’m just plain ol confused…..
Debbie.
Debbie, can you point me to the video you are talking about? I’m not sure what the spacer bar is, but maybe if I watch the video I can see what you are talking about.
Oh…sorry about that. Its the video that comes with the M4 Kreg. It shows sliding the blue spacer block into the groves under the piece that you adjust for different sizes of wood. I think it adds an extra 1/4″, but I just don’t know what it all means.
Debbie.
Debora, I watched this Kreg Jig video: http://youtu.be/XrebqzFXSII
I’m not sure if it’s the same one that came with the tool (mine is lost right now in the mess of our garage.) I don’t see a spacer that sit underneath the guide block (I think that’s what you are talking about. But, the three hole guide block slides up and down and you set that (in addition to the collar on the drill bit) to the width of your wood.
It might be helpful for you to just drill some holes in scrap wood to play and see how the jig works before using it on a finished piece.
Thank you for the clip, I hadn’t seen that one. It doesn’t have the spacer block in this video at all. I have tried to contact Kreg, to see what its for, but I just haven’t heard back. I tried to hook up with the Kreg forum, but for some reason, I don’t get the confirmation emails, so working on that as well. Right now its just hurry up and wait until I can chat with someone. It was the weekend, so I am sure mabey today or tomorrow…
I just wanna make something….
thanks for replying so quickly, I sure do appreciate it.
Debbie.
Debbie,
I remember seeing the spacer bar used in a YouTube. It is used when you take the jig out of the stand/clamp and take the jig to a large work piece that wouldn’t fit into it. If I remember, each spacer bar represented a half inch of board thickness and you could order more from Kreg to accomodate thicker boards. It slides onto the bottom of the jig (once you remove it from the stand/clamp) and the additional add-ons interlock. To me, it didn’t seem like something I would end up using, but ya never know.
Thanks bunches. Finally got it all figured out, and have to say I’m not sure I’d use it much either, but as you said…never know. I only have the one, but should probably get 3 more, so it will work with 2x wood. I was making the farm house table and actually needed to add a couple more holes, so used the portable and it worked great.
Hi Brittany,
Still the best Kreg Jig how-to! Can’t believe it’s been more than two years since I pinned this!!
So sad, the link to the Kreg youtube video is now private 🙁 . Is this something you still have access to?
If not, any suggestions on really informative videos? Not a big deal… it’s just there are so many tutorials on youtube that it’s so helpful when one is recommended!
Thanks kindly, Jan
Can you drill a hole for a door knob with this jig?
Dana, no, the Kreg jig is more for joinery holes. It drills at an angle.
One of the first things I built when I bought my jig was the “Workbench” project. It was an easy build, got me familiar with the tool and the result provided me with a very useful workbench to use on other projects.
Steve, thanks for your comment. I can’t wait to build a potting bench with the Kreg jig next.
Brittany nice blog! This Kreg system is a must for any DIYer! I use mine from home improvement to fine furniture. I recommend getting the largest kit you can afford. Once you get past the very very small learning curve you will end up getting the extras after you realize how much you can truly build with it. Have fun and create!
Ken
Ken, so true. I’m glad I decided to get the $99 version of the Kreg Jig.
Another tip – take some white paint and go over all the letters/numbers and wipe off the excess – allow to dry – much easier to read the settings.
Bill, great tip! That’s helpful for sure.
I was literally laying awake in bed last night trying to remember what that was called so that I could look up how to use it and here it is. Thanks!
Thank you SO much for your tutorial. I actually just purchased a Kreg Jig and haven’t yet used it. It seemed rather intimidating for a novice woodworker like myself. I had a hard time just figuring out how to assemble the thing… But after reading your instructions I feel a little more confident that I can use it with success. I’m hoping to build some large wooden planters for my first project. I’ll be looking forward to your next tutorial using the Kreg Jig.
OMG Kim… you will love your Kreg… I love mine… you can build anything with it… wait till you use it a couple times… you’ll see furniture items and say.. .”I can build that” go check out http://www.ana-white.com she has tons of plans to build furniture and they all use the Kreg… I made so many things… A table and chairs for my granddaugher.. a bed for her… a play kitchen set… a set of nesting tables for my living room… I love love love it…. I blogged about a few of the things I’ve made so far… My tables are my favorite project so far..
Hubby bought a Kreg at a DIY show in our area a few years ago, and we use it all the time. It was offered at the Kreg booth as a “special”, so we spent a LOT less than what they sell for now. It’s a really handy tool to have around!
p.s…glad Tutorial Friday is back!!!!
I had to smile when I saw this post. I broke out my Keg Jig today for the first time to build a bed using one of Ana White’s plans. Thanks for the great tutorial!
Ooh, thanks for the tutorial. I haven’t used the one we got in our Haven swag bags yet, but good to know where to come for a refresher when I’m ready to use it.
Sheila, have you used your jig yet? Get busy girl!
Can I cope the item photo pls
Nevermind… It’s me doing it incorrectly! LOL Thank you!
Actually, setting it to the ‘step’ is correct according to the DVD and little book that comes with the Jig. Setting it to the tip will cause the hole to be drilled a bit too shallow. It will work, but not as strong a joint in my experience.
Oh, Kelly, thank you sooo much for correcting me. I read the instructions wrong. Going to change the directions NOW!
No, you were right and I was wrong. Thanks for asking the question. I just updated my post.
Is that first photo, setting the depth collar correct or have I been incorrectly setting my “step” and not the tip to the thickness of my board?
I really want to get one of these!! Looks like a lot of fun!