
How to Paint Doors (The Professional Way)
Many of us have been staring at the same walls and doors in our homes for many years (or maybe many decades.) If you’ve wanted to give your home an update, painting a door is a quick and easy way to do just that. Today I’ll to show you how to paint doors (the professional way) so they look amazing for years (or decades) to come.
How to Paint Doors (The Professional Way)
So you want to paint like a pro? Well, sit back and let me give you some tips and a tutorial for painting a door. This tutorial pertains to any paneled door (interior or exterior).

Our doors are all the six panel type. If you have flat (non-panel) versions, you can skip this post and come back later. For the rest of us, get out your paper and pencils and take some notes (does anyone do this anymore?)
Materials:
(I’ve included affiliate links for your convenience. I earn a small percentage from a purchase using these links. There is no additional cost to you. You can read more about affiliate links here.)
optional: Painting Pyramids
How to Test for Latex or Oil Paint?
To determine if you need to prime your door you need to assess if your door was painted with latex or oil paint first. To test the paint, rub a small spot with rubbing alcohol (or ammonia) and if the paint comes off it is latex. If not, it’s oil paint.
How Do I Know if My Door Has Lead Paint:
You can easily test your door (or any paint) for the presence of lead by using a lead test swab. I go into more detail about lead paint in this tutorial.
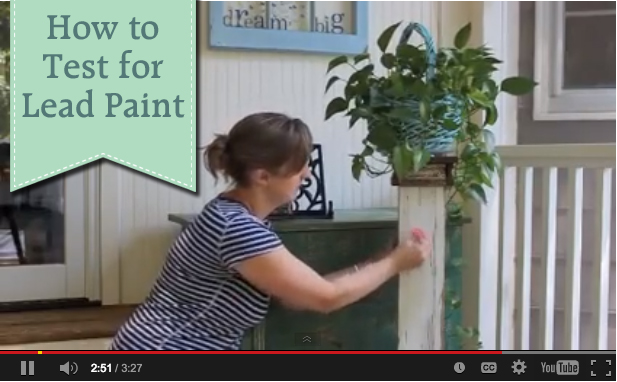
But, the short of it is, if you have lead paint, you must be very careful when sanding it. Cover the area with disposable plastic. Use a wet sanding block (never use a power sander). Wear a respirator and be sure to clean everything with disposable wet wipes.)
When Do You Have to Prime?
As we determined above, if your door was painted with oil-based paint (and you want to use latex paint) you will need to prime. But, here are a few more reasons you need to prime your door first:
- Bare wood or stained wood doors.
- Dark painted doors you wish to paint lighter (or vice versa), you want to use a tinted-primer to cut down on coats.
- If the door was painted with oil and you want to use latex paint. If you are painting over latex with latex (or oil over oil) and the previous paint job is in good shape you can skip the primer. (This was the case with my door, so I didn’t prime it.)
- The paint is chipping. First, scrape or sand any flakes and then prime. (Important: Check for Lead Paint First.)
- Lead paint (whether in good shape or not), you will need to prime.
Should I Remove or Paint a Hung Door?
The easiest way to paint a door is to remove the door, then remove the knobs and latch. Then you can lay it horizontally on sawhorses. Painting a door on sawhorses eliminates potential drips and is easier on your back. But, removing the door can also be a pain, especially if it’s a large solid wood door. I’ve painted plenty of doors without removing them, and they look great. It comes down to personal preference.
Preparation:
Whether you are removing the door or painting it in place, be sure to cover the area underneath with a drop cloth, newspapers, or flattened cardboard boxes (my favorite for hung doors because it gives some cushion when you are kneeling on the floor.
Lightly sand the entire door. No need to bust out the power sander, you can use a sanding block or sheet of sand paper. Be sure to sand down any bumps or blemishes. The main goal is to give your door a little “tooth” for the new paint or primer to adhere to. Wipe off the door with a damp rag to remove any sawdust.
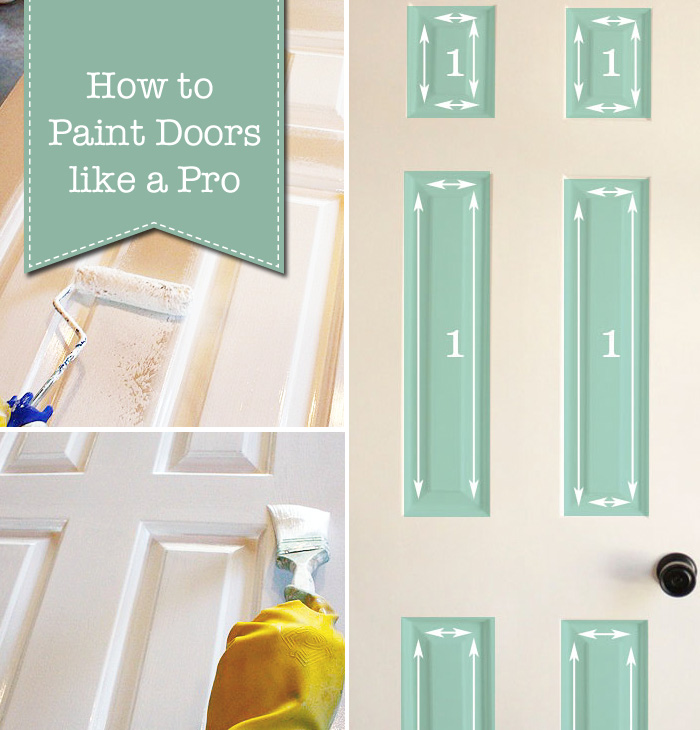
Instructions for How to Paint Doors the Professional Way.
Step 1: Paint the interior panels first as shown in the graphic below.

Using a small roller to paint doors can greatly speed the process. Begin by rolling paint on the flat panels. Work quickly by rolling on the paint, then use a brush to smooth out the paint and fill in the detailed areas around the flat panel.
This is one of the most important tips for getting a professional look:
Follow the grain direction when brushing on the paint
If you follow the grain and the direction of the arrows in the graphic above, you will maintain the look of the door construction. Original wood doors are made with several pieces and the wood grain changes direction. Even if you have cheap hollow core doors, you can fake the look of a quality door by following the grain pattern.

In other words: NEVER run your brush strokes perpendicular to the wood grain. This does NOT look professional.

Step 2: Next, roll the inside center vertical piece. Start by rolling the paint on in an up and down direction.

Then drag your brush up and down vertically with the wood grain (see arrows in the above diagram.)

Step 3: Next paint the horizontal cross pieces in the middle of the door.

Keep your brush strokes horizontal (with the grain) and cross over the tall vertical center.

Step 4: Paint the door border. Pay attention to the direction of the wood grain for this last step. The grain on the two sides should go vertically from top to bottom.

There are header and footer panels sandwiched between the left and right sides. These “sandwiched” pieces should be painted by dragging your brush horizontally (see diagram above.)

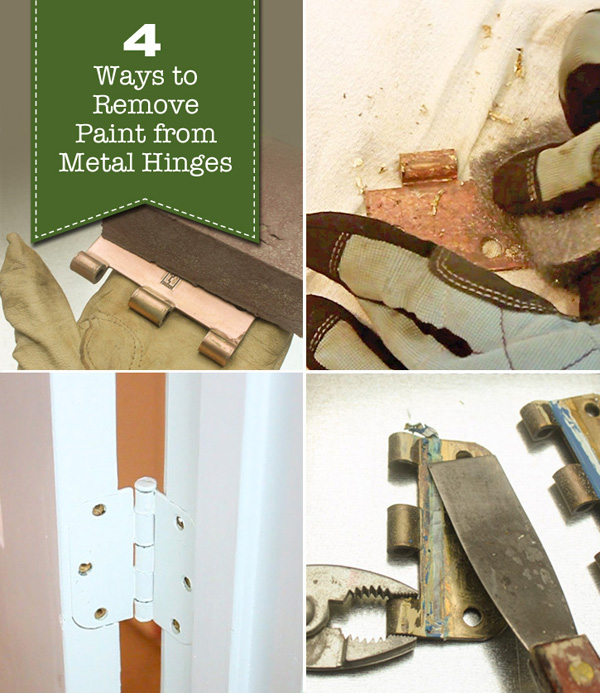
Step 5: The last step is to paint the edges of the door. (Do Not paint the hinges…that’s not very professional either!) If your hinges or doorknobs were painted previously you can follow this tutorial with four ways to remove paint from metal hinges.
Roll paint onto the edges then smooth them with the paintbrush. Be on the lookout for drips or puddles of paint. Go back and check the face of your door for drips now before the paint cures.
Let your door dry (30 minutes – 1 hour), then follow up with a second coat of paint. When you are done let the doors dry for 2+ hours before flipping to paint the other side. I have found that it helps to put pieces of cardboard or rags under the door so the paint doesn’t stick to the sawhorses. But you can also buy Painting Pyraminds which elevate the door and hold it on tiny points.
Ready to perfect more of your painting skills? Check out the Paint Week series with 5 Lessons to Perfect Your Painting Skills:

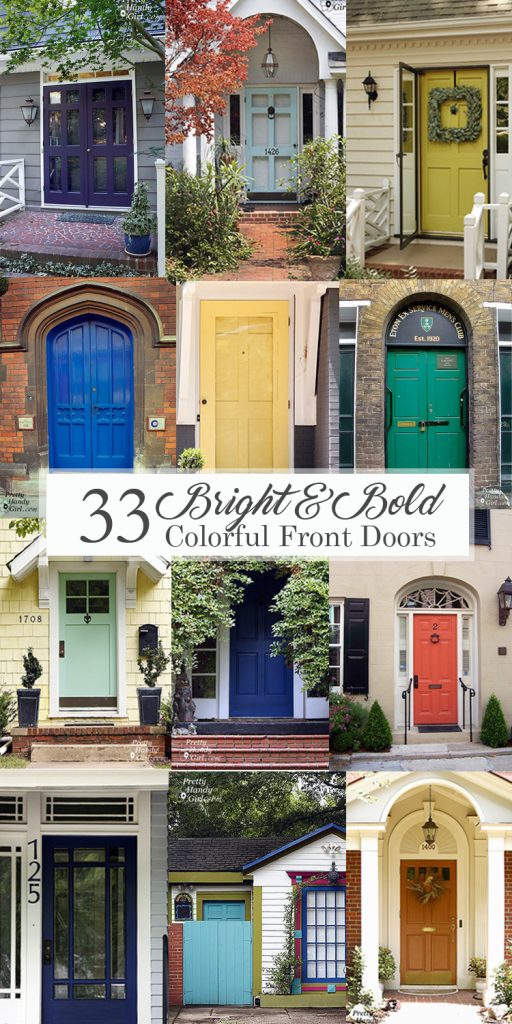
And if you really want to paint your front door but can’t decide on a color, you’ll love this collection of Bold Colored Front Doors!

Hi, I’m a professional painter & decorator and I do it a little differently to you. Taking a door off its hinges to paint might make sense if you are just painting one side of the door and you have a lot of time on your hands!
If you are painting both sides or more than one door it could be a serious hassle. Plus when the door is laying flat and dust in the air will settle on the wet paint. Unless you have the door in a clean room.
This is how I do it http://oisinbutler.ie/how-to-paint-a-panel-door-and-frame/
Oisin
Thanks Oisin! That definitely seems easier than taking the door off the hinges.
Is it different if painting a steel door? I have new doors and I believe they have primer on them and I want to paint them white.
Launa,
No, not much different, but you do need to determine for certain if it is pre-primed. Besides contacting the seller or manufacturer, I’m not sure how you could tell. Adding one coat of primer to the door isn’t a big deal. You don’t have to go for full coverage, just make sure you don’t have any drips.
I have solid core flat bedroom doors to paint. They were primed when we bought them, 3 yrs ago. They never got painted and are dirty. what should I wash doors with? Should I prim them, or is original priming enough? Thanks for the info on this site and I feel comments on this site saved me from removing three heavy doors to paint. I will leave them hanging.
If you think they are really dirty and more than just dust, I’d clean them with TSP. But, if it’s just dust you should be able to clean them off with a wet rag. You can always give them a super light sanding too. The original priming should be sufficient as long as you don’t see the original wood showing though.
Hey Ladies, do any of you who have painted your doors, have a paint color that you are in love with? I’d LOVE black (mine is currently burgandy from the builder), but I don’t want a super dark black. I was hoping those of you who have done this would have a recommendation? Also, would you use a satin or ? Thanks a million in advance for any suggestions!!!
Michelle, what about a deep charcoal color. And I prefer satin so it doesn’t highlight the imperfections as much.
Thanks for sharing this post. Good work! Thanks for post.
The BEST way to get ALL your doors done at one time… take all the doors off and remove all harware. Set up two long wood stips on the floor in your garage – use 2×2 or long scrap strips of 3/4″ plywood work great and I keep them specifically for painting doors. Next get scraps of wood about 6-8 inches long – anything from a 1×2 to a 2×4 – you’ll need a number of them equal to the total number of doors you have minus ONE. Next, accordian the doors across your two wood strips on the floor and nail a scrap of wood into the top edges of the doors where they meet. nail the nail in half way so you can easily pull it out with a claw hammer when you are done. You never see the top or bottom of the doors and you can write the location of the door in your house on either end and paint all surfaces of the door in one painting session. Works GREAT for anything more than 2 doors (3+). I’ve painted 5 doors, 2 coats all after work one day – just before dinner, 4 hrs later around 10 oclock – dry the next morning.
Scott,
I am a visual person – and having a hard time following your instructions in my head. Do you have any pictures of how to “accordian” the doors?
Thanks!
This is a great read! I appreciate the tips. The only question I have is this: the previous owners painted the wooden doors white, and the paint is chipping/peeling off because they didn’t sand down the original polyurethane/varnish before-hand. Am I going to have to scrape off this paint, then sand or just start sanding? Thanks in advance for your time!
Thank you. Yes, I understand that.
How long should I wait between steps? For example, after I paint step 1, and step 2- how long after should I paint step 3?
Thank you.
Don’t wait. Just keep painting around so you can hopefully overlap into wet strokes. If the paint starts to dry you’ll get drag marks.
I was thinking step 4 should be step 3, with my doors anyways as the wood grain is horizontal all across the bottom and top of the door.
Is that right?
I have 3 doors to paint and Ill follow this technique.
Thank you.
You can swap those two, but I learned to paint all the insides first. Also, if there are any drips from Steps 1 & 2, you’ll catch them sooner before moving to the exterior frame last. Make sense?
How do you paint the inexpensive doors that they place in houses today. Does primer help the paint stick ?
Carrie, yes, you will need to use primer. Especially if the door is pre-painted in an oil finish.
How do you tell it has been painted with an oil finish?
Carrie, dip a q-tip in rubbing alcohol. Rub it onto the door. If the paint rubs off it is latex. If not, it is probably oil.
No professional paints doors with a brush or roller; it’s all done using a paint sprayer. My parents painted all of the doors in our house with a sprayer they bought at the home depot. It’s super easy to use and affordable, and because the sprayer uses 1/2 paint 1/2 water- one gallon of paint goes a long way.
This how to was perfect. I completed my two door entrance to the laundry room today and kept my laptop open following step by step. Thank you so much! Lindy