How to Build a Scalloped Planter Box Centerpiece
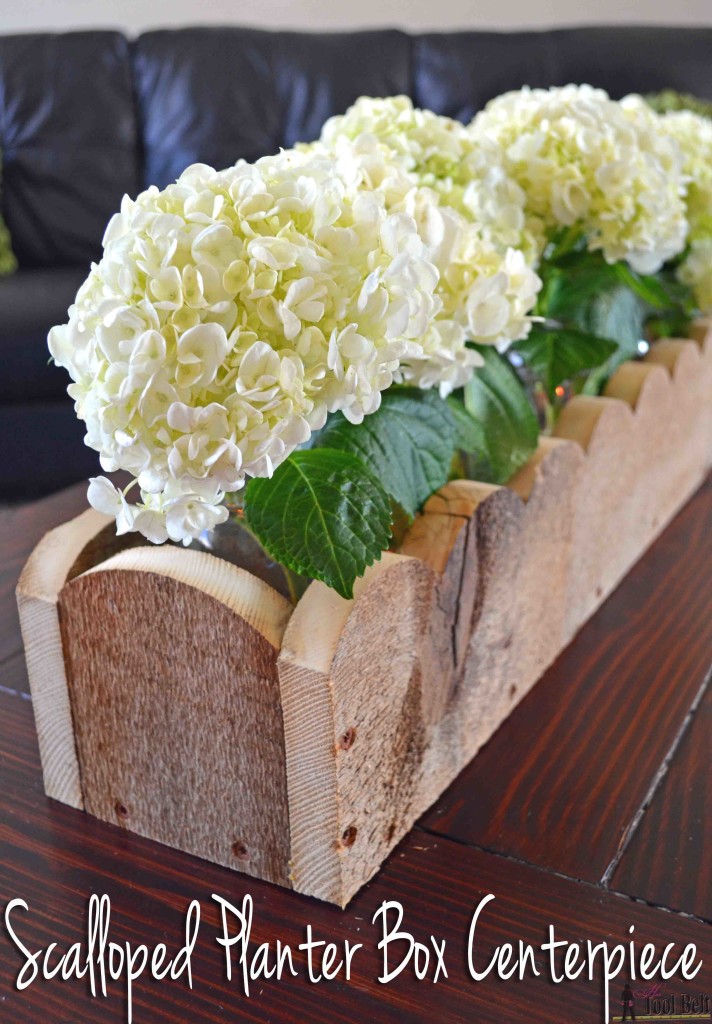
Today on the Rockstar DIY stage is Amy, with the tutorial to make this perfectly rustic Scalloped Planter Box Centerpiece.

Amy is the creative artist and builder behind Her Tool Belt! You may remember her amazing rustic chevron twin bed that crashed Pinterest (well, not really, but it should have.)
![]()
Well, the very talented Amy is in the wings right now and I just got word that she’s headed to the stage. So, without any further delay, here’s AMY!
![]()
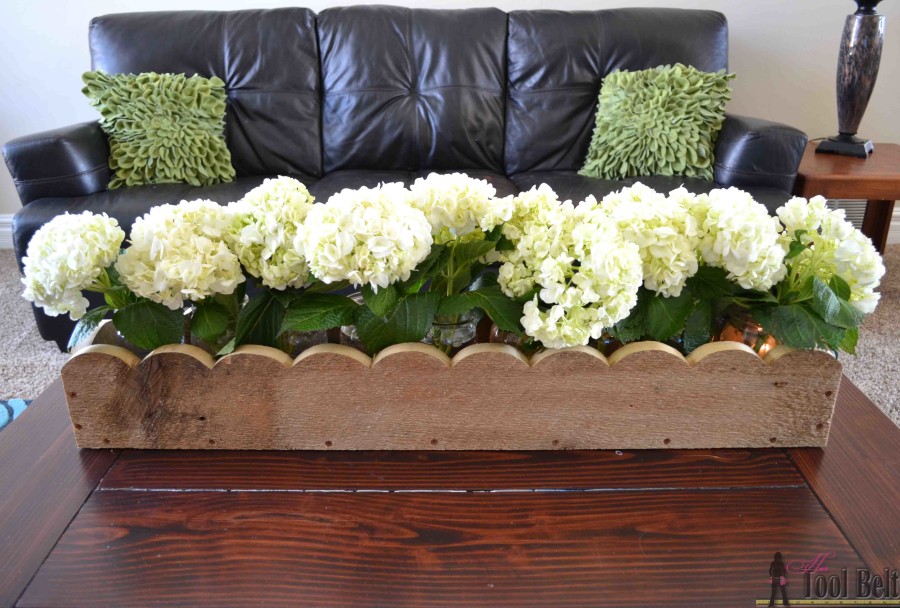
Hi! I am Amy from Hertoolbelt and I’m so excited to be visiting with you today. A couple of years ago I dismantled an old barn at my parents farm, now I have a good supply of barn wood. I enjoy building projects with barn wood because of the unique weathered and rustic look of each piece. It works great for planter box centerpieces. I like to have a few planter boxes on hand for party decorations. I wanted to make this one have a more feminine feel, so I added scallops.
How to Build a Scalloped Planter Box Centerpiece
Materials
- 2 – 1″ x 6″ x 6′ boards (or barn wood), actual 3/4″ x 5 1/2″
- 1 1/2″ minimum length screws (I used 1 5/8″ deck screws)
- wood glue
- sand paper
You can modify these plans for whatever size of centerpiece you need. I designed the inside width to fit mason jars.
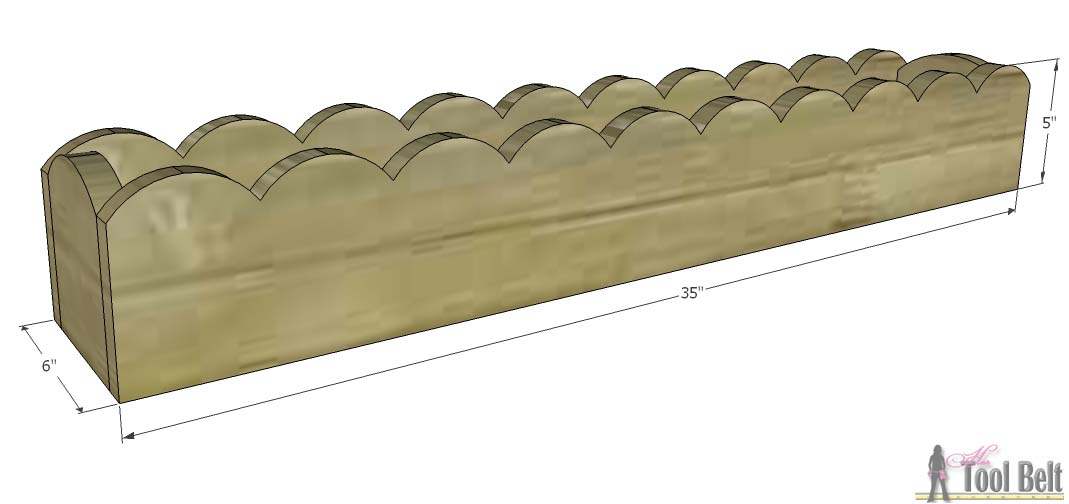
Cut List
- 2 – 3/4″ x 5″ x 35″
- 2 – 3/4″ x 5″ x 4 1/2″
- 1 – 3/4″ x 4 1/2″ x 33 1/2″
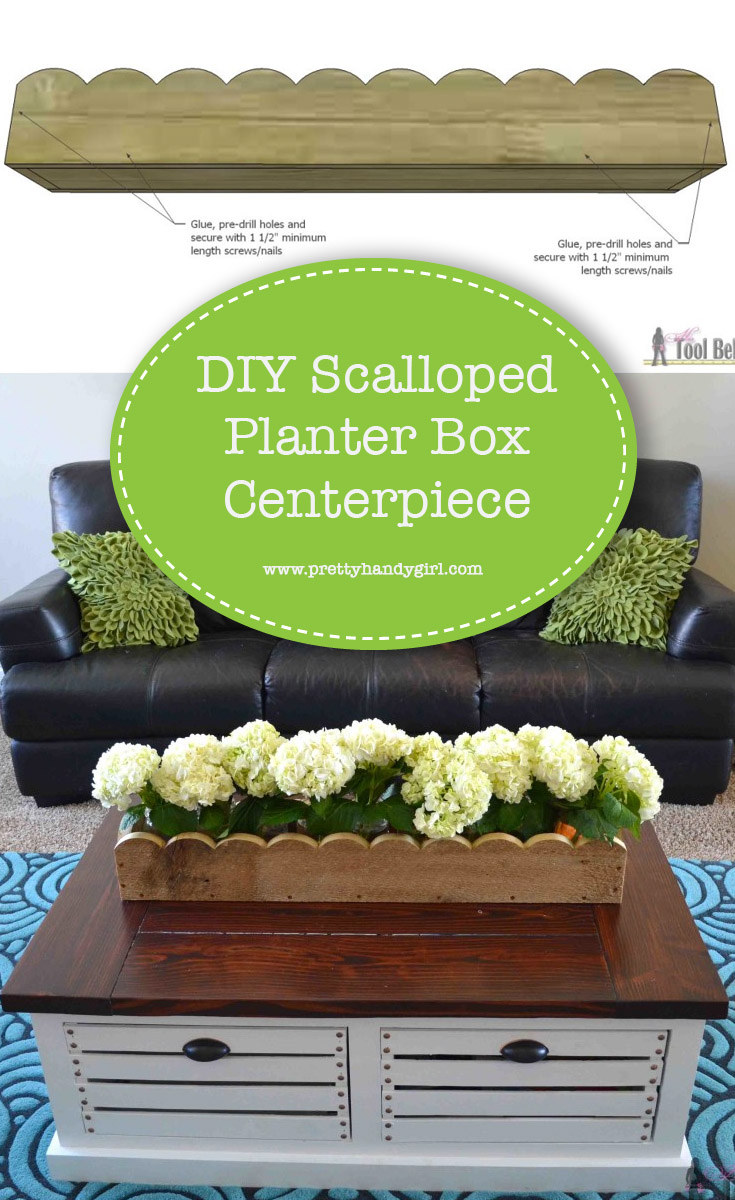
Step 1
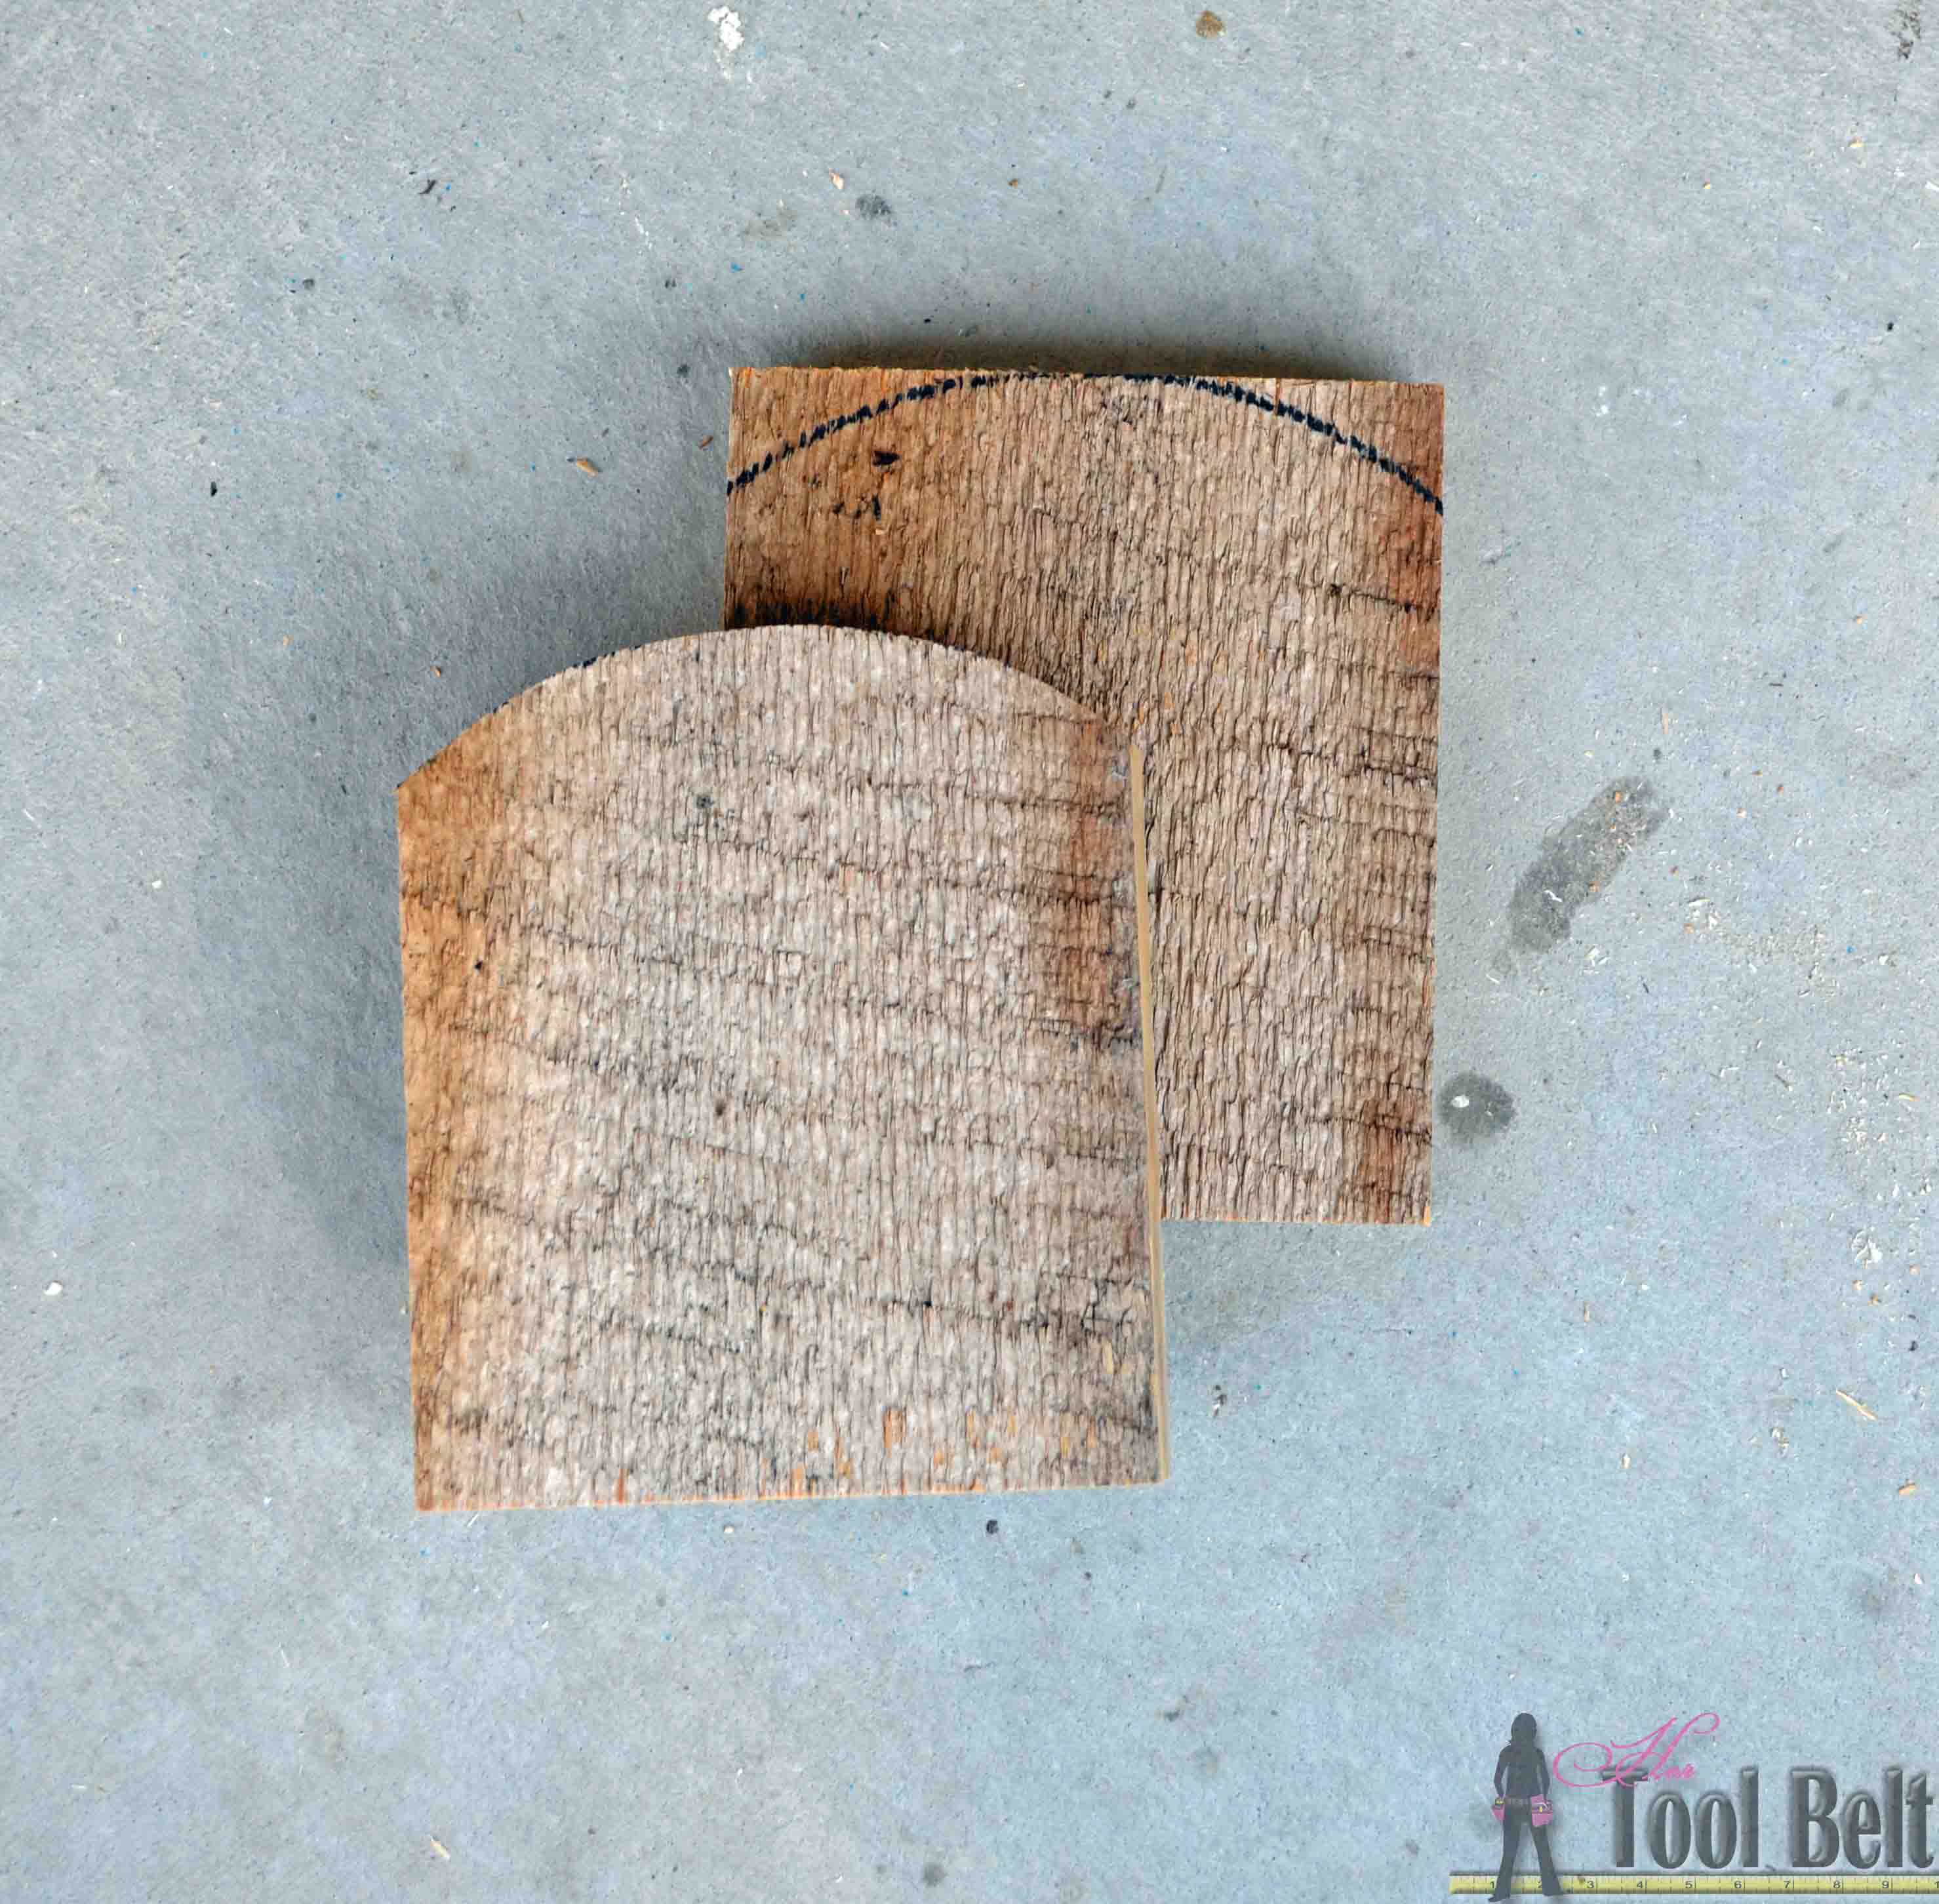
Cut the boards out according to the cut list above. Download and print the pattern for the scallop. When printing make sure your print settings are on 100%, not fit to page. Cut out the pattern and trace it on the 2 – 35″ boards.
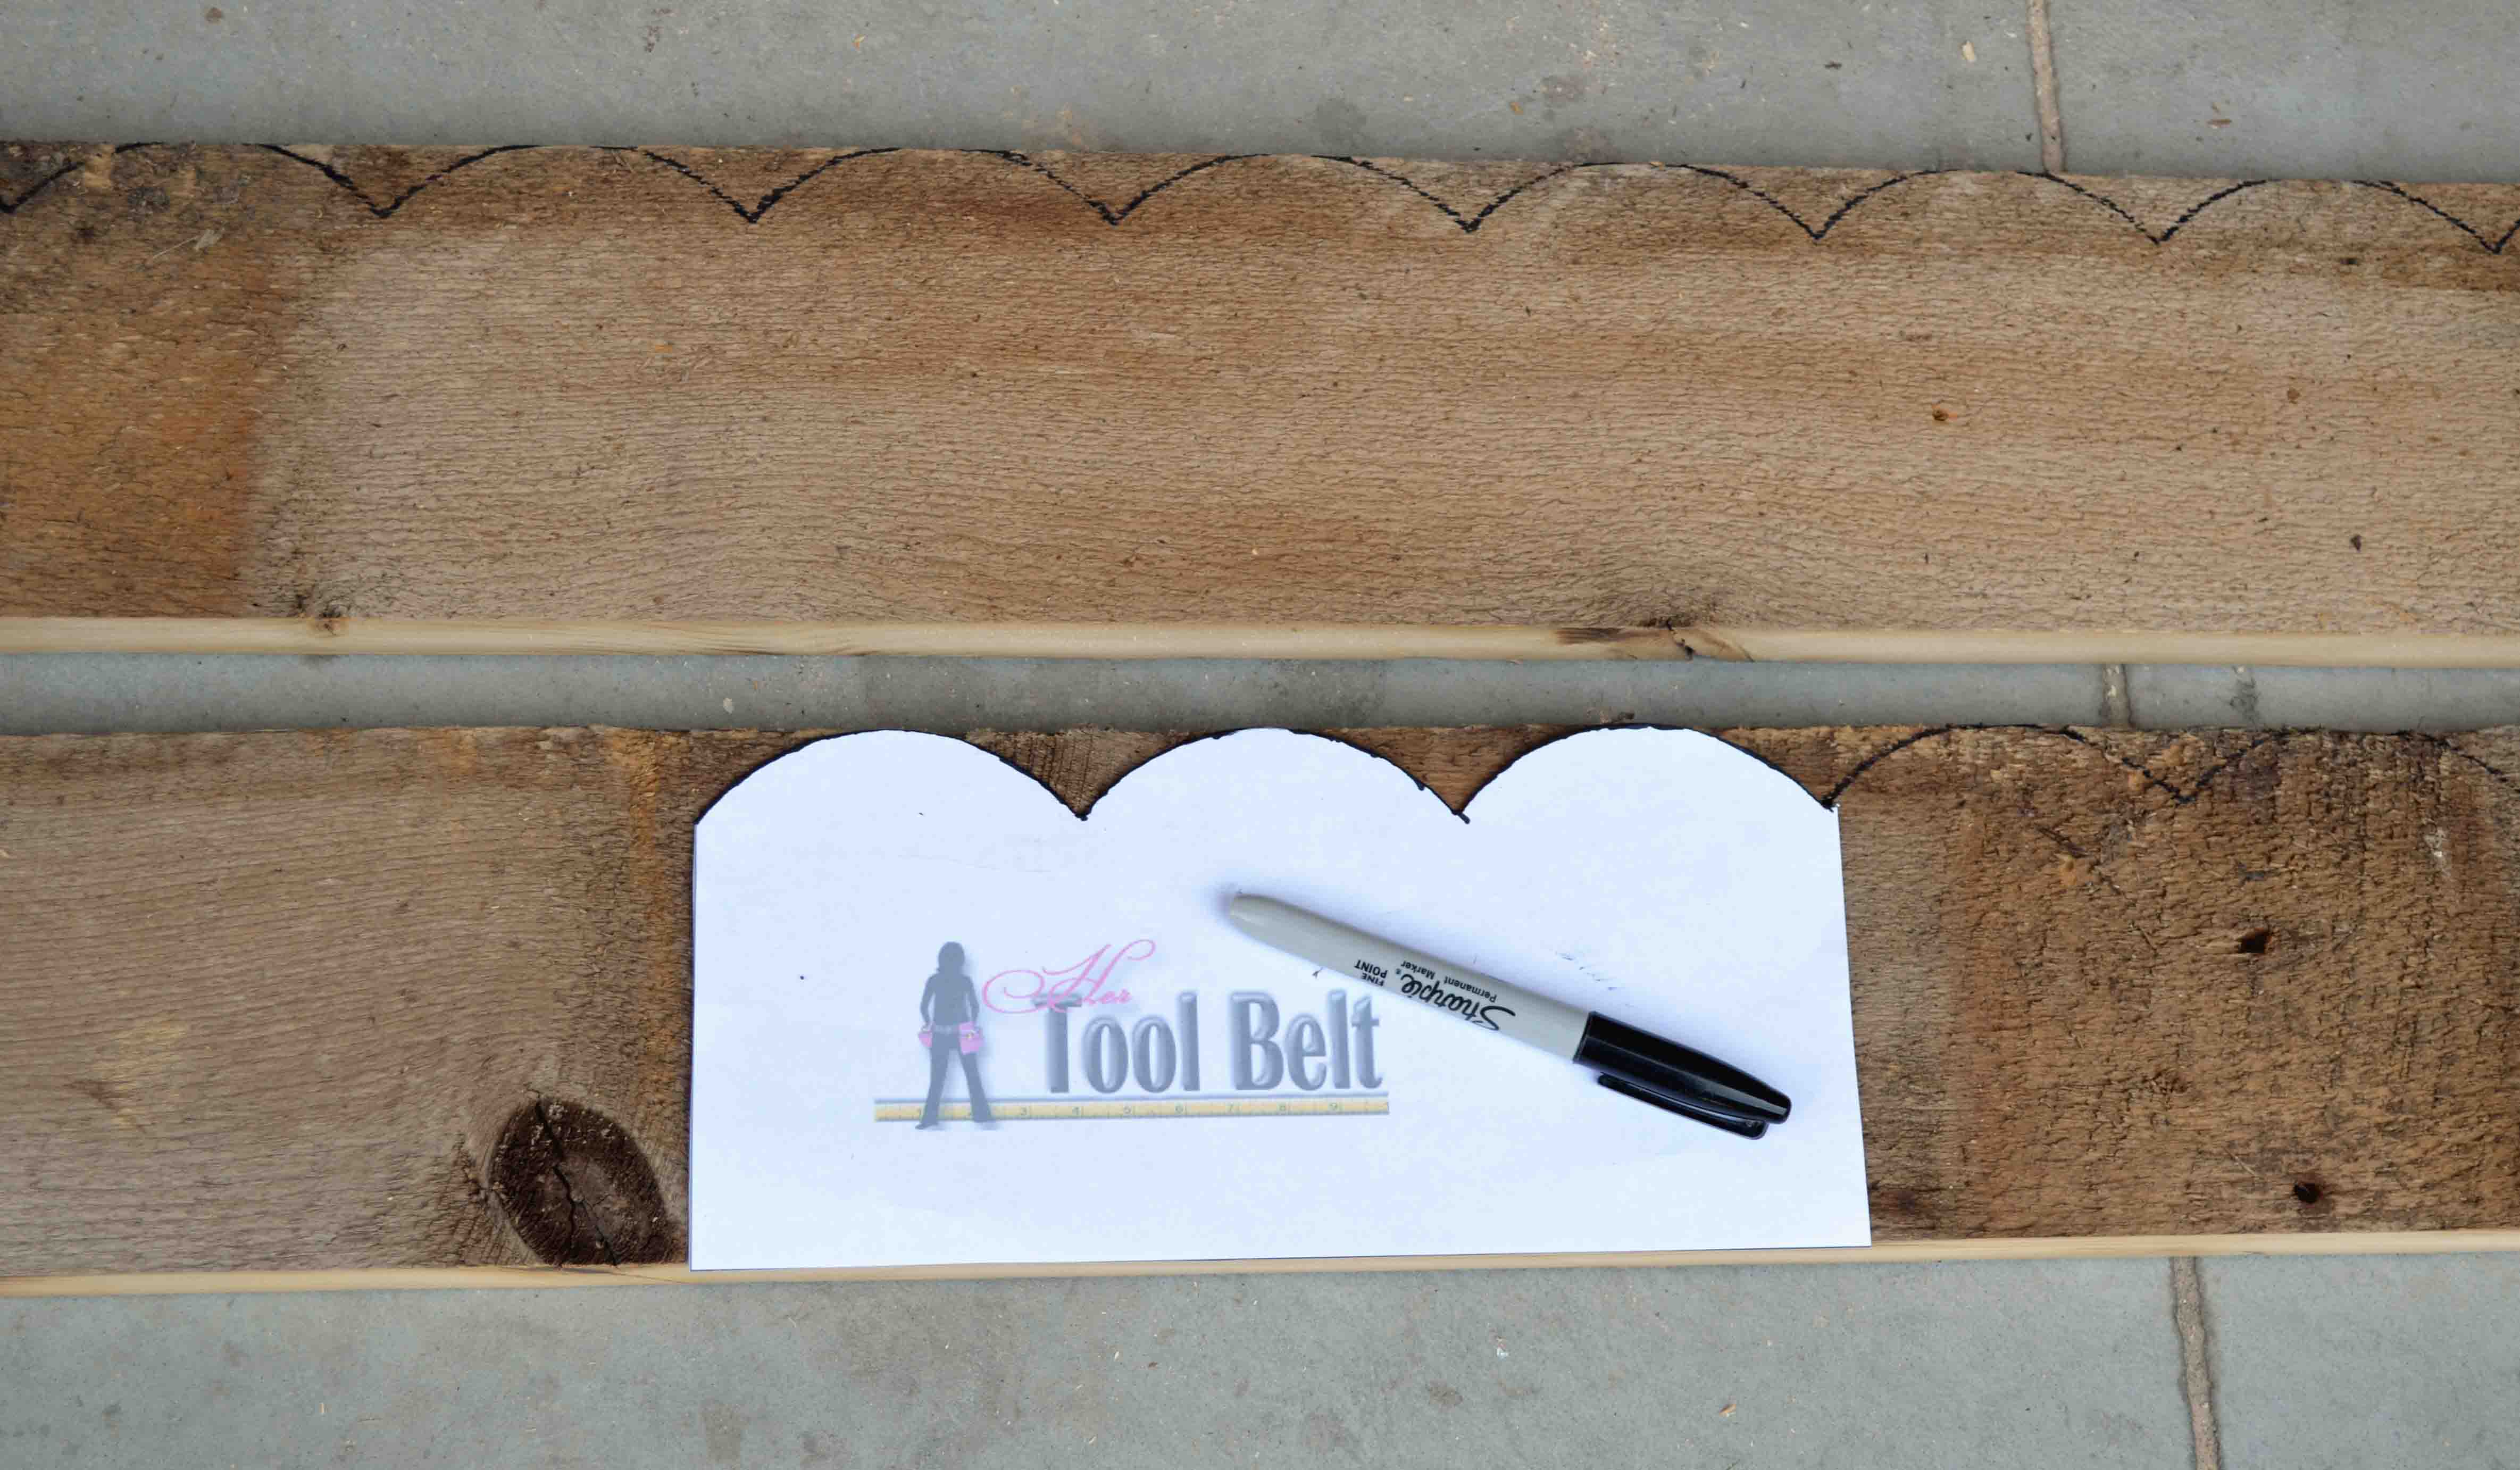
Use a band saw, jig saw or scroll saw to cut out the scallop design (I used a band saw). Sand the cut edges as necessary.
On the end pieces, if you want a curve, use a paint can to trace a curve. Cut out the curve and sand if needed.
Step 2
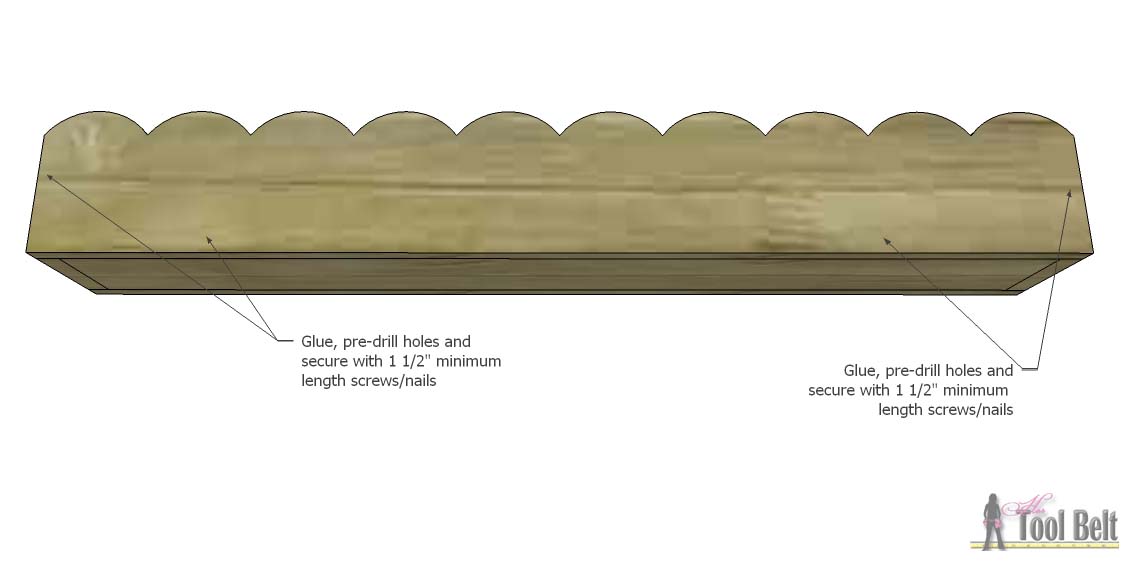
Pre-drill countersink holes along the bottom of the ends. Use wood glue and 1 1/2″ minimum screws/nails to attach the ends to the bottom piece.

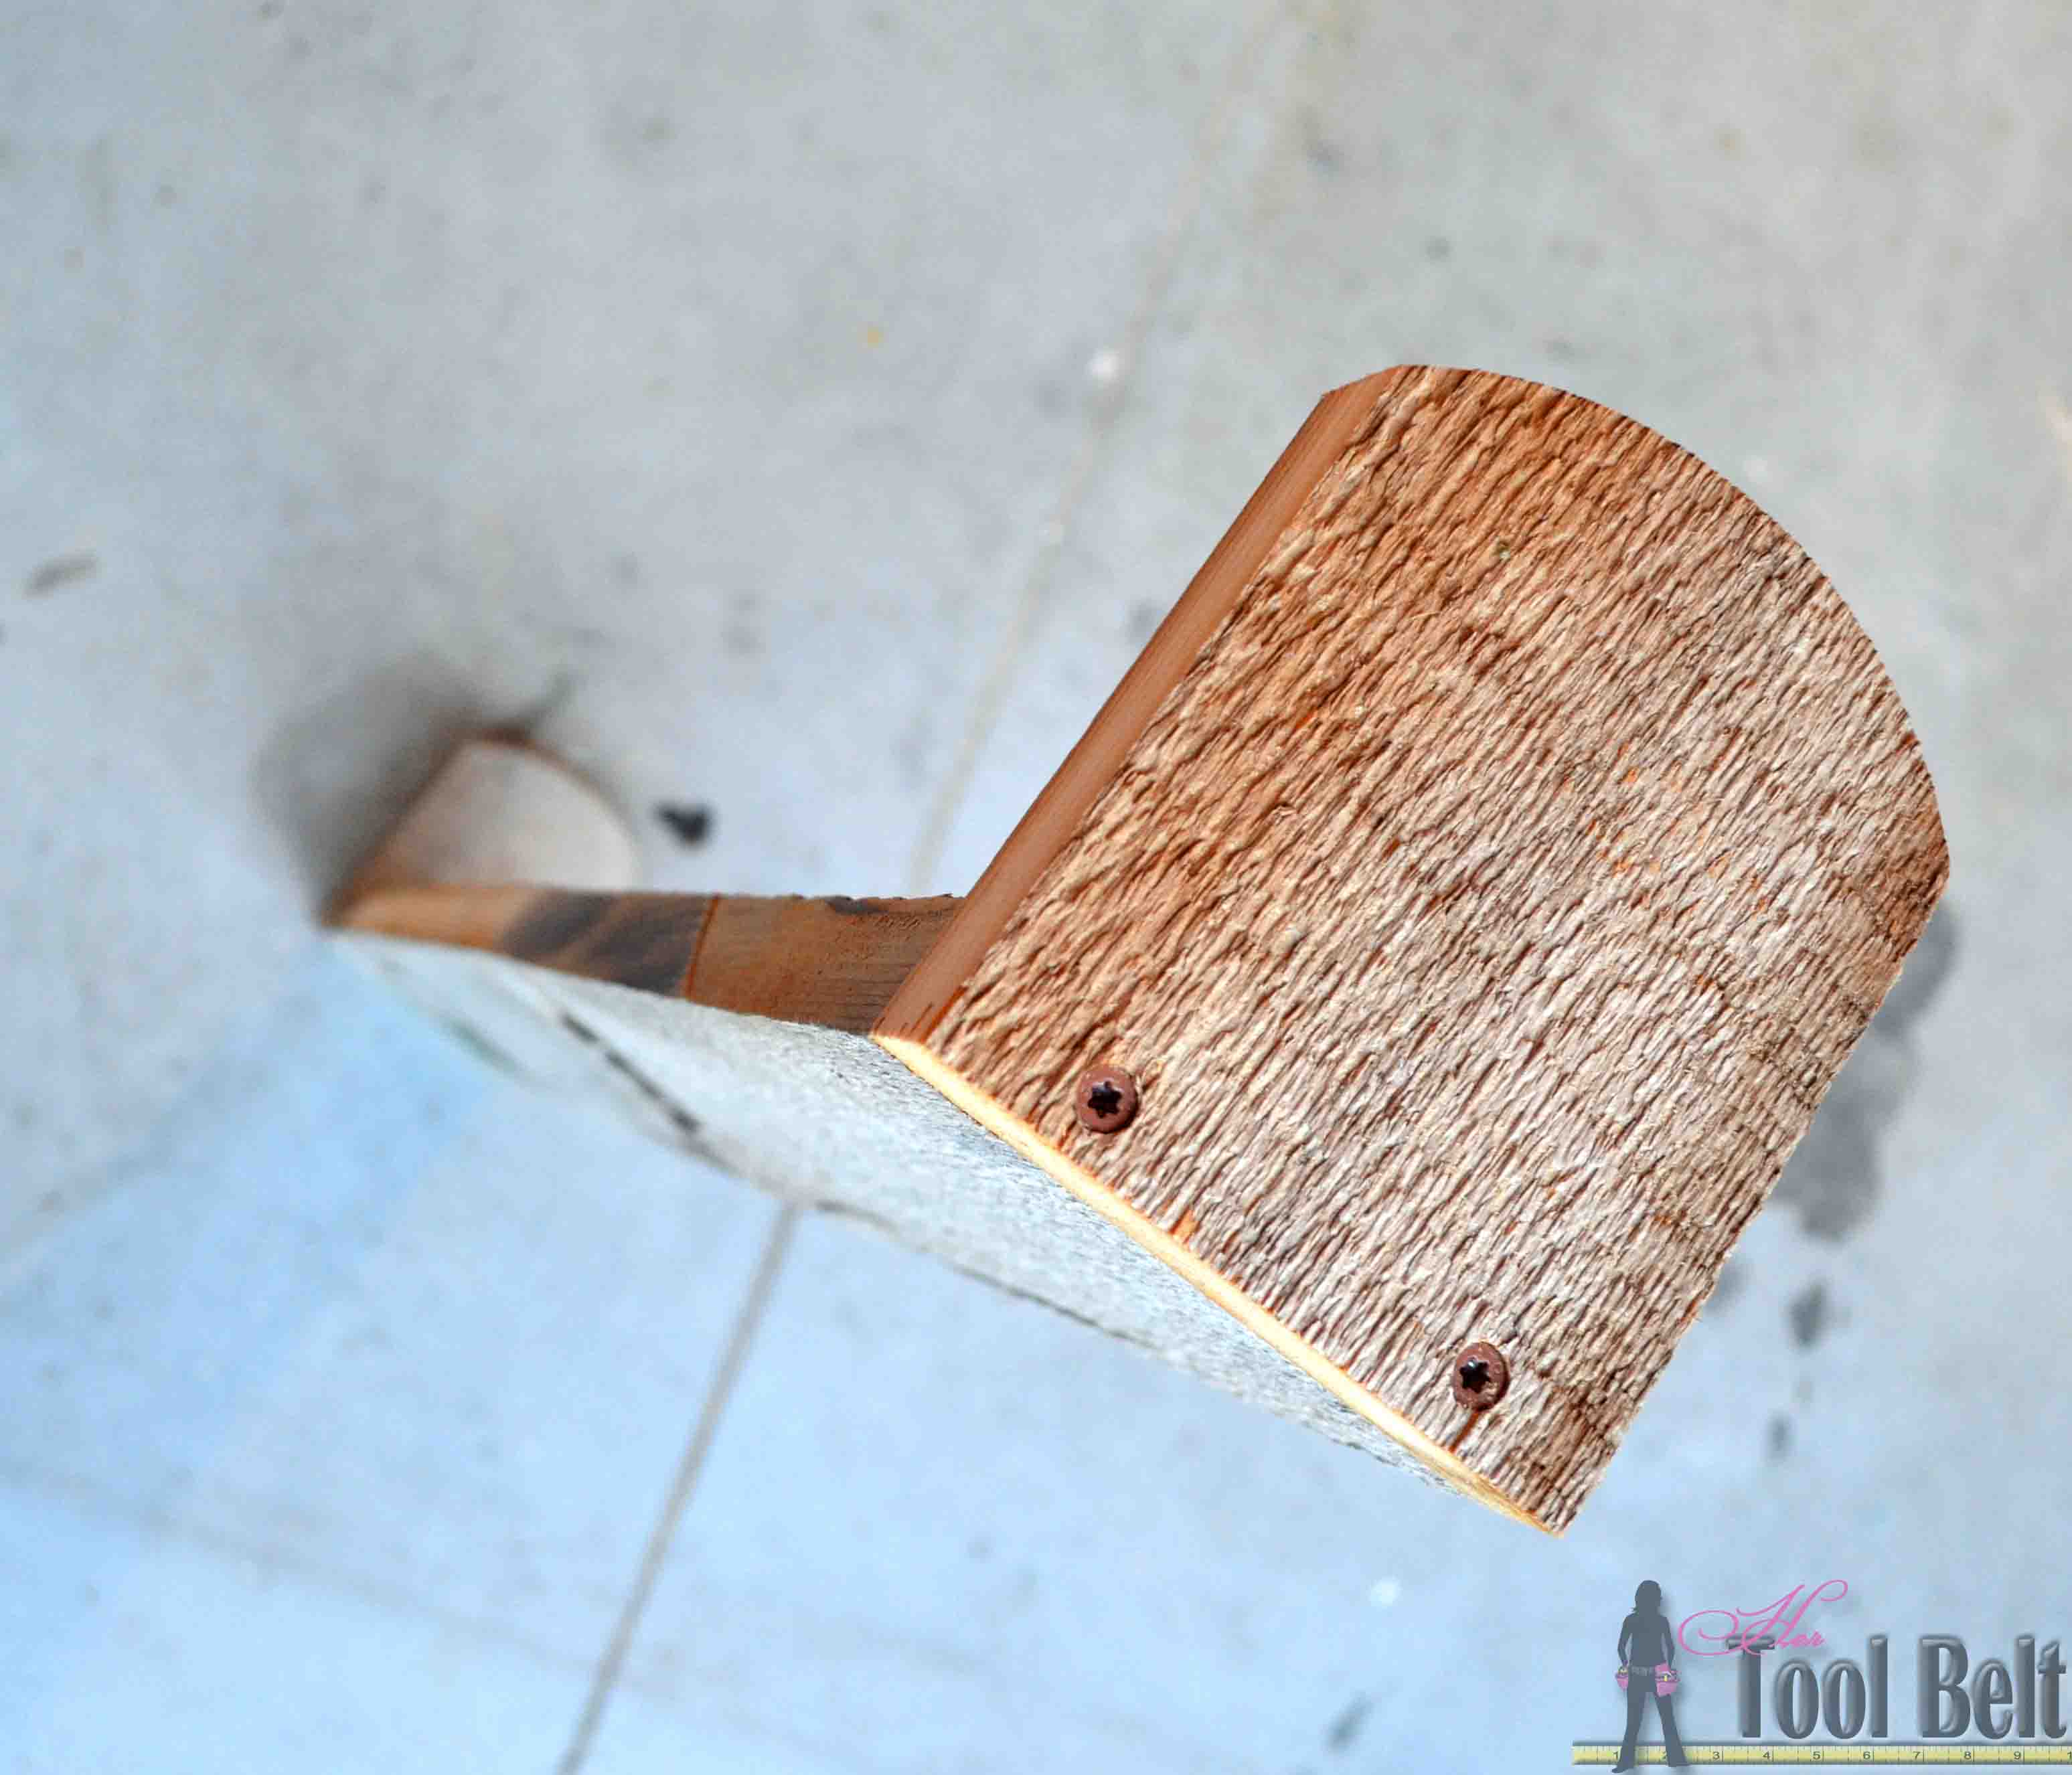
Pre-drill countersink holes along the bottom and sides of the long scalloped pieces. Use wood glue and 1 1/2″ minimum screws/nails to attach the long sides to the bottom/end pieces.
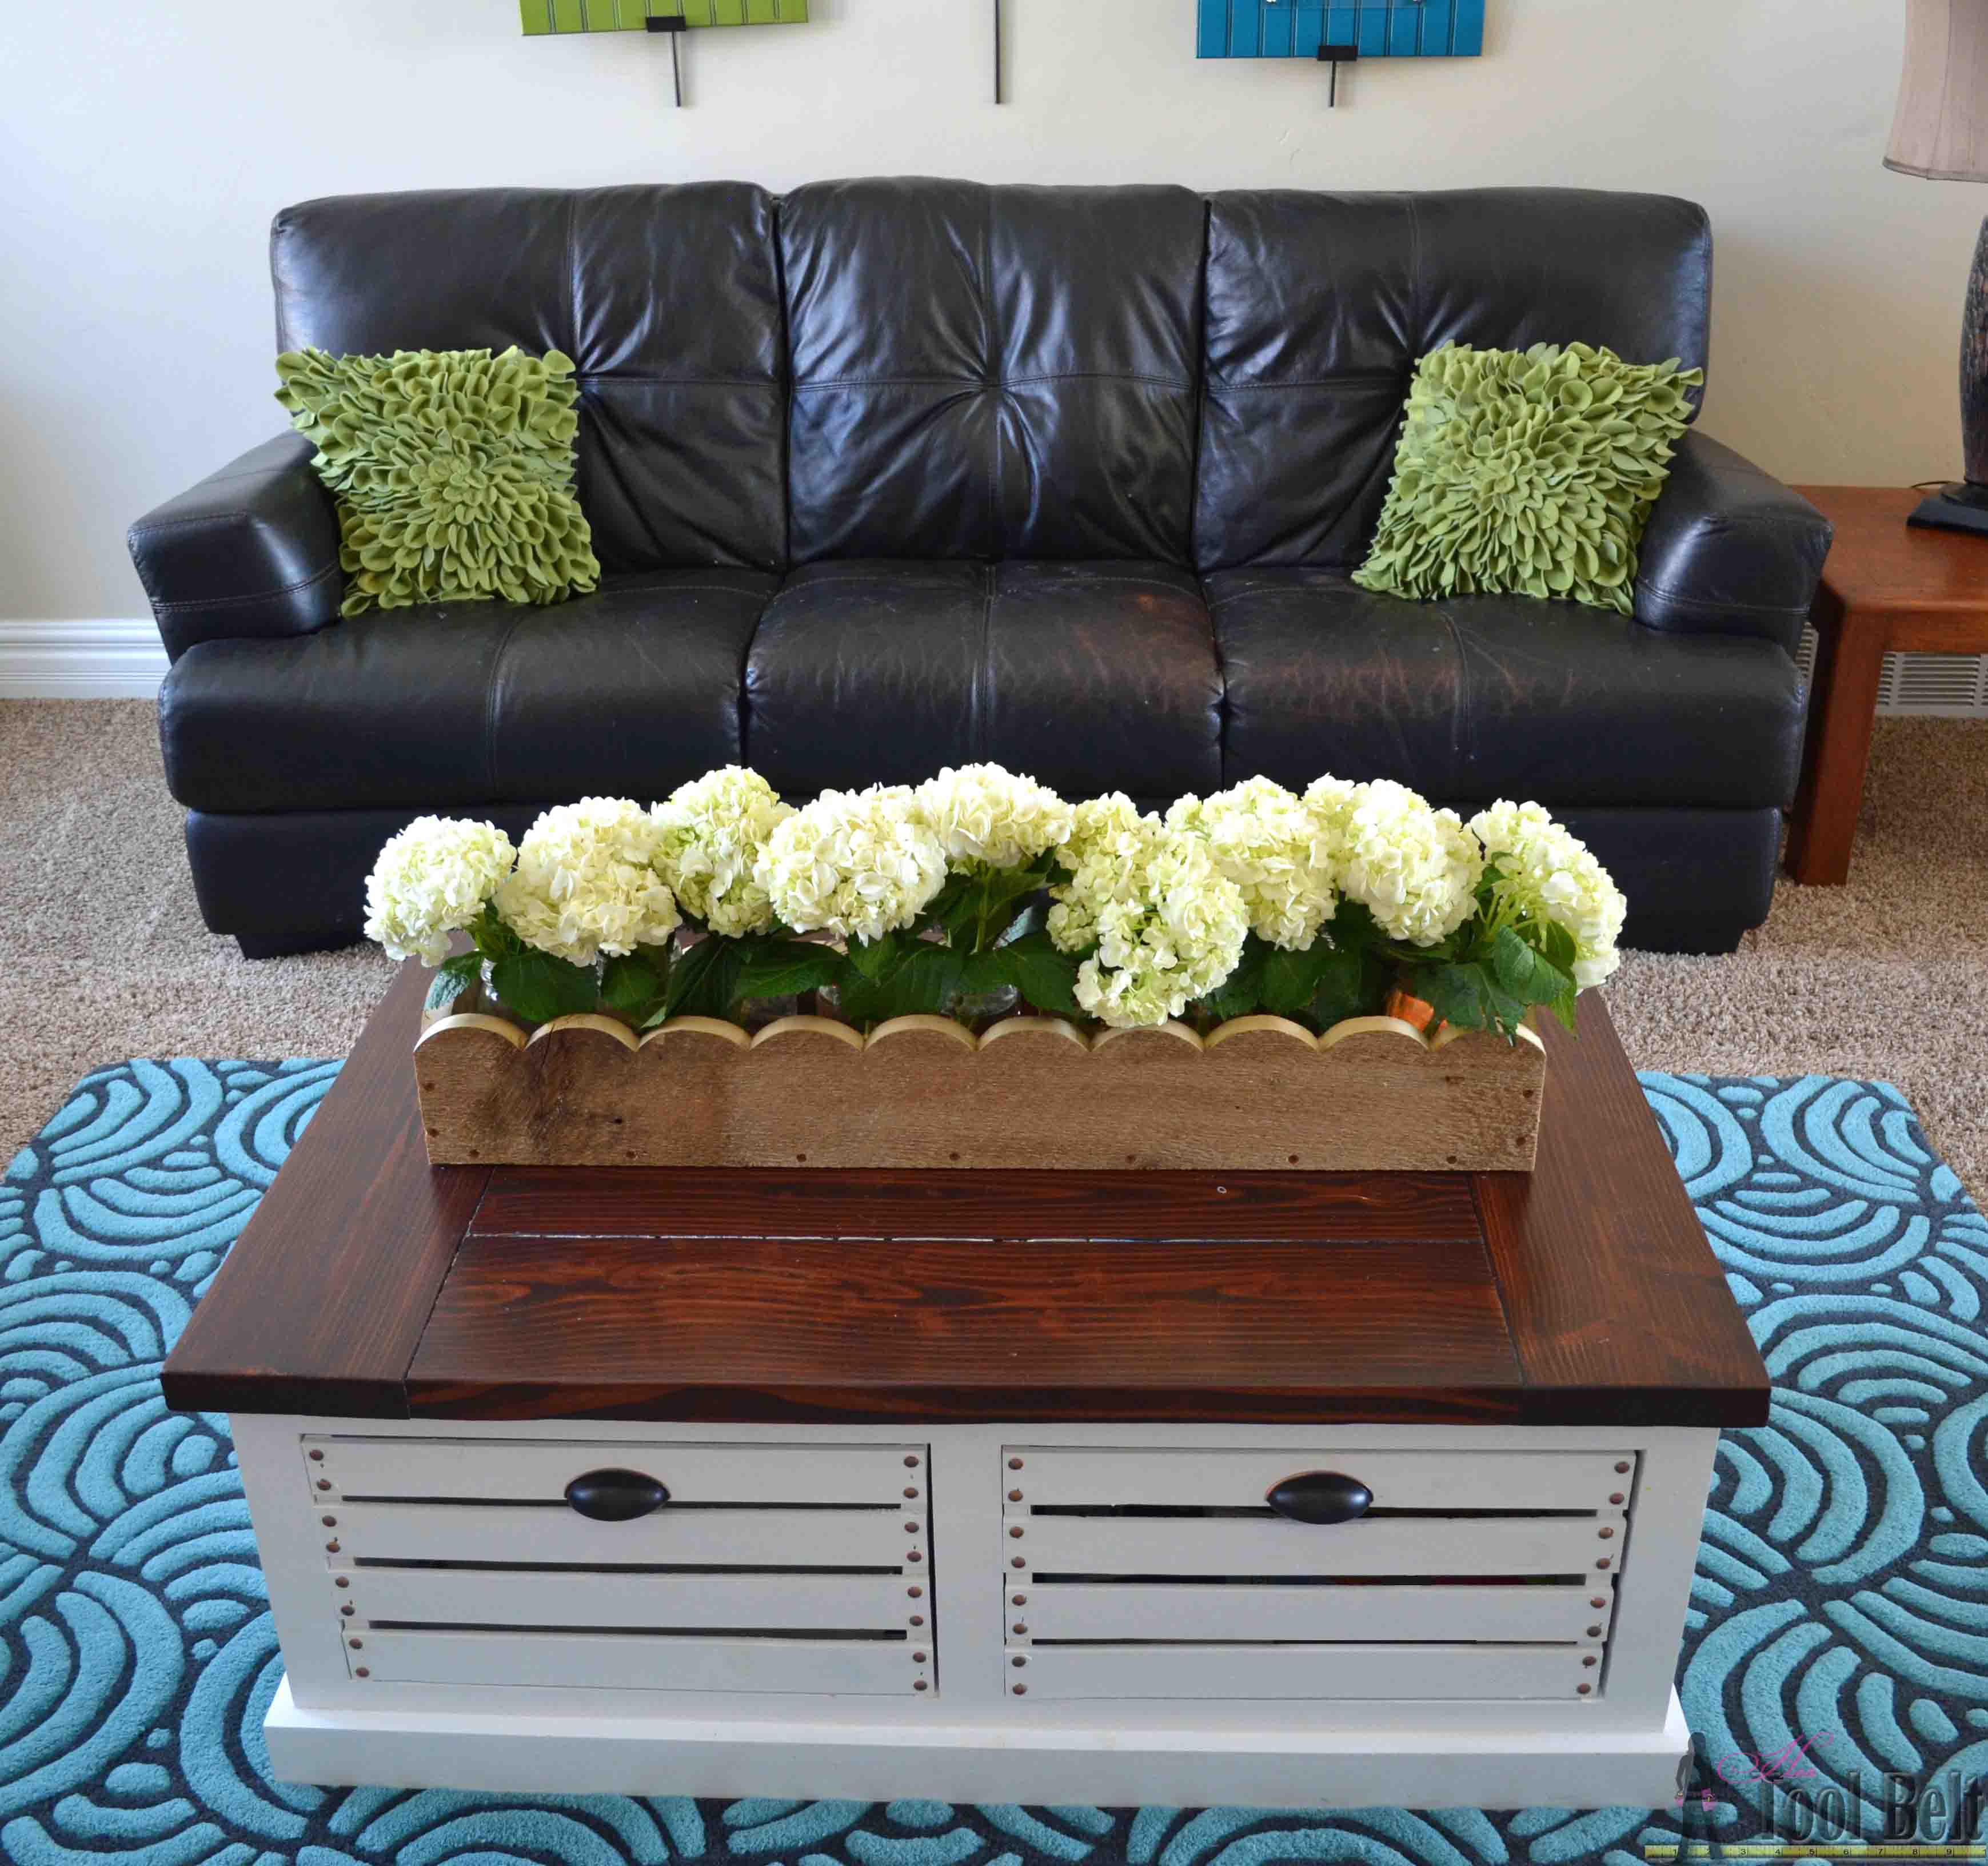
Add mason jars with flowers and you have a cute rustic centerpiece. This planter box will hold 9 pint jars.
If you’re looking for a coffee table with tons of storage, check out my free plans for this table.
![]()
Wasn’t this a performance you want to duplicate at home? I know I will be doing my best to duplicate that beautiful scalloped centerpiece. Stay tuned to more Rockstar DIY series.

Here is a list of the project performances so far:
Pin for later!

This is a great design. Where on earth is the scallop pattern to download? I can’t seem to find it here on the page. Yes I miss obvious things all the bloody time so I won’t be offended if you wonder if Im blind. 😉
Amie, sorry about that. I’m not sure why it is no longer linked. I fixed it, but here’s a link to the file: https://prettyhandygirl.com/wp-content/uploads/2016/05/Scralloped-planter-box-profile.pdf
Totally love it! Thanks for the detailed instructions, I plan on making one.
Could you paint these? Would you need to sand them or use different wood to do so? They look awesome! Thanks.
Thank you Chelsea. You can definitely paint these. If you want a smooth finish, I’d use new wood. If you like the distressed look, the rough wood painted then sanded works great.