Faux Zinc Painted Chalkboard File Cabinet

Faux Zinc Painted Chalkboard File Cabinet
This summer I was thrifting with a few friends and stumbled across an ugly cabinet at the Goodwill. The metal chest had extra wide and deep storage, but the worst colors imaginable! The hot pink and mint green were disguising the true potential of the chest, but like a color-blind dog, I was able to see beyond its garish appearance. In my mind, I pictured a vintage metal cabinet with a faux zinc side and chalkboard drawer fronts.

I scooped it up and brought it home. Then the poor chest sat in our garage for months and months until I had a chance to work a little spray paint magic and turned it into….this thing of beauty:

Yes, that is the same chest of drawers! You could do the same transformation.
Materials:
(I’ve included affiliate links for your convenience. I earn a small percentage from a purchase using these links. There is no additional cost to you. You can read more about affiliate links here.)
- Gray Automotive primer
- Rust-oleum Black chalkboard spray paint
- Rust-oleum metallic hammered metal spray paint (silver)
- Craft paper
- Painter’s Tape
- Rubber gloves
- White chalk
Instructions:
Clean off the drawers. Remove any dirt or debris (I actually had to use a little Goo Gone to get rid of some sticky residue. But, lemon essential oil will also work for this task.)

Remove the drawers from the chest. Tape over the drawer glides and slides. Mask off the drawer sides and insides by covering the drawers with tape and craft paper, leaving only the drawer fronts exposed.

Spray paint the chest and drawers with automotive primer. (I prefer the automotive primer because it sticks to metal and can withstand a lot of abuse.) Let it dry.

Spray paint the drawers with chalkboard paint. (Use three fine coats of paint instead of one or two heavy coats.) Set them aside to dry.
Adding a Faux Zinc Texture:
This is the most exciting part of the tutorial. I created this technique by trial and error and I’m excited by how well this method works for creating a faux zinc texture.

Getting a faux zinc texture is really easy. Just have some gloves on and use a crumpled up piece of craft paper. (A loose crumple works best.)

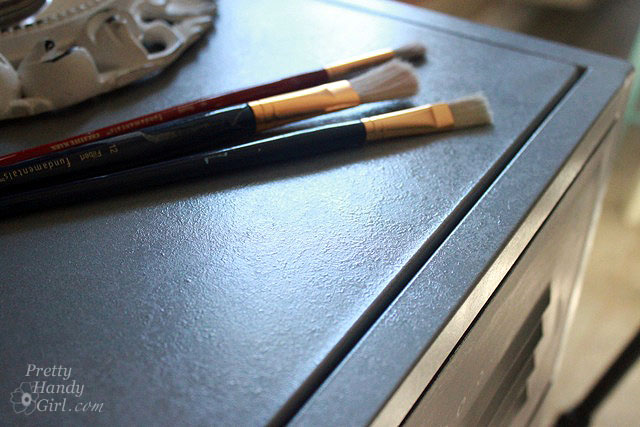
Spray paint the chest with a thick coat of the hammered silver spray paint, (but not so thick that it runs). Let the paint get tacky by waiting a few seconds. Then use the crumpled piece of craft paper to blot into the wet paint.

Work in small 1 foot sections and pounce the paper a few times. (Too much pouncing and you’ll lose the large textured pattern.)
Let the cabinet dry thoroughly.
Insert the chalkboard drawers back into the cabinet frame.

Add chalkboard art to your drawer fronts.

This metal chest of drawers is the perfect size for my large tablets of art paper.

The cabinet has a wonderful texture now.
I have the flexibility to move my art supplies around and just change the chalkboard label.

Did I mention this little chest is the perfect height to rest my palette on while painting.
I’m soooo thrilled with the results!


My stepdaughter and I are going to frame out some huge mirrors as statement pieces – I could use the gift card for lumber and supplies!
Cute chest! It might be easier to list the projects I have actually completed! 😉 I have a couple of end tables that really need to be refinished. I would use the gift card for those!
Oh wow! If I won I’d be able to revamp the laundry room! Oh wait, I meant the powder room. No, I meant the kitchen. Oh heck with $100.00 I bet I could do all 3!
I actually have been thinking about doing some industrial style projects in my home and this is exactly the texture I needed for a bunch a shelf brackets that I have. I want to line my pantry walls with wooden shelves and textured brackets. I have a butlers pantry so I think it would kinda fantastic. With 5 kids, I need as much storage as possible for spices, snacks, and of course pretty things!!!
Love the file cabinet – especially the chalkboard part. The faux zinc technique is really great – will have to try it. Would love to win the Lowe’s card to aid in finishing our master bath. I stripped the wallpaper off this week and it’s looking pretty sad at this stage…..
My kitchen table is in dire need of some TLC. Funds would help! The ugly green paint is chipping and it’s begging for a new paint job! I’m thinking chalk blue or something teal. 🙂
Redo a dresser for mom!!!
New tile for my shower!! The plastic panels are cracked and we have duct tape on the cracks ! So redneck!
Oh man.. I’d LOVE to win this. A Lowes gift card or Home Depot card is on my Christmas list- seriously. We just moved into a new house a year and half ago and I am SO ready to tackle the kitchen- there’s lame half wallpaper of a picket fence and wildflower garden with a border that matches.. that needs to go. And cheap vinyl flooring that is just laying there, not glued down. I’d like to be able to redo the cabinets as well. This would REALLY help me out!
shanna.u at gmail dot com
a dresser that I started to repaint, but didn’t prime it well enough on the sides and top so the spray paint job looks awful 🙁 I need to re-sand, re-prime, and re-paint it….
i live overseas so i dont want to win:):) but i do want to tell u it is fantastic job and i also want to see the pic of the wall behind it…it seems wonderful as well. we just did something wild with our wall that is based on the same concept–but very different. I will be posting it on my fb page if u r interesting in seeing it sometime later
https://www.facebook.com/heder21
Svietka, I love your hut! You can see more about my scrap wall here: https://prettyhandygirl.com/2012/10/how-to-install-a-scrap-wood-wall.html
i showed u mine after u showed me yours:):) so cool to exchange walls:):) my hubby did all the work and i hope u saw the inside of the hut where he did the whole kitchen and another wall in sitting area in same style. I m thinking i should paint the wood planks various colors (like u did) . Since all the wood is various sizes and depth i m hesitating so as not to overwhelm the look with “too much”.
I have so many projects in my mind, but time is always so short. The one highest on my list right now is an old desk I want to paint to a glossy chocolate-brown color and rusted hardware on it to be painted and turned to bright silver. Hope I win!
Oh wait! I want to win hahaha!!!! Right now we are working on finishing our bathroom…on a budget. Let me tell you bathroom and budget do not belong in the same sentence!!!!
Holy moley girl, that is awesome!
Our sixty year old kitchen cabinets need HELP. We could use that money for stripper, stain, and new hardware (okay, maybe not all of these things).
Not only do I love your cabinet, but my husband was looking over my shoulder and was amazed! It looks fabulous.