
Easy Wood Crate Nightstand (and Bookshelf)
 Easy Wood Crate Nightstand (and Bookshelf)
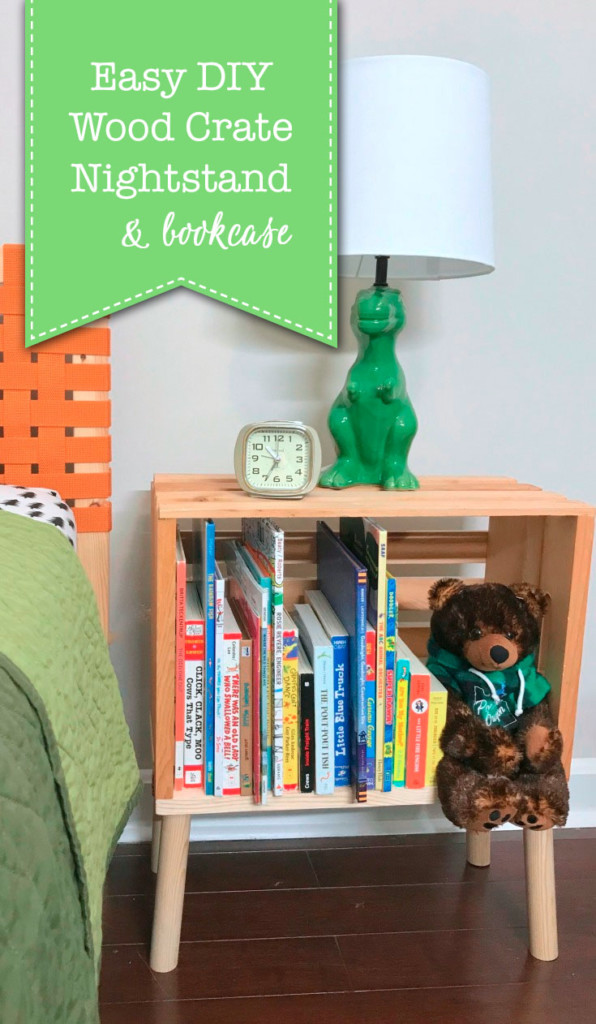
I’ve been using a wood crate as a nightstand for my son since he moved to his big-boy bed two years ago. Last week, I decided it was time to attach legs and turn this simple crate into a legit nightstand. I’m a big believer in low-cost, DIY furniture for young kids for all of the obvious reasons; they use anything and everything as race car tracks, and they seem to have magical powers that turn normal stickers into super adhesive, impossible-to-remove furniture tattoos. A cheap wood crate is the perfect price point for a 4-year-old’s nightstand in my opinion. Because this nightstand is made from a wood crate, it has the added benefit of doubling as a bookshelf. Below is a quick tutorial to show you how to make your own Easy Wood Crate Nightstand and Bookshelf! You can also watch the step-by-step video.
Materials:
(I’ve included affiliate links for your convenience. I earn a small percentage from a purchase using these links. There is no additional cost to you. You can read more about affiliate links here.)

- Drill
- Screwdriver
- Miter saw
- Tape measure
- 18 inch wood crate (also available at hardware and craft stores)
- 1″ x 10″ pine board (wider or thinner depending on the size of your crate)
- Furniture legs
- Angled plates
Alternatively, get the materials below to make your own legs.
Materials to make your own legs:
- 2 feet of 1 ¼” thick wooden dowel
- 4 Hanger bolts, 1 ½” long
- Wood glue
Instructions:
If you want to simplify the process, purchase pre-made furniture legs and skip ahead to step 2.
I decided to make my own legs because I had a leftover closet rod that needed to be used. After completing this project, I decided not to recommend making your own legs for a few reasons:
- It is the most difficult part of the build and needs to be more precise than wood crate furniture should require.
- Legs and angled plates aren’t very expensive.
- The metal plates allow you to screw and unscrew your legs. I glued mine for added sturdiness, which means I can’t adjust them.
With that said, making your own legs is cheap and absolutely possible. If you’re up for the challenge, here’s how to make them.
Step 1: How to make your own furniture legs
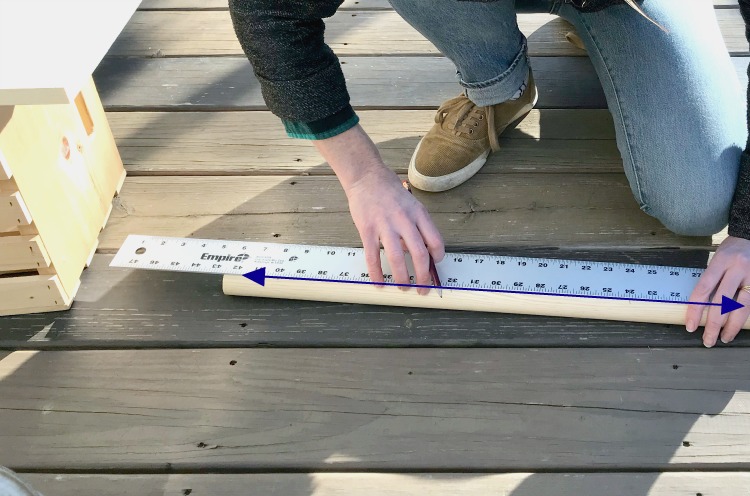
Draw a straight line lengthwise down the center of your dowel. This will make it easier to line up your bevel cuts on your miter saw.
.
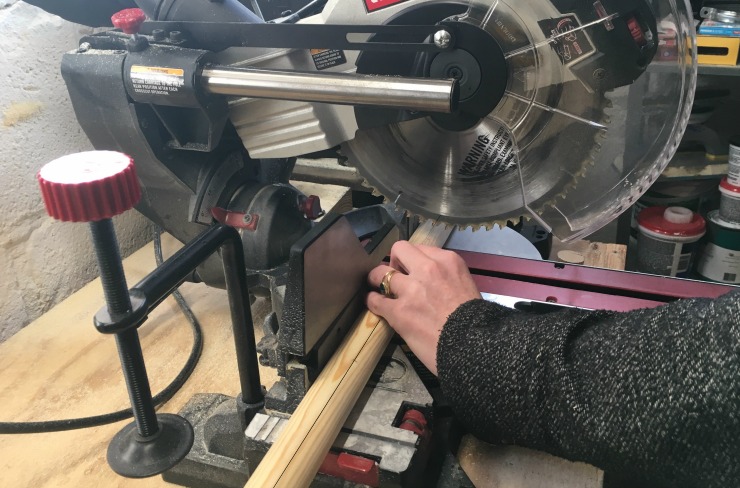
Measure and mark 8 inches (or the height you choose) on all four legs. Set your miter saw bevel scale to 10˚ for a slightly angled look. New to using a miter saw? Check out this Miter Saw Tool Tutorial. To ensure the legs stand flat, make your cuts as exact as possible. Keep the line you drew facing up as you slide the dowel into place for each cut. This is important to ensure the legs stand flat.
Once the legs are cut, stand them up and drill into the tops at a 90˚ angle as best you can. Use pliers to screw in the hanger bolts.
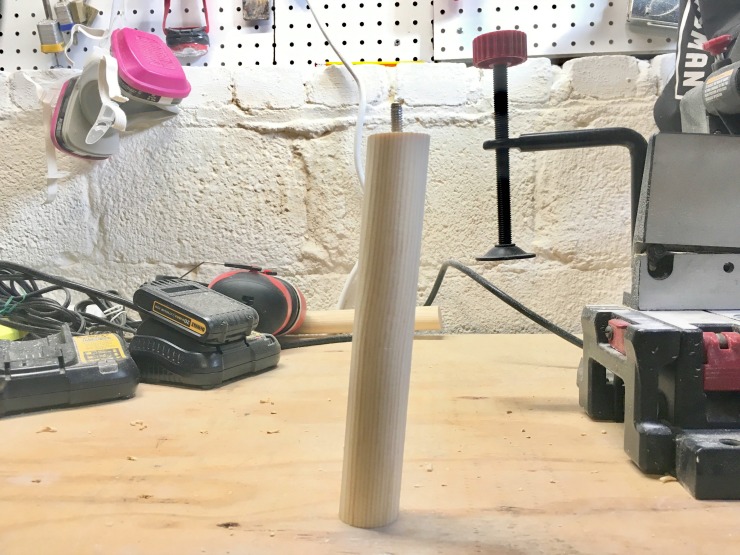
When you are done, all four legs should look like this:

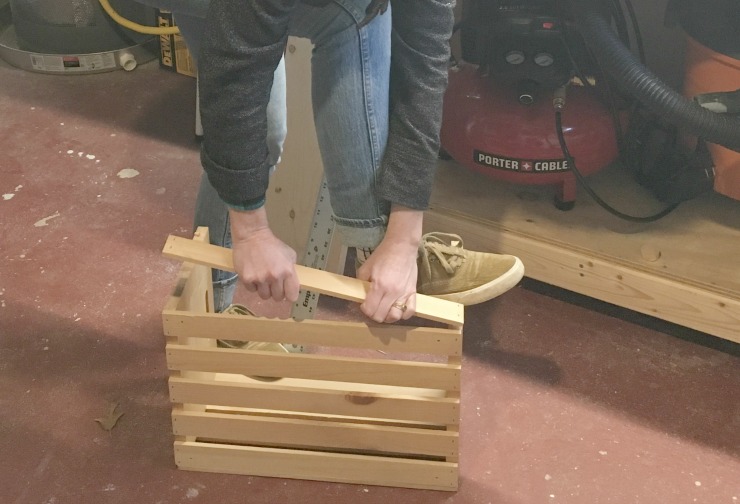
Step 2: Crate Deconstruction
Remove the slats from one of the long sides of the crate to prepare it to become the bottom of your nightstand. Most crate slats are stapled on. Simply set the crate on the ground, put your foot on top, and pull those babies off. It’s easy and you’ll feel super strong!
Step 3: Attaching the Furniture Legs
Measure the width of your crate from side to side (18 inches is fairly standard for the width.) Cut your 1 x 10 to fit the bottom of the crate.
Attach the legs to the 1 x 10. If you bought legs and angled plates, this is easy. Just follow the instructions on the kit. If you made your own like I did, measure 1 inch x 1 inch from each corner.
![]()
Make sure your drill bit is the same size (or slightly smaller) than the bolts. Put a small piece of tape on your drill bit the depth you want to drill. This will keep you from drilling completely through the base.
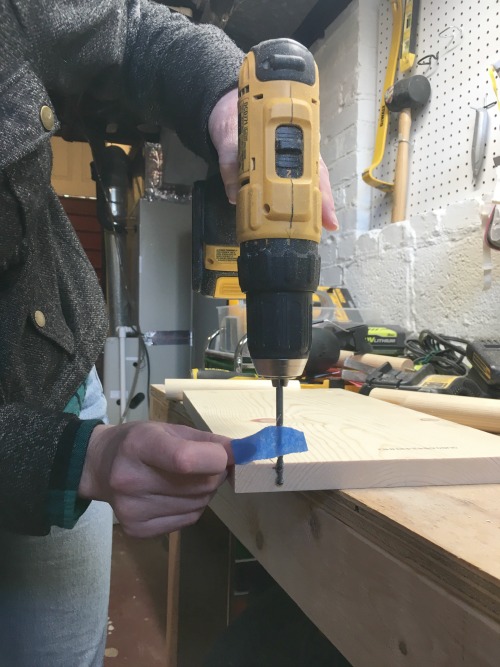
Drill in each corner at 90 degrees, stopping when the tape hits the base.
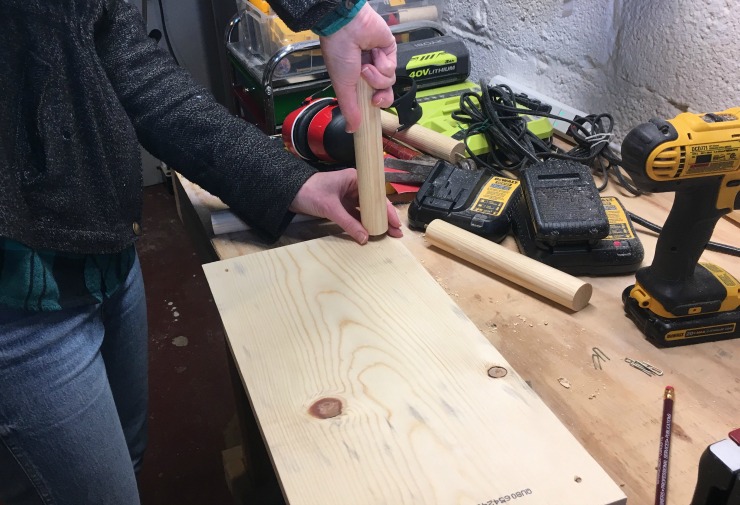
Add a bit of wood glue to the top of the leg and screw it into the base (making sure the legs angle out.)
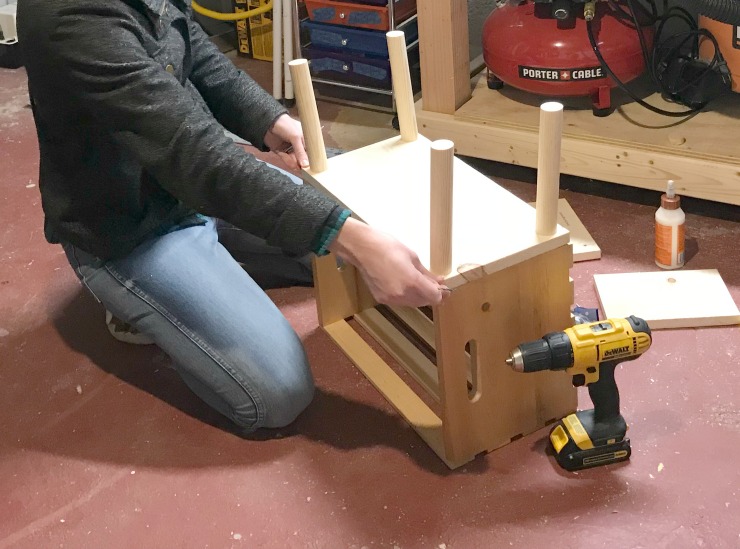
Step 4: Attaching the base to the crate
Flip your crate over and attach the base to the open side of the crate. Pre-drill holes to prevent splitting, then screw in four wood screws.
Step 5: Sand and Finish
Sand lightly. Clean off any sawdust, then paint or leave unpainted.
This is a quick and easy project that adds bedside functionality to a kids room or an adult room too!
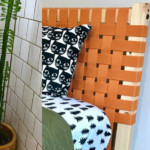
If you are interested in making the woven headboard pictured here, visit me at the Unprofessional to see the headboard tutorial and video. Thanks for reading!

In the meantime, be sure to check out other simple build projects here, like these cute DIY Rolling Storage Seats!
 ~ Discover more Tutorials from Lara ~
![]()
 Hi! I’m Lara, the creator of The Unprofessional blog and YouTube channel. I am an aspiring handy-woman with little to no experience building, tiling, landscaping, demolishing, and what have you. I’ve drilled holes in the wrong places, cut on the wrong lines and stripped more screws than I care to count. And yet, I’m on my way to customizing my home, project by project. I believe you can do pretty much anything with a few good tools, a stack of wood and a half-baked
idea.
I like to find challenges and solve them with my miter saw. When my 3-year-old son complained that he couldn’t reach the picnic table, I designed an easy-to-build folding booster seat perfect for camping trips and beer gardens. When the low ceilings in my cape cod wouldn’t accommodate a bulky barn door, I found an alternative approach to turn any interior door into a space-saving barn door. I love to share these solutions with others in hopes that the empowerment and love of power
tools spreads.
You can connect with me on Instagram, YouTube and Pinterest.
This adorable!
Would I be able to leave the slats attached & attach the 1”x10” to the crate left fully in tact?
CUTE !!!!!