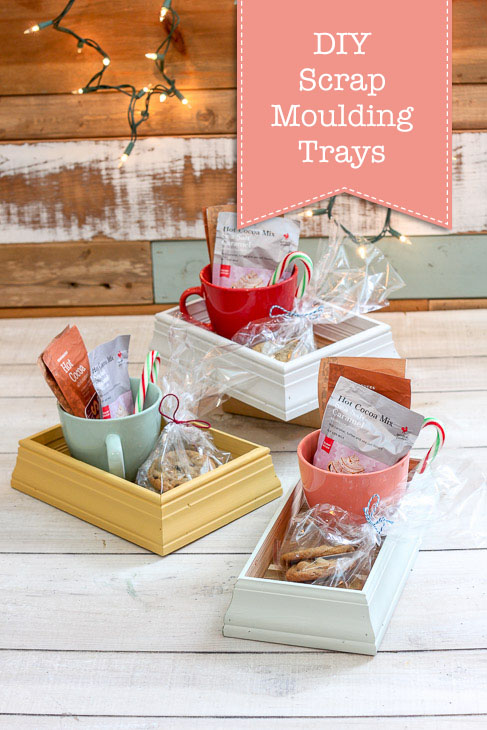
DIY Scrap Moulding Trays
Are you on a purge mission to get rid of excess stuff? Me too! How about your workshop? Do you have scrap wood you need to get rid of? Yes? Perfect. Today I have a simple tutorial to show you how to make DIY Scrap Moulding Trays.
DIY Scrap Molding Trays
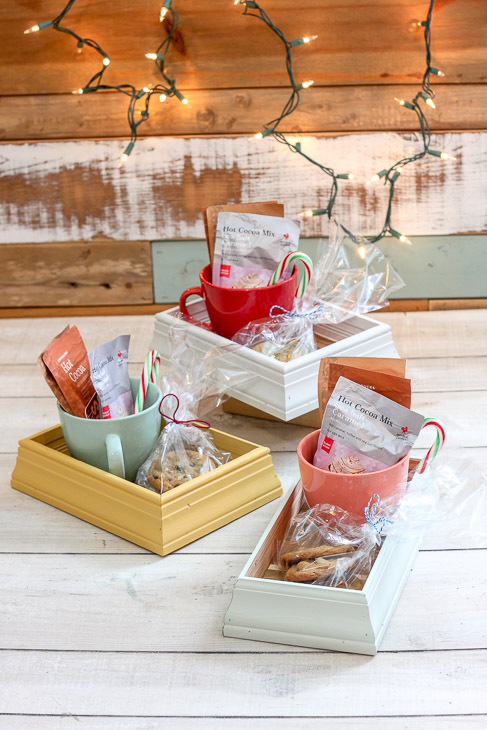
These trays are really cute and can be given as gifts and used to corral things together. Honestly, they are now one of my favorite scrap wood projects!
Regardless of how you use these scrap molding trays, they are a great way to reuse materials.
Materials:
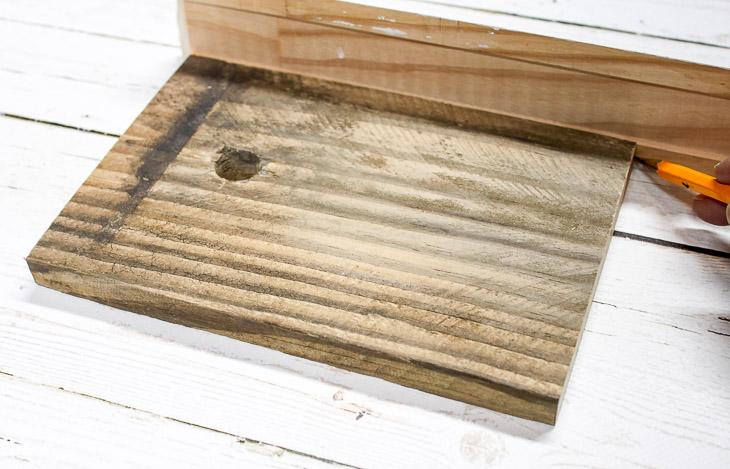
- Scrap 1″ board (cut to any size rectangle or square you like.)
- Door/Window casing
- Speed square
- Sandpaper
- Brad nailer
- Brad nails
- Wood Glue
- Fusion Mineral Paint
Optional: Clamps
Instructions:
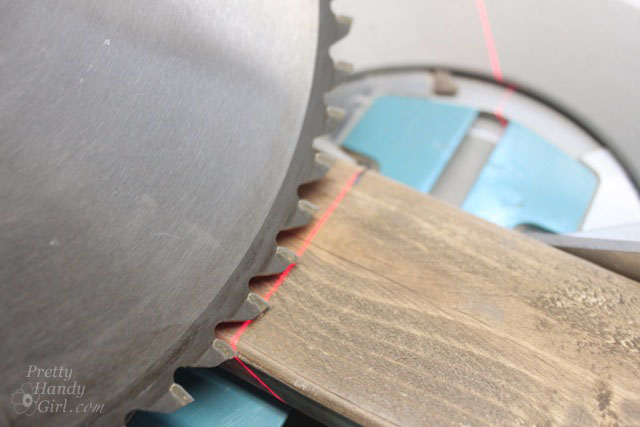
Cut a 45˚ angle into one end of your case molding (the longer side of the cut should be on the outside of the molding.) Never used a miter saw before? Watch this video tutorial to learn how to use a miter saw.
Line up the inner edge of the cut against one corner of your base wood. Mark the location of the other corner onto the molding.
Extend the line along the molding using a speed square.

Line up the mark with your saw blade and cut at a 45˚ angle.
Repeat for the remaining sides until you have four sides cut with all ends mitered to 45˚.
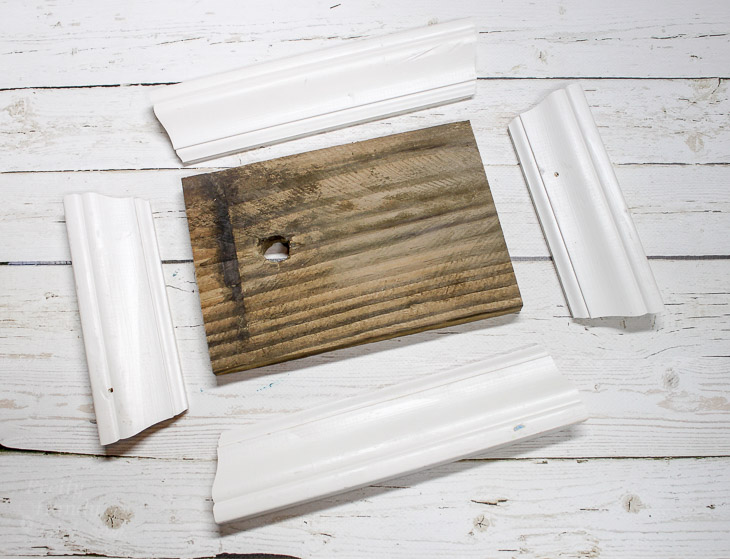
Test fit all the molding sides against the baseboard and make any adjustments as needed.
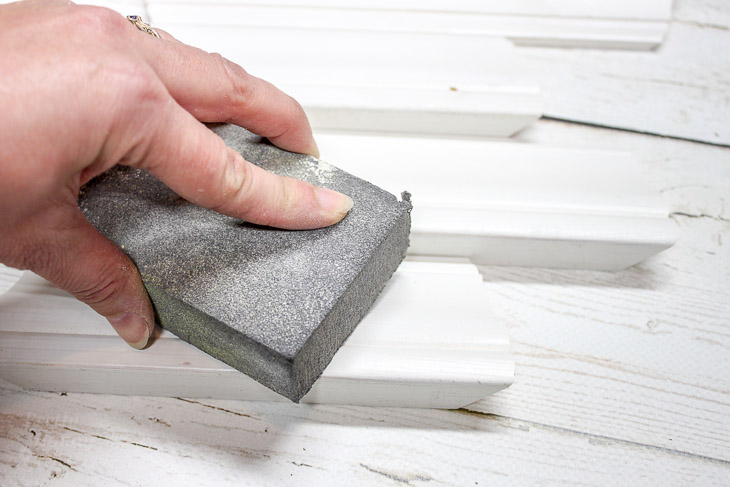
Sand any rough spots off with a sanding sponge.
Paint the molding your color of choice. I used a variety of Fusion paints. This is the first time I’ve used Fusion Mineral Paints, but it definitely won’t be the last! They go on smoothly and don’t require a primer. Plus, with a light sanding afterward the paint doesn’t feel chalky.

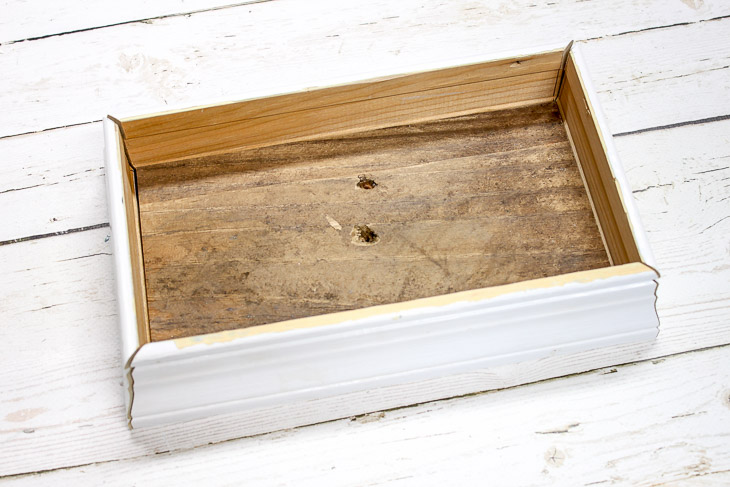
Squeeze wood glue onto the corners and bottom edge of the molding pieces.
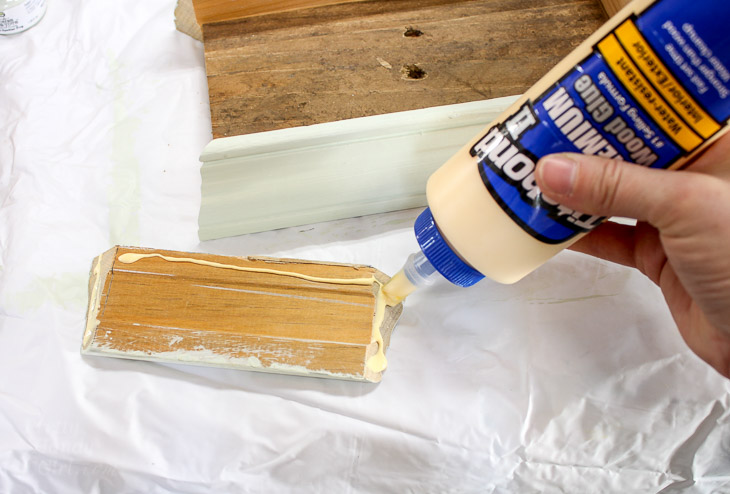
Set them in place around the base.
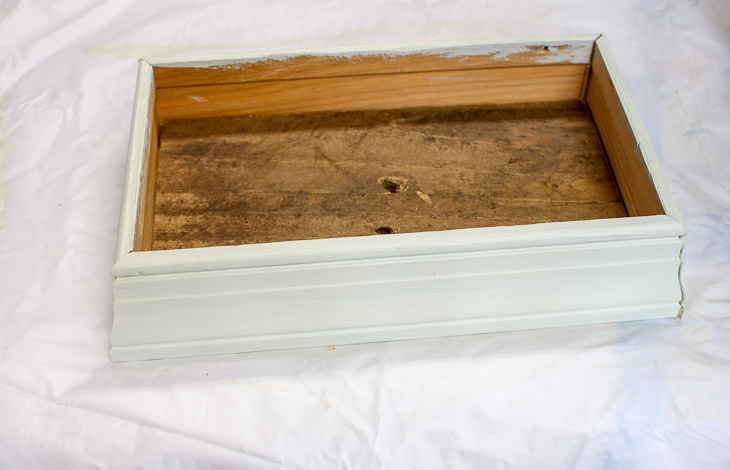
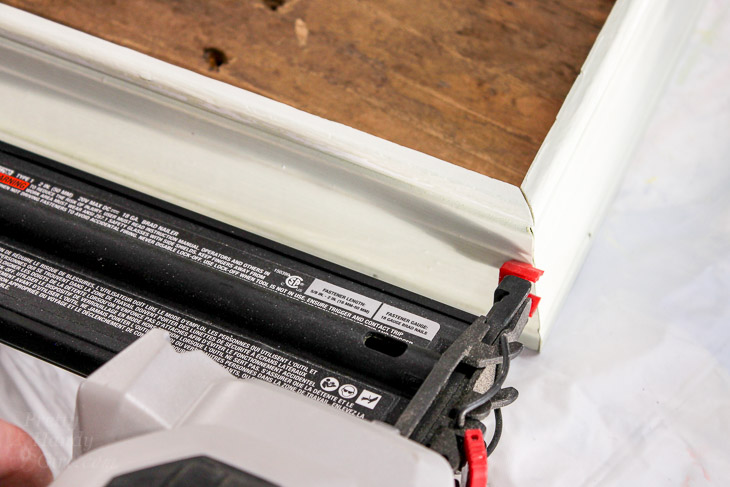
Nail 1 ¼” brad nails through the molding and into the base.
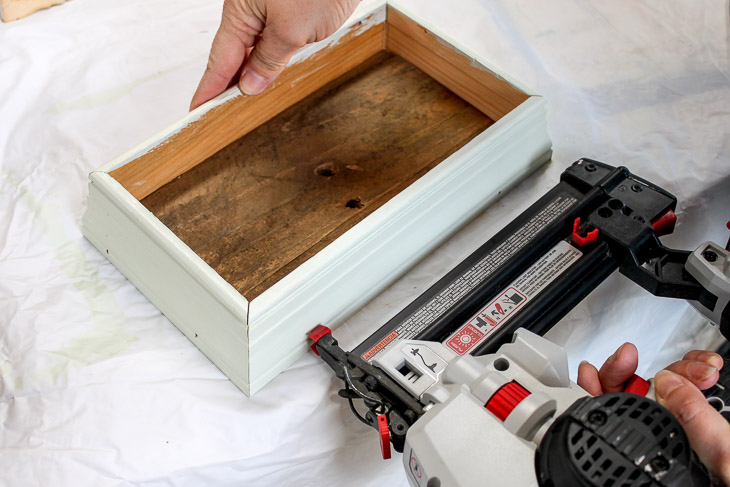
Secure the corners with one or two more brad nails.
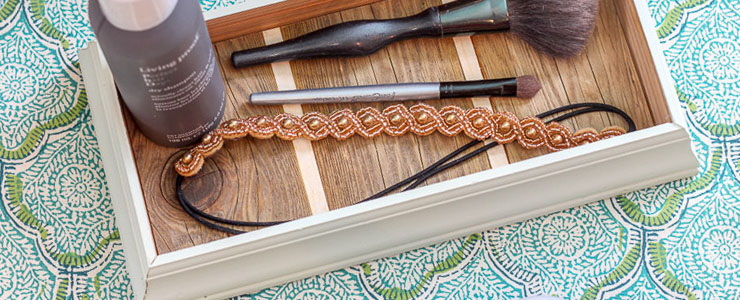
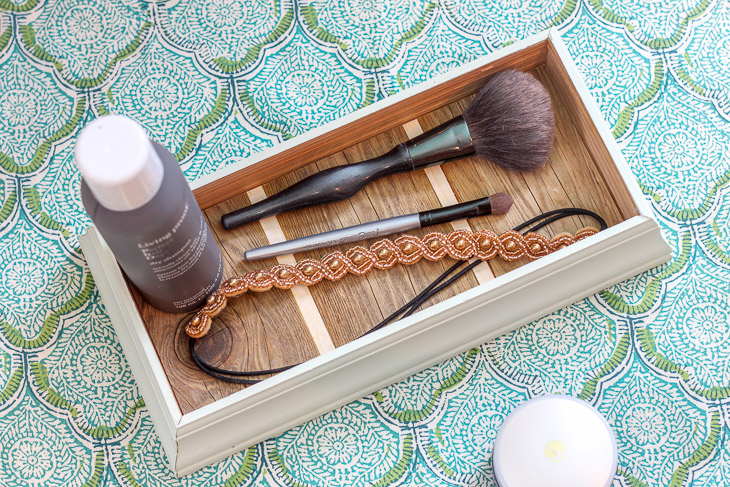
Time to load up your tray with goodies and give them as gifts.
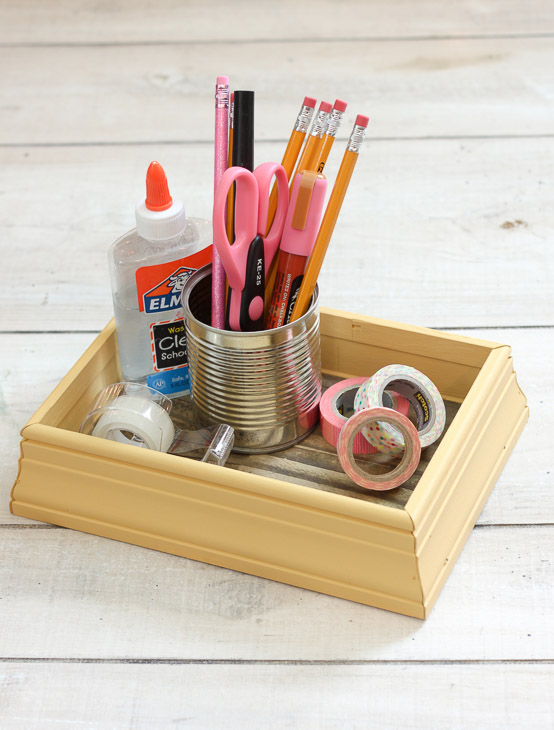
Or use your tray to organize your desk.
If you fell in love with the tray with the striped bottom, you can learn how to make striped wood block here:

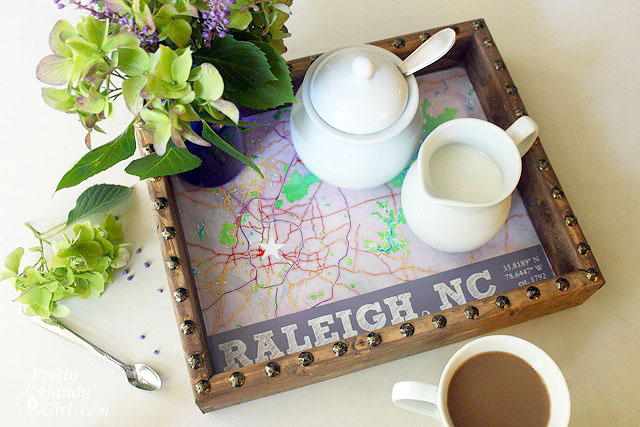
Another tray you can make with scraps is this fun Nailhead State Capital Tray:
What do you think? Want to use up your scraps to make some fun trays?
![]()

You are so creative! We just renovated the house and we have so much leftover stuff. I was going to throw everything away… and then I read your blog…and tried to make some trays. They turned out great! I would have never thought to combine the leftover parts and make such beautiful and useful items. Thank you for the tips.
Your beautiful talent just keep on going, and I love it. Thanks for this gorgeous idea.
Nice! I love it! I just have some spare wooden parts around!
I love your trays. What a great way to use leftover pieces of molding. I like the painted versions and I could paint them any color to enhance my decor. Thanks so much for showing the whole process of putting one together.
You’re welcome Barbara. Thank YOU for the compliment.
Love a good scrap wood project! I have quite a bit that I need to find projects for.
Thanks Brittany! I love how these turned out, too.