
DIY Reversible Wooden Sign

DIY Reversible Wooden Sign on a Pedestal Base
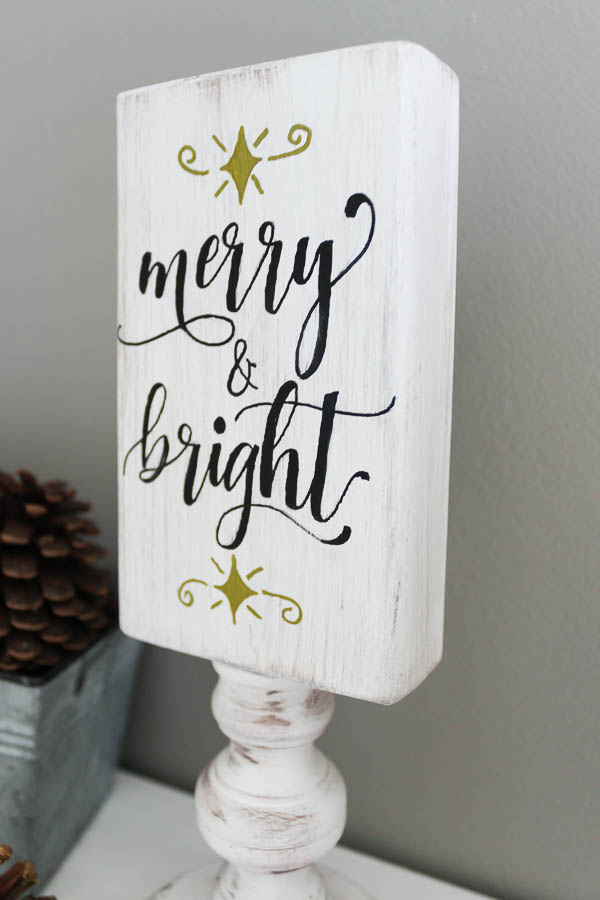
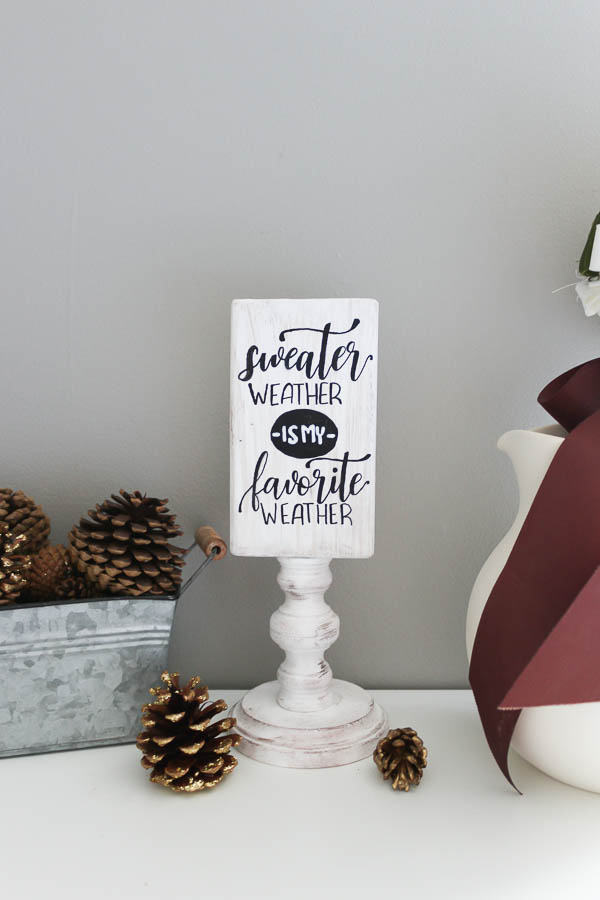
This is an easy project to create for any season! Make your very own Fall/Christmas reversible wooden sign on a pedestal base with this easy tutorial. The top is made with a scrap 2×4, while the pedestal base is assembled from a few pieces of craft wood. Can it get any more simple? There’s no need for a stencil or Cricut to make your sign! Instead use this simple method to transfer the design from paper to wood.
Materials:
(I’ve included affiliate links for your convenience. I earn a small percentage from a purchase using these links. There is no additional cost to you. You can read more about affiliate links here.)
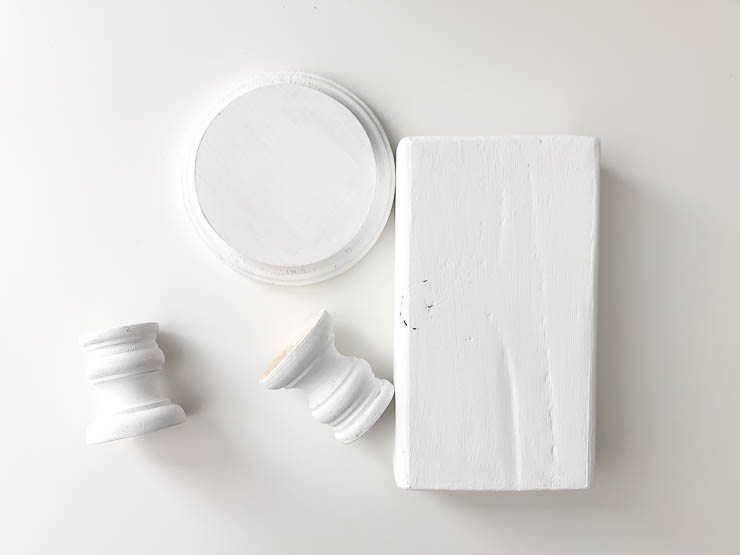
- 2×4 cut to 6″ in length
- Wooden plaque with beveled edge
- 1 1/2″ tall wooden candle sticks (or you can purchase these exact ones from Hobby Lobby)
- Palm Sander
- 100, 150 and 220 grit sand paper
- White chalky paint
- Gray or brown chalky paint
- Paintbrush
- Chip brush
- Gorilla glue or another brand of wood glue
- Clamp
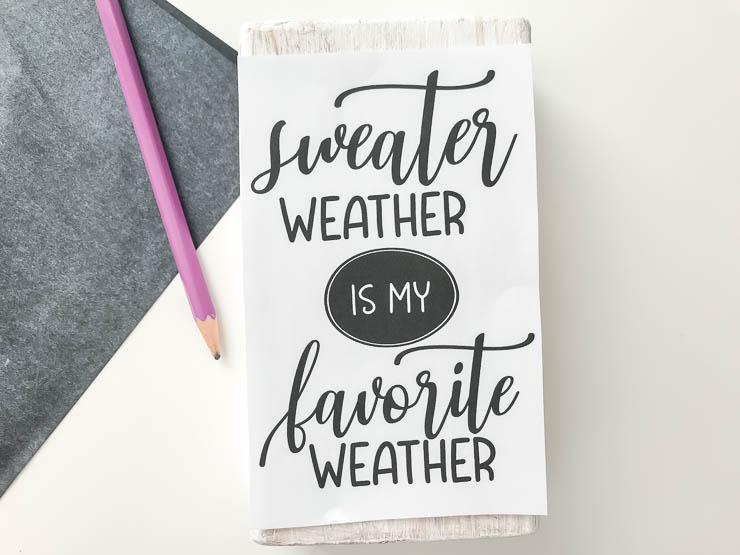
- Merry & Bright, and Sweater Weather designs printed onto paper
- Graphite paper
- Pencil
- Black acrylic paint marker (I prefer the 2mm Molotow brand as they do not bleed and the tip stays clean)
Instructions
1. Sand the wood
Using the palm sander, start with 100 grit sand paper and sand all sides of the freshly cut 2×4 board. Make sure to smooth out any imperfections as much as possible. Continue sanding with 150 grit and 220 grit consecutively to get a smooth finish. If needed, use the 220 grit sand paper on the wooden candlesticks and circle base. You might find it easier to sand these items by hand.
2. Paint the wooden pieces
Give each piece two coats of white chalky paint. Chalky paint is great for going over bare wood because there is no priming involved and it dries very quickly.
Once both coats of paint have dried completely, sand each piece of wood again with 220 grit sandpaper to smooth out any brush lines.
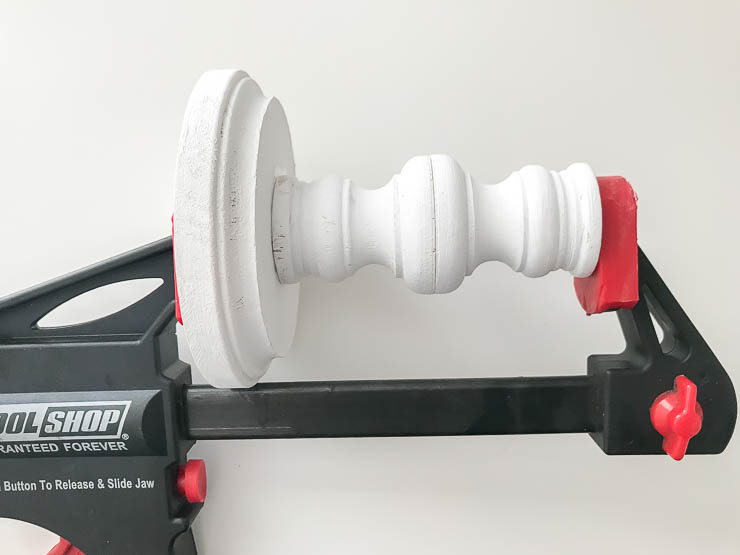
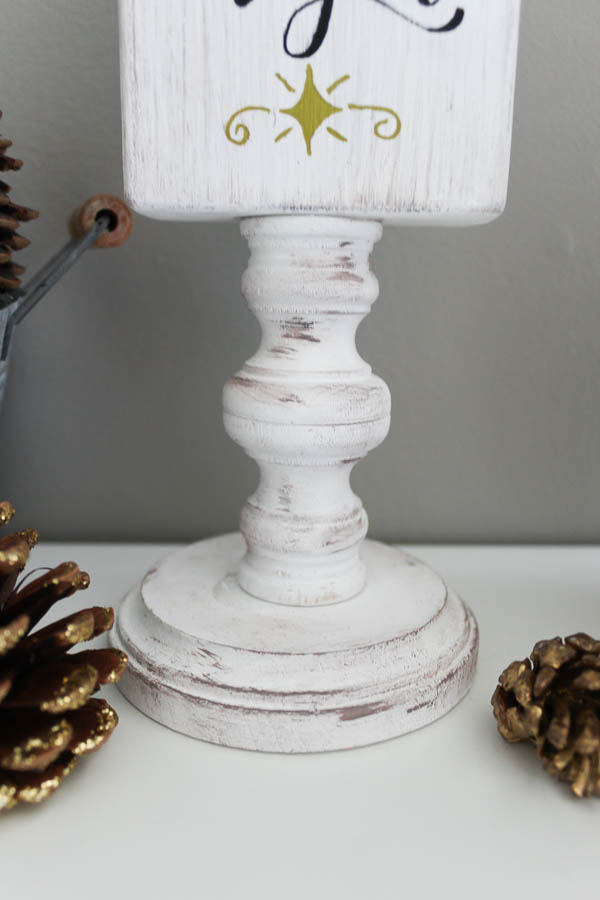
3. Glue the pedestal together
Use a small amount of wood glue to assemble the pedestal base of the sign:
- Glue both candlesticks together first
- Glue candlesticks to the beveled edge circle
- Use a clamp to keep everything together while the glue dries and sets.
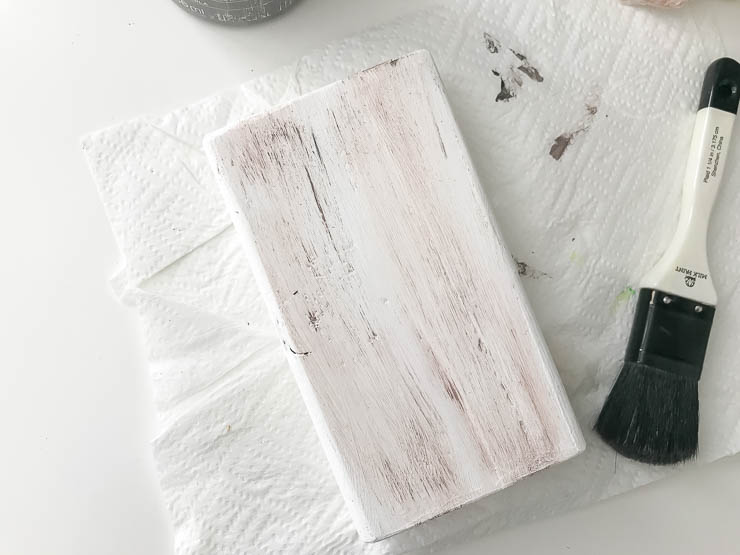
4. Dry brush to add an aged look
Using a chip brush or a wax brush to dry brush each piece of wood using the gray or brown chalk paint.
Tips for Dry Brushing: Lightly dip the very end of the chip brush into paint. Wipe off the majority of the paint and then lightly brush onto the wood surface. There is no exact science to this method which means there is no wrong way to do it. Just make sure you have wiped off most of the paint before applying.
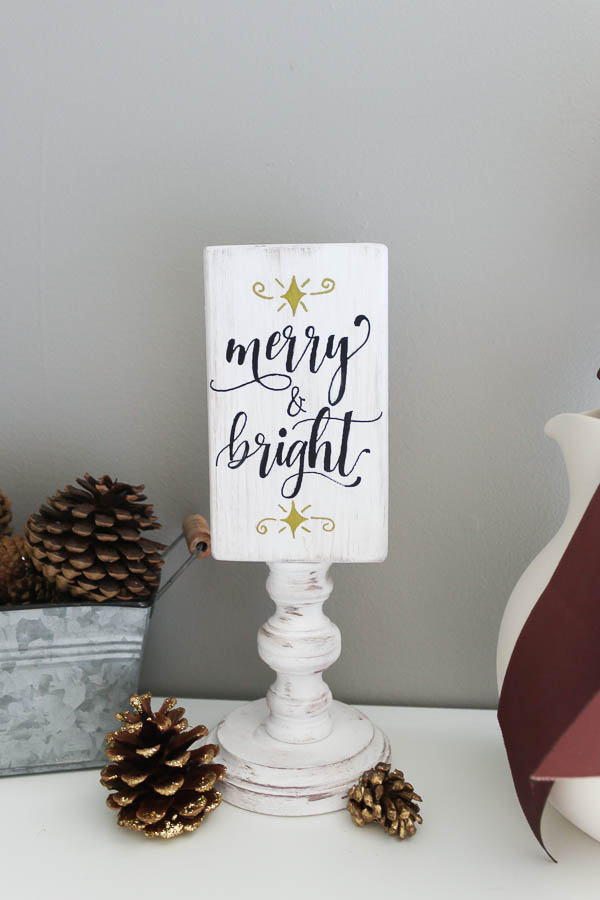
5. Add the Fall and Christmas designs
To add the designs to each side of the reversible pedestal sign, use the same method as these His and Hers Towel Hooks. You could make a stencil with a Cricut or Silhouette Machine, but if you don’t have one of those, this font transfer method is very easy to do!
Print each design out onto paper to the size of the 2×4 sign. If using the designs provided above, they are already sized correctly.
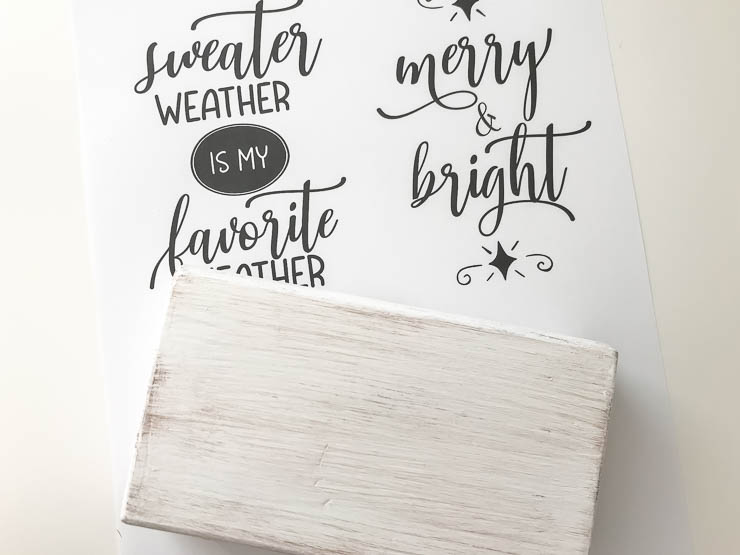
Place a sheet of graphite paper on top of the 2×4, and the design on top of that. Use a pencil to lightly trace over the design, but be careful not to press in too hard.
Once you’ve traced over the whole design, pull the paper away and you’ll be left with an outline of the design.
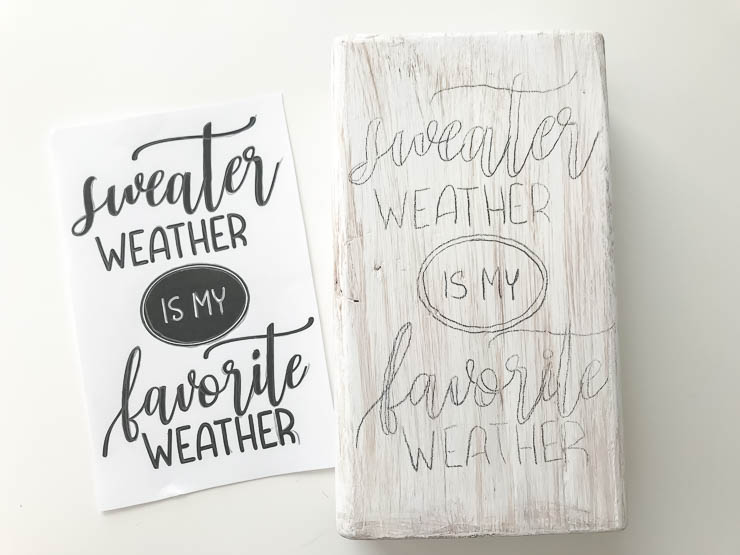
Simply fill in the design using your acrylic paint marker. Repeat the steps above for the other side to make it reversible!
6. Glue the sign to the pedestal
The last step is to secure the 2×4 sign to the pedestal base. Use wood glue and a clamp to secure the base to the sign like in step 3. Let it dry and cure completely before moving.
Pretty easy right? Now you can create your own for every season or occasion!
Another fun way to use this reversible wooden pedestal sign is to have the front side display “be our guest” and the other side with the WiFi access information. It doesn’t just have to be for the holidays!
What will you put on your reversible wooden pedestal sign?
![]()

I’m Amanda, and I am the creator and voice behind the food and DIY blog, Domestically Creative. What started as a place to share updates with friends and family after we moved from Illinois to Tennessee and then to Texas, turned into a passion for finding creative and frugal ways to feed us and decorate our homes.
I have always had the “make it myself” attitude and I’m not afraid to bust out the power tools or get creative when it comes to decorating our home on a budget. You can usually find me scouring the local thrift stores, garage sales and estate sales looking for my next makeover (like this litter box cabinet), or dreaming up ways to make our new house feel more like home. My most recent project was giving my home office a much needed facelift. Some of the plans included creating a fun inspirational accent wall and adding pegboard to store my craft hoards.
I currently call Missouri home, where I live with my husband, dog, and 2 cats in a pretty dull, late 90’s split level. My husband and I both love to travel the U.S and recently purchased a small travel trailer to tag along in our journeys. In our free time together we can usually be found working together on a home project, exploring a new place, or just lounging with our pup, Delilah.
I’d love for you to connect with me on social media via Facebook, Instagram, Pinterest and Twitter!
See all of Amanda’s tutorials HERE.

Leave a Reply
Want to join the discussion?Feel free to contribute!