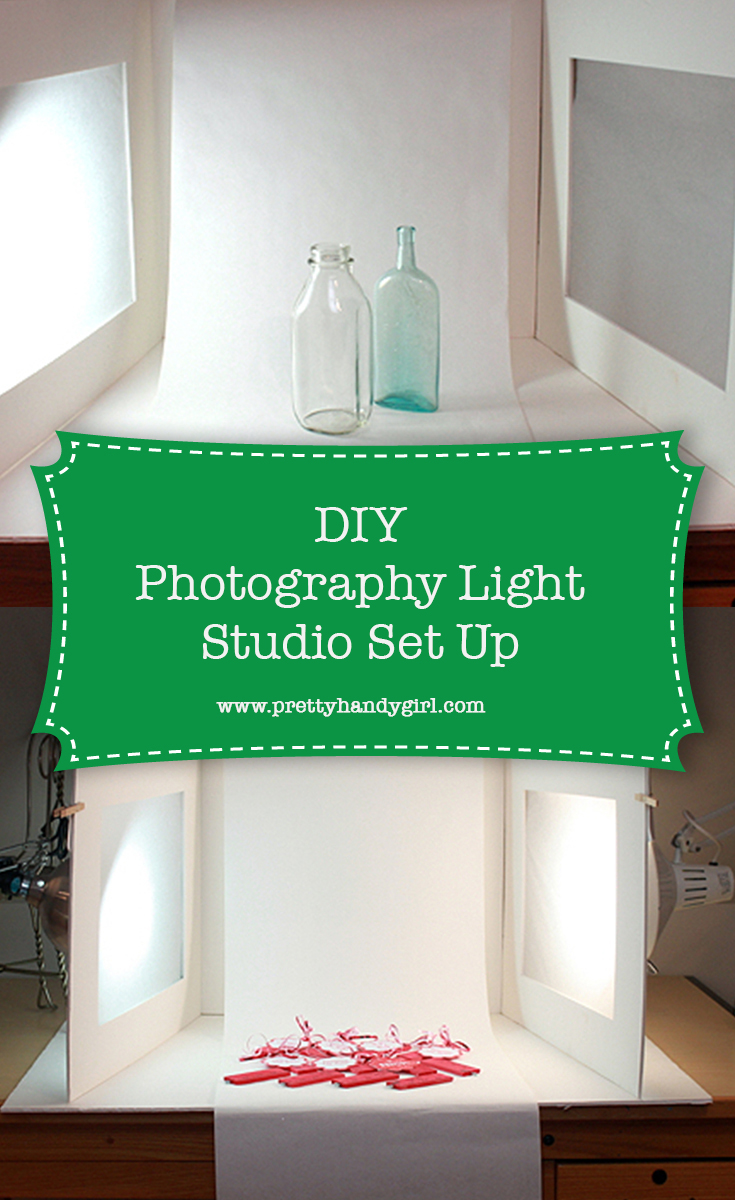
DIY Photography Light Studio Set Up

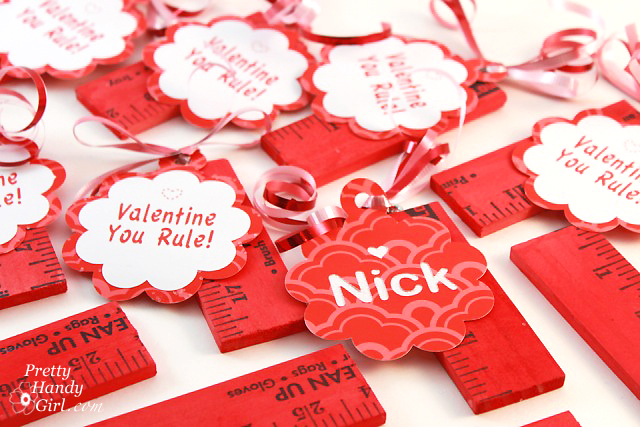
Can I just tell you that I have a bone to pick with Mother Nature lately. She seems to sense when I’m just finishing up a DIY project that really needs to be photographed. Case in point, last week I wanted to photograph my “You Rule Valentines“, but we had 4 days of gloomy weather! 1,2,3,4! I shook my fist at the heavens and told that Mother that I wasn’t going to wait any longer. Then I took matters into my own hands…so there!
I built a little table top light studio, and now come rain or sleet or shine, I have control of my photography lighting!
Want to make your own? It’s super easy. Here’s how…
Materials:

- 3 – 30″ x 40″ Foam Boards
- White Poster Board
- 2 Clothes Pins
- 2 sheets of Tracing Paper
- Xacto Knife
- Metal Ruler
- Scissors
- Packing Tape
- Roll of White Craft Paper
- 2 Lamps (clamp style or a bare bulb lamp)
- 1 CFL light bulb
- 1 Incandescent light bulb
Instructions:
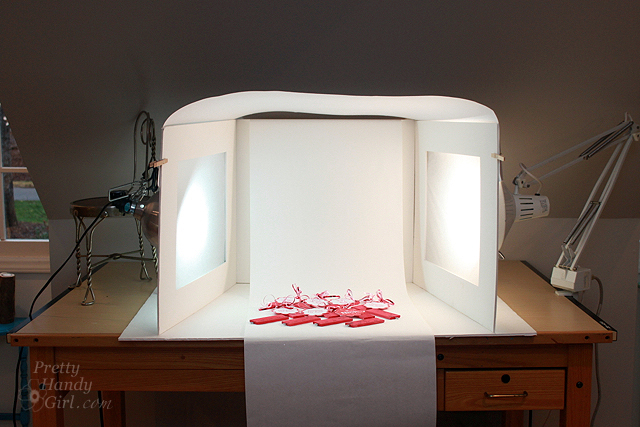
Cut two sheets of foam board in half along the 40″ side.
Cut a window (slightly smaller than the tracing paper) into two boards with the Xacto knife. Tape the tracing paper over each window.

Tape the two window boards onto one board in between the two. (Put your tape on the outside of the light studio so the glare off the shiny tape won’t be visible.) Set the tri-fold boards on top of the uncut 3rd foam board.

Arch the poster board over the top of the light studio and use clothespins to secure the sides. (This will give you more head room to take downward shots of your subject matter.) Leave a gap in the back to feed the roll of paper through. Let the roll hide behind the studio set up. (I like having a big roll of craft paper so I can tear off any that gets marked, creased or dirty.)

Line up the lamps on either side of the tracing paper windows. Keep an inch or so between the paper and the lights.

Here’s a trick I learned in art school. To get more natural color lighting, use one CFL bulb and one Incandescent. The warm and cool will balance each other out. (You may still have to play with your photo color temperature in a photo editing program, but this will get you closer to a good mid-range white.)


Set up your subject and snap away!
For more drama, try turning off one light.


It’s the perfect set up for photographing teeny rings and jewelry.

And when you’re done, simply fold one side forward and one side back.

…and your photo studio can be stored away easily.
Take that Mother Nature!!! Of course, wouldn’t you know that the day after I made my table top light studio, the sun was out and shining in full force. That Mother, she really knows how to annoy a DIY blogger. 😉
What about you? Do you have any photo tricks for dealing with imperfect lighting?
![]()
Two other posts to help you improve your photography skills!

Lighting Tips for Indoor Photography
Take Better Photos with Better Composition and Lighting

Pin for later!

Love it! I have previously set up a studio on top of my toilet using pvc boards because it was the only room in the house in which I could completely control the light. This looks like a much better idea!
Thanks so much, Brittany- I need all the help I can get!
Brilliant! Thanks for sharing this. Seattle is experiencing some gray days here. Can you come up with something similar that lights up an entire room? ;o)
You don’t know how badly I needed this dumbed down for me! I had seen one elsewhere and they used more expensive items, so this is fantastic. I think I already have lamps I can use for it, too!
I purchased an older digital Nikon on CL and I am afraid it isn’t as user friendly as the newer one’s (this is actually supposed to be a professional level one, so it is meant for people who know what they are doing!). Do you own a macro lens to take such great closeups?
Thanks for always being a great teacher!
Jenny
Thank you! I am going to make one of these today.
This is great! I have a small space so I need something that can be tucked away when not in use. Thanks, you just gave me a project for the weekend.
Wonderful idea!! Now I can get thoses great shots for on-line auctions and start to de-cluter my house! As always , your the “GO-TO GIRL”! Thanks Brittany.
THANK YOU! What a wonderful idea. I need all the help I can get in this department; I appreciate your writing out this tutorial. (Of course, I’d need more than good lighting to become a good photographer, but I’ll take what I can get!)
Hope you’re having a great January! Stay warm!
Hi, Brittany
You are so cool! I have all the material and I am going to make this. Thanks so much for sharing.
Hugs,
Vanessa
Thanks so much!! I so know what you mean about lighting dilemmas. We live on the West Coast, and gray winter days are a challenge for photography. I just love your photo booth set-up. I want to give it a try. Thanks for explaining it so well.
love that it folds away!
perfect! the weather has been less than cooperative here too! need to do this!
Brittany, what a great write up! Thanks for sharing a budget friendly way to take our photography to the next level!
The bulb things is a little weird. You can get most bulbs in any range of color temp. Main reason, I’m always in a panic over what bulb to get. LEDs, CFLs, and the like all come in Warm and Cool.
If you are unsure, remember that APSC 35mm camera’s are using direct metering. Stop and think about it, since you are using static lighting, get a small light meter that reads Incident light to meter properly (Sekonic). It doesn’t matter what the color temprature are, just use one loight as the primary and the second as fill use a 3 is to 1 or 2 is to 1 ratio and the primary light temp will be picked up.
Brilliant!!