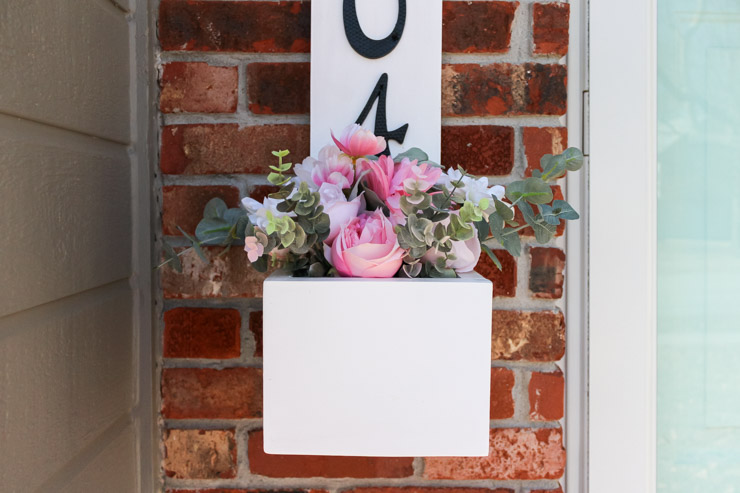
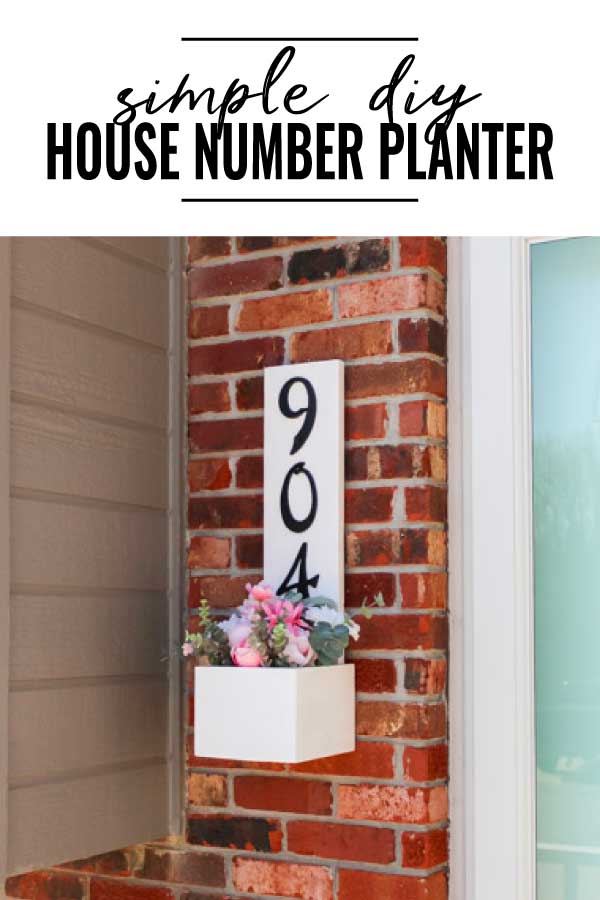
DIY House Number Planter Box
It’s important to have house numbers displayed on your home, especially if emergency crews need to locate your house. Today I’ll show you how to build your own DIY house number planter box.
DIY House Number Planter Box
When we moved into our home in the Fall of 2018, I had no idea there were no house numbers on the exterior of it. I was clueless to the fact until a few months ago. A friend came to visit us from out of town and called from our driveway because she was uncertain if she was at the right house. All because we had no numbers on our home!
Ever since this issue was brought to my attention, I’ve been trying to come up with a creative way to add the numbers to our house, but make them stand out a bit. We have wood siding and brick around our front door, so I was also a little cautious about wanting to drill into either. I figured out a solution to all of those things with this DIY house number planter. It’s functional, creative, and I didn’t have to drill any holes into the side of our house.

Let me show you how you can build your own house number planter. Don’t be intimidated by the number of materials needed for this project, it’s actually simple to build.
Materials:
(I’ve included affiliate links for your convenience. I earn a small percentage from a purchase using these links. There is no additional cost to you. You can read more about affiliate links here.)
- 1″x”6×6′ board
- Miter Saw, Table saw or Circular saw
- Tape Measure
- Speed square
- Nail gun, brad nails
- Wood glue
- Putty knife
- Wood putty (if needed)
- Palm Sander and varying grit sandpaper
- Tack cloth
- White outdoor paint
- Sealant (optional)
- House numbers
- Drill, drill bits
- Brick clip (if hanging on brick)
- Wood screws (if hanging on wood)
- Large sawtooth hanger (if using brick clip)
Instructions:
Step 1
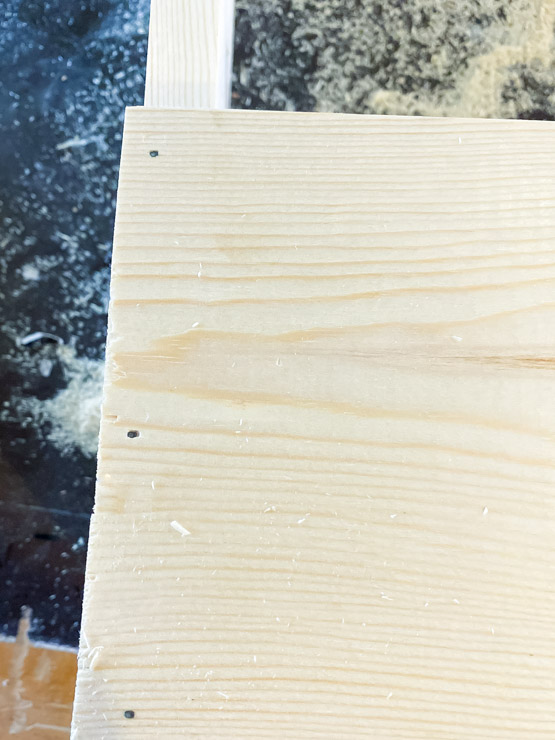
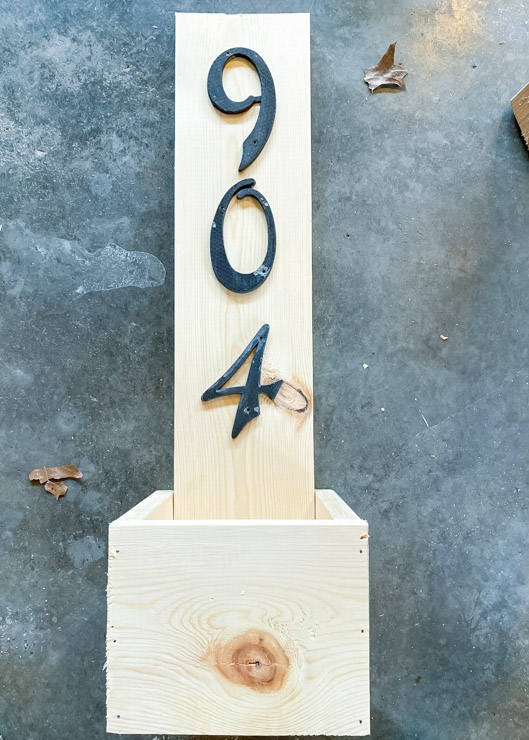
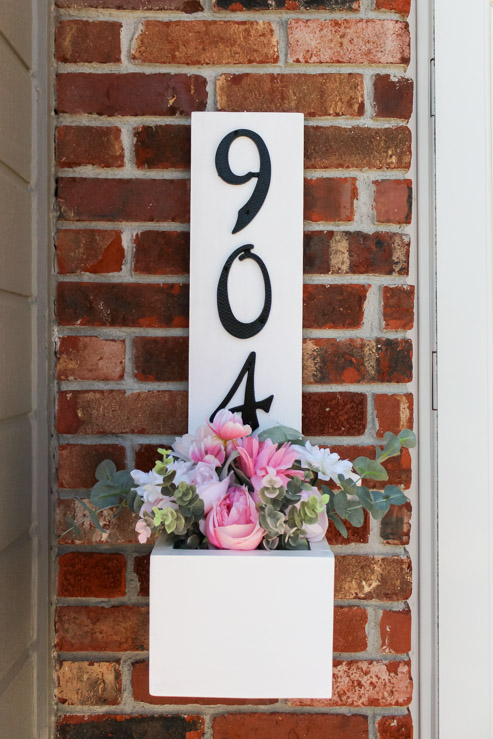
Measure and cut a piece of wood to 24” long for the back of the house number planter.

If you have more than 3-4 numbers for your street address, you may need to cut the back piece longer.
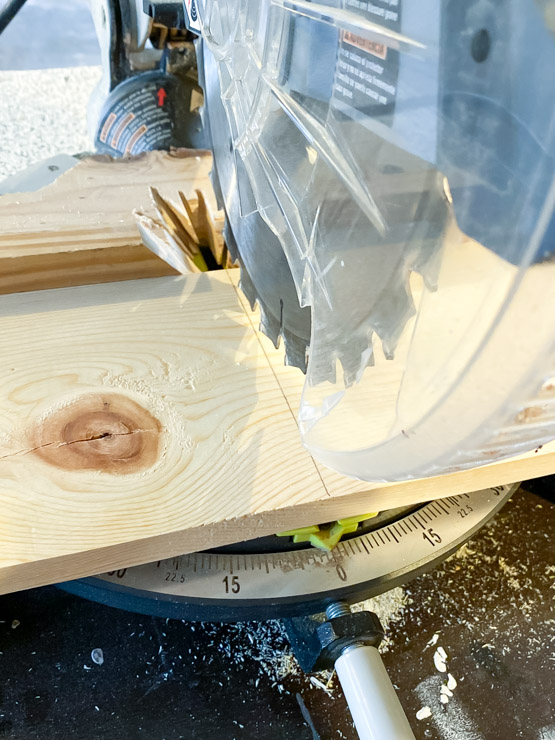
Cut three pieces of wood to 6 ¾” for the sides and bottom of the planter box, and one piece to 7″ for the front.
Step 2
Using wood glue and a nail gun, attach one 6 ¾” piece to the bottom of the 24” board. This will be the bottom of the house number planter. Place a thin layer of wood glue between the two boards before securing with brad nails.
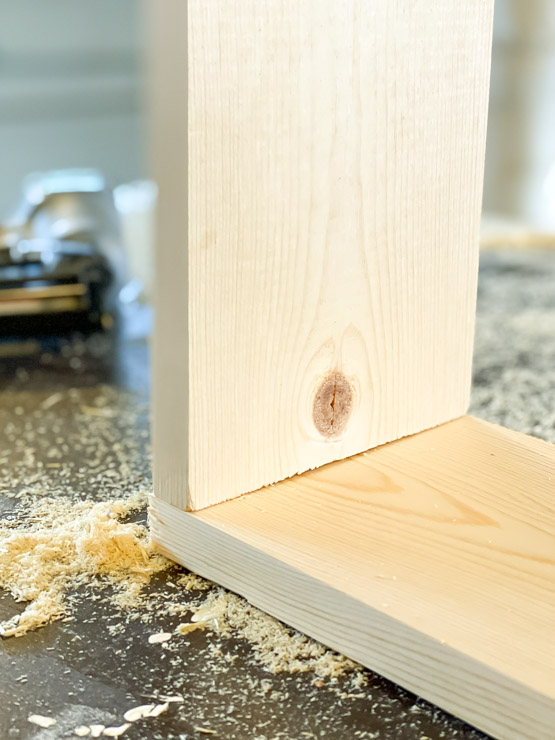
Repeat the step above to attach the other two 6 ¾” pieces to each side of the box, and finally add the 7” piece to the front of the box.

Step 3
Fill in the holes left by the nail gun or any imperfections with wood filler using a putty knife. Let it dry completely before moving on to the next step.
Step 4
Using a palm sander with 150 grit sandpaper, give the entire piece a good sanding (especially where wood filler was used). Follow with 220 grit and 320 grit if needed to achieve a smooth finish. Use a tack cloth to remove any sawdust left behind.
Step 5
If your wood has any knots, prime them first with a strong primer like BIN primer. Otherwise, the knots will start to appear after a year or so. Now give the house number planter 2-3 coats of white (or color of your choice) outdoor paint using either a foam roller or a foam brush. Let the paint dry in between coats. Lightly sand using 320 grit sandpaper when finished for a smooth surface.
Step 6
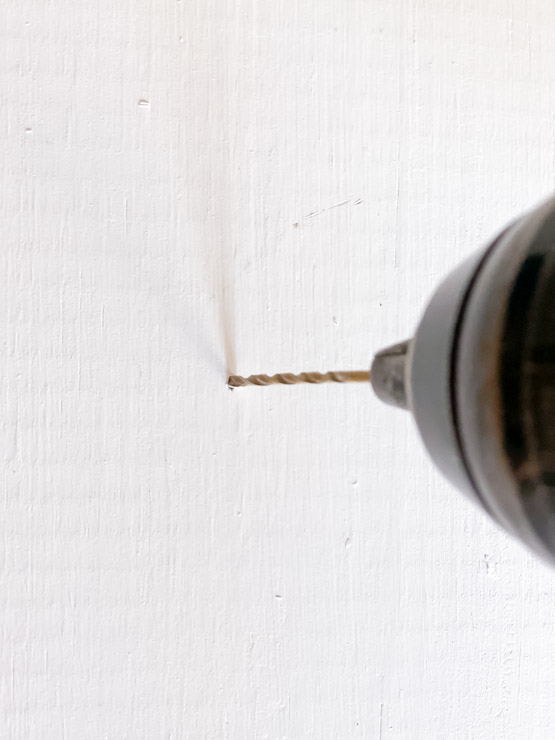
Attach the house numbers using the hardware provided. It may be necessary to pre-drill holes to avoid splitting the wood.
Step 7
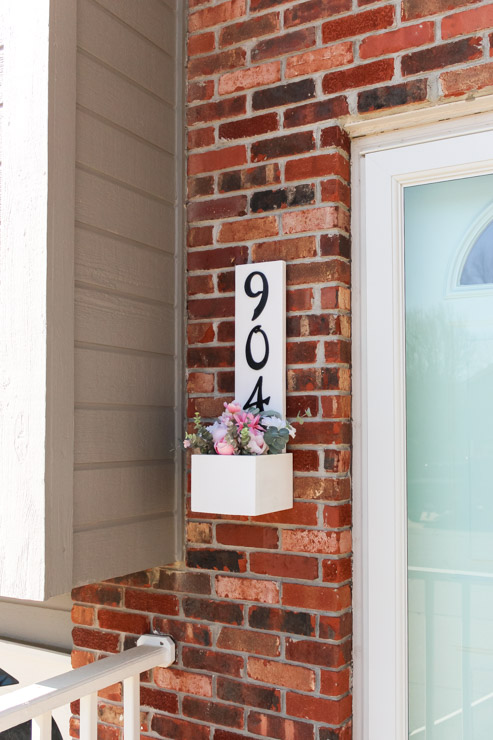
If the planter will be hanging on brick, using a brick clip can be a cost-effective way to hang without drilling into the brick or mortar.
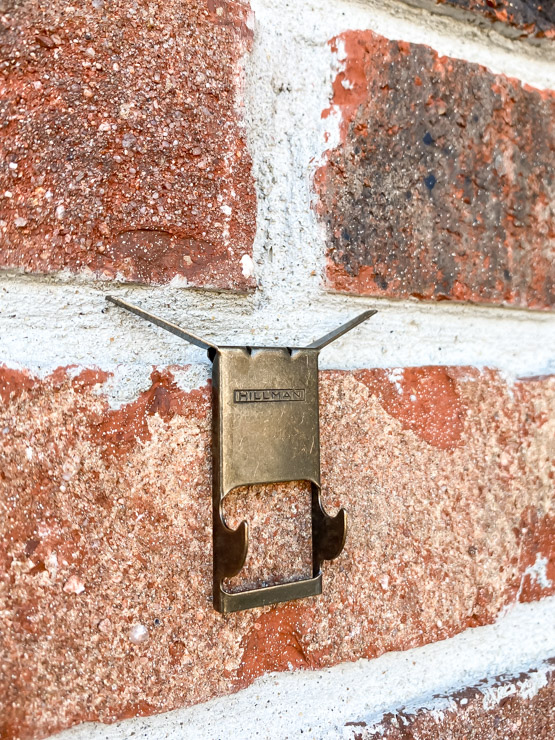
Attach a large sawtooth hanger to the back of the house number planter. Place the brick clip onto the desired location and simply hang the planter onto the clip. No drilling required! You can also hang the planter on a wood surface by using wood screws. I’d recommend drilling directly through the planter into the wood surface behind using 1 ½” screws. Add a bit of paint to the screw head if necessary to hide them.
Step 8
Add some flowers or greenery to the planter. I would recommend placing a few already potted plants inside the box, rather than planting directly into it.
Now you can have a beautiful planter box that is also functional. You should feel mighty proud you built it yourself! Depending on the season you may like to add different decor to the planter box.
It’s still Winter in the Midwest, so fake flowers will have to do for now, but I plan to add some potted succulents to our house number planter for the Summer months. In the Winter you can use some evergreen trimmings, or even fill the box with colored ball ornaments. For Fall wouldn’t it be beautiful with some small mums tucked in there?
![]()

I’m Amanda, and I am the creator and voice behind the food and DIY blog, Domestically Creative. What started as a place to share updates with friends and family after we moved from Illinois to Tennessee and then to Texas, turned into a passion for finding creative and frugal ways to feed us and decorate our homes.
I have always had the “make it myself” attitude and I’m not afraid to bust out the power tools or get creative when it comes to decorating our home on a budget. You can usually find me scouring the local thrift stores, garage sales and estate sales looking for my next makeover (like this litter box cabinet), or dreaming up ways to make our new house feel more like home. My most recent project was giving my home office a much needed facelift. Some of the plans included creating a fun inspirational accent wall and adding pegboard to store my craft hoards.
I currently call Missouri home, where I live with my husband, dog, and 2 cats in a pretty dull, late 90’s split level. My husband and I both love to travel the U.S and recently purchased a small travel trailer to tag along in our journeys. In our free time together we can usually be found working together on a home project, exploring a new place, or just lounging with our pup, Delilah.
I’d love for you to connect with me on social media via Facebook, Instagram, Pinterest and Twitter!
See all of Amanda’s tutorials HERE.

Assuming the area near your planter is lit at night then this is perfect!
We used to walk through a lot of different neighborhoods to get our exercise and I would always comment on house numbers – so many are essentially useless. They may look great up close but often can’t been seen or read from the street – especially at night.
My biggest suggestions – use the largest numbers you can, have a high contrast between the numbers and their background and be sure the numbers are lit at night.