Got Scrap Wood? DIY Gift Caddies using Scrap Molding
DIY gift caddies made from scrap trim is a great way to create an inexpensive gift basket AND use up all those little pieces of scrap trim in your wood pile.
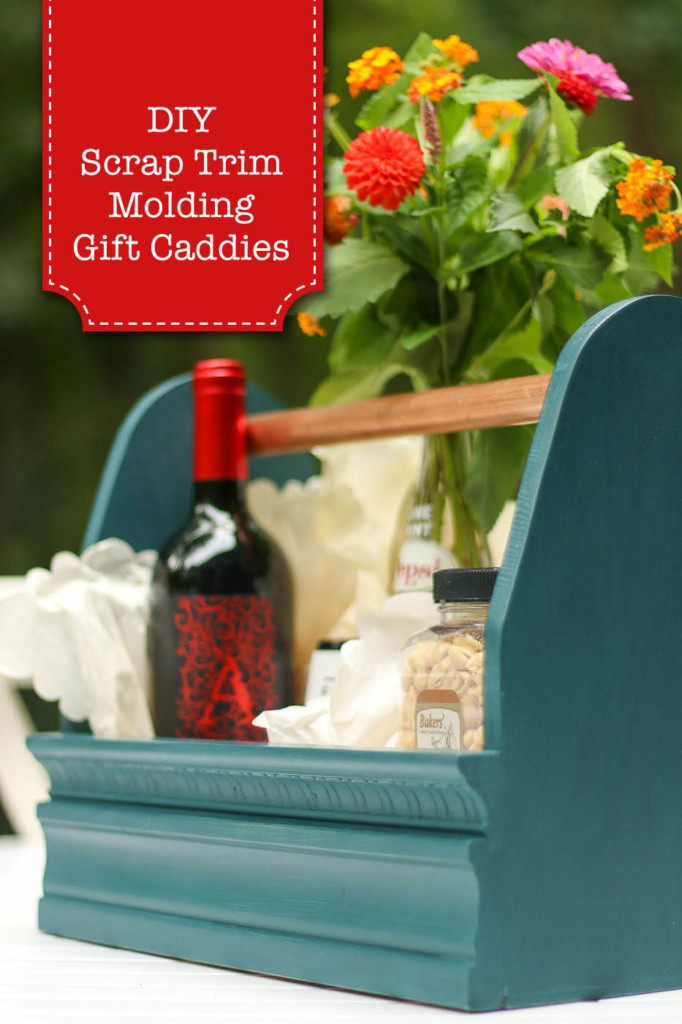
DIY Gift Caddies using Scrap Molding
Christmas is a few weeks away and I don’t feel like going shopping in the mall. I’m not really sure what to get everybody. But, after mulling over all the scrap trim in my scrap wood pile, I came up with a genius plan. Gift baskets are always a winning idea for anyone on your list because they can be filled with a variety of gifts in a theme. Fill these caddies with anything you like, but be sure to leave me a comment letting me know what you included in your gift caddies!
Ready to get started? Let’s turn this scrap wood pile into…
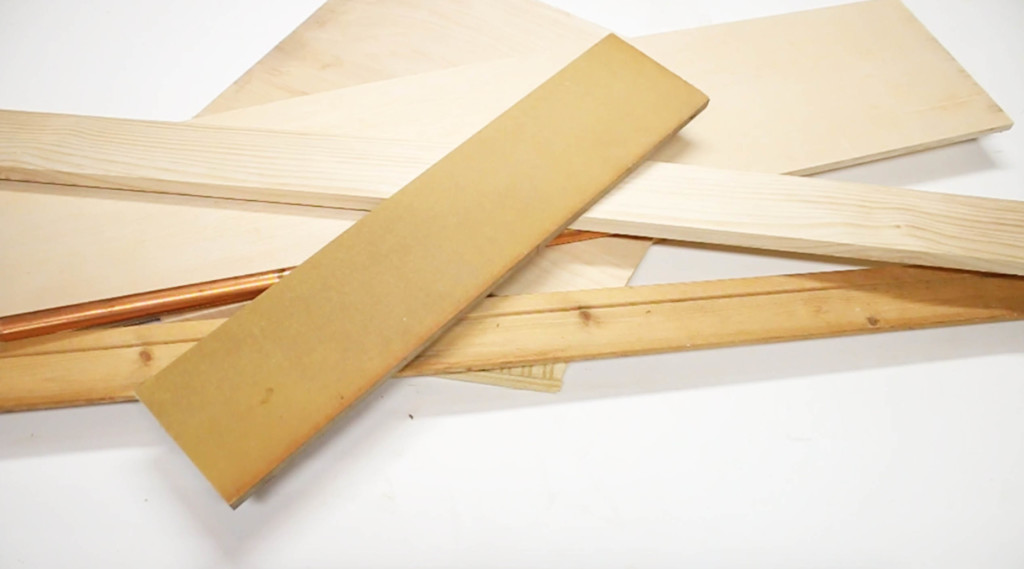
… beautiful DIY gift caddies!
Gather these materials and tools and then we can get building!
Materials & Tools:
(I’ve included affiliate links for your convenience. I earn a small percentage from a purchase using these links. There is no additional cost to you. You can read more about affiliate links here.)
Protective Equipment:
Materials:
- 3/4″ plywood
- Copper pipe (or dowel rod or a thick branch)
- Chalk Paint
- Construction Adhesive
- Wood putty
Tools:
- Measuring tape
- Miter Saw
- Track Saw
- Band saw (or jigsaw)
- Palm Sander
- Drill
- 7/8″ Fostner bit
- Brad Nailer
- 18 gauge nails
- Wood glue
- Chalk paint
Cut List:
- 1 – 3/4″ x 8″ x 18″ plywood
- 2 – 3/4″ x 8″ x 11″ plywood
- 4 – pieces of 18″ trim molding (egg & dart, colonial trim)
- 1 – 3/4″ pipe or rod cut to 17 ½”
If you need tips for cutting metal pipe, click here to see how easy it is to cut metal pipes by hand or watch my video:
Scrap Trim Ideas:
You can use any scrap trim molding you have on hand. For a simple caddy, use flat door casing or door stop. For a more decorative look, use trim with more details. No scrap trim? No problem! At Home Depot, you can purchase trim by the linear foot, so feel free to head over there and purchase a 3 foot section of decorative trim for your 18″ long caddy.
You’ll probably want to steer clear of polystyrene trim since it’s not as strong, nails will go right through it, and wood glue generally won’t hold it firmly.
Instructions:
To start this project, cut your wood from the cut list above. Definitely watch my video to learn how to make these simple DIY Gift Caddies using Scrap Molding!
The base of my gift caddy is 8” x 18”, but feel free to make your caddy a custom size based on your scraps or your gifts.
Cutting the top of the sides:
You can curve the top of your caddy by tracing the perimeter of a paint can or another round object.
Alternatively, you can cut straight angles off the top corners as shown in the diagram below. Simply mark off two inches at the top of the sides. Then make an angled line down to the location where your trim starts on the sides.
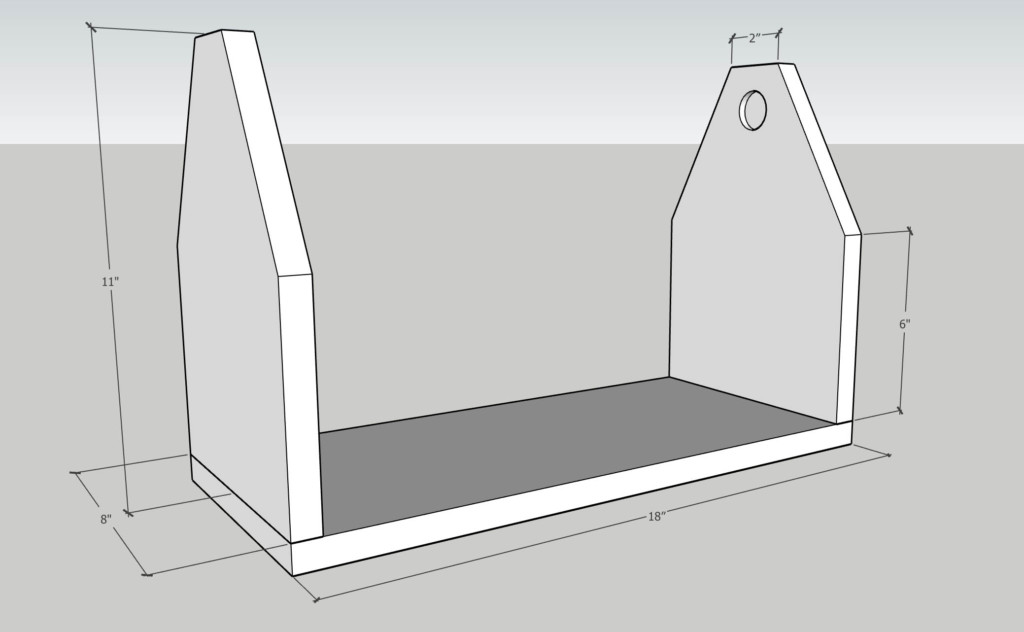
Cut the top profiles using a band saw or jigsaw. If you don’t have either, you can use a coping saw.
Sand off any rough edges from your plywood pieces using a sander.
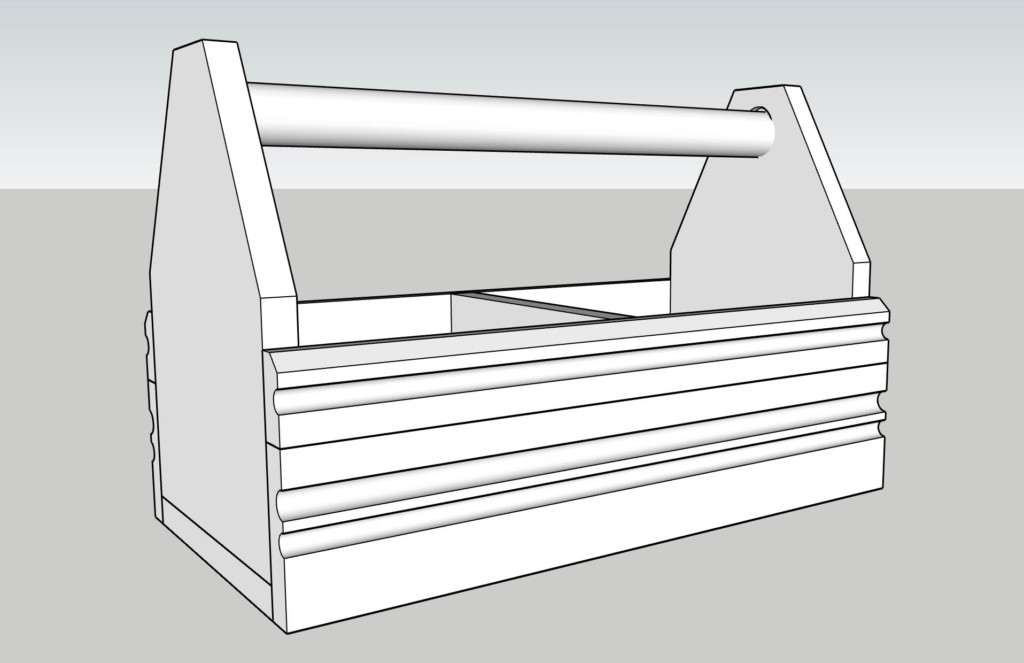
Adding Scrap Trim:
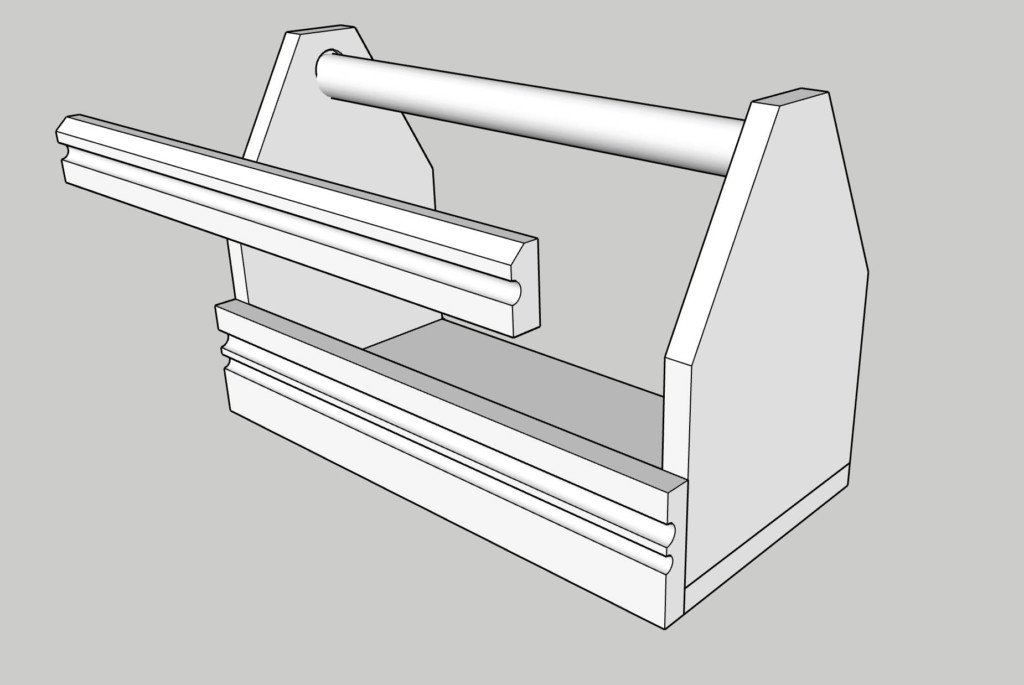
Now it’s time to use all your fabulous scrap trim. You can use whatever trim you have laying around, there are no rules. I chose a piece of door trim and some decorative egg and dart trim for this caddy.
Cut your molding to 18” (the same length as the base).
Caddy Handles:
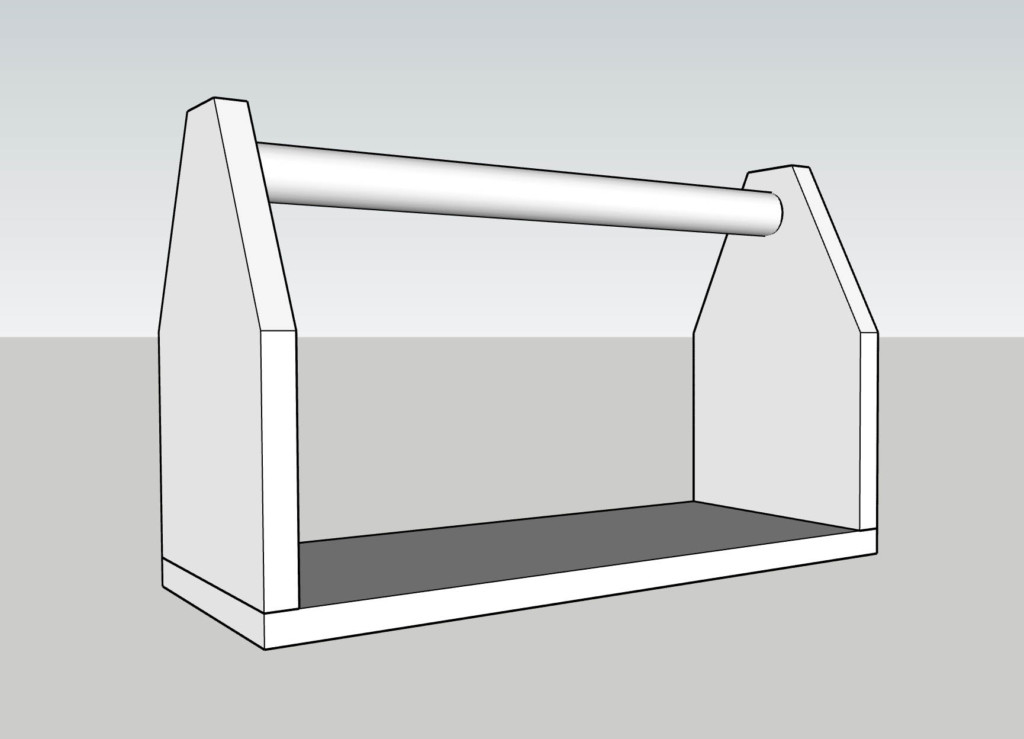
For the caddy handle, I happened to have some copper pipe in my scrap pile, but you can use a dowel, old closet rod, or even a branch like I used on this caddy.

Use a forstner bit the same width as your handle to drill halfway into the caddy sides. (For the branch, you might want to drill completely through the sides.) The 3/4″ copper pipe is equal to a 7/8″ forstner bit.
Dry fit the handle into the sides. You’ll need to measure to make sure the width of your caddy is the same at the top and bottom. You might have to drill a little deeper into the sides until the top is equal to the bottom when the handle is fitted into the holes.
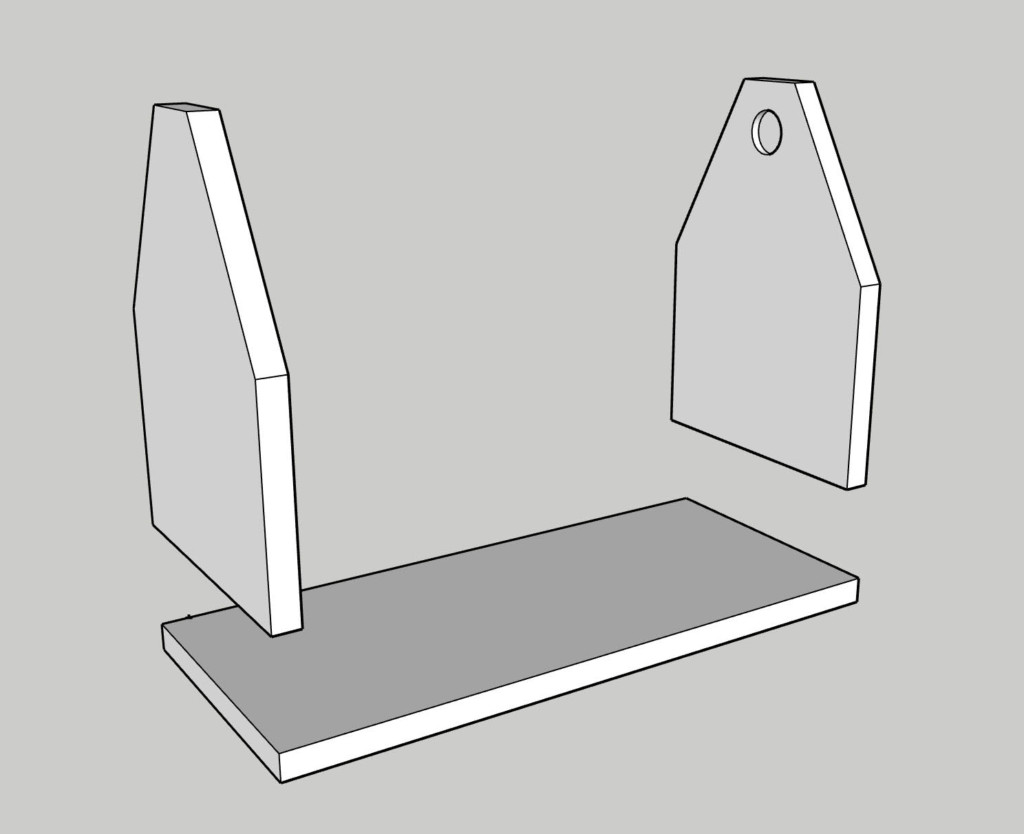
Assemble the Caddy:
Run a bead of glue along each end of your base. Then set the sides on top of the base.
To secure the handle, add a bunch of construction adhesive into the holes you drilled into the sides.
Assemble the caddy. Clean up any glue squeeze-out. Flip your caddy onto its side and secure the base into the sides with several brad nails.
To secure the scrap trim sides. Use more wood glue along the edges of the side pieces. Then set the trim in place and secure it with a few more nails. Wipe off any glue squeeze-out.
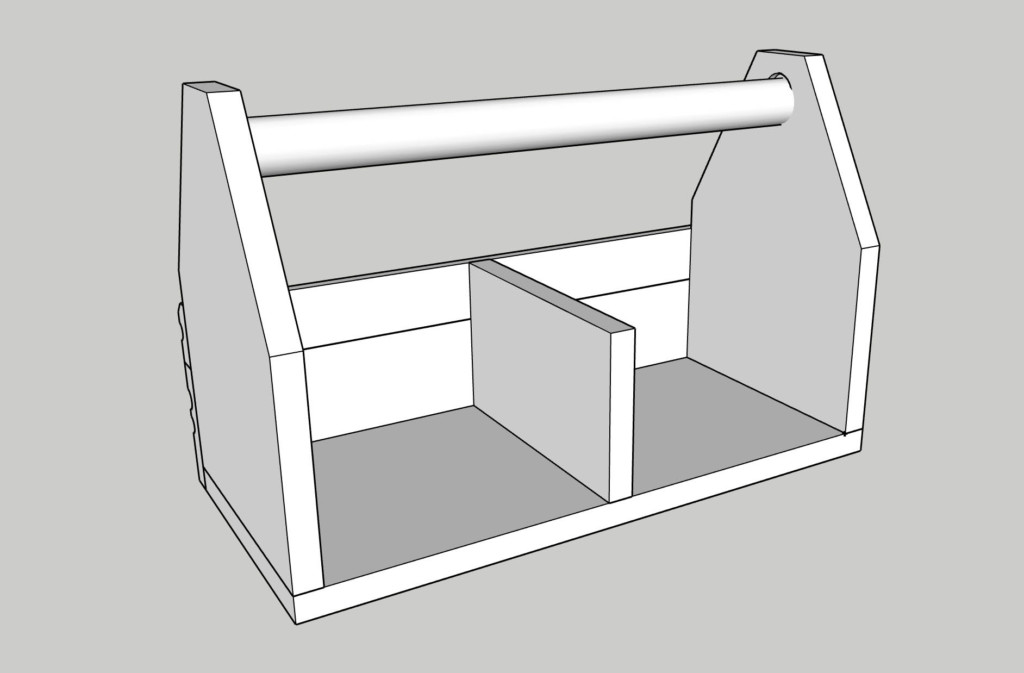
This next step is truly optional. I like to add a divider in larger caddies. If you want to do the same, cut a piece of one-by to fit inside the caddy. Add some wood glue onto the bottom and sides of the divider, then set it in place.
Finish off the caddy build by adding trim to the other side. Secure the trim and divider with nails.
Finishing the Caddy:
Use a wood putty to fill in the gaps and nail holes. After the wood putty dries, sand it smooth.
Paint or stain the caddy in the color of your choice. Finish the caddy with polyurethane or wax to protect it.
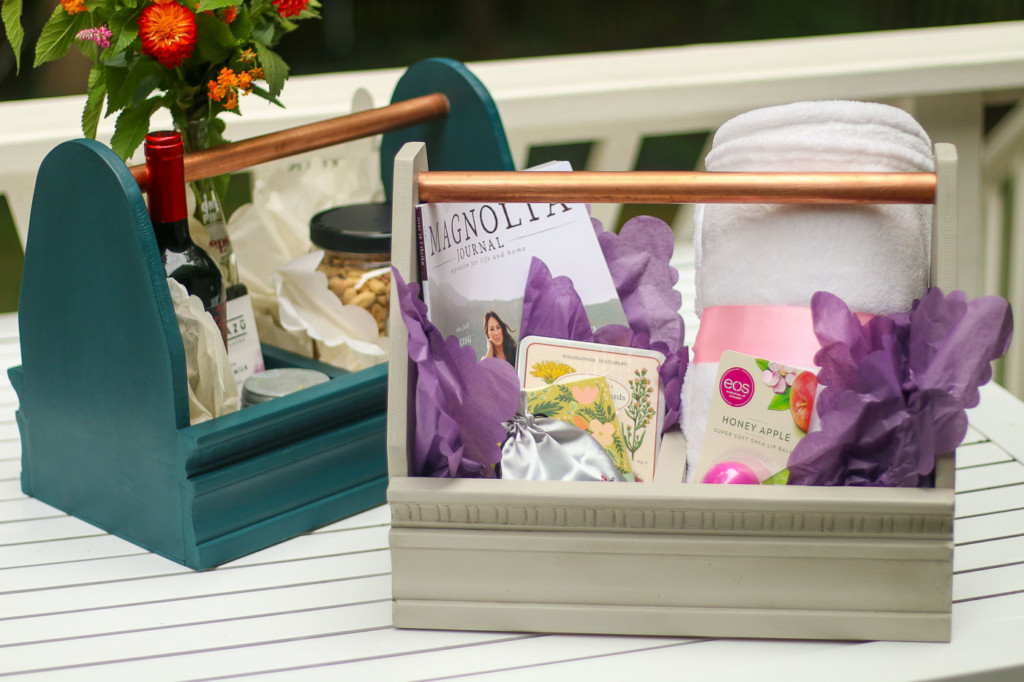
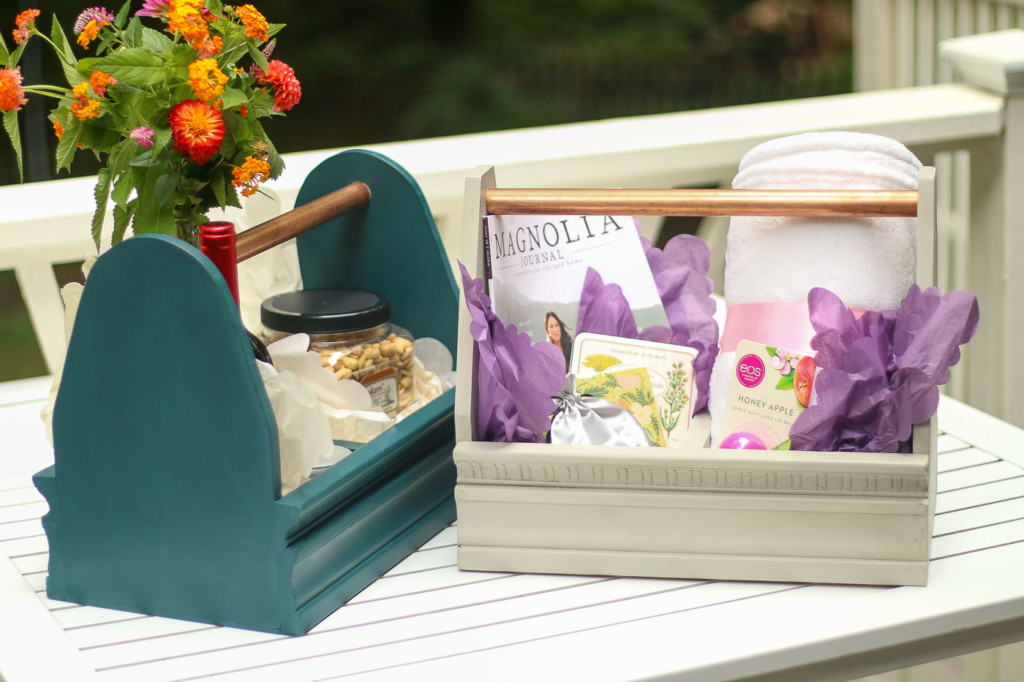
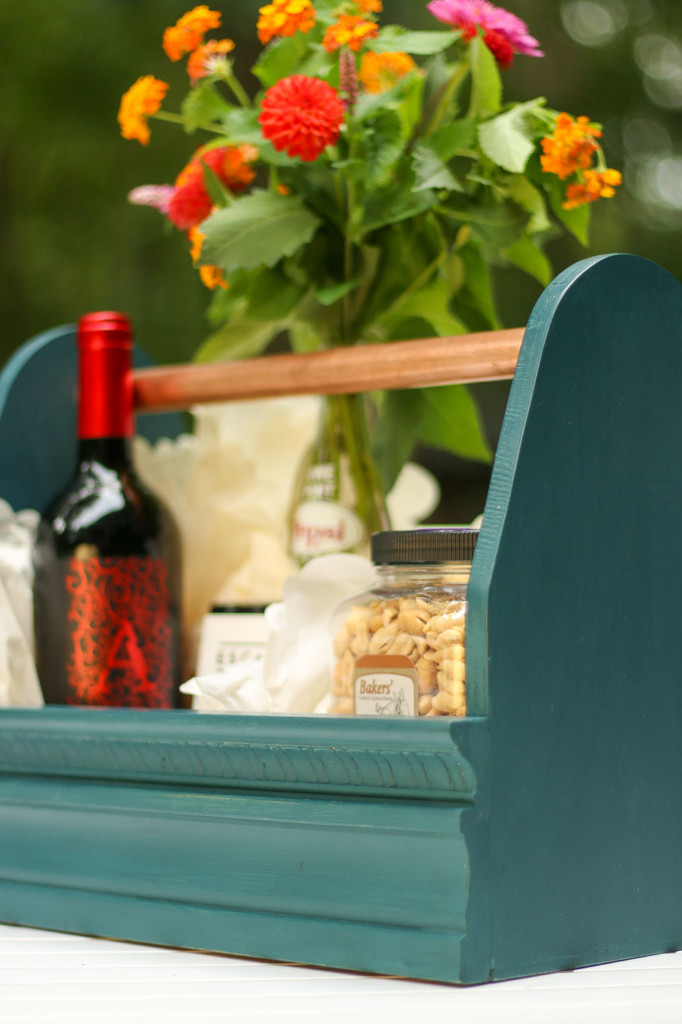
Fill Your Gift Caddy:
You can fill these caddies with just about anything! Create a snack basket:
Or a fill it with a candle, eye mask, cozy blanket, and a magazine for a relaxation basket.
I would honestly love to hear your suggestions for things to add to these gift caddies in the comments below! Until next time, hope you have a very Happy Holiday season!
![]()
Like this gift idea? Then you’ll love these additional gift basket ideas:


Leave a Reply
Want to join the discussion?Feel free to contribute!