
DIY Drawer Dividers
I like to think of myself as an organized person, but that isn’t 100% true. I spend 15 minutes searching for my son’s baseball hat on the way out the door to his game; I shuffle papers from one pile to another; and I have that dreaded “drop spot” in my kitchen where everything seems to land when I walk in the door. The one thing I am good at is putting things back where they belong. If an item has a spot to live in my home, it is easy for me to put it there.
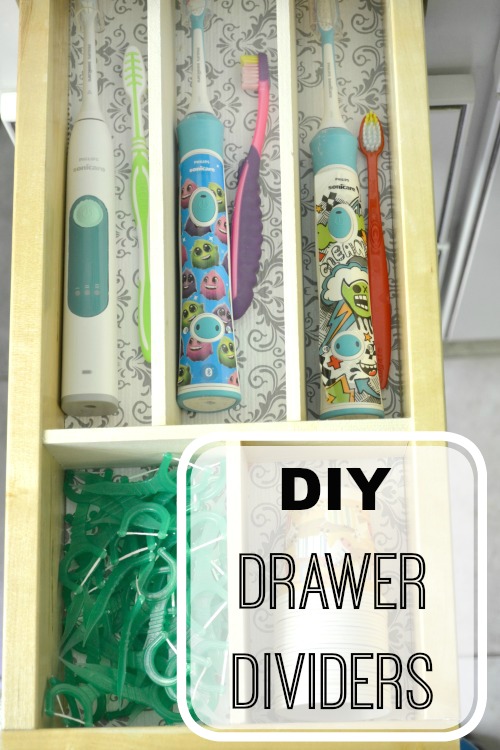
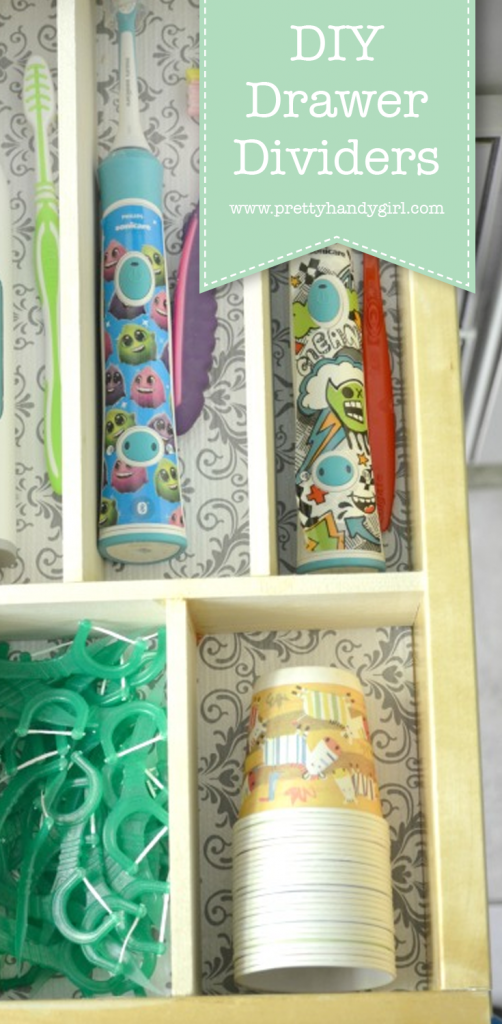
Drawers can be tricky when it comes to organization because when you toss things that belong in, they can still become cluttered. DIY Drawer Dividers help get your drawers more orderly and I can show you how to build them to suit your exact needs!
Materials:
- 1/4″ poplar hobby boards (width and length will be determined by the size of your drawer)
- Wood glue
- Shelf paper
- Old newspaper or other scrap paper
- Painter’s tape
Tools:
- Hand saw or miter saw
Instructions:
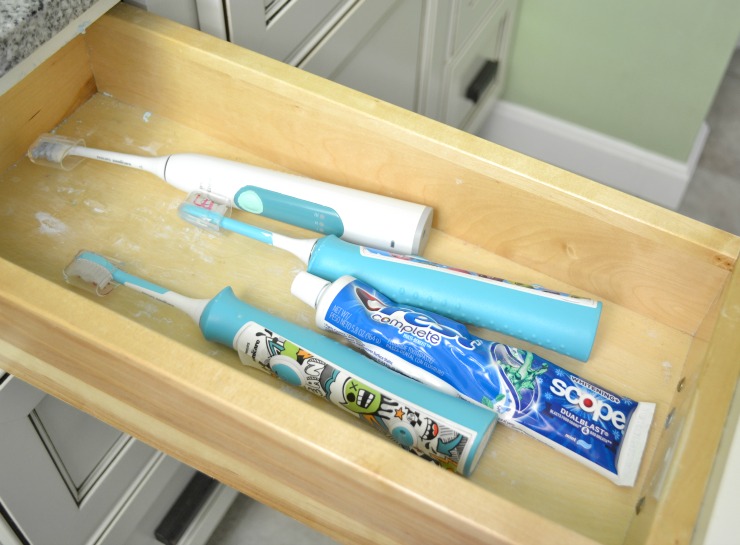
The first step is the most important. Clean out your drawer. By emptying it completely and then adding back what you intend to keep, you are designing your storage around things you actually need.
I built my dividers for my bathroom drawers that hold our toothbrushes, toothpaste and floss so there wasn’t much to throw away, but there was plenty of cleaning to do.
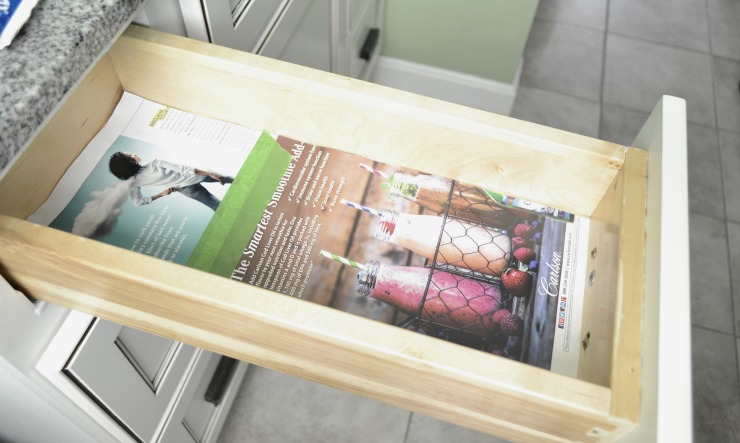
Once your drawer is cleaned out, line it with some pages from an old magazine or craft paper. This will protect the drawer from the wood glue later on.
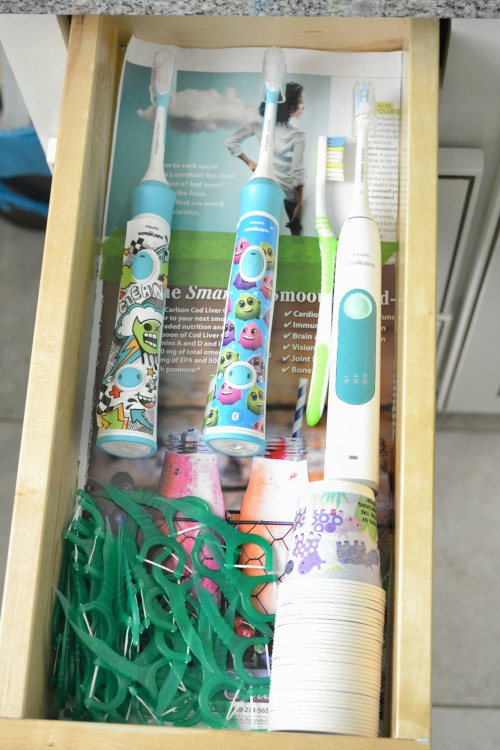
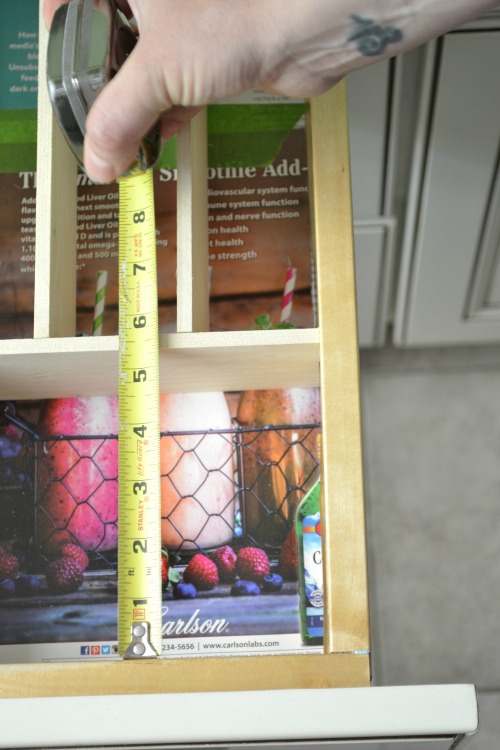
Next, add back the items you want to keep in your drawer. This will help you with measuring and planning where the dividers will go. Use a marker to map out the compartments by drawing lines on the magazine pages.
Take your measurements and cut your wood. Then place them in the drawer for a dry fit.
You may need to do this in sections to get the right measurements.
If you have a section that will run the entire width of the drawer, you can cut that piece to fit snug so it stays in place and then glue other pieces to it.
Glue the pieces together in your desired configuration and use the painters tape to hold them while the glue dries.
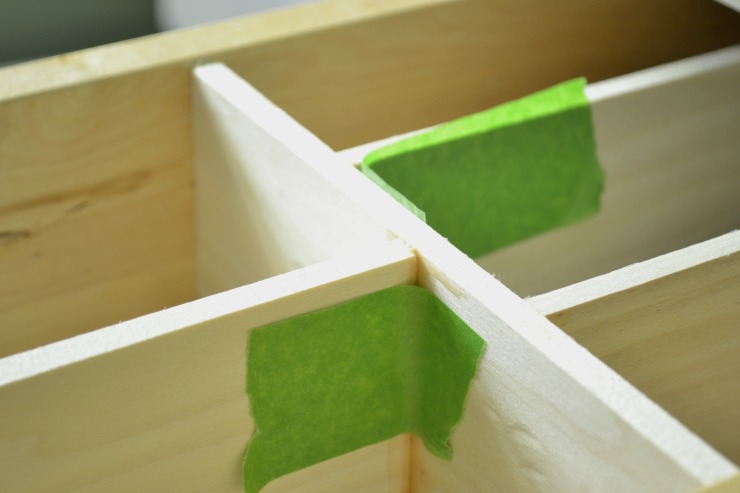
(I don’t recommend gluing the dividers to your drawer sides. You never know when you may want to change the configuration. By only gluing the sections to each other, you can remove them easily to clean without any damage to your drawers.)
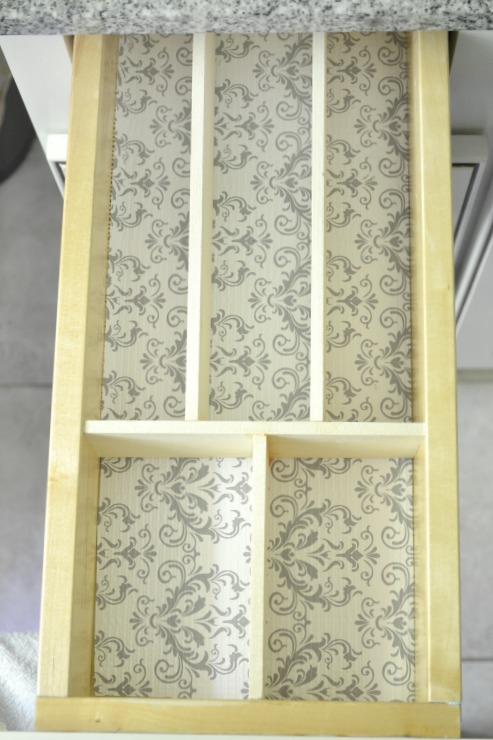
After the glue has dried, remove the dividers from the drawer and remove the tape. Add shelf paper to the bottom of the drawer and put your dividers in place.
All that’s left to do is add in all your perfectly organized items.
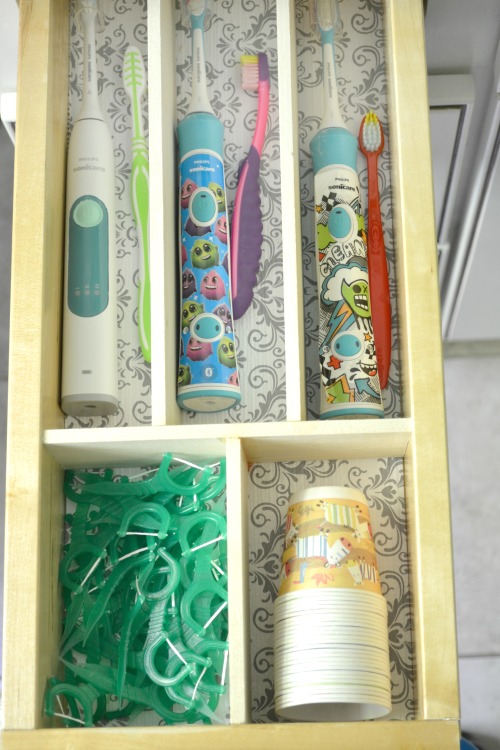
This project was so easy, I made a DIY Drawer Divider. My kids aren’t the only ones who need organized toothbrushes. Now my husband and I have ours neat and tidy too.

By creating custom drawer dividers you save time, effort and money. I have tried so many different ways to organize these drawers with no success. These DIY drawer dividers have finally made this storage space work for me. I hope you have the same success.

~ Read more of Jillian’s tutorials ~
Pin for later!


I really like the dear information you offer in your articles. I’m able to bookmark your site and show the kids check out up here generally. Im fairly positive theyre likely to be informed a great deal of new stuff here than anyone.
I need to do this for drawers that are taller. What kind of wood to I use? Is there wood higher than you used that I can cut the lengths I need? I’d be looking for thin wood, right? I don’t think it would need to be thick or heavy.
Thanks ~ you are awesome!
Hi Cheryl,
They do make this wood in various sizes. You should be able to find something to suit your needs, at the hardware store.
What’s up, after reading this remarkable paragraph
i am too delighted to share my familiarity
here with mates.
I used to do those separators with thick cardboard, but this is a few levels up. Very nice 🙂
Cardboard is a great alternative.
Can you get the wood at Home Depot or do you need to go to a hobby store?
A hardware store will have these boards. If you can’t find them, just ask someone in the lumber department.
Thanks alot for this tutorial. I’m tempted to try this out for my daughters room. Looks a but tricky but worth a try. Thanks again.
My pleasure. I think you’ll find they aren’t that tough, once you get started.
Fantastic timing! I was just working in a project were I needed some drawer dividers and none of the products I found were exactly what I needed. I’ll just make them myself now! Thanks for the info!
I hope it helped, Liz. Good luck!