
DIY Christmas Tree Crate
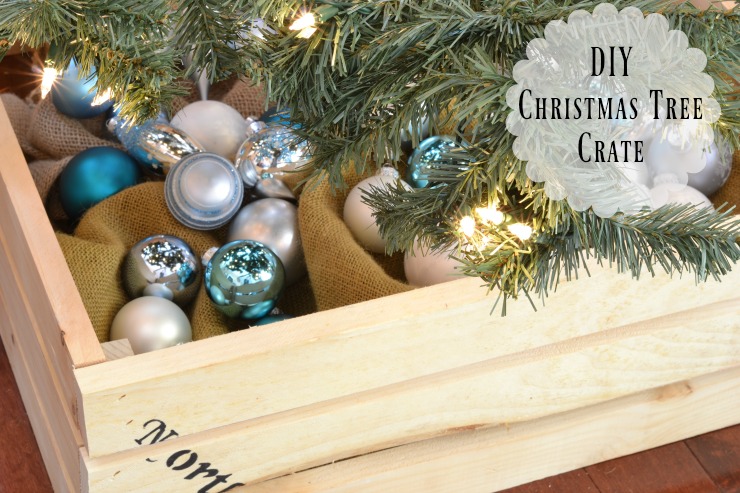
Hi Pretty Handy readers! It’s Jillian from I Am a Homemaker, and I am here to share a fun and inexpensive idea to hide your Christmas tree stand.
I have always had a tree skirt for my tree, but this year I thought I would mix it up a bit. I have so much scrap wood in my shop. Finding uses for it is almost a relief. It took one hour and cleared up one tiny little section of my pile, but now I have a great DIY Christmas Tree Crate for the bottom of my tree. Interested to learn how to make your own? Let me show you!
(I’ve included affiliate links for your convenience. I earn a small percentage from a purchase using these links. There is no additional cost to you. You can read more about affiliate links here.)
Materials:
- 2- 1″ x 4″ x 8′ board
- Pneumatic Staple Gun (or Cordless nail gun)
- Permanent Marker
- Stencil
- Wood Glue
Cut List:
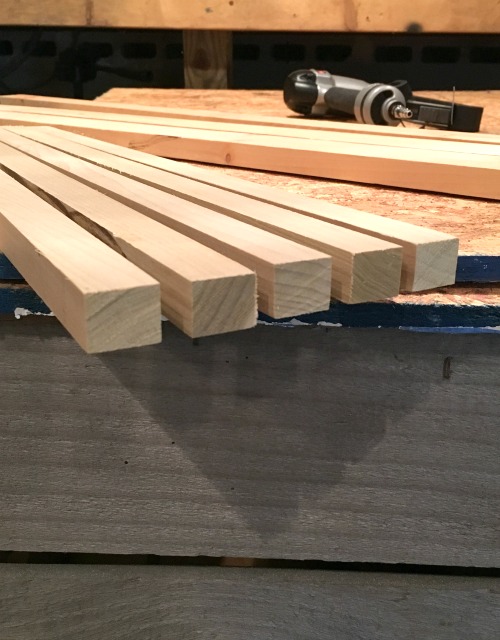
- 12 – 1″ x 2″ @ 24″
- 4 – 1″ x 1″ @ 7.5″ cut from left over 1×4
Instructions:
Step 1: Before we get into cutting, measure your tree stand. My tree stand is 20″ across but I wanted to make the crate to accommodate any stand I may buy in the future, so I made each side of my box 24″ long.
Cutting a 1×4 down to size makes this project inexpensive, but if you aren’t comfortable using a table saw you could also buy 1×2 boards instead.
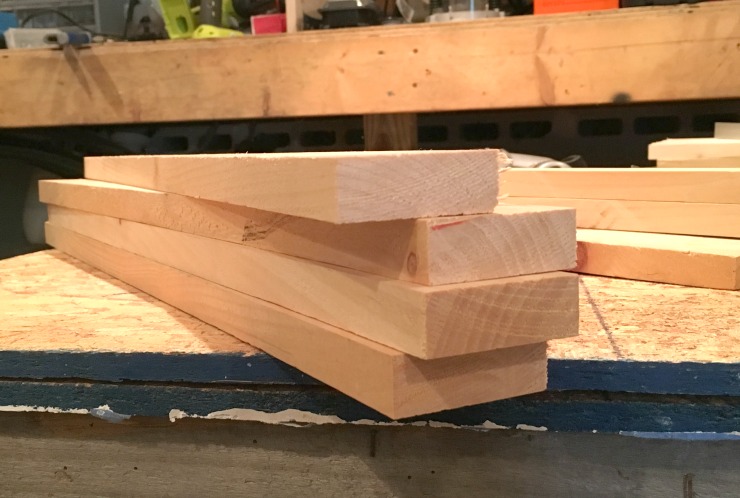
The 1x4x8 can be cut in half lengthwise and then cut into 24″ sections. You will have enough scrap left over to slice into 1″x1″ pieces for the corners. We’ll pretend I only took a picture of 4, right? ‘Cause you only need 4 ;-).
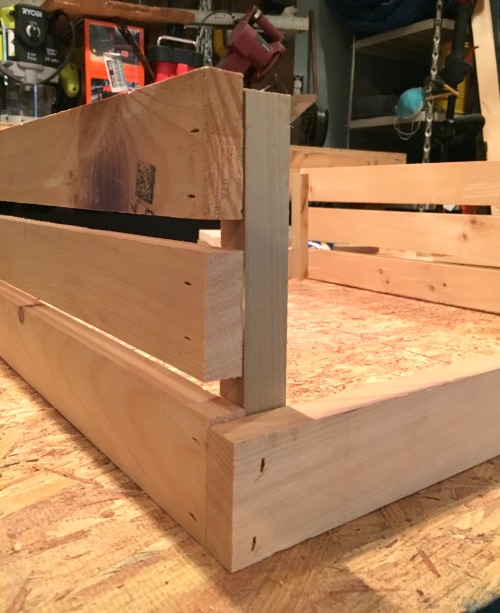
Step 2: Lay two 1×1 boards onto your work surface. Dry fit the 1x2s on the top to figure out your spacing. You can just eyeball a space that looks good to you. (I’m sure Santa doesn’t require the elves to have perfect measurements on shipping crates.)
Glue and staple the 1x2s onto the 1x1s.
It is fine if you want the top 1×2 to come a bit above the 1×1.
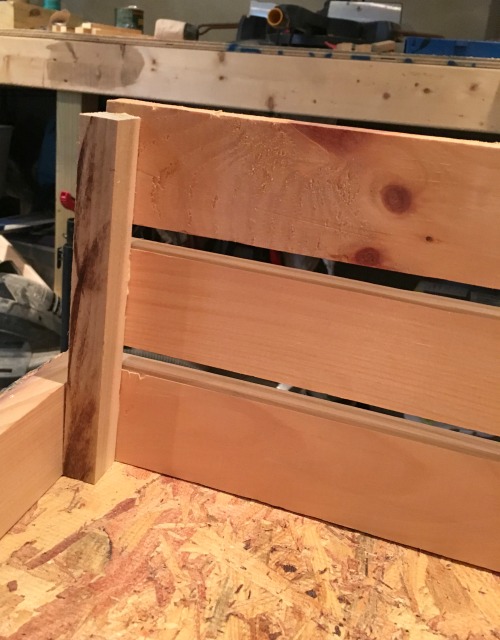
Step 3: Continue stapling the 1×2 boards onto the 1×1 to create a box. Line the sides up flush on the ends.
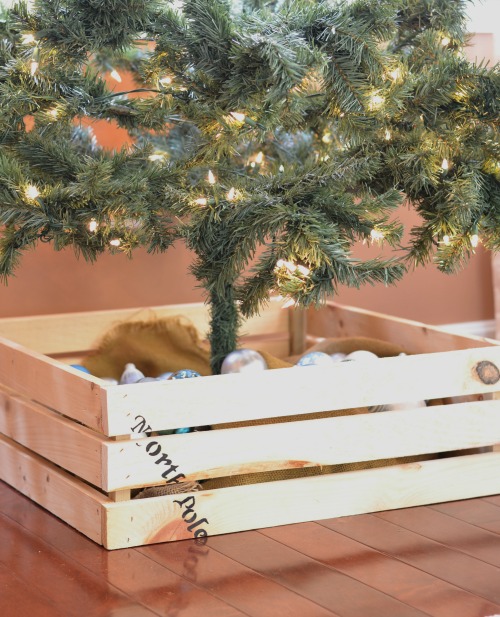
There is no need to create a bottom because the tree will sit directly on the floor in the middle of the crate.
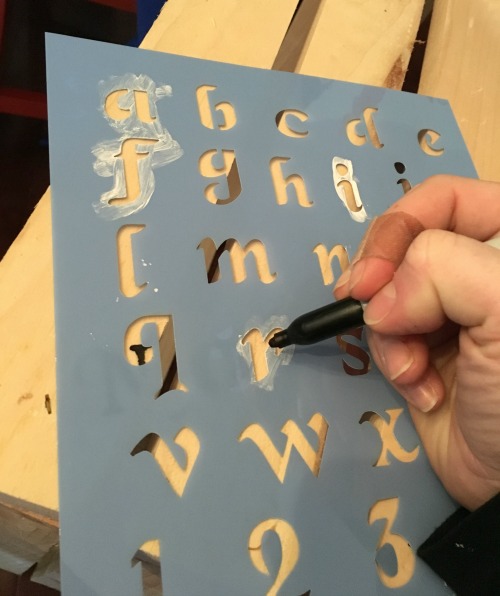
Step 4: Once you have completed the four sides of your crate, you can customize it with stencils. You could write something like “North Pole” or “To: your family’s name From: The North Pole.”
Step 5:
Add your tree and some burlap, shredded paper or left over packing peanuts. You could also add small, wrapped gifts or ornaments for fun.
I have been meaning to build this for years. I am so glad I can finally cross it off my list!

I’m off to wrap some gifts and get this season started.
What is your favorite way to camouflage your tree stand?

-Read more of Jillian’s posts-
Pin for later!


This is darling Brittany. What a great idea & a unique one as well. My tree skirt is a piece of heavy upholstery fabric loosely gathered under the tree. I wanted something in a deep turquoise color to match my tree so I used what I had. It’s nothing special & it’s hard to really see the bottom since my branches extend out quite far & deep. It works for now. Very cool idea here.