
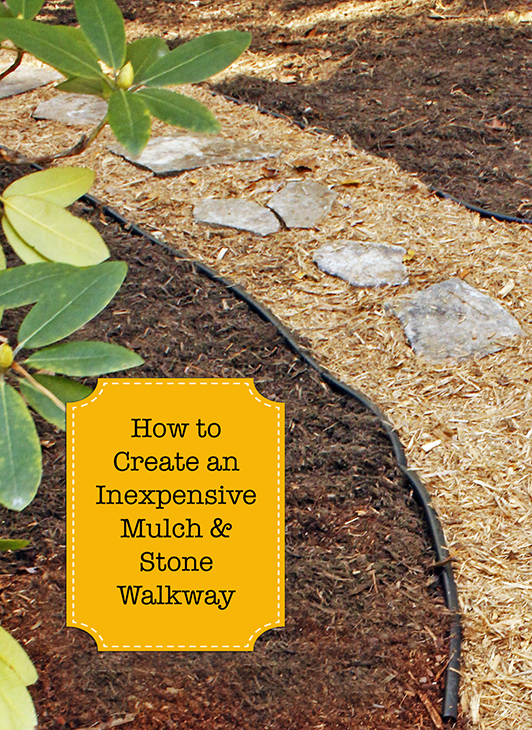
How to Create an Inexpensive Stone and Mulch Walkway
Creating walkways around your home can keep mud and dirt from getting on your shoes and ultimately from being tracked into your house. Today I’ll show you how to create a super easy (and inexpensive) pathway using mulch, stones, and edging. It’s a very easy DIY project, let’s get going on this landscaping task.
How to Create an Inexpensive Stone and Mulch Walkway
Spring is on its way and that means more rain. It’s also the time of year when the grass has been dormant, we had a harsh winter (lots of snow and ice), and there is more exposed dirt and mud in the yard. Let’s be honest, everyone tends to have problem spots in their landscaping that end up looking like a mud pit. And if you have kids or pets running around, that mud means keeping your home clean is a constant battle.
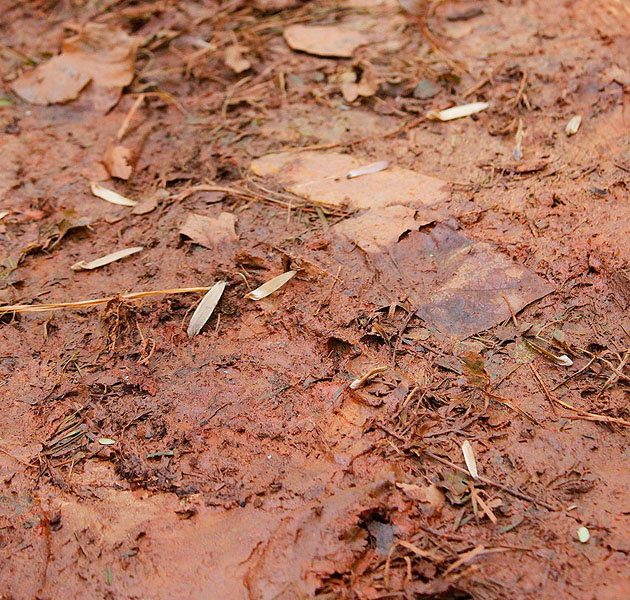
For those of us that live in the south, mud is not just wet dirt. It’s usually tough red clay! And unfortunately, it will stain everything you own and make housekeeping a nightmare. With early spring here, it’s time to come up with a fast and inexpensive solution to the mud problem. Let’s put a stop to the muddy yard.
Potential Materials:
While searching the exterior section at Lowe’s, I found a large selection of materials both man-made and organic in a variety of colors and textures.
- Pea gravel
- Crushed granite or crushed limestone
- Crushed limestone
- Pine bark mulch
- Hardwood mulch
- Rubber mulch
- Concrete pavers
- Brick pavers
- Crushed granite
- Natural stone (flagstone, limestone, sandstone, slate, blue stone, quartzite, or granite)
- Cobblestone (for an old antique look)
- Hardwood tree stumps
- Deck Boards
- Concrete cement
- Any non-slip smooth surface material
Considerations When Choosing Materials:
I really mulled over the different options and considered all the pros and cons of the different materials.
- house style/landscaping (a cottage style garden may not fit with a modern architecture house)
- color selection (color should compliment your house not compete)
- material availability
- cost (what’s your budget)
- maintenance (will the material break down or scatter too easily)
- sloped or flat path (will the material stay put or be a tripping hazard)
- choking hazard (do you have little kids or pets that might eat pea gravel)
For this pathway project, I had a very limited budget. Plus, I didn’t want to haul a lot of heavy materials home. Finally, I liked the idea of covering the entire area with organic materials that would help by adding nutrients as it breaks down. I chose to use two different colors of mulch.
Edging Choices:
Using edging for your pathway is important to keep the walkway materials from shifting or scattering. Like most home improvement stores, there are a wide variety of edging materials to choose from.
- Brick
- Cast concrete
- Stone pavers
- Steel or aluminum edging
- Rubber or plastic edging
- Landscape timbers
- Creative recycled materials (old bottles, metal parts, tiles, or roof tiles)
- Durable plants (shorter plants like liriope or taller plants like boxwood hedge)
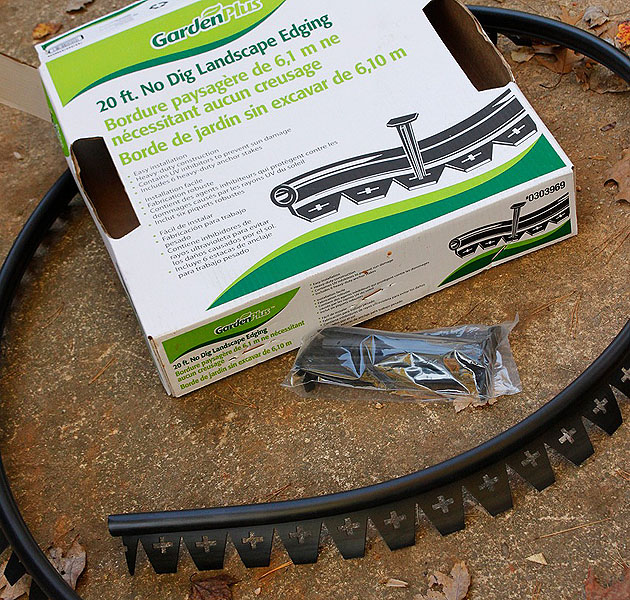
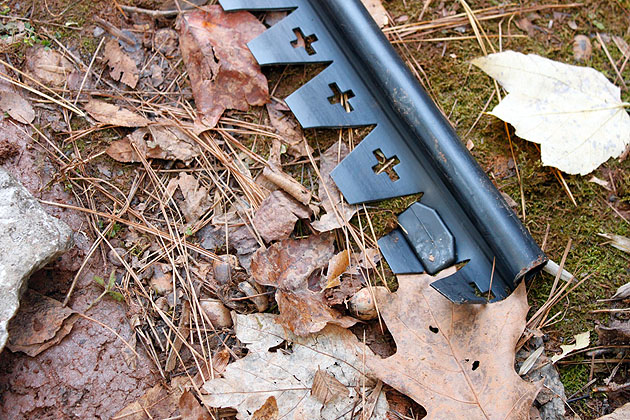
I would have chosen a more professional-looking edging (like pavers or landscape timbers), but my budget was tight so I chose an inexpensive (and time saving) no-dig landscape edging. This plastic edging doesn’t require any power tools and no digging a trench to bury half of the edging like you’d need to do with a metal edging This no dig edging uses pegs to nail into the ground and hold the edging in place.
How to Create an Inexpensive Stone and Mulch Walkway
Materials:
(I’ve included affiliate links for your convenience. I earn a small percentage from a purchase using these links. There is no additional cost to you. You can read more about affiliate links here.)
- Stepping stones (flagstone, limestone, sandstone, slate, or blue stone)
- No Dig Landscape Edging Kits (or your choice of edging)
- 2 Types of Mulch (Pine bark, hardwood mulch, pine needles, pine nuggets, cedar, cypress mulch)
- Yardstick for your width template
- Hammer
- Garden Rake
Optional:
- Garden hose
- String & Stakes
- Spray Paint
- Weed barrier
- Sand or Paver base
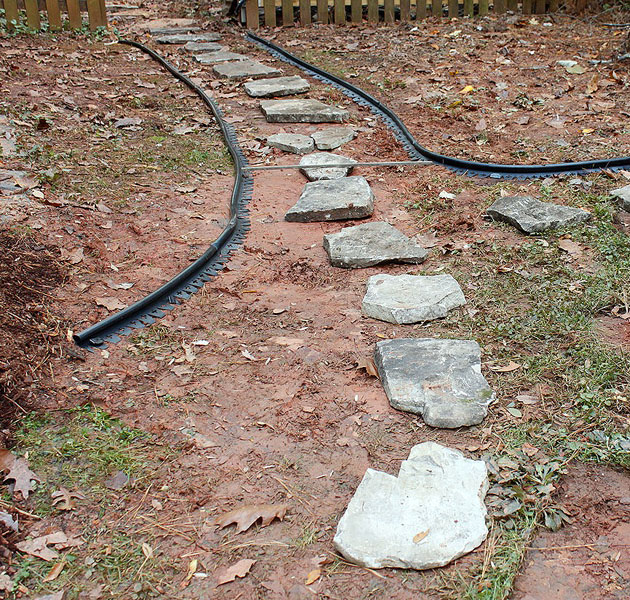
Instructions to Create an Inexpensive Mulch and Stone Path:
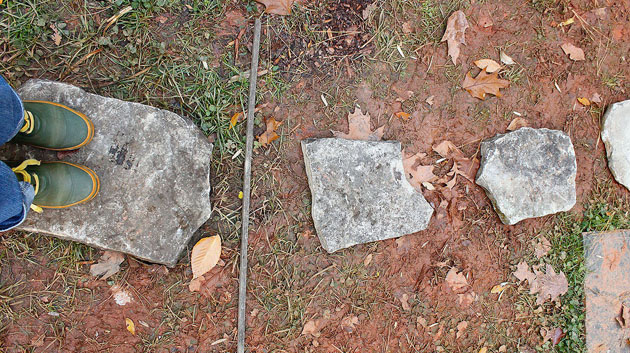
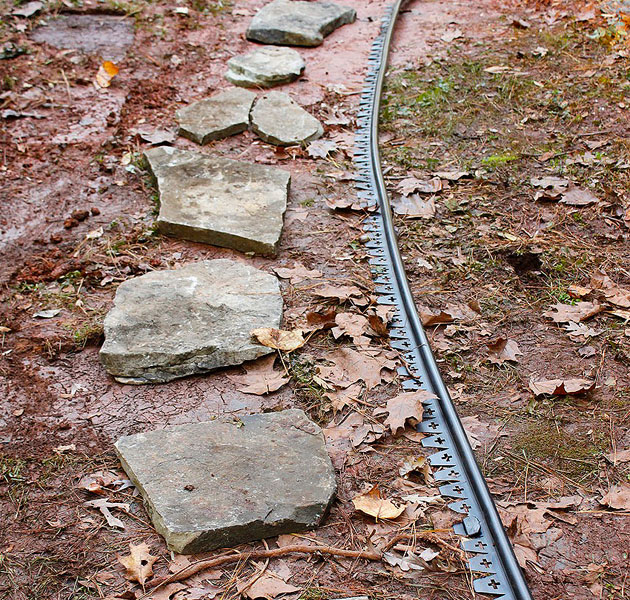
Gather all your materials near the path site. Layout your stones and walk on them to make sure they are spaced for a comfortable gait. (Do you see that stick in the above picture? That is my three foot path width guide.)
For a perfectly curved path, use a garden hose to line one side of the path creating smooth curves. For straight lines, use stakes and strings to set the path line. Once you are happy with your path location and shape mark the edges with spray paint.
Use your path width template (aka stick) to keep your edging equal distance apart the entire length of your path. (You may need to put a weight on your edging or set a peg in halfway to hold the edging in place.)

After the path and edging are laid out, step back and take a look. Make any tweaks to your pathway now.
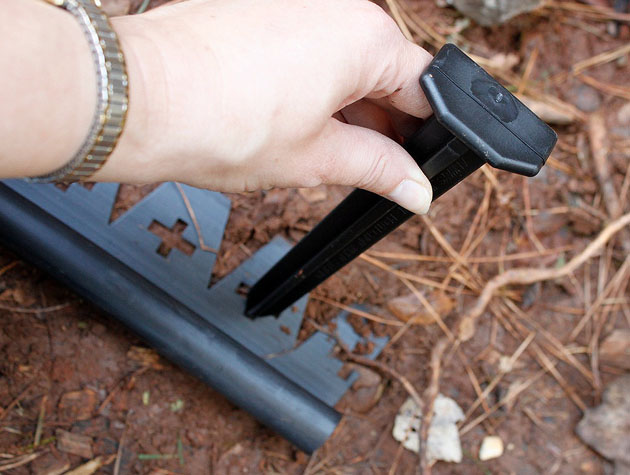
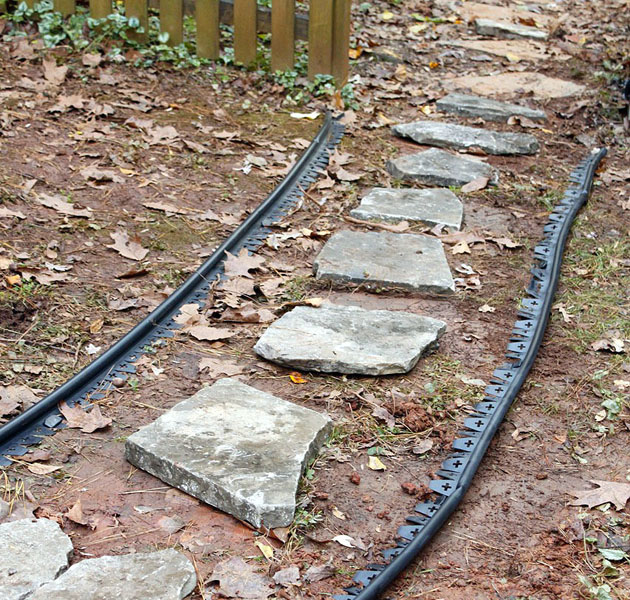
To set the path, start from one end and insert a peg into one end of the edging.
Then hammer the peg into the ground…
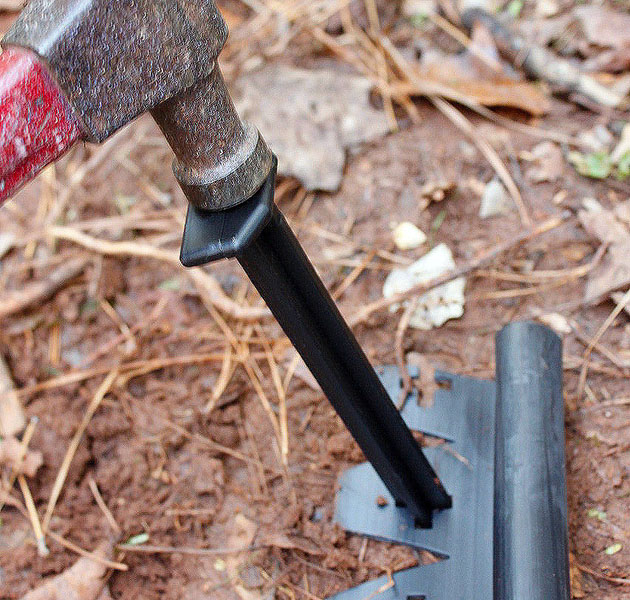
…until it is flush with the earth.
Continue setting a peg every 4-6 feet (and especially at the peak of any curves.)
Repeat for the other side of your path. If you want to lay down weed barrier cloth, now would be the time to do it.
Also, check to make sure your stepping stones are flat and don’t rock when you walk on them. (If you have very hard or compact soil, you should level underneath the large stones with sand or paver base.)
Open a bag of mulch and first spread one color to the top of your stones and the edging. Use the back side of your garden rake to smooth the mulch and eliminate any high or low spots.
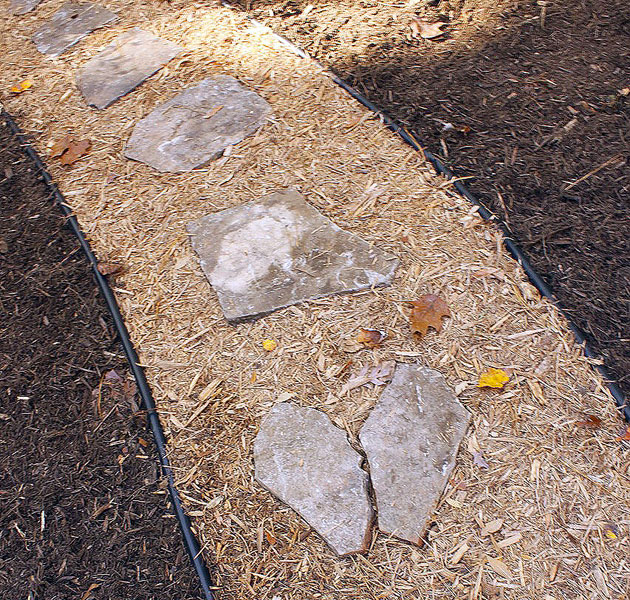
Repeat until you have filled your entire path. Then spread the second color mulch (a nice dark brown color is a great contrast to the lighter mulch) on the outside of your path.
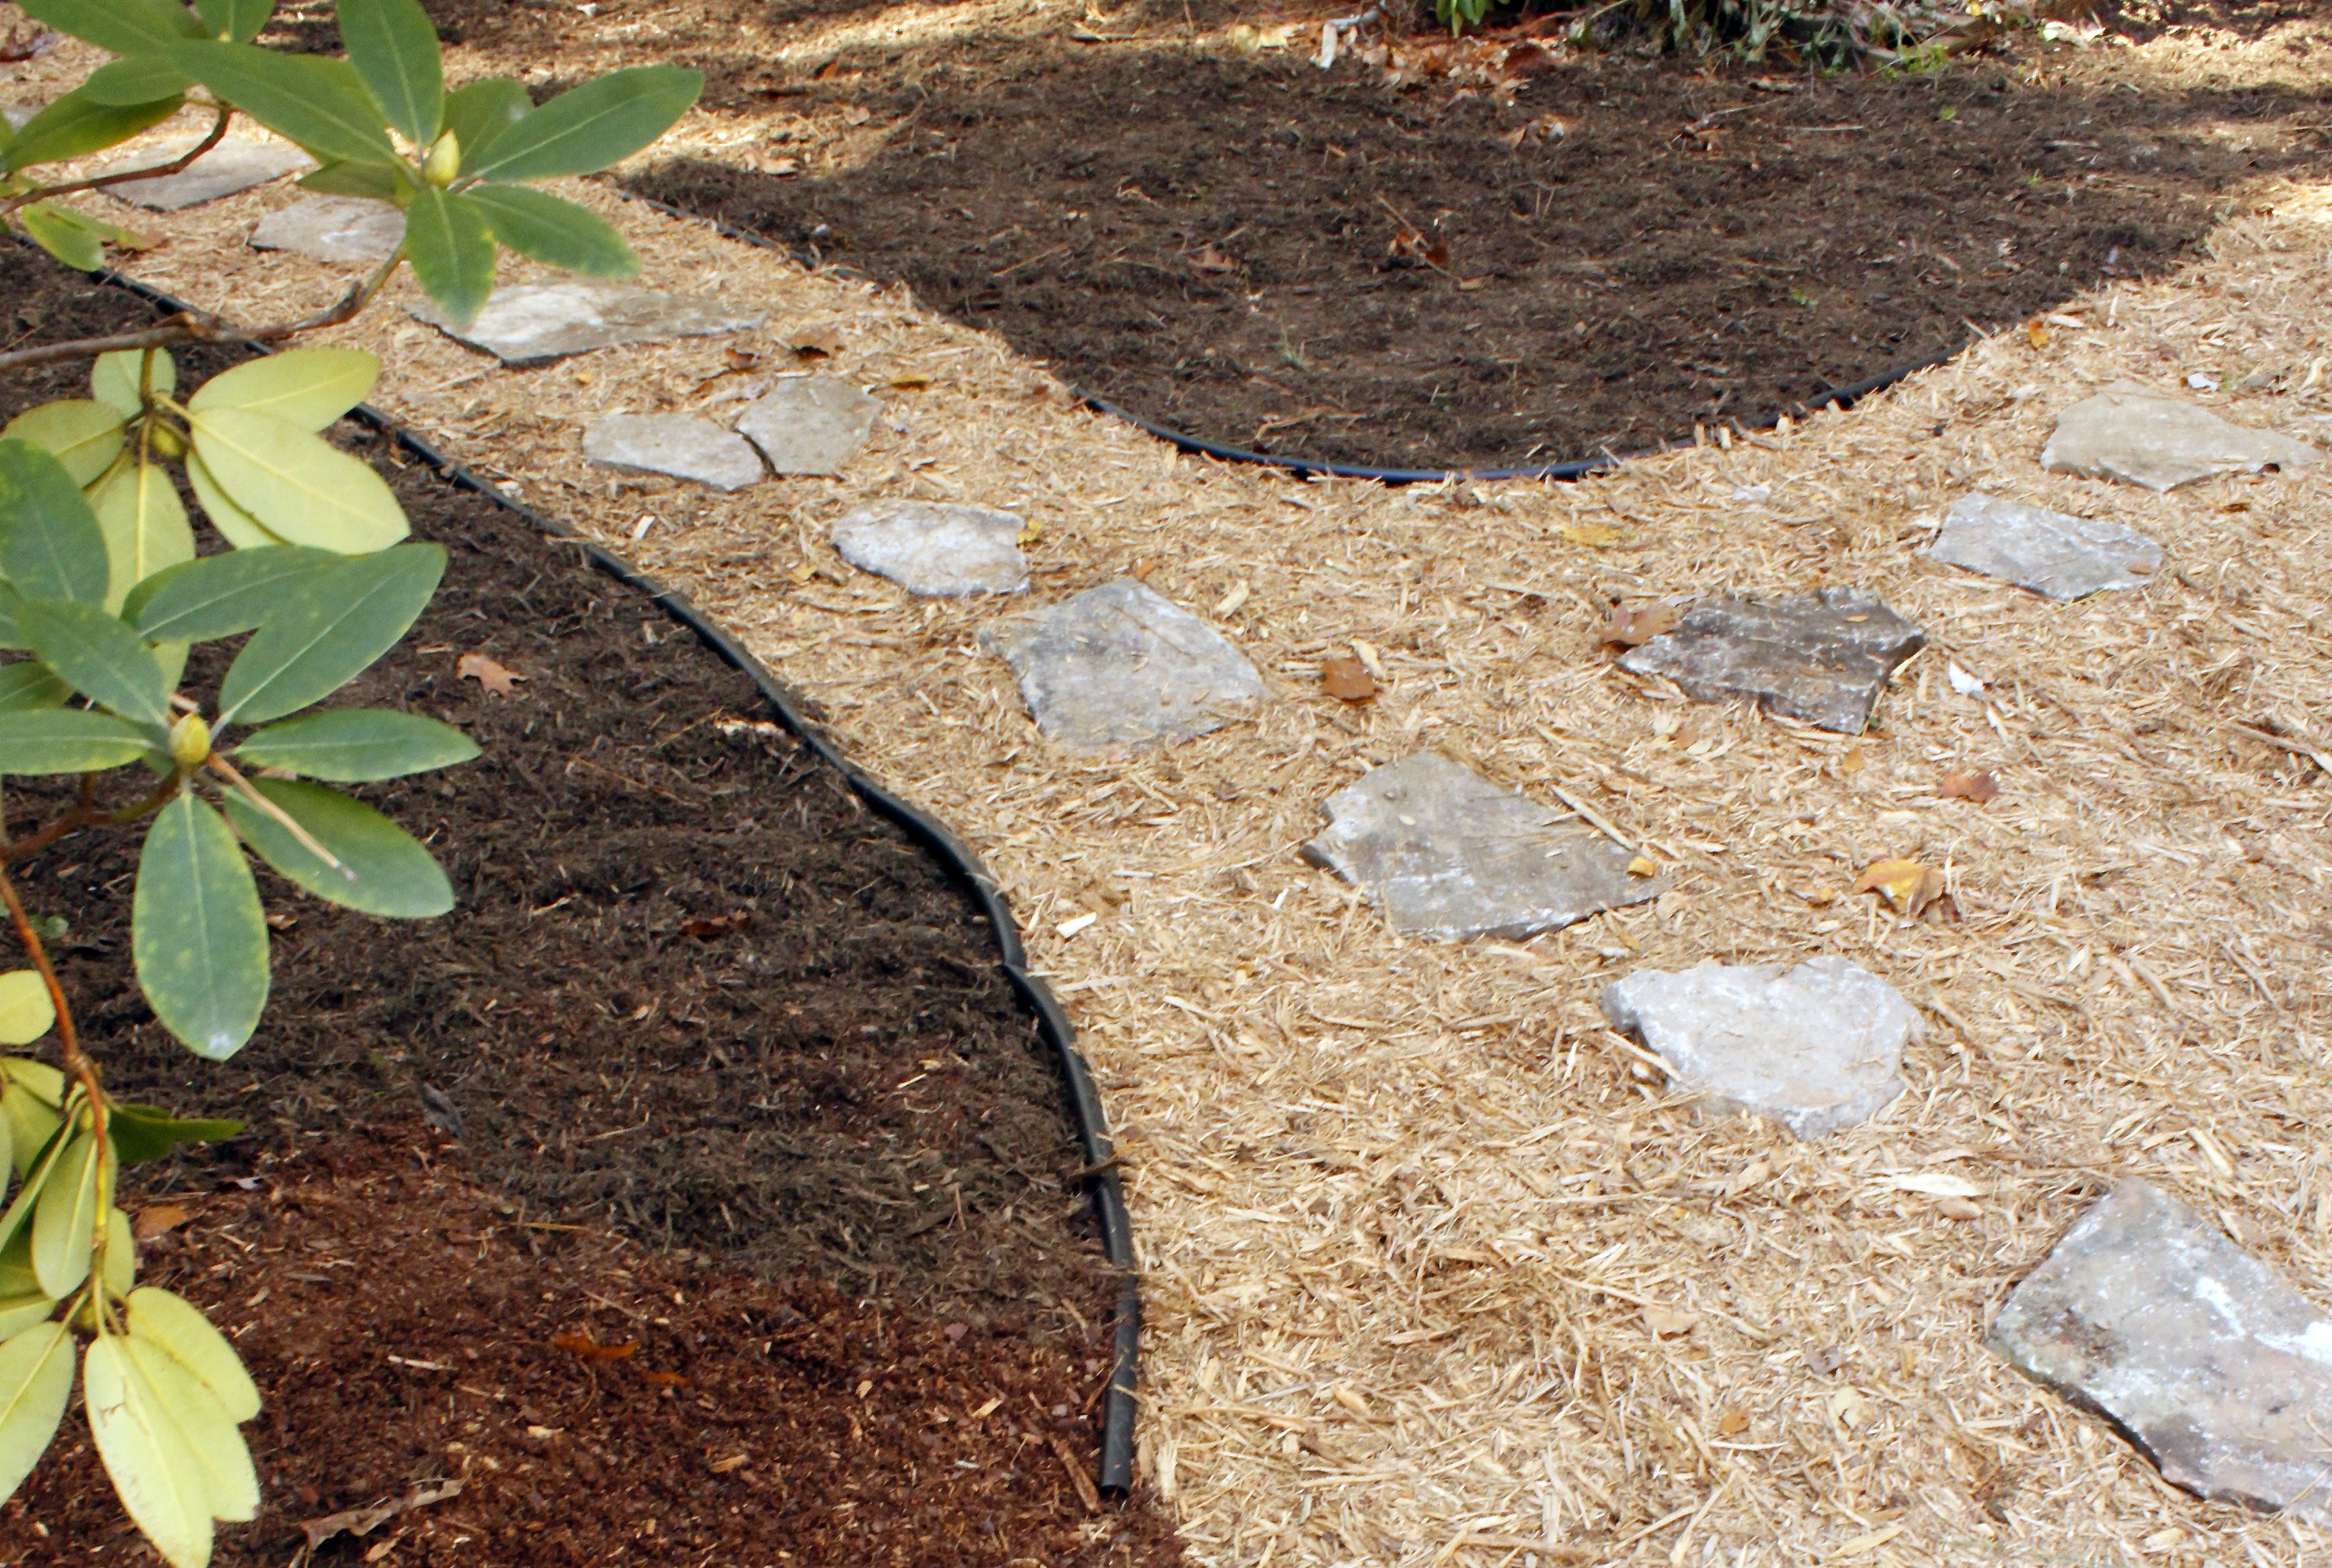
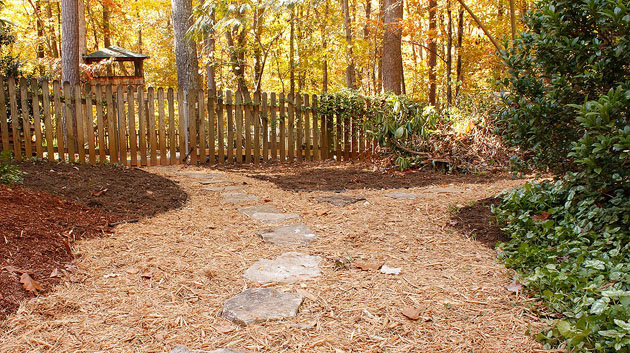
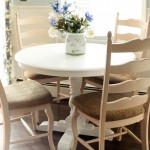
Don’t you just love the contrast between these two? The lighter colored mulch is cypress and the darker is hardwood mulch and adds some much-needed color to this previously barren area. Walk on your stones and put some dirt or sand underneath any that wobble. Now stand back and admire your finished path! I think my favorite stepping stone is the broken heart stone I made with two rocks.
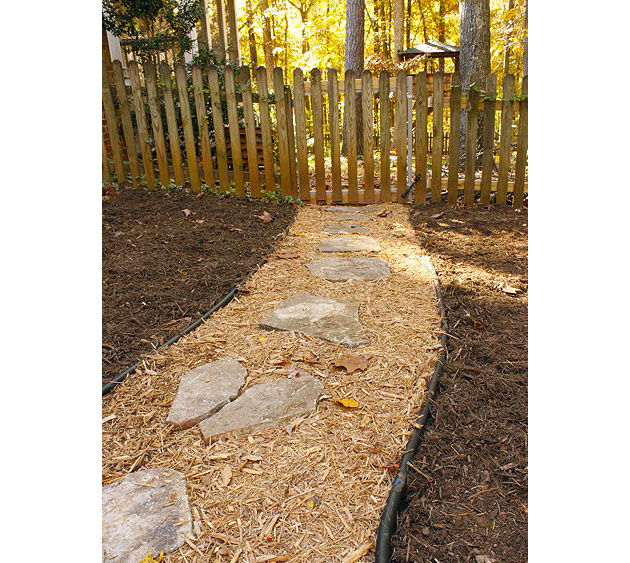
The entire path took me just over two hours. Not bad, and the bonus is that I didn’t need to go to the gym to workout that day!
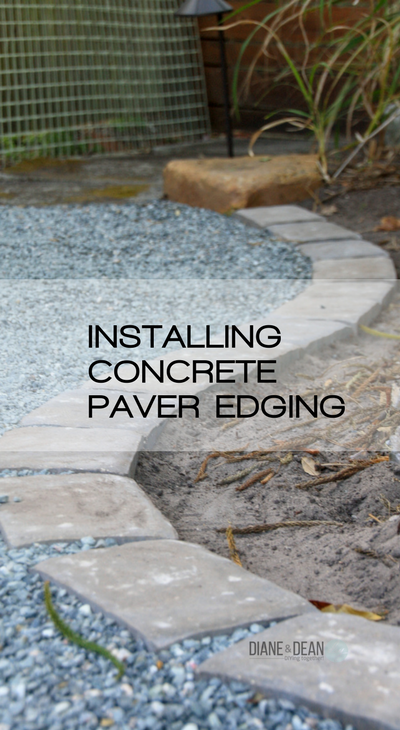
If you wanted to learn how to use concrete pavers to edge your walkway, I have you covered in this tutorial:
Finally, I have a great article helping you find 10 Creative Concrete-Free Walkway Ideas for Your Home.


Want to improve your curb appeal? Here are some tips and tricks to improve your landscaping in no time!

Edging in rolls like this is available at Menard,s. Menaces has a plastic underlayment that replaces a gravel base. Place your leveling sand and then pavers.
Love your path! My husband and I are going to tackle a path this coming weekend. Do you not need a gravel or sand base? Most tutorials include those but I would love to skip that step if possible. lol
How has this path held up?
Gravel will help water drain away easier and a base will help level the stones easier. Although helpful, it’s not 100% necessary. Our path held up for years, we wold have to replace the layer of mulch every year as it broke down. But, we eventually replaced the path with pavers from a leftover project.
For my edging I am using bricks do I have to fill it with mulch to the height of the bricks
It’s up to you, but I would fill it to just below the bricks to help keep the mulch in place when it rains.
Hi- Where did you get your edging? It looks a bit heavier-duty than the stuff I see on Amazon and Lowes, I especially like the cross-shaped spikes.
It’s the same width, just the old style has a hollow tube for the top edge.
I’d like to try that, but what about weeds and grass? Should I lay down cardboard or weed blocker? Also, I made a stone pathway with pea gravel last year but the gravel gets scattered over the stones and to the side (even with edging). Is there any way to prevent that, i.e. set the gravel? Thanks!
Ellen
Yes, weed cloth is a good idea.
Can you drive a handicapped scooter over the mulch pathway without sinking in or ruining the mulch ?
It depends if the mulch is tamped down or not and the weight of the scooter and person.
do I need landscape lining to block weeds if sunny area?
It wouldn’t hurt.
Toward tge end of last summer, I did a pathway using pea gravel, this was the north side of our shady area, and I love it. On the south side of the house, we laid flagstones, love it to. Your pathway is fabulous, as always. Thanks for saring.
Looks fantastic! My husband and I are about to start this project, ourselves. Did you need to dig a hole for the stones so they are secure in the ground?
Looks like we figured it out! Thanks for the inspiration!
That looks great, and I’m sure it will help keep winter mud at bay. Thanks for the great, economical solution!
Exactly what I wanted to do. Ty. You made it easy.
How do you end the path? Ours will lead down into our yard. Do you put barriers at the end as well?
I just stopped adding more mulch at the grass.
I am so glad I found your site, great ideas and tutorials. 🙂
Try Sheet Mulching 3 months before to kill of weeds! Lay on wet soil layers of cardboard or newspaper (8 sheets of newspaper) layered with compost, straw, mulched leaves or mulch and let mother nature kill grass/weeds…then before laying stones (instead of weed barrier) add a few more layers of newspaper, then mulch or use pebble stones (that don’t need to be replenished)…not only will you enrich the soil, you will have a cheap weed barrier that will low maintenance!!
Gorgeous! I have been really thinking about doing this in my yard, and now I am convinced!! Thank you for sharing!
Bookmarking this project – thanks for the inspiration! I have to remove grass, but I want to make a little path from front door to the back gate (a short distace) but instead of mulch around the stepping stones I wan to use that terra cotta colored rock fill that you see on park paths (not sure what it’s called – not pea gravel). so excited I won’t have to dig trenches!!
I think you are probably referring to crushed granite. I am also curious how fast the weeds start growing. I would have thought you would need to put a weed barrier down with a couple of inches of sand before laying the stones and the mulch. Anybody know for sure? I’d hate to do this project and then have the weds start growing through.
Pennie, if your spot is fairly sunny and you have good soil you might want to put down a weed barrier. Ours is just a big mud mess, so I just put new mulch over it each year which helps control the weeds.
I have to add to all my mulch areas every year or every other anyway. So that’s not a negative. Great project and great photos and info. Thanks.
Great solution. I’m curious though – Do you find that the mulch drifts out of the edging when it rains? I’m just wondering if it is tall enough to keep the good stuff in…
The section that is flat doesn’t wash out too much, however there is a drain pipe that empties into the path which does carry some mulch away when it rains. If your pathway is on a slope, be prepared to refill the mulch yearly. I hope that helps ;-).
Bought 6 boxes of this edging the 20 foot with stakes.Found out on the outside of the box it states to have (1) 8 inch connector to join them together. Well they are not supplied why state this if not true.
David,
I’m sorry the kits didn’t come with the connector pieces. I think they may be with the bags of extra pegs that I recommended purchasing as well.
So glad I stumbled onto your side when I googled the Garden Plus no dig edging. I just purchased some and was considering taking it back because I’m just not sure, but now I’m going to try it. I need to go back and get some extra stakes. How difficult was it to uncoil it when you took it out of the box? Did you have to cut any? I am going to have to cut it, but it says a hack saw will work?
With plastic edging I open the package and lay it out in the sun for a while. It softens and is much easier to bend this way. A hack saw will cut it easily.
Your yard looks great! I love the flagstone. We really need a path that goes around the house up to the driveway. I like the edging you used. I am constantly raking the edge of our cypress chip path!
It looks great! A GREAT solution. Thanks for linking up to Topsy Turvy Tuesday's.
Wow, what a great solution! I love it. It looks nice and neat as well. I'm all about the thrifty, low-time answers. Thanks for linking up!
That's really pretty and I love how easy it is compared to some of the other options. Thanks so much, I'll be linking.
That path is great. Lots of hard work went into that. I know because I do most of our yard work. Thanks so much for joining the party. I ask that you add my link in your blog. People do not know to go to the side and click on the linky parties nor do they know what party you are linked to without posting it. It just helps others to find the party. Thanks so much!
You are my hero!
I love this idea 🙂 I've been trying to make our front walk beautiful and I think this will be just the ticket!
I always love everything you do.
I'd be honored if you'd stop on by and take a look around our blog!
-Emily
http://crispinteriors.blogspot.com/
http://crispinteriors.goodsie.com/
Sadly, I know that red clay firsthand (says the VA girl). It gets everywhere! How pretty your new path looks.
Do you think weeds will grow through the mulch?
Weeds will grow through the mulch to a point. Especially dandelions and Thistles. When I did this even in my raised flower and shrub beds I put down a weed barrier cloth and cut out where the plants were. This has eliminated most of the weeds. However, I still get the odd one coming up around the plants or at the edge of the raised brick work.
That is awesome! I would love for you to come link up at our Strut Your Stuff Party!
http://danajeanward.blogspot.com/2010/11/strut-your-stuff-link-party-and.html
I've done the edging that needs digging in. What a pain! On top of the digging needed,it tends to sink down pretty quickly. with the flat section, this looks as though it would eliminate that second problem as well. The two colors of mulch really make this stand out!
I'm going to have to steal this idea for an area we walk on too much to get grass growing.
Thanks for another great idea.
Wow, that looks great. What a transformation.
I am with Becky, So Cal gal too. But what a great solution you did. It looks great, and I can't believe you did it in two hours!
I think it looks great!
Ok…now I see the reason for the mud rooms. I'm a So. Cal. girl and we don't have that mud! That's incredible…that path is going to be a life saver to your house!
That's so cool! I love it!