Creating Minnow Trap Light Pendants
On our last trip to the beach, I stopped in a hole-in-the-wall thrift shop. The store was musty, dirty and reeked of old cigarette butts. I’m still not sure why I was drawn into this store. But low and behold, this is what I found!
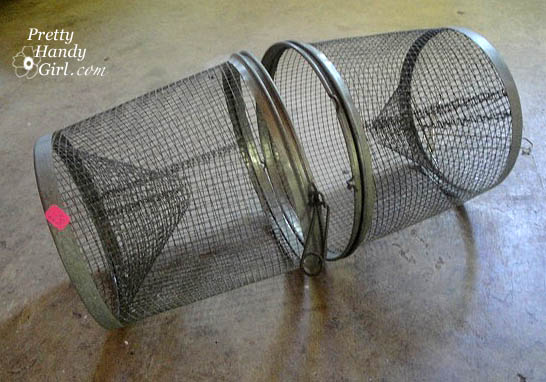
The owner told me it was a minnow trap. Duh, of course it is! Actually, I’m not a fisherperson, so I never would have guessed that.
What I did see was two pendant lamps for my screened porch. I have been trying to decorate it for a year, but I have been unable to find some inexpensive porch furniture. Regardless, I am aiming for a breezy ocean theme, so these would fit in perfectly!
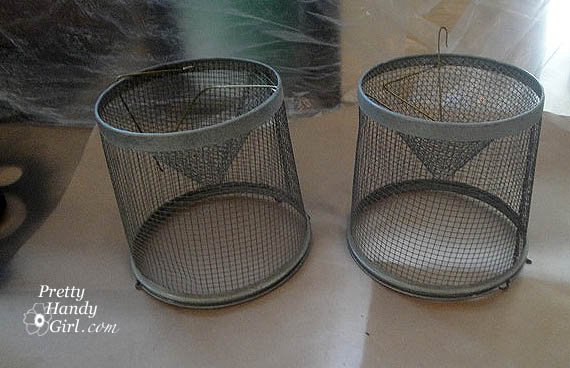
I separated the trap into two pieces. Then cleaned them with a damp rag.
To create the light kit frame, I used these tools:
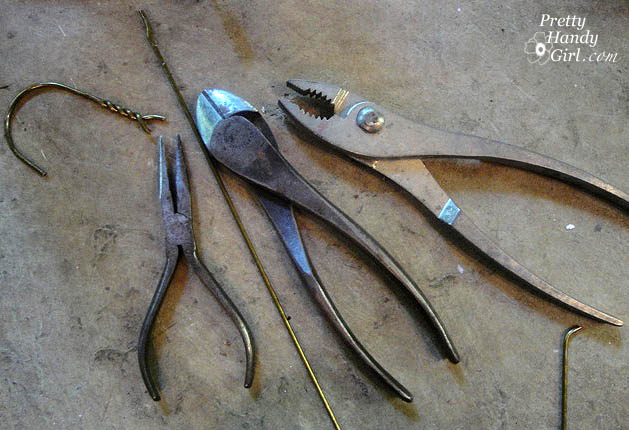
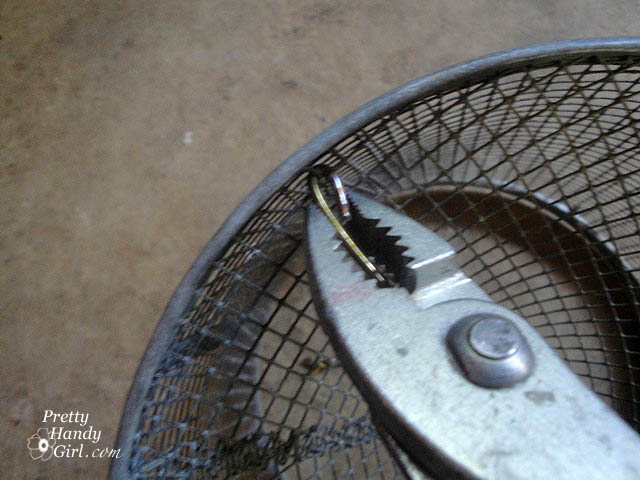
I bent a small hook in the clothes hanger with the needle-nosed pliers. Then fed the end of the coat hanger through one top edge of the minnow trap.

Using my pliers, I pinched the hook shut.
If you pretend that the first hook was attached at 12 o’ clock, then you want to attach the second hook at 3 o’clock.
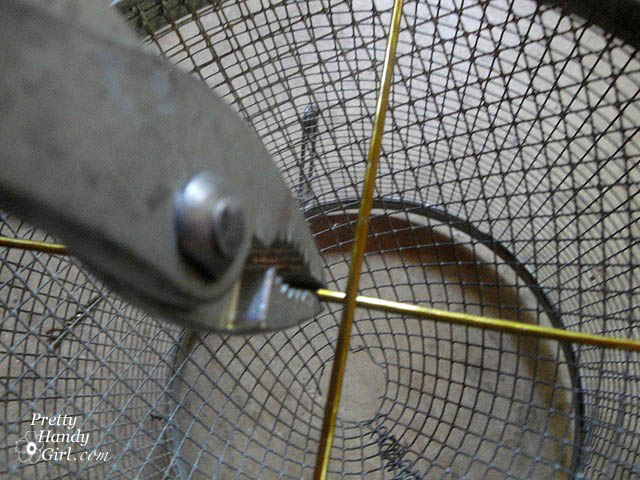
Using my pliers again, I bent both wires near the center into a 90 degree “L” shape.
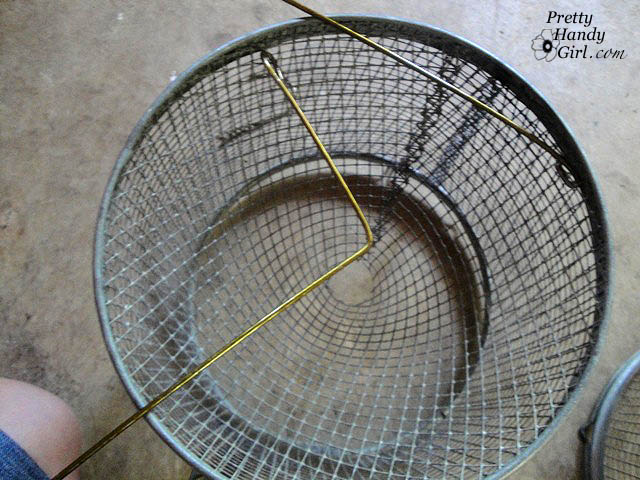
Next, I wove the other L hook (over and then under) the first hanger and bent the wires until they overlapped at 6 o’ clock and the second one at 9 o’ clock. I played with the wires until I was able to create a small hole in the center.
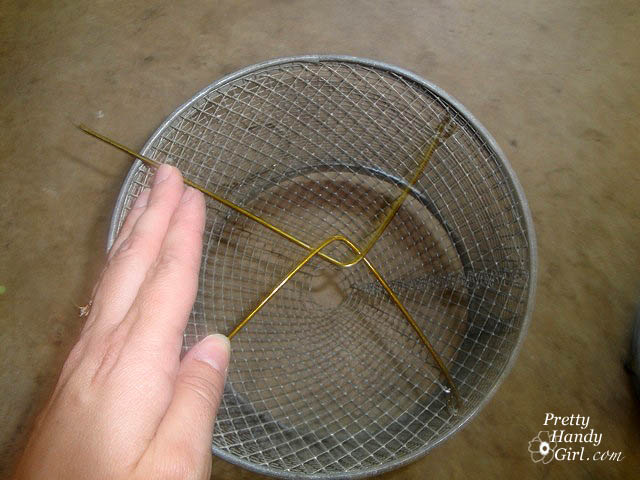
I ended up with this on both traps (now looking more like lamp shades):

I sprayed my two lamp shades with an automotive primer (I read somewhere that it has better adhesion to metal) and followed up with 2 – 3 coats of Oil Rubbed Bronze spray paint.
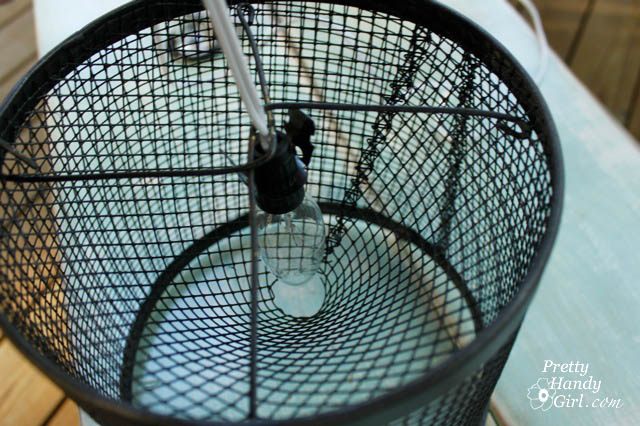
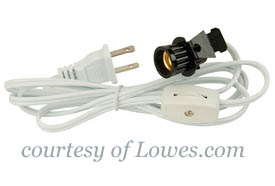
For the light sockets, I purchased 2 candelabra base kits from Lowe’s.
I simply inserted the socket and light bulb underneath the coat hangers. Then bent the coat hangers while making sure to get the light kit centered in the shade.

When I got everything centered, I fed the unattached ends of the coat hangers through the shade and hooked it around securing it to the wire shade.

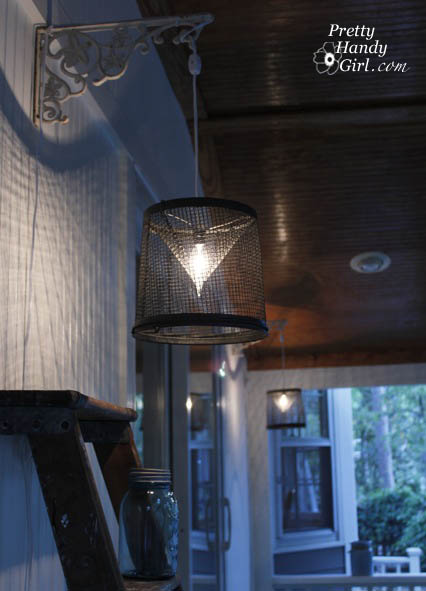
Then all I had to do was screw in these cool iron shelf brackets into the wall on my porch and feed the wires of my lamps through and use a twisty tie to secure it.

Now we have some unique mood lighting on our porch!


Do you like? Would you have known that they were minnow traps?
Too bad the weather is turning cool again. Maybe I can find some deals on porch furniture now!


These are SO cute and fun! You did a great job.
I pretended to attach the first hook at 12 o'clock, and then waited until 3 o'clock. Nothing happened so I read a magazine until it was time to overlap some wires at 6 o'clock and then another wire at 9 o'clock. I wasn't sure what I was supposed to do in between time, so I fixed myself a nice cup of tea and looked out the window. I feel so relaxed, I can't wait for your next project.
Many thanks,
Amelia Bedelia
PS. would your boys like the minnows I caught?
Holy smokes! That is a really neat project…I wish I were that handy with wiring. You are a jack of all trades!
Christa
I LOVE this, Brittany! What an awesome light fixture — I can't get enough light fixture projects! 🙂 I'm with you on the porch furniture — hopefully you find a good deal now that it's fall! 🙂
awesome job perfect looking on your s-porch
Really, really cool! I love the pattern they leave on the walls!
I likey!!
Ah, that is genus. How did you know to bend the wires at a 90 degree angle? I don't think I would have thought of that. I have a girlfriend who needs to see this.
These are so cute and soooo creative.
Very Cool…these are great.
Really cute, what unique lights! They really do look great!
These are so great! Love them!
ummm…I didn't even know what a minnow trap was! But I love what you turned it into!
Yes! I love the texture it creates on the walls. Man, I never would have seen those minnow traps and thought anything of them 🙂 You have a great eye for re-purposing.
ummm… i NEED those on my porch. they turned out so good. gonna try to see if i can make some. thanks for sharing the tutorial!
angel
Wow, those turned out GREAT! 🙂