• Home
  • About
  • My Home
  • Project Gallery
    • Decorating
    • Painting & Antiquing Techniques
    • Arts & Crafts
    • Build It
    • Electrical
    • Plumbing
    • Gift Ideas
    • Sewing
    • Tool Tutorials
    • Home & Auto Maintenance
    • Landscaping & Gardening
    • Photography
    • Recipes
    • PHG TV
  • My Toolbox
  • Contributors

Pretty Handy Girl

A DIY Blog Empowering You to Complete Your Own Project. Build it, Fix it and Do it yourself. Home project tutorials.

  • Contact
  • Advertise
  • Home
  • About
  • My Home
  • Project Gallery
    • Decorating
    • Painting & Antiquing Techniques
    • Arts & Crafts
    • Build It
    • Electrical
    • Plumbing
    • Gift Ideas
    • Sewing
    • Tool Tutorials
    • Home & Auto Maintenance
    • Landscaping & Gardening
    • Photography
    • Recipes
    • PHG TV
  • My Toolbox
  • Contributors
Home » arts and craft » Create Your Own Decorative Bin

Create Your Own Decorative Bin

November 4, 2010 Brittany Bailey 21 Comments

842shares
  • Facebook
  • Twitter

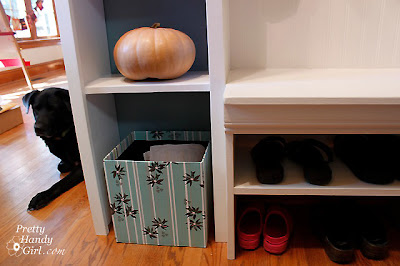
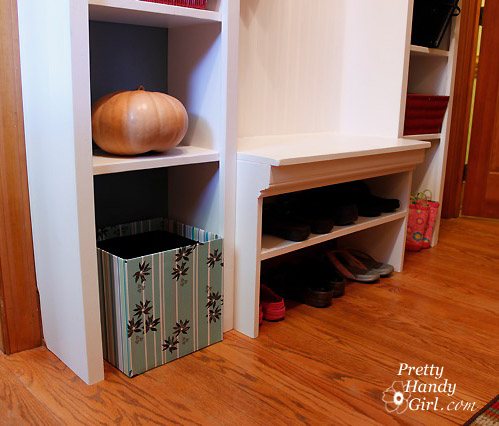
Do you remember that cute little blue striped bin in Renee’s storage unit? The one that she uses for junk mail and recycling.

How much do you think she paid for that? Would you believe nothing?! I made it for her out of a cardboard box and art supplies I had on hand.

Materials:
Cardboard Box
Black Spray Paint (or other color)
Spray Mount (Spray Adhesive)
Elmer’s Glue
Scissors
4 sheets of scrapbook paper (wrapping paper, fabric or wallpaper)

Instructions:

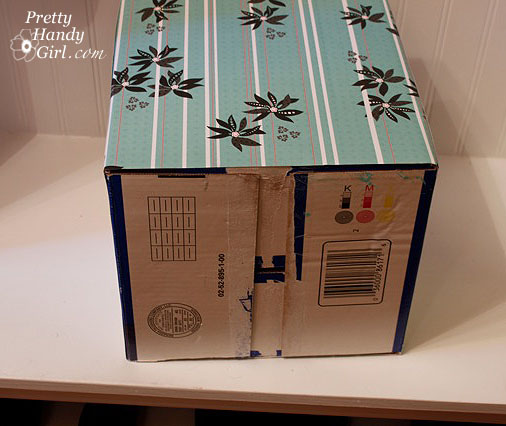
1. I started with a square Huggies Pull Ups box. I knew you wouldn’t believe me, so here is the picture to prove it.


2. Spray paint the inside of your box (be sure to wear gloves because the spray will coat your hand since it swirls around inside the box.)

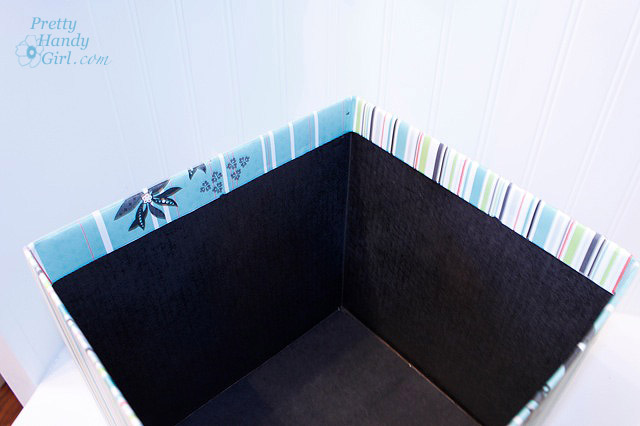
3. Spray adhesive on the back of 2 sheets of scrapbook paper.

4. Attach them to opposing sides of the box.

5. If your scrapbook paper wraps around the sides, that is good. Be sure to snip the top of the paper at the corners of the box so it can fold over inside the box.

6. Cut your other two sheets of scrapbook paper to the exact width of the uncovered box sides. Spray adhesive on those two sides and attached them to the box. Then fold over the top edges of the paper.

7. If the folded top edges don’t stay glued, put a little elmer’s glue underneath and then use a book, clothespins, or binder clips to hold it down while it dries.

And you are done! Cute, easy and cheap! That’s how I like my men projects.
842shares
  • Facebook
  • Twitter

You might also like:

arts and craft, Bin, Crafts, Recycling Box, scrapbook paper, Trash to Treasure, Upcycling

Comments

  1. Carla Castro-Gonzalez says

    June 27, 2013 at 3:58 pm

    Hi! I tried this with old wallpaper samples i had lying around. Worked like a charm however i would shoot for the ones with the glue already on the back, just to make it easier.

    Reply
  2. thepeasanthousewife says

    November 9, 2010 at 1:17 pm

    This is so great and just perfect for my workroom redo this week! Thanks!

    Reply
  3. Jess @ Frugal with a Flourish says

    November 9, 2010 at 6:53 am

    Love this!!! I had to share on my FB page!

    Reply

Read more comments:

« 1 2

Leave a Reply Cancel reply

This site uses Akismet to reduce spam. Learn how your comment data is processed.

Hi, I'm Brittany aka Pretty Handy Girl. I like the smell of coffee and sawdust in the morning. I live to break stereotypes and empower you to take on your own DIY project.

  • Email
  • Facebook
  • Instagram
  • Pinterest
  • Twitter
  • YouTube

Saving Etta - Follow the Adventure to Flip a Historic House

  • Email
  • Facebook
  • Google+
  • Instagram
  • Pinterest
  • Twitter

Privacy Policy

Affiliate Link Disclosure:

Pretty Handy Girl is a participant in the Amazon Services LLC Associates Program, an affiliate advertising program designed to provide a means for sites to earn advertising fees by advertising and linking to Amazon.com.

Copyrighted Content Permission

All images and tutorials on this blog are copyrighted material. Please contact me if you would like to borrow any media (photos, video or audio files), tutorials, or ideas from this blog. 99% of the time I would be happy to allow you to use one photo with appropriate credit and link back to PrettyHandyGirl.com (preferably to the same post it was borrowed from.) I can be contacted via email: PrettyHandyGirl (at) gmail.com.

© 2021 · Pretty Handy Girl ·