
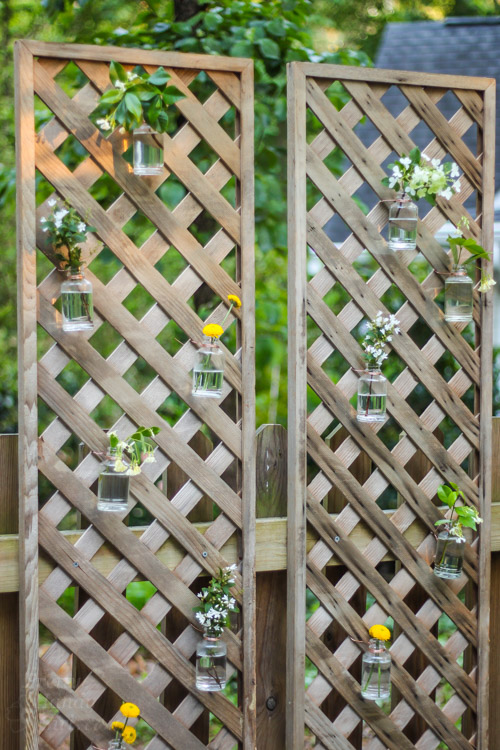
Create a Living Wall Lattice Privacy Screen
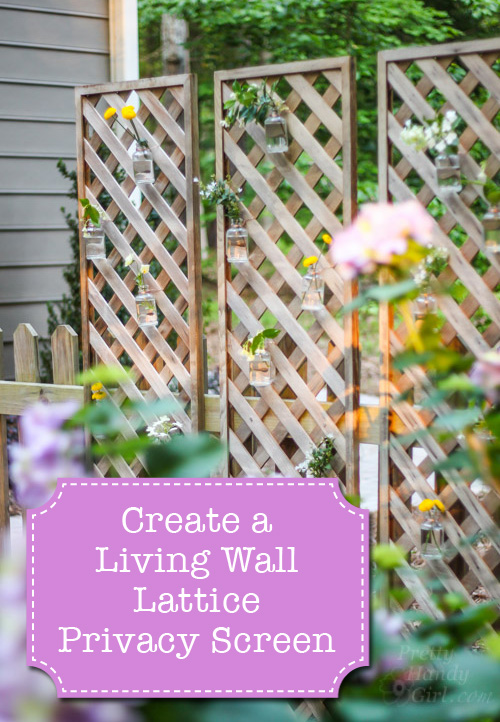
Did you see the Living Wall Lattice Privacy Screen I created for our new patio? It was so easy to install that I’m kicking myself for not thinking of the idea sooner. I’m just happy to have it now as it gives us a little more privacy and a cozy intimate feeling on our patio.
I have to laugh because one of my subcontractors commented on it while repairing a complicated section of our deck railing (the tree guys destroyed it by dropping a large limb on it.) He said he thought it was cool and did I find the idea on Pinterest? I just laughed and told him, “No, but it will be on Pinterest soon because I rule on Pinterest.” I’m sure he had no idea what I was talking about.
Let’s get this tutorial going so you can pin it and help add it to that huge idea catalog in the cloud called Pinterest.
Materials:
(contains affiliate links)
- Lattice screen panels (rounded top or cedar square grid)
- 2 1/2″ exterior wood screws
- Level
- Drill
- Small bottles or jars
- Copper wire
- Flowers or clippings
Instructions:
Decide where you want to install your privacy screen. It’s best to install on a solid surface like a fence. If you don’t have a fence to attach to, you can set two 4×4 posts into the ground. (For permanence and rock solid construction, set the posts in a concrete base per the depth required by the building code for your geographical area.) Connect the two posts with two horizontal 2×4’s using steel hangers.
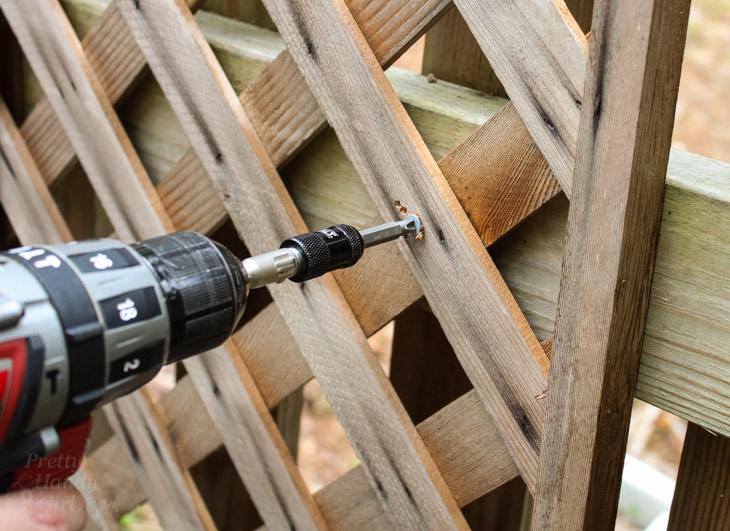
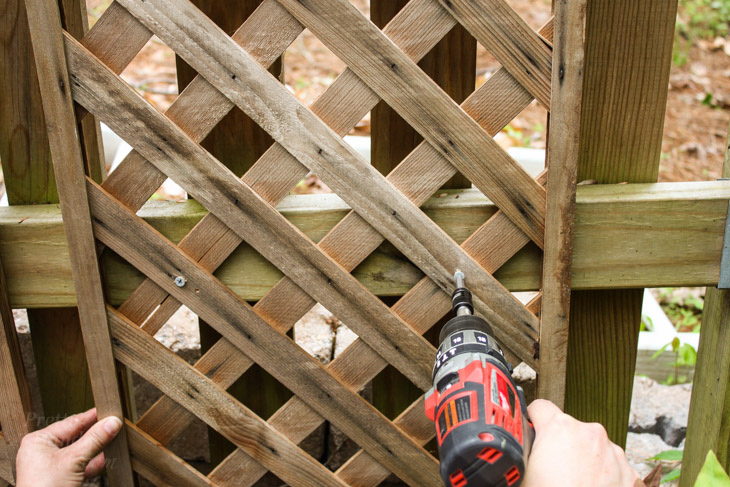
Drive one screw into the top horizontal rail to secure your first panel.
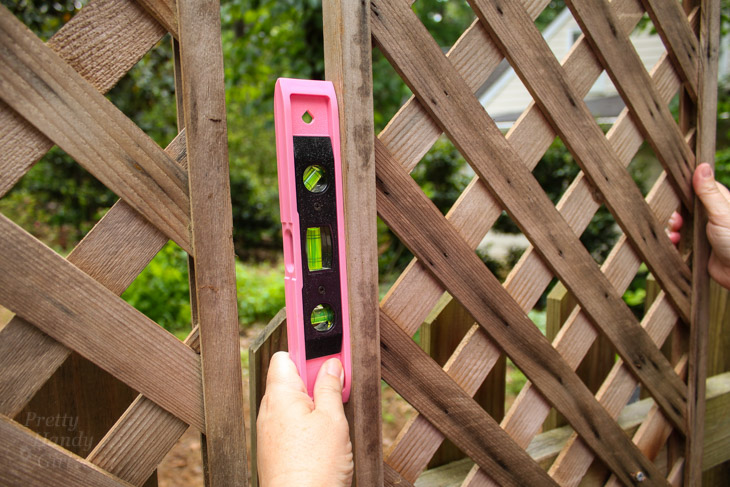
Check the lattice panel to make sure it is plumb.
Drive a second screw into the other side of the panel. Repeat with two more screws attaching the panel to the lower horizontal 2×4 of your fence.
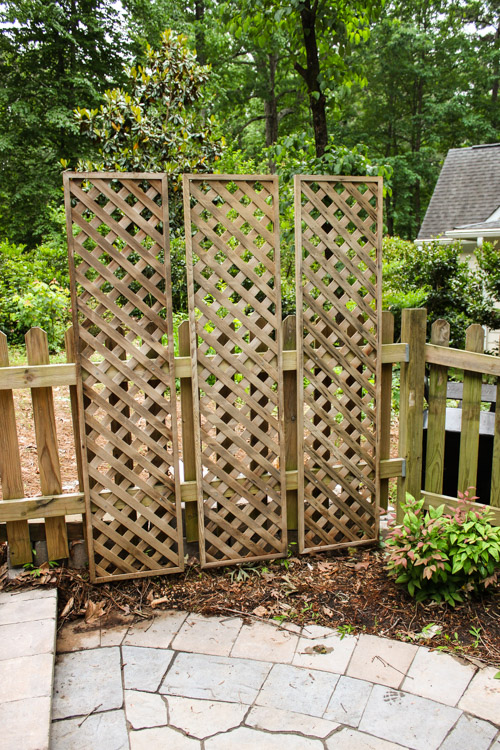
Hang your other panels using the same technique.
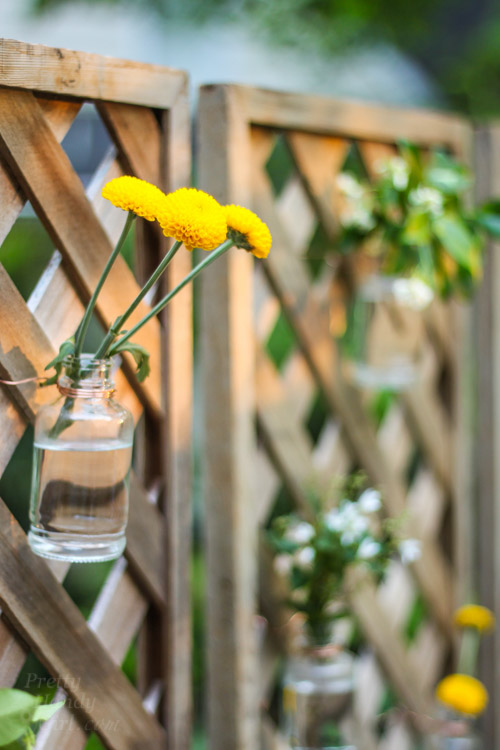
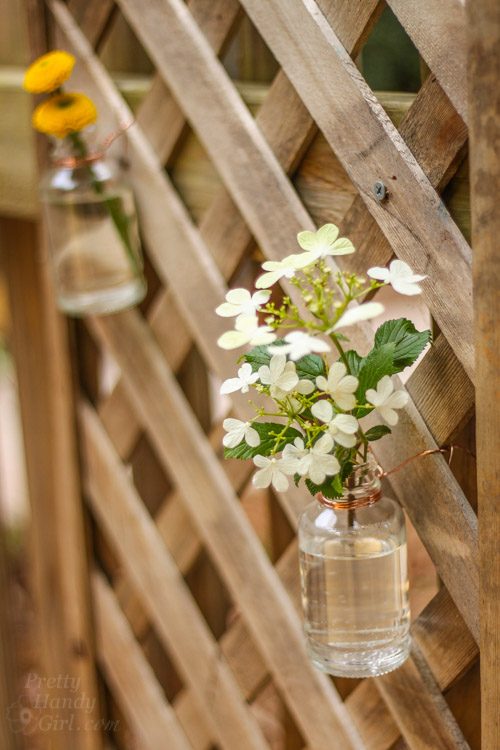
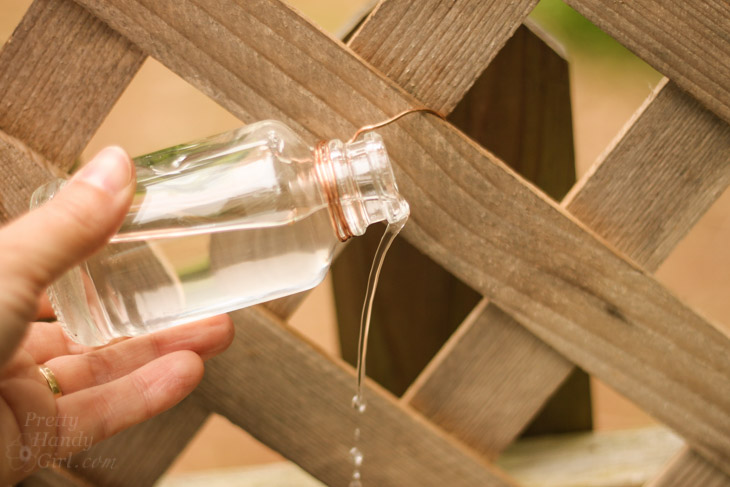
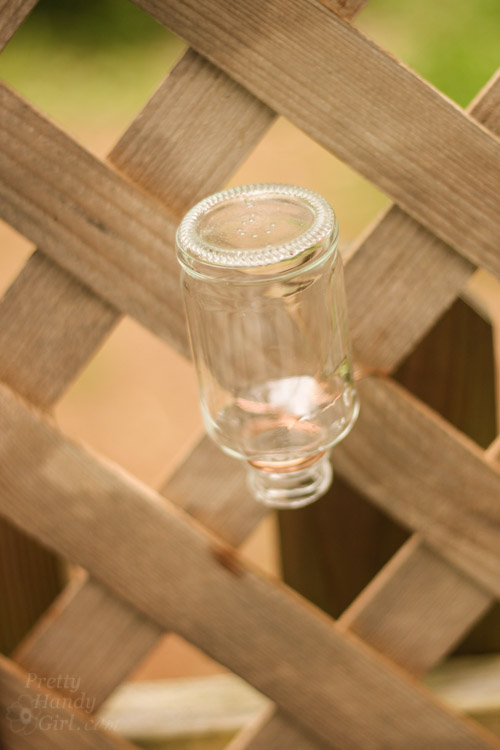
Wrap copper wire around the neck of your bottle or vase. Leave a couple inches of wire after twisting the ends. Hold the bottle up to the lattice screen and pull the wires through to the back of the screen.
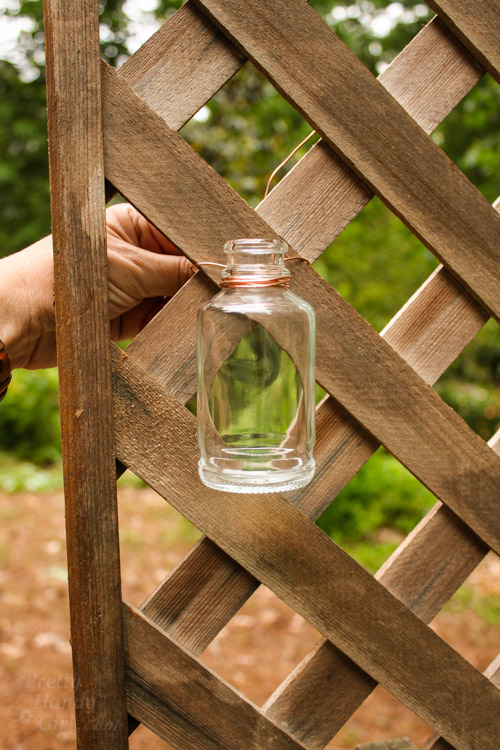
Twist the copper wire ends to secure the bottle.
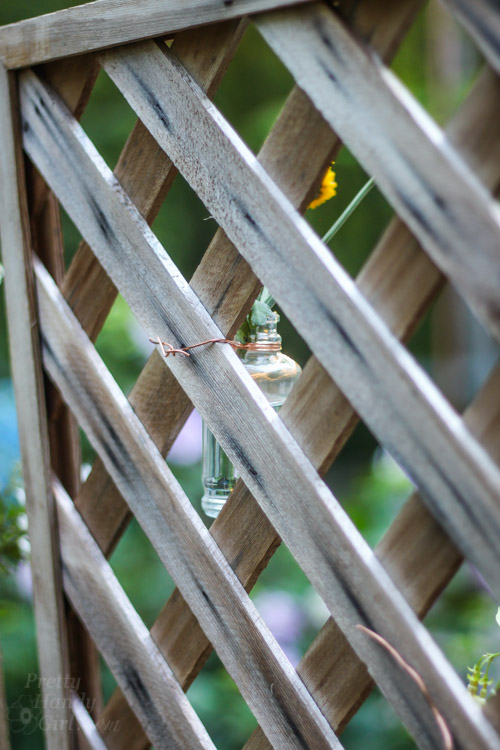
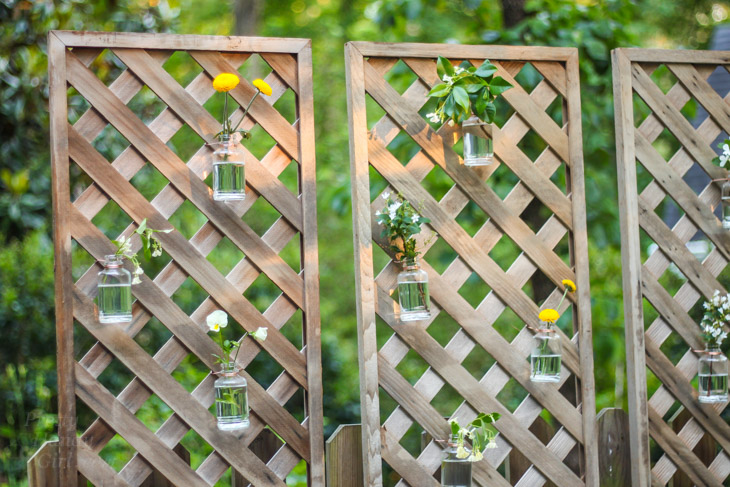
Hang as many bottles as you’d like. Add water (a small spout watering can works best) and fresh flowers.
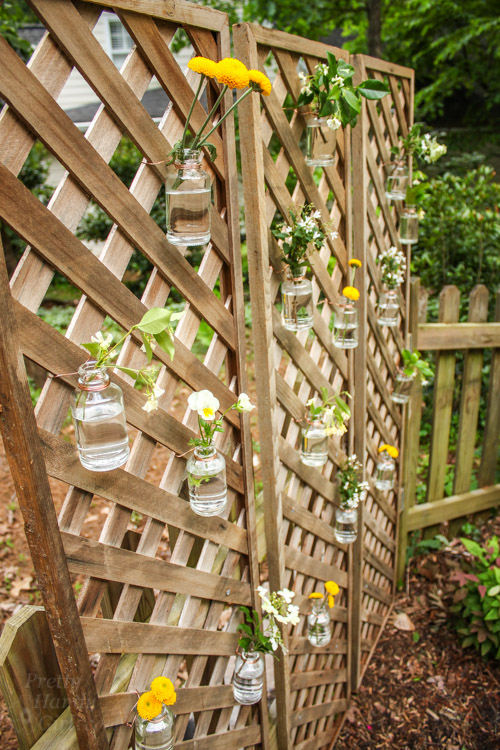
Enjoy the living wall lattice privacy screen you created.
When the flowers are spent, remove them…

…and dump the water by twisting the bottle.
Leave the bottles upside down when not in use to prevent water from becoming a mosquito breeding ground or to prevent water from freezing and breaking the bottles.
Do you have a spot you can enjoy a living wall? This is a super easy project that can be completed in under an hour!
![]()
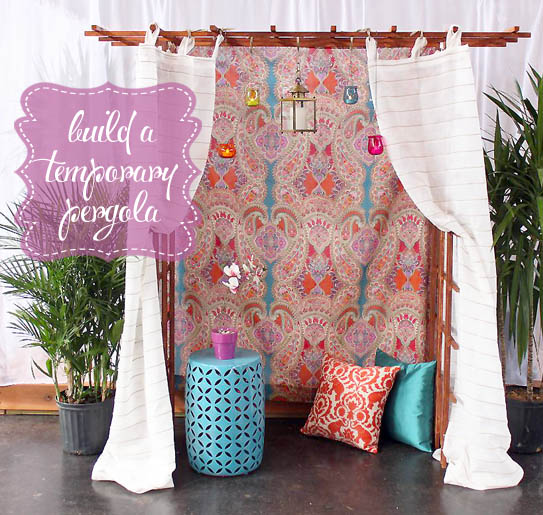
Liked this tutorial? You’ll also love this temporary trellis pergola.


Thank you!!! I had this idea for a privacy screen, however you took it to another level! 🙂
hi. i LOVE this idea. Thinking about doing this on our deck for privacy. i really like the look of the lattice screens you used. do you have a link for these ones?
I wasn’t able to find the exact same ones. These are two similar ones from Amazon affiliate links: http://amzn.to/1rS0evq or http://amzn.to/1TlS6fR. This might be another option: http://amzn.to/2s1UgJ3
Your gorgeous lattes wall is fantastic! Thanks as always.
Thank you Ivory.
I have lattice panels around my above ground oil tank from when I moved in 10 years ago. I used S-hooks to hang some of my garden hand tools along the side that is protected from the weather as my shed is at the far end of my yard and sometimes I see a quick project and don’t feel like walking across the lawn, especially after a rainstorm.
I think the living garden is a great idea for the panel across the front of the tank. It always looks so bland compared to the rest of the patio area. The fact that you can leave the bottles propped upside down when not in use makes it all the better. I might even think about adding wider mouthed bottles and put in electric tea lights for different effect at night!
I could see planting clematis at the bottom and just let it go crazy!
We have actually been considering doing something like this ourselves. Luckily, we live at the end of a dead-end street, but you can still see through our chain link fence into our backyard. We recently set up our pool for the summer, and have been wanting some privacy for the kids while they’re swimming. Thanks for the how-to. Just not sure if we’ll be spiffy enough to do the bottles… lol
Ha! Well, just the lattice alone will help give you more privacy.
I love this idea, especially for our back fence to hide our neighbors mess 🙂
Mary, yes, instant new view!
This would be a great idea in our garden. I am looking for ways now to improve our garden and you just give me an idea about it. It will be very relaxing to have it in our home especially I love flowers and I love making diy projects also.
Happy New Year, can you post your garden after you have installed this lattes wall? I have a garden that needs improvements, but I don’t know how to go about doing it. Hopefully seeing what you did can help me with ours. Thanks in advance!
Ivory, is it my vegetable garden you want to see or the backyard? Right now it is snow and ice covered. But, perhaps I can do an update in the Spring.