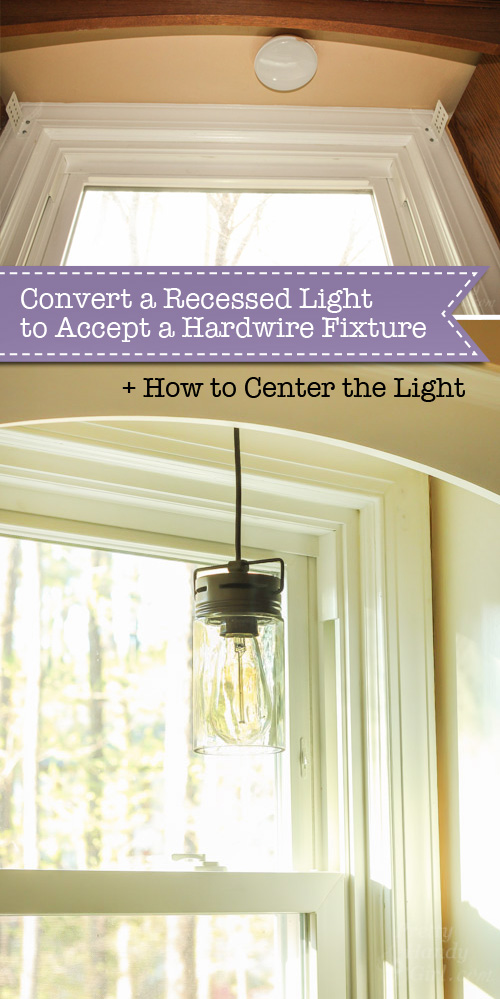
Convert a Recessed Light to Accept a Hardwire Fixture
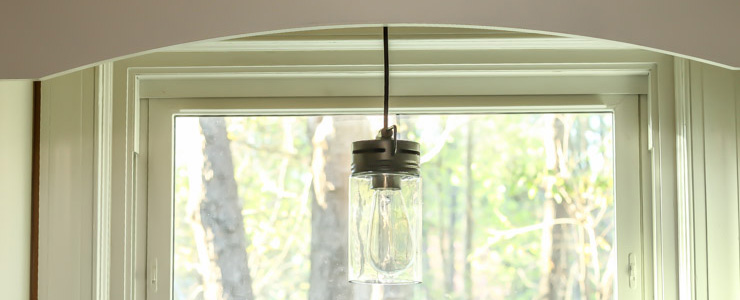
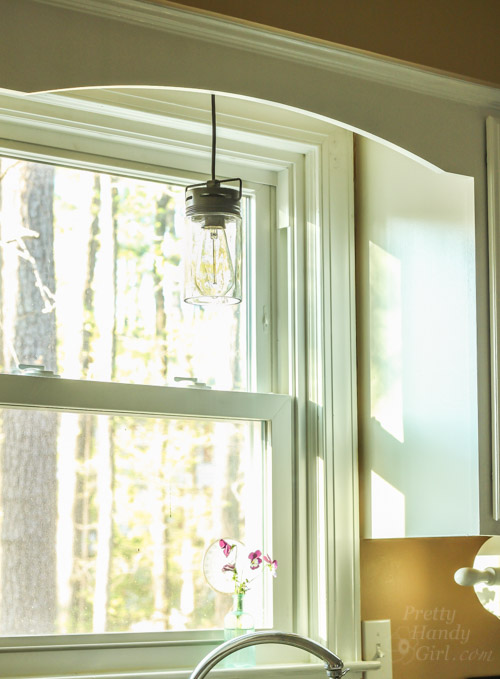
Things are winding up at my client’s home. We’ve been getting her 3000 sq. ft. home ready to sell. Most of the changes we’ve made have been simple cosmetic changes. A few outdated light fixtures have been updated. In the kitchen, I wanted to add a stylish pendant light over the kitchen sink.
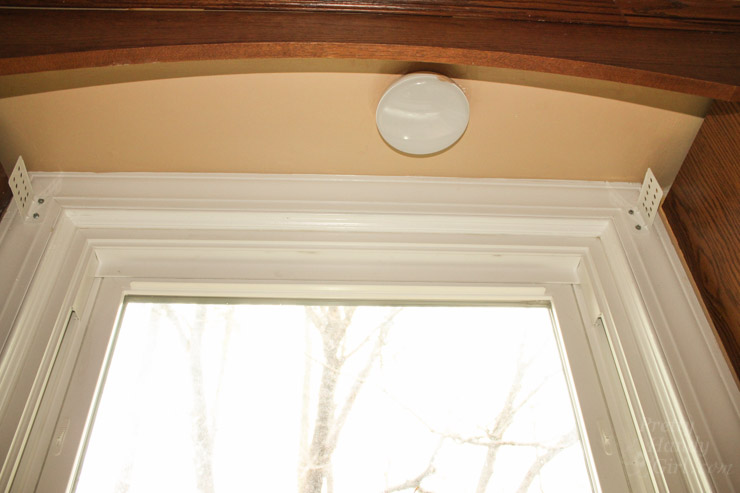
But, I ran into a slight problem when I realized that it was actually a recessed light fixture and I bought a hard-wired pendant.
Without giving up the style of the cool pendant light, I found a way to Convert a Recessed Light to Accept a Hardwire Fixture. I also solved the issue of the light fixture not being centered over the sink. This can happen if you have a joist in your way. But, it’s an easy fix.
Okay, ready to get started? Here’s is a quick tutorial for How to Convert a Recessed Light to Accept a Hardwire Fixture and the slick little gadget I used to do it.
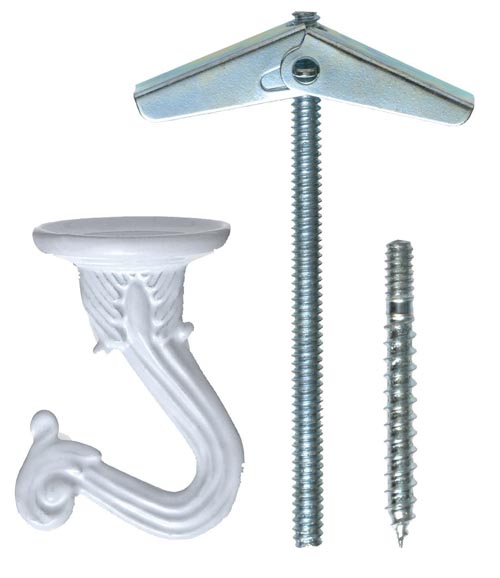
Materials:
(contains affiliate links)
- Drill with philips and flat head bits
- Westinghouse Recessed Light Converter
- Swag Hook
- Wire Strippers
- Non-Contact Voltage Tester
- Hard-wired light fixture of your choice
Instructions:
Unscrew your bulb from the recessed can. (This bulb was so big, I didn’t realize it was actually a light bulb in a recessed fixture. I could not for the life of me figure out how to remove the globe to start removing the fixture. Finally I turned it and voila, I realized it was just a large light bulb. Definitely a head smack moment and a good laugh.)
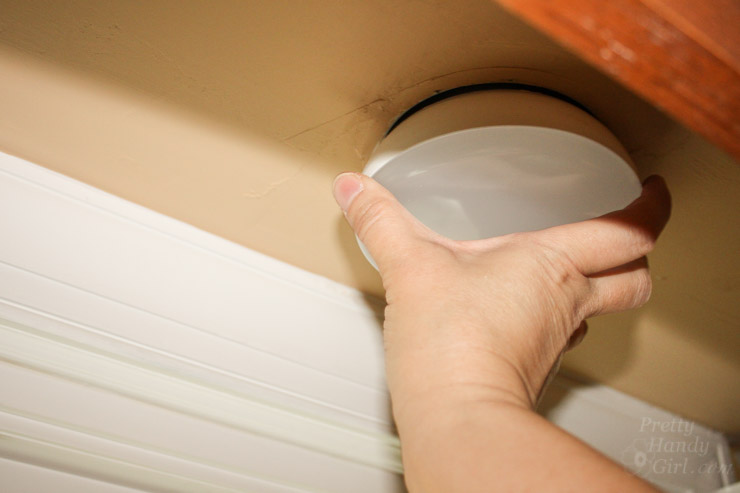
You will need this nifty recessed light converter.
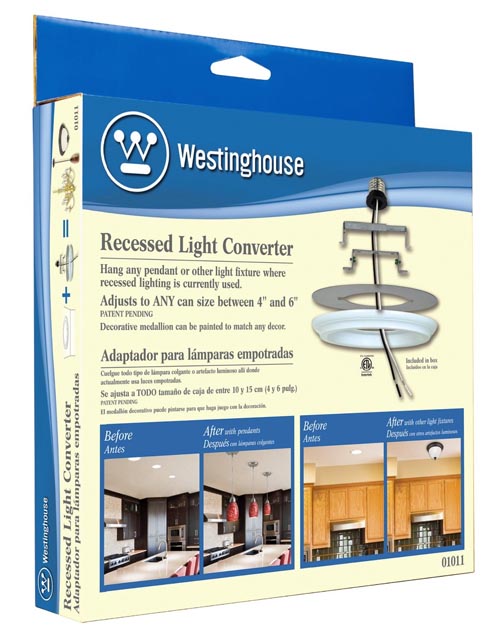
Alternatively, you can find lots of all-in-one converter and pendant fixtures like I used here.
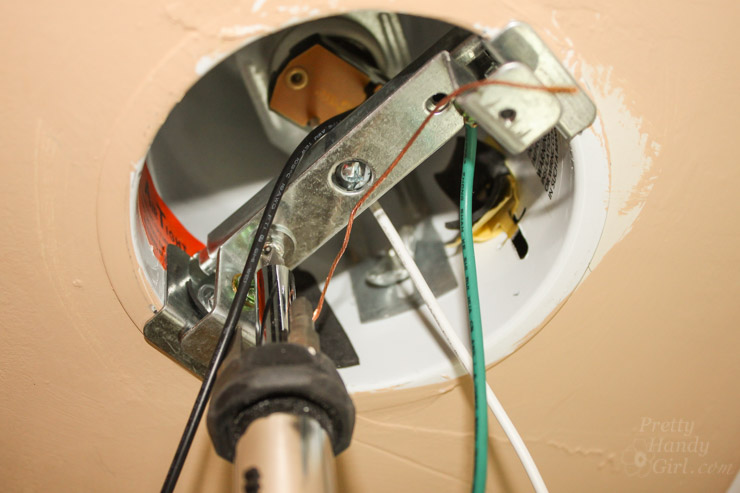
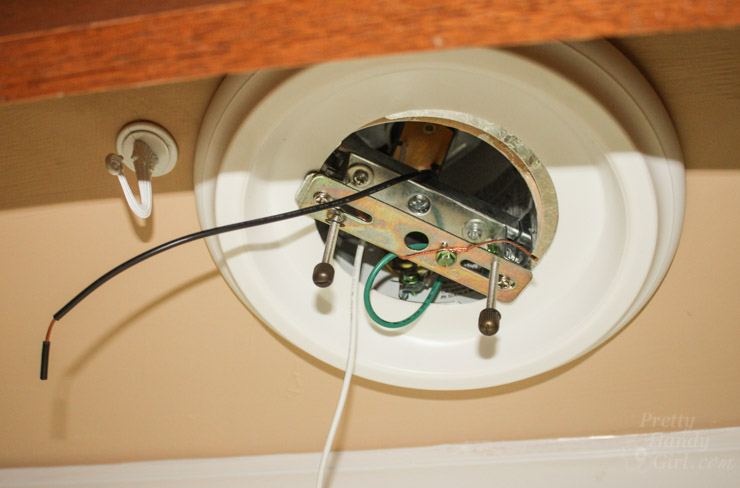
Screw the converter into the socket in your recessed fixture.
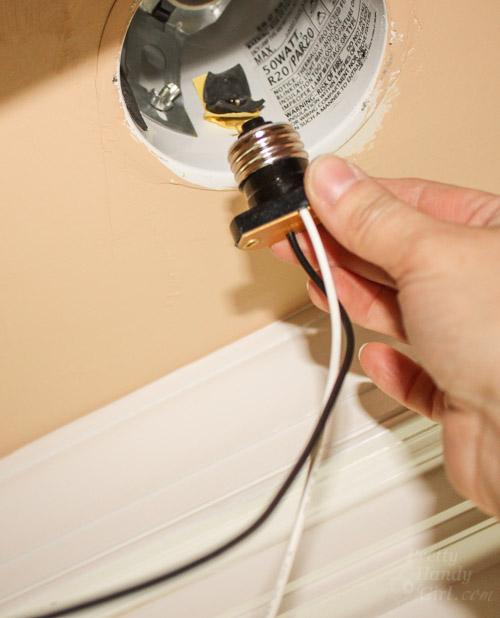
The converter should sit snuggly into the socket.
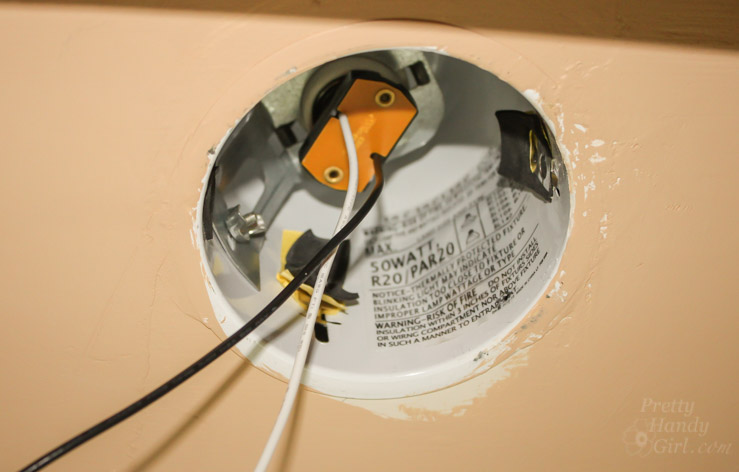
Fit the provided brace into the recessed can with the wings snug against the outside of the can.
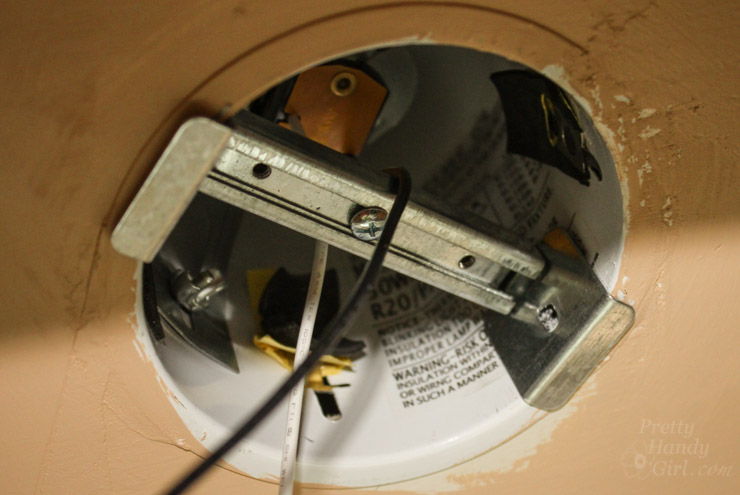
When the brace is at its widest position, turn the set screw to secure the brace in position.
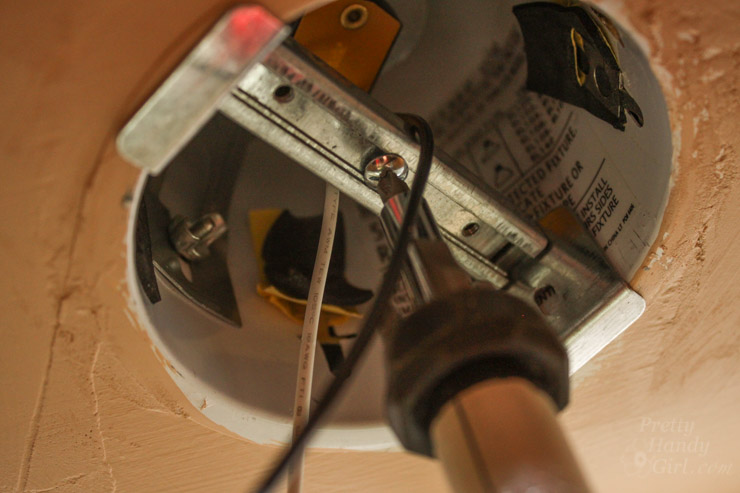
Use provided sheet metal screws to tap into the recessed can on both sides of the brace.
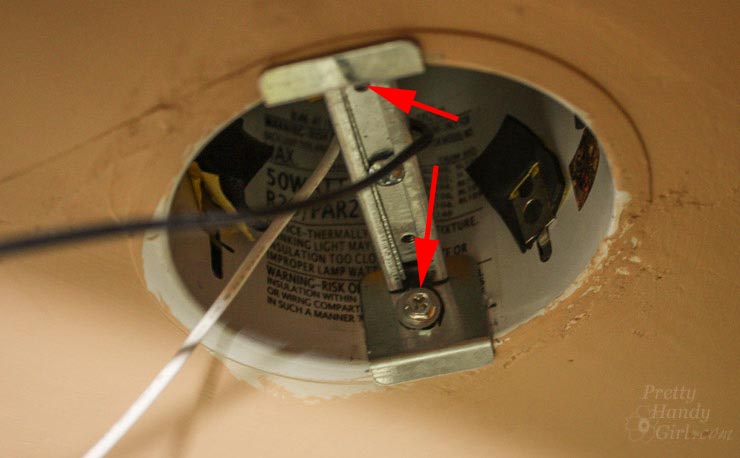
The brace should be strong enough to hold your pendant light (within reason.)
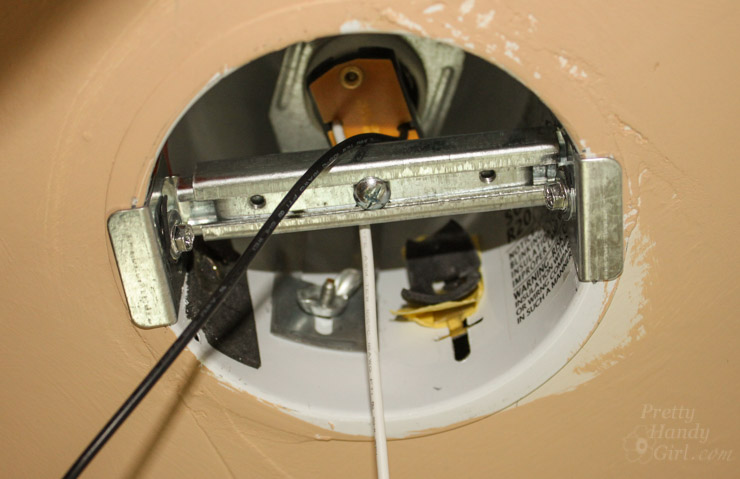
Attach the mounting bracket to the brace with the provided screws.
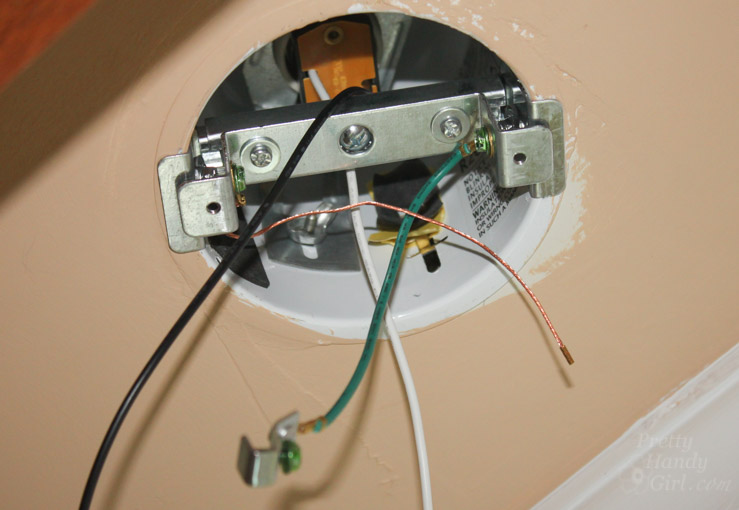
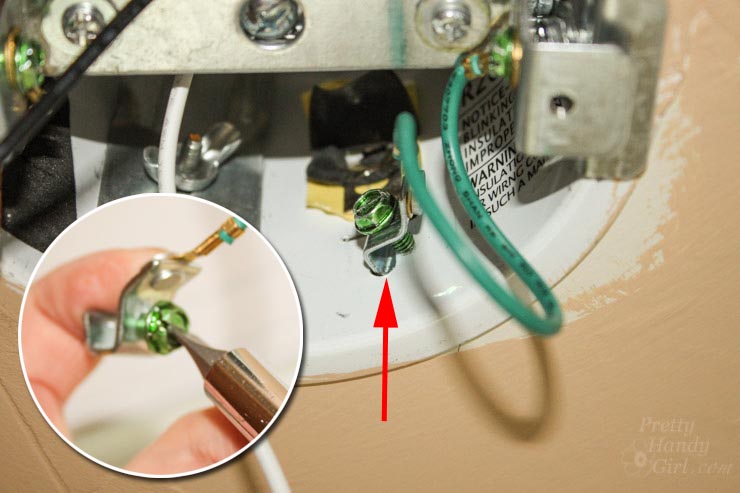
Loosen the screw on the green ground wire and slip the clip into one of the slots on the recessed can. Tighten the ground screw.
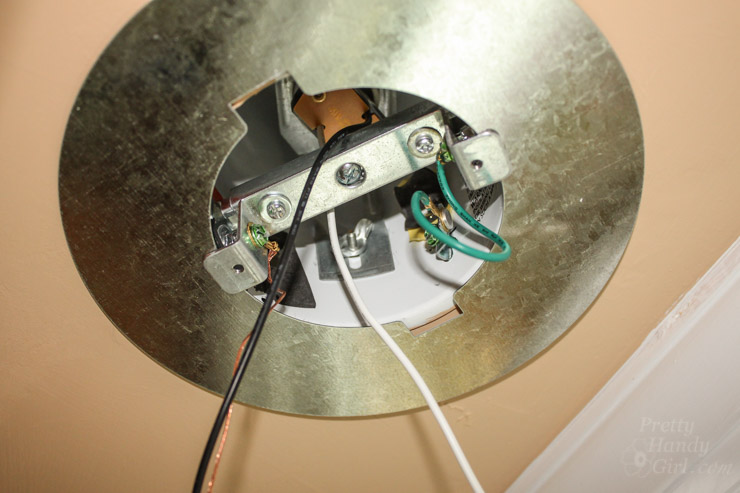
Slip the metal shield over the mounting bracket and rotate 90 degrees.
Time to add that hook if you need to center your pendant light. Either screw the hook into a joist, or use the anchor.
Slip the ceiling medallion over the metal shield. Attach your new light fixture’s mounting bracket to the recessed converter bracket.
Install your hard-wired pendant light per the manufacturer’s instructions (or follow this tutorial to install a hard-wired pendant light).
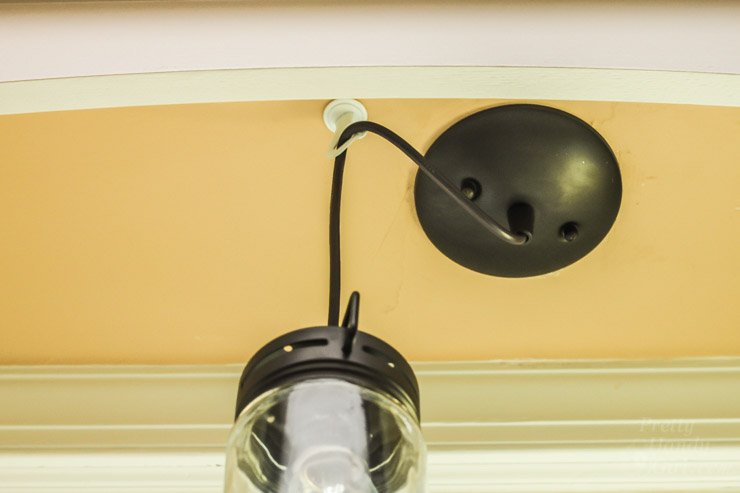
Thread your pendant wire through the hook.
Enjoy your new centered and updated pendant light!
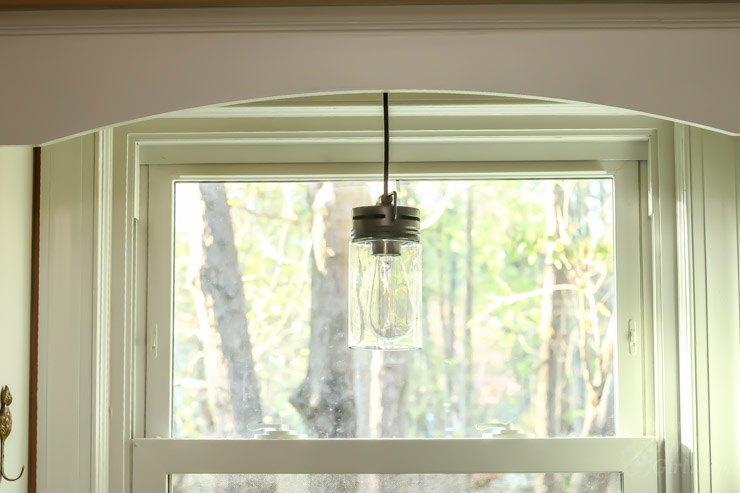
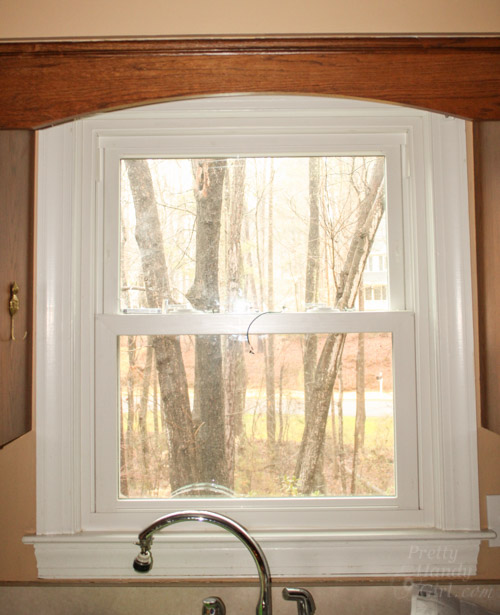
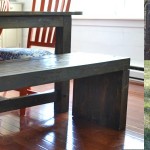
Honest, this is the same kitchen! We had the cabinets painted to give the kitchen a brighter and updated feel.
I can’t wait to show you the rest of the changes we’ve completed in the house. Stay tuned!
![]()

Awesome!! Thanks for the step by step how too… extremely helpful!!
Gorgeous!
Love this! Was wondering can the conversion kit be used outside. I have several can lights in my covered front porch. Would love to update the look
That’s a good question Monica. I would think you could, but you might want to check with Westinghouse. You might need to use caulk to seal the canopy to keep any moisture out.
I contacted Westinghouse and their reply is “This recessed light conversion kit is approved for indoor use only.” Well I’m disappointed. I guess I’ll have to look for another answer.
Our house has a ridiculous number of recessed lights, and I was wondering how it would be possible to put some pendants over the dining table. So glad you posted about this kit!
What a great way to update a dated fixture without a huge expense. LOVE the idea!
We have had to do this before and for some reason Lowes does not carry the converter-only Home Depot. However, that could have changed in the last few months since we hung our lights. My next project is the 3 recessed lights above my island that we renovated and added a lower longer countertop to. The recessed lights do not line up properly with the counter now and I have been wanting to add large pendants over the island. Do you have any experience with moving recessed light (anywhere from 2-4 inches sideways)? or do you think this is best left to professionals? I havent had any luck searching the web for how-to’s. Love your new site design by the way !
Sara, chances are there are ceiling joist in the way, which might explain why they aren’t lined up ;-(.
okay – where is the light from? love it!
Debbie, it’s from Lowe’s: http://www.lowes.com/pd_588695-65619-B10049_1z0vgc3__?productId=50244767&pl=1
The kit was from Home Depot, but I bet Lowe’s carries something similar.
I love the new fixture and knowing there’s a kit for that.
Love the new blog design too. What’s not to love here? Fast loading, easy to navigate and just a feast for the eyes both visually and as far as helpful home & craft information goes.