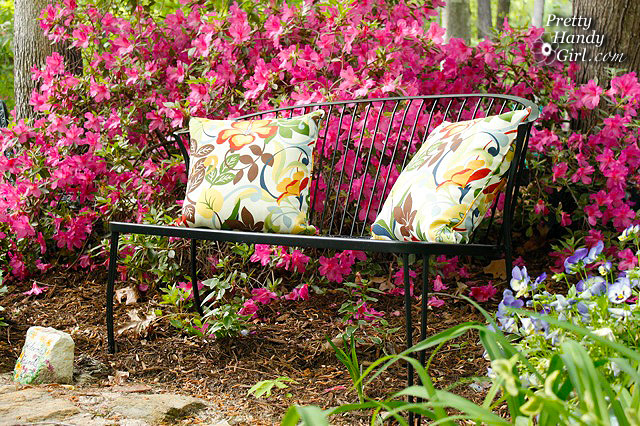
Ahhh, the birds are chirping and the flowers are in full bloom. The azaleas in our yard look like fireworks exploding with color.

I long to open the windows and let in the sounds and the sweet smells.

But, alas, the pollen bomb is still in full dumping mode.

I’m not going to let that get me down. I decided to bring the outdoors in and finished switching out my Valentine’s Day decorating (yup, I like to get the most out of my seasonal décor.)

So, without further ado, here is how I’m celebrating Spring!

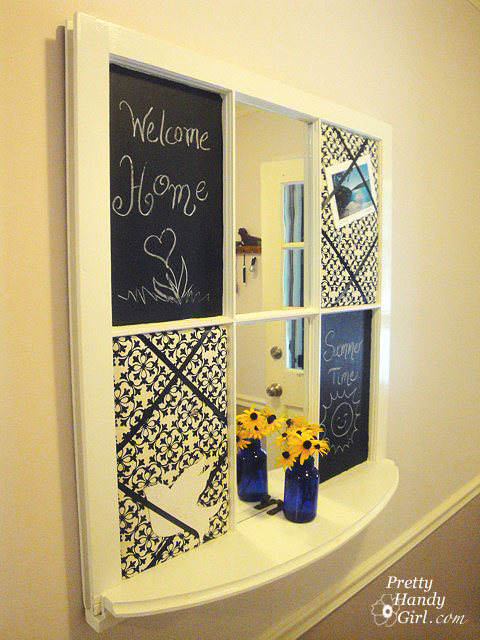
I saw the window idea at Classicly Amber (via Pinterest) and had just pulled a few old windows out of a curbside pick up pile. Speaking of Pinterest, if you haven’t tried it yet, you are missing out! It is a great place to “pin” ideas you see and be able to refer back to them easily.

Beth at The Stories of A2Z gave a tutorial on using Pinterest HERE. She’s the one who introduced me in the first place, so I’ll let the master show you the ropes!

I always make it a point to refer back to the original source if I get an idea somewhere else. (Granted, some things are so widespread amongst bloggers, that it is hard to credit the original source.) Pinterest has helped me keep all the ideas together and makes it easier to find the original source. Plus, you can follow other people’s pins and boards. Feel free to sign up and follow mine HERE. Then you can steal my ideas before I blog about it…just kidding!

The striped pedestal holding up the plant is actually a cake stand I made recently using a plate and a candlestick. I’ll be blogging about it later this week, but trust me it is nothing new. You’ve probably seen this trick somewhere else.

This little adorable birdhouse was lovingly painted by my 7 year old son. I always have a stock of $1 birdhouses that they like to decorate on a rainy day. This one brings so much sunshine into my heart.

I love how easy this centerpiece was to create. I rested the ceramic bird into  a shredded paper bag nest. Then set the nest on top of a ceiling medallion ($3 at a yard sale) and surrounded the medallion with ivy.

And finally, my favorite: a robin’s egg nest that I made with chicken eggs.

You can view the tutorial for making the eggs and nest at TLC’s Parentables today.

If you struggle with decorating and creating vignettes, you might want to read a few of the guidelines I use when designing groupings and seasonal décor HERE.

Entering this post into the CSI Spring Decor and Vignettes challenge:

Visit thecsiproject.com

Purple_Honor_front_doors

Sprucing up your entryway. If your home is like ours, we have two entrances. The front door,

and the door near our driveway. The latter is used about 95% of the time by us and our friends.

Creating an inviting entrance for yourself is so important for falling in love with your home. Start sprucing up your entryway!

Think about it this way: How many times do you go in and out of your home through that one doorway? How many times do guests go in and out of that doorway? Do you follow me? So, it is you who should be welcomed home to your lovely home first and foremost!

This is what our family entrance looked like a few months ago:

How I lived with that ugly brown aluminum door for 3 years, I will never know. And let’s not even talk about that little red CPI security sticker!

Lucky for us, a neighbor sold us her full view storm door when they added a garage onto their home. Had they not, I probably would still be scouring the Habitat ReStore. Or at least I would have painted the old door to match the house or use a more inviting color than doo-doo brown.

After I installed the storm door, I made sure to repaint the threshold as well. What?! You can’t see behind “Doo Doo Brown” above, is this?

Niiiiiice. Gold threshold with silver metal showing through. Not exactly my favorite rustic look. The easiest way to repaint it would have been to remove the threshold and spray paint it in the yard on a tarp. But, those screws weren’t going to budge for me. So, I masked off the entire doorway…

…storm door, floor, and…

…the mudroom to spray paint  one piece of threshold brushed nickel. Okay, call me crazy, but I was on a mission to make my entryway more inviting for myself. And I wasn’t about to get brushed nickel on any other surfaces.

Much better, don’t you think? And I can honestly say that after using automotive primer and then the Rustoleum Brushed Nickel metallic paint, the threshold still looks like new!

But, I didn’t stop there. I added a kick plate in matching brushed nickel. And replaced the door sweep as well. And splurged on a new door mat. {Love my new mat!}

Finally, looking beyond the doorstep, I add some pumpkin topiaries, plants, wreath or other decorations (depending on the season) to greet you – errr, I mean me.

My good friend has this adorable planter near her side entrance (that she uses about 95% of the time, too.) It is the perfect place to switch out plants, or other decorations depending on the season.

So, that takes care of the exterior, but don’t neglect the inside! I added a new coat of paint to the inside of the door (that my sweet departed maniacal dog had left claw marks all over it.) I was so anxious to freshen it up, I didn’t even tape off the windows.

After the paint dried, I used a razor blade to score…

…and then scrape off the paint.

And as a final, welcome home, I hung my message center just inside the door.

I’m so happy to be home! And you should too so start by sprucing up your entryway.

So, what do you think? How does your home greet you? Does it welcome you with open arms or is it more of just a brief, “hi?”

CloseUpWreath.jpg
Sneak Peek at my Christmas Wreath

I am getting a lot of mileage out of my white base wreath I bought at Target several months ago. With it I’ve been able to make a Magnolia Leaf Wreath for the fall.

welcomewreath.jpg

I made a Feather Wreath for Thanksgiving.

SideViewWreath.jpg

Now it was time to give the wreath an injection of Christmas spirit. I removed the feathers, but left the green nuts on it. I had a green fabric leaf wreath that I made out of some floral filler stalks. All I did was twist 4 of the stalks into a circle shape and secure with a few pieces of floral wire.

2Wreaths.jpg

I set my white base wreath inside the green leaf circle.

TogetherasOne.jpg

To secure the two together, 1) I fed some of the base wreath twigs under the leaf wreath and 2) twisted them over to hug the green leaf wreath.

FoldUpSpring.jpg

That couldn’t be any easier! No glue, no mess.

I compared two different ribbons next to my wreath and ultimately chose the black and white one.

2Ribbons.jpg

Tied a pretty bow and stood back to admire.

BandWWreath.jpg

Hmmm, I like it, but it just wasn’t feeling Christmasy enough, so I quickly tucked some red floral sprigs with teeny bells on them into the wreath and gently curved them to match the shape of the wreath.

FinalWreath.jpg
Now that is more like it!
In less than 10 minutes I have my Christmas wreath! This base wreath has been the best $10 I’ve spent all year!

I’m going to try to use this wreath all year and will be sure to share the transformations with you.

I bought this basic white base wreath at Target a few months ago. I knew it would take me through several seasons.
Case in point, my magnolia-fied wreath from September.
Well, I stripped out all the dried magnolia leaves and was determined to give it a new look for Thanksgiving. When I think of Thanksgiving, I think of turkey! So, turkey, pheasant, and peacock feathers seemed like an ideal filler for my plain wreath. I also threw in some other feathers I had in my décor stash.
All I did was tuck some feathers into the wreath. Played with the placement of the feathers until I liked the look.
Then I added a dark teal satin ribbon.
Not bad, but not very exciting. I wanted to add some color, so I grabbed some green potpourri nuts and gave them a fresh coat of spray paint (Rustoleum Apple Green) to freshen them up.
Then, I put a small dollop of hot glue on the backs and pressed them onto my wreath. My goal is to continue to re-use the wreath, so I used the glue sparingly.
Now, that looks much better.
Then I hung my feather wreath up and my door is festively decorated for Thanksgiving.
After Thanksgiving, I’ll be haulin’ down the Christmas decorations. I’m trying so hard to keep the kids from dictating our decorating with inflatable santas, elves and more. Personally, I prefer the classic white lights, some greenery and a red bow to top it off.


Mag-nolia-fying a Fall Wreath

I promised you that I’m embracing Autumn now that the weather is cooling off. In fact, I’ve been switching out the summer decor for some more seasonally appropriate reds, oranges, brown and greens. I even spent time Mag-nolia-fying a Fall Wreath. What? You don’t know what Mag-nolia-fying means? Well stick around and see how I made this Magnolia Leaf Wreath on the cheap.

Dried Magnolia Wreath | Pretty Handy Girl
Here is a little sneak peek from my mantle:

Mag-nolia-fying a Fall Wreath

My Ballard Design Knockoff Pear has already found a spot to sit.

In an effort to spend less and store less, I’ve been trying to buy just 2-3 wreaths that I can switch up and tailor to meet the season. A few months ago, I bought this little white bud wreath from Target:

Mag-nolia-fying a Fall Wreath
It will be my springboard or base wreath for many seasons to come. The neutral white color works well with any color and I can add other natural elements and ribbons to change the color palette.

When I saw how Centsational Girl, made a beautiful wreath with magnolia leaves, the light bulb went on for me.

Mag-nolia-fying a Fall Wreath
 Centsational Girl’s Wreath

My neighbor has a beautiful magnolia tree, so I asked if I could steal some of its fallen leaves. I filled a grocery bag with the ones that looked most interesting to me. Then brought them home, rinsed the dirt off of them and laid them out to dry.

Mag-nolia-fying a Fall Wreath

After they dried, I started playing with them and found that I they would easily work to mag-nolia-fy the bud wreath. Here’s how to do it:

Materials:

(I’ve included affiliate links for your convenience. I earn a small percentage from a purchase using these links. There is no additional cost to you. You can read more about affiliate links here.)

Instructions:

Tuck magnolia wreaths into the grapevine base frame. I fully intended to hot glue them in place, but they held tight and stayed on their own! The leaves must have been so happy to be offered a second life, so they cooperated.

Mag-nolia-fying a Fall Wreath

Tie a cotton ribbon onto the wreath. You can thread it through the loop that came with the wreath. Or tie around the wreath.

Mag-nolia-fying a Fall Wreath
Here are the results for that super easy mag-nolia-fied fall wreath:

Mag-nolia-fying a Fall Wreath
Hang it on your door and enjoy it until December.

Then you can quickly turn the berry wreath into a Christmas wreath by removing the leaves and adding greenery! Bam!

Mag-nolia-fying a Fall Wreath 24 Fabulous Creative Fall Wreaths
Want more Fall Wreath inspiration? Enjoy these 24 more Fall wreath ideas:

24 Creative Fall Wreaths | Pretty Handy Girl

Happy Fall Y’all!