I have a new update for you on Millie’s Remodel. Join me as I uncover the damaged wood floors and ask the question: Can We Save these Wood Floors?
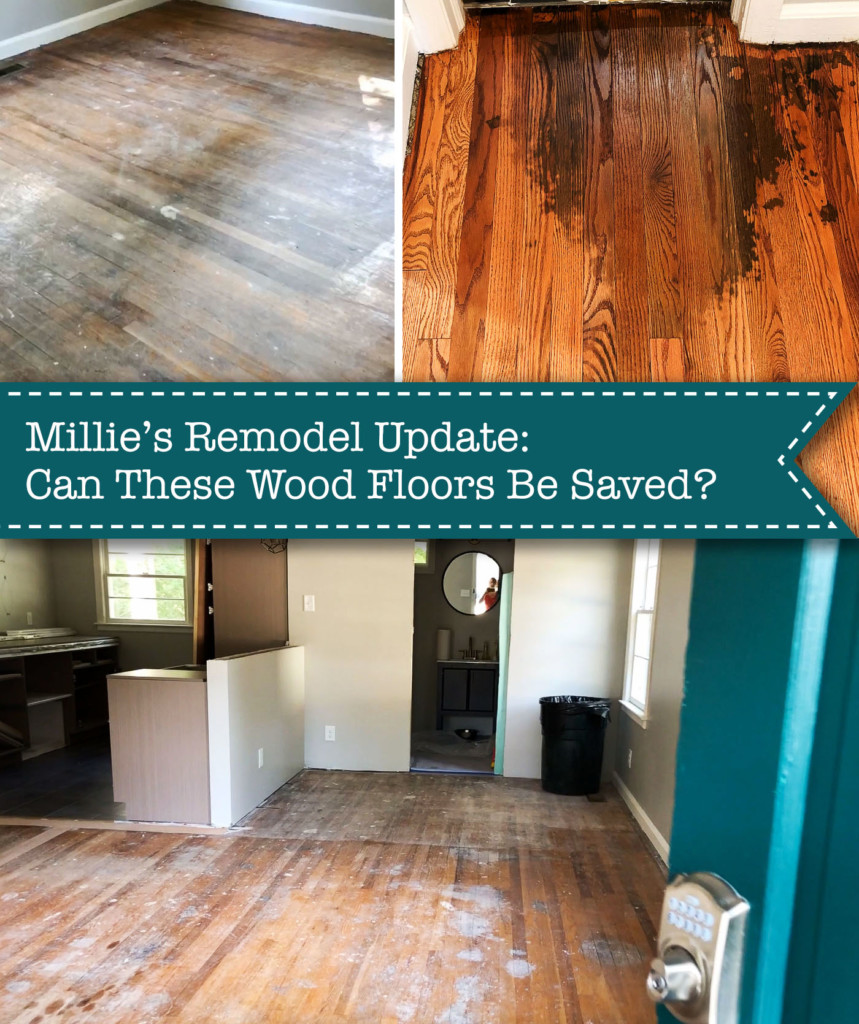
can these wood floors be saved?

Millie’s Remodel: Can We Save These Wood Floors?

I know it’s been a minute since you got the last update, but unfortunately, my husband contracted COVID and it was the scariest two weeks of my life while I tried to prevent the boys and I from getting sick. While I cared for my husband and worried about his health, I documented his symptoms and what it was like caring for someone with COVID in my Instagram highlights. Unfortunately, I didn’t start saving the stories until a few days in. Regardless, it should give you a good idea what it was like caring for someone who has COVID and how his symptoms progressed.

Can We Save These Wood Floors:

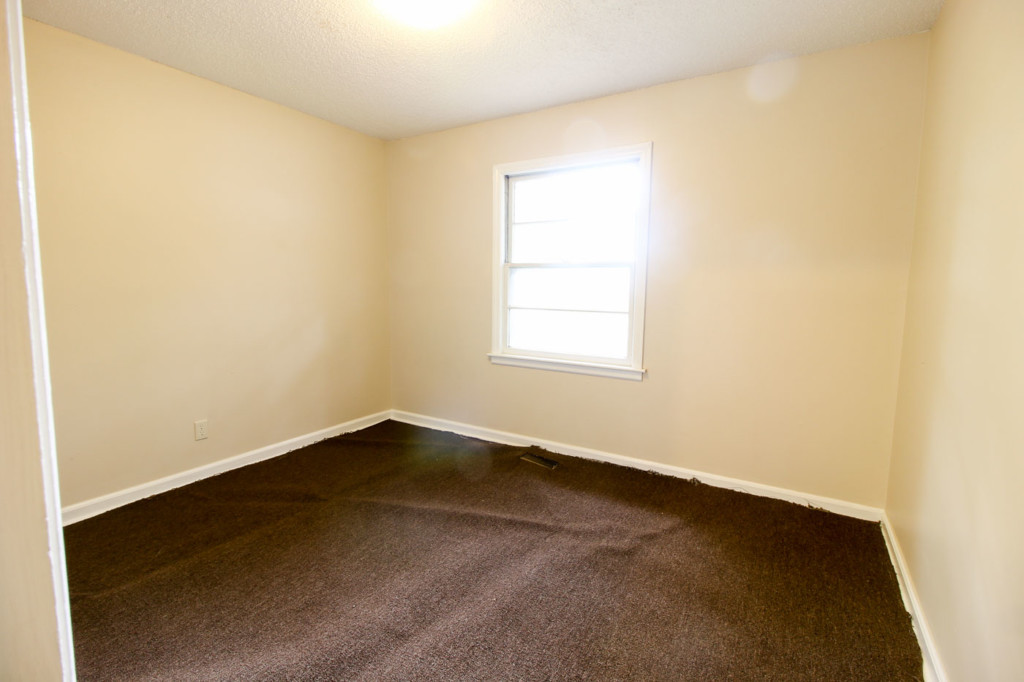
Now back to Millie’s Remodel, the real star of this show. When I purchased the house, it had brand new brown berber carpeting in every room except the kitchen.
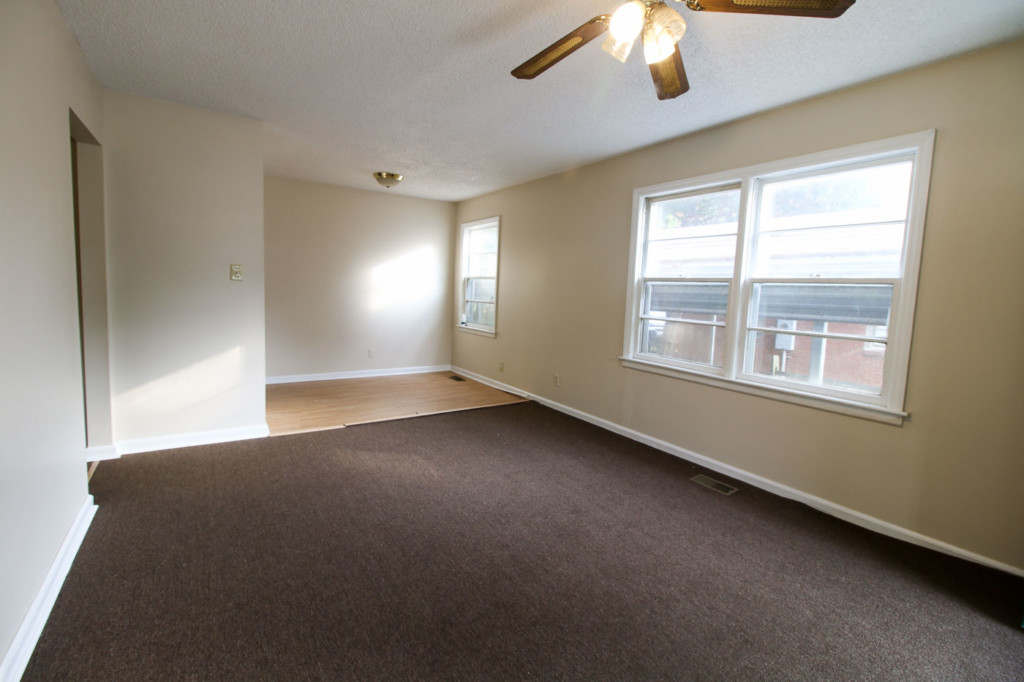
Crazy enough, the carpet wasn’t professionally installed, it was cut and the shoe molding was tacked on top of it. Which made it super easy to remove and allowed me to see that there were wood floors underneath before I bought the house.
Although I saw some of the floor before closing, I had no idea what type of shape they were in. What lurked underneath the carpet were real wood floors in REAL BAD SHAPE.
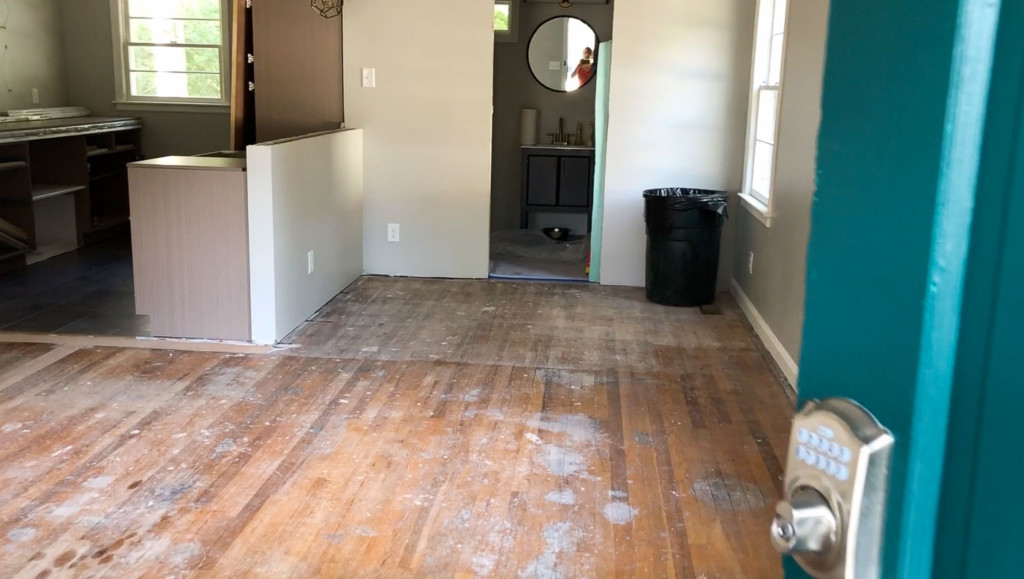
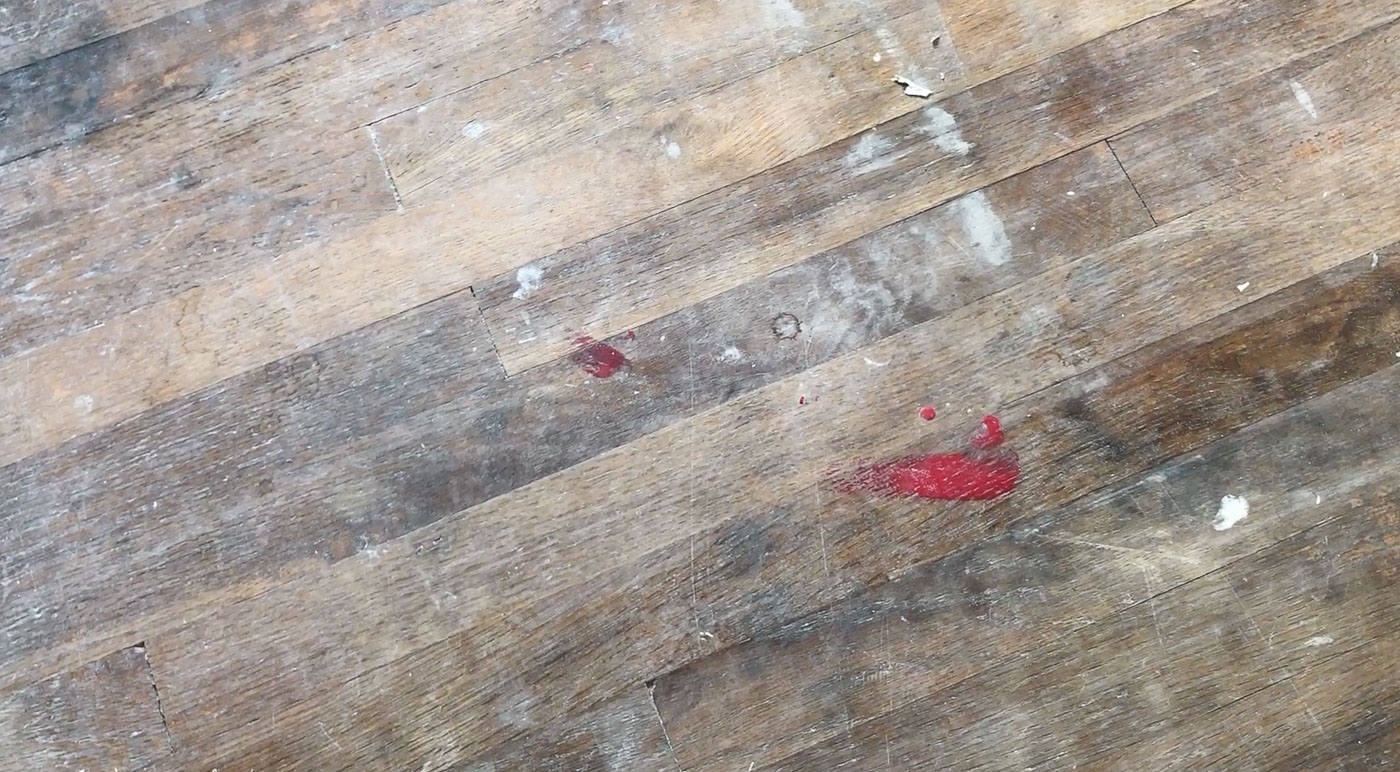
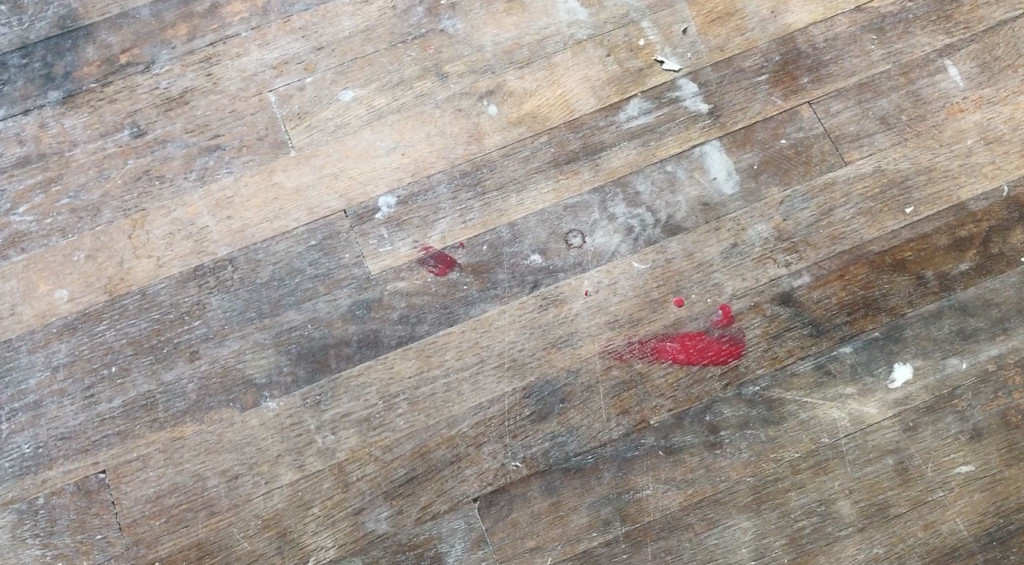
Lots of stains and even a nail polish spill (not blood!)
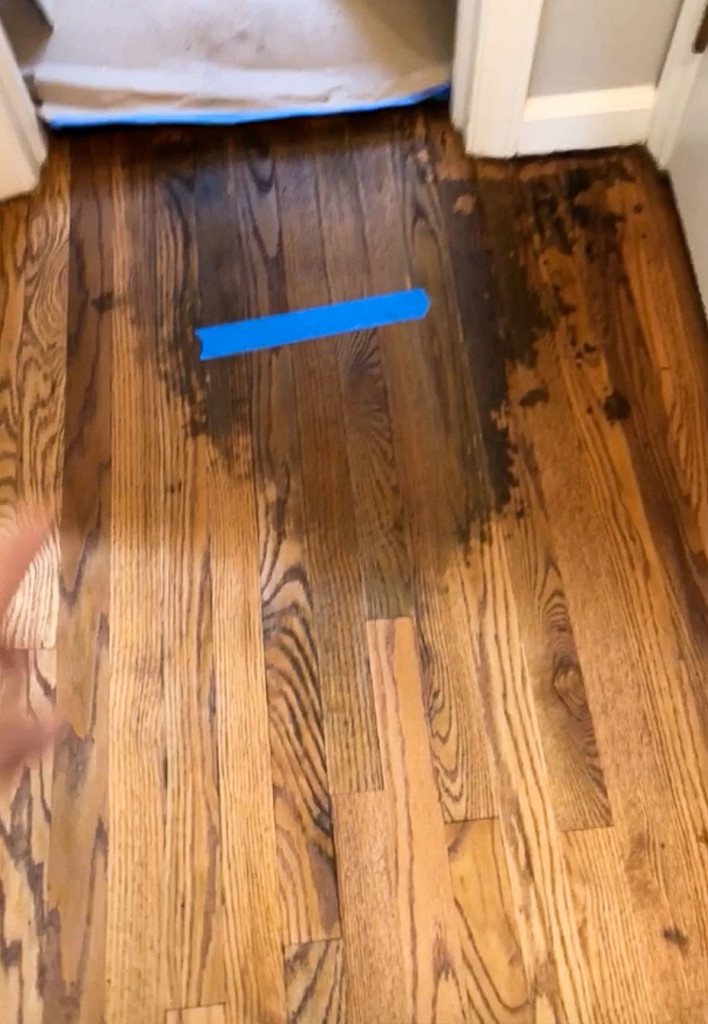
A spot in front of the bathroom had the worst damage, but my floor refinisher felt confident it would sand out.
This bedroom had the least damage, but this room had a horrible smoky/fishy odor. We think the previous tenant was a cigarillo smoker based on all the plastic tips I found in the backyard.
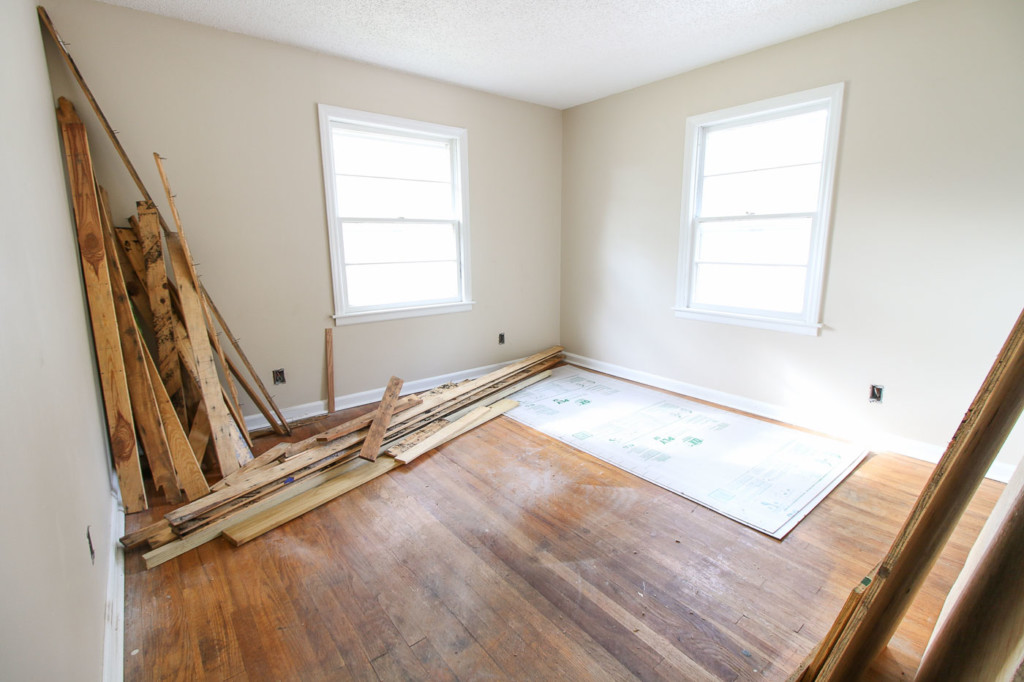
salvaged materials in back bedroom

Patching the Wood Flooring:

Before the floors were scheduled to be sanded, my wood floor contractor sent out his “guy” to patch the plywood in the hallway and the area where I removed a doorway to open up the living room more.
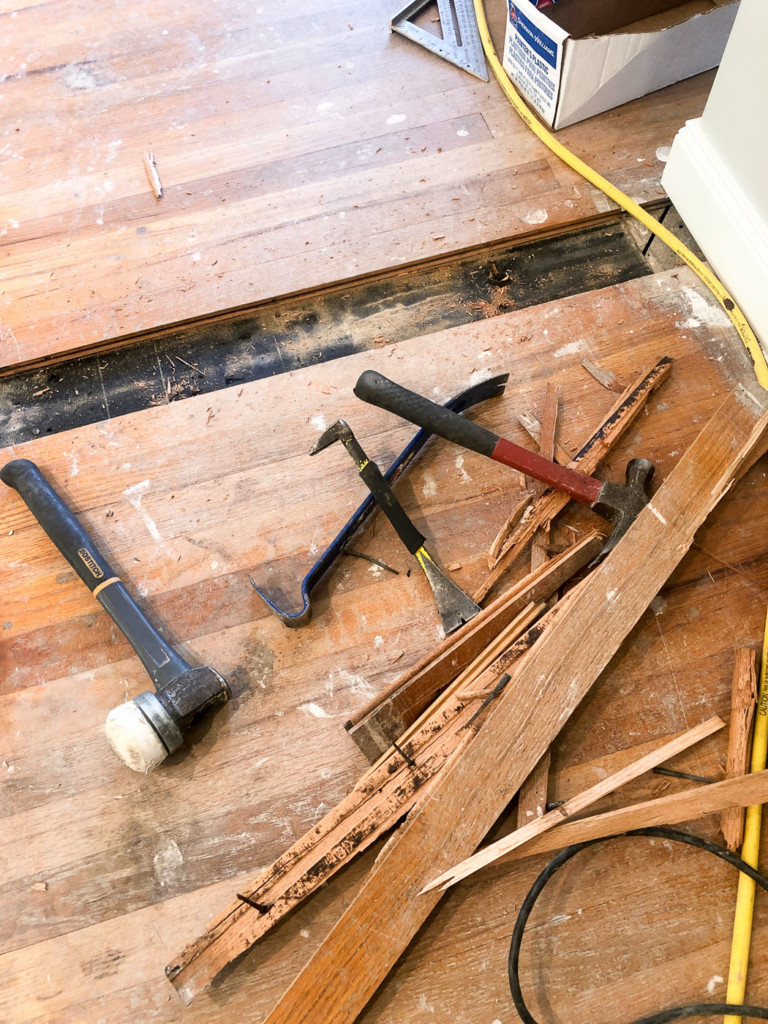
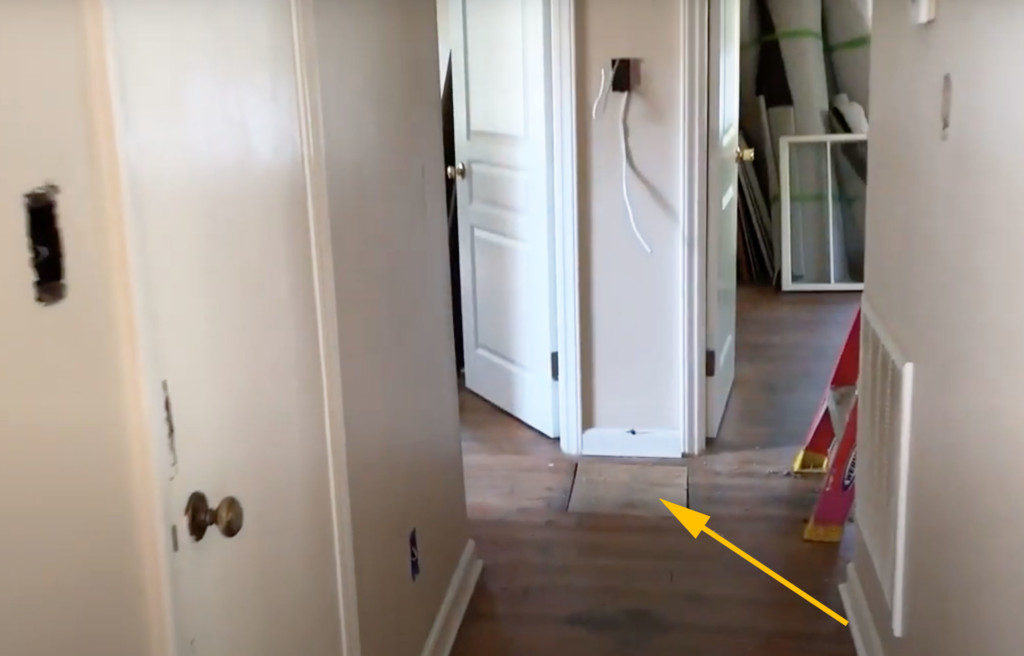
Here’s where that plywood was in the hallway.
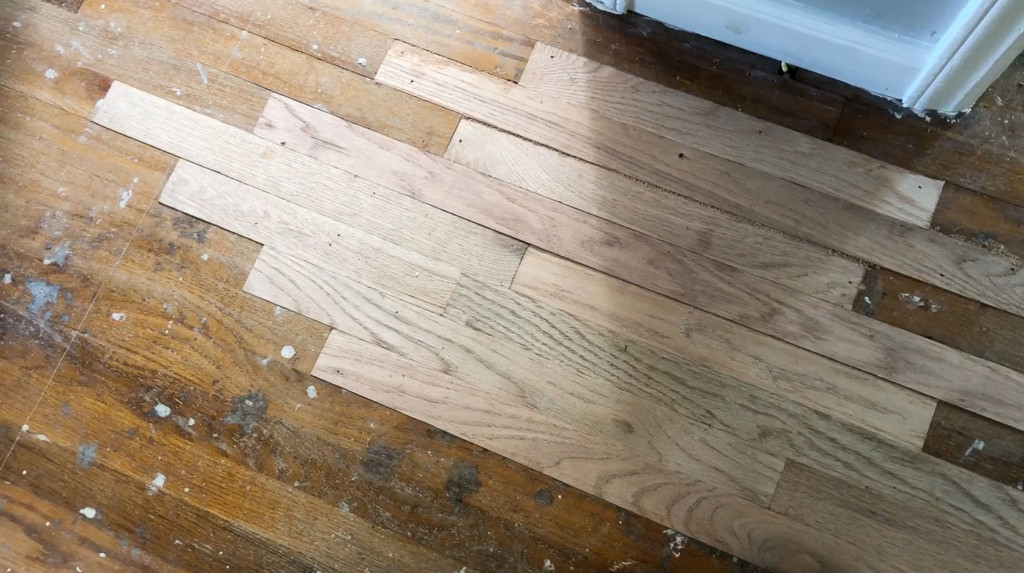
He was able to match the oak flooring and feather in some replacement boards.
And then the floor refinishing came to a screeching halt. This was one of the most frustrating contractors I’ve ever dealt with! (I won’t share the name of the refinisher I worked with. But, I will NEVER work with him again! If you live in the Raleigh/Durham area and want to know who I recommend and who to steer clear of, just shoot me an email.)

Rant Warning:

The flooring contractor promised that his guy would come to sand the floors in the evening after I left. This should have been the first red flag, as most reputable companies send their employees during the day. But, I was just happy to have my job scheduled for refinishing.

Every morning I’d show up at the house expecting to see progress made on the floors only to be let down when I realized nothing had changed. I’d text the refinisher and he’d ultimately get back to me after several hours or sometimes a day later (again, another red flag.)

This back and forth of texts and promises went on for two weeks! For 10 days I would show up and find nothing done. But, the biggest issue was all the time I spent stashing everything into the bathrooms and then emptying them in the morning so I could continue tiling in there.
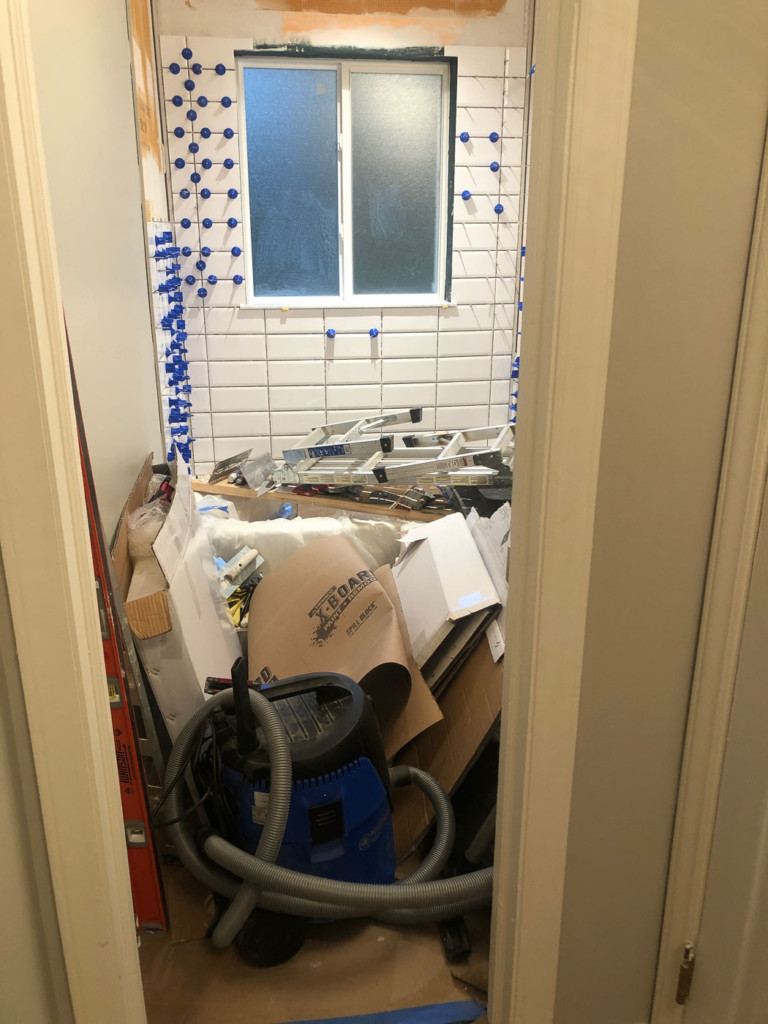
This might seem like a minor inconvenience, but I spent 20 minutes out of my day each day loading and unloading tools and tiles. Add that up over 10 days and that was over 3 hours of time I wasted loading and unloading all my equipment.

Finally, I told the flooring contractor I was headed out of town for a few days and I needed the floors to get done while I was gone. I was fed up.

Making the Stain Decision:

Finally, the floors were sanded while I was away. The floor refinisher sent me a picture of the floors after sanding and offered me a few stain colors to choose from. What a kind thing for him to do, right?
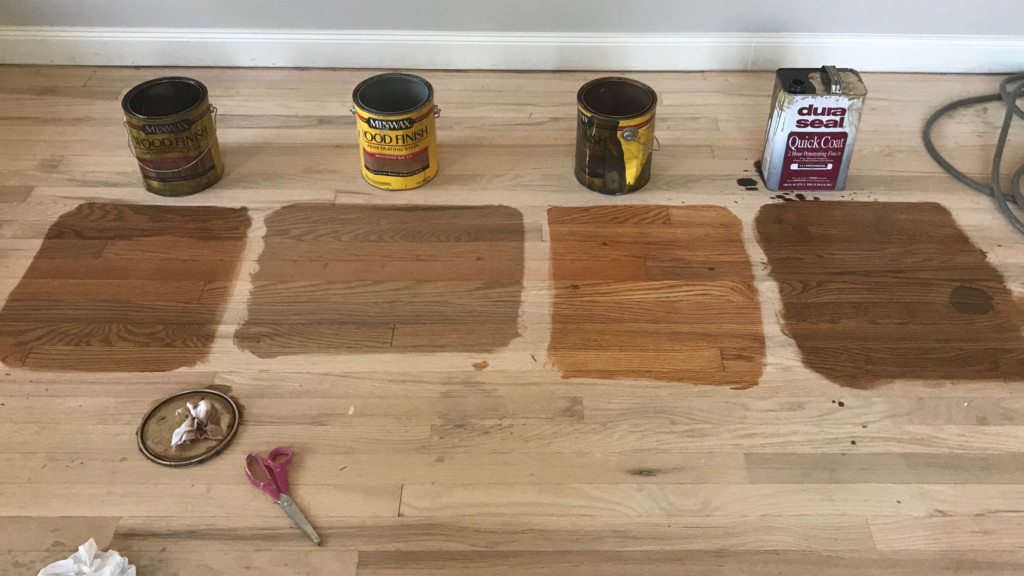
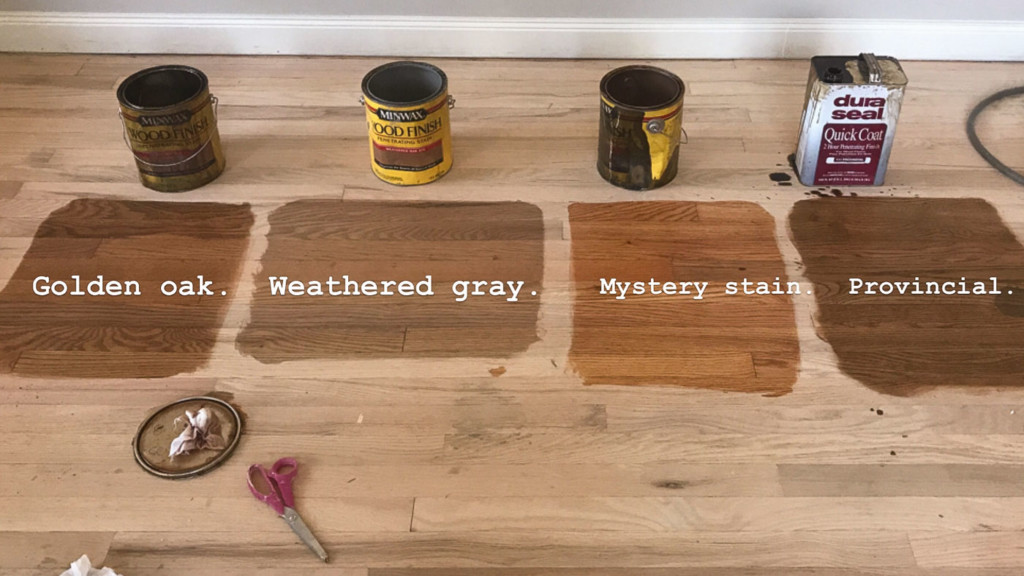
Umm, yes, except he didn’t tell me what the stain colors were! I can’t even properly express my frustration. He sent me the photo above with no stain color names. I was able to figure them out by zooming into the picture (except the “mystery stain” color.) He never got back to me with colors. For your convenience here is what I was able to decipher:
How I Choose Stain and Paint Colors:

I’m very methodical when I choose paint or stain colors. Usually, I look at the colors in the space for at least a week. But, in this case, I needed to make a decision quickly. Luckily I have a friend who had recently used Golden Oak and told me to search for pictures of it online. It seemed like the perfect mid-range stain that would go well with the mid-century vibe I was using in Millie’s Remodel. Although I liked the weathered gray, it was too gray for this house. And provincial was darker than I wanted the floors to be. Finally, I texted my flooring contractor and told him to go with golden oak. I said a little prayer that they would be finished when I got back to Raleigh.

Wood Floor Stains:

When I got back, the floors had finally been stained! Hooray, but also not good. Most of the house looked pretty good. There were some mild stains still showing, but I was okay with that. In my mind, it’s okay when a 63-year-old house has some signs of age.
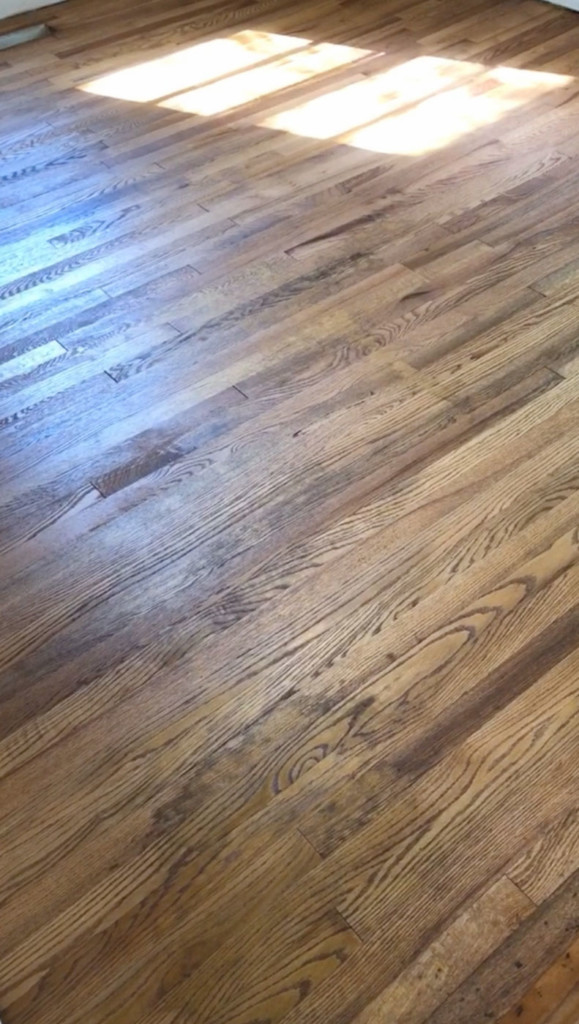
I never expected perfection, but in several areas, there were very dark stains. I was starting to doubt that the wood floors could be saved.
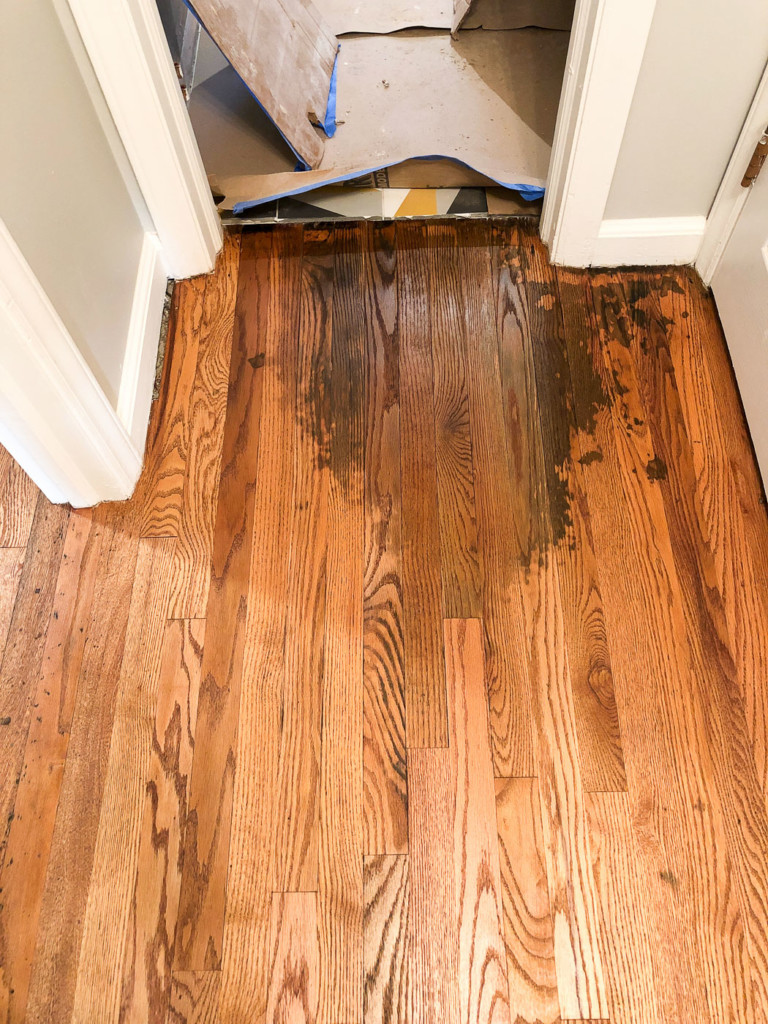
There was a huge water stain outside the bathroom. And another bad stain near the front door.
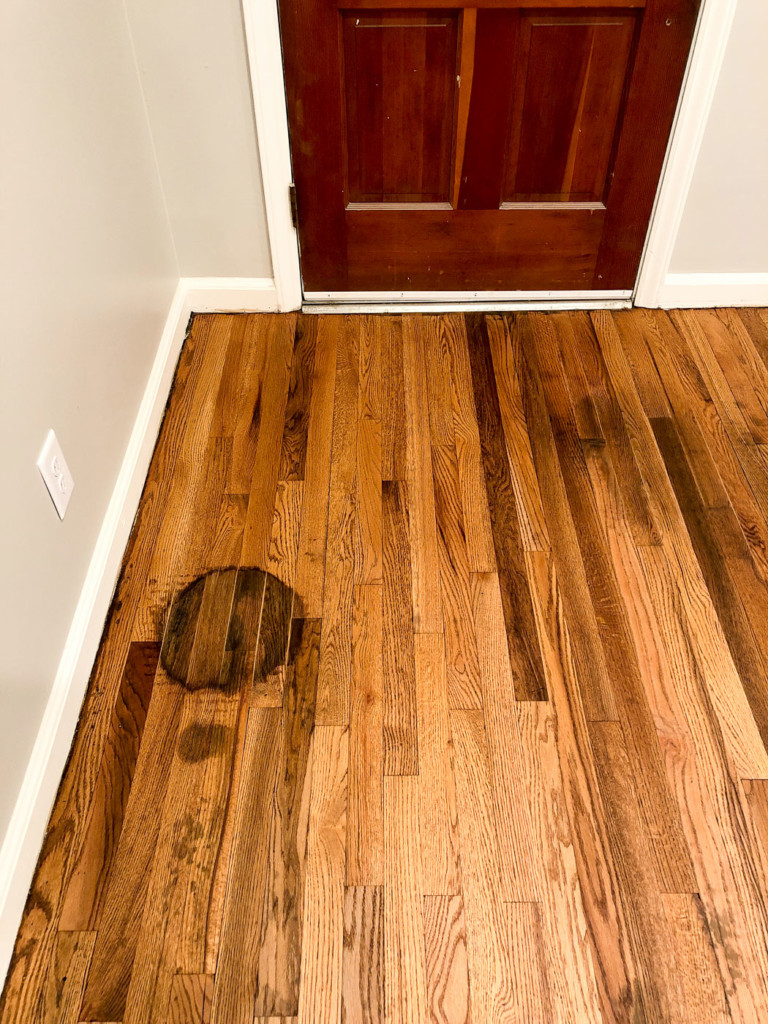
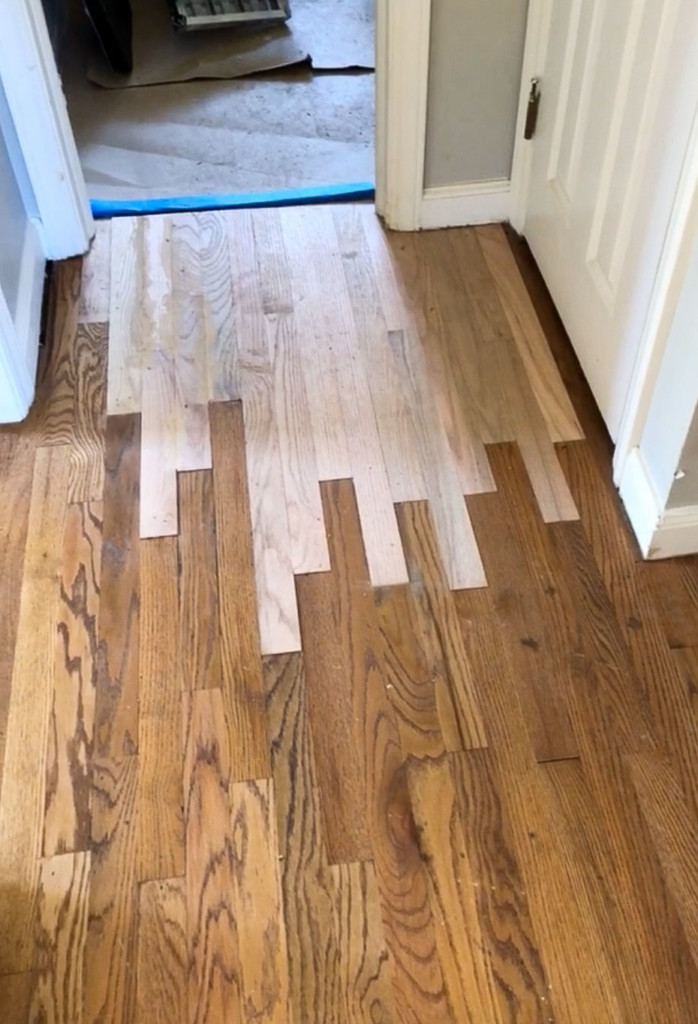
I was disappointed the floor refinisher didn’t call me to suggest we go with a darker stain. I tried to call him and ended up hearing back the next day. He said his guy would come to patch the really bad spots. This was a great solution and luckily he was able to come back within a few days to patch the floor where the bad stains were.
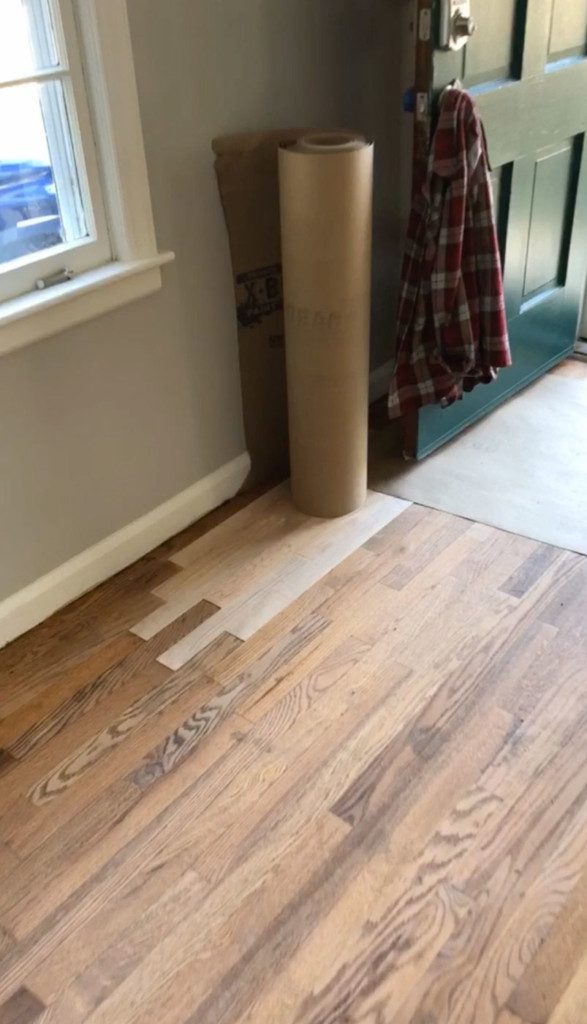
The spot near the bathroom needed the most patching.
Never Pay a Contractor Until the Job is Complete:

This is the point where suddenly my floor contractor was super communicative! I got multiple texts saying he wanted to come by and pick up a check to pay his guy. I told him not until the job was complete. He was so persistent, but luckily I didn’t give in.

For days he hounded me for payment. This is a huge red flag! A contractor who can’t pay their “guys” because they rely on the income from one job to the next is not managing their business well.

Luckily, my stubbornness paid off, and the floors were finished quickly so he could get paid.

Could These Wood Floors Be Saved?

The answer is a resounding YES! Feast your eyes on these beautiful original 1957 wood floors refinished with Minwax Golden Oak.
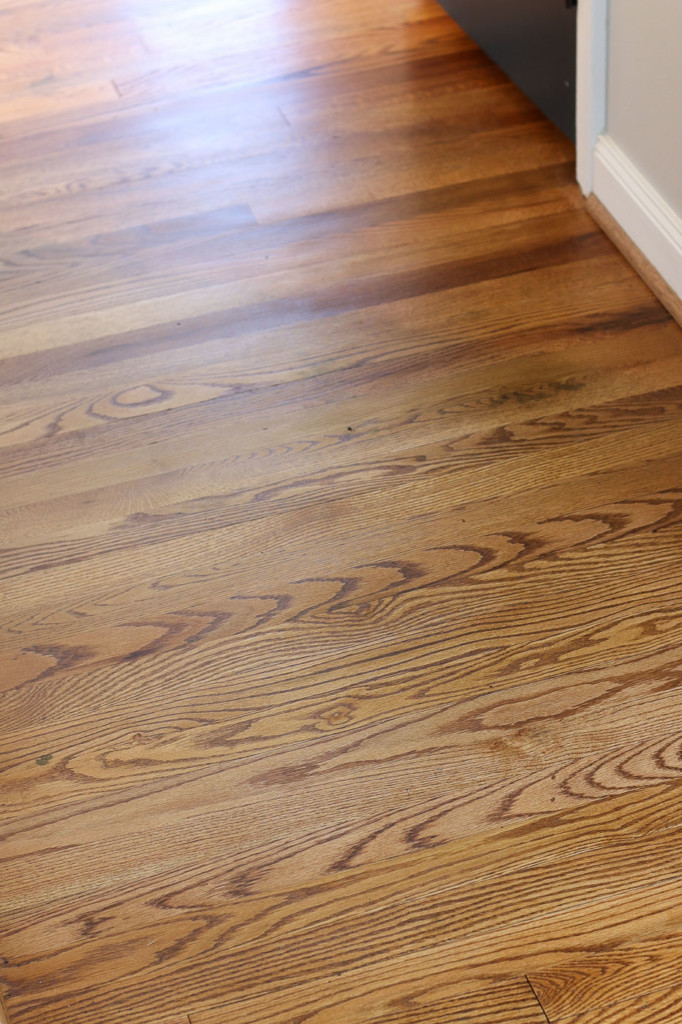
They certainly aren’t perfect, but that’s okay, this house deserves to show her age a little.
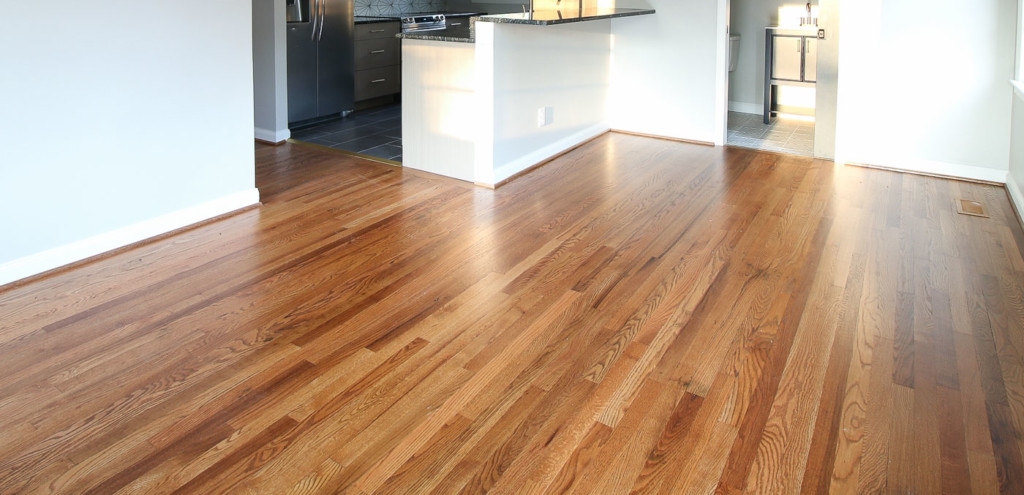
Remember the living room before? Can you even believe this is the same floor?

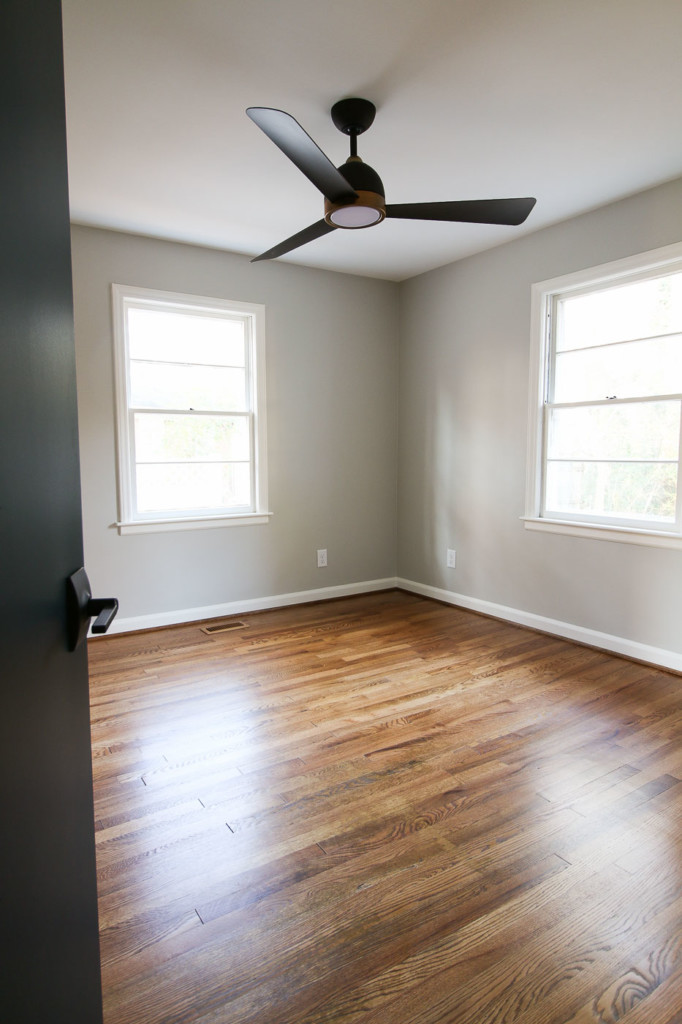
And remarkably the back bedroom never smelled so fresh!
Remember this was the before:

salvaged materials in back bedroom

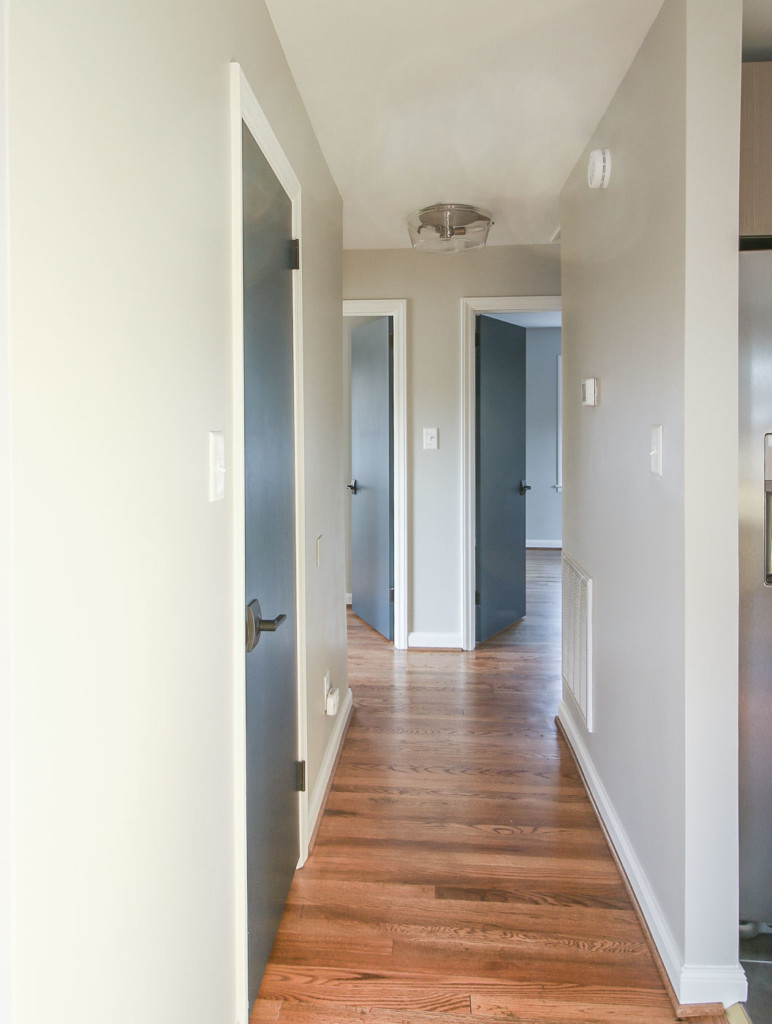
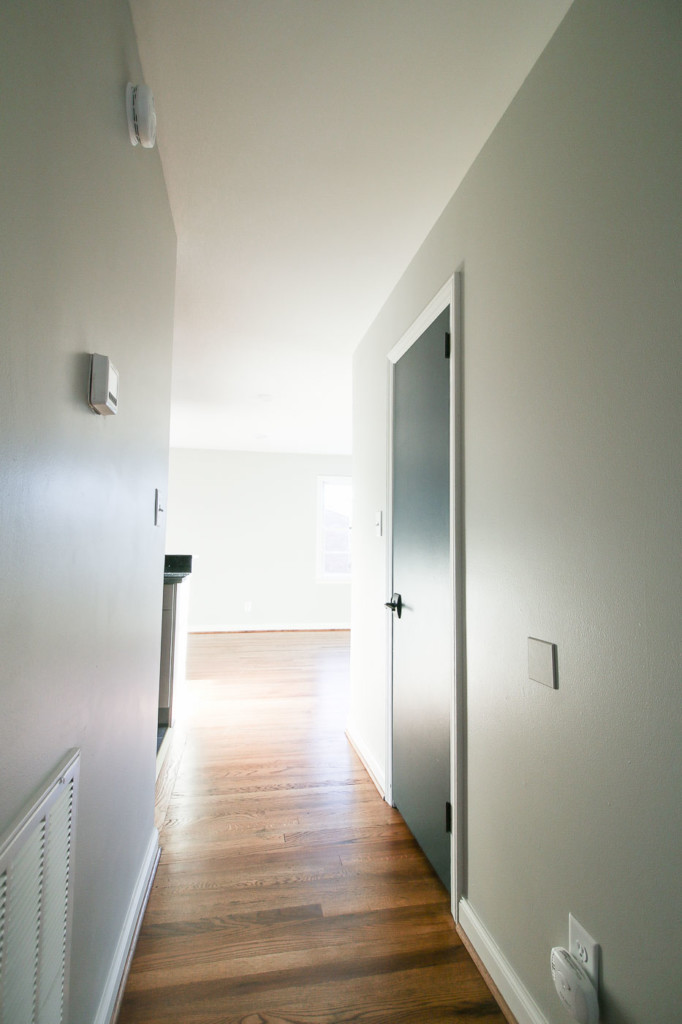
The other bedrooms came out phenomenal too. What do you think of the door colors I chose? It’s Dark Night by Sherwin Williams.
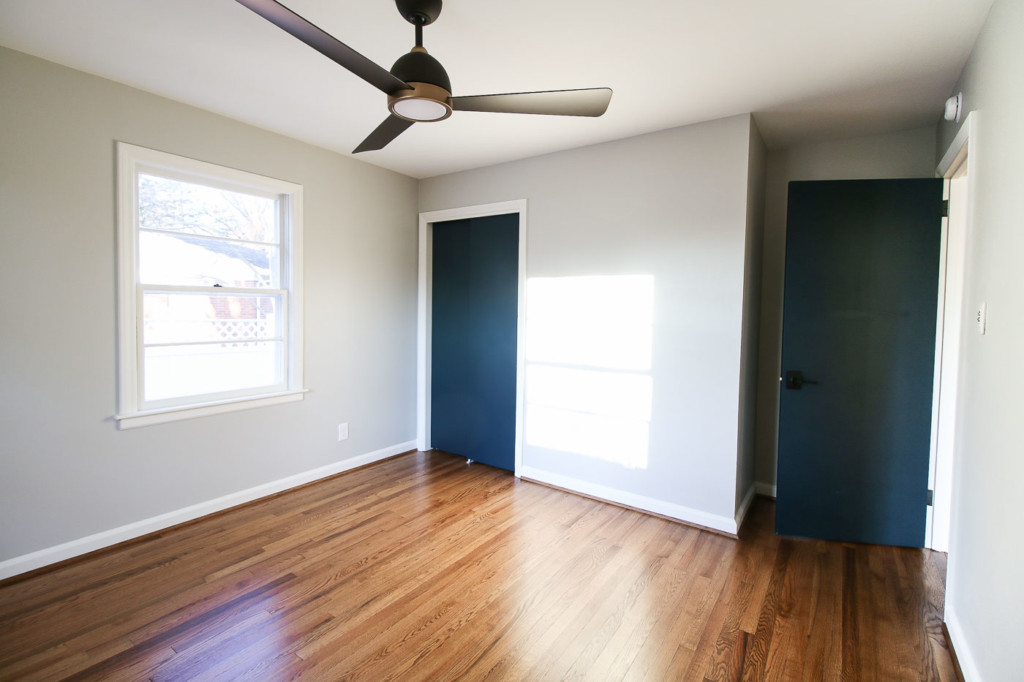
The walls are Repose Gray by Sherwin Williams and I love how simple and neutral the color is.
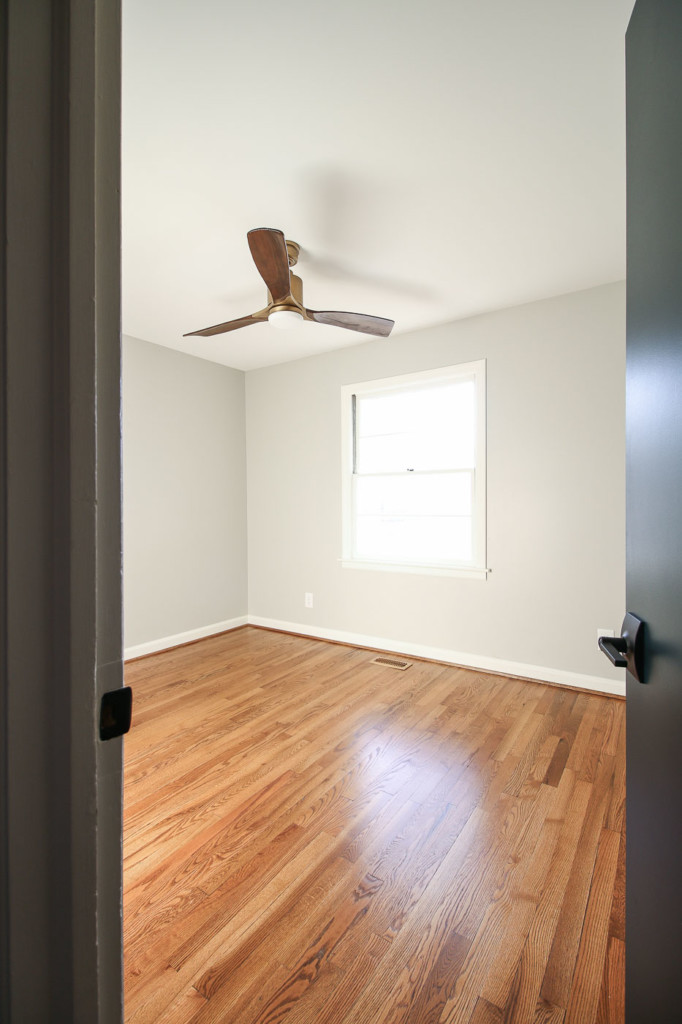
Unlike the Saving Etta house, all the rooms are painted the same color. This makes it easier for me to repaint when renters move out.
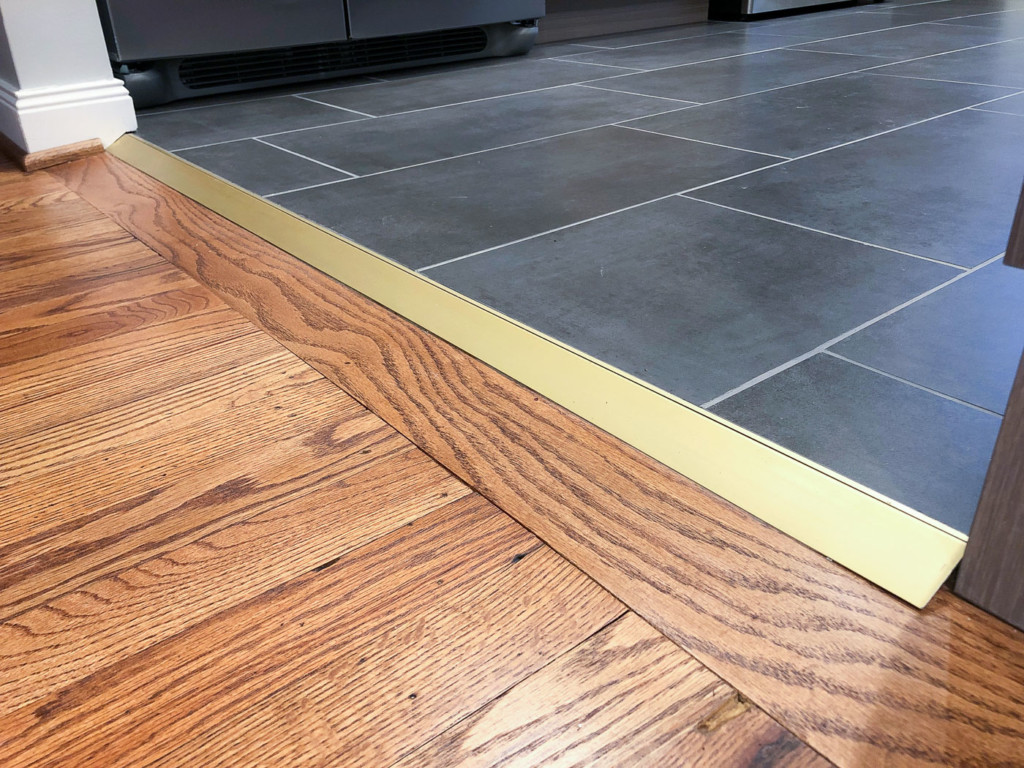
I’ll leave you with the transition from the hall to the kitchen tiles. I used a Schluter Reno-V profile to bridge the transition. You can read my entire article and see the video for 11 Tips to Get Professional Looking Tile Floors!
How to Hire Great Contractors:

I’ll be the first to admit, I could have followed my own advice when hiring this flooring contractor. I should have asked for references and followed up more. Instead, I rushed to hire him because his price was good (red flag number 4.) But, I did follow my own advice and didn’t pay him until the work was done. This one thing saved me the headache of trying to get him back to finish the job.

Read my article on how to hire great contractors and questions you should be asking?

How to Hire Great Contractors! Plus: Free Printable Questions You Need to Ask

Have you ever had bad experience with a contractor? Do tell! I’m also curious about what you think about the stain color I chose.

How to Fill Holes and Knots in Wood | Pretty Handy Girl

How to Fill Holes and Knots in Wood | Pretty Handy Girl

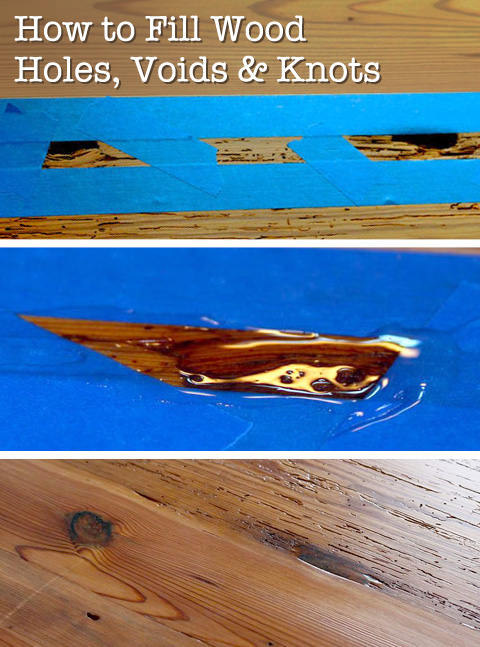
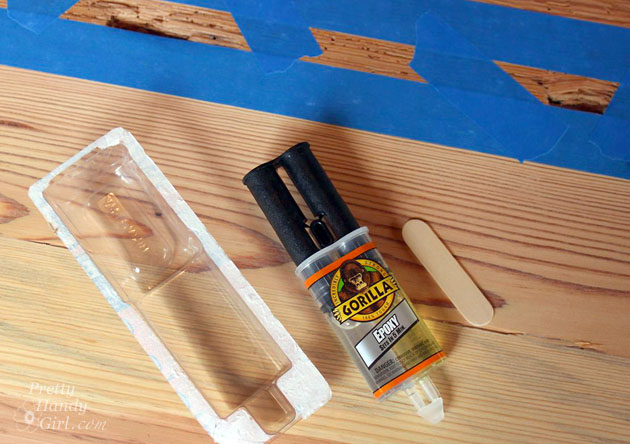
Occasionally, you will get a piece of gorgeous wood that has voids or knots in it. You wouldn’t want to add wood putty, because it wouldn’t retain the look of the knots. But, you want a smooth surface. The solution is to fill the wood knots and voids with epoxy. The results will be beautiful and you’ll be hard pressed to find the patch afterwards.

Materials:

(contains affiliate links)

How to Fill Holes and Knots in Wood | Pretty Handy Girl

Instructions:

Begin by taping off the area around the holes, voids or knots. Press the edges of the painter’s tape down to seal it against the wood.

How to Fill Holes and Knots in Wood | Pretty Handy Girl

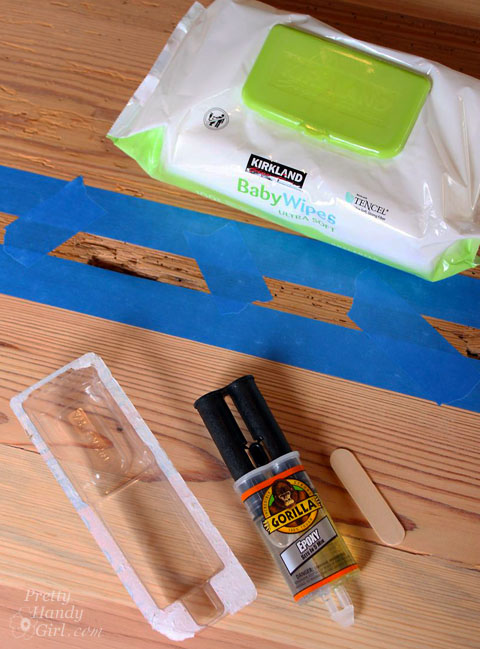
Remove the epoxy from the packaging. (I used Gorilla Glue Epoxy glue that sets up in 5 minutes.)

How to Fill Holes and Knots in Wood | Pretty Handy Girl

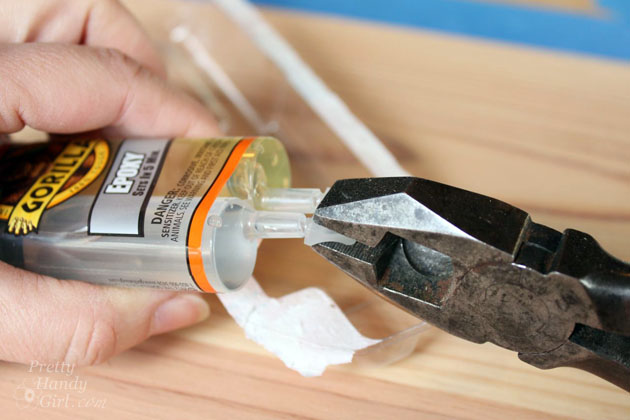
Snip or snap off the tip of the epoxy tubes.

How to Fill Holes and Knots in Wood | Pretty Handy Girl

Press the cap out of the plungers before trying to depress the plunger. Retain the cap to use if you have any leftover epoxy. Read more

How to Refinish Wood Floors without Sanding | Pretty Handy Girl

How to Refinish Wood Floors without Sanding | Pretty Handy Girl
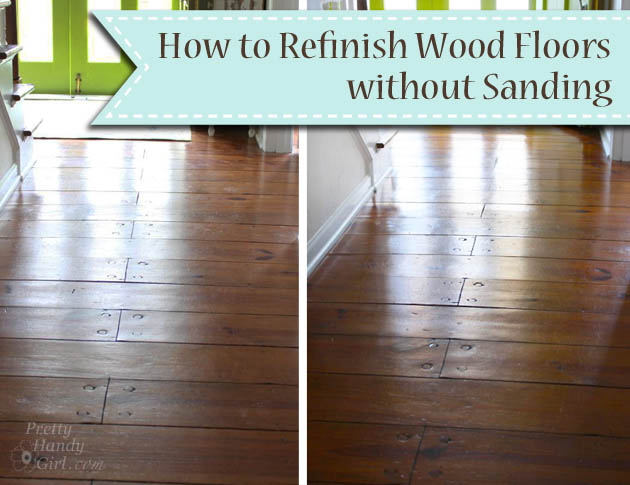
How to Refinish Wood Floors without Sanding

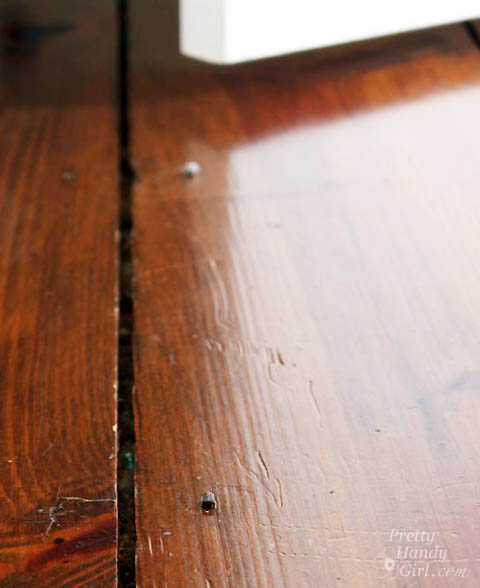
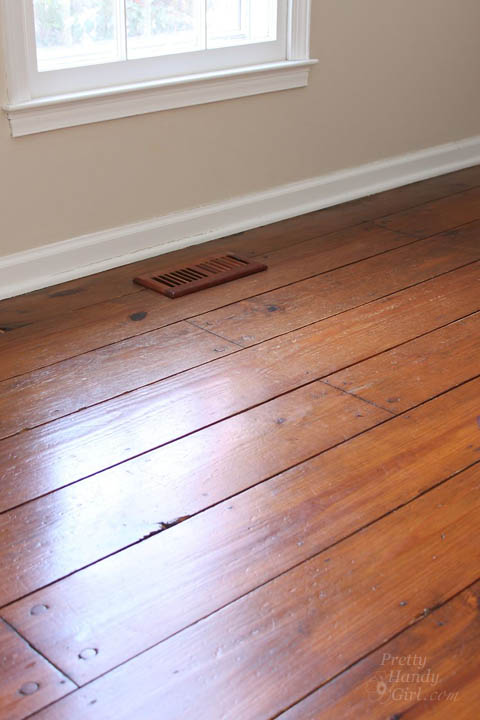
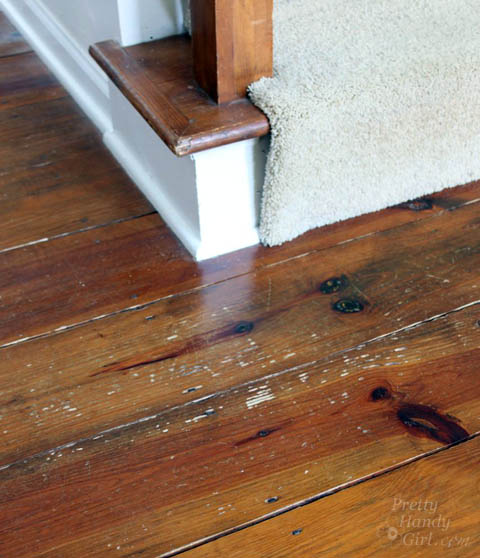
I love our antique heart pine floors! They are beautifully distressed. The round pegs and square nails securing them in place add loads of character. However, the square nails sit flush with the surface preventing us from ever being able to refinish them with a sander. The nails would tear up the sandpaper in no time. But, that’s no problem because I know a way to Refinish Wood Floors without Sanding!


How to Refinish Wood Floors without Sanding | Pretty Handy Girl

From time to time, our floors start to look dull…

How to Refinish Wood Floors without Sanding | Pretty Handy Girl

…and the scratches are more noticeable. This is when I know it’s time to refinish them.

How to Refinish Wood Floors without Sanding | Pretty Handy Girl

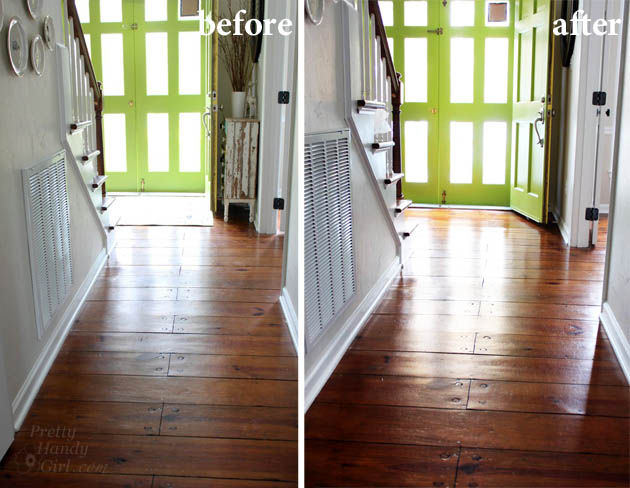
The first time I refinished our floors, it was several years ago when we were painting the office and dining room. I decided to try to refinish the floors because the rooms were already devoid of furniture. Several neighbors had recommended Bona® Hardwood Floor Cleaner and Bona® Hardwood Floor Polish. I was skeptical, but the results were beautiful floors that had luster, but still showed their beautiful age.

Before and After Finishing Wood Floors without Sanding | Pretty Handy Girl

The Bona® Hardwood Floor Cleaner did a fabulous job of cleaning the floor without damaging them. And, the Bona® Hardwood Floor Polish provided a strong finish without any waxy build up. The high gloss protective layer adds some shine, but isn’t overly shiny. The polish also fills micro-scratches, evening out the appearance of the floor.

How to Refinish Wood Floors without Sanding | Pretty Handy Girl

Fast forward to this past week when Bona asked me to write a sponsored post for them, I jumped for joy because I already use and love the Bona® Hardwood Floor Products! (Here’s my full disclosure: Yes, this is a sponsored post. No, I was not told what to write. And yes, I probably would have blogged about my experiences using Bona® Hardwood Floor Products at some point anyway. Win-win.)

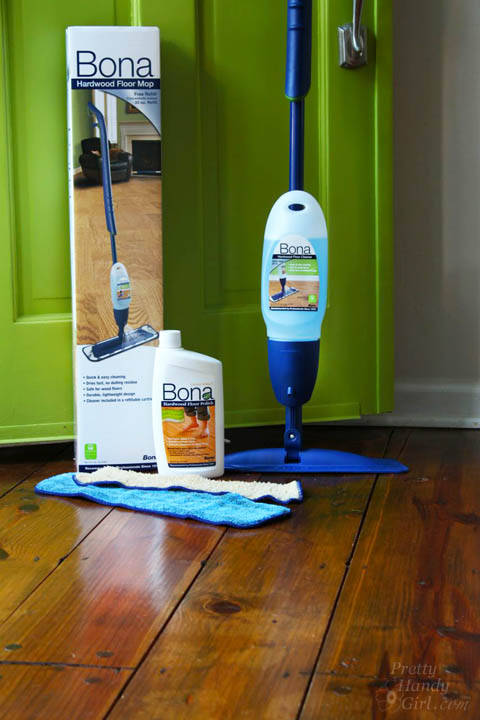
I highly recommend trying the combo of the Bona® Hardwood Floor Cleaner and the Bona® Hardwood Floor Polish before spending huge amounts of money to have your floors refinished. (Bona® Hardwood Floor Cleaner & Polish will not work on floors that have an oil or wax coating. Test in an inconspicuous area to be sure it will work for your floors.)

Here’s how to Refinish Your Wood Floors without Sanding:

Materials:

(I’ve included affiliate links for your convenience. I earn a small percentage from a purchase using these links. There is no additional cost to you. You can read more about affiliate links here.)

Instructions for Cleaning the Wood Floors:

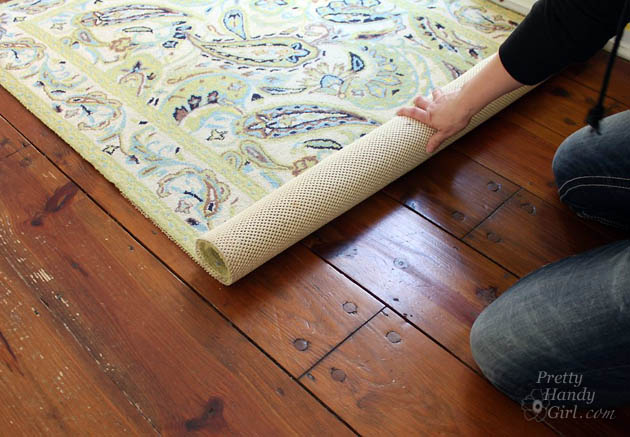
Remove all rugs and furniture from the room. If you have heavy furniture pieces that are never moved, you can leave them in place.

How to Refinish Wood Floors without Sanding | Pretty Handy Girl

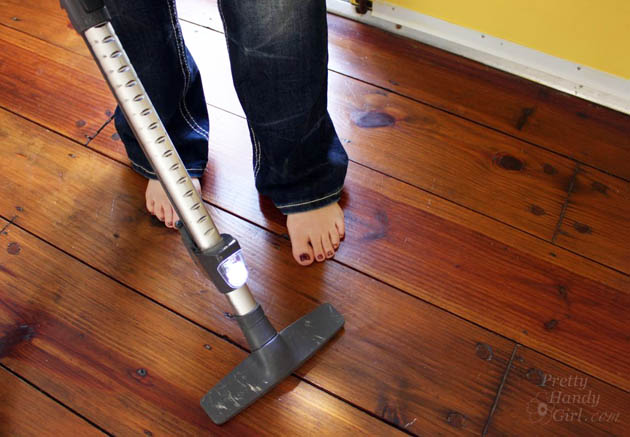
Vacuum or sweep the floors to remove all dirt and debris.

How to Refinish Wood Floors without Sanding | Pretty Handy Girl

Assemble your Bona® Hardwood Floor Spray Mop as shown here: Read more

Welcome back! If you are just joining us, we are on the fifth step of a five part series on our living room. A living room that started out as a dark cave of a room:

Before picture shot during daytime with a lamp lit. VERY DARK!

Previous steps can be viewed here:
1. Faux painting brick over a previously painted white brick fireplace
2. Lightening up a room in 5 steps
3. Painting decorative graphics on a wall
4. Preparing to Install Antique Heart Pine Floors (and living to tell about it!)

It has been four days since Christmas and we’ve been working like busy beavers on our living room. Only a few more days until Pretty Handsome Guy has to go back to work. Our boys are getting antsy and tired of being shooed from the living room.

Keeping the troops from getting restless:

I came up with a spur of the moment idea to keep them busy for a little longer! Painter’s tape and a coin made for an instant hop scotch game on the kitchen floor!

I quickly duck into the living room and start the installation process.

When choosing the direction to run the boards, I had to look under the house from our crawl space to see which direction the floor joists ran. We wanted our wood floor to run at a 90 degree angle (or perpendicular) to the joist direction. (This isn’t a rule, but it helps with the stability of your floor.) If you can’t get under your house (or want no part of that underbelly) then study the nail pattern on the plywood subfloor. The nails that are nailed into the floor joists will be in straight lines across the floor.)

To lay the flooring straight, I drew out guide lines in the living room.

Marking Start and End Lines:

  1. Mark the green line first (with chalk line) as your starting line.
  2. Measure the width of the room at the top and bottom.
  3. If these values differ, choose the lesser amount or close to it and mark that distance at the top and bottom of the room.
  4. Snap your chalk line between the two points.

Figuring First and Last Board Widths:

Before you nail in that first board (because I know you are itching to get started). You will need to do some math to figure out how many board widths you will use across your room. Take the total width of your room, divide it by your floor board width.

For example, our room is 187″ wide. My board widths are 5.5 inches wide. So, here is my equation: 187 ÷ 5.5 = 34″  Oh happy day, a whole number!!! I have room for 34 full width boards in our living room.

This very rarely occurs! Normally you end up with a number that has a fraction, let’s say .3 for example. You will be left with 1/3 of your board width at the end. This board won’t look good being so narrow, and it is harder to work with. If you had .5 or larger, you might be fine depending on your board widths. You will need to be the judge.

So, in the case of the .3 excess, you will need to split the difference between both your starter and end boards. Find out what .3 of your board widths is: 5.5 x .3 = 1.65. Then you will add that width to your standard board width: 1.65 + 5.5= 7.15″. Now divide the 7.15 in half: 7.15 ÷ 2 = 3.575. So, now you know that you need to rip your start and end board to be 3.5″ wide. I hope you followed that.

Time to learn two new glossary words:


  • Rip – ripping a board is cutting with the grain along the length of a board. This is usually done with a table saw, but can be done with a circular saw and a straight edge.
  • Cross cut – a type of cut that is perpendicular to the grain or along the width of your board. Cross cuts are usually made with a miter saw or circular saw, but can also be made with a hand saw. (I’ve been known to make this cut using my band saw before I had either a miter or table saw. Okay, I’ll have to give you a lesson on types of saws at a later date. I promise!)

Remember how I said we had a whole number, meaning our room will take full width boards. In other words, no ripping needed (guess we didn’t need that table saw after all. But, no way was I returning my Christmas present!)

Cutting and Dry Fitting the floor:

I started by laying out all the boards across the room. Sounds easy right? WRONG!!! It wasn’t really difficult, just time consuming. I had to cut each board to size with the miter saw (this is where I really learned the value of the old adage “Measure twice, cut once.”  Then, I moved to the next board. Several rows took two board lengths. I was careful to stagger my seams randomly. I also had to take more time to cut the profiles around door jams, fireplace, heating vents and bookcases. Also, be sure to cut a hole where your heating and A/C vent is (more detailed information on cutting profiles can be found in this post.) Cutting around a vent instructions can be found at OneProjectCloser.com here. Measure, cut, check fit (and repeat about 100 times).

I chose to create a mitered frame around our fireplace. This took a little more measuring and time, but the results were well worth the effort.

Phew, that only took a day and a half! I laid out ALL the floor boards without nailing. Moved a few to stagger seams or put prettier planks in a more prominent spot. When everthing fit, I lightly numbered each board with chalk and stacked them up near the end side of the room.

FINALLY! Install Your Floor:

Okay itchy fingers, now it is time to install that first board! Grab that huge pneumatic nailer, right?! What? No?! The nailer won’t fit close enough to the wall for your first (or maybe even second or third row.) Time to bust out the power drill and predrill your nail holes. I put holes approximately every 18″ about an inch in from the edge. Then hammered the nails in using a nail set to countersink the nails. Before you sand, you will need to add some wood putty to fill and hide the nail holes.

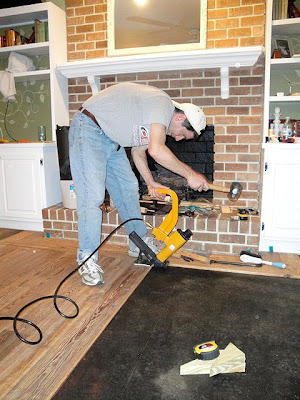
Ah ha, NOW you can grab that nailer! I have to admit I was a little nervous. I had never actually used a floor nailer (although my Dad has pictures to prove otherwise).


Please, please, no comments about my topless internet photo!
I was 5 people! And a tomboy, what can I say.

It is true, I had watched my parents lay wood floors. But, that was many many years ago. Luckily times have changed, and the tools are better. We rented a pneumatic nailer with a compressor so that the nailer would do most of the driving with forced air.

We lined up that second board. Used a scrap block of wood and a hammer to tap it firmly against the installed board. Then Pretty Handsome Guy gave me the nod letting me know I could proceed. I trembled a little as I lifted the rubber mallet. Then stopped, moved my feet wider and clear away from the nailer. Then raised the mallet. It was now or never! And {{WHAM!}} The mallet hit smack in the middle of the black button and a loud bang filled the room. Woot! What a rush! I just love power tools :-).

Back to work, one floor cleat in and about 400 more to go. Plenty of {{WHAM}} for me and Pretty Handsome Guy to share.

When we reached the end of the room, we had to ditch the nailer and predrill holes and hammer in the nails by hand again.

Ooo la la! Step back and admire that beautiful floor!

Because our floor planks were custom planed, they had varying heights. But, that wasn’t a big deal because we were planning on finishing our own floor.

Well, at first we were so scared of ruining our beautiful wood floors that we almost paid a professional to come finish them for us. But, Mark Kegler (the guy who planed the wood for us) reassured me that I could definitely do it myself.

He gave me a few tips on Refinishing Your Own Floors:

  • Rent a drum sander (rented at Home Depot.)
  • Watch some videos on YouTube for using a drum sander.
  • Practice on a sheet of plywood to get the hang of it.
  • When you reach the end of your row, gently raise or rock the sander up and of the floor.
  • Whatever you do, DO NOT stop moving while the sanding drum is in contact with the floor.


  • Rent an edge sander (rented at Home Depot.)
  • Again watch a video on YouTube for how to use it.
  • Again DO NOT STOP moving it while it is in contact with the floor.
  • And hang on tight to that puppy, cause it will pull you into the next county if you let it.
  • A side note on the edge sanders, this thing will really give you a good glute and hamstring workout (just in case you were looking for some added results. Okay, yes, I added this last bullet point.)


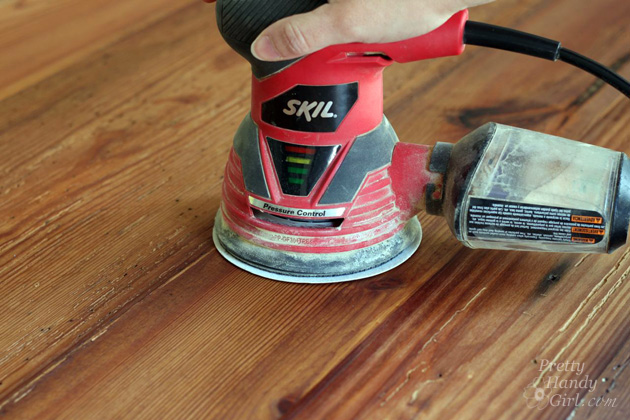
  • Then rent a Square Buffer (or Random Orbital Sander). It will give you your fine sanding and buffing finishes. (Rented at Home Depot)
  • Yup, you guessed it, watch a video on You Tube. Seriously, how did people learn anything before YouTube?
  • Buy the most expensive floor finishing system they have (it will last much longer than a cheap polyurethane.) We used ProFinisher Water-Based Floor Polyurethane.
  • It can be a water based system.
  • The system should include a sanding sealer and a sealer (polyurethane or varnish).
  • Follow the directions on the bottle.

This site: www.easy2diy.com has some a great video and information for the whole finishing process. They left off the square buffing step, but it’s your DIY project and you can buff if you want to!

After following all the directions for finishing the floor, we were left with….

Ta Da! Droolingly Gorgeous Antique Heart Pine Floor

I hope you noticed that I didn’t mention the stain color we used. That is because we didn’t use a stain. This is the actual color of antique heart pine wood! No stain, just glorious amber red heart pine.

Which we had to cover up with a rug. But, every once in a while I pull back the rug and admire this:

You can just barely see that little spot of turquoise paint in the nooks of this knot.
It is just whispering, “I’m old and I have a story behind me.”

Before I reveal the room to you:
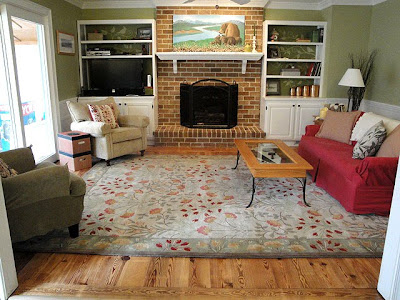
Do you remember the before picture?
Here are a few more:
And this was before we moved in:

Here is the final reveal of our living room:

I should note that it took another few hours to cut, install, and paint the quarter round molding to hide the edges of the floor. And I had to wait a month for custom transition strips for the doorways and special heart pine quarter round for around the fireplace. But, I’m one proud and happy Pretty Handy Girl now!

Post Note:

Several people have emailed me asking where we got our rug. It is from Pottery Barn and is called Adeline.