Window Cleaning Solution - Water and Dish Soap

How to Clean your Windows Like a Pro

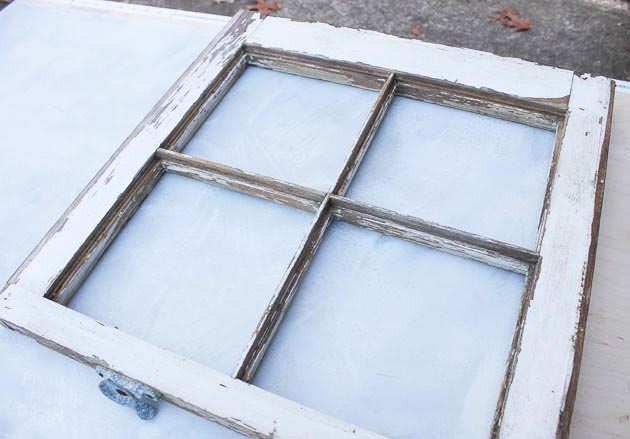
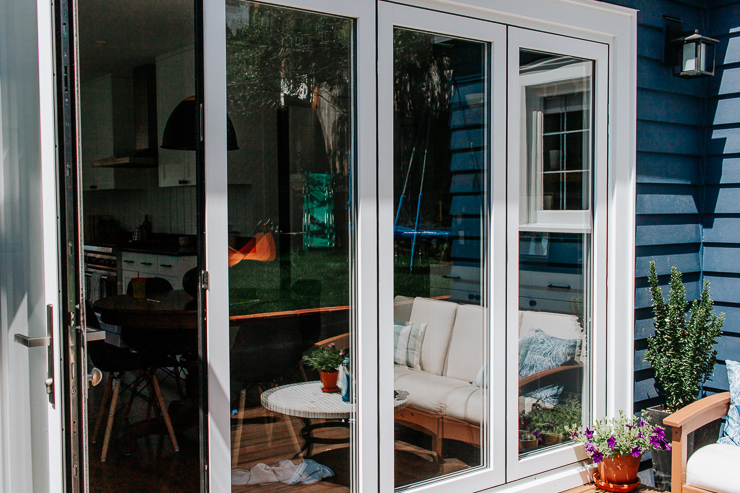
How to Clean Your Windows like a Pro

Hi, Pretty Handy Girl Readers!!  What’s one way to improve both the interior look and exterior curb appeal of your home? Clean your windows! Not only do sparkling clean windows look amazing from the outside, but they also let more light in and create a brighter home on the inside.  This post will teach you how to clean your windows like a pro.

Unfortunately, cleaning your windows is not a fun task. While you can always shell out hundreds of dollars for a professional window cleaning, this one simple and cheap tool will get the job done as good as the pros and leave that money in your pocket.

(I’ve included affiliate links for your convenience. I earn a small percentage from a purchase using these links. There is no additional cost to you. You can read more about affiliate links here.)

When to Clean Windows:

Spring Cleaning is the perfect time to get this done. Although, if you have a lot of pollen you may want to wait for pollen season to end, then clean the pollen and debris off them.

Cleaning Tools for your Windows

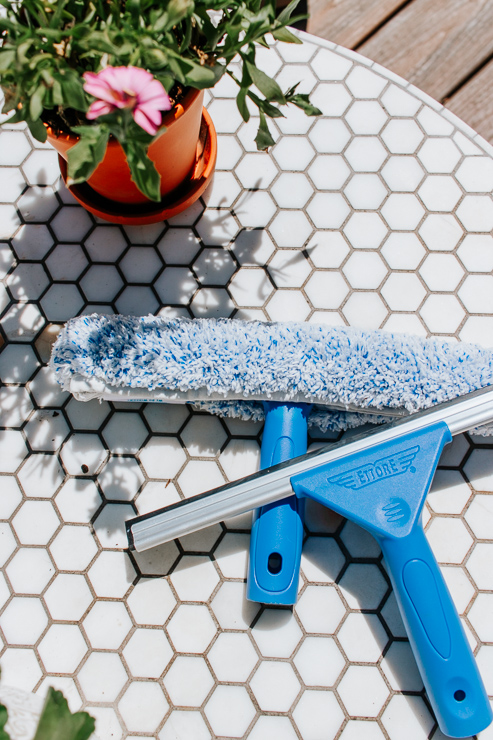
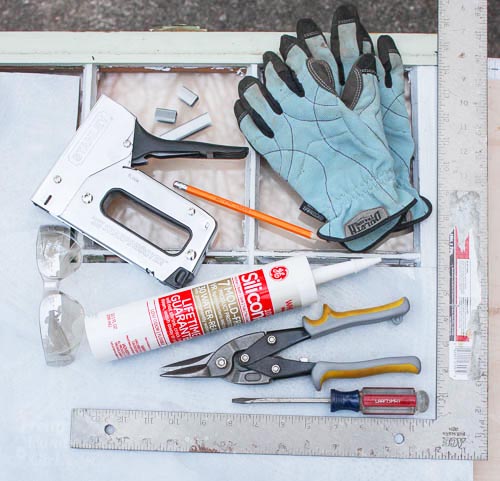
The only tools you need is this Ettore 65000 Professional Window Cleaning Kit for less than $20. The kit comes with a handy squeegee and a microfiber mop head. (Bonus: the microfiber mop head is washable too!)

How to Clean your Windows:

Follow these steps for sparkling clean windows that your neighbors will envy! 🙂

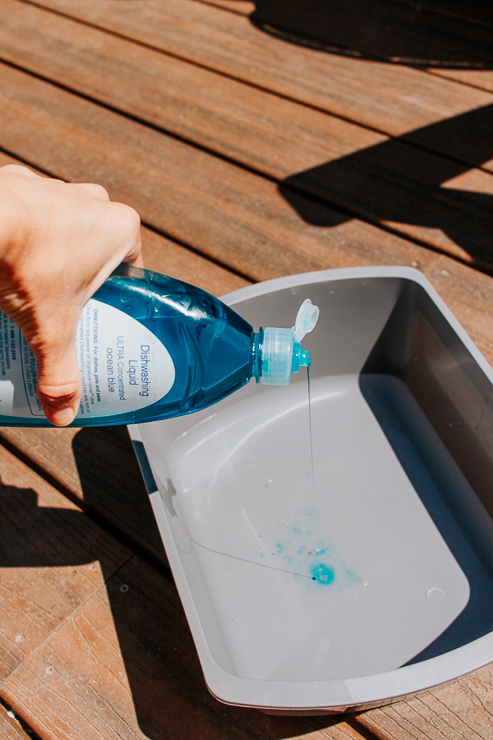
Step 1 – Prepare your Cleaning Solution

Window Cleaning Solution - Water and Dish Soap

First, fill a bucket with water and add a few squirts of dish soap.

Step 2 – Wet your Mop Head

Dip your mophead in the cleaning solution

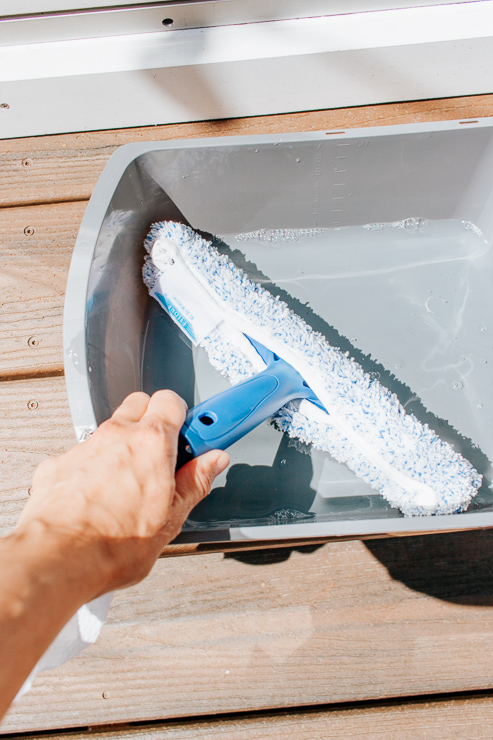
Take your microfiber mop head and dip it in your soapy bucket a few times. Wring it out a bit with your hand. You don’t need it to be dripping wet.

Step 3 – Scrub your Windows

Scrub your Windows Clean

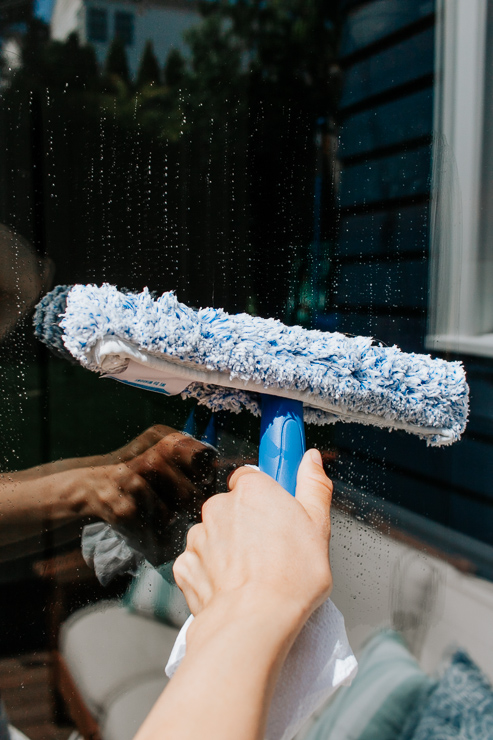
Run the wet microfiber mop head over your dirty windows a few times to clean them. Some spots may take a bit of elbow grease.

Step 4 – Squeegee!

Squeegee water and soap from your windows

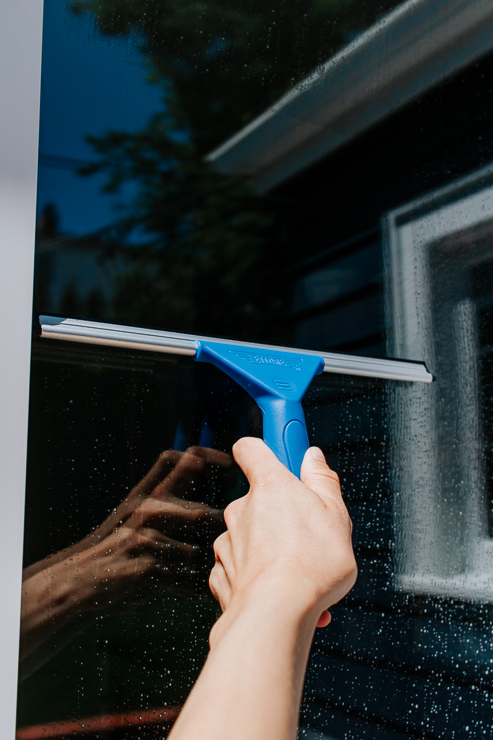
Starting from the top middle of the window, take your squeegee and run it over the window in a fluid, top to bottom motion. Continue all the way to the bottom of the window. By using your squeegee in this pattern, you avoid leaving streaks from where you stopped and started. Don’t worry – you can always start over again if you find you left too many streaks.

Step 5 – Wipe up Excess Water

Wipe off excess water from your window sill

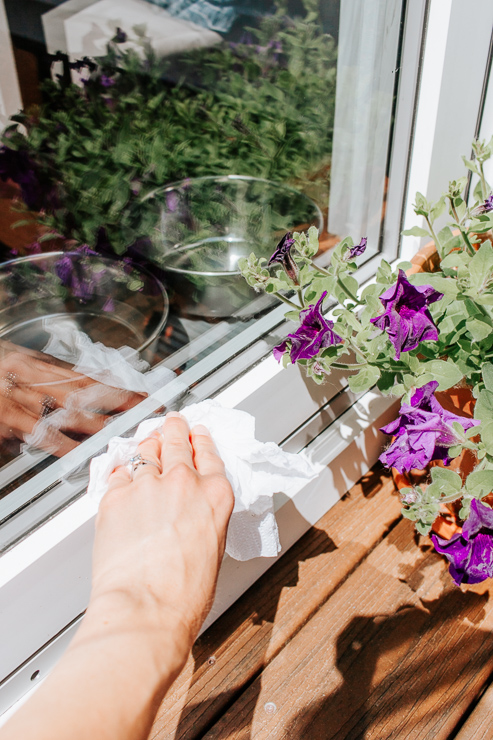
Finally, use a clean, microfiber cloth or paper towel to wipe up the excess water from the squeegee at the base of the window frame.

You can clean your windows both inside and outside using this same method. This tool gives you such clean windows – you will never go back to your old method of cleaning windows again. I dare say you may even find window cleaning is somewhat enjoyable. Put on your headphones and your favorite tunes and get lost in the zen of cleaning windows!

Trust me, it’s an oddly addicting activity.

Sparkling Clean Windows - Clean Windows Like a Pro

Windows Too High?

What if you have a window that’s really high and hard to reach? Fortunately,  this upgraded tool has an extension pole that easily snaps on both the squeegee and microfiber mop head. It takes a bit more finesse to use this with the extension pole attached, but after a few times you will get the hang of it.

When you are finished cleaning, the extension pole collapses for easy storage. I keep the squeegee and microfiber mop head conveniently stored under my sink and pull it out whenever I see dirty windows and kids fingerprints.

It’s amazing what clean windows will do for your home! (PS: This tool works for your glass shower doors as well! Give it a try.)  If you want more cleaning tips – check out how to clean your oven racks on Decor Hint.  And find out why you should never throw away your old toothbrushes (hint: it’s not for your teeth!)

I hope this helps you on your way to cleaner windows! I’ll be back here next month with another tutorial for you!

karen signature

~ See More of Karen’s Tutorials ~


karen from decor hintHello!  I’m Karen, the creator of the Home Decor and DIY Blog: Decor Hint. I’m a Native of the East Coast, but I currently live in beautiful Seattle with my hubby, our two wonderful children, and our spunky wheaten terrier.

You can usually find me with some sort of craft in one hand and a coffee in the other. And I’m always rearranging furniture or moving lamps from room to room. I have a passion (read: obsession) for decorating, DIY, and gardening. In short, I love making my house into a home.

Like many, I’m inspired by what I see in home decor magazines, but I’m not so inspired by the price tags.  Consequently, I love finding and creating beautiful budget-friendly home decor items. In a head to head competition, I bet you’d never know the difference between the designer items and my DIY creations!  Many of my DIY projects focus on sewing, crafting, upcycling and organizing. Some of my favorite projects have been making pretty wreaths, sewing my own tassel hand towels, and crafting these trendy wood bead garlands. I can’t wait to inspire you and spark your creativity through my DIY projects.

You can always connect with me on Pinterest, Twitter or Instagram.

10_dreamy_window_seat_inspirationsDreamy Window Seat Inspiration Photos

I have a friend, named Claire, who is an interior design genius. She would beg to differ, but honestly she is brilliant when it comes to design decisions. This friend was the visionary who created our kitchen floor plan for us. She was also the person who envisioned a window seat in our bay window. Magnifique! Adding a window seat to the bay window was a great way to free up floor space, add storage to the kitchen, and give us a cozy spot to sit and eat. You can read how I built the window seat with storage in our bay window here.

Fall Decor in a Rustic Farmhouse Kitchen | Pretty Handy Girl

Before building our window seat, I scoured the web for window seat inspiration photos and here are my Favorite Dreamy Window Seat Inspiration Photos (of the MANY more photos I pinned):

BHG_window_seatDesigner Carrie Miller created a relaxing beadboard window seat via BHG.com


California_blue_white_breakfast_nookGorgeous tower breakfast nook. Photo by Karyn R. Millet via House Beautiful


elegant_built_in_no_windowElegant built-in seat (without a window) via: London Painting Group


Refrigerator cabinets used to build a window seat via Centsational Girl


storage_drawer_window_seatWindow seat with storage drawers via BHG.com


Bedroom window seat by Newport Beach Interior Designer Wendi Young Design via Houzz


Curved banquette by Brooklyn architect Ben Herzog via Houzz


White_window_seat_with_plantation_shuttersWhite and black built in storage bench via BHG.com


Huge bay window seating by Flemington architect Pickell Architecture via Houzz


Small corner window seat by Santa Cruz Media and blogs Shannon Malone via Houzz


Finally, this was the photo that set my wheels in the right direction for construction via Houzz

Want to build your own? I have a great tutorial for how to build a window seat in a bay window with storage.

Hope you find some window seat inspiration! Happy building!

PHGFancySign

Rustic Metal Magnetic Window Frame | Pretty Handy Girl

Galvanized Metal Magnetic Windows | Pretty Handy Girl

I was really inspired by Laura Putnam’s new book: DIY Rustic Modern Metal Crafts. I love the look of aged galvanized metal and knew that our home needed more of it. Today I’ll share with you a tutorial to create your own Rustic Metal Magnetic Window Frame, inspired by Laura’s Vintage Window Memo Board. But, you’ll definitely want to get a copy of Laura’s book to learn how to make 34 more storage and decor items using galvanized metal!

Materials:
(contains affiliate links)

Galvanized Metal Magnetic Windows | Pretty Handy Girl

Optional: Silicone Caulk (for more secure metal)

Instructions:

Ready to make your own Rustic Metal Magnetic Window Frame? If you have newer galvanized metal, you can easily add an aged patina to metal following this tutorial. Prepare ahead of time, because it might take up to 8 hours to get the look you want. The sheet you see below was left overnight in the solution to get a nice white patina.

aged-galvanized-sheet-metal

Remove the glass panes from your old window.

old-window-pane

Measure the size of each pane.

measure-window-panes

Transfer your measurements onto the galvanized metal sheet. Read more

Family Organization Door | Pretty Handy Girl

Family Organization Door | Pretty Handy Girl

It’s hard to stay organized when you are a DIY blogger, Mom, wife, cook, cleaner, taxi driver, and a student (taking evening classes for the general contractor exam.) I’ll be the first to admit that I’ve dropped a few balls in this massive juggling act. But, I strive to improve and part of that effort involved hanging a Family Organization Center Door next to the refrigerator.  Did you know there was such a thing? Ha, me either until I saw this half window door at our local Habitat ReStore.

Family Organization Door | Pretty Handy Girl

A vision of a place to plan meals, keep track of chores and keep reminders became clear in my head when I first saw it. Want to see how I took this old door and turned it into a family organization center? Hang around for a few minutes to find out.

Materials:
(contains some affiliate links)

Optional:

Instructions:

After finding a door for your organization center, you may need to trim down the sides to fit your space. I had to trim an inch off each side of my door to fit on the side of our refrigerator cabinet. Use a circular saw to trim the door. Using a Kreg Rip Cut will help keep the saw straight.

Family Organization Door | Pretty Handy Girl

For extra stability, you may want to add a caster on the bottom of the door (opposite the hinge side). This is not necessary, but will add extra support.

Family Organization Door | Pretty Handy Girl

Cut scraps of coax cable to fit into the tops of the windows. Read more

How to Add Security Film to Glass Doors & Windows | Pretty Handy Girl

How to Add Security Film to Glass Doors & Windows | Pretty Handy Girl

The folks at Allstate Insurance have graciously sponsored this post, which will help you learn how to install security film to safeguard your doors (or windows) from a potential break-in! It’s a simply DIY solution that could potentially save you the heartache of having your home burglarized.

I’ve noticed an unsettling trend in our area. There are more thefts popping up around our neighborhood. Luckily the majority of them are burglaries with no violence. But, it’s still unsettling. If you want the latest on crimes around you, sign up for SpotCrime.com. Simply enter your address and you’ll get emails when crimes are reported around you. Then again, this could lead to a bit of paranoia {raising hand.}

SpotCrime.com map

Regardless, there are two doors in our home that have always caused me some concern. We have two half window doors that needed some added security measures. The first one is the entrance to our mudroom. The second one is the back door to our garage (and you know I’d be heartbroken if anyone stole my power tools!)

How to Add Security Film to Glass Doors & Windows | Pretty Handy Girl

If you have a door like this, a burglar can simply break the pane of glass closest to the knob, reach in and turn the deadbolt and handle. One option is to install a two-sided keyed entry deadbolt lock. Because we have little children, I worried about them not being able to find the key and get out of the house in the event of a fire.

How to Add Security Film to Glass Doors & Windows | Pretty Handy Girl

This past week I happened to hear about security film and did a little research. I was skeptical until I tested the material myself. The results seriously amazed me! You can watch my test in the video later in this post.

In the meantime, here are the supplies you’ll need and the very simply installation instructions!

(I’ve included affiliate links for your convenience. I earn a small percentage from a purchase using these links. There is no additional cost to you. You can read more about affiliate links here.)

Materials:

 Instructions:

1. Begin by removing the grill if you have one solid piece of glass with faux dividers (see my video below for more details on removing the grill.) If you have true divided light, move on to the next step.

2. Measure your windows. Reduce the size by 1/8″ to leave space at the edges for the water to escape. Transfer the measurements onto the film with pen. Cut the window film with the x-acto knife and ruler. (You could use scissors in a pinch.)

How to Add Security Film to Glass Doors & Windows | Pretty Handy Girl Read more