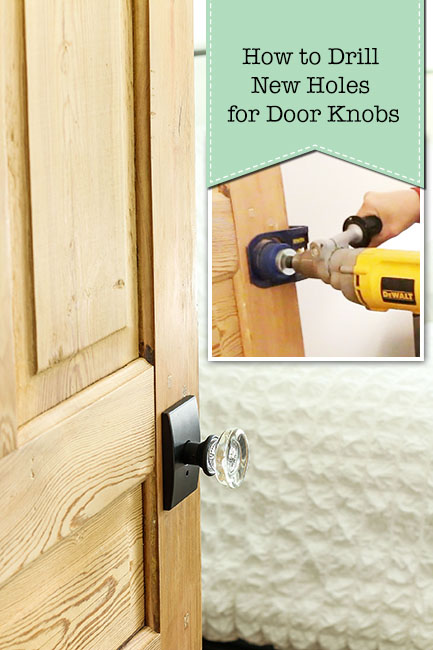
Every once in a while, you might find yourself with a new (or old) door that needs a hole drilled into it for a door knob (or a deadbolt). Today I have the perfect tutorial to ease your mind and help you learn how to drill a new hole for door knobs in your door.
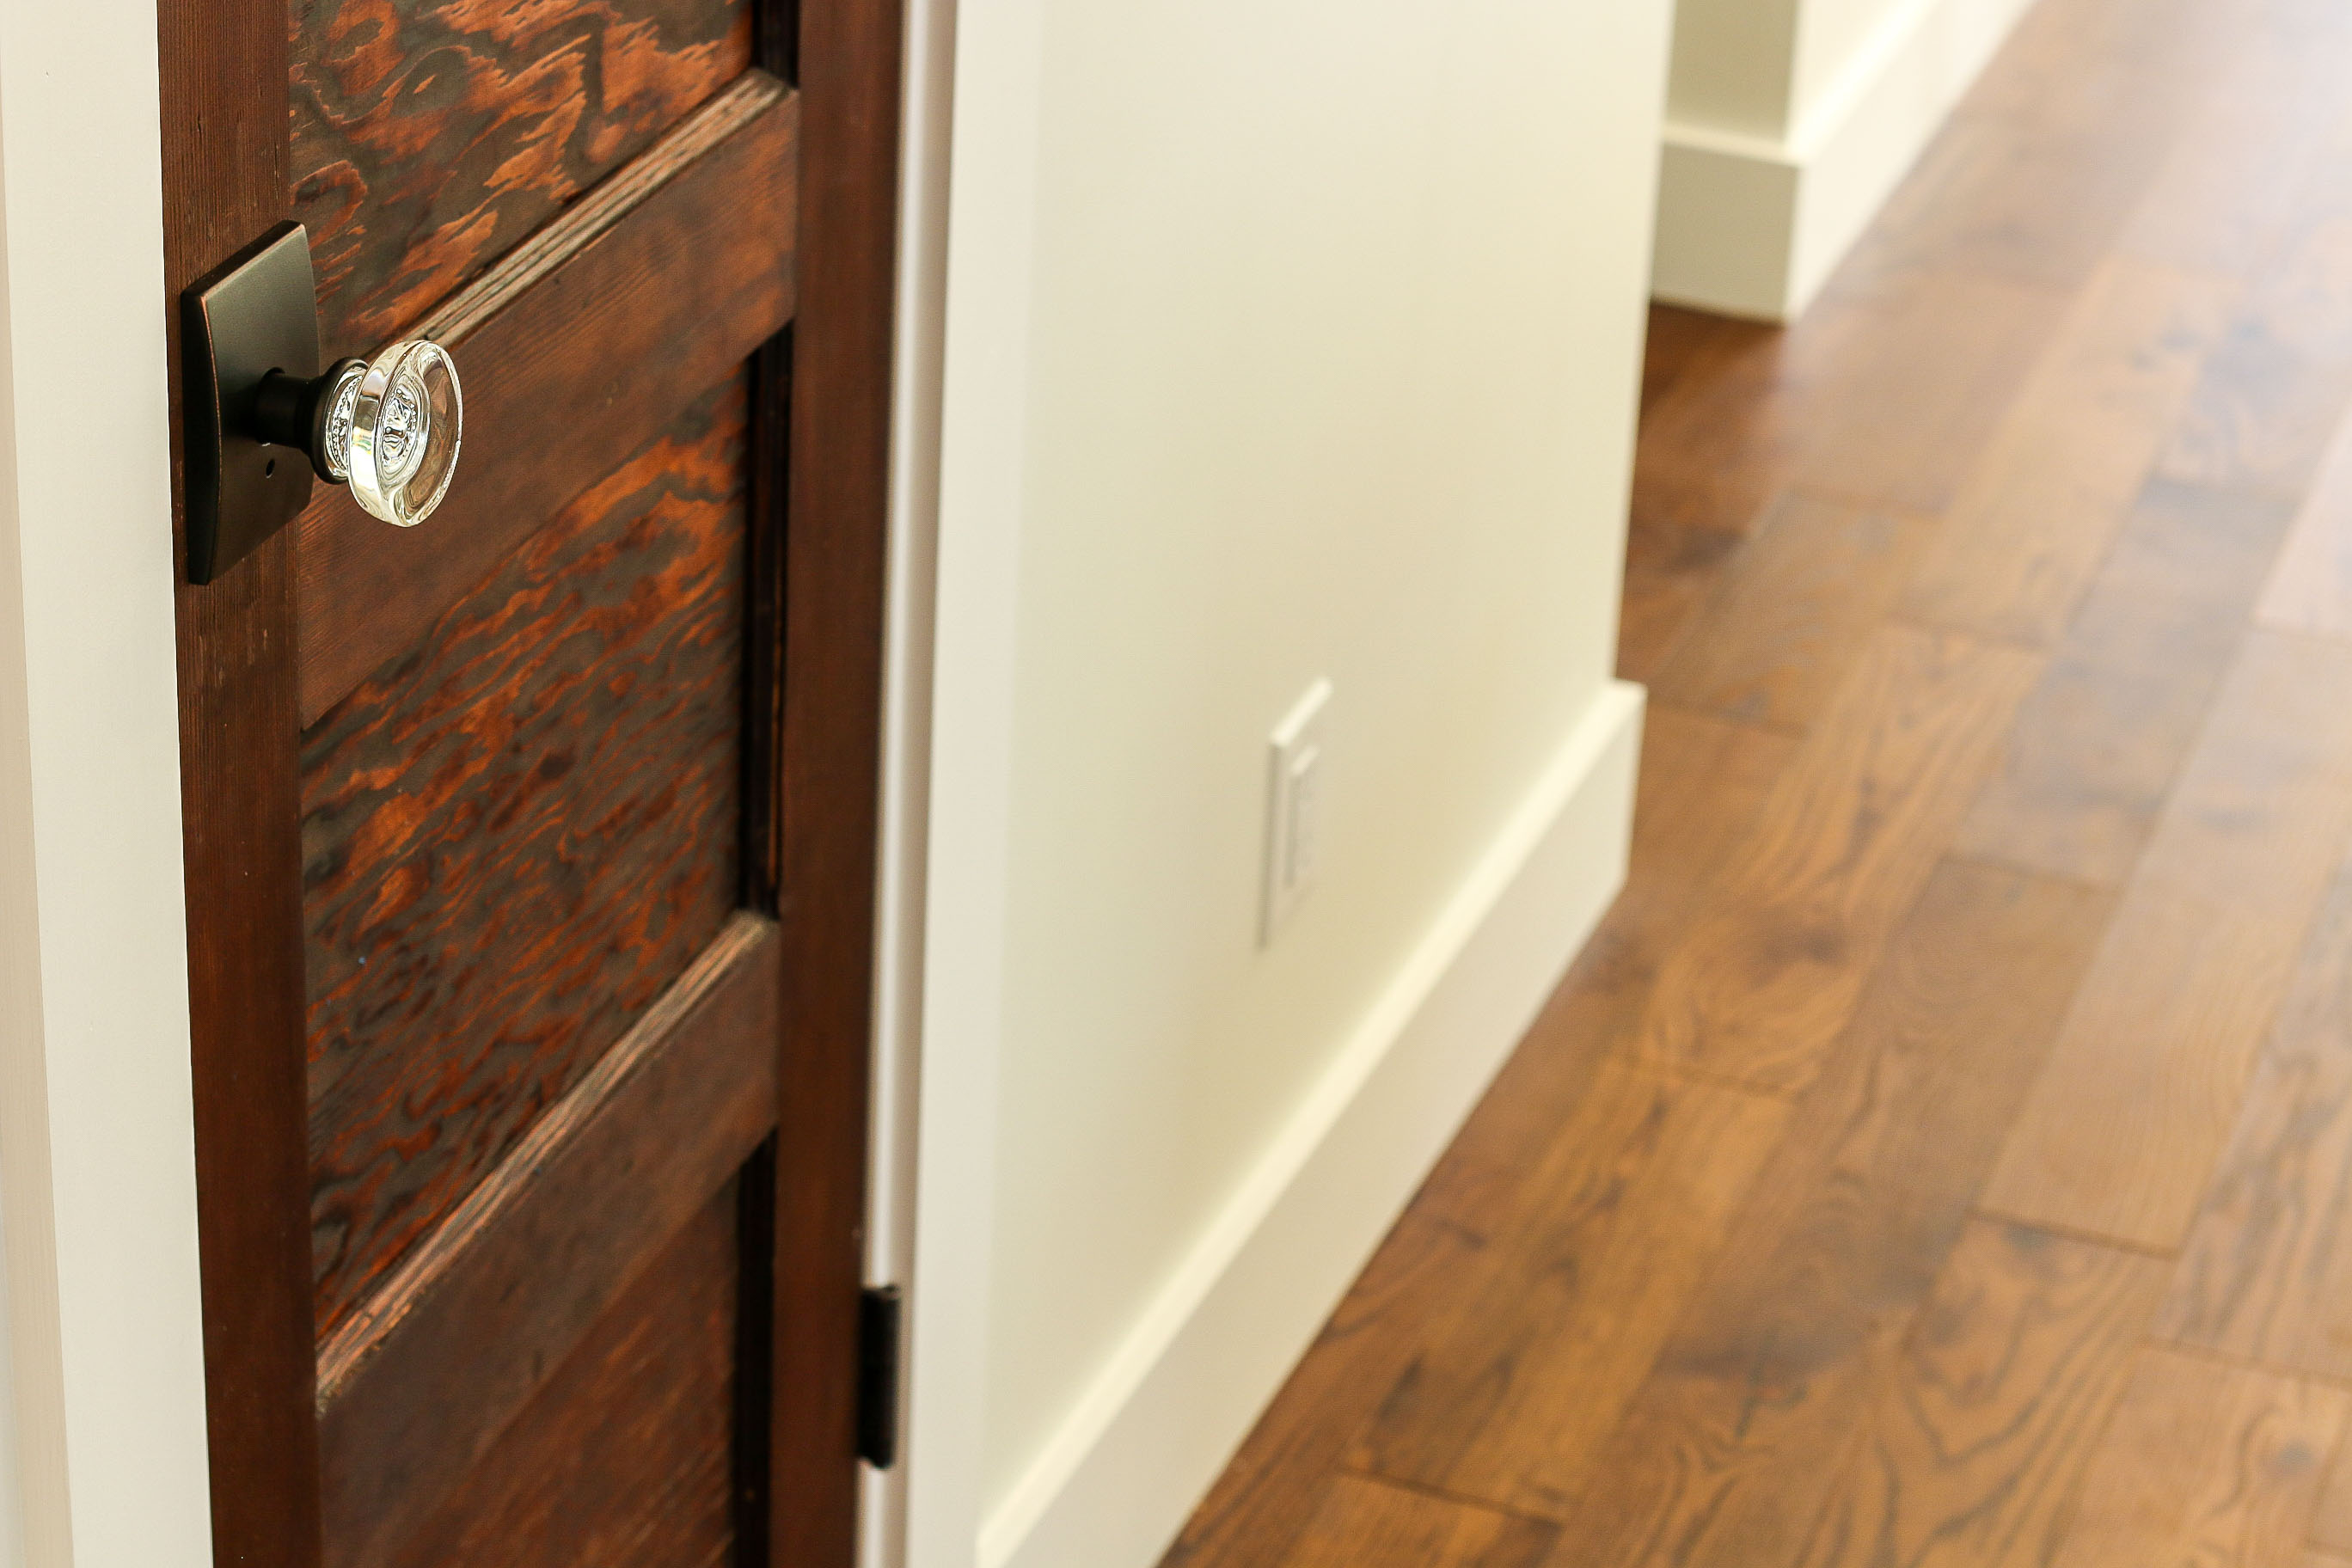
While working on restoring the original 1900 portion of the Saving Etta house, I removed the original bedroom doors and took them to a local workshop to have the lead paint stripped off the doors. It was a pricey decision, especially because I didn’t know what the doors would look like when they were stripped. But, as you can probably tell from the photos, they came back more beautiful than I could have imagined! In fact they were so pretty, I didn’t stain them. They just got a clear sealant to protect them. The restoration company had to do some “surgery” on one of the doors, basically adding a new stile. When I received the door it didn’t have a door knob hole. But, I knew I could drill a new hole (if I could stop drooling over the beauty of the wood grain).
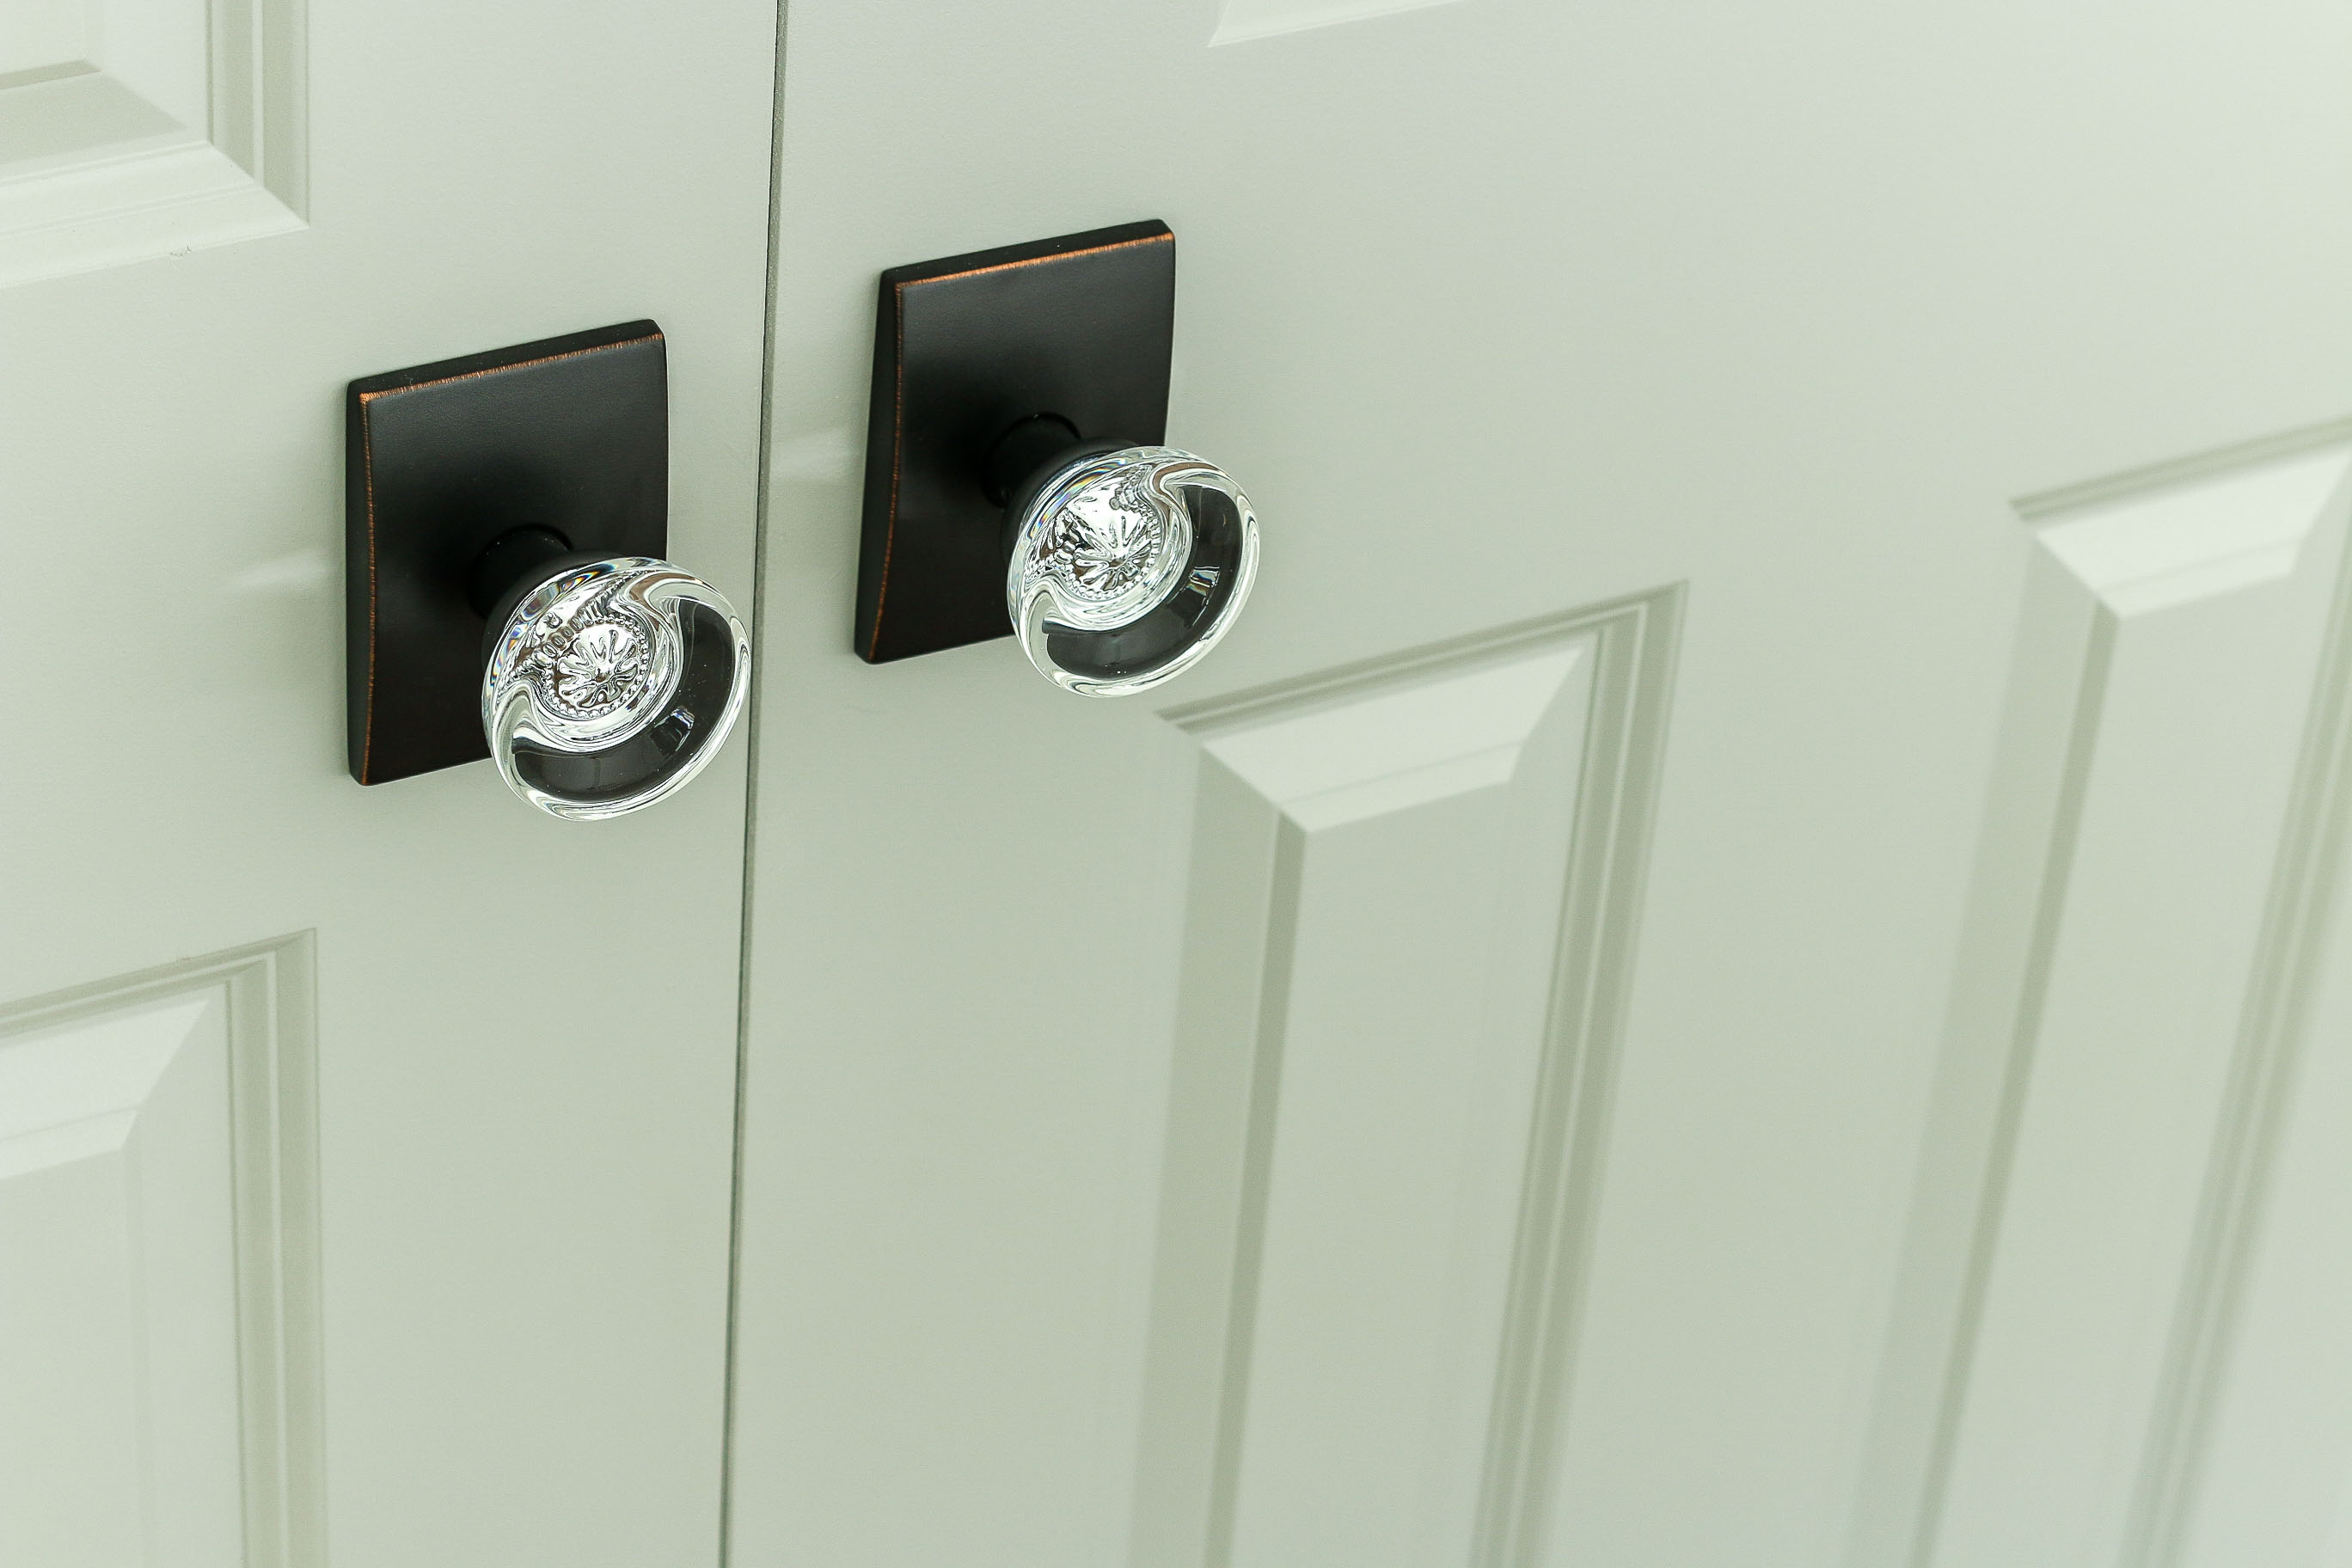
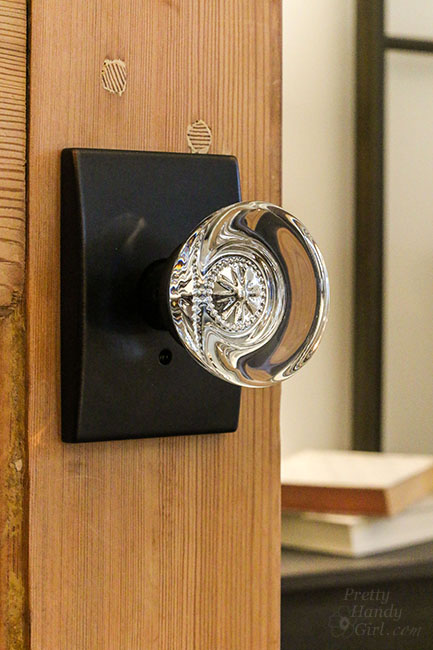
Doors this gorgeous needed exceptional door hardware. For that reason, I reached out to Schlage and asked them to be a Saving Etta sponsor. Luckily, they responded that they would be thrilled to send me door knobs and hinges for the whole house.
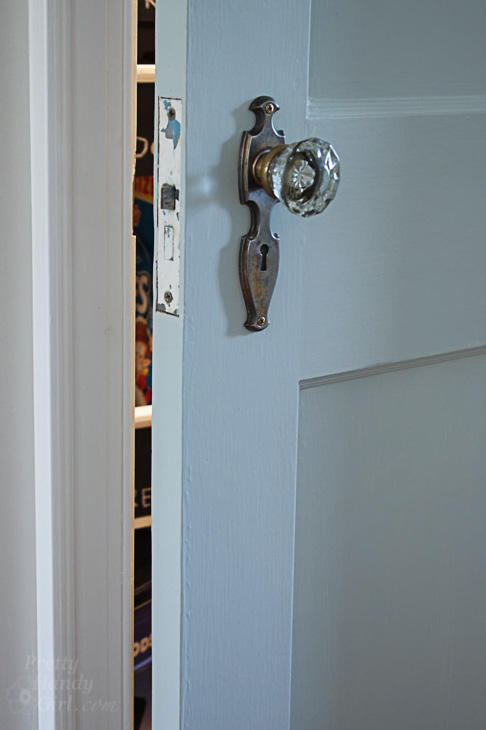
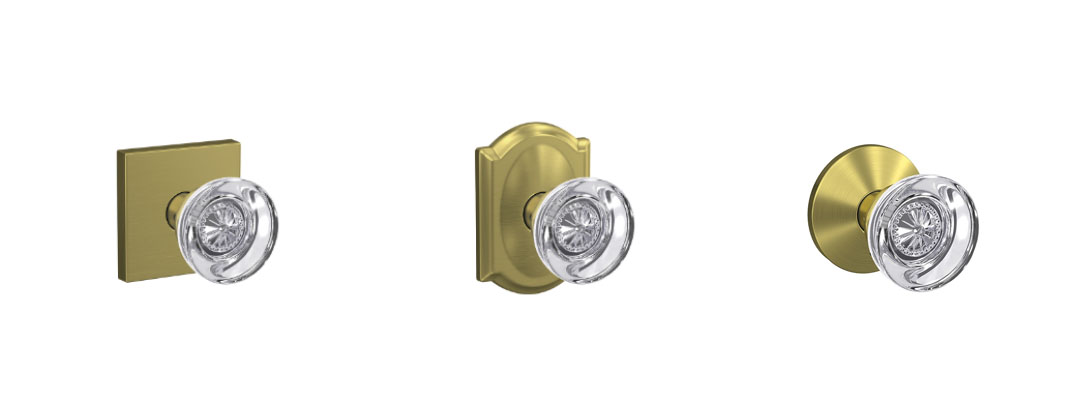
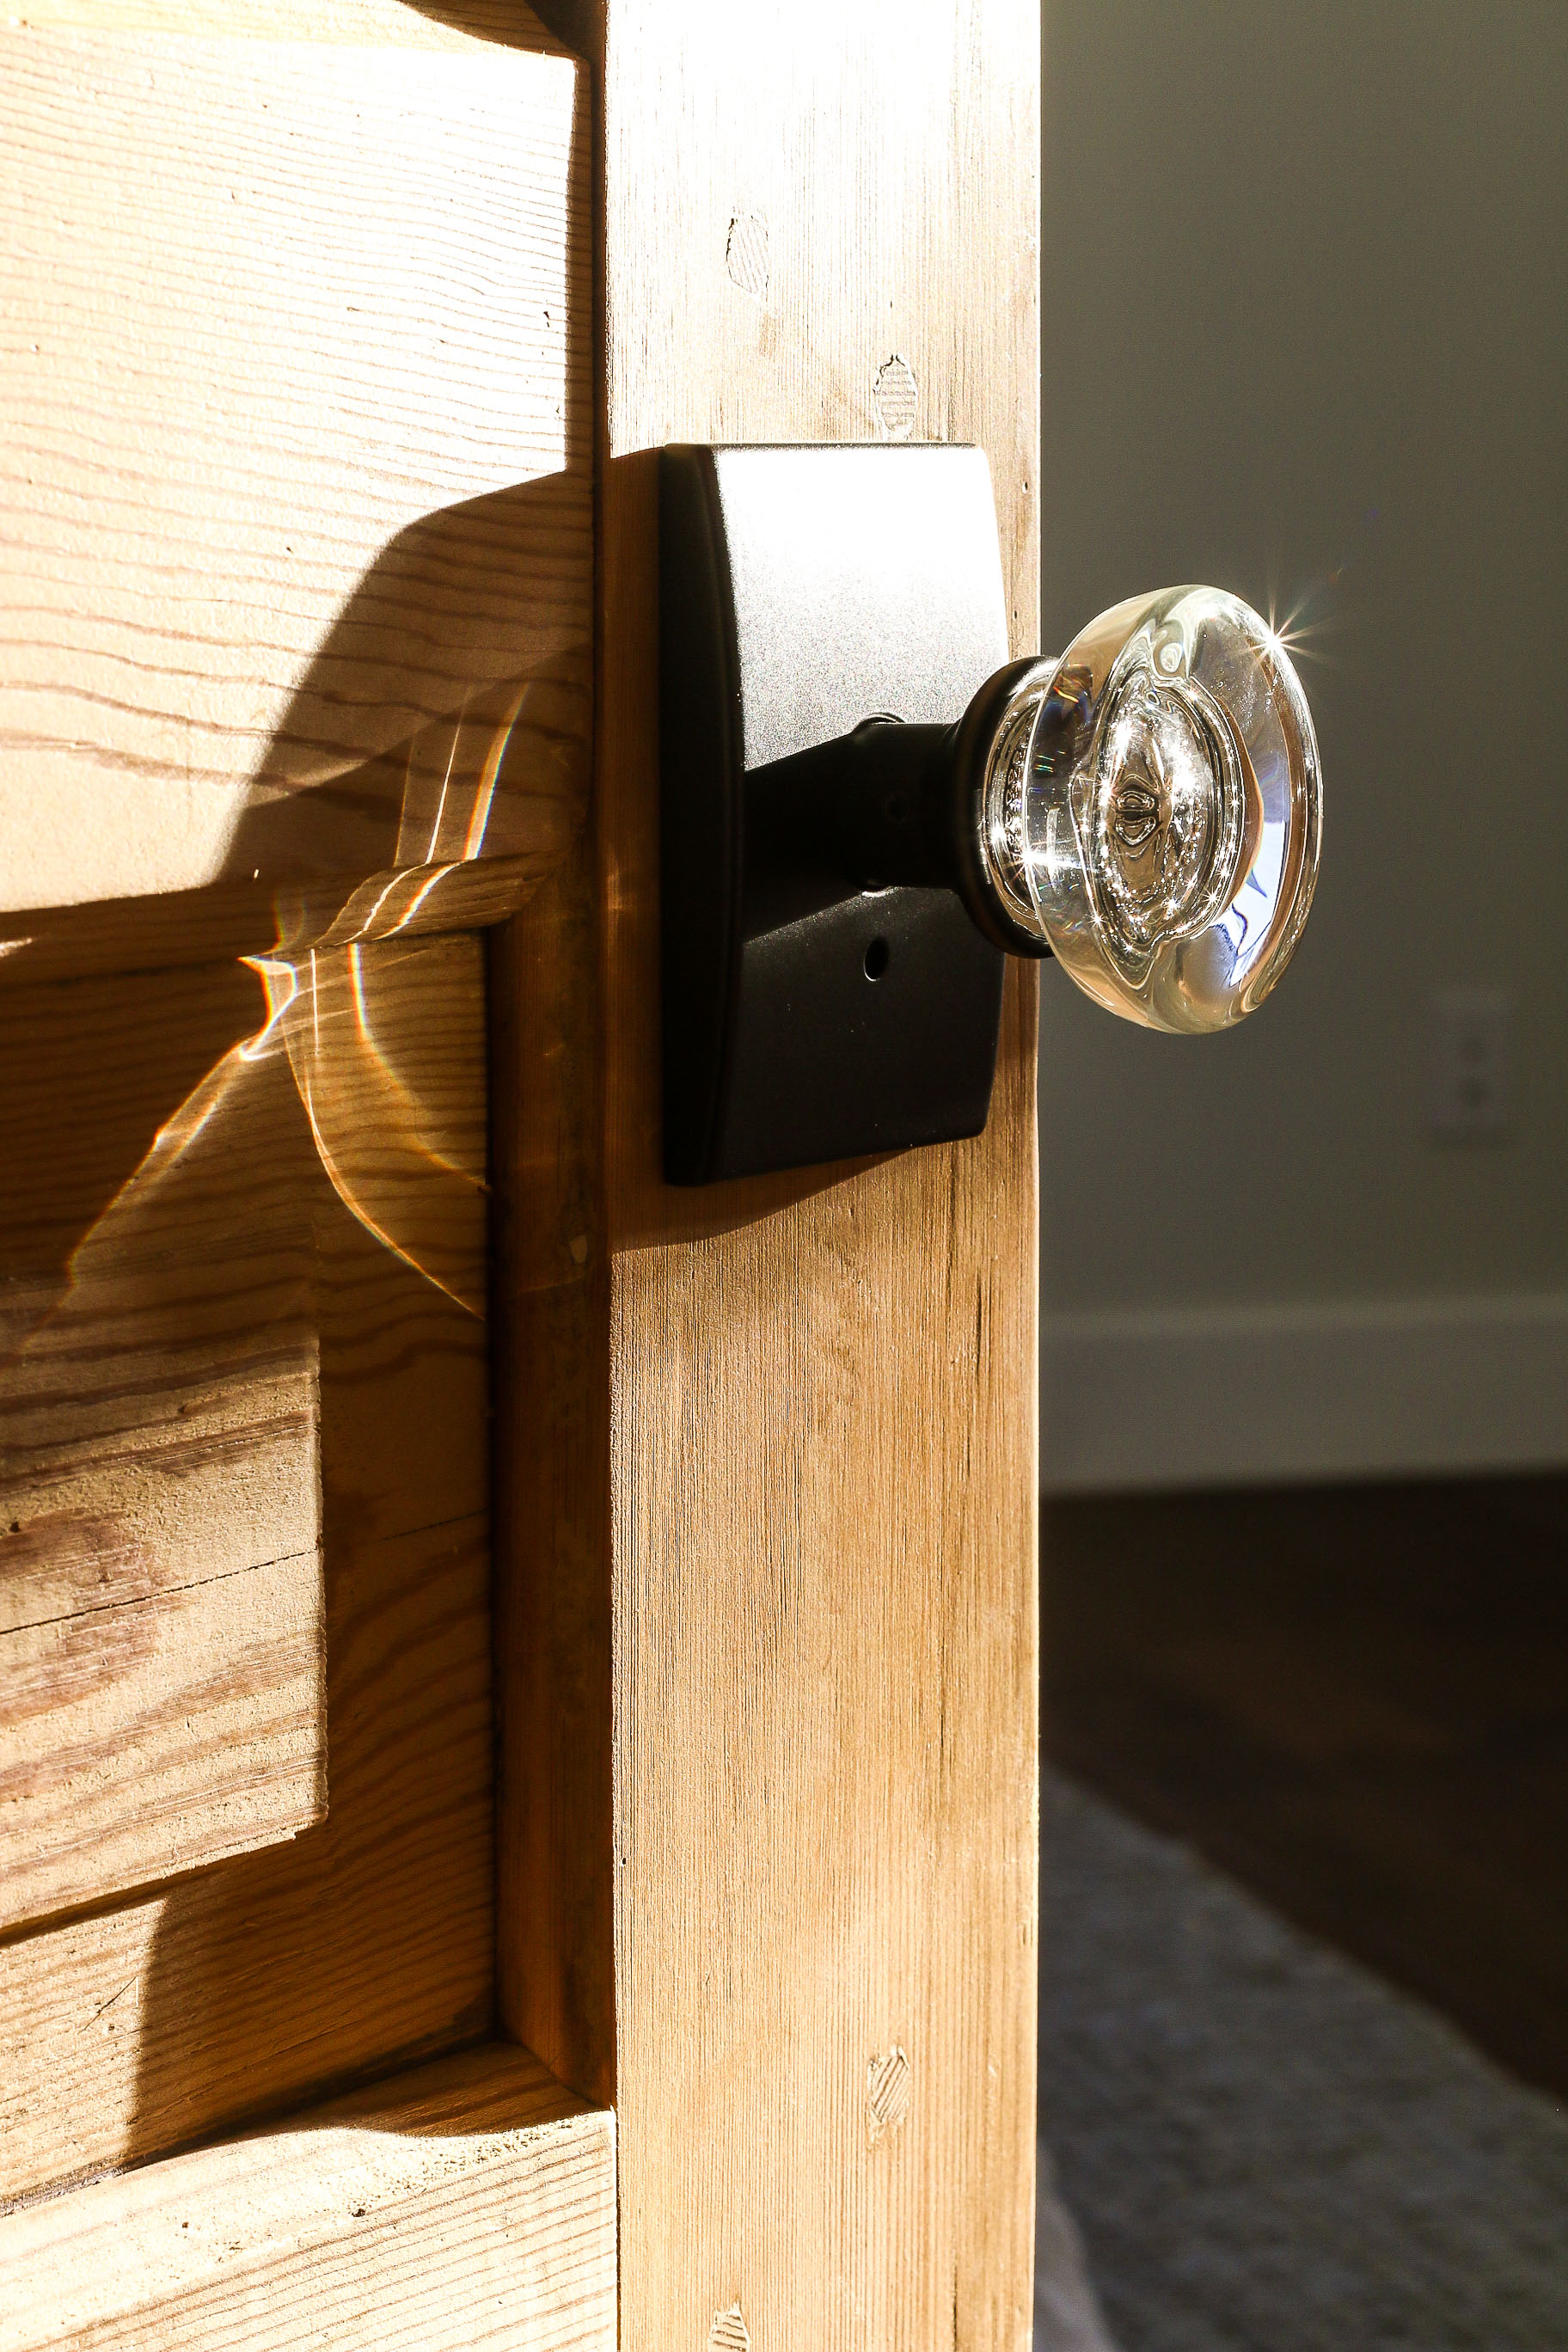
The coolest thing about these knobs (besides the intricate detail inside the glass), is you can purchase a variety of backplates to compliment your style:
I loved the look of the round and square backplates, but felt the rectangle was more fitting for a historic house.
Ready to learn how to drill new door knob holes in your door? Luckily, I’ve drilled holes for knobs in many a door and each time I’m amazed at how simple it is to accomplish with a good door knob jig. Ready to learn how to drill a new door knob hole? Watch this video or read the step-by-step tutorial below!
Tools:
(I’ve included affiliate links for your convenience. I earn a small percentage from a purchase using these links. There is no additional cost to you. You can read more about affiliate links here.)
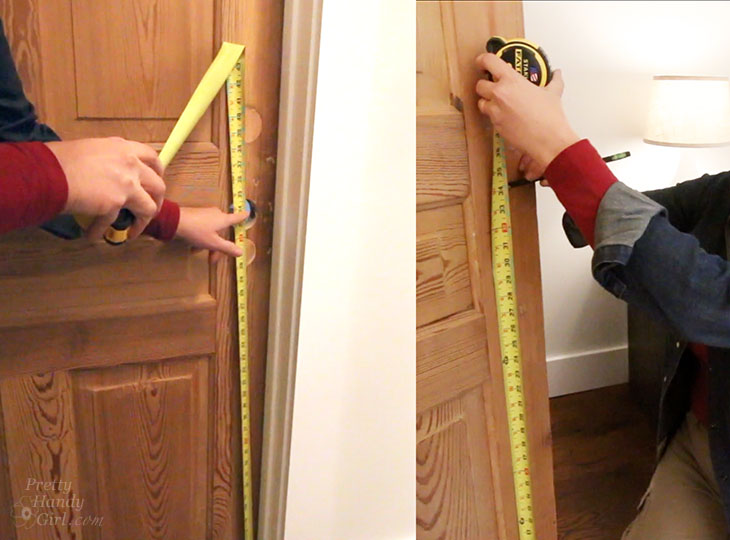
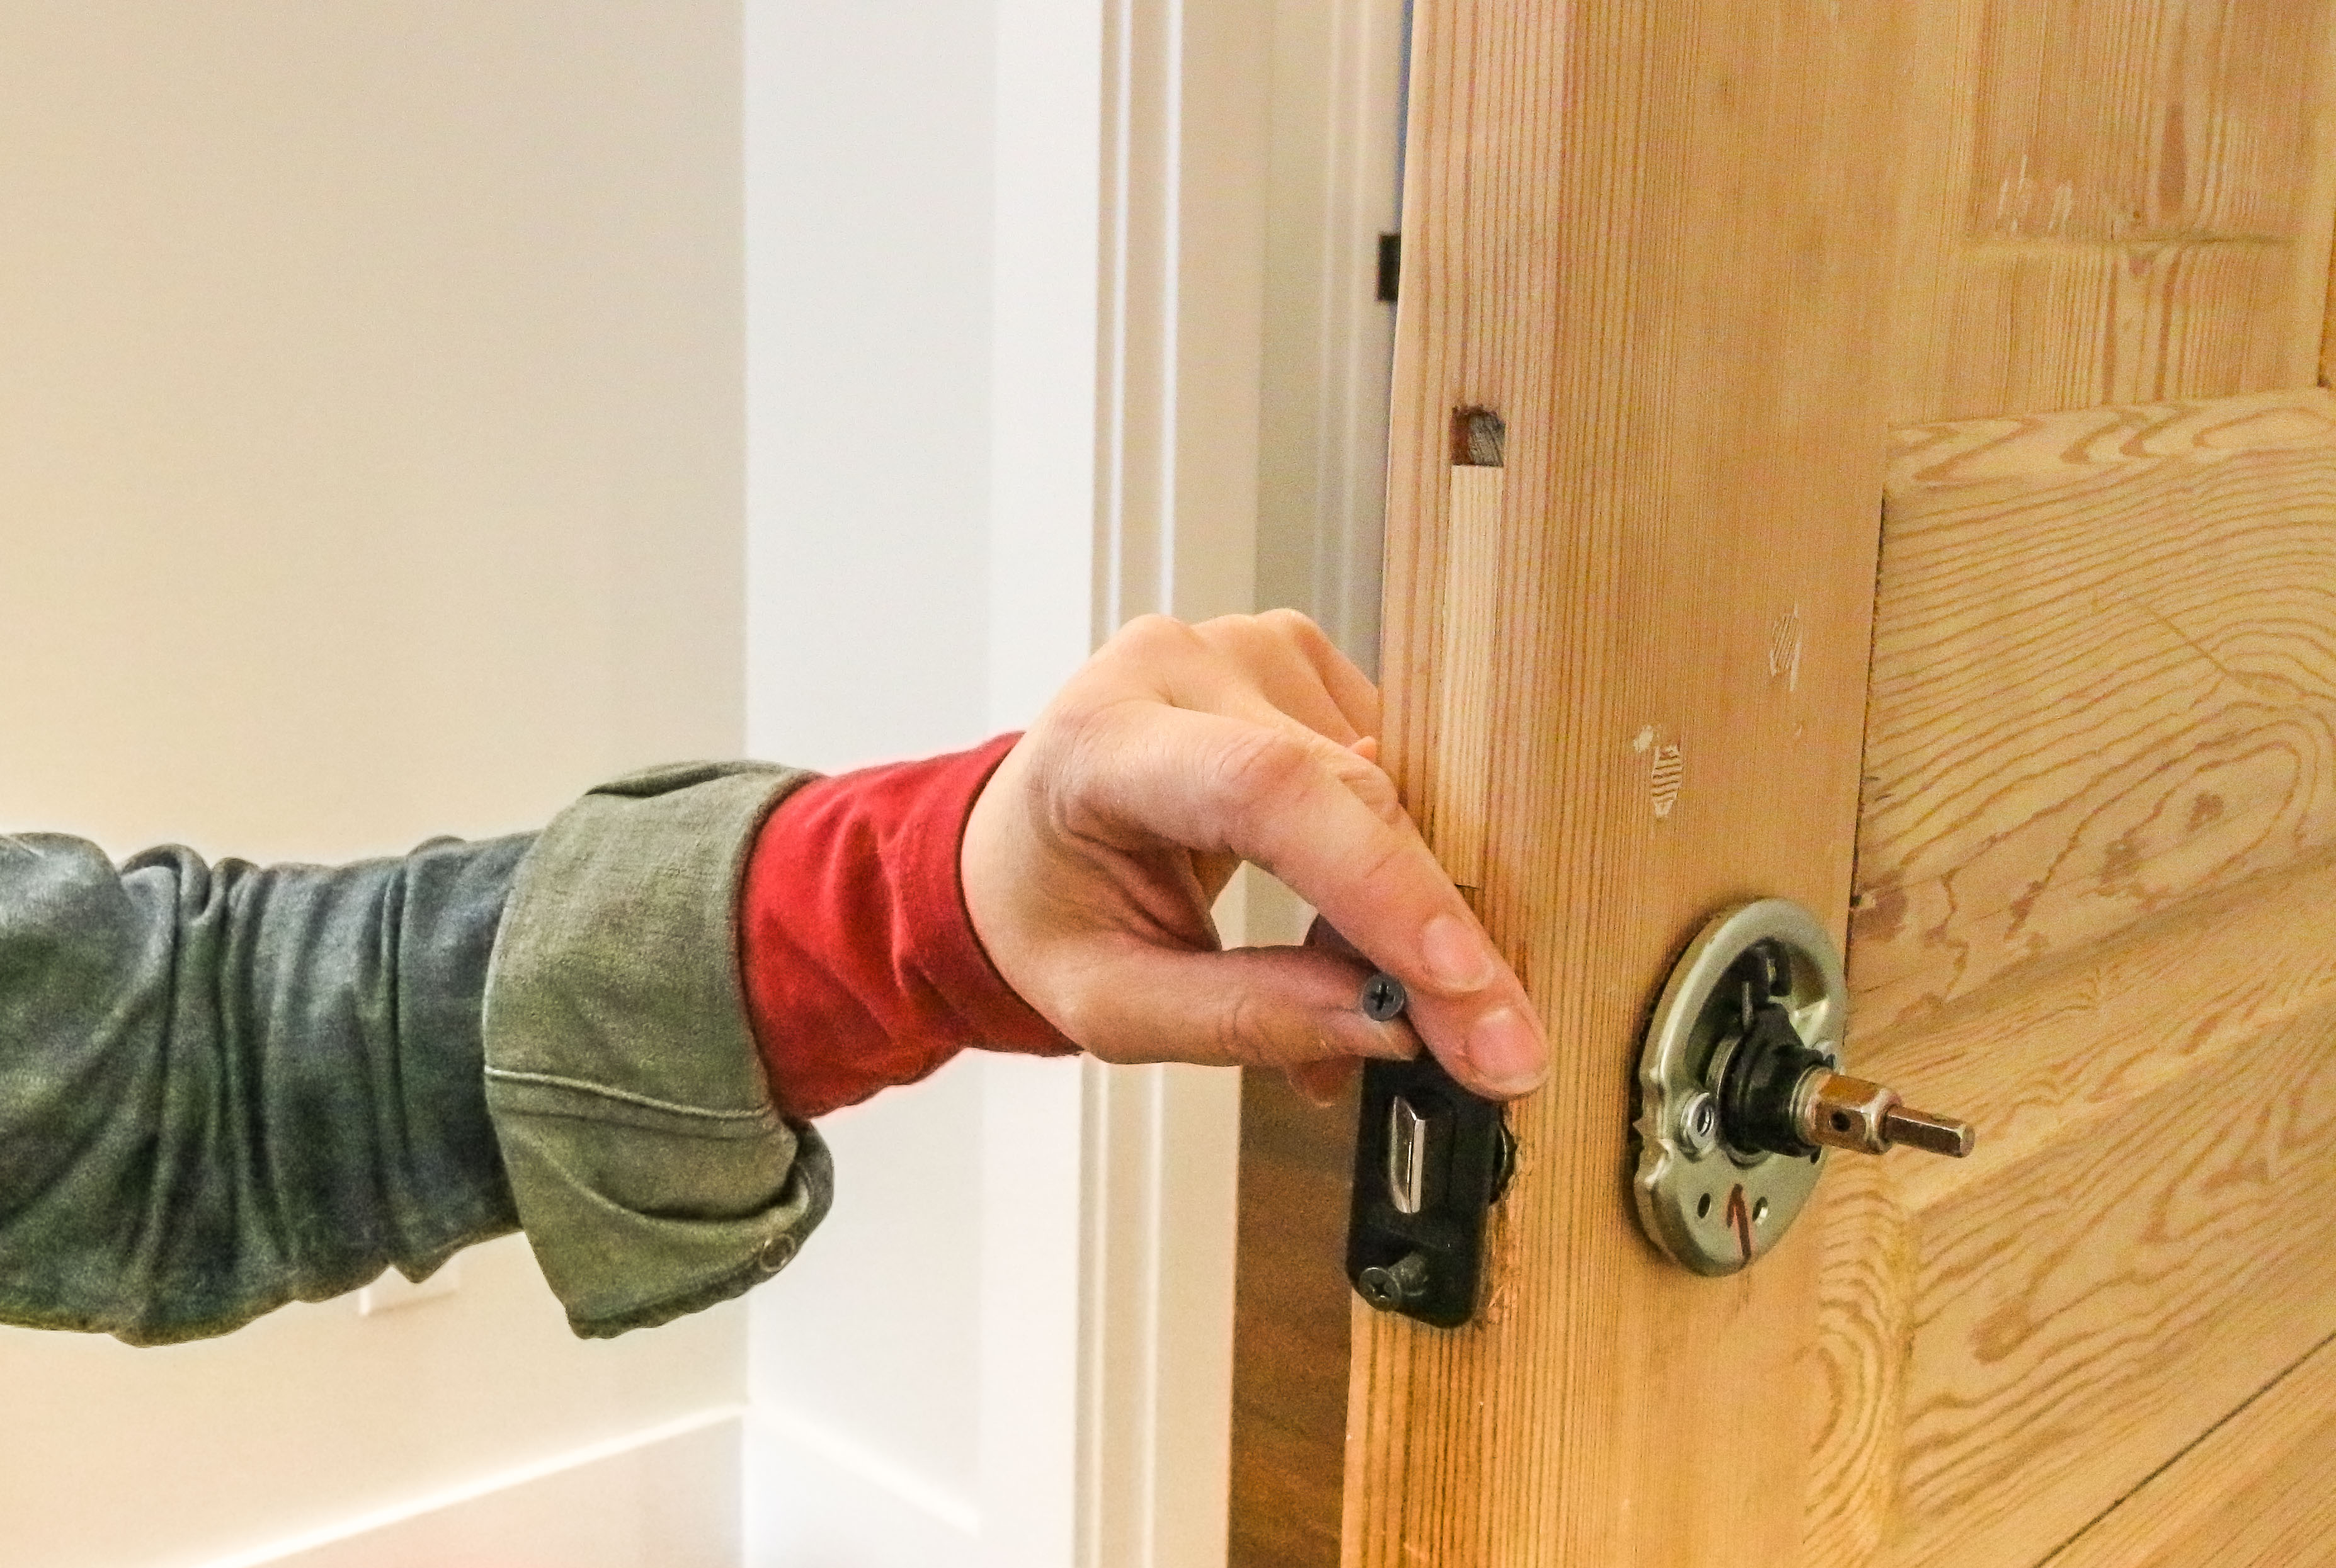
Measure the height of the door knobs on other doors in your house. Transfer this measurement onto your slab door.
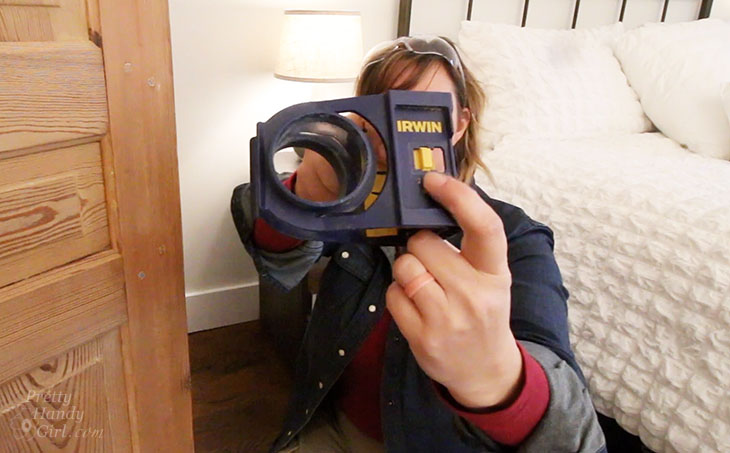
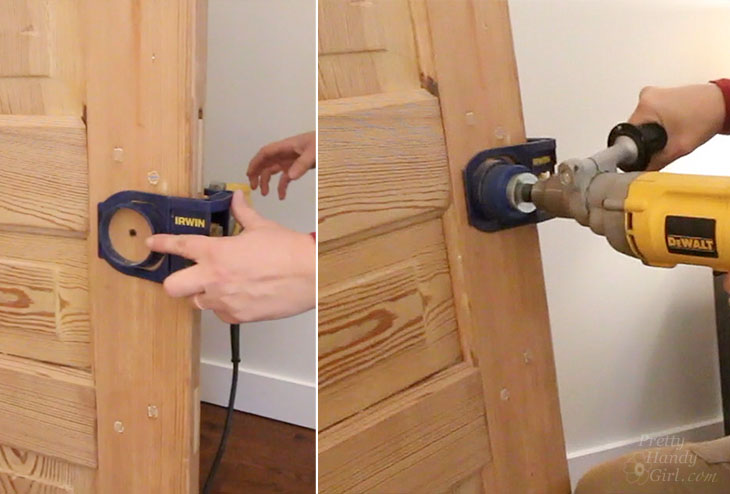
Be sure to select the backset for your door knobs on the jig before you begin.
Locate the latch face plate screws with your door knob. Use these screws to secure the door knob hole jig to your door.
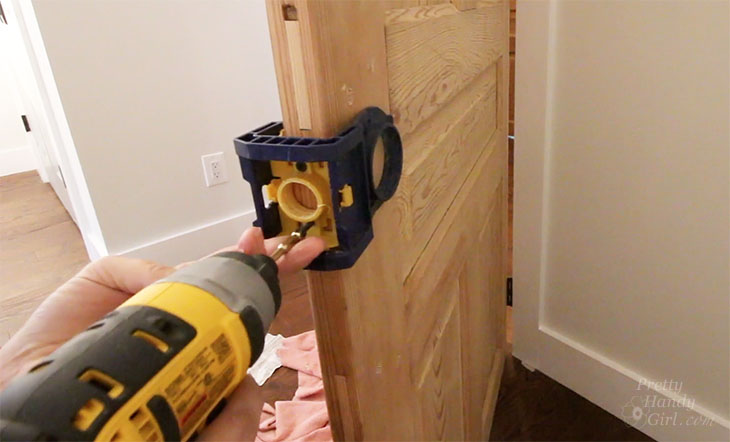
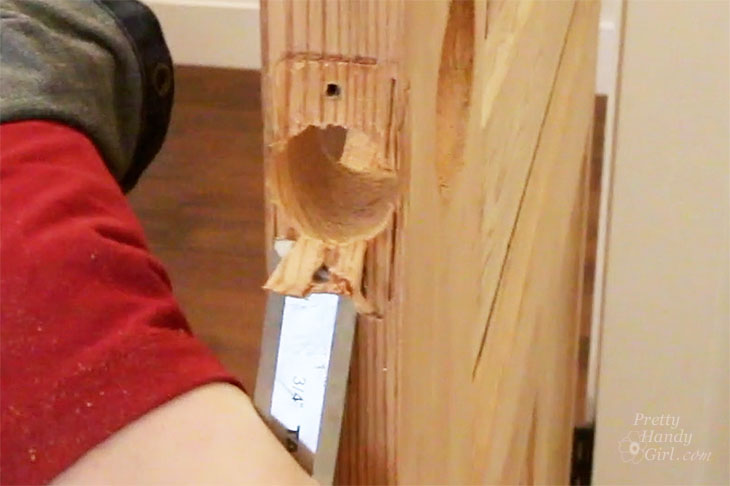
Grab your drill and insert the 2 ⅛” hole saw into the drill. Apply firm pressure as you drill the hole into the door making sure the hole saw is flat and not angled as it goes through the door.
Once the center bit protrudes through the door, stop and switch sides. Continued drilling through the opposite side until you complete the door knob hole in the door.
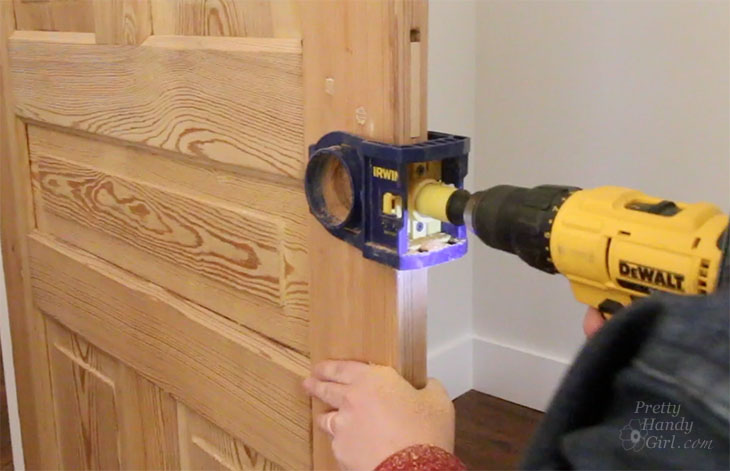
Now find the 1” hole saw and insert it into your drill. Drill through the edge of your door to create the hole for the latch. Use the same firm pressure and make sure the drill is perfectly perpendicular to the door edge.
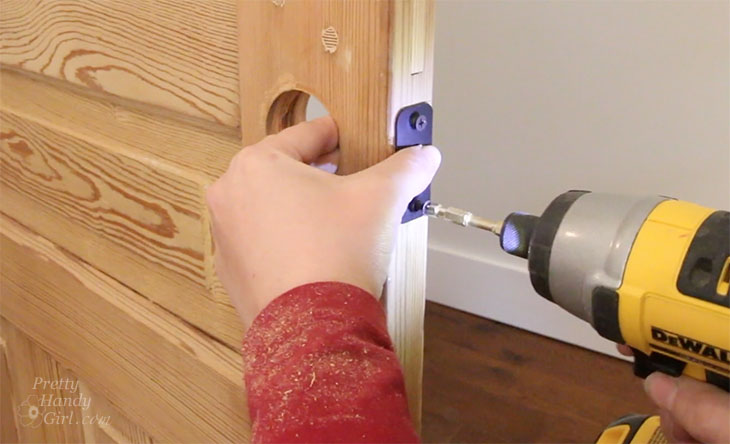
Sweep out any sawdust in your door knob holes. Remove your face plate screws from the jig and set them down nearby. Remove the jig.
Attach the face plate to the door using the same screws you used on the jig.
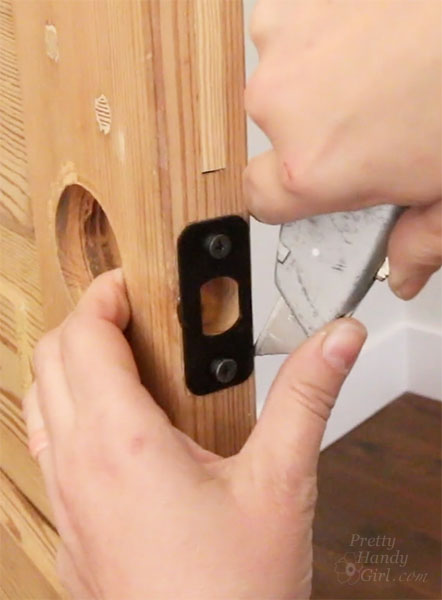
Using your utility knife, carefully score a line around the face plate.
Remove the face plate. Use your chisel and a hammer to remove some of the wood material inside the marks you made.
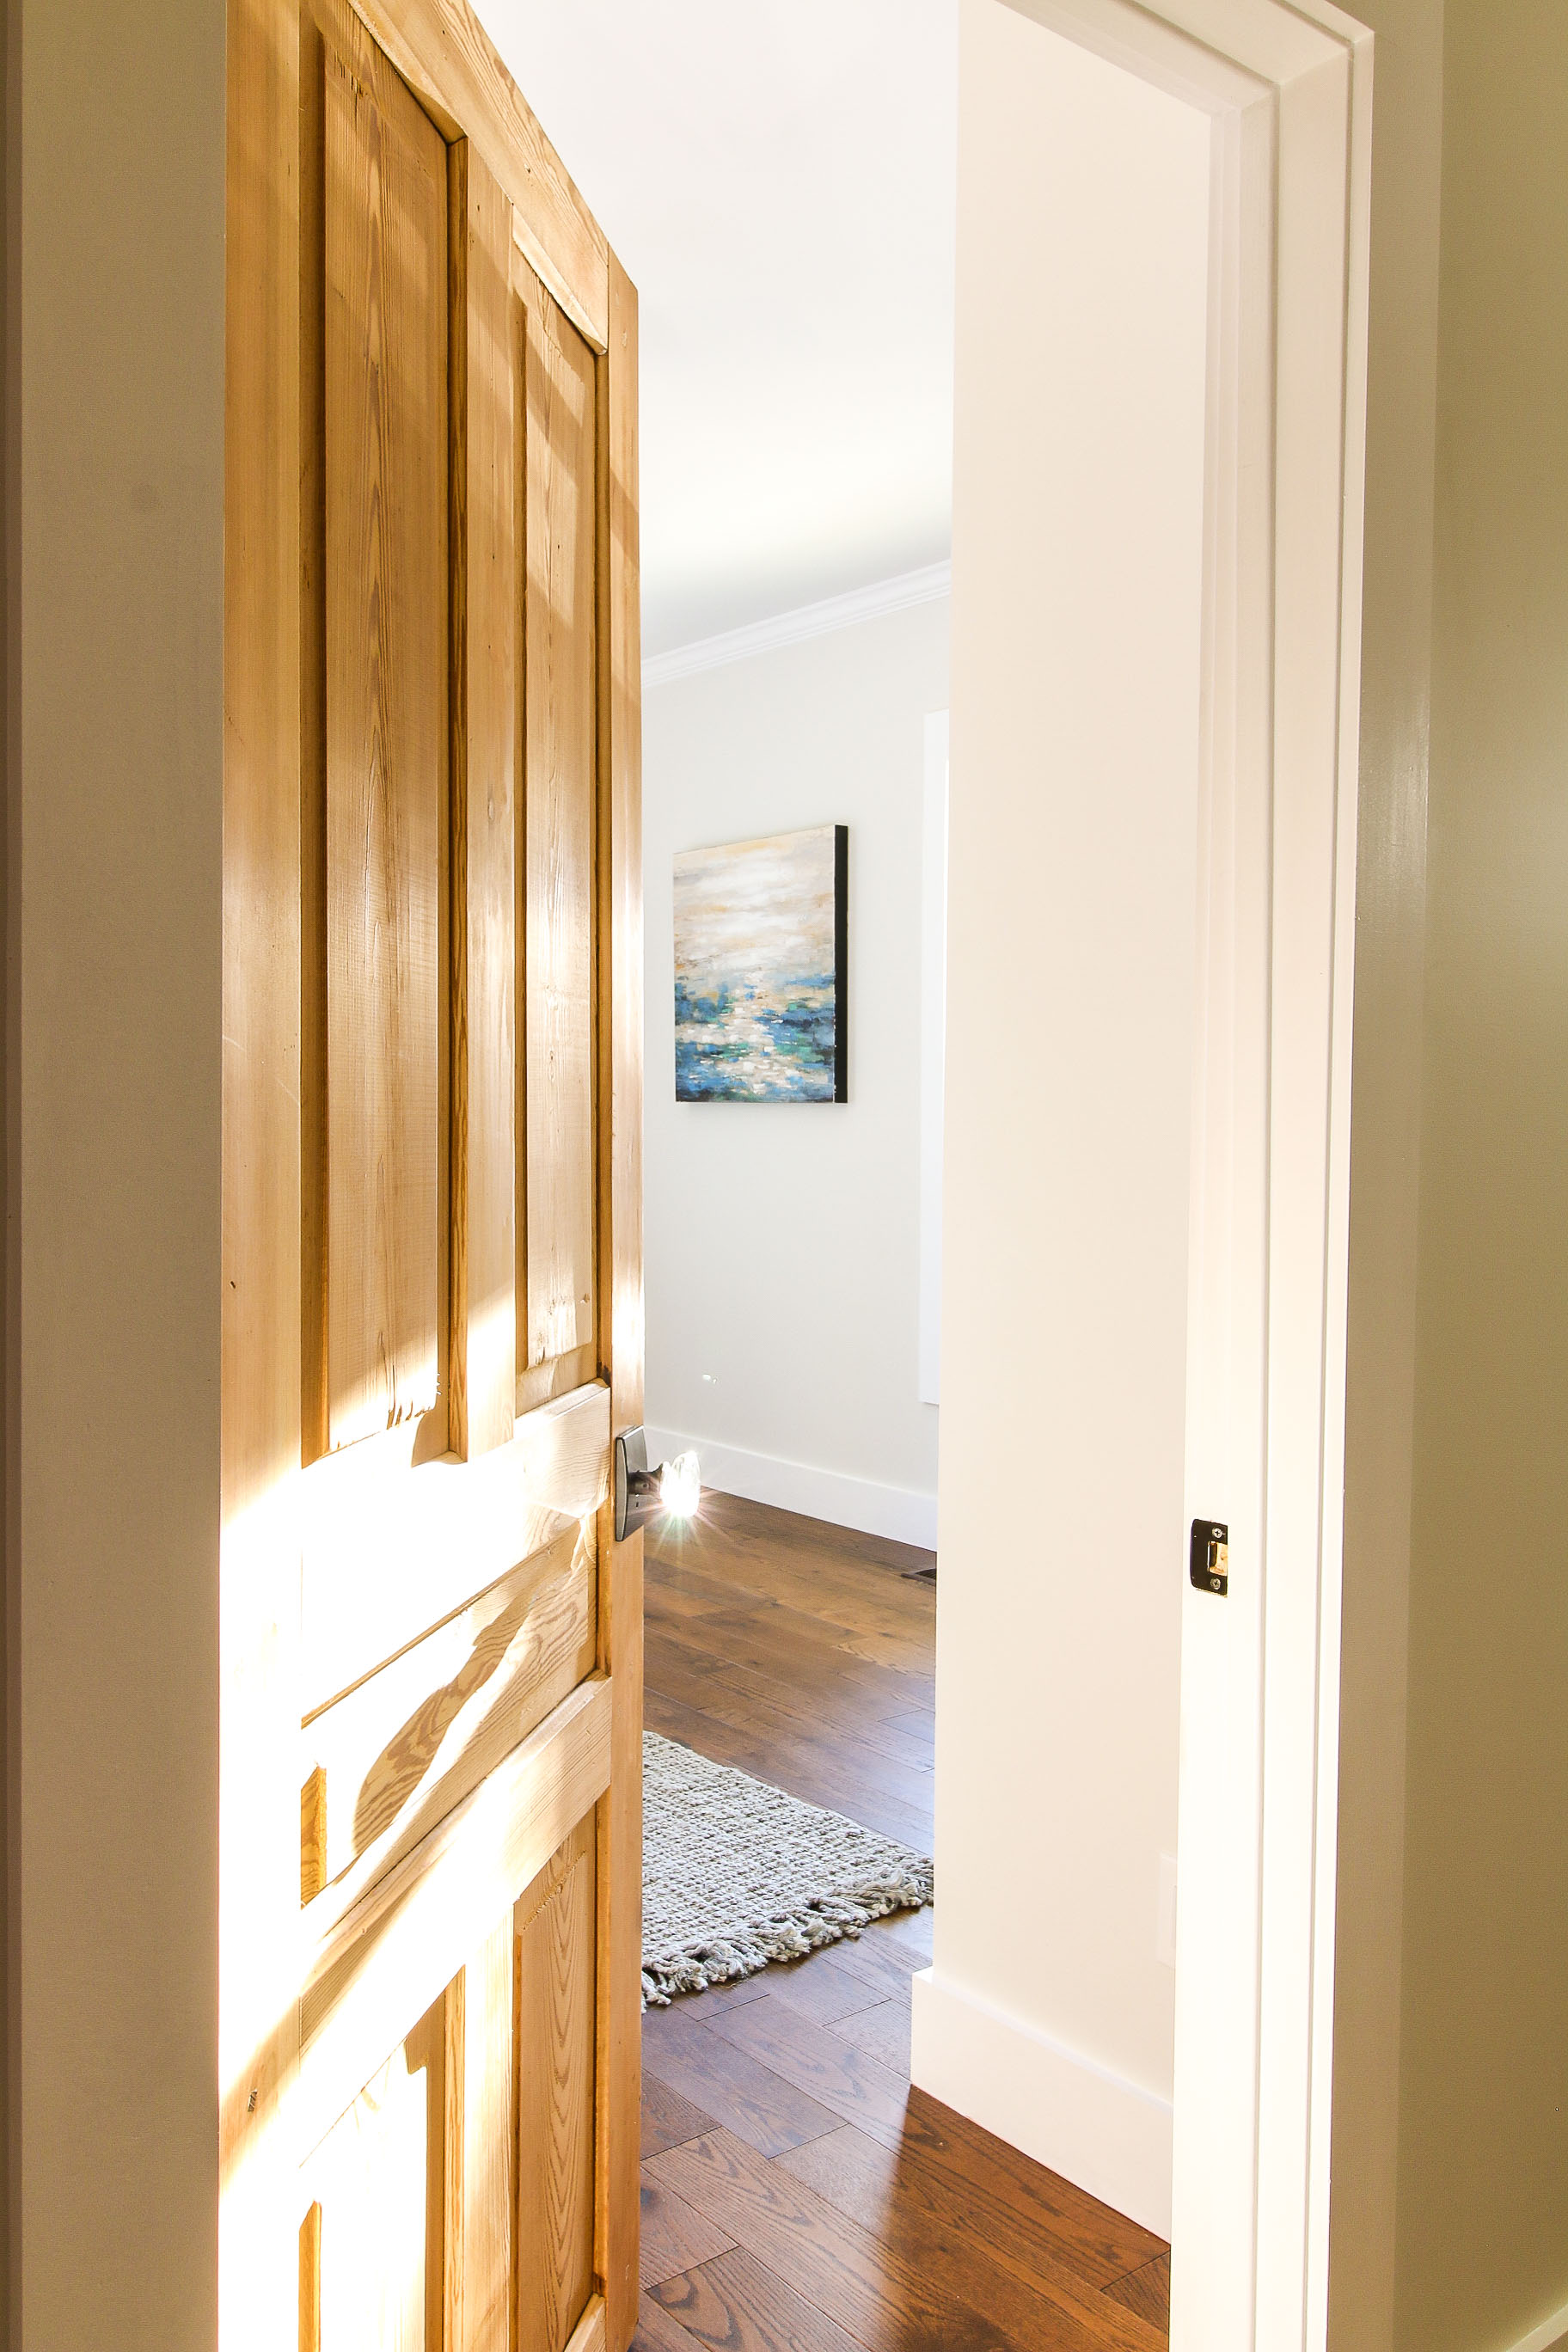
Please excuse me while I drool over these gorgeous glass knobs I installed on the doors in the Saving Etta house. They have to be the most beautiful door knobs I’ve ever seen!
Wasn’t drilling a door knob hole easy? I know you can do this (assuming you have a wood door of course.)
Disclosure: As a sponsor of the Saving Etta project, Schlage sent me the door hardware for the doors. I was not told what to write, all opinions are my own.
https://prettyhandygirl.com/wp-content/uploads/2019/03/drill-new-door-knobs-feature.jpg353730Brittany Baileyhttps://prettyhandygirl.com/wp-content/uploads/2021/07/PHG-logo-tagline-2020-1030x211-R.jpgBrittany Bailey2019-03-04 07:00:002019-11-03 17:41:55How to Drill New Door Knob Holes
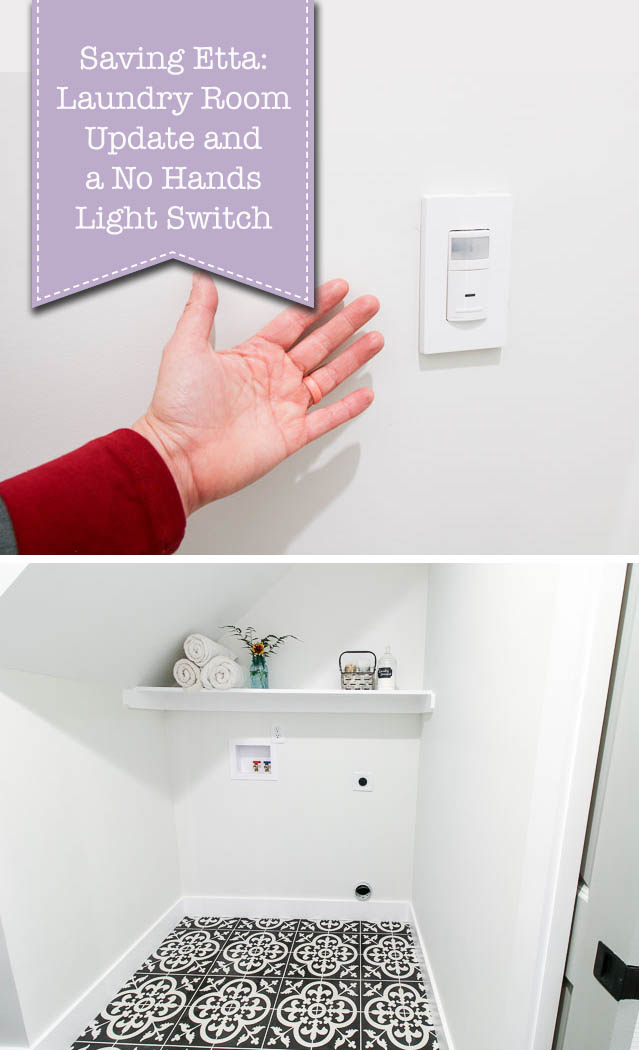
Saving Etta: Laundry Room Update and a No Hands Light Switch
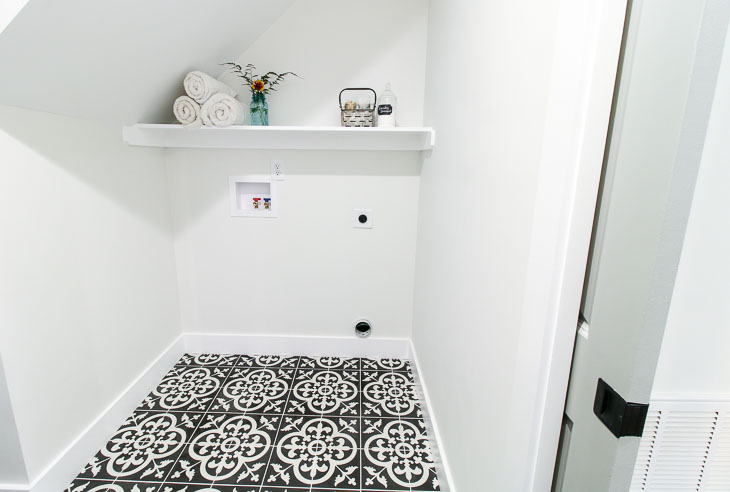
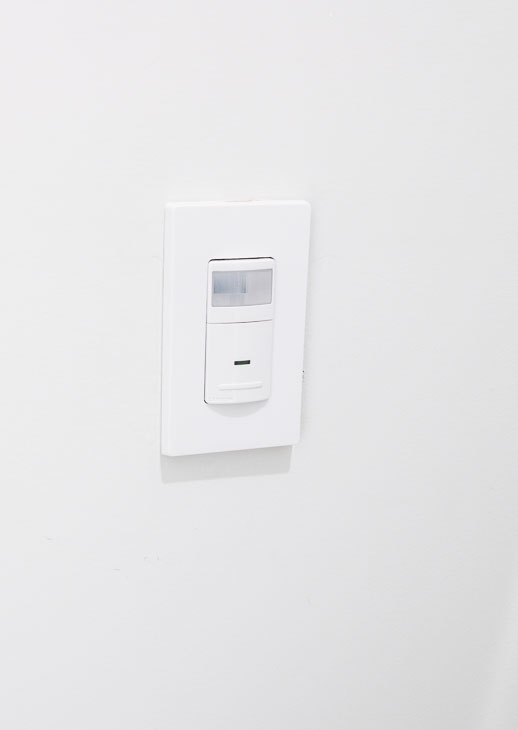
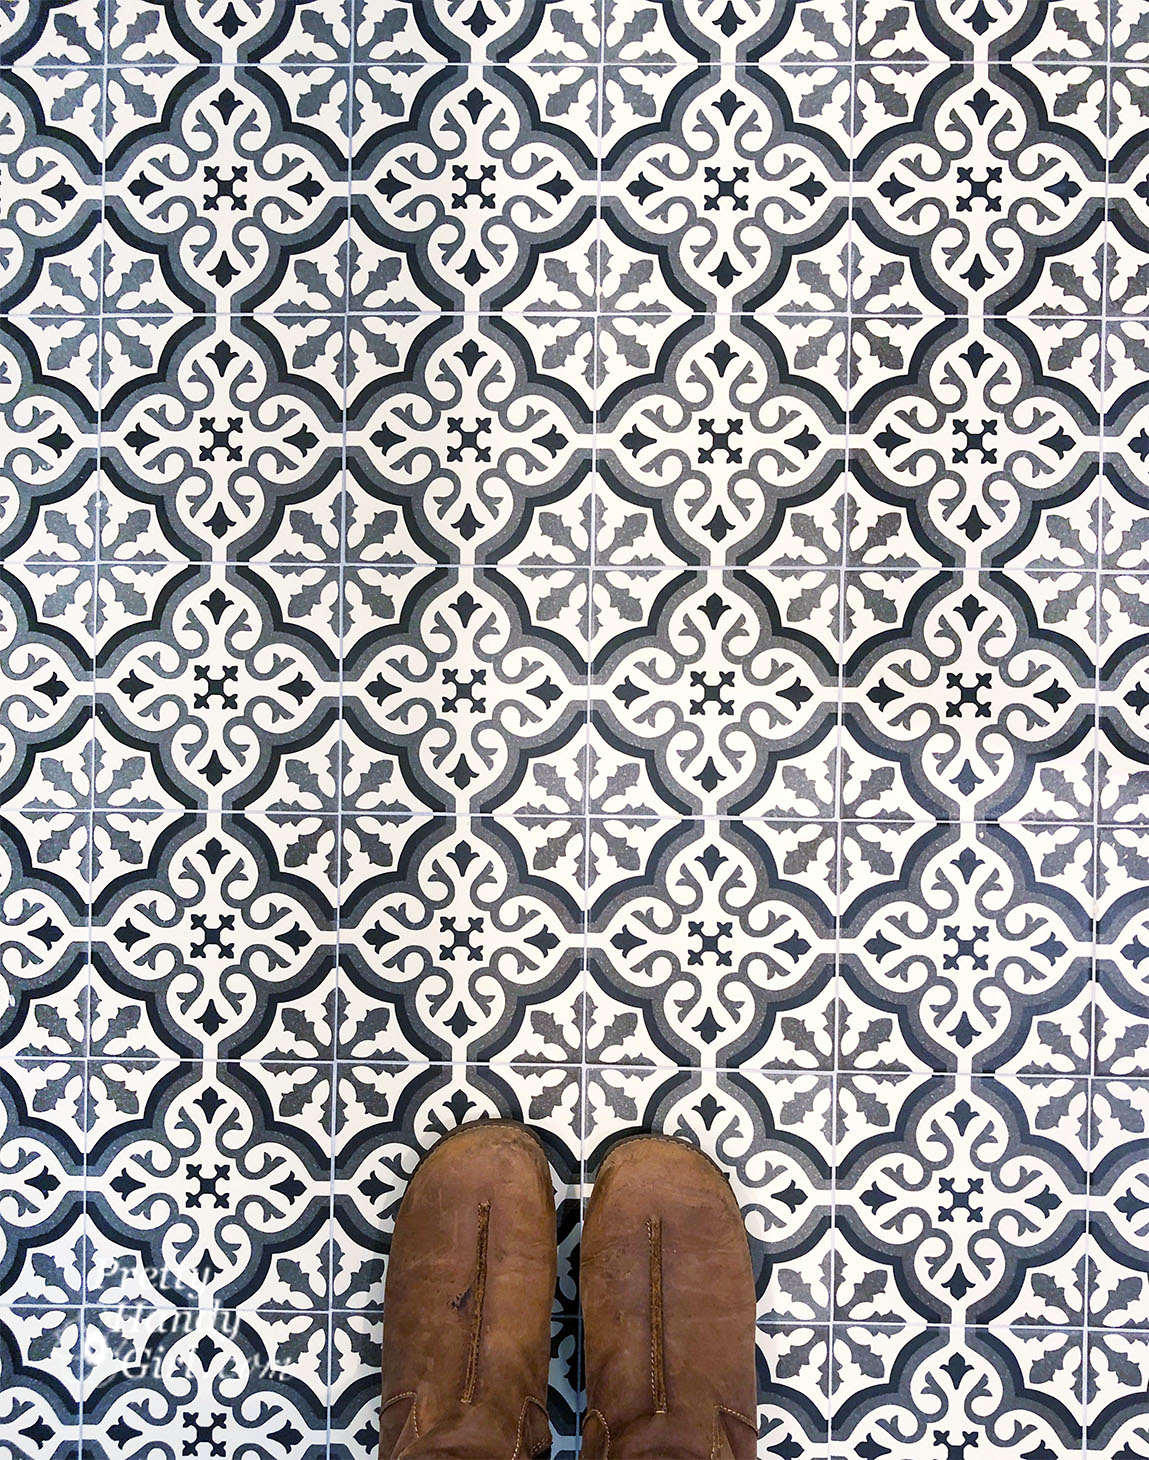
About that Saving Etta laundry room, did you get a peek last week? If you missed it, I showed you how I installed the cement tile floor. We can all agree, the star of the laundry room is the floor. But, there’s another star in this room that’s hard to show in pictures. It’s this little guy:
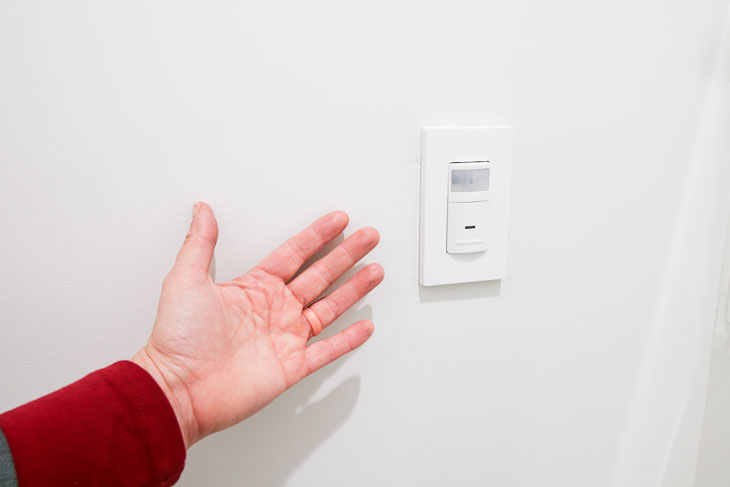
That, my friends, is a Decora motion sensor in-wall switch from Leviton (one of the proud Saving Etta sponsors.) And it works automagically! When you walk in the room, the light comes on. Then it shuts off after a predetermined amount of time (choose between 30 seconds, 5 minutes, 15 minute, or 30 minutes for the time-out period.)
Before I tell you more about this fabulous no hands light switch, I need to give you the full details about the laundry room and discuss something I would definitely do differently next time.
Saving Etta: Laundry Room Update
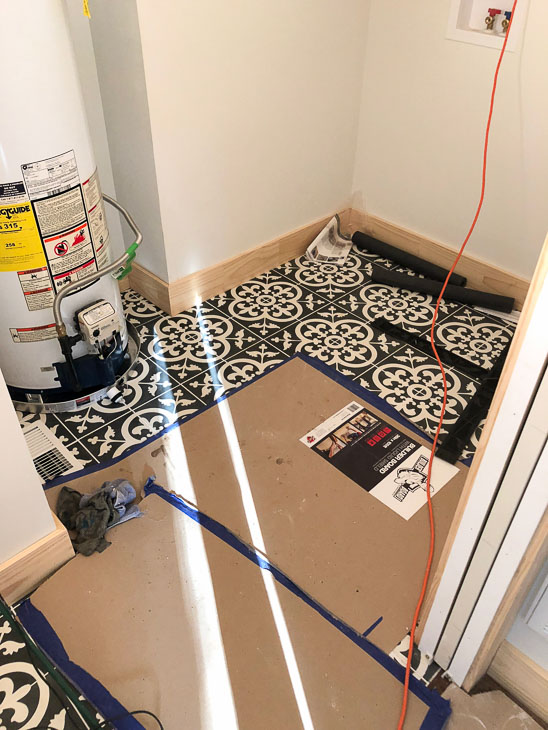
After the cement floor tiles were installed, I had to cover them up with Builder Board from Surface Shields to protect them. The small area covered was protected, but I should have covered the entire floor because my mechanical subcontractors were the messiest bunch of guys I’ve ever met. Every time they came into the house I had to follow them around cleaning up mud and dirt. Plus, I lost track of the number of fingerprints they left on the walls. Seriously, it was like following children who had just played all afternoon in the mud.
To make matters worse, they didn’t share my eye for aesthetically pleasing mechanics.
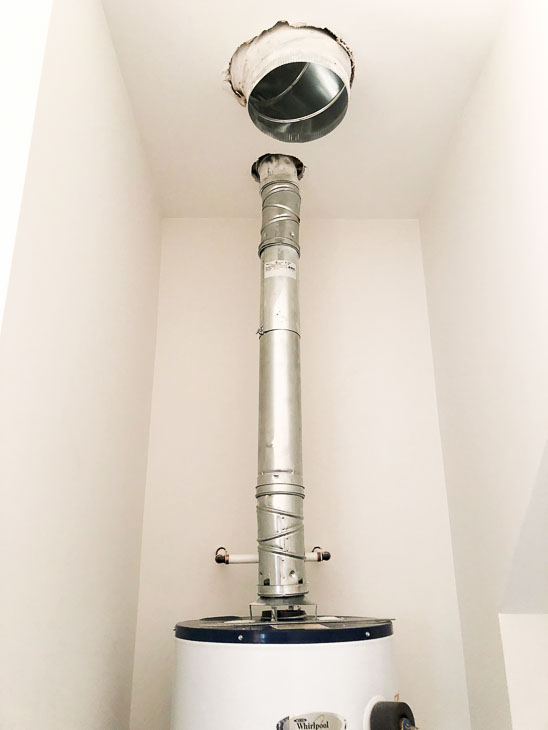
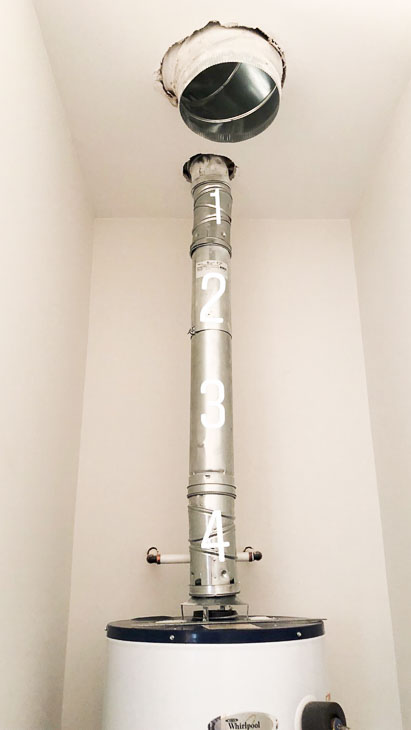
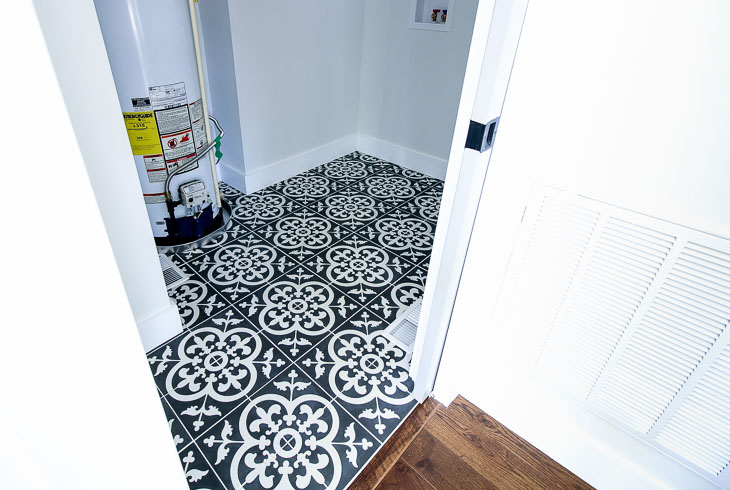
Avert your eyes from the giant hole in the ceiling and look at the water heater vent pipe. Did you count all the sections?
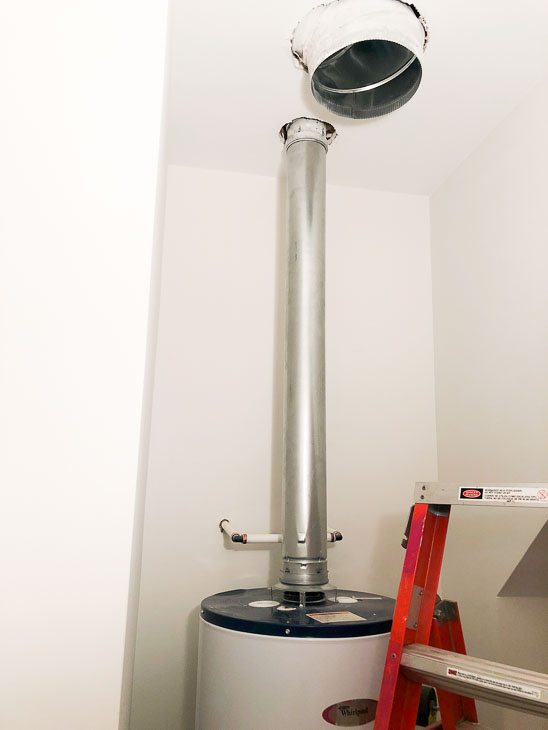
One, two, three, four sections. What the fizz?! When I called my mechanical contractor, I told him this looked like a preschooler installed it. In all fairness, it would have passed the inspections, but I hated how it looked. Instead of letting them monkey around more, I took matters into my own hands and ran to Ferguson to purchase one vent pipe. It looks much better, right?
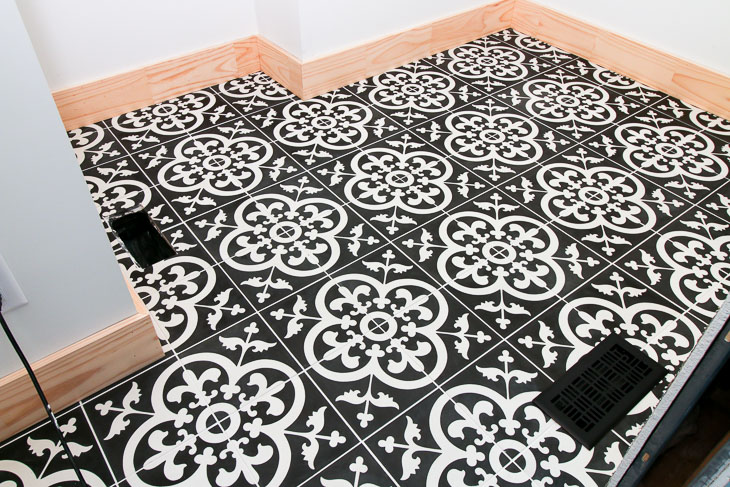
I’m sure you are wondering about the giant hole in the ceiling — it’s for make up air. This is required when you have a gas appliance in an enclosed room. The codes want to make sure that gas can’t build up in the room. I had already installed a built-in vent over the door, but the inspector wanted more. We added make up air in the floor. (You can see it in the picture below. It’s the hole in the floor on the left. And it eventually got a floor vent cover.)
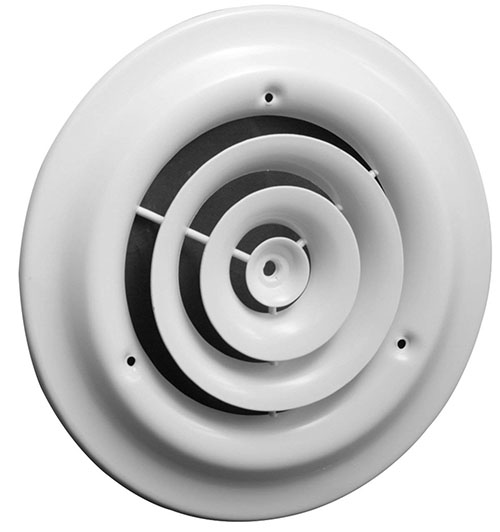
But, the inspector still wanted more make up air. My mechanical contractor suggested cutting holes in the wall into the kitchen, but I said “No way!” Ultimately, the best (and least unattractive) solution was a ceiling vent which eventually got a round diffuser placed over it.
It felt like the issues around the gas water heater were never ending. One of the inspections noted where there wasn’t enough clearance between the vent pipe and the framing. It was easily fixed, but between this and all the makeup air required for the gas water heater, I have vowed to go tankless next time. In the next flip, I’ll listen to my plumber’s suggestion to install a tankless water heater. It will cost more, but will look a lot better and not have as many issues during installation. A tankless water heater will still need to be vented, but it can be vented out the wall instead of the roof.
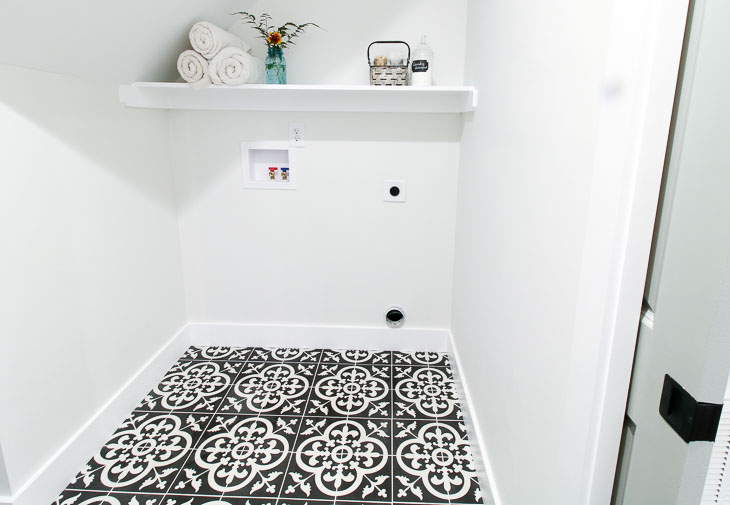
Live and learn, right? Regardless, the laundry room is still a show stopper with the cement tiles and room for a side-by-side washer and dryer. (Most of the houses in the downtown area only have room for a stackable washer and dryer.)
How to Install a Hands Free Light Switch
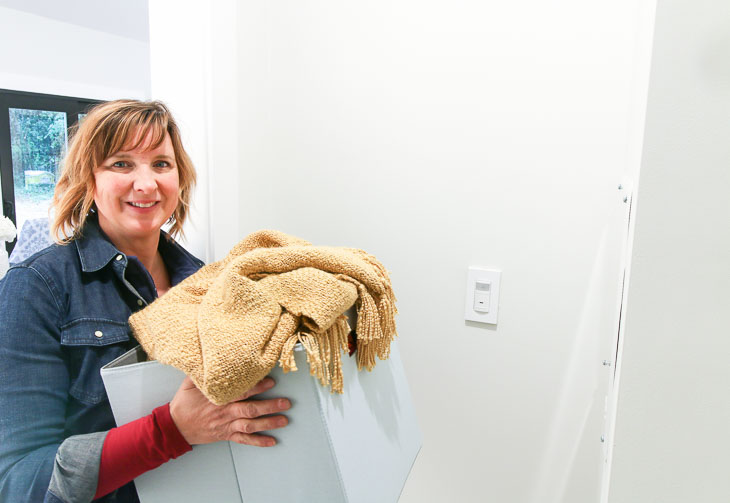
Now, onto the one affordable upgrade I will make again and again! The Leviton motion sensor switch is a wonderful addition to a laundry room or other areas in your home where you frequently have your hands full carrying things such as laundry or groceries. Or you might be carrying something so filthy you don’t want to touch the light switch. As soon as the door is opened (or someone walks into this room) the sensor detects your presence and turns the light on. It will also automatically turn the lights off, saving you frustration and money in rooms where lights are frequently left on.
The Leviton Decora Motion Sensor is set to turn off after 15 minutes when no motion is detected, but you can set the device to turn the lights off at 30 seconds, 5 minutes, 15 minutes, or 30 minutes. The motion sensor can also be tweaked to detect motion in a certain range from the sensor.
You’ll definitely want one in your house, so here’s the video tutorial to learn how to install a Leviton Decora Motion Sensor switch:
Materials:
(I’ve included affiliate links for your convenience. I earn a small percentage from a purchase using these links. There is no additional cost to you. You can read more about affiliate links here.)
Before installing the motion sensor, turn off the power at the circuit breaker to your switch. Using a voltage tester, make sure the power is off.
Disclaimer: Always use caution when working with electricity. Follow the instructions provided with your device. Do not attempt to make changes to your home’s electrical system without prior electrical experience and knowledge of your area’s electrical codes. Contact a licensed electrician if you have any questions. Pretty Handy Girl can not be held responsible for personal injury or harm.
Remove the Leviton Decora Motion Sensor from the package and read the instructions.
Look at your wiring, you should have a ground wire (bare or copper), a neutral wire (white), a line wire (this is the live wire that’s usually black), and a load wire (sometimes it’s also black and sometimes red.) The line wire is the wire that carries the electrical current from the circuit breaker to the switch. The load wire carries the power from the switch to the light fixture.
Strip ⅝” of the insulation off the wires. You don’t need to bend your wires into shepherds hooks, the wires can be inserted straight under the screws on the Leviton Motion Sensor.
Always connect the ground wire first.
The neutral wires should be connected to each other not the sensor.
Next connect the load wire to the black terminal.
Finally connect the line wire to the red terminal.
Gently fold and tuck the wires into the wall box. Make sure the word TOP is facing up on your sensor.
Drive the screws into the top and bottom of the motion sensor.
Turn the power back on and test your motion sensor. If it works, great!
Follow the instructions to make any adjustments to the length of time the lights stay on and the motion sensing field.
You can also install the motion sensor in a room where little kids like to play but aren’t good about turning out those lights. Or in that dark room where you always fumble for the light switch.
What about you, where would you install a motion sensor light switch?
Disclosure: This is a sponsored post for Leviton. I was compensated for my time and efforts to promote the Leviton Residential products. However, all ideas and opinions are my own. I will always let you know when you are reading a sponsored post. You should also note that I’m very particular about the brands I work with.
https://prettyhandygirl.com/wp-content/uploads/2019/02/laundry-room-view-horizontal.jpg492730Brittany Baileyhttps://prettyhandygirl.com/wp-content/uploads/2021/07/PHG-logo-tagline-2020-1030x211-R.jpgBrittany Bailey2019-02-11 07:00:002019-11-03 17:40:32Saving Etta: Laundry Room Update and a No Hands Light Switch
With Valentine’s looming just around the corner, I’m sure you are looking for a fun DIY project to make for a friend. Or perhaps you participate in the challenge to choose one word for the year. Either way, this is the jewelry making tutorial for you! Why not embellish a leather bracelet with a word, a name, or be rebellious and add a date to your band? It’s easy and fun to make these DIY Leather Word Bracelets. Ready to learn how?
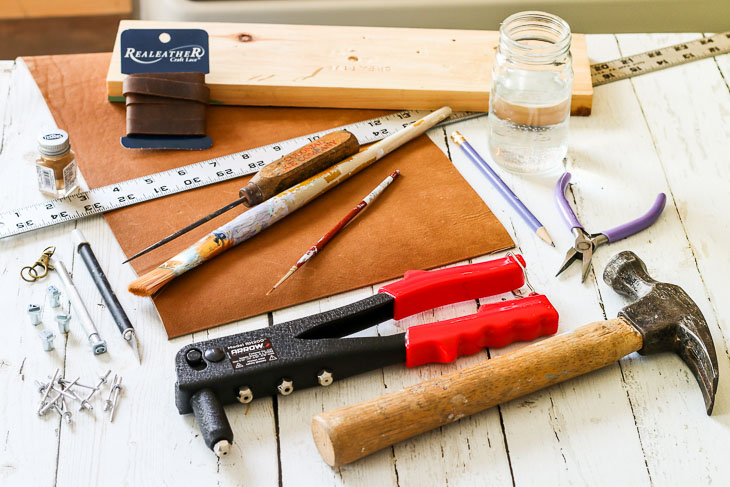
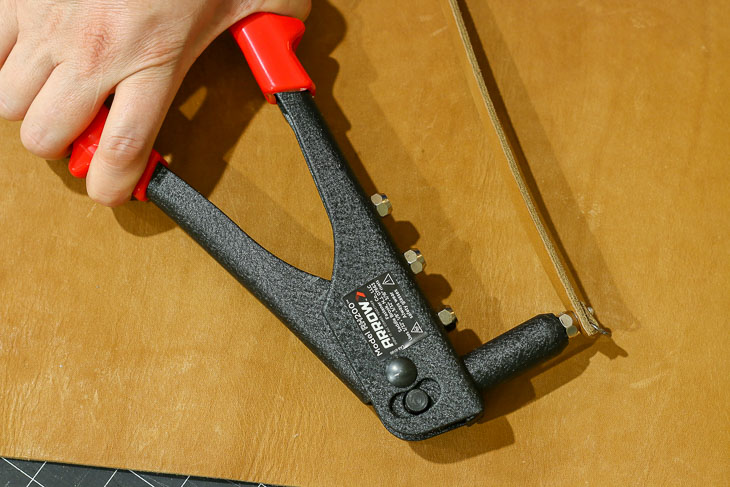
A big thank you to Arrow Fastener for sponsoring this tutorial. To be truthful, I’ve never owned a rivet tool before, but after making these bracelets I’m hooked! Not only is a rivet tool perfect for making leather jewelry, but it’s also great for gutter repairs, home decor projects, and more! To make these bracelets you’ll want to invest in an Arrow Rivet Tool.
Materials:
(I’ve included affiliate links for your convenience. I earn a small percentage from a purchase using these links. There is no additional cost to you. You can read more about affiliate links here.)
Grab your coffee and watch this three minute video to learn how to make a stamped leather bracelet. Or keep reading for the step-by-step tutorial.
Instructions for Constructing the Leather Bracelet:
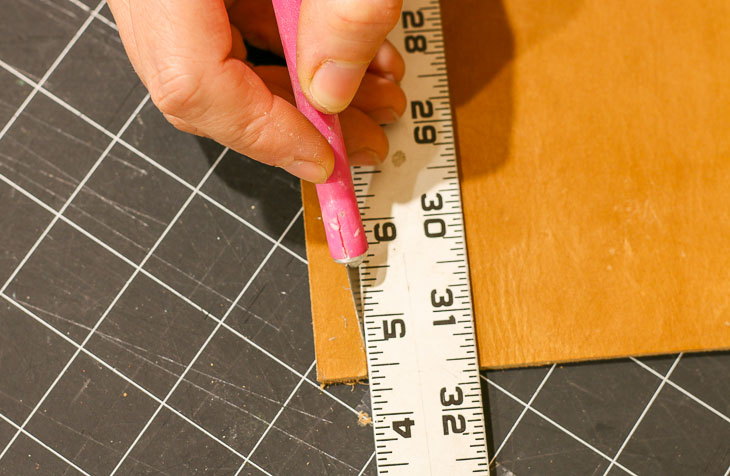
Step 1. Cut your leather into strips or bands approximately 1/2″ wide. (If you purchased pre-cut leather strips, skip this step.) Using a sharp x-acto knife, and a ruler as a guide, make several passes with your knife until the blade cuts through the leather.
Step 2. Taper one end of your band by cutting off the corners.
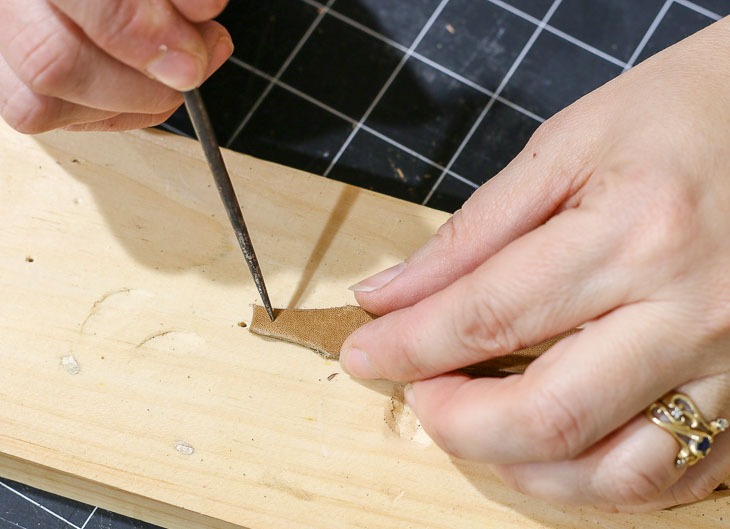
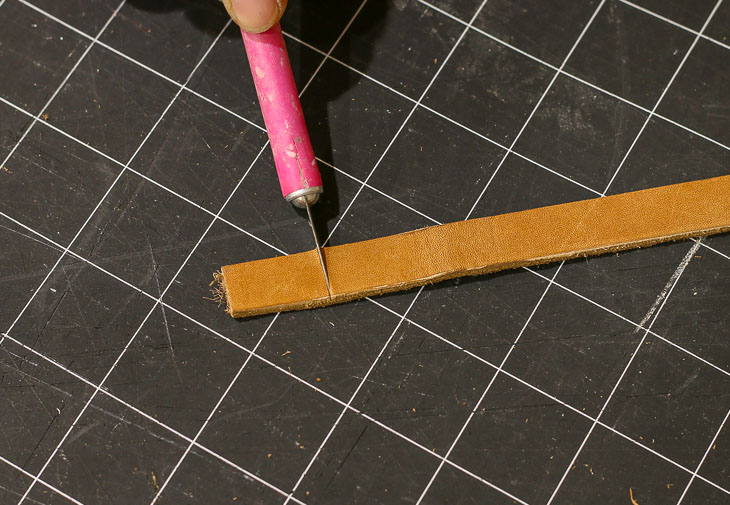
Step 3. Position your leather band on a scrap piece of wood. Using your awl, poke a hole into the leather band at the tapered end. Hammer the awl until it punctures the leather.
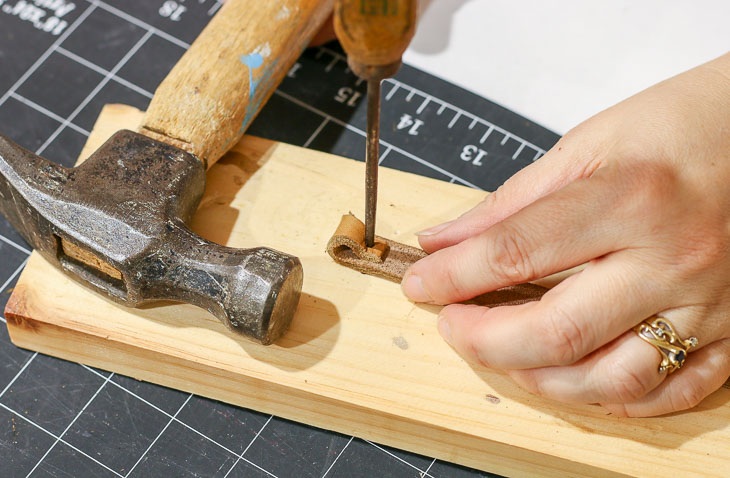
Fold over the tapered end and poke the awl through the first hole and into the band again as shown below. Use the hammer to strike the awl and punch the second hole.
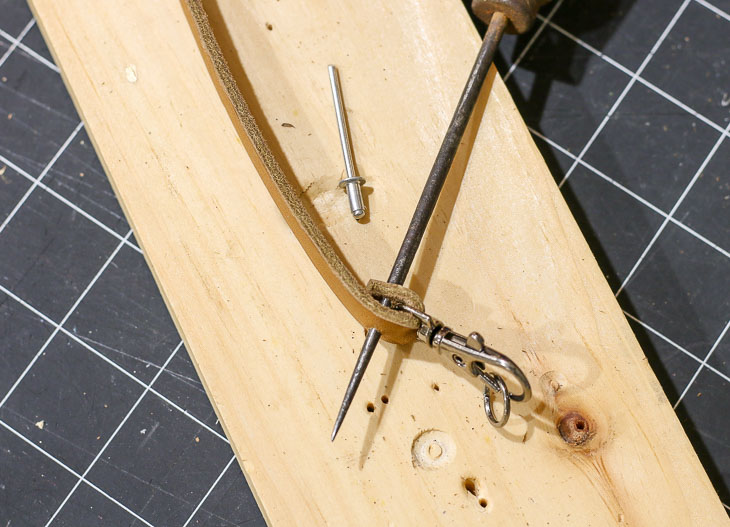
Step 4. Feed your jewelry clasp through the tapered end.
Step 5. Insert the short end of the rivet through the two holes. If the rivet won’t fit, try widening the holes by working the awl through the holes.
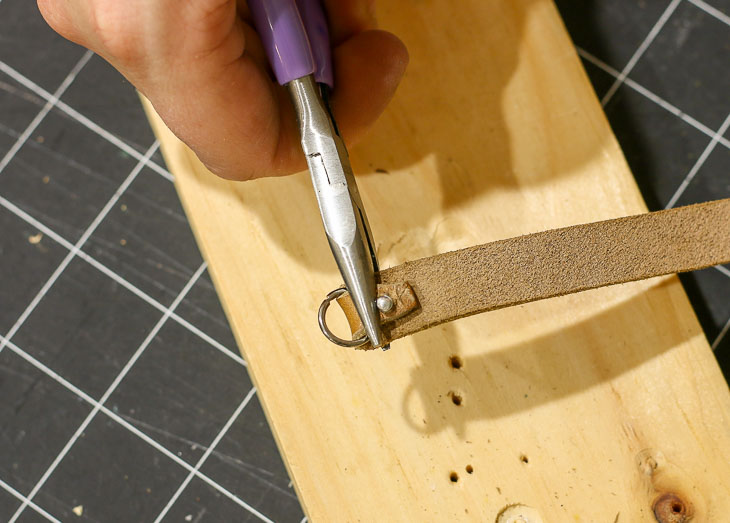
You can also try using pliers to help squeeze the leather over the rivet.
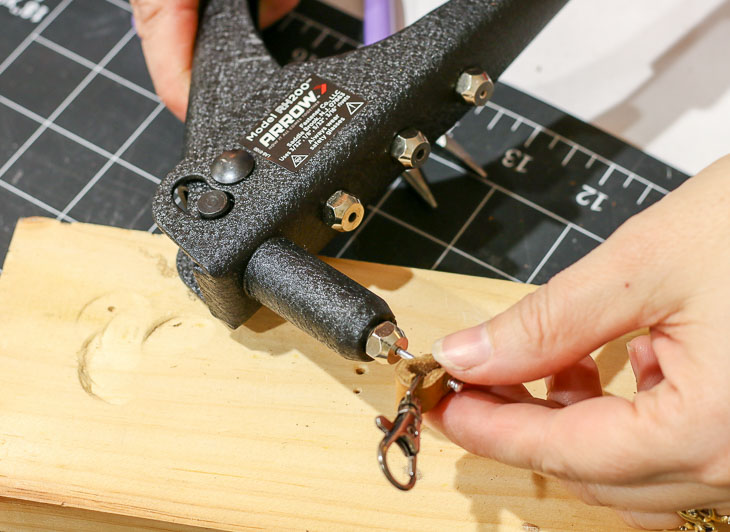
Step 6. Feed the long end of the rivet fully into the rivet tool.
Put on your safety glasses. Squeeze the rivet tool handles multiple times until…
…SNAP! The long end of the rivet will automatically snap off when the rivet is set.
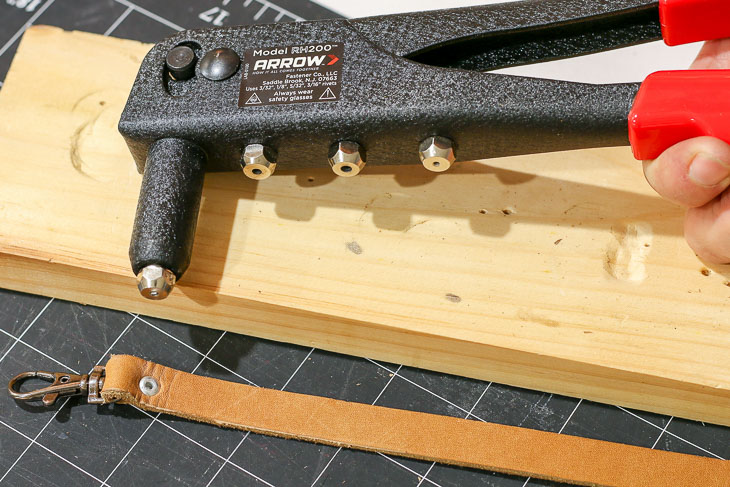
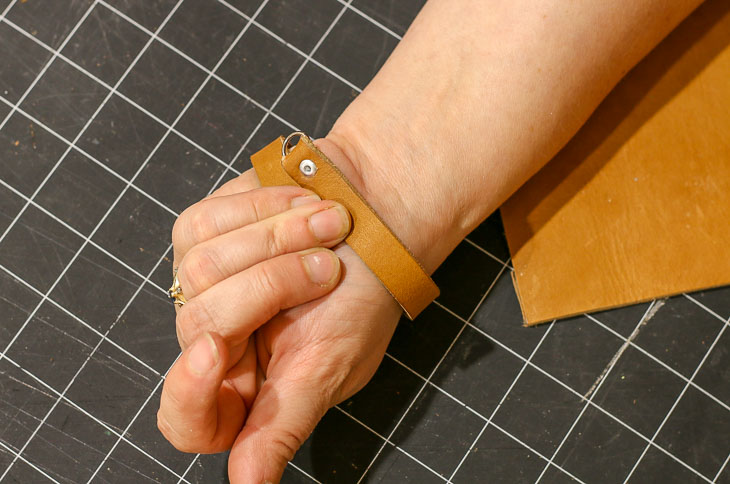
Step 7. Wrap the bracelet around your wrist, mark the length that’s comfortable for you. Subtract the length of your clasp from this mark then add 1/2″ back to account for the fold over.
Now you can cut the band to length.
Repeat steps 2 – 6 above to secure a jump ring to the other end of your bracelet.
Instructions for Stamping Leather:
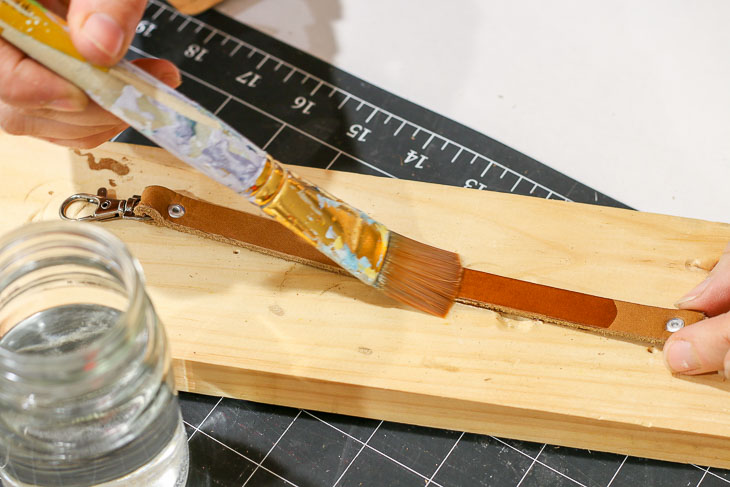
Wet the leather to soften it. Let it sit a minute or two to allow the water to penetrate the leather.
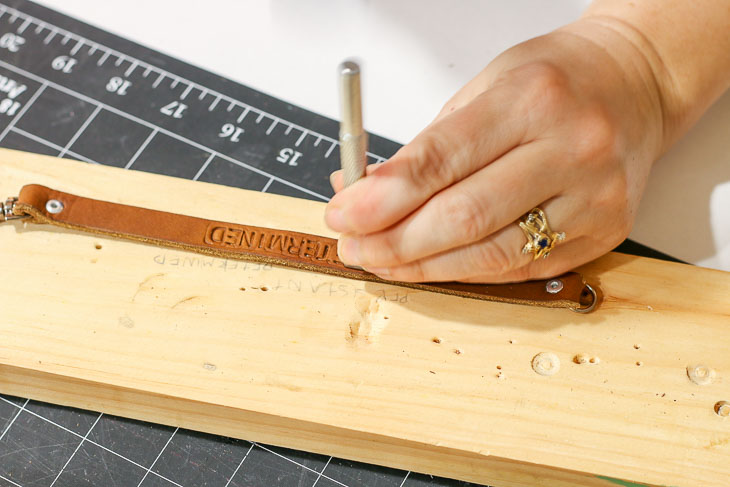
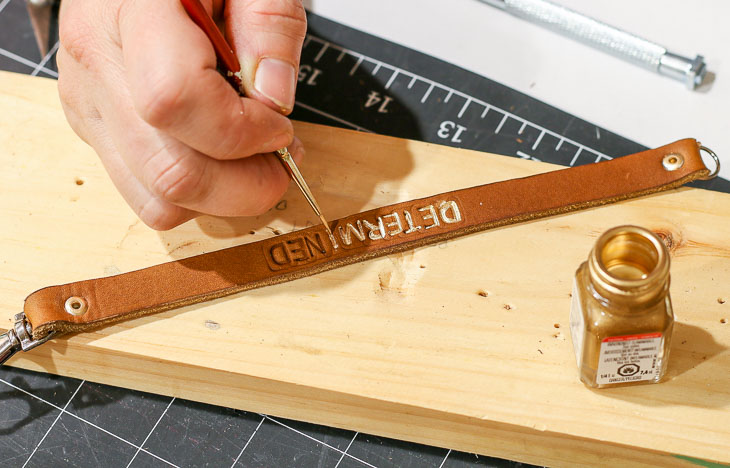
The easiest way to center a word on your bracelet is to start with the middle letter(s). Set the metal letter stamp in place and strike it lightly with a hammer. For a crisp letter, roll the stamp and hammer it lightly several times.
Continue stamping letters to the left and right of the middle letter(s).
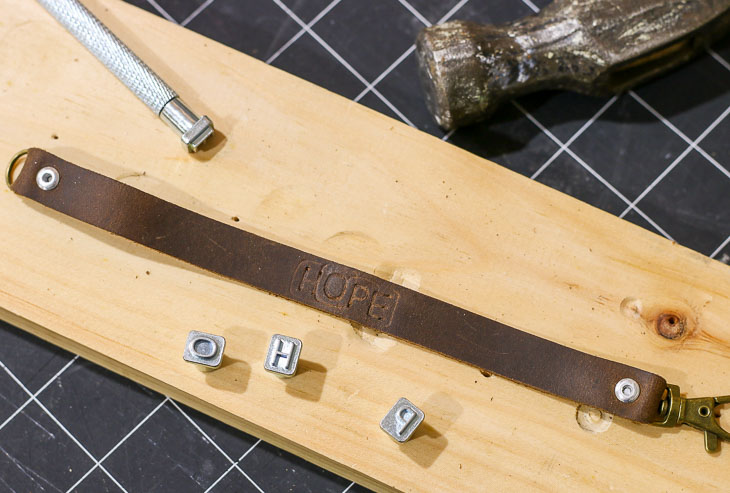
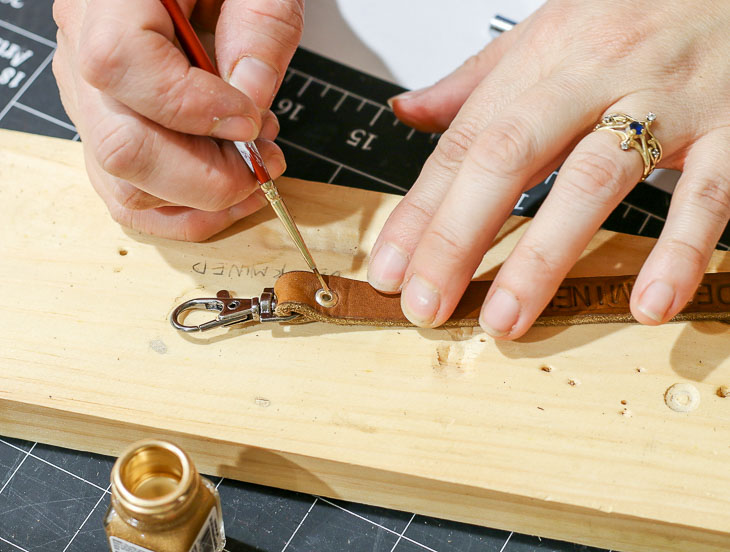
You don’t have to paint the letters, but I like how the word shows up better. You can use any acrylic or enamel paint to fill in the letters. The key to crisp letters is a steady hand, a good fine round brush (size 00 or smaller), and moving the band around to comfortably fill in each stroke (no need to be a contortionist). If you screw up, use the x-acto knife to lightly scrape up the paint.
If you want, you can paint the rivets with enamel paint.
Disclosure: This is a sponsored post for Arrow Fastener. I was not told what to write. All words and ideas are my own. I am very particular about the brands I work with, and only partner with companies that provide quality materials and/or services.
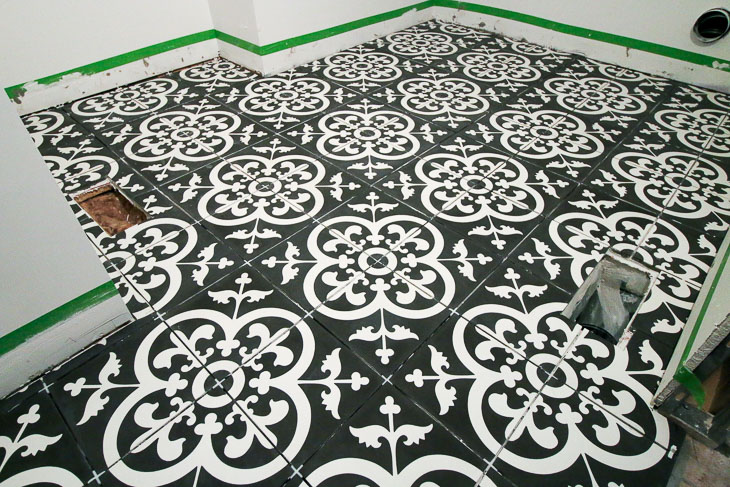
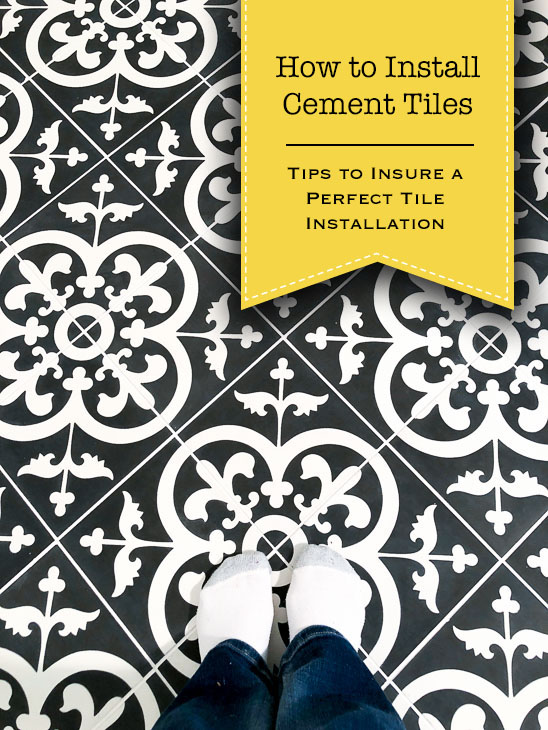
How to Install Cement Tiles and Achieve Professional Results
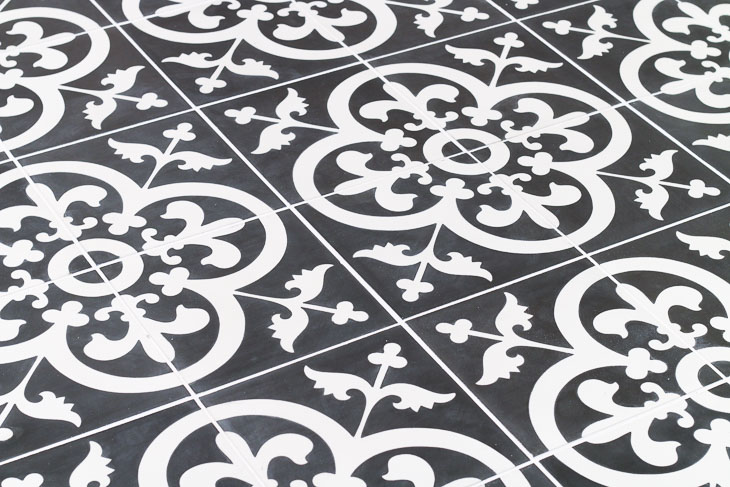
If you’ve been browsing Pinterest lately or flipping through the pages of your favorite home design magazine, you’ve probably seen (and likely fallen in love with) real cement tiles. Cement tiles are trending, so much so that porcelain and ceramic lookalikes are popping up at most tile retail shops. The first thing you’ll notice about real cement tiles, is the price tag can be steep. What you probably don’t realize is cement tile can be a bit trickier to work with than standard ceramic or porcelain tiles. Don’t let this dissuade you, because today I’m going to show you how to install those beautiful authentic cement tiles and achieve professional results. Plus, because we’re friends, I’m going to share with you my affordable source for real encaustic cement tiles!
Seeing those beautiful cement tiles and a great price prompted me to contact my friend at The Builder Depot and ask him about being a Saving Etta sponsor. He agreed but on one condition; he asked me to write a tutorial on How to Install Cement Tiles and discuss the pitfalls and risks associated with improper installation techniques. Apparently customers were unaware of the proper way to install cement tiles. In fact, even seasoned tile installers were making costly mistakes because they were treating cement tiles like ceramic and porcelain tiles. There is a big difference between them.
What’s the Difference Between Cement Tiles and Porcelain or Ceramic Tiles:
Ceramic and porcelain tiles are slick (often shiny) and aren’t absorbent on the surface.
Encaustic cement tiles are highly porous and absorbent from the surface to the base.
Porcelain and ceramic tiles can be grouted immediately after the thinset mortar has cured.
Cement tiles must be sealed before grouting or you risk the grout staining (or permanently sticking to) the surface.
Porcelain and ceramic tiles do not need to be sealed.
Cement tiles need careful handling to avoid staining and scratching the tiles.
Porcelain and ceramic tiles are forgiving and can stand up to a lot of abuse.
Encaustic cement tile patterns are created by pouring different colored clay baked into the tile. It’s not merely a coating.
Porcelain and ceramic tile patterns are applied in the glazes (painted on top of the tile).
Here’s a beautiful video showing exactly how encaustic cement tiles are made:
Now that you know more details about cement tiles, you can have a beautiful cement tile floor. But, you need to follow this tutorial closely. (Almost all these instructions will apply to installing cement tiles on a wall, so keep reading.)
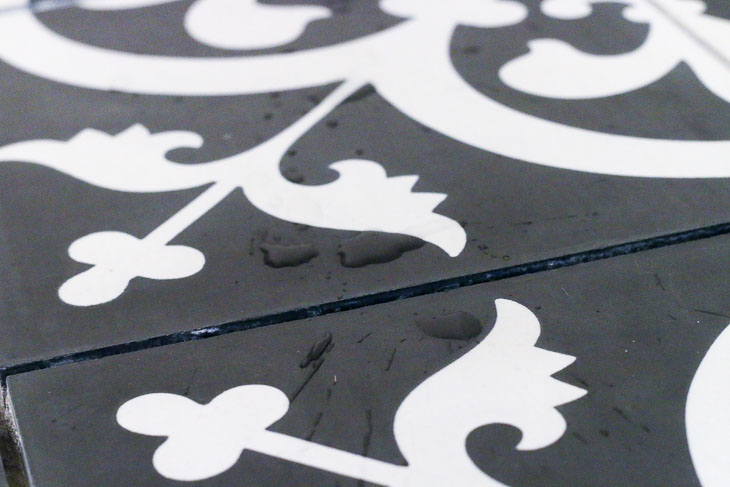
When you receive your cement tiles you’re going to be tempted to rip open the box and rub your grubby hands all over the smooth tiles (or am I the only weirdo that likes to stroke tiles?) Regardless, before you open the box, wash your hands. Cement tiles are EXTREMELY porous and will absorb oils and stain easily. Until you get to the sealing step, you’re going to have to handle these tiles with care (kid gloves wouldn’t be a bad idea.) Lest you think you can seal the tiles before installation, don’t try it. The tiles have to be porous to release moisture while the mortar is curing. If you seal it ahead of time, there’s a good chance your tiles will develop a ghosting appearance.
Cement tiles can scratch easily. Keep the packing material between the tiles until you are ready to install them. Don’t mark your tiles with a pencil or pen for cutting (unless you will be cutting off the marks.) Even faint pencil lines can’t be easily removed from the tile surface.
How to Prepare Your Floor for Cement Tiles:
(I’ve included affiliate links for your convenience. I earn a small percentage from a purchase using these links. There is no additional cost to you. You can read more about affiliate links here.)
Just like when you paint a room, you’ll get the best results if you take the time to prep your space before you begin.
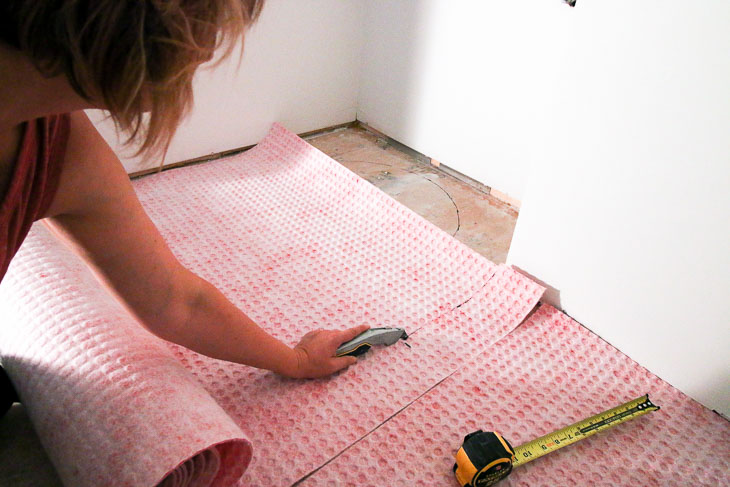
Before laying tiles on your floor, you must put down a substrate to prevent future flexing that can lead to cracks in your grout or worse in your tiles. Typically tile installers will use cement backer board. But, because the cement tiles are so thick, I chose to use an uncoupling mat to reduce the finished floor thickness.
Measure and cut your mat (or cement board) with a utility knife. Dry fit the mats (or boards) before proceeding.
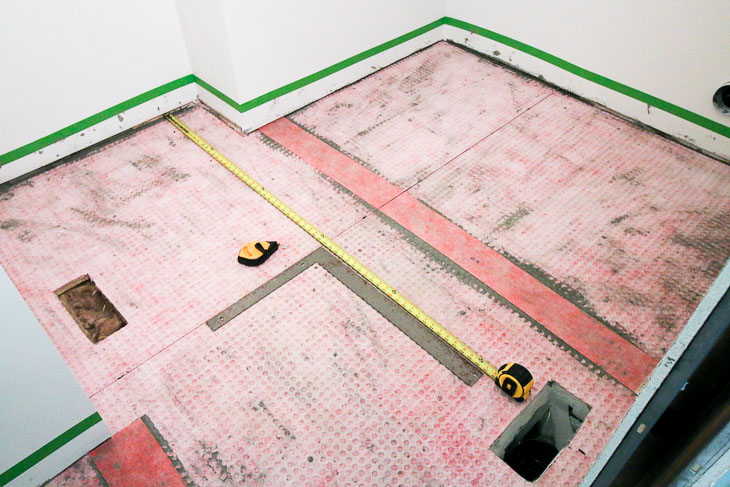
Whichever substrate you use, be sure to follow the manufacturer’s installation instructions. For improved waterproofing, you’ll want to cover seams with the recommended seam tape. For completely waterproofed floors, add seam tape around the perimeter of the room (as shown in this video.)
Next find the center of your room and mark perfectly perpendicular guidelines to use as a guide when laying out your tiles.
Dry fit the tiles with spacers in your room before you begin. Make any adjustments to the tile layout or pattern before you begin.
How to Install Cement Tiles:
With your substrate installed, it’s time to install your tiles. Before we begin, make sure you have these tools and materials. A quick note on cutting the tiles. You can use a score and snap manual tile cutter for straight lines, but nothing beats a wet saw for angled and more complicated cuts. If you don’t want to buy a wet saw, you can rent one. Tile setting is a one person job, but it helps to have an assistant to speed things along by making cuts and mixing more mortar and grout.
Here’s a video I made to help you learn how to install cement tiles properly and keep them looking beautiful!
Mix your thinset mortar according to the package directions. (I usually try to achieve the consistency of peanut butter.)
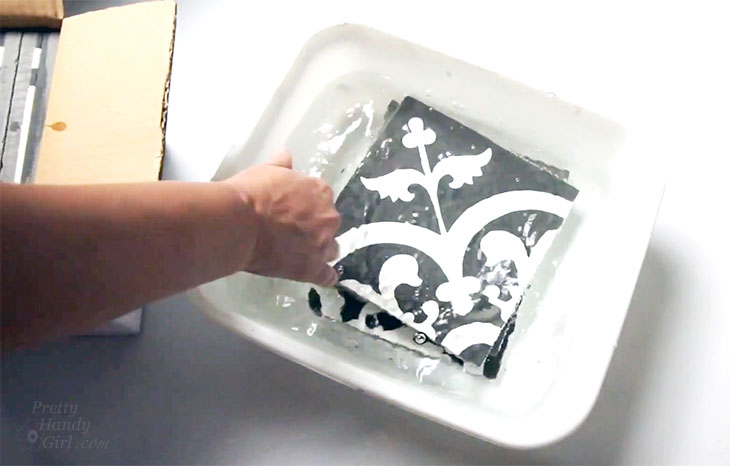
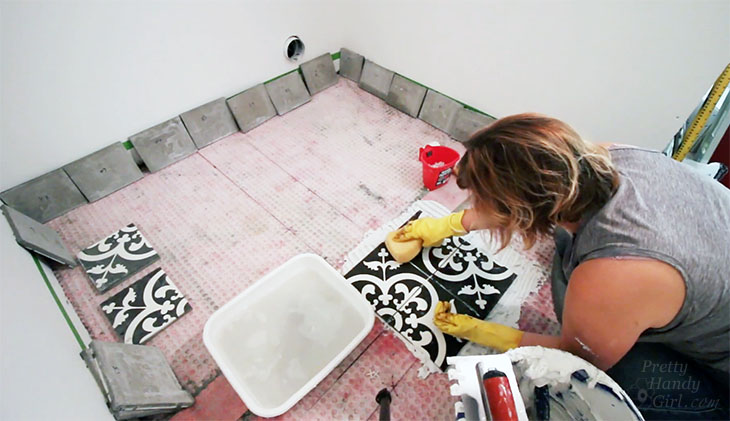
Prepping Your Cement Tiles:
One of the most important tips for working with cement tiles is to soak them in water before installation. Allow them to soak for at least 30 seconds before laying them into the mortar. If you don’t soak them, the tile will absorb too much moisture from the mortar.
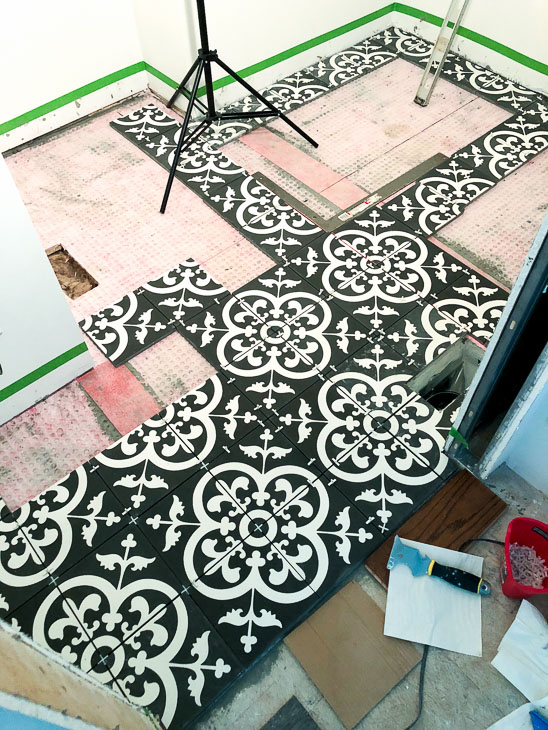
Starting from the center of your room, apply the thinset mortar to a small area and use your 1/2” notched trowel to comb the thinset. Lay your tiles down. Lift one tile to check and see if the mortar is completely covering the back of the tile. If not, your mortar consistency may be too dry.
Avoid the temptation to lay more than a few tiles at a time.
After your first small group of tiles are set, insert spacers. Check to make sure the tiles are level and the same height. Then immediately clean any and all thinset off your tiles using a damp sponge.
After all your tiles are installed, block off the room and keep off the tiles for at least 24 hours while the thinset hardens.
Sealing Cement Tiles:
We’ve arrived at the most important step when installing cement tiles! You must seal the tiles before grouting them. Use a penetrating sealer made for porous stone or cement tiles. Before sealing, make sure your tiles (and the thinset for that matter) are completely dry. You can test the tiles for any remaining moisture by laying down a piece of plastic on the tiles after installing them. If there is moisture the next day when you lift the plastic, they aren’t dry enough. Wait for them to dry or you could risk discoloration of your tiles.
Clean the tiles by sweeping off any debris and clean with a ph balanced cleaner (a bucket of warm water with one drop of dish soap is a good cleaner.) Let the tiles dry. Wipe or buff with a rag.
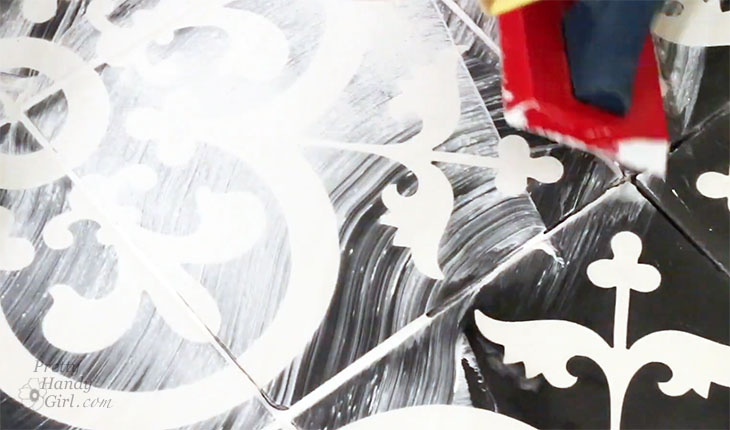
Pour the sealer into the dish pan. Dip your pad applicator into the sealer liquid. Squeeze off excess sealer against the edge of the dish pan.
Apply the sealer in thin coats working in one direction. Remove any excess sealer from the tiles BEFORE it dries. (See the streaks below? Those streaks and any puddling needs to be buffed off to avoid uneven drying.)
Let the first coat of sealer dry completely. In fact you may want to take a break for 30 minutes or so between coats.
Be prepared to apply many coats before your cement tiles are fully sealed. (My tiles needed 5 coats to seal them. Then I had to wait another 24 hours for the sealant to fully cure before grouting.) It may seem like a long process, but this insures the tiles will withstand regular use and resist stains.
After each coat of sealant dries, you need to test to see if the cement tiles are completely sealed. Drip water onto the tiles. If the water beads up, they are sealed. However, if the water absorbs into the tiles, add another layer of sealant and try the water test again later.
Once your tiles are fully sealed, wait 24 hours before grouting.
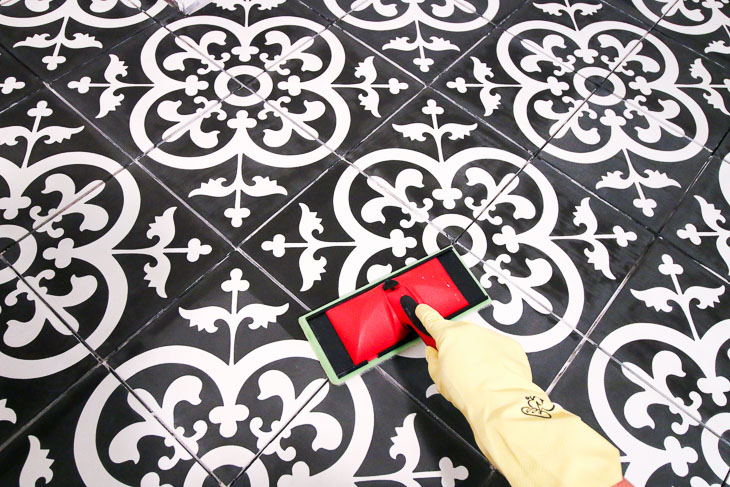
How to Grout Tiles:
Because I work alone, it takes me a little longer to grout. To prevent my grout from hardening too quickly, I like to float my mixed grout container in a bucket of ice water to slow down the setting action.
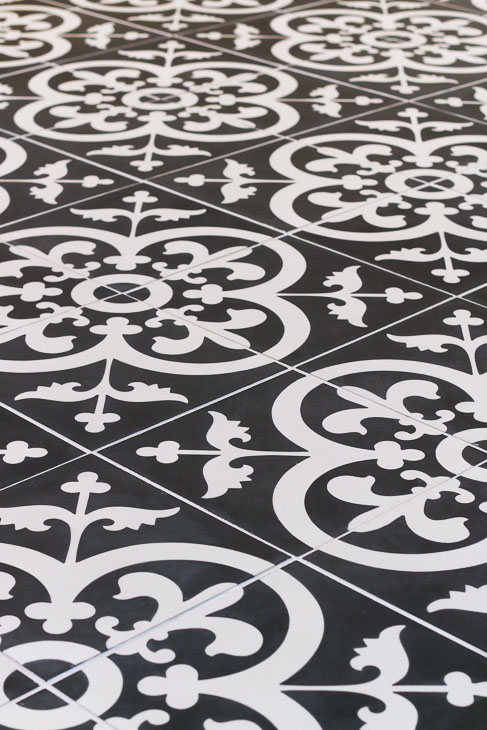
Load up your float with fresh mixed grout. Holding your grout float at a 45 degree angle against the floor, spread the grout over the gaps between the tiles in a diagonal motion. Work in small 3 – 4 square foot areas. Then scrape any excess grout off the tiles using a clean grout float.
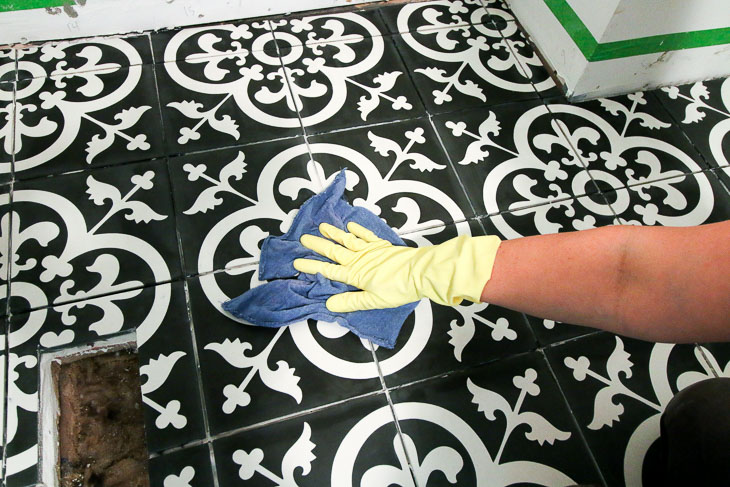
Immediately wipe off any excess grout using a clean damp sponge. Ring out and refresh your sponge with clean water frequently.
It is imperative to get all the excess grout off the tiles or you risk the grout staining or settling into the tiles. Go ahead and move on to the next section, but go back to the previous tiles and buff off any haze with a dry rag.
After the grout has cured, clean your floors with a pH neutral mild cleanser. Then apply one final coat of penetrating sealer. A new coat of sealer should be reapplied every 6-12 months for floors, and every 2-3 years for wall tiles.
Cement Tile Maintenance:
To protect your beautiful cement tile floors, clean up any spills immediately. Never leave anything sitting on the floor that could stain or scratch your tiles. If your tiles get scratched or stained, you can use a fine grit sandpaper to sand off the stain. Just be sure to re-seal your tiles after sanding.
A big thank you to The Builder Depot for providing the laundry room tiles for the Saving Etta project and for giving me excellent instructions for installing the cement tiles. What do you think? Do you love the cement tile look?
I hope you found this tutorial helpful. Happy tiling!
Disclosure: The Builder Depot is a proud sponsor of the Saving Etta project. I was provided with materials for this project. I was not told what to write. All opinions and ideas are my own.
https://prettyhandygirl.com/wp-content/uploads/2019/01/grouted-cement-tiles.jpg487730Brittany Baileyhttps://prettyhandygirl.com/wp-content/uploads/2021/07/PHG-logo-tagline-2020-1030x211-R.jpgBrittany Bailey2019-01-28 10:00:002019-02-25 18:10:30How to Install Cement Tiles and Achieve Professional Results
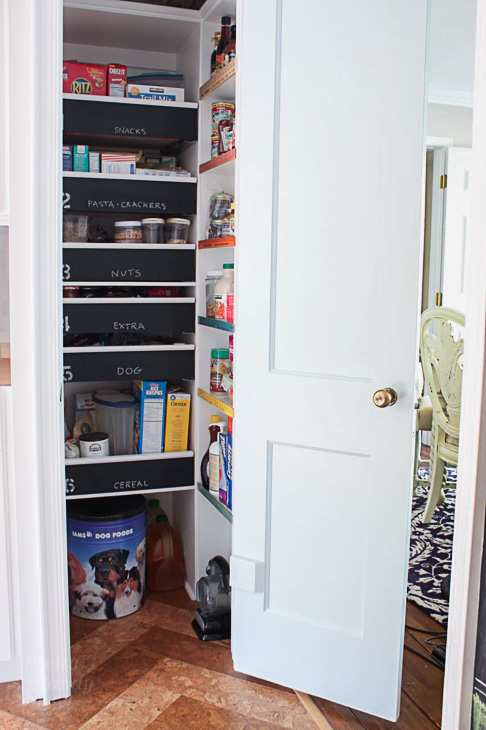
Did you enjoy that sneak peek of the pantry renovation project? I’m sure you are dying to see what lies behind that closet door. Well, you’re in luck because today you get to see the reveal and learn how I made these Pull Out Drawers with Chalkboard Fronts.
Recently I’ve been putting the finishing touches on the big pantry renovation. Although the space wasn’t that big to start with, I’ve created more usable spots to store our food and pantry items. Part of the renovation involved putting up a wall to create a closet with pull out shelving. This area is 1/3 of the original pantry. But, it holds about 2/3 of the original food items. Amazing!
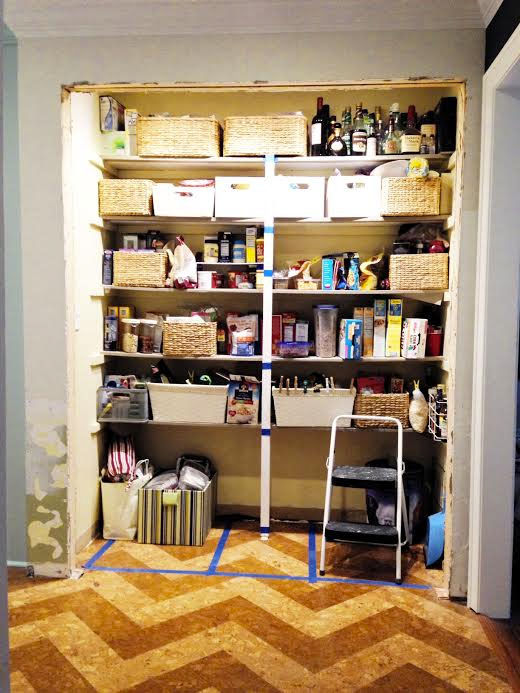
I started with your standard 6′ wide by 3′ deep closet with bi-fold doors. It may sound like a fair amount of storage space, but the shelves were only 12″ deep and there were only five shelves. Trust me when I say there was a lot of wasted space.
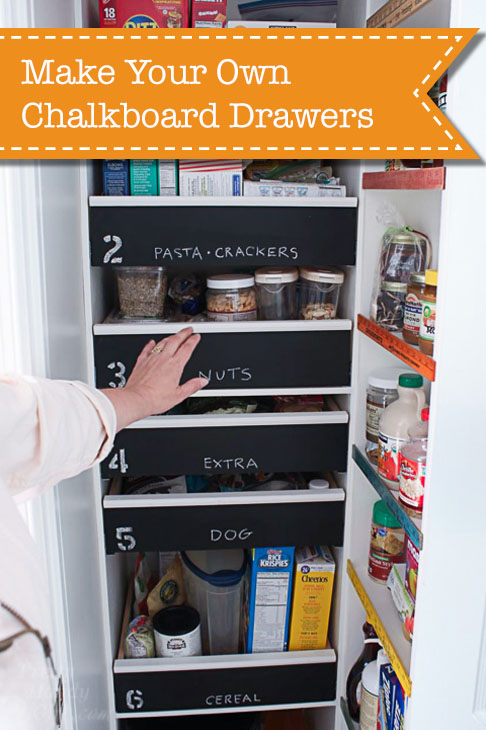
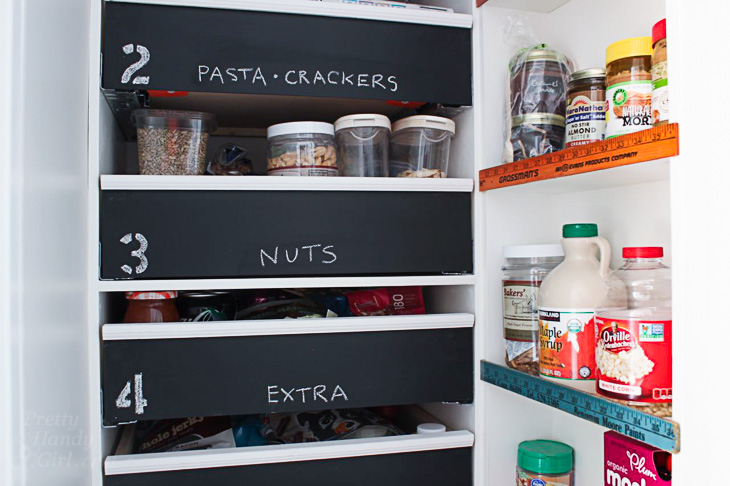
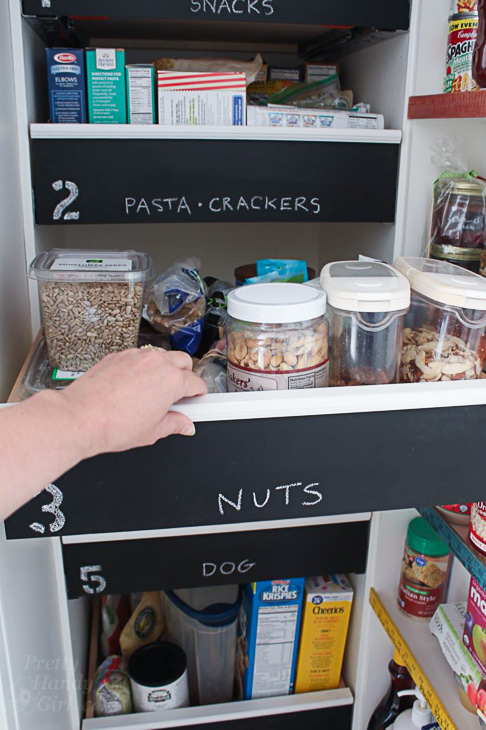
Ready to see the new closet portion of the pantry? Let’s throw open that door and let you see the organization I have in there now!
Hark, I think I hear singing angels! Keep in mind this is only 1/3 of the pantry renovation. The other two thirds will have more storage than you can shake a stick at.
A drastic improvement from the before:
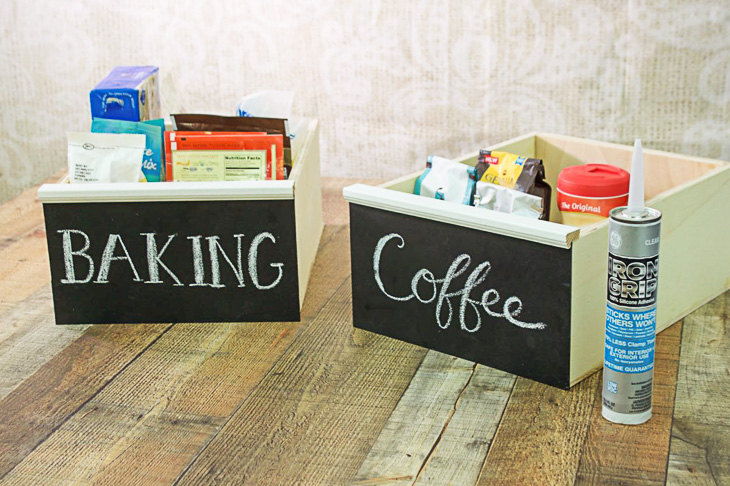
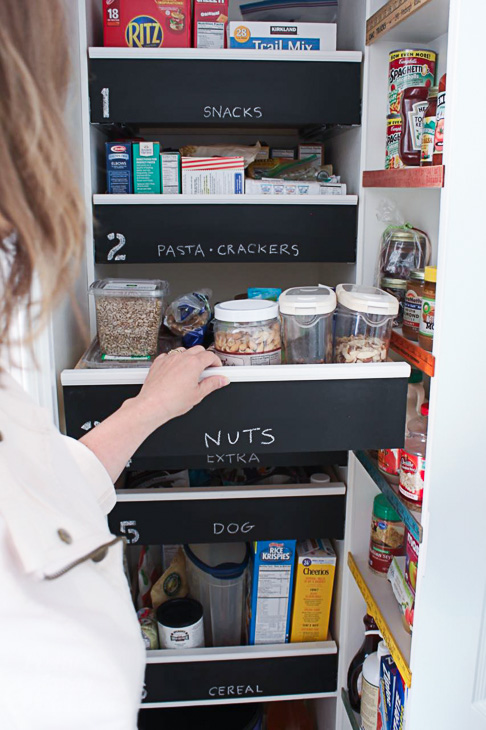
Enough of the ugly, I’m sure you’re really here to find out how to create these fun Pull Out Drawers withChalkboard Fronts.
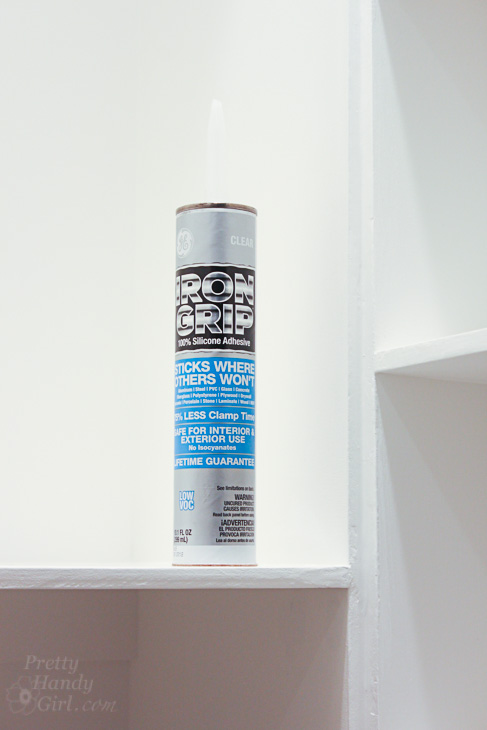
Before we begin, I want to thank my sponsor for providing me with GE Iron Grip* 100% silicone adhesive for this project and for the giveaway. Just to be clear, I have partnered with the manufacturer of GE-branded sealants and adhesives to bring you this post, and have been compensated for my honest opinions.
Since receiving this product, I have put it to the test. So far I give it a top score. The curing time is much faster than some other adhesives I’ve worked with. What really sets it apart for me is the clear color, so it blends in with any project: wood, metal, masonry, tile, glass, you name it.
Ready to get building? Great! Let’s get busy making these fun organizational chalkboard front drawers.
Building Chalkboard Front Drawers:
This is an easy build project. You don’t have to use a nail gun if you don’t have one. The brad nails simply hold the box structure in place while the adhesive cures. If you do choose to not use the nail gun, be sure to secure the box with clamps for the required clamp time.
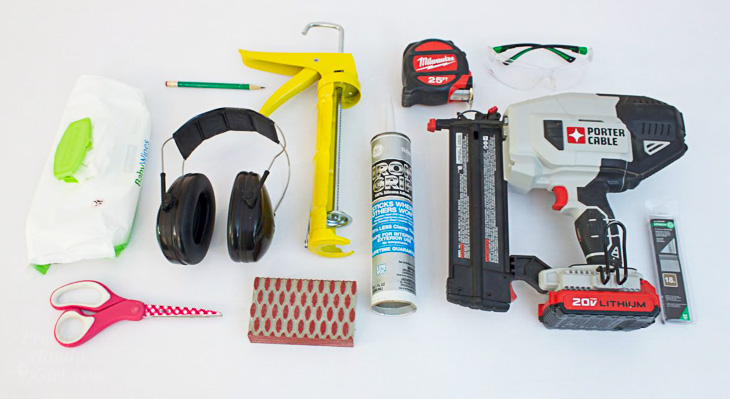
Materials:
(I’ve included affiliate links for your convenience. I earn a small percentage from a purchase using these links. There is no additional cost to you. You can read more about affiliate links here.)
Note: If you are using the drawers in an existing cabinet box, measure your opening and create the drawer to your specifications. You’ll also want to follow the guidelines and measurements provided by the drawer slide manufacturer*.
To make things simple for you, I put together this brief video to show you how to build the chalkboard front boxes:
Instructions:
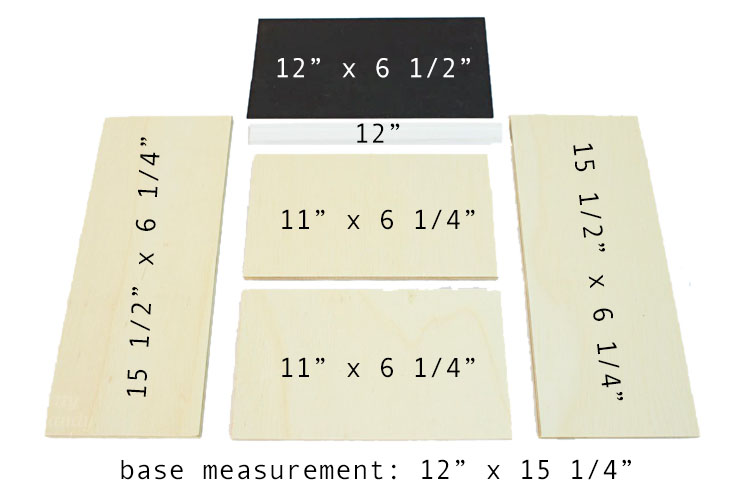
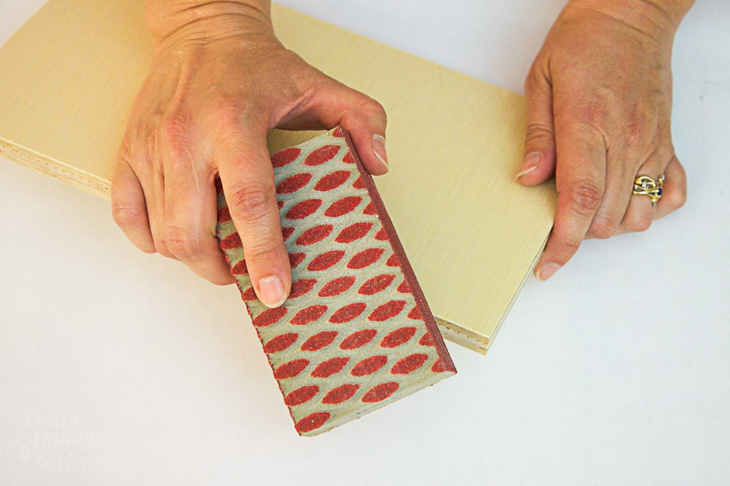
Sand the edges of your plywood pieces to knock off any splinters.
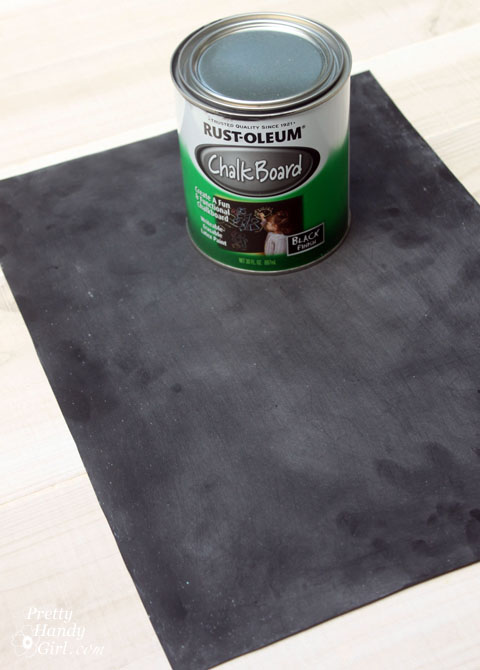
Paint one side of the masonite panel with two coats of chalkboard paint (sand between coats.)
Dry fit your plywood drawer pieces together.
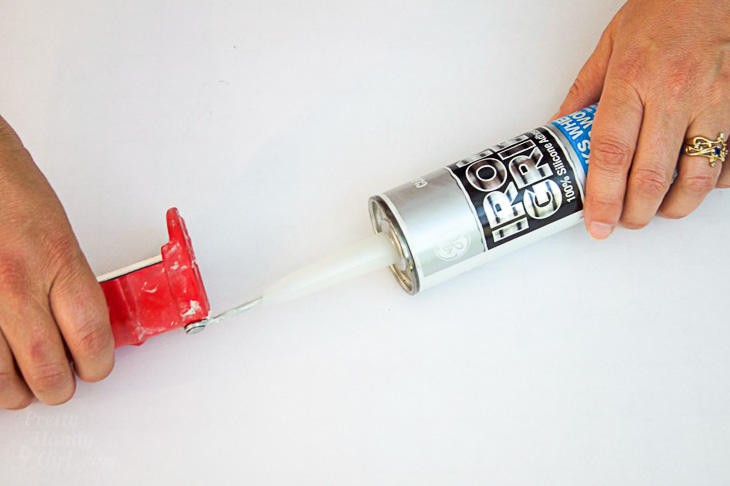
Cut off the tip of your GE Iron Grip* adhesive tube.
Use the stick on your caulk gun to puncture the inner seal.
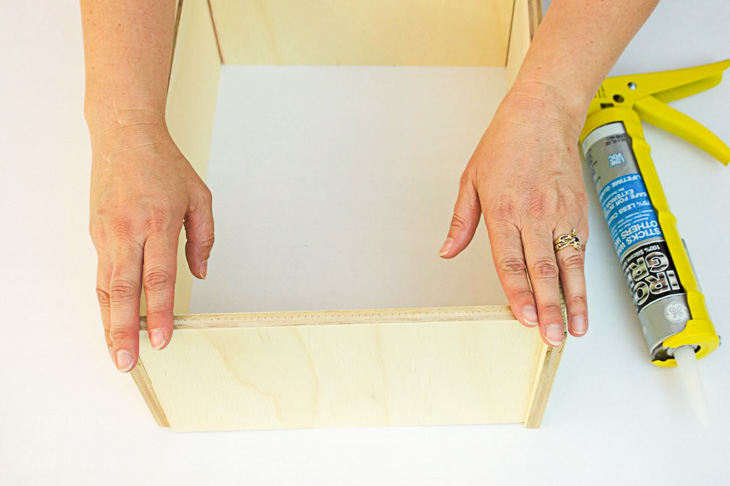
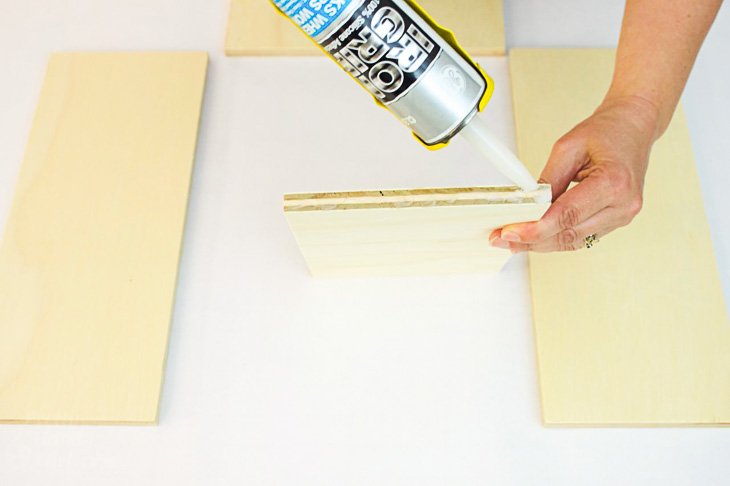
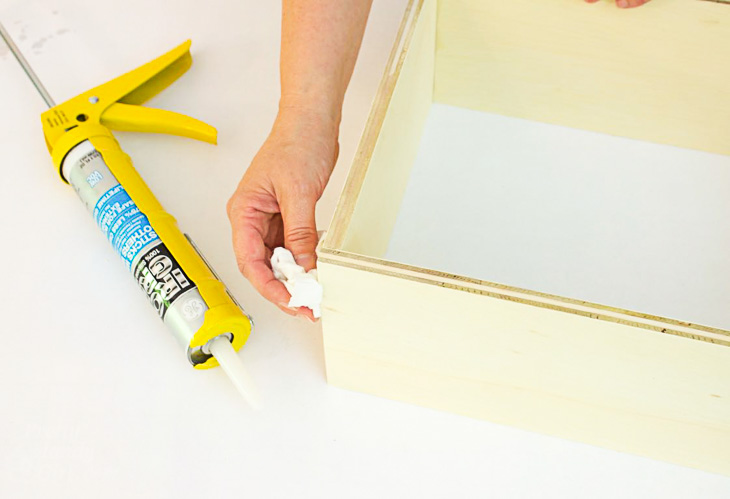
Run a line of adhesive along the sides of your front and back pieces.
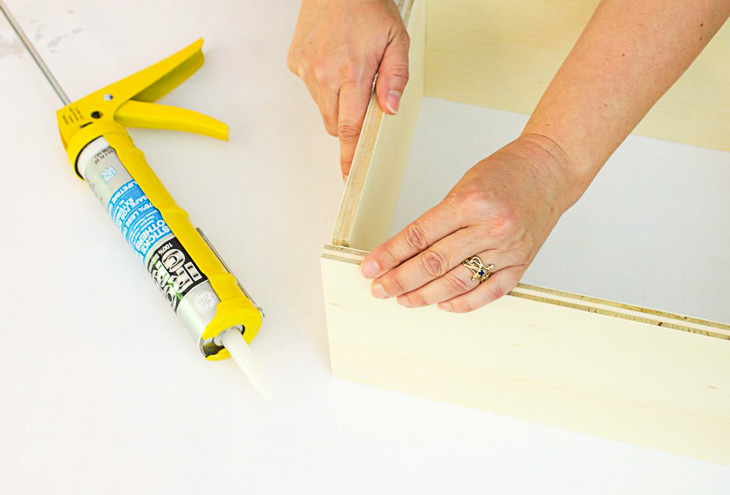
Sandwich the front and back pieces between the side pieces.
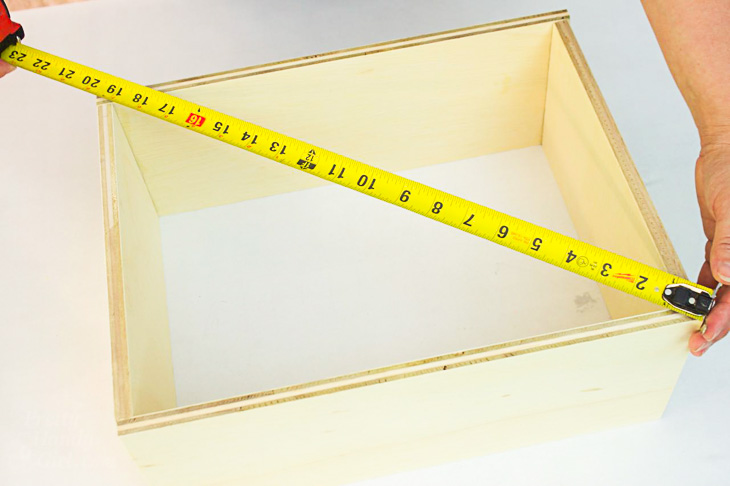
Check the box to see if it is square by measuring both diagonals and making adjustments until they are the same length.
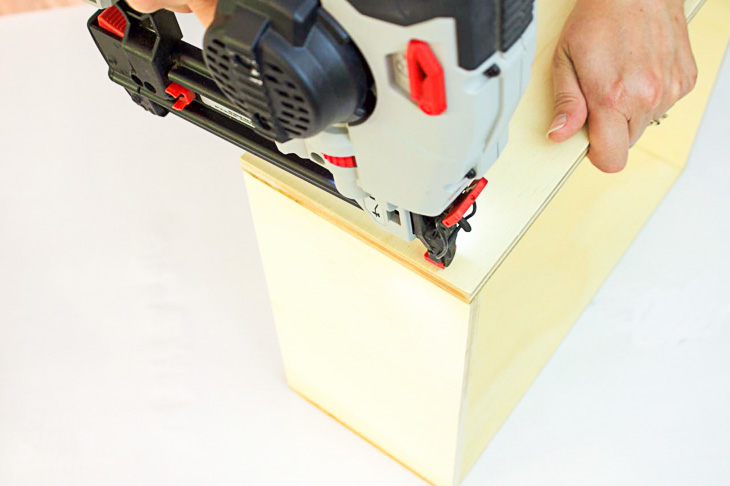
Add 2-3 brad nails into the side pieces to secure the box while the adhesive cures.
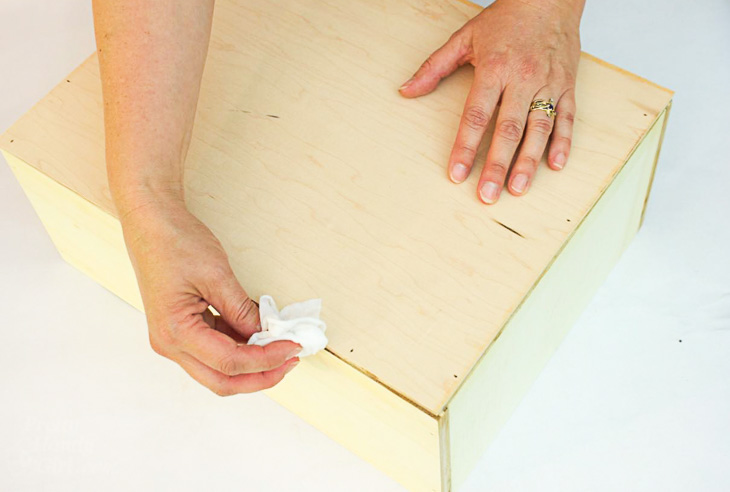
Wipe off any excess adhesive with a baby wipe or damp paper towel.
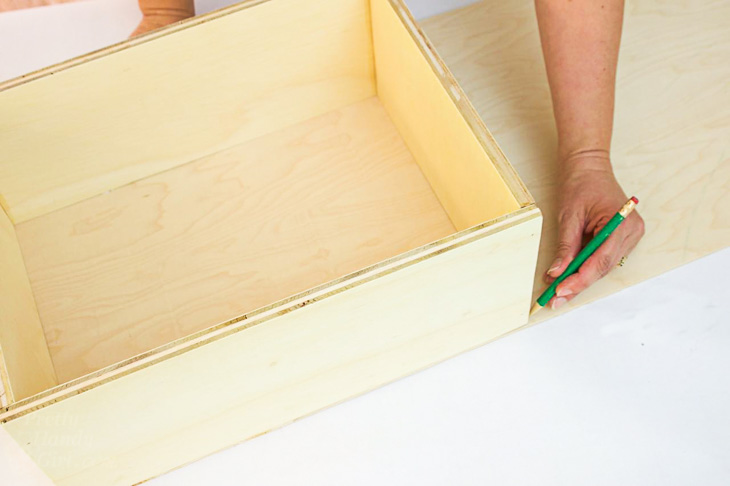
If you haven’t cut your 1/4″ plywood base yet, that’s fine. I prefer to cut the base after building the drawer box to insure an accurate fit. Lay the box on top of the 1/4″ plywood and mark the perimeter onto the base.
Cut the plywood base and sand any rough edges.
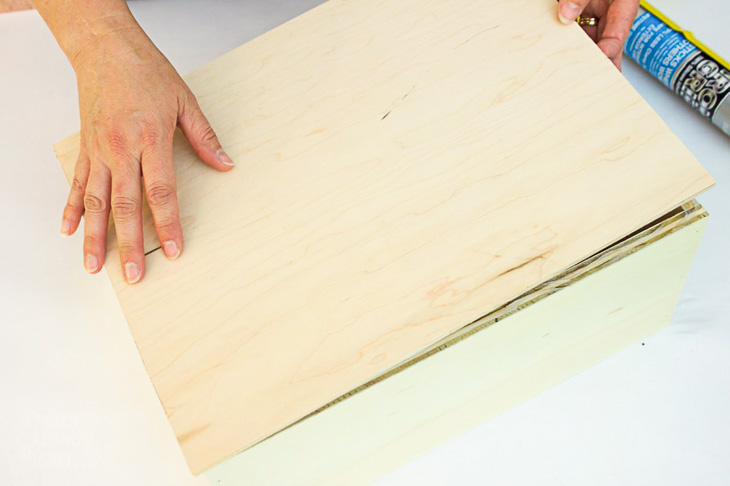
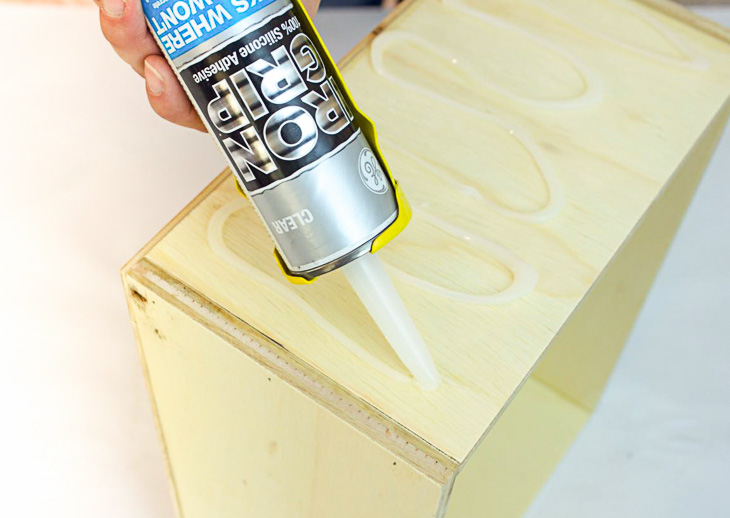
Run a line of adhesive along the bottom edges of your drawer box.
Line up the base and press it onto the drawer box.
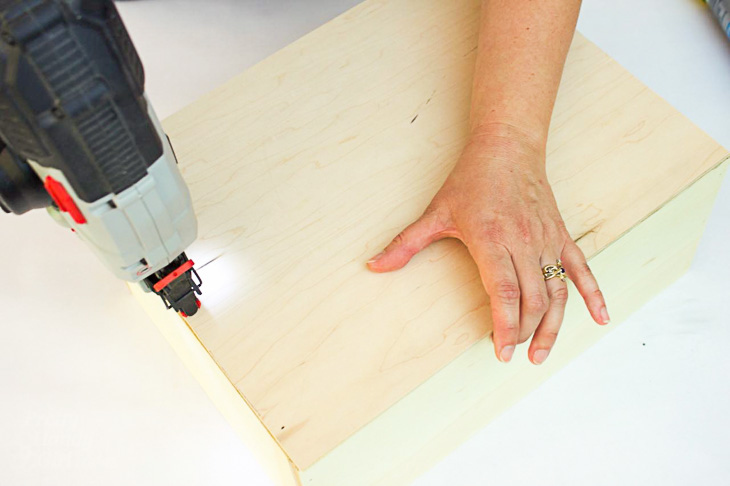
Secure the base with a few nails to hold it in place while the GE Iron Grip* adhesive cures.
Wipe off any excess adhesive that may have squeezed out.
Time to add the chalkboard face. Add a liberal amount of GE Iron Grip* adhesive to the front panel of your drawer.
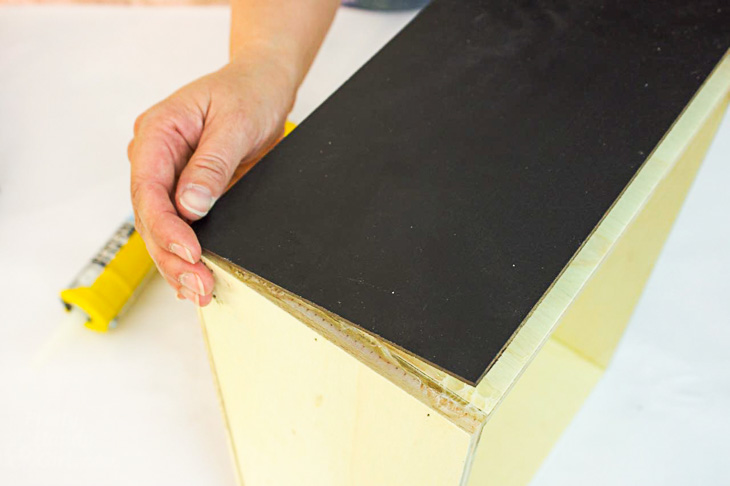
Center the chalkboard panel on your drawer front. Press firmly on the chalkboard panel to set in place. Let the drawer sit face up until the adhesive has cured.
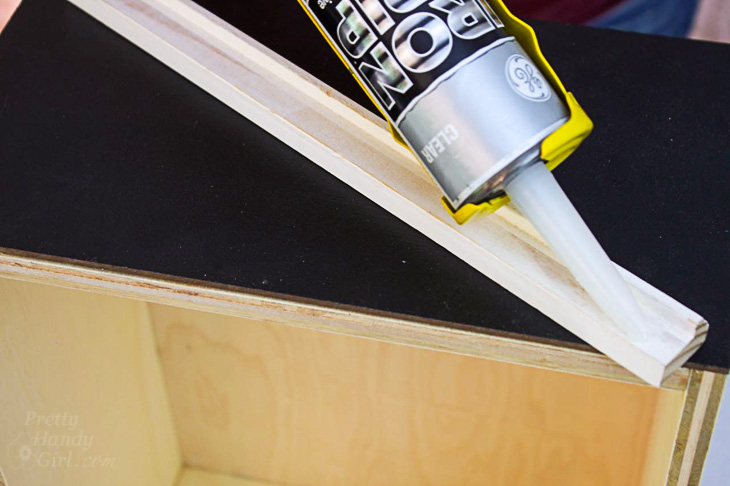
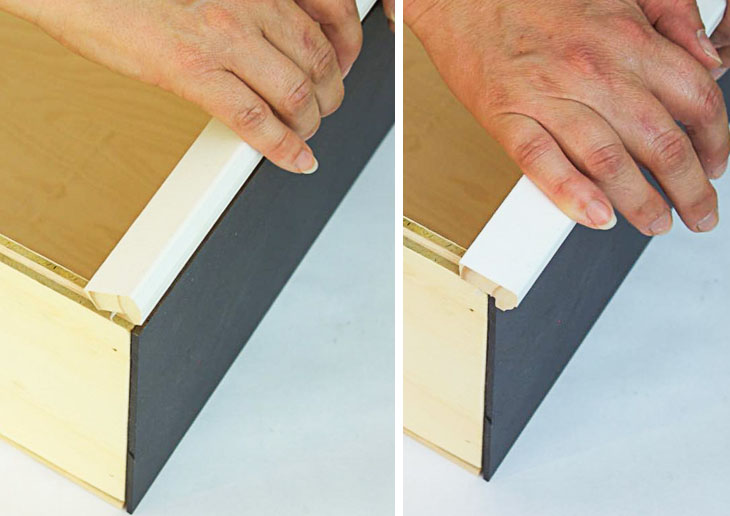
For a finishing touch, add your backer band piece to act as a handle. Run a line of GE Iron Grip* adhesive along the inside edge of the backer band moulding.
Press the backer band over the front edge of the plywood drawer and chalkboard panel.
Insert your drawers into any cabinet box using the drawer slides of your choice or simply slide the drawer box onto a shelf for better organization of smaller items.
I’m loving my new full extension chalkboard front drawers. It helps the kids (and me) find all our pantry items and keep them organized.
Disclosure: This is a sponsored post for GE –branded sealants and adhesives.
*Iron Grip is a trademark of Momentive Performance Materials Inc.
https://prettyhandygirl.com/wp-content/uploads/2017/05/chalkboard-drawers-3.jpg486730Brittany Baileyhttps://prettyhandygirl.com/wp-content/uploads/2021/07/PHG-logo-tagline-2020-1030x211-R.jpgBrittany Bailey2017-06-01 12:00:002017-06-14 12:01:37Pull Out Drawers with Chalkboard Fronts

 How to Drill New Holes for Door Knobs
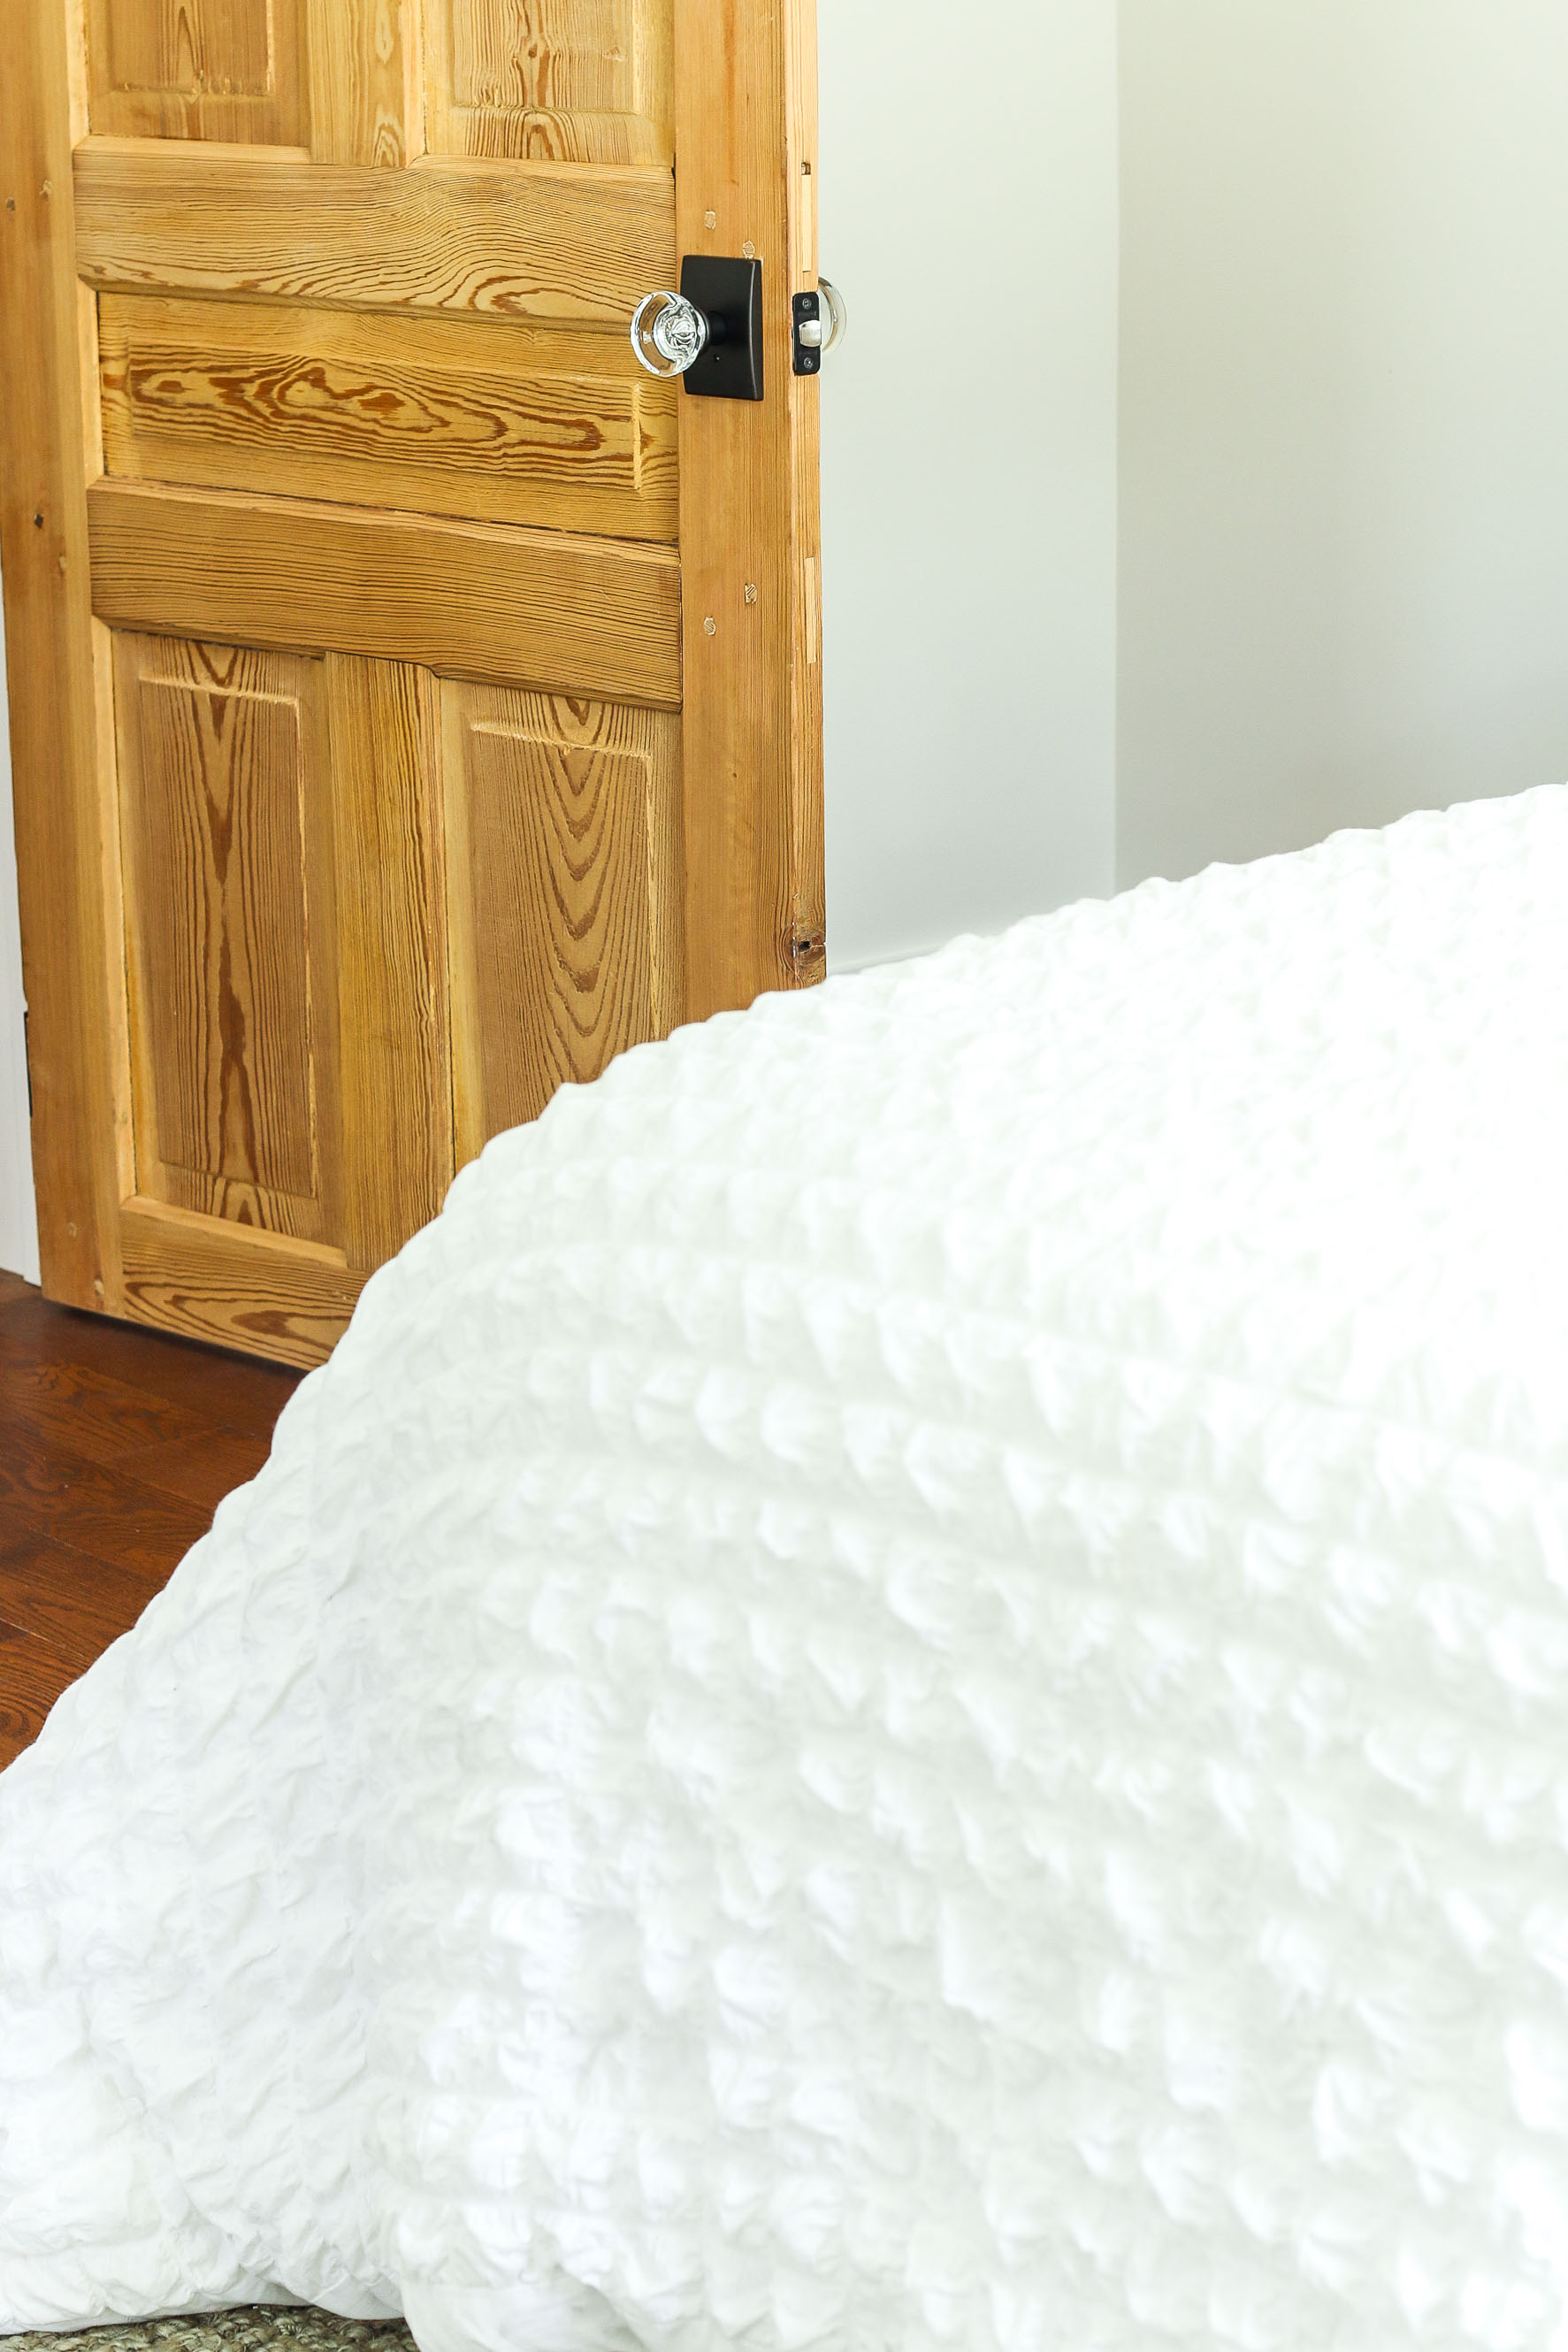


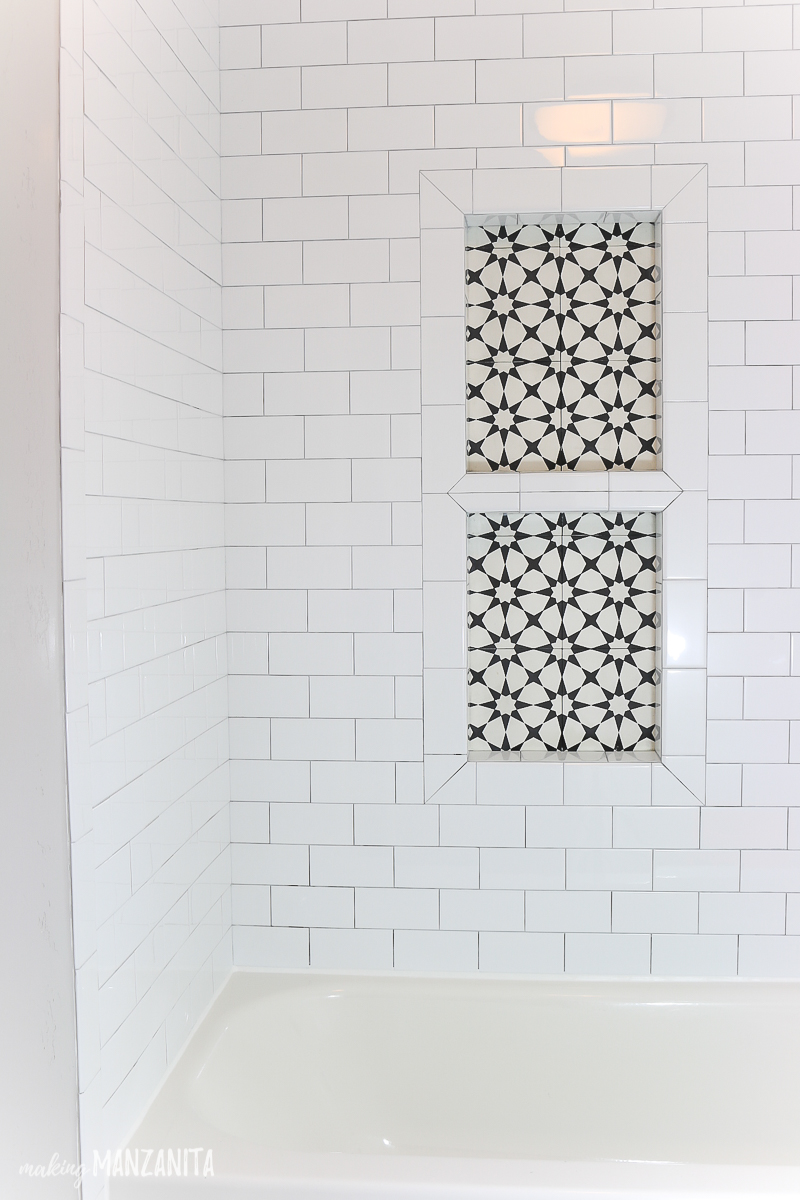 Check out this beautiful bathroom makeover with a Cement Tile Niche