Facelift for a Knotty Pine Dresser | Pretty Handy Girl

Facelift for a Knotty Pine Dresser | Pretty Handy Girl

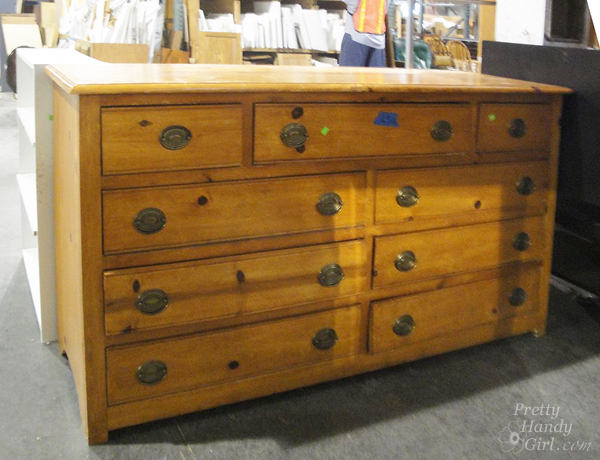
You know you’ve seen those knotty pine dressers from yesteryear. Their spotlight has faded and they are finding themselves at thrift shops, ReStores or worse yet…at the curb.

Facelift for a Knotty Pine Dresser | Pretty Handy Girl

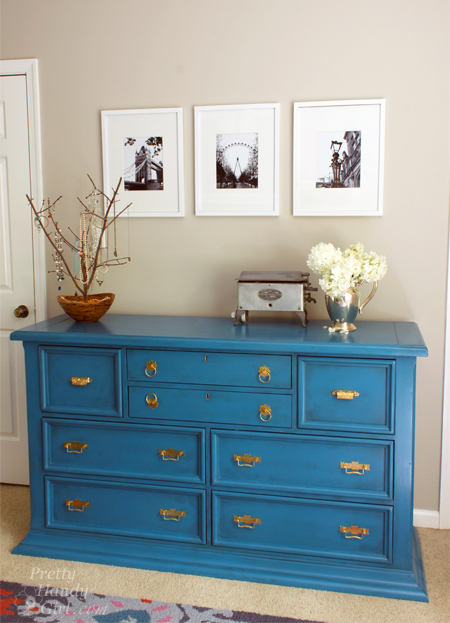
I’m begging you to let this knotty eyesore back into your home. It doesn’t have to be banished. It’s KNOT her fault she was built from cheap pine. All this dresser needs is a new coat of paint and some beautiful brass knobs and all her flaws and knots will be forgotten.

Facelift for a Knotty Pine Dresser | Pretty Handy Girl

Extra observant points to anyone who realized that this blogger forgot to take a good before picture! She looked very similar to the knotty pine dresser shown above, except she had wooden circle knobs and an unfortunate set of bun feet. I did remove the bun feet from the dresser when I first brought it home. Mama ain’t got no need for buns in this oven (or on my dresser.)

Here are the details on how to refinish a knotty pine dresser and give it a complete makeover!

Materials:

  • Sandpaper
  • BIN primer
  • Damp rag
  • Paint brush
  • Foam paint roller
  • Quart of Benjamin Moore Advance paint (Deep Ocean)
  • Valspar asphaltum glaze
  • Brass hardware (I bought mine from House of Antique Hardware)
  • Drill with bits
  • Screwdriver
  • Level

Instructions:

This tutorial will be fairly brief, if you need more photos and explanation, you can view my previous dresser painting adventure.

Begin by removing all the drawers and knobs. Lightly sand the dresser and drawer fronts. Wipe off any sanding dust. Read more

DIY Aged Chippy Paint Technique | Pretty Handy Girl

DIY Aged Chippy Paint Technique | Pretty Handy Girl

This is another one of those tutorials that I’ve been dying to share with you! Like sitting on my hands and anxiously waiting to type it out. But after taking 2 weeks off from blogging, I’m back and ready to give you this fabulous tutorial for achieving the aged chippy paint look on your next project.

DIY Aged Chippy Paint Technique | Pretty Handy Girl

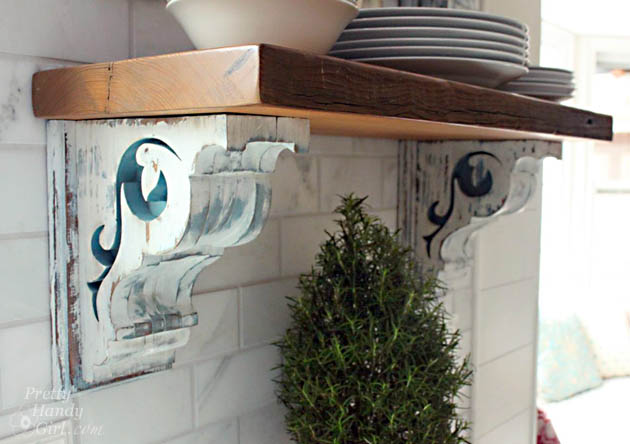
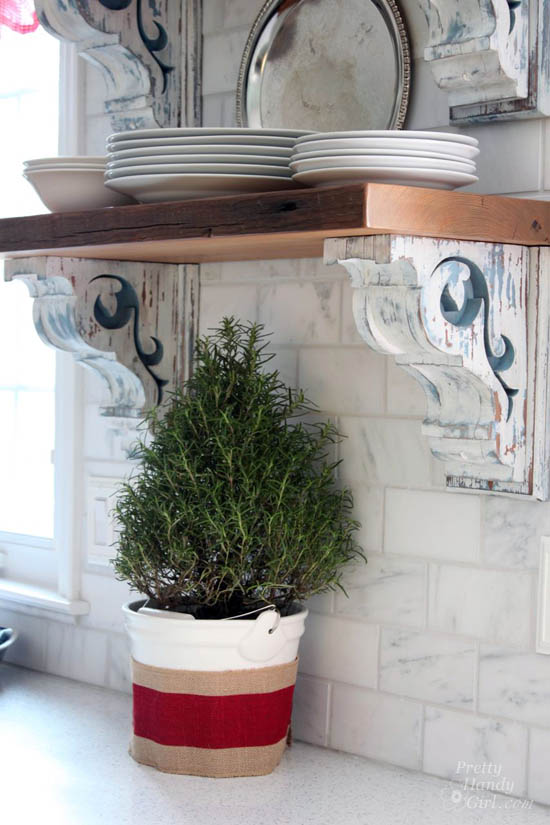
Before I give you the chippy gritty, I want to give you the background story on those gorgeous corbels.

If you’ve been following along, I finally completed my 13 month kitchen renovation. The last task was installing two open shelves on the full tile wall. Finding the perfect corbels to use as shelf brackets was not an easy task. I scoured eBay, Craig’s List and salvage shops. I was really getting discouraged. That was when I met Garlan from Southern Accents Architectural Antiques at Haven. We talked for a few minutes and he showed me some of the corbels he had in his store. There were some wonderful old ones, but I felt a bit like Goldilocks. One was too tall. The other not big enough, but the biggest problem was that I needed four of them. Garlan showed me some new corbels that he had. He told me he has a guy that can duplicate any corbel design and can customize them to meet any size requirements. It was as if the heavens parted and angels sang! I was elated and couldn’t wait to find an image of a design I liked. But, again, the Goldilocks in me couldn’t find the “perfect” corbels. So, I opened up Adobe Illustrator and started to design my own unique corbels.

Chippy Paint Technique

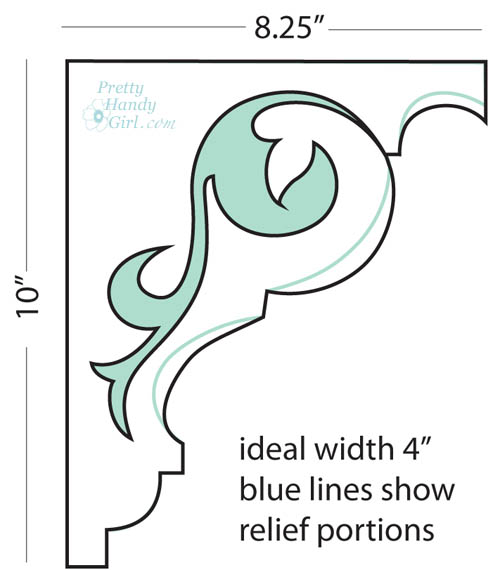
PHG Corbel Design for Sa1969.com


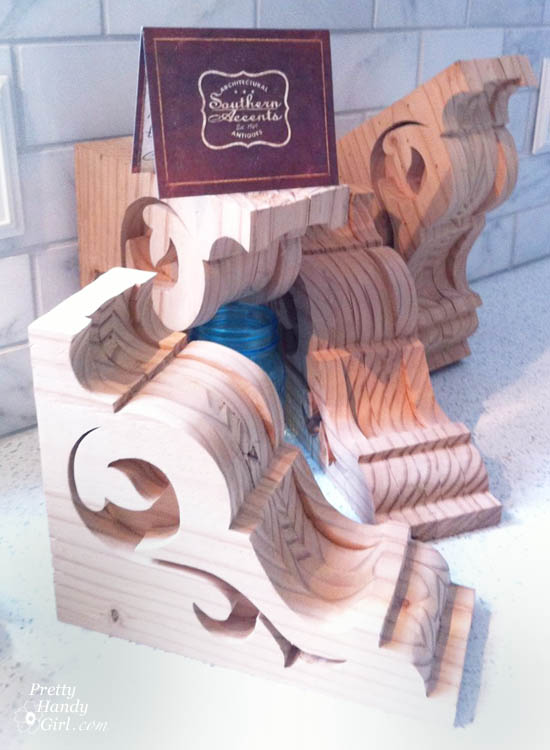
I designed a scroll pattern based off of one corbel I saw, but also added some relief portions inside the corbel. I sent the image to Garlan and a week later he sent me a picture of one of the corbels. It was love at first sight! I quickly approved the initial one and waited anxiously for the corbels to arrive. When I opened the box, they were beautiful and exactly as I had pictured them in my head.

Southern Accents Architectural Antiques corbels

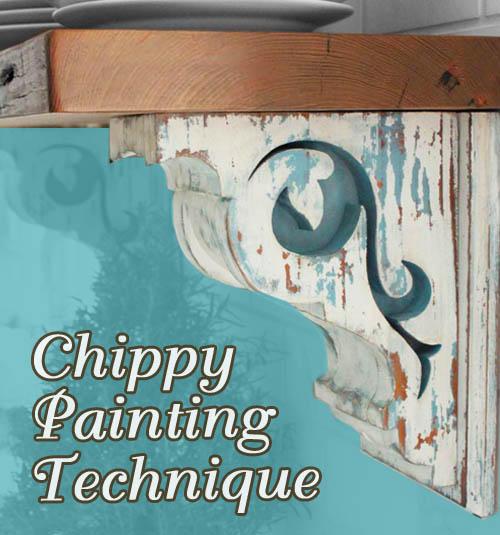
I set forth to give them an appropriate aged chippy paint look to fool people into thinking they were actually antique salvage. Here’s how I did it. Read more

How to Make New Wood Look Old, Weathered and RusticHow to Make New Wood Look Old, Weathered and Rustic

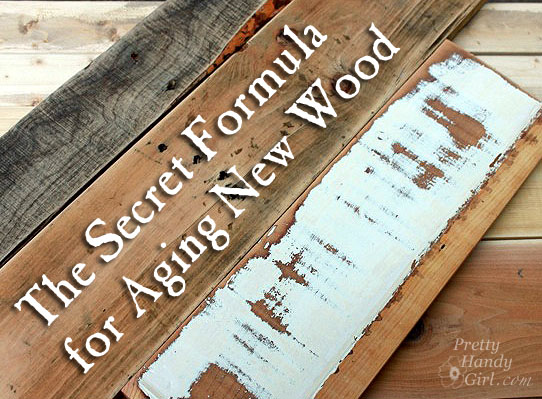
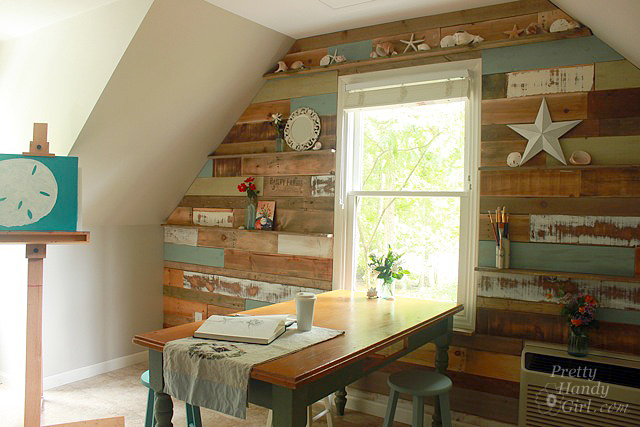
I have a confession to make. All the wood that you saw on my art studio wall is not exactly old or salvaged. Will you forgive me if I share with you the Secret to Make New Wood Look Old, Weathered and Rustic? 

In order to have enough wood, I had to buy some new pine boards off the shelf at Lowe’s. I actually chose furring strip boards because they are already chewed up and imperfect.

But, I also grabbed a few other supplies:

Optional: General Finishes Flat Out Flat Top Coat to protect furniture.

(I’ve included affiliate links for your convenience. I earn a small percentage from a purchase using these links. There is no additional cost to you. You can read more about affiliate links here.)

The Secret of Weathered Boards: 

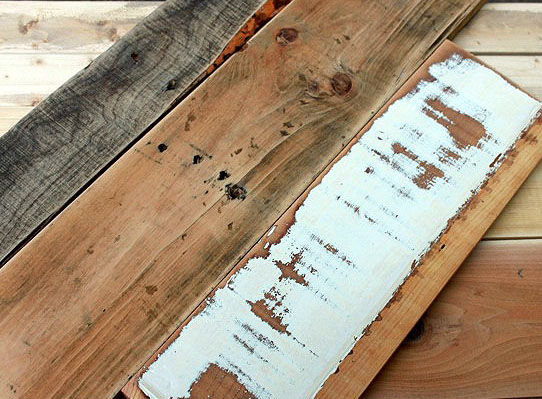
Old rustic boards are gray and have enhanced grain and plenty of dings and character. Replicating that look can be tricky unless you have the right tools, glazes, and a few tricks up your sleeve.

I wrote another post about aging and antiquing that shares some other techniques, but today I’ll focus solely on making new lumber look old.

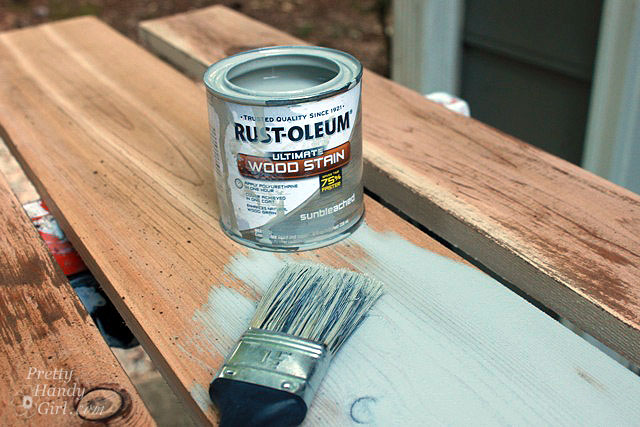
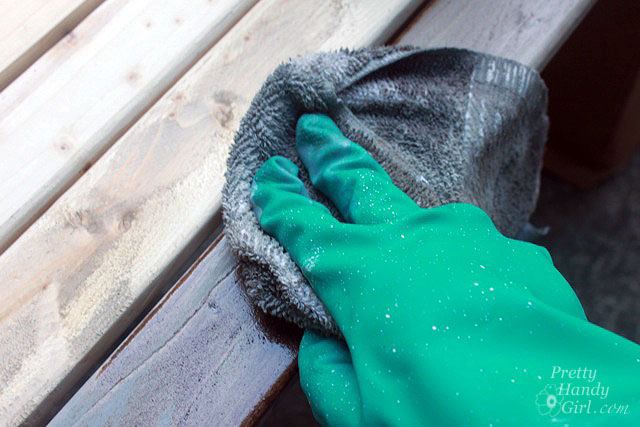
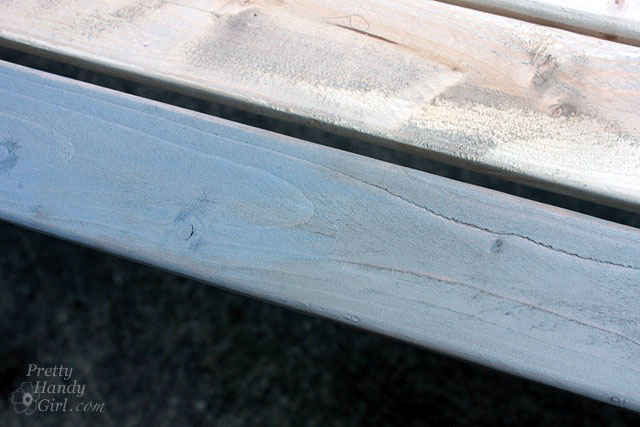
Weathered boards have a warm gray color. To create this color I stained the boards with Rustoleum sunbleached. Then wiped off the excess.

Next I added a little Minwax Early American and wiped it off.

The results are the blue-gray weathered look. For more dimension and detail try adding the glazing technique described below.


My Secret Rustic Glaze Formula:

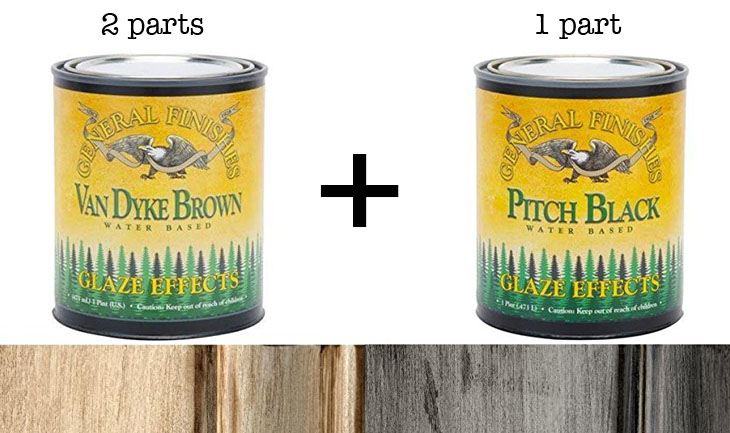
UPDATE: Valspar stopped making the products I originally used. I’ve tried a lot of alternatives, and settled on General Finishes Van Dyke and Pitch Black glazes to get the same look. The good news is that you don’t need the additional clear mixing glaze.

There is nothing in this world more beautiful to me than rustic barn wood. Those dark chocolate timbers that look like they’ve been gathering dirt for decades are gorgeous in my eyes.

To fake this look I created a glaze that works wonders when wiped over new lumber.

Mix 2 parts Van Dyke glaze and 1 part Pitch Black glaze.

Secret Formula to Age Wood

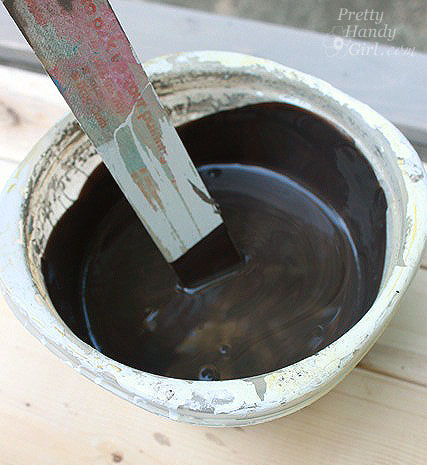
Mix thoroughly. The resulting color should be a very dark chocolate color. Adjust your color by adding more VanDyke or more Pitch Black.

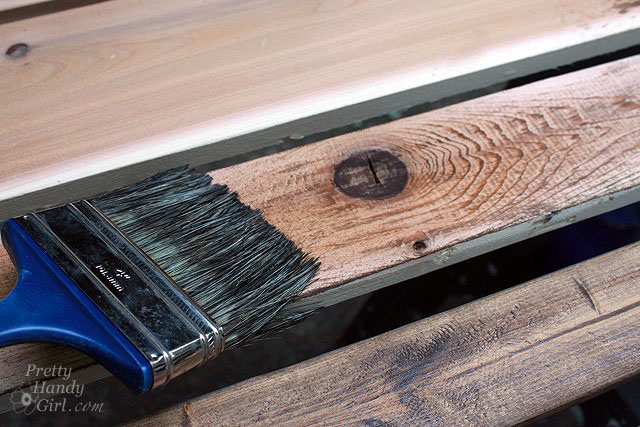
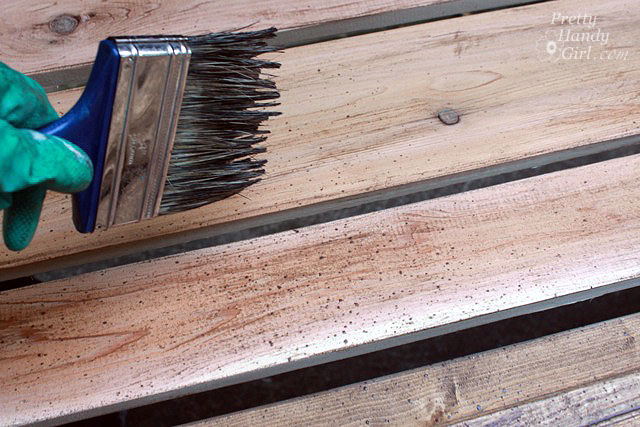
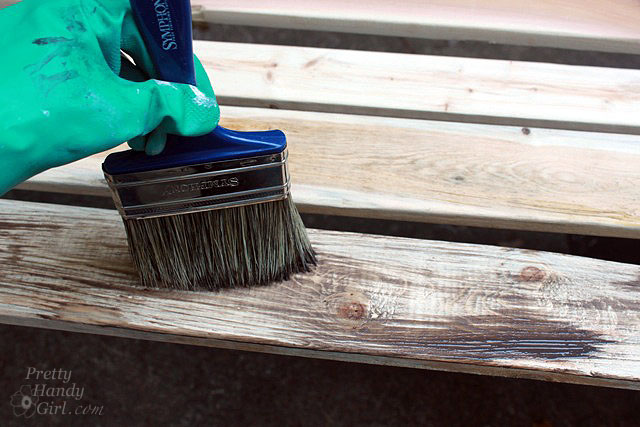
Dip your flat brush into the glaze and drag it over the wood. The glaze really accentuates the grain in the wood.

Shake or tap the brush on a stick to give your lumber age freckles.

For more uniform color, brush the glaze over the entire board (don’t forget the ends of the wood.)

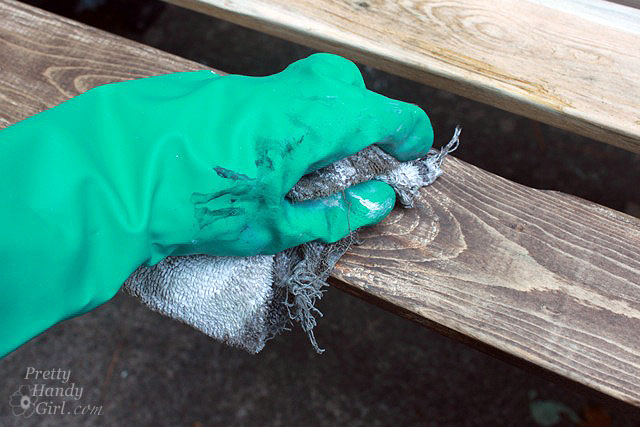
Rub the glaze into the wood and wipe off any excess.

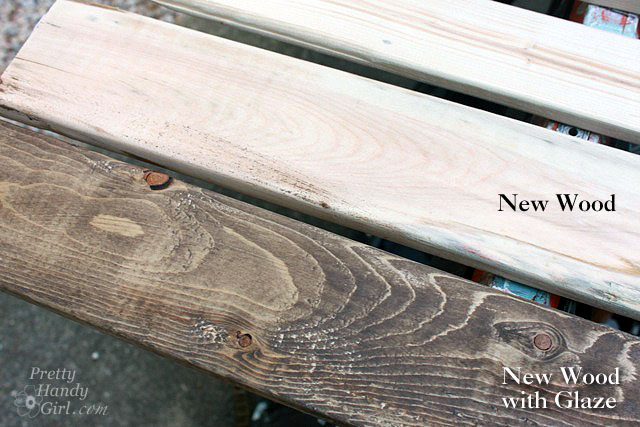
Take a look at the difference:

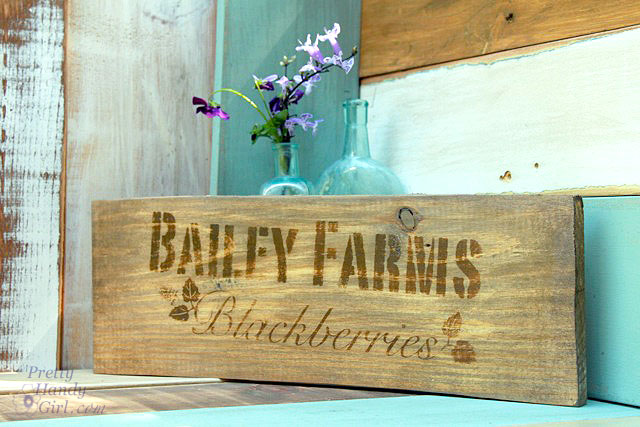
Not bad, did you know this farm crate sign is brand spankin’ new?

I hope I fooled you. Here’s the tutorial for making the farm crate sign.

In the meantime, have fun aging those new boards! I’d love to hear if you try these techniques and how they worked for you.

How to Make New Wood Look Old

Pottery_barn_like_organizational_box

I love a challenge. If you hold an object up to me and ask me how it can be transformed, I can usually name a few different things. So, when the Elmer’s #Look4Less Challenge was introduced, I jumped at the opportunity!

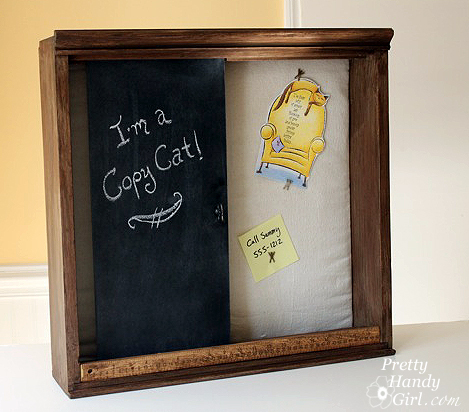
For this challenge I chose to recreate Pottery Barn’s Sliding Chalkboard Wall Organizer. I loved the idea of a sliding board and a bulletin board in the back. But, I especially loved the rustic wood look.

However, I wasn’t crazy about the price. (Obviously that didn’t stop the item from selling out!) So, if you want one for yourself, I’ll save you $100 and show you how to make your own!

My version cost approximately $30 (cost estimate based on materials used. If I used a 1/2 can of spray paint I calculated half the cost.) Personally, I spent about $10 out of pocket on this project because I had a lot of the supplies already. Plus, Elmer’s was kind enough to sent me some of the materials to make the project (shown as links below.)

Be sure to read the end of this post to learn how you can win your own Elmer’s materials!

In addition to the new art supplies, I bought an old drawer to use for the structure of my organization unit. I paid — are you ready for this — two dollars at our local Habitat ReStore! Seriously, only $2 for the main component of my wall organizer unit.
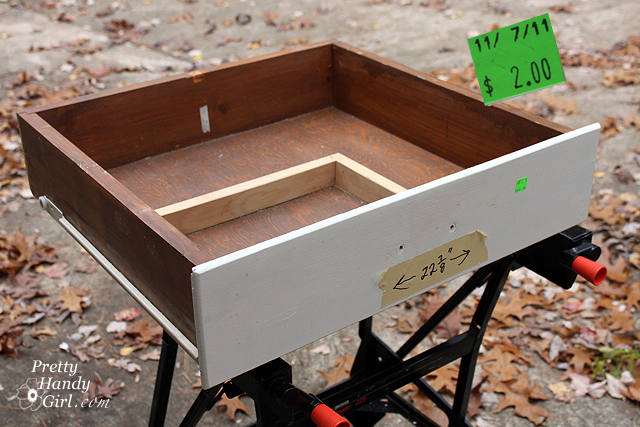
Here is a list of the rest of the supplies I used:


  • Krylon chalkboard spray paint
  • Drawer
  • Damp rag
  • Painter’s drop cloth
  • Batting
  • Wooden ruler
  • 1 Knob
  • Washers
  • Rustoleum brown spray primer
  • Behr glazing liquid
  • Valspar mocha glaze
  • Acrylic or latex paint (dark brown tester sample)
  • Acrylic or latex paint (light tan tester sample)
  • Wood putty
  • Saw
  • Hammer
  • Drill and drill bits
  • Handsaw
  • Brad nails
  • Finish Nail
  • Construction glue
  • Clamps
  • Pencil
  • Trim molding
  • 1″ x 1″ wood strips (or square dowels)
  • Duct tape

Prepping the drawer:

Remove any hardware from the drawer. Use a handsaw to trim off the sides of the face of the drawer. You want the sides to be flush with the sides of the drawer. The top and bottom of the face can extend beyond the drawer.
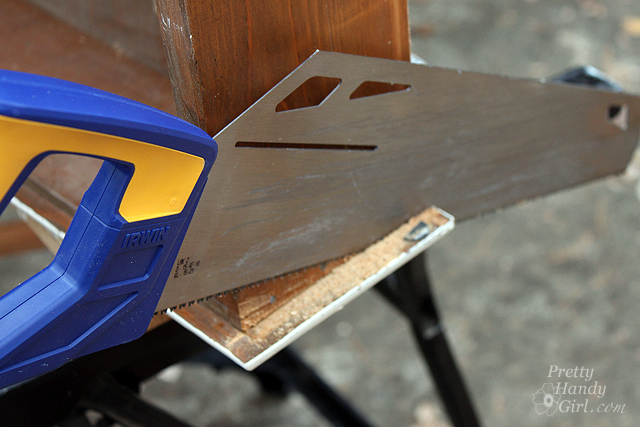
Orient the drawer so the face is now the bottom of the wall organizational unit. The rear panel of the drawer is now the top of the unit.

Add decorative trim molding to the top as shown:
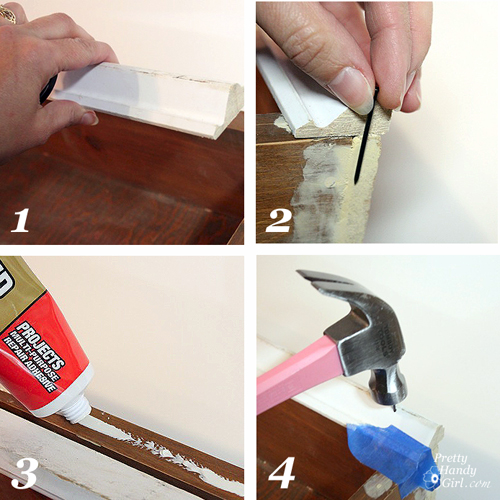
  1. Cut decorative trim molding to the width of the top of the unit/drawer. (Check with your local Habitat Restore for inexpensive trim.)
  2. Choose a finish nail that is long enough to go through the molding and into the drawer. Drill a few pilot holes into the molding (to avoid splitting the wood when you hammer a nail into it.)
  3. Run a bead of construction glue on the top of the drawer. Lay the molding on top of the glue.
  4. Use finish nails to hammer through the pilot holes and attach the molding to the drawer.

Wipe off the drawer/unit with a wet rag.


Faux painting the unit:

If you are dealing with a mixture of wood finishes (some paint, some stain), you will want to prime and paint your unit. I decided to give mine a faux rustic wood treatment (because I love that rustic wood look!) Here are the basic steps:
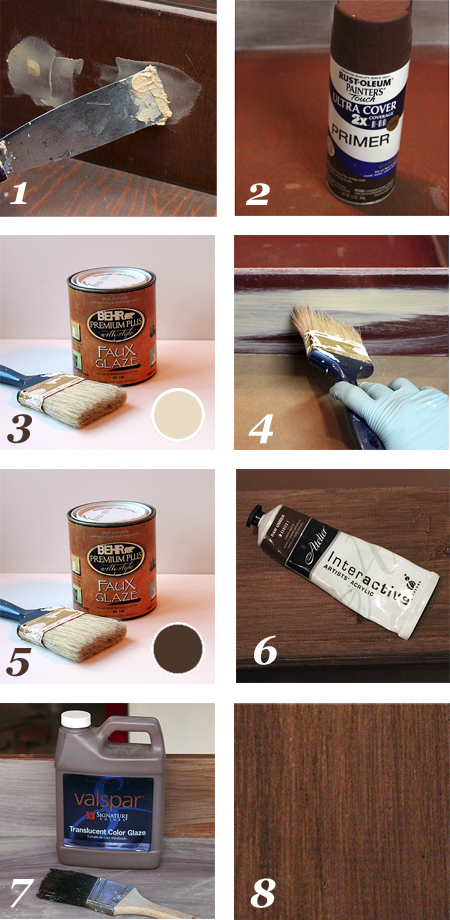
  1. Use wood putty to fill any holes or cracks. After the putty has dried, sand it smooth. Wipe off any dust from the wood using a damp rag.
  2. Prime the entire box (minus the back) with Rustoleum brown primer.
  3. Mix 1 part glaze to 2 parts light tan paint.
  4. Brush the mixture onto the unit using a tattered paint brush. Keep the strokes in long lines to mimic wood grain.
  5. Let that layer dry. Mix 1 part glaze to 2 parts dark brown paint.
  6. Brush it on the unit using the same technique as step 4.
  7. Finish up by brushing a coat of Vaspar Mocha glaze over the entire unit.


Creating the bulletin board:

After the glaze has dried, cut a piece of Elmer’s White Foam Board the dimensions of the inside of the drawer/unit.
Cut a piece of batting the same size as the foam board.

Cut a piece of painters’ drop cloth 2-3″ wider (on all sides) than the foam board.

Layer the drop cloth, then the batting and top it with the foam board.

Wrap the edges of the drop cloth around the foam board and secure it with duct tape.

Add a few Elmer’s CraftBond Glue Spots Pop-up Medium to the back side of the foam board and press the board into the back of the unit. Instant bulletin board!


Adding a graphic letter to the bulletin board:

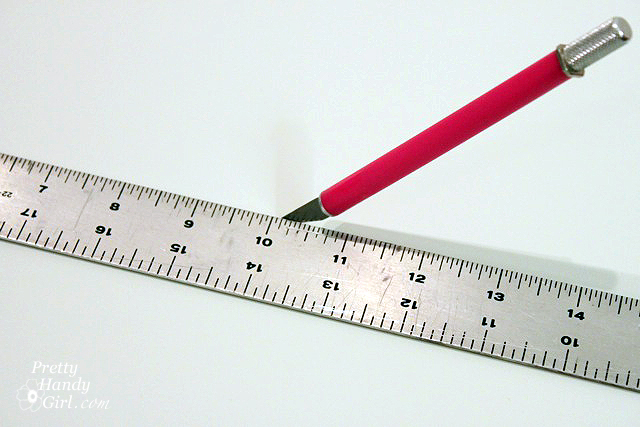
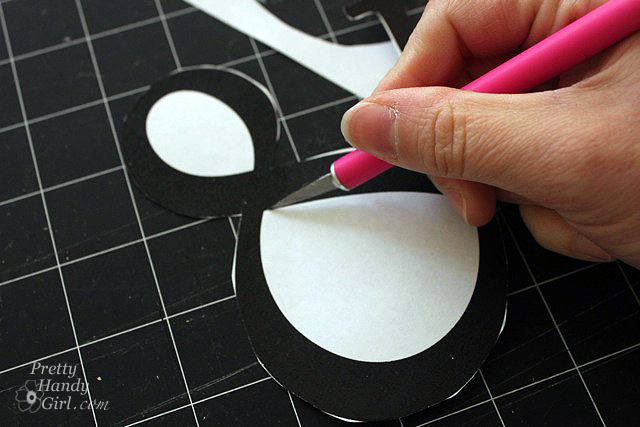
Print out a large letter, number or symbol. Cut out around the shape using an x-acto knife.
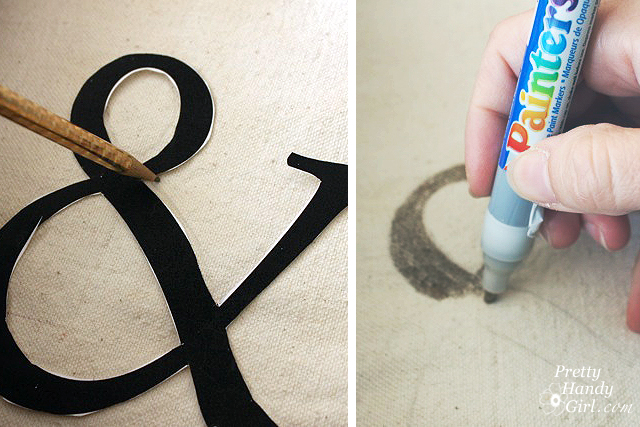
Position the cut out onto the bulletin board and trace around the edges lightly with pencil.Use an Elmer’s Painters gold paint marker to color inside the pencil tracing.
 

Creating the sliding chalkboard:

Cut the Elmer’s Black Foam Board the height of the interior of the drawer/unit and about 1/3 the width.

Spray the black foam board with the chalk paint. Add 1-2 more light coats per the directions on the can.
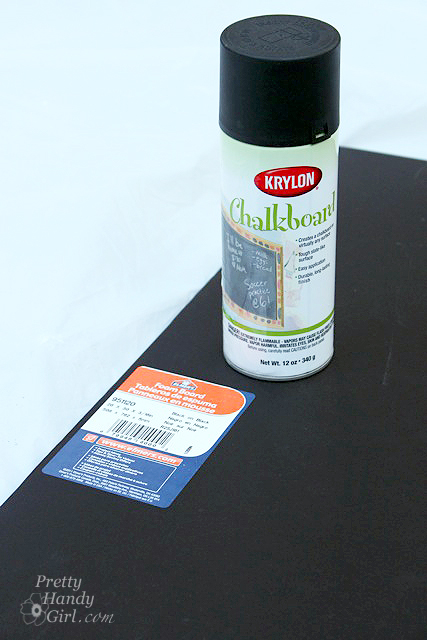
Measure the interior width at the top and bottom of the organizational unit. Cut two 1″ x 1″ strips of wood (or square dowels) for the top and 2 strips for the bottom. Drill a hole in each end of the strips.
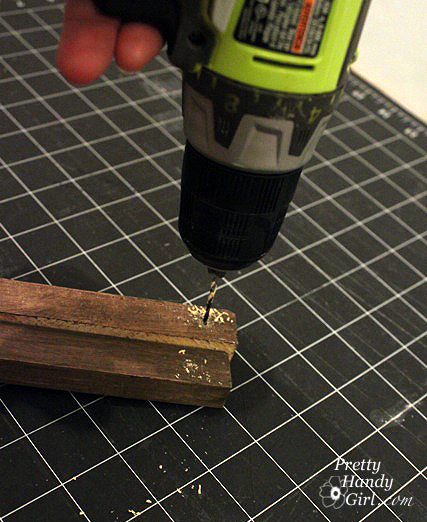
Measure out 1″ from the bulletin board, on the bottom of the unit. Mark this location. Repeat for the top . Run a bead of construction glue onto the bottom of the wood strip and then adhere it to the bottom of the unit at the 1″ measurement mark.

Hammer brad nails into the predrilled holes. Repeat for the top of the cubby. (Two 1″ square strips are shown, but only install the back ones at this time.)

If the chalkboard paint has dried, rub a piece of chalk all over the board to season it. Wipe it clean with a dry cloth.

Drill a hole into the chalkboard where you want the handle. Feed the handle through. Add washers to the backside of the chalkboard if you need to take up some of the slack on the screw.
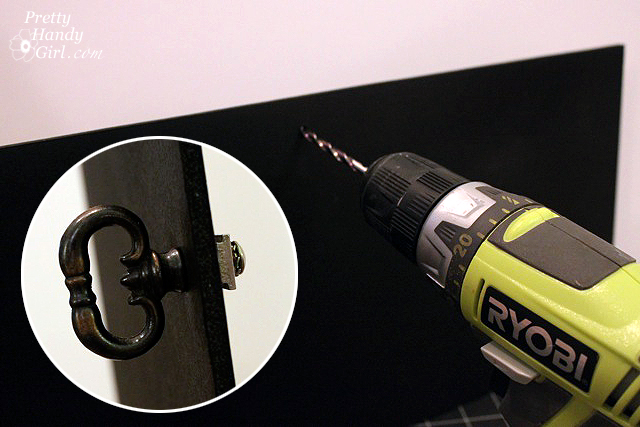
Insert the chalkboard into the wall unit and rest it against the first strip. Add the second strip in front of the chalkboard and attach it the same way you did above.

Be sure that the wood strips are not too snug against the chalkboard. The board should have enough freedom to slide back and forth freely.


Finishing touches:

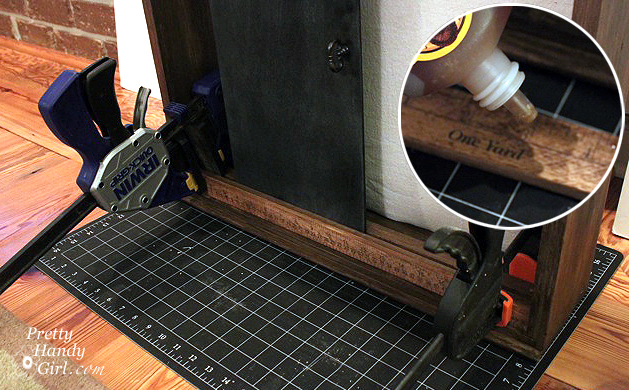
If you want to give your ruler some age, rub a walnut stain onto the wood. Let it dry. Glue the wooden ruler to the front of the wood strip on the bottom using construction glue.

Clamp the ruler in place and let it dry overnight.
Add your pushpins and a message to the chalkboard and enjoy your efforts! You just saved yourself $100!!! Woot!
If you want instructions for hanging the unit, check out this post on hanging objects on the wall (the right way) the first time.

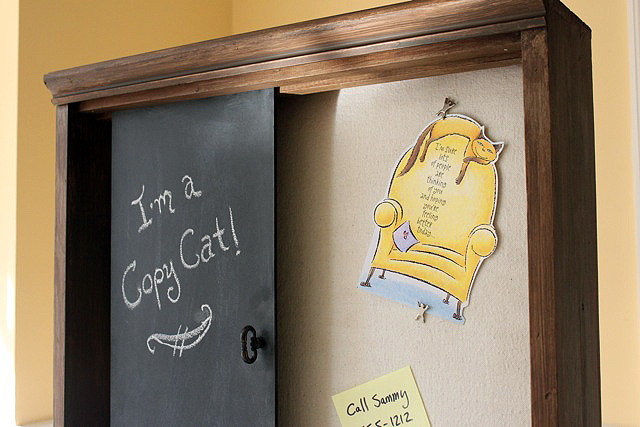
I’m pretty pleased with my Pottery Barn copy cat. Not to be mean or anything, but I like mine better because of the ruler,

the decorative crown molding,
and most of all for the price!!!
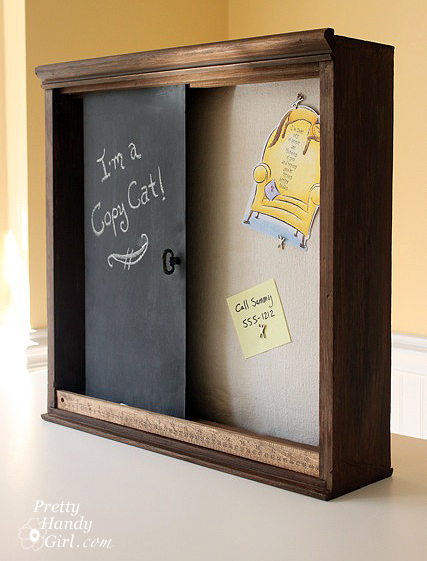

Do you like my Pottery Barn knock off? Or does it still look like an old discarded drawer to you?


Disclaimer: This project has been compensated as part of a social shopper insights study for Elmer’s #gluenglitter #collectivebias #CBias. I was paid a small fee and sent some Elmer’s products. However, the ideas and opinions expressed in this post are solely mine.

Sharing with Sawdust and Paper Scraps – Build{hers} Link Party

Did you like this post? Want to be notified when there are more fantastic tutorials by Pretty Handy Girl? Sign up to receive emails in your inbox:

Enter your email address:

Delivered by FeedBurner

Or follow me on Twitter or Facebook so you can be the first to know!
 

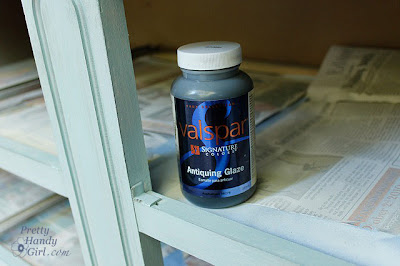
I’ve seen several talented furniture rescuers (Miss Mustard Seed comes to mind) using Valspar Asphaltum glaze on their shabby chic creations.

Valspar Asphaltum Antiquing Glaze

I have to tell you right now, I had not been very successful with this glaze. Every time I tried to use it, I ended up wiping it all off and ditching my efforts. However, I finally figured out the technique for using this glaze (on this project). The trick can be summed up with “less is more”!

I poured out a quarter size dollop of the Valspar Asphaltum glaze.

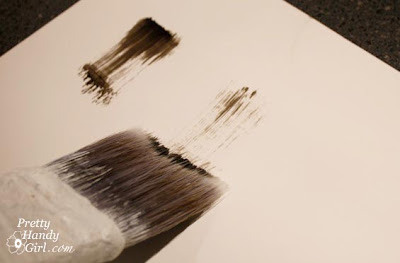
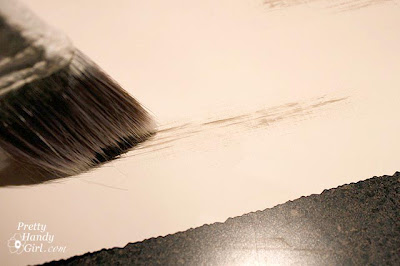
Then gently dab your paint brush into it. Dab almost all of the glaze off onto a rag.

Next, lightly brush the glaze over your surface. The picture below shows using TOO MUCH!

Too Much Glaze

This is the amount you should see when you drag your paintbrush over the surface. Very dry brush and hardly any glaze on it:

Just Right

If the results still look too dark to you, go ahead and wipe the glaze off with a rag.

You can also drag your brush sideways. This works especially well on furniture edges.

Just Right, Sideways Dragging

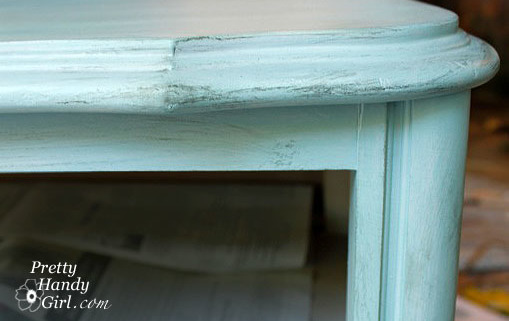
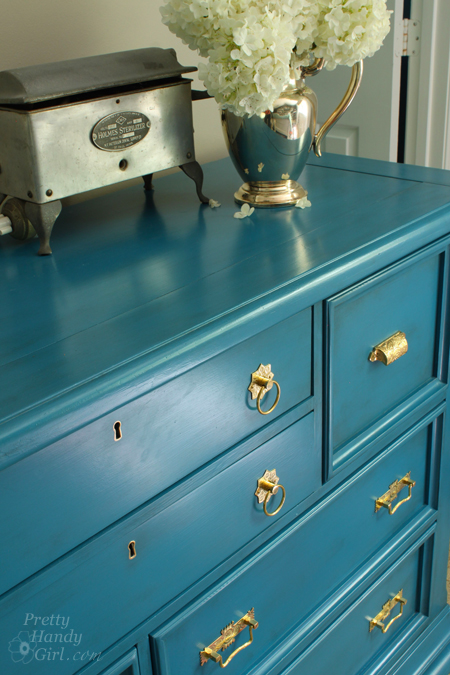
Here are the results of using the asphaltum glaze on this dresser.

Now that you’ve seen the technique, what do you want to try this out on?