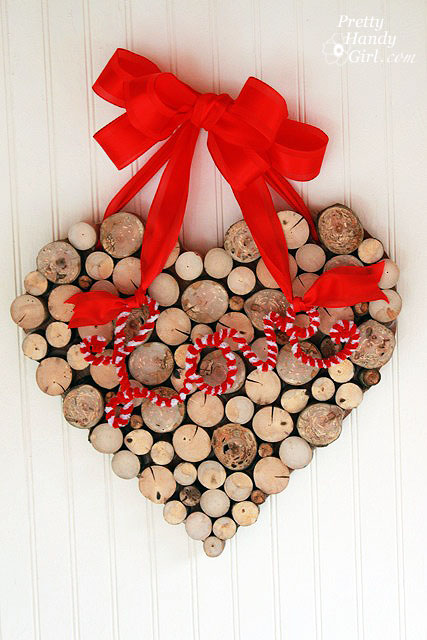
I am officially kicking Valentine’s Day decorating into high gear! Yesterday I shared with you my wooden branch heart wreath. Thank you for all your nice comments about it. I wasn’t sure anyone would like it because it looks so…well…different.

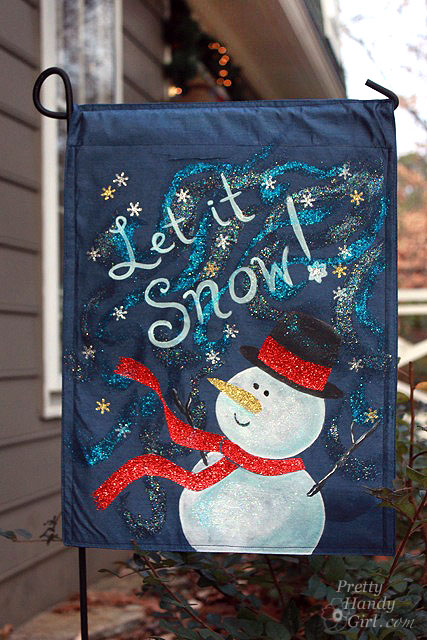
Do you remember my snowman wreath made from a Dollar Tree placemat?

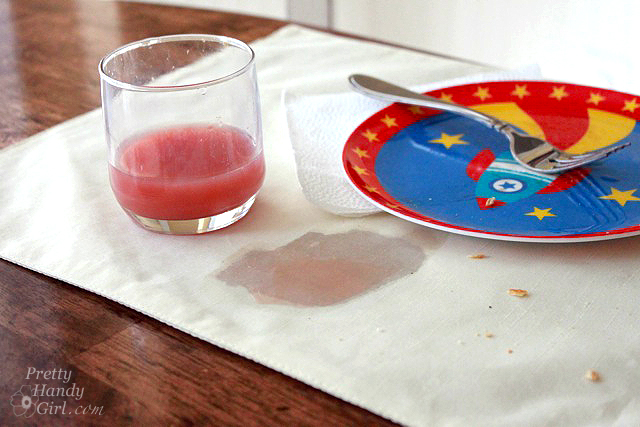
Well, I was given the opportunity (by my  messy boys) to make a Valentine’s theme one.

You can view my tutorial for making the placemat “Just Like New” by turning it into a “Bee Mine” garden flag at I Am Momma – Hear Me Roar!

I’m guest posting there today while she hob knobs with THE Martha Stewart! Is that like 2 degrees of separation for me? I’d like to think so.

Have a great Thursday y’all! See you tomorrow for yet another Tool Tutorial Friday.

Photobucket

ANNOUNCING the Best DIY Project of 2011 CONTEST!!!

Stacy from Not Just a Housewife is hosting a contest to find the Best DIY Project of 2011. As the power tool wielding writer of a very popular DIY blog, she is the perfect person to host such a competition!

Here are the details:

  1. Go to Not Just a Housewife on January 2nd.
  2. Link up your favorite DIY projects you did this year.
  3. Sit back and wait for some esteemed DIY guest judges to pick the top 5 projects.
  4. Then you get to vote! ALL of you will have the chance to vote for your favorite project to win the Ultimate DIYer prize package!!!!!

The top 5 will be announced on January 9th. Voting will start the 9th and run that whole week. The winner will be announced on January 16th.

Here’s a little sneak peek of the companies who are donating prizes:


The projects will be judged by these super handy DIY bloggers!!!! Check out the line up:

The projects will be judged based on creativity, how well it was executed, and visual interest. Basically, if we like the project and think you did a good job 🙂

Here are the DETAILS:

*You must be a follower of Not Just a Housewife

*You may link up a max of 3 DIY projects (cause I know how hard it is to pick just one….)

*The project(s) must have been done by you (it is alright if you had a little help but the idea and the majority of the work should be YOU)

*The project needs to to have been completed and posted about in 2011

*You need to add the contest button in the post or on your sidebar (I will provide the button code when the contest goes live)

Head forth and link up your projects!!!!!!!


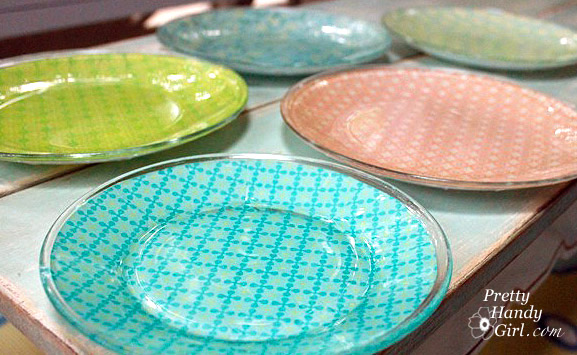
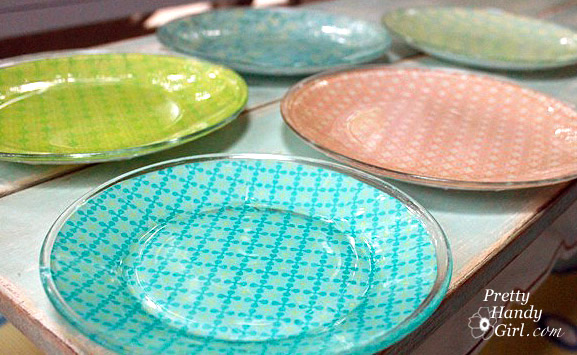
Today I want to share with you an easy craft tutorial. I call these my citrus themed glass plates.

Before my 4oth birthday party, I had been scouring the stores for some pretty citrus colored plates to serve sweets on. I was coming up empty-handed, was running out of time, and was concerned about my budget.

I happened to stumble upon some glass plates I bought at Goodwill awhile ago. And then the idea hit me! Why not make my own decorative plates!

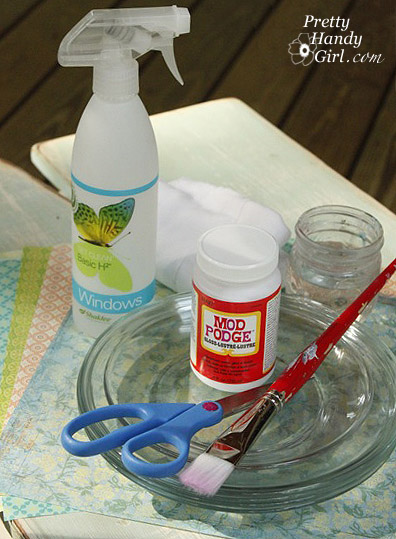
Materials:

  • Mod Podge Glossy
  • Paint Brush
  • Jar of Water
  • Glass Cleaner
  • Paper Towels
  • Scrapbook Paper (thin works better)
  • Glass Plates
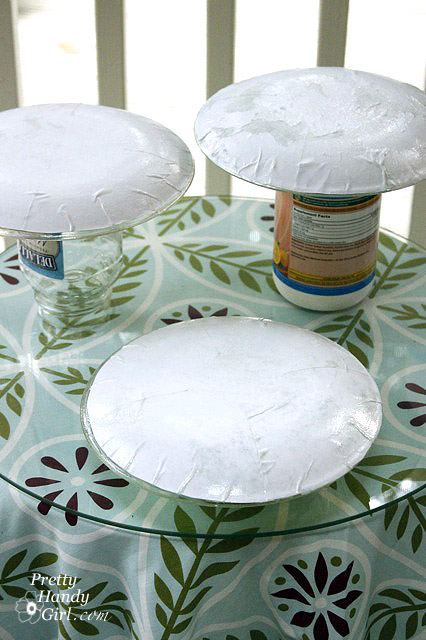
  • Recycled Jar or Cans to Dry Plates on
  • Scissors
  • Pencil

Instructions:

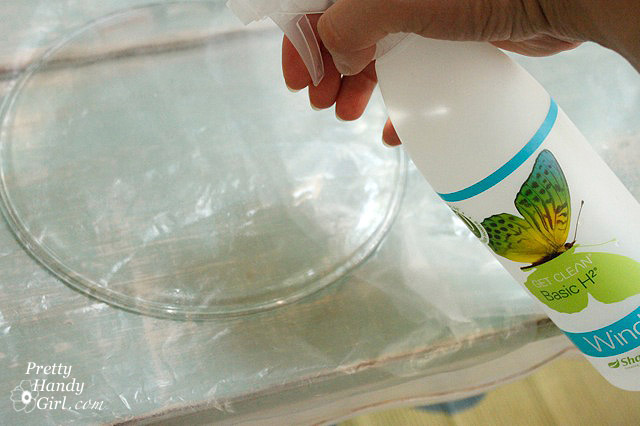
1. Clean the bottom of the glass plates with glass cleaner.

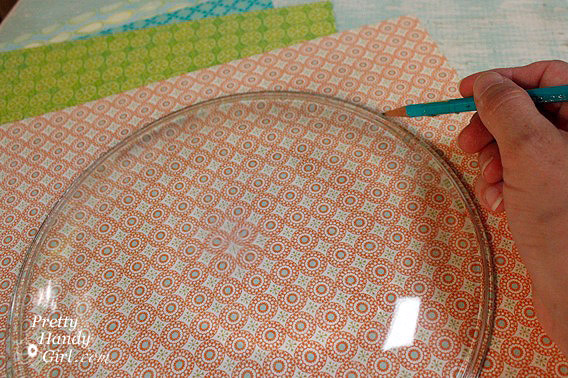
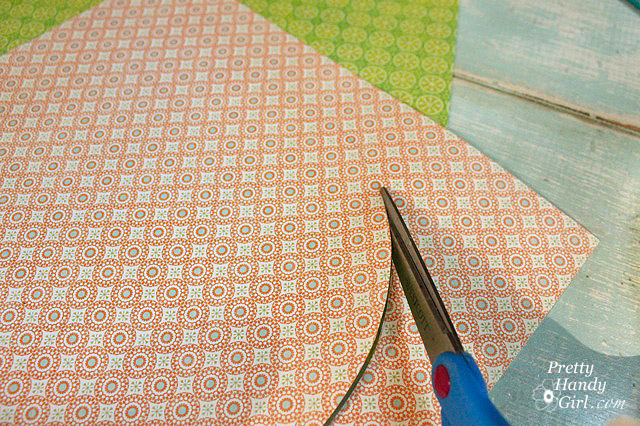
2. Trace around the plate on the scrapbook paper.

3. Cut out the circle.

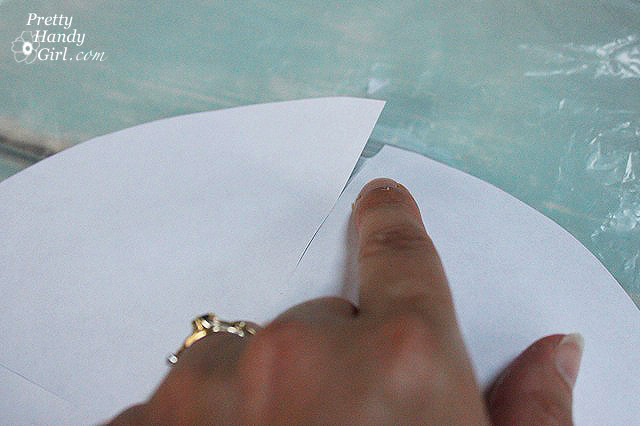
4. Snip four slits into the circle but NOT all the way to the center.

5. Snip four more slits centered between the first set of slits. You should end up with eight cuts equally spaced.

6. Cover the bottom of your glass plate with mod podge.

7. Center the cutout circle onto the bottom of the plate, pattern side down. Gently press the paper onto the plate allowing the paper to overlap slightly at each slit.

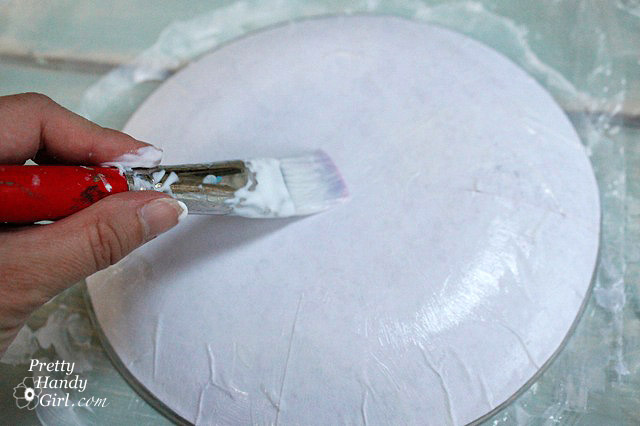
8. Liberally apply mod podge over the scrapbook paper.

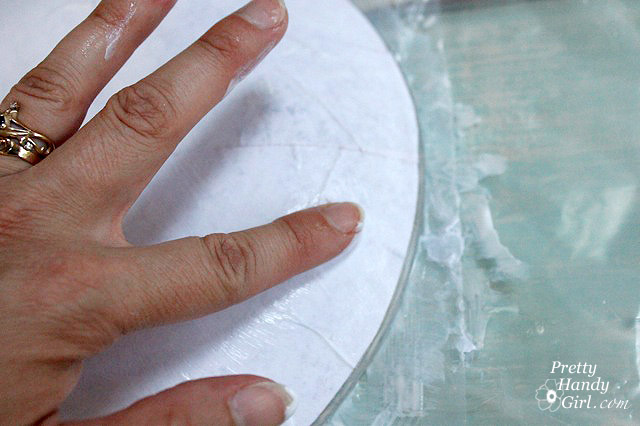
9. Use your finger to smooth out the wrinkles in the paper. But, be gentle or the paper will tear.

10. Lay the plates upside down on the jars and cans until dry. Add more mod podge if needed to seal the scrapbook paper and glue it down.

Turn them over and enjoy your unique decorative plates.

Note: Do not fully submerse the plates in water, wipe them off and wash the tops so as not to mess up the paper side. Stack them with a paper towel in between so they don’t stick together.

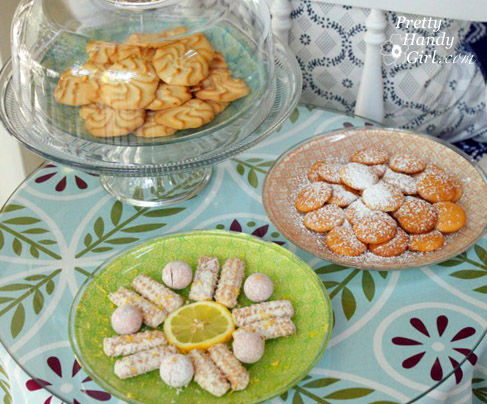
Load them up with some light citrus sweets and they will be the hit of the party!


The possibilities are endless with these plates. Think about personalizing them with photos or monograms. What are your ideas for making your own plates?


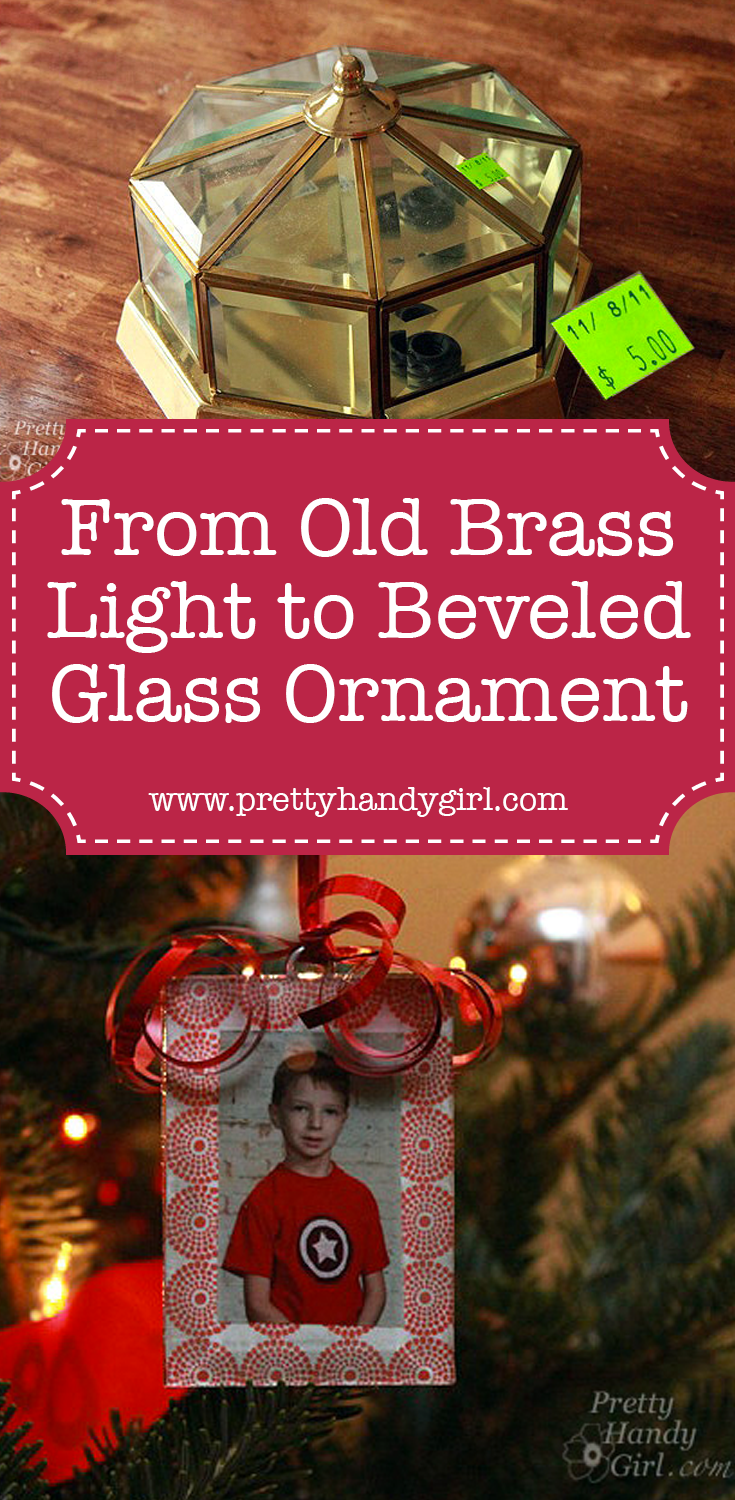
I had so much fun at the Habitat ReStore talk this past weekend. My favorite holiday decorations were these adorable beveled glass ornaments. Would you believe me if I told you that they began life as a dated octagon brass light fixture?
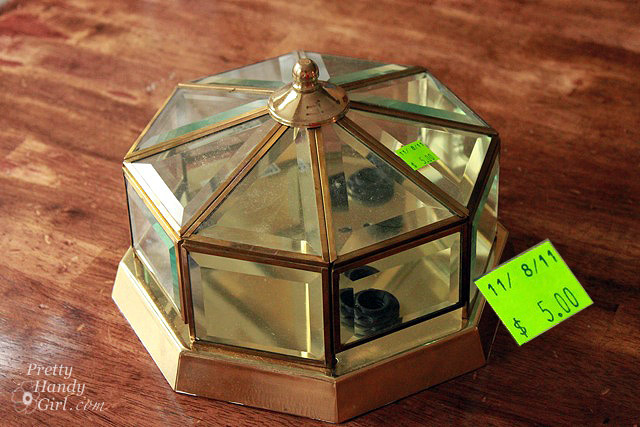
Well, they did! And here is the best part, for $5 you can score one of these fixtures at your local Habitat ReStore and make 16 ornaments from the one light!

Materials:

  • Beveled glass octagonal light fixture (the flimsier the brass the better)
  • Needle-nosed pliers
  • Wire cutters
  • Small flat head screwdriver
  • Gloves
  • Glass cleaner
  • Soft cloth
  • Scrapbook paper
  • Printed photos
  • Mod podge
  • Paint brush
  • Screw eyes
  • E-6000
  • Wax paper to protect work surface
  • Ribbon
  • Scissors


Instructions:

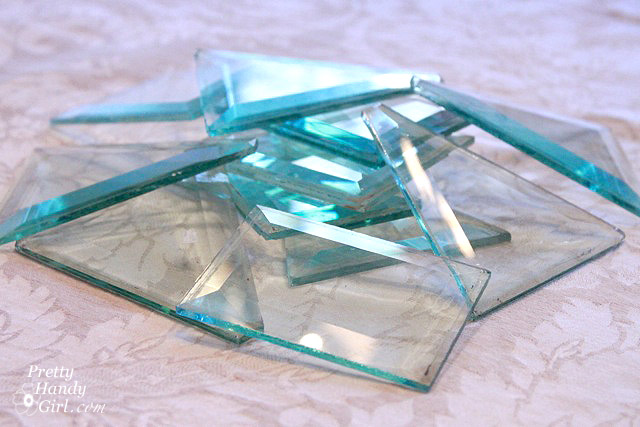
Put on your gloves for this first task! To free the beveled glass, you’ll need to poke, prod and cut at the brass surrounding the glass. Inserting a flat screwdriver will help to pry up the edges. As the edges come loose, cut into the metal with wire cutters, and pull it apart using needle-nosed pliers. All the while, use caution so as not to break the glass pieces.

After all the glass is free, clean both sides of the glass with windex and a soft cloth. Scratch off any dirt with your fingernail (or a razor blade).
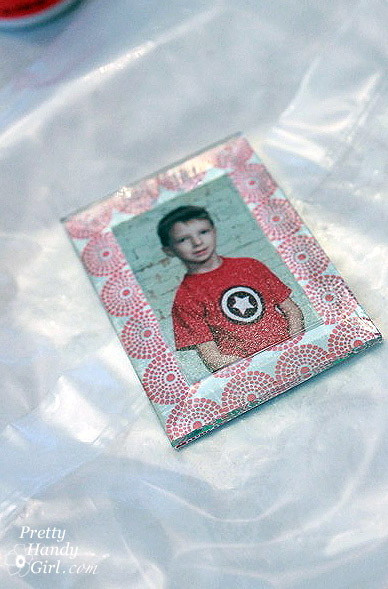
Cut photos to fit inside the middle of the beveled glass piece.

Trace around the glass and cut a piece of scrapbook paper the same size as the glass.

Coat the back of the photo with mod podge and center it on the scrapbook paper.

Gently coat the front of the scrapbook paper border with mod podge (do not paint mod podge onto the photo or streaking can occur.)
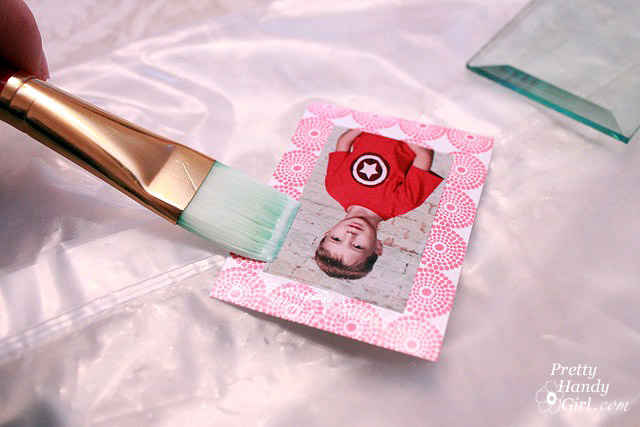
Press the flat side of the beveled glass on top of the scrapbook paper/photo.
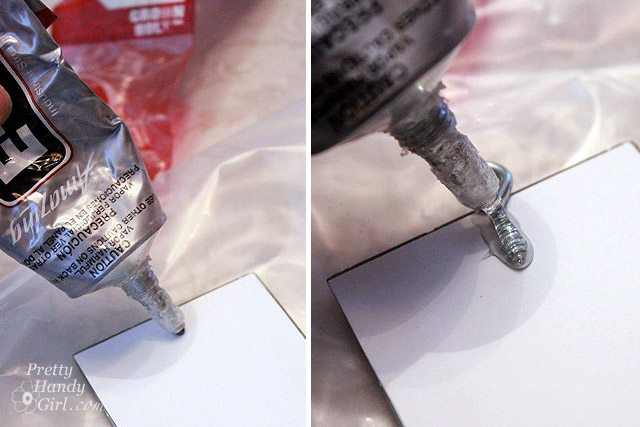
Flip the glass over and put a dollop of E-6000 at the top center of the scrapbook paper. Lay one screw eye into the glue, then cover the screw with a small dollop of E-6000 glue to secure the screw eye.
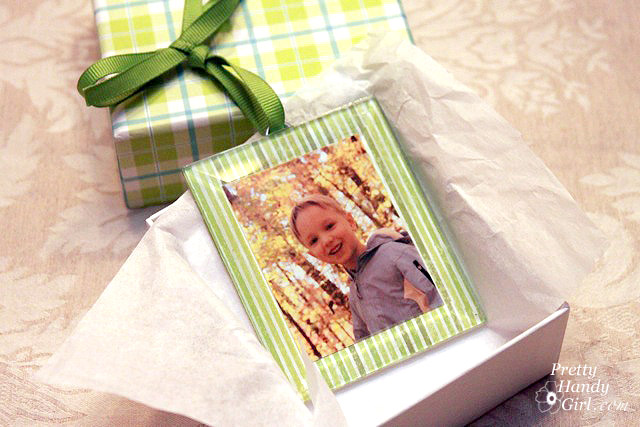
After the mod podge and E-6000 has dried, cut some pieces of ribbon and thread them through the screw eye. Make a loop with the ribbon and hang it on your tree!

Or give them as gifts to the Grandparents!
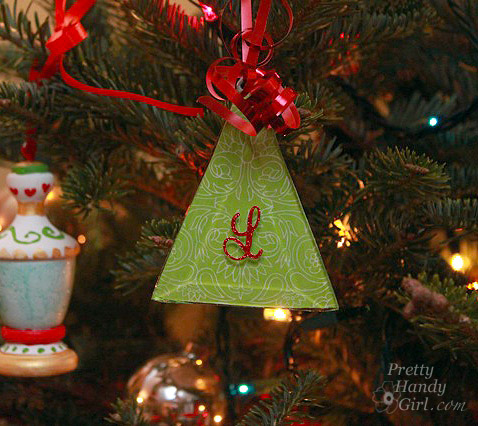
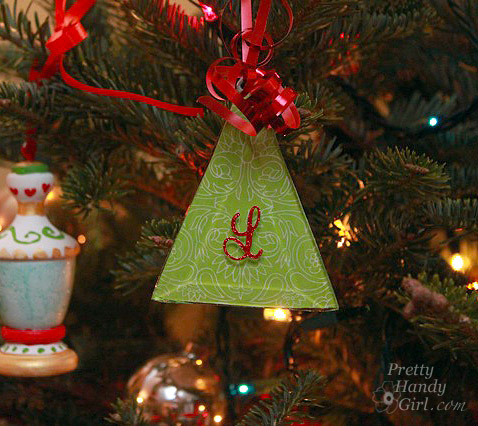
I made another ornament using scrapbook paper and stuck a monogram letter sticker on top of the glass. I also added a small quote on another ornament. The possibilities for this project are numerous!
I had to share with you a few other transformations that I showcased during the talk at the Habitat ReStore:

I took an old chandelier and flipped her over, coated her with primer, heirloom white spray paint and then added some distressing and finished with some antique gold Rub n’ Buff.
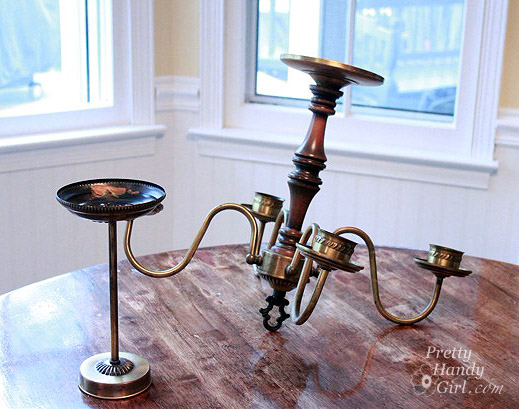
Now she’s a beautiful candelabra for our dining room table!
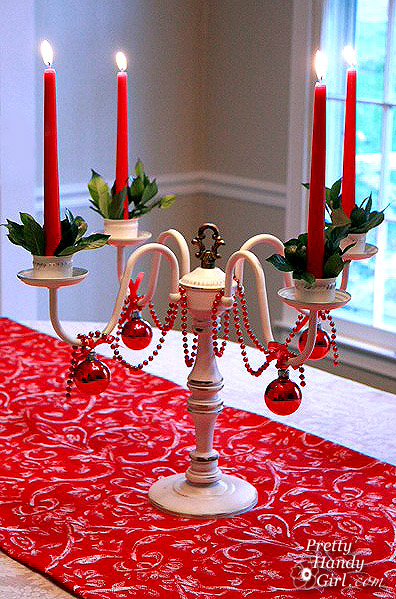
I used the canopy (round flat disk that attaches to the ceiling) as the base for the candelabra. When you take apart a light fixture, you can get creative by flipping and switching around parts and pieces.

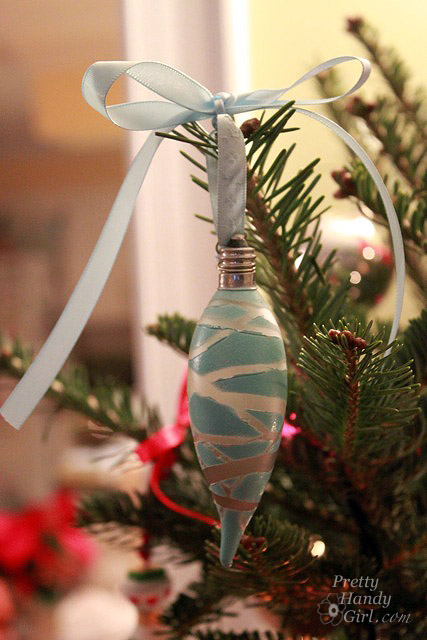
Old lightbulbs became adorable little ornaments with a few stickers and a coat of spray paint. My favorite is this clear bulb that I added a heart sticker to. When I peeled off the sticker a little heart shaped window remained. Peek inside to see the filament.

If you’ve ever wrapped an easter egg with rubber bands before dying it, you’ll recognize this pattern.
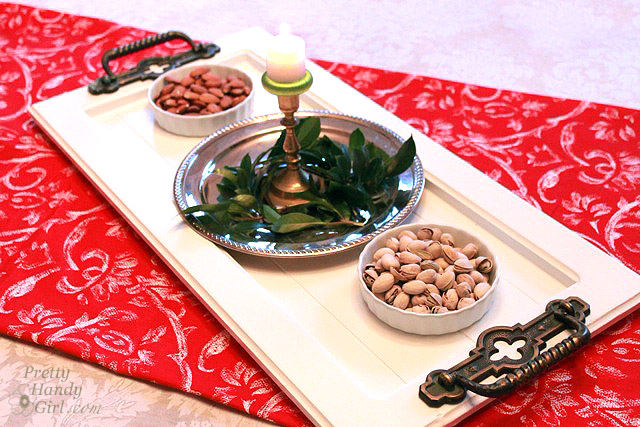
A $2 cabinet door and some chunky cabinet handles partnered to form a holiday serving tray. The handles also got a little Rub ‘n Buff for shine.
I’m sorry I don’t have the tutorials for you right now. Most likely at a later date, I’ll post them for y’all.

I have two announcements:

#1 – The winner of the RIT dye giveaway is: Judi! She said,  “Dye WOOD –really !!!! Can’t wait to see what all else you (and I) can dye !! Loving it !!”

RIT Dye

#2 – My son let me paint his cast like a candy cane! I used KILZ Clean Start (zero VOC) primer and a flat brush to give his cast the stripes. One of my facebook fans had the genius idea of asking Santa to sign it!
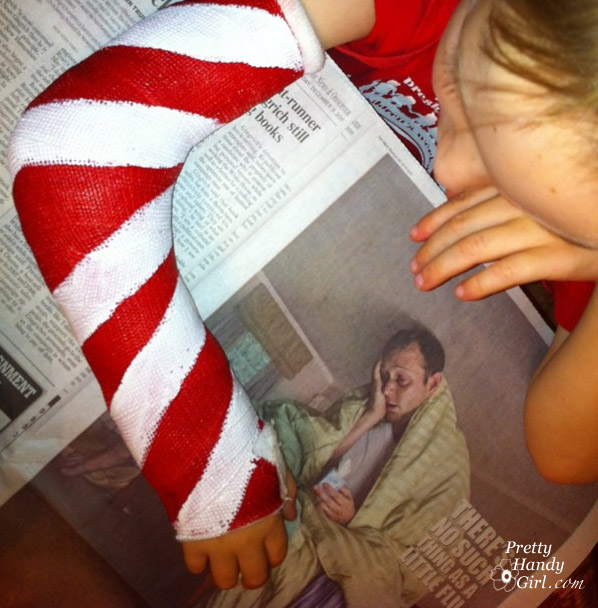

Let’s just hope that he can keep this cast for more than a week!


Linking up to Home Stories A2Z Tutorials & Tips TuesdaysCentational Girl’s Holiday Home Craft Link PartyNot Just a Housewife’s Show Me What Ya GotFunky Junk Interiors SNS


Pin for later!

The holidays are at full throttle speed and my boys couldn’t be more excited. Myself? I still haven’t decorated the house — in fact — truth be told I let Pretty Handsome Guy and the boys bring in the tree and decorate it. But, I did want to get into the holiday spirit so I poured a little eggnog into my coffee (Dee-lish-ious!!!) and sat down to make a humorous holiday shirt for my eager little ones.

If you’ve ever used silk screens before you know how wonderful they are for making duplicates. Team t-shirts, family reunion shirts, signs, banners, gift bags, pillows and linens are only a few things that you could silk screen. But, getting fine details and creating a screen that has text on it was usually reserved for the professionals who had the proper equipment. Well, those days are gone! Plaid has developed a DIY silk screen kit that allows you to create a screen using any black and white design printed on your home computer using regular printer paper. No transparencies and no need to reverse your image! Plus, for those of us eco-conscious crafters, the simply screen inks are acrylic and non-toxic! The  Simply Screen kit retails for $39.99 and you can purchase the refill screen pack for $19.99. The kit can be found at Hobby Lobby or online at shop.plaidonline.com.

Plaid was kind enough to send me a kit to try. And thankfully, several bloggers (especially Crafts by Amanda and Mrs.Greene), worked out the kinks and shared their knowledge. Gotta love that creative blogger network ;-).

This video will give you all the tips and tricks you need to know to get a perfect screen exposure when creating a Simply Screen silk screen:

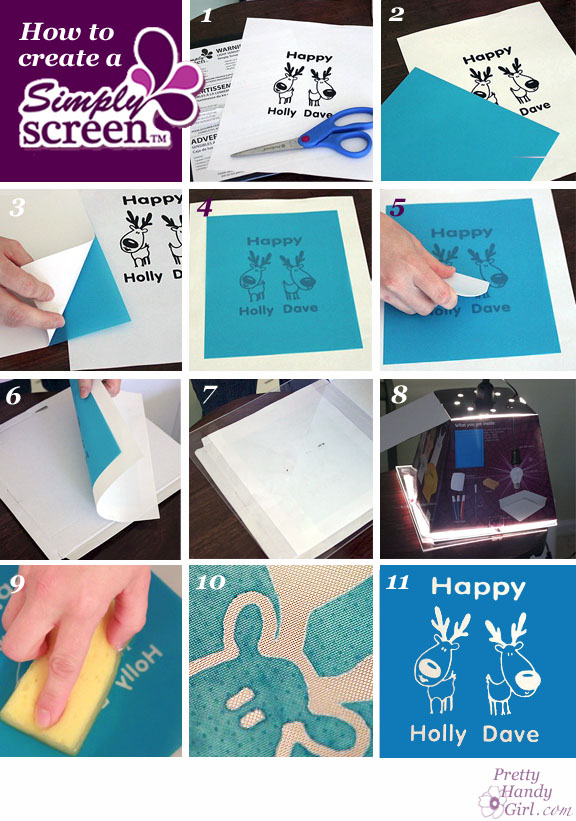
If you have trouble viewing the video, here are the steps to create the screen:

1. Print out your black and white design on regular printer/copier paper. Touch up any white spots with a sharpie marker.
2. Remove one screen from the black plastic envelope. Cut the screen down to size (leave at least 2″ on all sides of the design.) Put the unused screen back into the black plastic bag.
3. Peel the backing off the screen.
4. Flip it over and lay the sticky side onto your image.
5. Use the squeegee to firmly press down on the screen and to affix it to the design.
6. Turn the image and screen over so the screen is on the bottom. Lay it onto the bottom of the Simply Screen box.
7. Lay a piece of plexiglass or glass on top of the screen and printout.
8. Close the lid, turn on the light, and set your timer for approximately 25 minutes.
9. Turn off the light, remove the screen and immerse it in tepid water for 30 seconds. Gently rub the design with a sponge.
10. Continue rubbing both sides of the design until there is no blue emulsion in the graphic areas. The graphic should be a clean see-through image.
11. Dry your screen and follow the directions below to make your screen prints.


Printing Using your Silk Screen:

Now that you have learned how to create the screen, printing with it couldn’t be easier! This is truly the fun part.

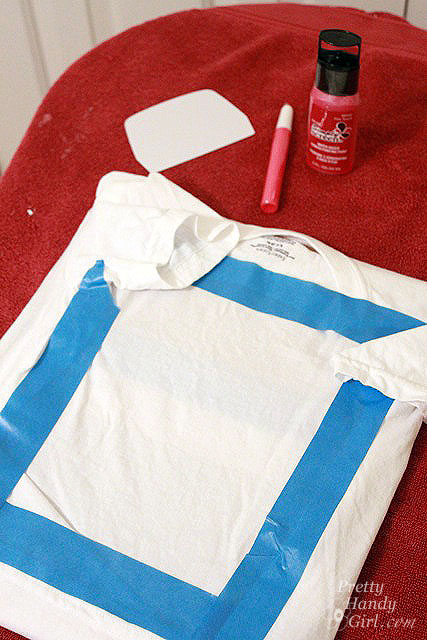
Start by taping your fabric to a piece of cardboard or foam board. If you are printing shirts, pillow cases, or anything that is double thickness, put the cardboard directly behind the layer you are printing on to protect from any ink bleeding through.

Position the screen where you would like the image to appear.

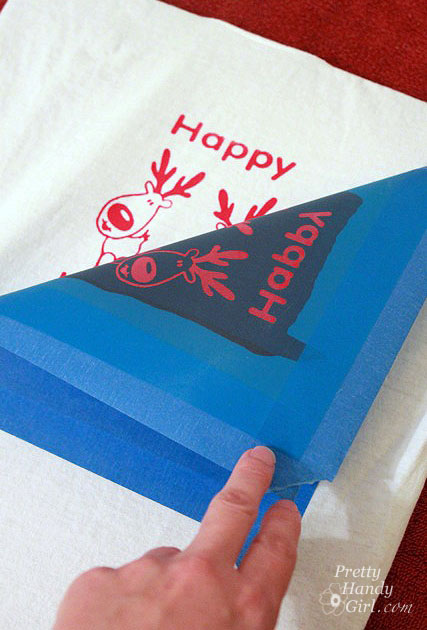
Tape the screen down with masking or painter’s tape.

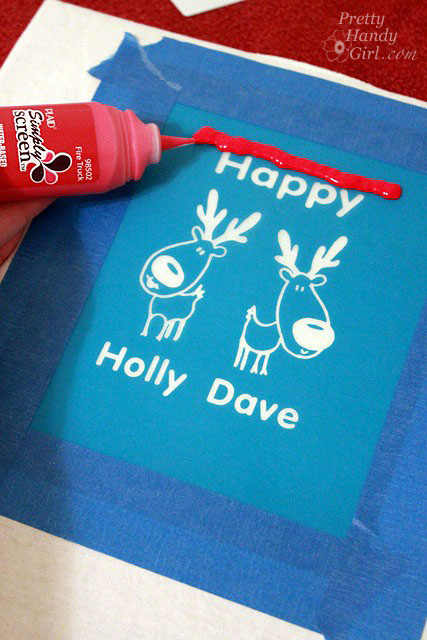
Run a thick line of Simply Screen silk screen ink at the top of your image.

Hold the squeegee at a 45° angle against the screen.

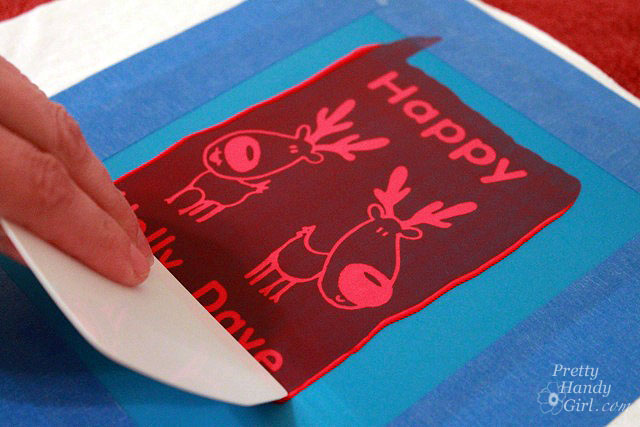
Press down firmly and pull the squeegee towards you. Focus on pressing the ink through the screen and scraping it off the screen at the same time.

Immediately remove your screen being careful not to get any ink on anything when you lift. Lay it down on the next item  you want to silk screen. (It is a good idea to clean the screen after every third impression, as the ink starts to stick around the edges and the image quality will decline.)

Let the ink dry.

Heat set the image with a hot iron. Wash on cold and air dry to protect your image.

I think this is the perfect kit for making holiday gifts! I’m on a big sew your own gift bag kick and I think I’ll make some more bags and screen print a graphic on it for gifts.

If you like my “Happy Holly Dave” design, feel free to download the printable pdf file and use it for your own personal use.

Or you could also download an earlier incarnation of the design with three reindeer!

Hope you all have a Happy Holly Dave! LOL!


Disclosure: This post has been sponsored by Plaid Simply Screen. I was sent a Simply Screen Kit and paid a small fee in return for writing a post about my experience using their product. The ideas and opinions are strictly my own. I will never let any compensation (monetary or free product) keep me from giving you (the reader) a straight up and honest review.