Clean Your Dryer Ducts - Prevent Fires

Once the weather turns cold and the heat kicks on, your home starts to get dry and static electricity arrives once again. This minor nuisance that causes siblings to shock each other for fun can actually be dangerous if it ignites lint that has built up in or around your dryer.

Why you should clean out your dryer ductwork:

According to The Consumer Product Safety Commission, ( CPSC ), annually there are tens of thousands of Dryer Fires leading to many injuries or death, due to dryer exhaust duct fires. You should clean your dryer hose and around it once a year, and inspect the vent and hose for any blockages at least every 6 months.

You could pay a professional to clean your dryer ductwork, but the price could be anywhere from $65.00 to $150.00! Ummm — no thanks — I’ll keep my money and do this myself. It only takes about 15 – 20 minutes to do and it is easy! As long as your ductwork is fairly accessible, you can handle this!

If your dryer exhaust hose tube is longer than 10′ this may be a bit more difficult. And if it is longer than 10′, did you know that your dryer may be working extra hard to dry your clothes? Worse yet is if you have a long tube that goes up into the attic (or the eaves) and then out the roof. The warm moist air from the dryer enters the cold attic, and condensation forms in the exhaust tube. Do you know where this little story is going? Well, at first your dryer can’t dry as quickly because the tube is blocked by water. Eventually it will fill with enough water to cause the exhaust tube to split and guess where all that water goes? Through your ceiling, that is where! Trust me on this one, it happened to us in our old house.

So, why don’t you sit back down and let me give you a little tutorial on cleaning out your dryer exhaust ductwork.

Instructions:

Start by unplugging your dryer and turn off the gas if you have a gas dryer.

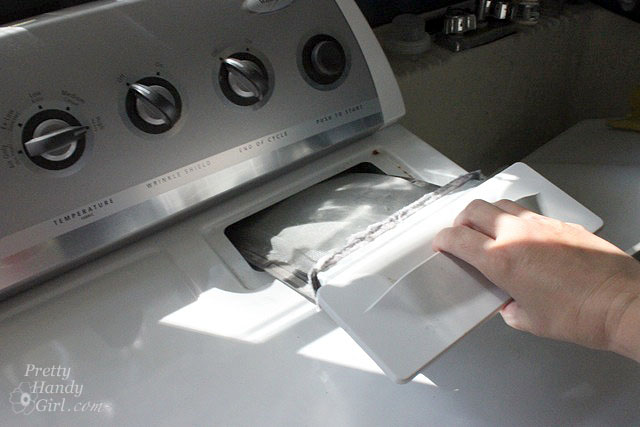
Remove your lint trap and remove any lint from the screen.

Clean Your Dryer Ducts - Prevent Fires

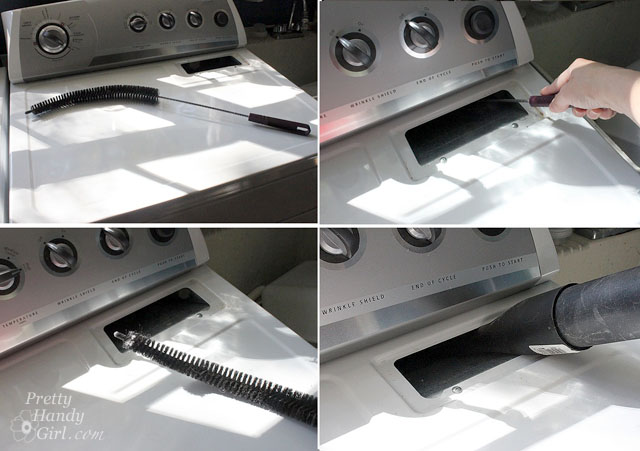
Using a brush (designed for cleaning out the coils under your fridge) bend the brush and run it inside the lint trap. Then follow up by using a shop vac or vacuum to suck up any lint and dirt loosened by the brush.

Clean Your Dryer Ducts - Prevent Fires

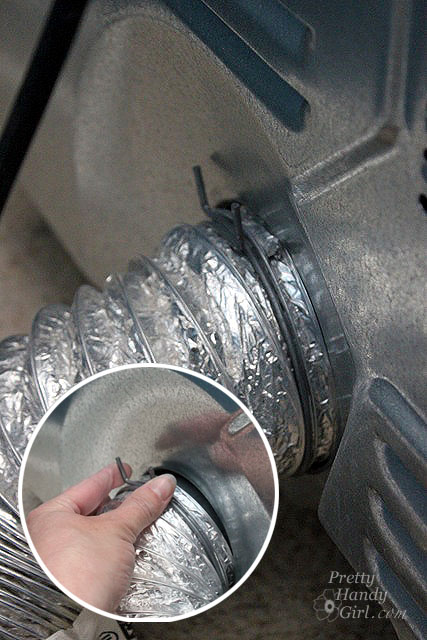
Pull the dryer away from the wall and disconnect the exhaust duct tube from the wall and the dryer. There are normally two kinds of hose clamps holding the tube to the dryer and wall port. The first is a ring with two prongs. Simply squeeze the prongs toward one another to loosen the clamp.

Clean Your Dryer Ducts - Prevent Fires

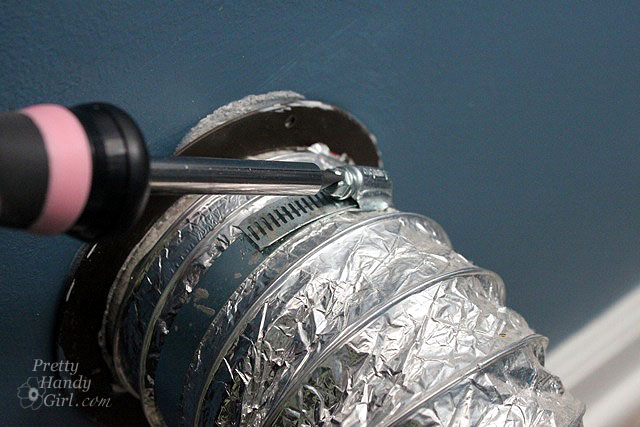
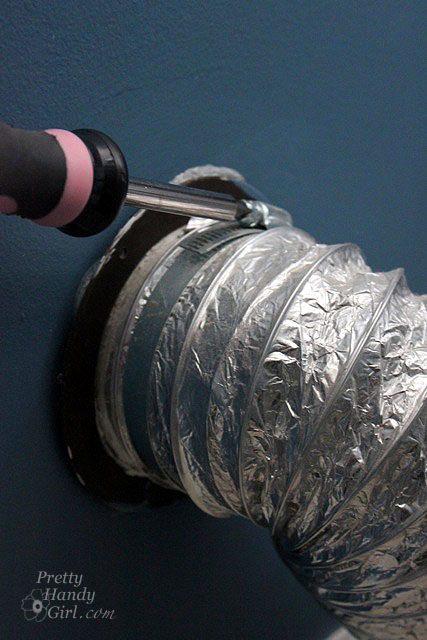
The second type of hose clamp requires a screwdriver to loosen the bolt attached to the clamp.

Clean Your Dryer Ducts - Prevent Fires

Slide the exhaust tube off the dryer and the port (hole in the wall.)

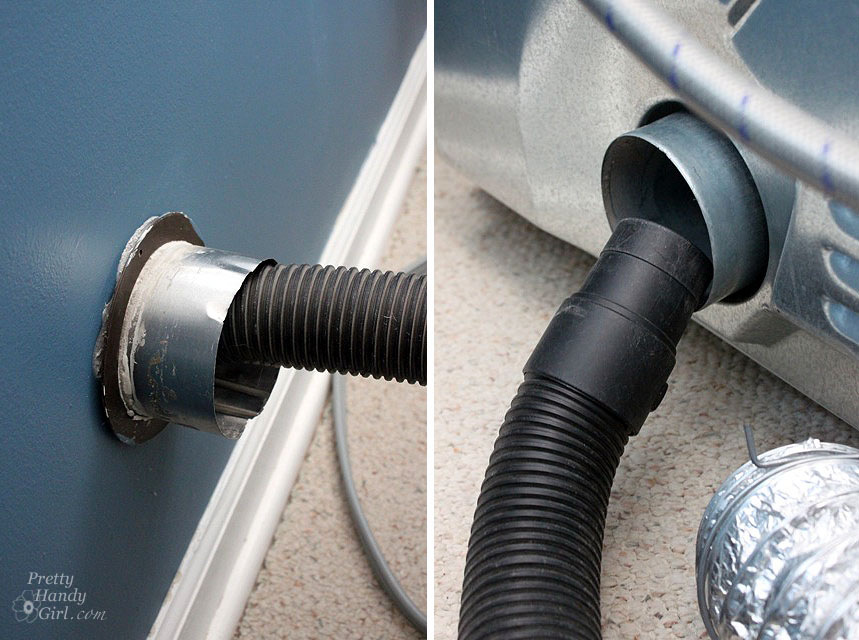
Use your vacuum to clean out both the dryer and wall ports.

Clean Your Dryer Ducts - Prevent Fires

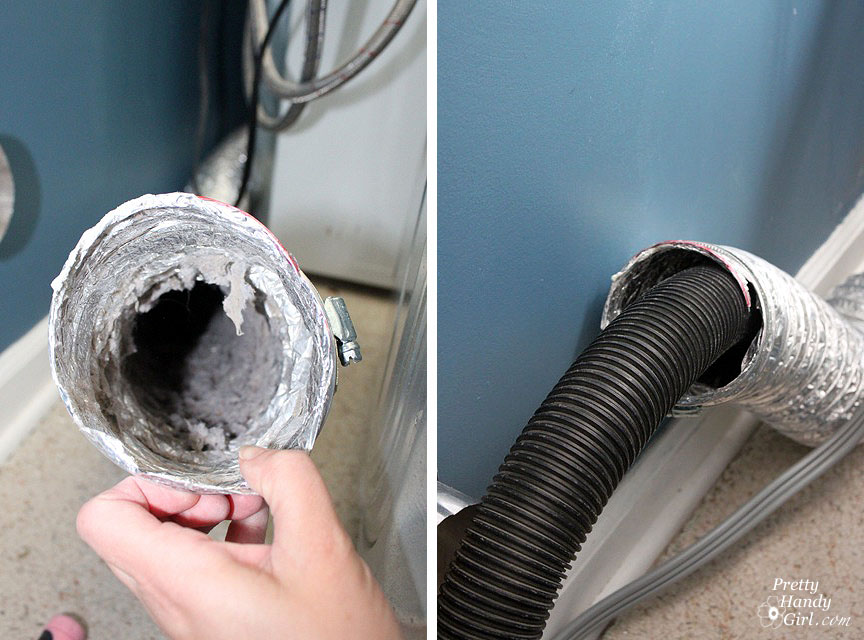
Then use the vacuum to clean out the dryer exhaust tube.

Clean Your Dryer Ducts - Prevent Fires

If you have an older style vinyl tube, it is important that you replace it with a metal one. The vinyl and foil ones are fire hazards. Also, if you can’t get your tube clean, go ahead and replace it.

If your tube is long or difficult to clean out, you may want to purchase a hose brush like this one:
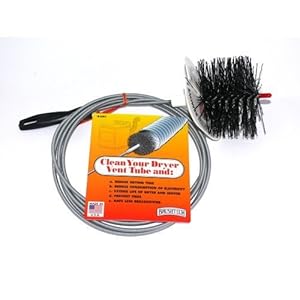
Brushtech B68C 10-Feet Long Dryer Vent Duct Cleaning BrushAmazon.com: Brushtech B68C 10-Feet Long Dryer Vent Duct Cleaning Brush: Home & Garden. (affiliate link)

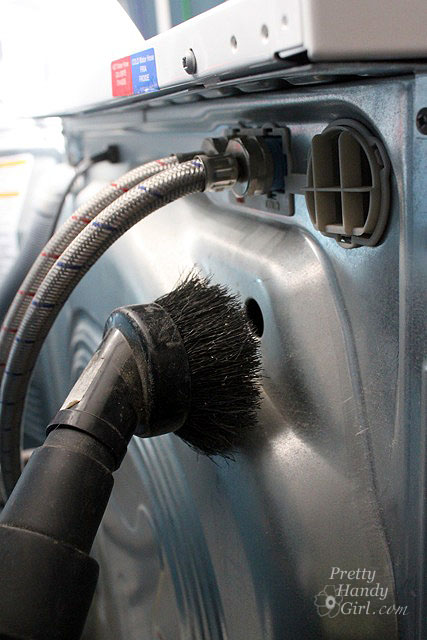
While you have the dryer pulled out, vacuum off the back of the dryer, the washer, and the wall behind both. Eliminate as much lint as possible. A clean laundry room is safer than a lint covered one.

Clean Your Dryer Ducts - Prevent Fires

Re-attach the dryer tube to the wall and the dryer.

Clean Your Dryer Ducts - Prevent Fires

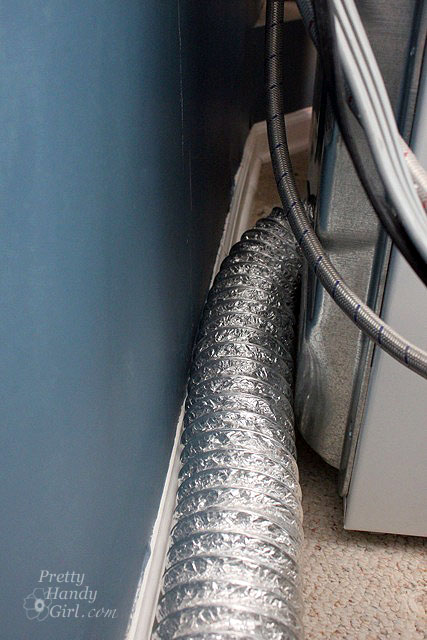
Gently push the dryer back towards the wall being careful not to crush the tube.

Clean Your Dryer Ducts - Prevent Fires

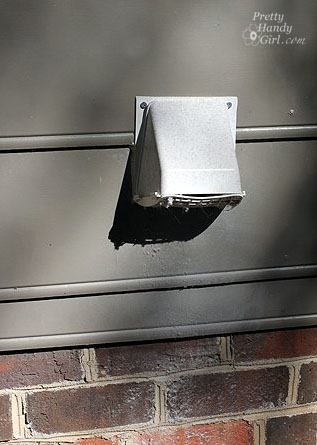
Locate your exterior dryer vent.

Clean Your Dryer Ducts - Prevent Fires

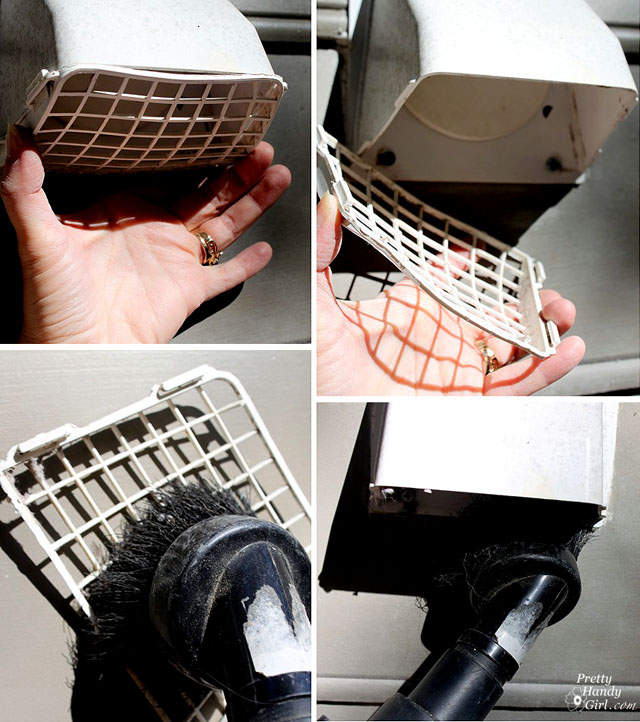
If you can reach the exterior vent, go ahead and clean it out also. Make sure the vent closes properly when the dryer isn’t running.Otherwise you may get birds, rodents or bugs in your vent. I don’t think I need to tell you that they won’t be helping your dryer’s efficiency!

Clean Your Dryer Ducts - Prevent Fires

And that is it?! That was easy wasn’t it. Be sure to keep your home and family safe by cleaning your dryer exhaust ductwork yearly.

Update: I wanted to let y’all know that the flex foil pipe shown in this tutorial is FLAMMABLE! Luckily I found this out before we had a fire.

prevent_fires_replace_dryer_hose

Read about installing semi-rigid non-combustible duct in this easy tutorial!

Clean Your Dryer Ducts - Prevent Fires


You might also like:

keep HE Clothes Washer CLean

Learn how to keep your HE Washer Clean like the day it was delivered!

Miracle Stain Remover


DIY Laundry Detergent & Miracle Stain Remover


Happy Monday morning y’all! I’ve been working like a busy bee this past month. So many projects! I need to clone myself so one of us can work on the projects like this dry erase message board and the other can write the posts. (Luckily I had an extra hour yesterday thanks to switching back to standard time.)

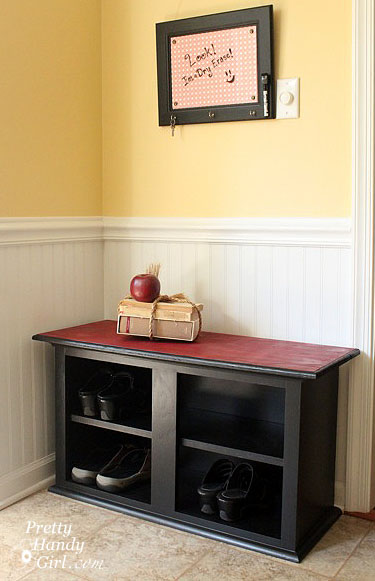
One of the reasons I’ve been so busy is that I will be giving my first demonstration at the Raleigh Habitat for Humanity ReStore this Saturday at 1pm. If you are in the area, I’d love to see you. Here is the address and more information about the  ReStore. I will be demonstrating how I turned a truly nasty greased wall cabinet into this charming shoe storage bench.

I’m not the type who can throw something away, so when I removed the cabinet doors to make the shoe bench, I decided to salvage them and make message boards. The first one was transformed into a cute chalkboard frame.

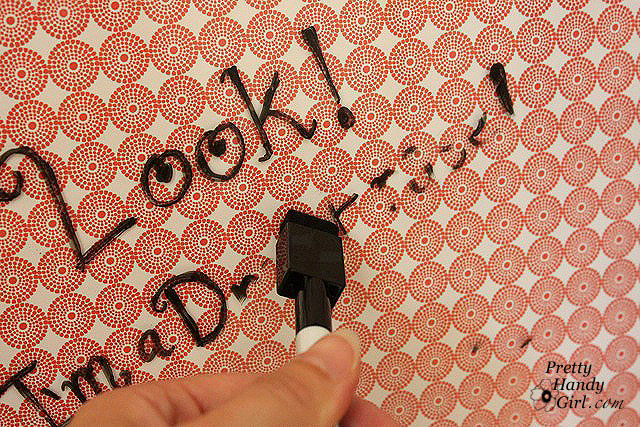
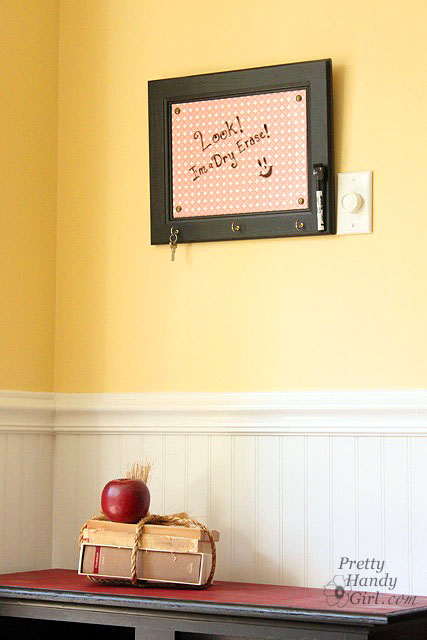
The other one was turned into a — you guessed it —  a dry erase message board!  And of course (because I love you), I’ll share with you how I made it.


Materials:

  • Cabinet door (pre-primed and painted)
  • Plexiglass cut to the interior panel dimension
  • Scrapbook paper (choose a light color that dry erase marker will show up on top of)
  • 4 Nail head trim tacks
  • 3 Cup hooks
  • X-acto blade
  • Metal ruler
  • Sharpie marker
  • Drill and bits
  • Scrap of wood
  • Hammer
  • Needle-nosed pliers
  • Dry erase marker
  • E-6000 glue

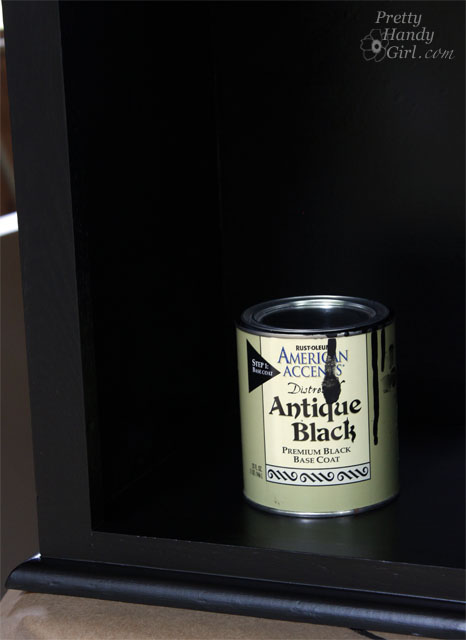
1. If you haven’t already: clean, prime and paint your door. It isn’t necessary, but if you want to give your cabinet door a new look, go ahead and paint it any color you like! The sky is the limit on color. I used American Accents Antique Black.

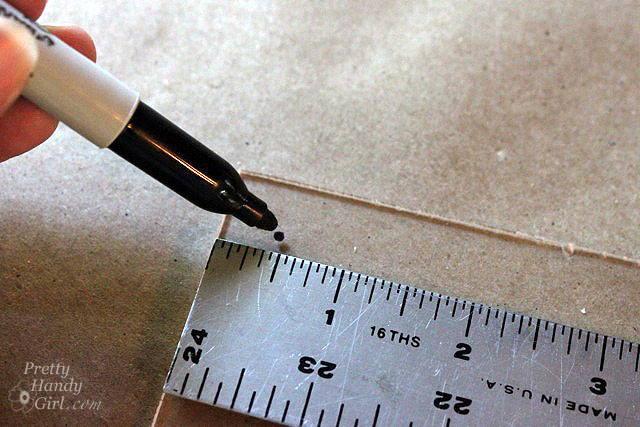
2. Now, cut your scrapbook paper to fit inside the cabinet door panel. As always, be sure you are using a fresh new x-acto blade and a metal edged ruler.

3. Next mark a dot 1/2 inch from the corners of the plexiglass.

4. Drill a small hole through the plexiglass at each dot. Use a drill bit that is slightly larger than the nail on your nail head tack.

5. Lay your scrapbook paper into the panel, then rest your plexiglass on top of the paper. (I purposely didn’t glue the scrapbook paper so I could change it out when I want a décor change.)

6. Set a nail head into each corner hole in the plexi. Hold the nail with the needle-nosed pliers as you hammer each tack into the cabinet door.

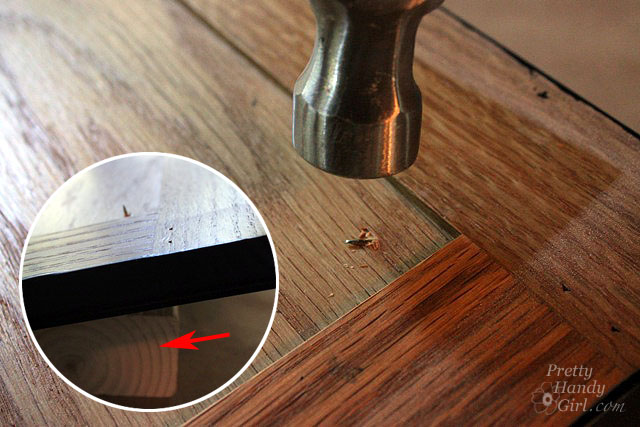
7. If your tacks go through the back, flip over the cabinet door. Set the piece of scrap wood (red arrow) under the nail head and hammer the point of the nail to bend it to the side (so no one gets poked!)
8. Use a ruler to mark where you want your cup hooks mounted. Pre-drill holes for your cup hooks using a drill bit slightly smaller than the cup hook screw end. Then screw them into the holes.

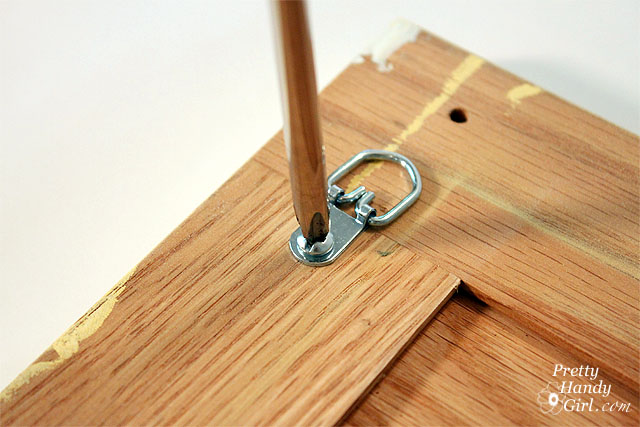
9. Attach D-ring hooks to the back of the door.

10. Attach a dry erase pen to the board using string. Or if you find a marker with a magnetic cap, you can glue a magnet to the board using E-600o. Now you can hang the marker back on the board when you’re done writing a message.

11. Hang that cute little dry erase board up on the wall! Did you see this and this tip for hanging frames that have two hooks? Genius!

That is how you can make a custom dry erase board out of an old cabinet door! I love how it matches the bench colors and can match anything I want it to by changing out the scrapbook paper. Shoot, I could probably put photos behind the plexi too!


Okay, so who is coming out to join me on Saturday? Please don’t let me show up and give a talk to the crickets. 😉


How to Use a Pneumatic Finish Nailer and Air Compressor

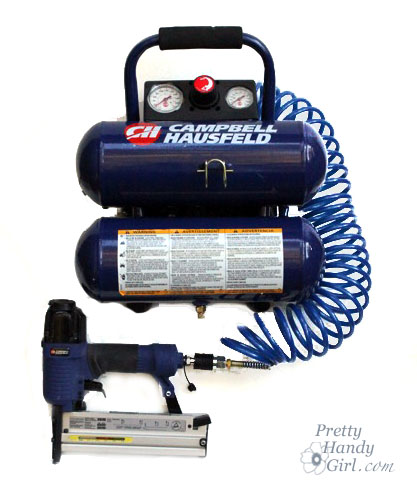
Welcome back for another Tool Tutorial Friday! Today I’m going to introduce you to a 2 gallon compressor and pneumatic finish nailer.  I use the Campbell Hausfeld 2 gallon compressor with Pneumatic Finish Nailer. I bought these as a kit when they were on sale at Lowe’s for $69! A good price on this set is $89. There are loads of other brands out there and I’m sure they have other features and capabilities, but frankly I’ve been happy with my set that I’ve had for 2 years. Other kits can cost up to $300. The only drawback with this set is that they can not be used for framing (building walls of a house structure.) But, so far I haven’t needed to do that.

The finish nailer works very well on moulding, trim, board and batten, wainscoting, and other small wood projects.

How to Use a Pneumatic Finish Nailer and Air Compressor

How to Use a Pneumatic Finish Nailer and Air Compressor

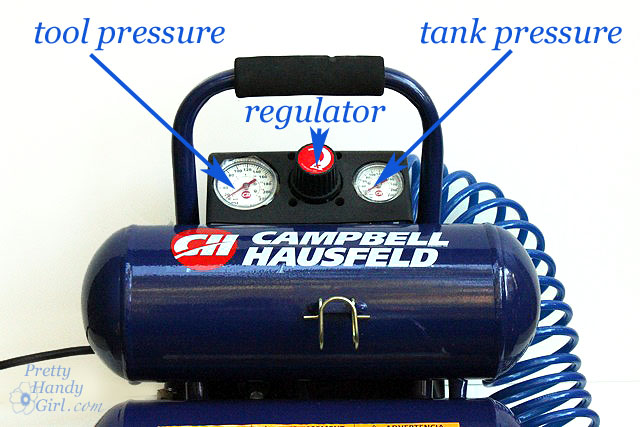
The compressor is a fairly simple tool. When turned on, air builds up in the chambers until it reaches the maximum 110 psi.

How to Use a Pneumatic Finish Nailer and Air Compressor

The pressure going into the air hose can be controlled by the regulator button. I typically use my compressor and nailer at about 90 psi. But, if the nails are going too far into the wood, I might turn it down to 80 psi. Or if the nails aren’t going in far enough I will turn it up to 100 psi. With continual use, the pressure will drop down. When the pressure is low enough, the compressor will start itself back up to raise the pressure again.

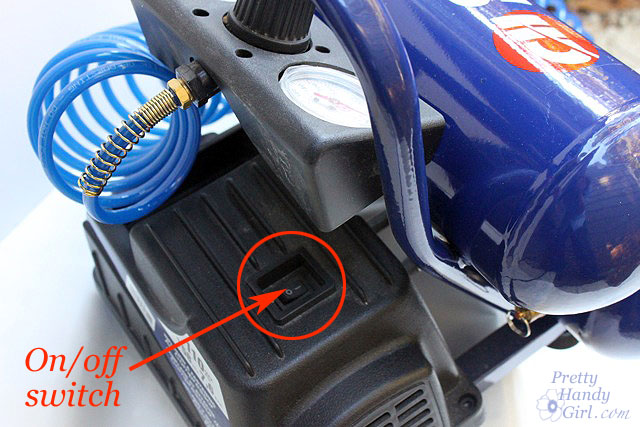
The on/off switch on my compressor is in the back.

How to Use a Pneumatic Finish Nailer and Air Compressor

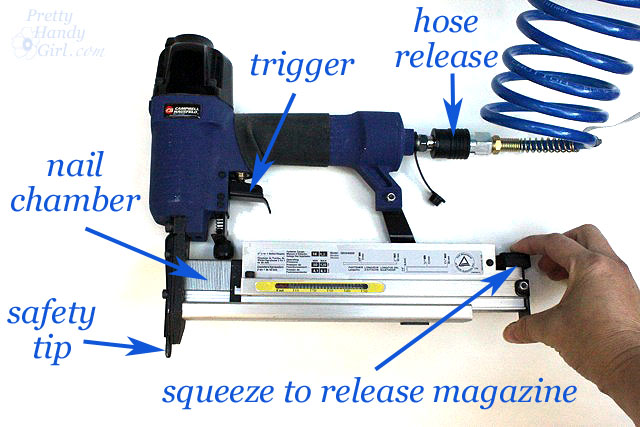
The finish nailer holds small brad nails up to 2″ in length and “U” shaped staples. They are held in the magazine. The safety tip on the nailer must be pressed into the wood before a nail will fire. Otherwise, the gun will not discharge.

How to Use a Pneumatic Finish Nailer and Air Compressor

While using the nailer and compressor it is very important to use safety goggles and ear protection.

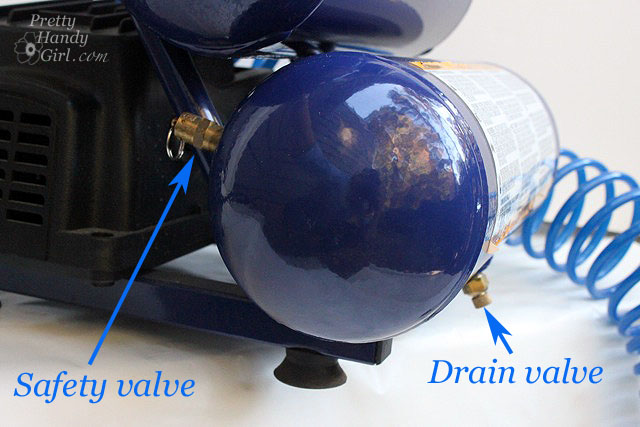
When you are finished using the compressor, it is important to release all the air from the compressor. If you don’t release the air, moisture can build up and rust the tank. Start by reducing the pressure by turning the regulator down. Then pull the safety valve ring. It will close automatically, so you will need pull it a few times or hold it open. I also unscrew the valve at the bottom of the tank to insure it is completely empty before storing. Then I screw the valve back in.

How to Use a Pneumatic Finish Nailer and Air Compressor

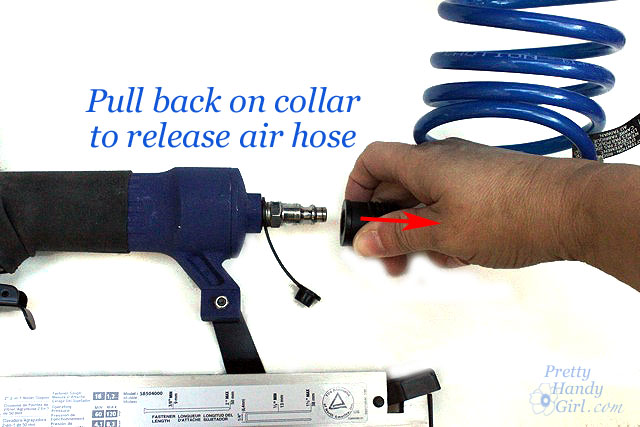
After the tank is empty, release the hose from the nailer. Add a drop or two of penetrating oil onto and in the air inlet on the nailer to keep it well lubricated. Cover the air inlet and then you can store your nailer and compressor.
How to Use a Pneumatic Finish Nailer and Air Compressor
DISCLAIMER

The viewer assumes all responsibility and liability associated with the hazards of woodworking. Pretty Handy Girl is not responsible for any errors or omissions that may be present in this tutorial. She also assumes no liability for any action or inaction of a viewer.

Please use extreme caution when using power tools. Read your tool manual thoroughly and wear protective safety gear. Take your time familiarizing yourself with a tool before using it. (If you are missing the manual, you can easily find it online by going to the manufacturer’s website or google your saw’s make and model + manual.)

Please recognize that I have tried to put together a basic finish nailer and compressor tutorial to get you started. I have tried my best to show the safest way to use them. That being said, I am not a professional (I only play one on this blog ;-) .)

Without further ado, here is the tutorial video:

How to Use a Pneumatic Finish Nailer and Air Compressor

How to Use a Pneumatic Finish Nailer and Air Compressor


Today I’ll teach you how to use a miter saw safely. We’ll learn the difference between a miter and a bevel cut. Plus, I’ll also show you the different features and functions of miter saws.

How to Use a Miter Saw

Hello and welcome to the very first Tool Tutorial Friday (a series of tool tutorials)! Come right in and have a seat. If you give me less than 10 minutes of your time, I will empower you with a new power tool skill! Today, I’m going to show you how to use one of my favorite power tools. Before I owned a miter saw, I used a hand saw and a cheap plastic miter box. But, they were really putting a cramp in my DIY style (if you know what I mean.)

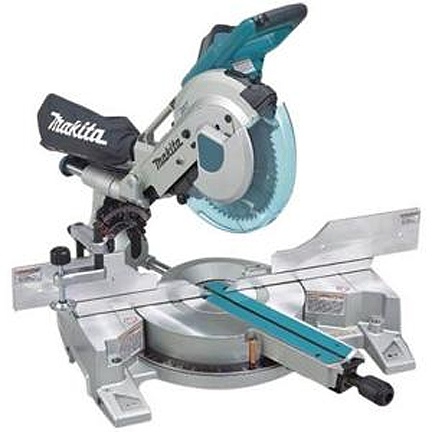
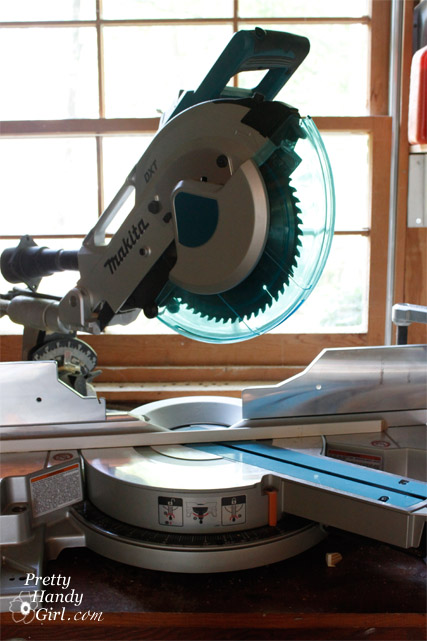
About two decades ago, my husband gifted me my Makita 10″ Sliding Compound Miter Saw. That’s right, I don’t ask for jewelry for big occasions, Pretty Handsome Guy knows to ask one thing before an upcoming holiday, “So Honey, what power tool do you want now?” It’s true, I’m a power tool junky.

Ready to learn how to use a miter saw? Okay, let’s get started…

Working with power tools can be dangerous, but your risks drastically eliminated if you give the tool some respect. Today I’ll show you how to use a miter saw safely.

About Miter Saws:

Miter saws come in many shapes, sizes, and colors. The size (usually from 7.25″ up to 12″) refers to the diameter of the blade on the saw. The larger the blade, the wider the material it can cut. However, if you purchase a “sliding” miter saw, you can cut several inches wider than your blade diameter (the specifications on the saw should tell you this cutting distance). Miter saws run anywhere from $80 up to $800 depending on the features and brand you choose.

Sliding Miter Saw:

I highly recommend a sliding miter saw if you can afford it. Being able to cut lumber a few inches wider means the difference between using your miter saw or having to break out the circular saw or table saw.

On a non-sliding miter saw, the saw head will not slide forward and back. Most of the entry-level models will cut a miter and a bevel. You may have heard miter saws without the ability to slide referred to as chop saws. They will work great for “chopping lumber” but without sliding, dual miters, and dual bevels, you will spend some time flipping the lumber to make your compound cuts.

Speaking of miters and bevels, let’s talk a little more about what is a miter and a bevel cut.

Type of Cuts:

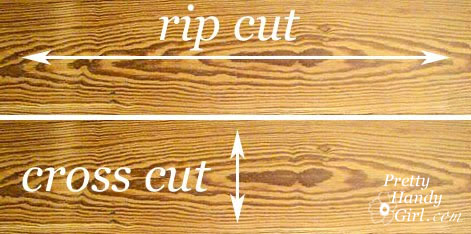
Miter saws are perfect for cross cuts, miter, and bevel cuts. Miter saws cannot make rip cuts. Rip cuts are easier cut on a table saw or track saw (or using a variety of other handheld saws.)

  • Rip – ripping a board is cutting with the grain along the length of a board. This is usually done with a table saw but can be done with a variety of handheld power saws and a straight edge.
  • Crosscut – a type of cut that is perpendicular to the grain or along the width of your board. Crosscuts are usually made with a miter saw or circular saw, but can also be made with a track saw, jigsaw, band saw, or hand saw. You can make crosscuts with a table saw, but you will need a crosscut sled to perform a crosscut cut safely.

Miter Cut:

A miter cut is made when you change the direction of your blade from straight ahead (90Ëš) by moving it from side to side. Think of pizza wedges. For example, in the image below, the saw is set up to cut a 45Ëš miter, and no bevel because the blade is still straight up and down.

Bevel Cut: 

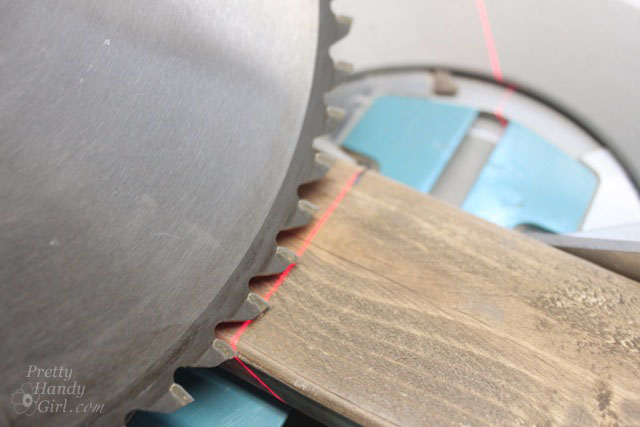
A bevel cut is made when you angle your blade tipping it to the left or right. As an example, in the picture below, I’m making a 45Ëš bevel cut into the wood.

Compound Cut:

A compound cut happens when you make a miter and a bevel cut at the same time. Essentially you are cutting two angles simultaneously. This is particularly useful when you are cutting crown molding for a room.

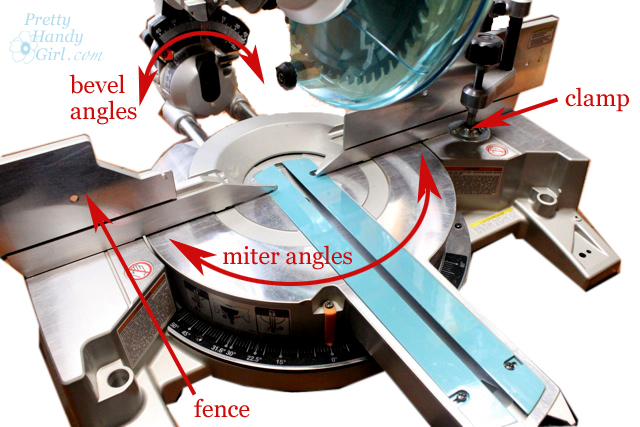
You can see in the diagram below how to set up your saw for bevel angles, miter angles, or both.


Safety Features and Operating a Miter Saw:

All modern miter saws have a trigger built into the handle. Most miter saws also have a safety button that you must push with your finger or thumb before you can squeeze the trigger. To start a straight downward cut, press the safety button, squeeze the trigger and wait for the saw to reach maximum rotation. Then slowly lower your saw into the board you are cutting. Never force the saw through the wood. Let the saw cut and then guide it downward. Once you have completed the cut release the trigger while the blade is in the wood. Let the saw come to a stop before lifting it out of the wood.

Most miter saws have a fence. The fence lets you rest the position your lumber against a straight edge. It keeps the wood steady and helps your miter saw cut true to the degree setting you have chosen.

Some miter saws have a detachable clamp. This is a nice option and helps keep your hands away from the blade during cuts. Let the clamp be your right-hand man (or left-hand man). If you don’t have a clamp on your saw, be sure to always position your hand as far away from the blade as possible. Do not attempt to make cuts where your hand is close to the blade. AND NEVER reach under the saw while it is rotating! Even when you have finished your cut, your hand is not safe until the blade has completely stopped.

Three Safety Tips for Using a Miter Saw:

  • Blade down until it stops! You should always end your cut and release the trigger while the blade is down and in the lumber. Let the blade come to a stop before raising the blade.
  • Always make sure the lumber is supported on both sides. And never clamp both sides of your lumber. One side should be free so as not to pinch the blade during the cut.
  • Never cut small pieces of wood where your fingers are too close to the blade. If you absolutely must cut a tiny piece, clamp or attach it to a larger piece of lumber.

Making a Safe Sliding Cut:

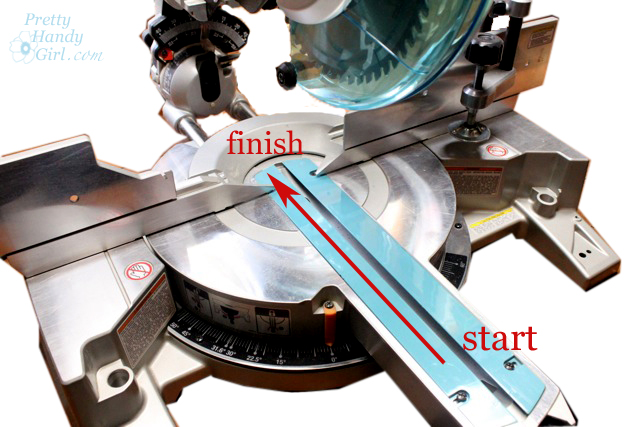
When using a sliding miter saw, there is a proper way to make a sliding cut (used to cut wider boards):

  1. Make sure your saw is positioned fully on your workbench. Test the blade in its full reach toward you to make sure it won’t tip as you lower the blade.
  2. Put your lumber up against the fence and clamp it on one side (if you can).
  3. Before you start the blade, pull the saw toward you until the blade is directly over the board’s edge closest to you.
  4. Squeeze the trigger to start the saw and wait for it to reach peak rotation speed. Then lower the blade down into the wood.
  5. While the blade is still rotating, slide the saw back and away from you as your blade cuts through the rest of the wood (see photo below.)
  6. Once the blade has finished cutting through the wood, release the trigger and let the blade stop before raising the blade.

I created a video, so you can see how to safely use a miter saw. Before you watch the video — a few necessary words of caution:

DISCLAIMER

The viewer assumes all responsibility and liability associated with the hazards of woodworking. Pretty Handy Girl is not responsible for any errors or omissions that may be present in this tutorial. She also assumes no liability for any action or inaction of a viewer.

Please use extreme caution when using power tools. Read your tool manual thoroughly and wear protective safety gear. Take your time familiarizing yourself with a tool before using it. (If you are missing the manual, you can easily find it online by going to the manufacturer’s website or google your saw’s make and model + manual.)

Update: Please recognize that I have tried to put together a basic miter saw usage tutorial to get you started. I have tried my best to show the safest way to use a miter saw. Two safety revisions I want you to be aware of:

  1. You should wear appropriate Personal Protective Equipment when using a miter saw. (Ear protection, eye protection, and a dust mask.) I should have been wearing a mask.
  2. When I first learned to use a miter saw, no one told me to keep the blade down until it came to a stop. This is now standard practice when I work.

And now, let’s get you more familiar with using a miter saw!

I hope you have been empowered to use a miter saw! Go on and give your miter saw a try if you own one. If you decide to buy a new miter saw, I recommend buying a reputable brand with a decent amount of features. I have a lot more information about how to buy quality tools and save money on tools in this article.

These workshops were meant to be interactive, so don’t be shy! Ask questions, leave comments, and let me know you are learning something new.

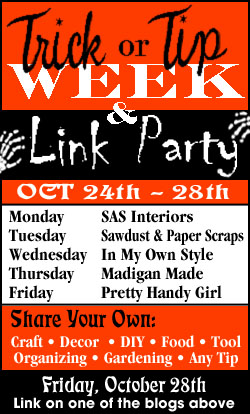
Halloween is just around the corner. And in honor of that spook-tacular holiday, some blogging friends and I are hosting “Trick or Tip Week” from Monday, October 24th – Friday, October 28th. We’ll end the week with a Link Party for all your tricks or tips! So be ready to link up Friday, October 28th. Your trick or tip will show up on ALL of the blogs simultaneously (thanks to some super secret Wizard magic we obtained.)

Your tips can be about anything! Heck, if you are a witch and know how to put a hex on a troll, we want to hear about it! And if you have a tip but no blog, PLEASE by all means leave a comment letting us know what you tip is! Anything goes (obviously nothing vulgar or profane, etc.)

These fabulous bloggers will each have a tip to share next week. So be sure to stop by their blogs and yell “Trick or Tip!”

Monday: SAS Interiors – Paint

Tuesday: Sawdust and Paperscraps – DIY

Wednesday: In My Own Style – Decor

Thursday: Madigan Made – Blogging

Friday: Pretty Handy Girl – Tools


Be sure to end up back here on Friday, the 28th for another Tool Tutorial Friday

AND a Tip on using Jigsaws

AND the Link Party! WOW, you won’t want to miss it! Oh, and don’t forget to spread the word. The more the spookier merrier!