Brrrr! Anyone else experiencing the dipping temperatures? I really don’t like the cold unless it is going to snow. If it snows, I’ll put up with the sub-zero artic blast because I know we couldn’t have snow without the cold. But, if it isn’t going to snow, you can take your cold temperatures and get the heck out of here!

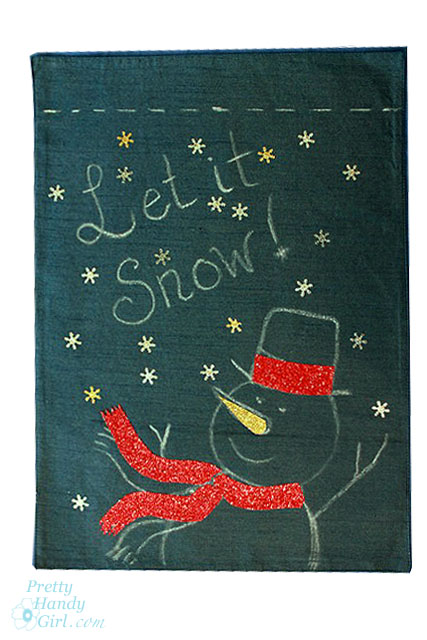
For this reason, I thought we needed to give Mother Nature a little hint, hint, nudge, nudge, and then a boldly displayed sign:

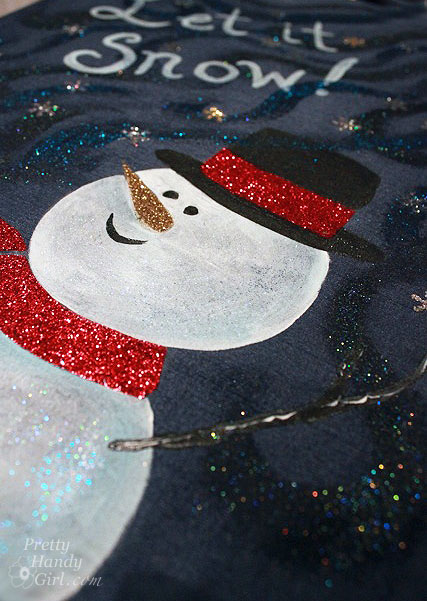
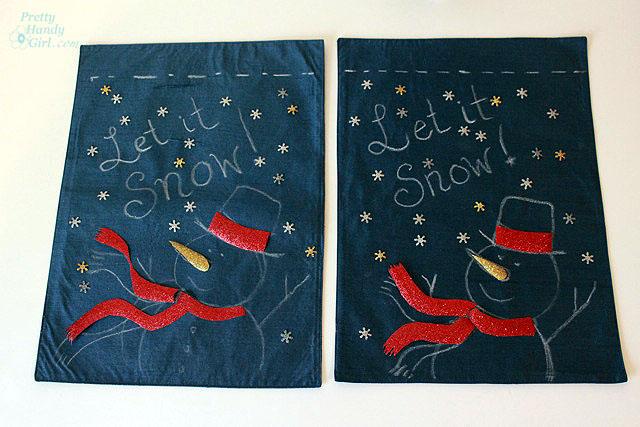
Cute garden flag, don’t you think?! Would you believe me if I told you that the flag is made from Dollar Tree placemats? Yup, I wouldn’t lie to you. I bought two because I wanted to decorate both sides and only one side of the placemat has a sheen to it. But, for $1 each, who can complain.

Stick around and I’ll show you how I made the flag. But, first, I have a confession to make…

…Do you secretly loathe glitter? Me, too!

When Pretty Handsome Guy sweeps up errant glitter from the kitchen floor, he’ll say, “The person who invented glitter never had children.” Then we both laugh. We were both in the camp of Glitter Haters Anonymous and detested any bedazzled art projects that came home from school. But, this week I snuck out of the camp under the radar and tried out a new product: Tulip® Fashion Glitterâ„¢ Shimmer Transfer Sheets and  Tulip® Fashion Glitterâ„¢ Shimmer Fabric Paint. Pretty Handsome Guy doesn’t know yet, but I think I’m changing my tune about glitter thanks to Tulip Shimmer products.

Why you ask? It is elementary, my dear Watson. The glitter stays put on the transfer sheets and in the fabric paint! No more sweeping up underneath the glittered project. No more random speck of glitter on the tip of my nose like a Rudolf wanna be. The shimmer products hold their glitter!

Materials:

Instructions:

Mark  a line 2″ from the top of the “flag” placemat using the chalk (this will be your stitching line for the rod pocket. Then draw your design below the pocket line.

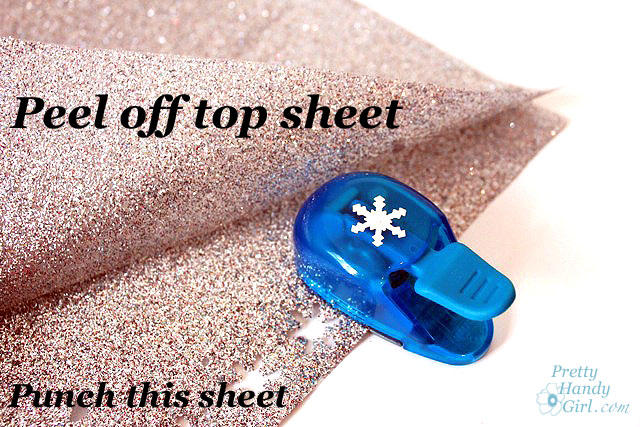
Punch out snowflakes from the Tulip Fashion Glitter Shimmer transfer sheet. Because the sheets are thick, it is easier if you peel up the top sheet and only punch through the transfer sheet.

Cut out the rest of your design (you can leave the top sheet on if you are cutting with scissors.) After the designs are cut out, remove the top sheets.

It can be confusing to determine which pieces you removed the top sheet from, so look at the pieces from an angle and look for any reflection or shine on the top sheet of plastic.

If you pull the top sheet off too quickly, it can pull the glitter with it (see below.) Go slow, and if it does happen — don’t stress it — just cut a new one.

Position all the snowflakes and any other transfer sheet pieces on top of the flag. Pay attention to make sure the glitter side is up and the glue transfer side is down. 
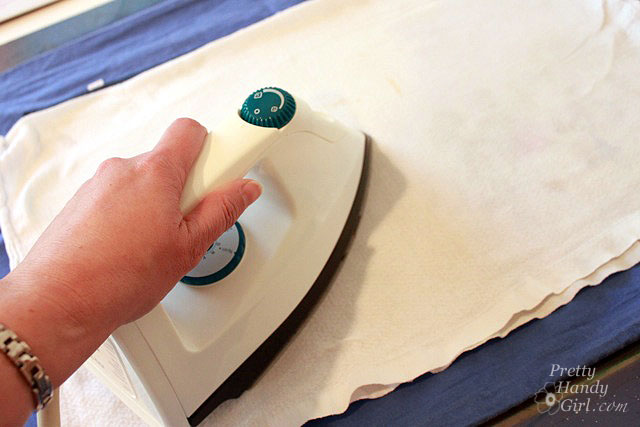
Lay a clean rag on top of the pieces and iron the design onto the placemats according to the directions. (The placemats I used are polyester, so I used that setting on my iron. And it took about 30 – 40 seconds to get the transfer sheet glue to heat up enough to stick to the placemats.)
Remove the cloth and check to make sure that the design is adhered to the flag/placemat.
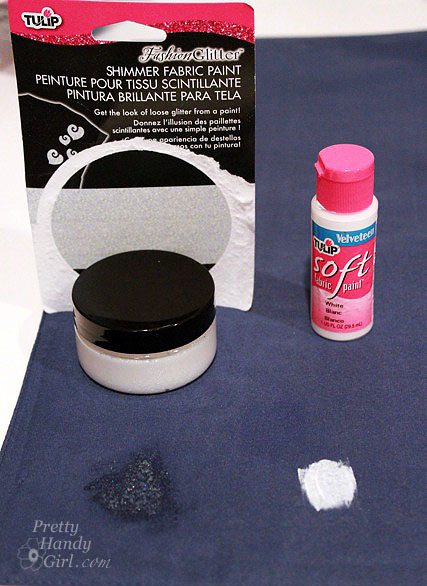
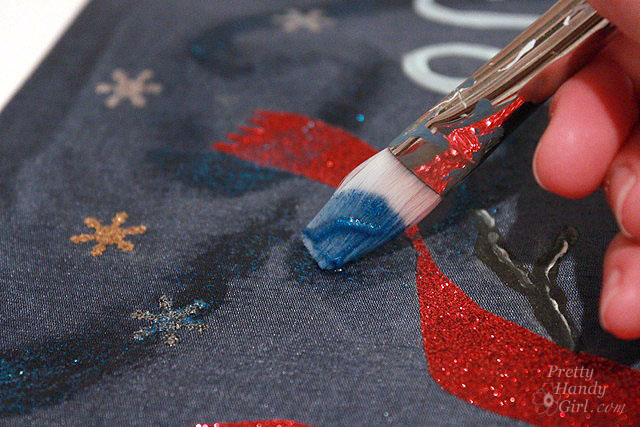
Before painting my snowman, I did a little test on the backside of my placemat to determine if the Tulip Fashion Glitter Shimmer fabric paint was transparent or opaque. It is transparent, so I chose the Tulip Soft fabric paint to fill in the snowman.

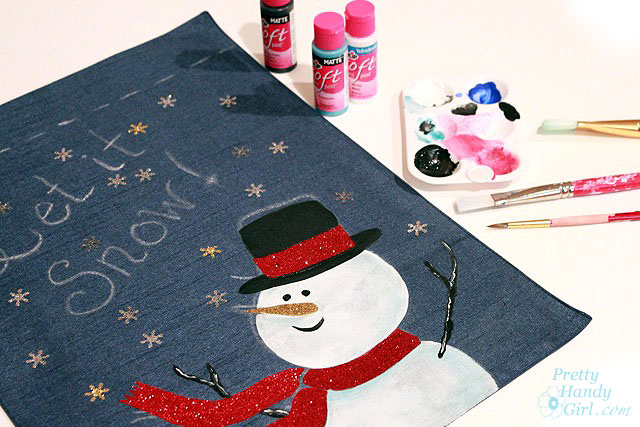
Paint your snowman, arms, hat, eyes and mouth using the Tulip Soft fabric paint. Using the smaller brush, paint the words too.

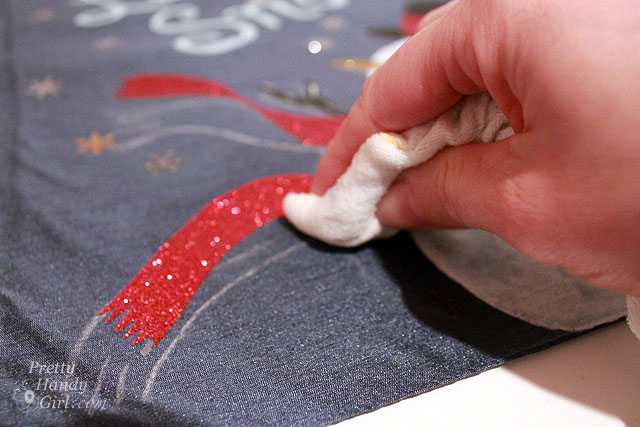
After the fabric paint has dried, dampen a clean cloth and gently wipe off the chalk.

Now is the time to add the Tulip Fashion Glitter Shimmer Fabric Paint magical glitter dust! I call it that because it really looks magical and the gel slowly disappears as it dries and leaves the glitter trail behind. Tinkerbell would be proud. Brush on curves and curly-q’s. You can brush on top of the words and the snowman because it will dry transparent.

Look at that beautiful magic glitter dust!

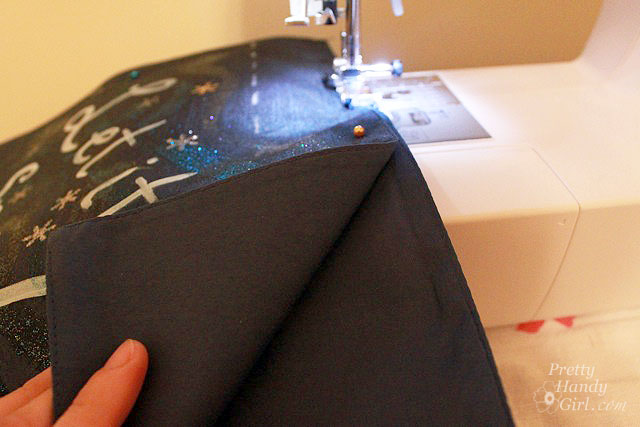
When the Tulip Fashion Glitter Shimmer Fabric Paint…ahem…I mean magical glitter dust has dried, pin your two placemats together rights sides facing out.

Stitch one line across the top. Stitch a second line across the marked pole pocket.

Leave the two sides of the pocket open and stitch down the sides and across the bottom (as shown.)

Thread the flag onto a standard sized decorative flag bracket.

And then challenge Mother Nature to “Bring it on!” (Be prepared, you might have to do a snow dance too. But that is a whole other tutorial!)

I have to tell you that the Tulip Fashion Glitter Shimmer products really surprised me. I truly loathe loose glitter, but these products really held the glitter in place. There might be a few pieces of glitter that are dislodged when you peel the transfer paper top sheet off, but honestly I didn’t notice and I never found any on me. I highly recommend these products. Especially if you have kids that love glitter!

You can find the Tulip product line at these retailers. Selections may vary per store.


Disclosure: This post has been sponsored by Tulip Products,  iLoveToCreate®, a Duncan Enterprises Company. I was sent some samples of the Tulip® Fashion Glitter™ Shimmer Transfer Sheets and Tulip® Fashion Glitter™ Shimmer Fabric Paint. I already owned the Tulip Soft Fabric paint. I was also paid a small fee in return for writing a post about my experience using the products. The ideas and opinions are strictly my own. I will never let any compensation (monetary or free product) keep me from giving you (the reader) a straight up and honest review.


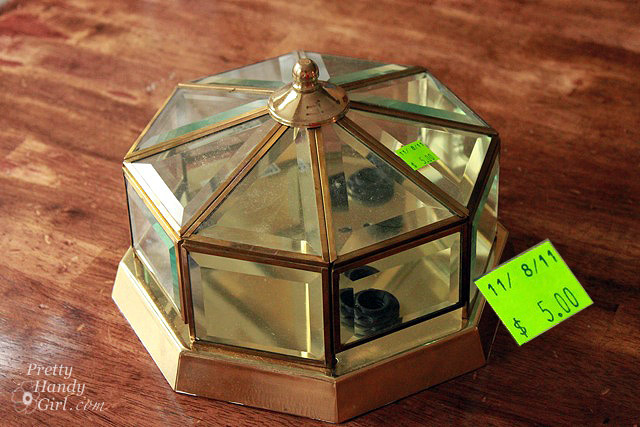
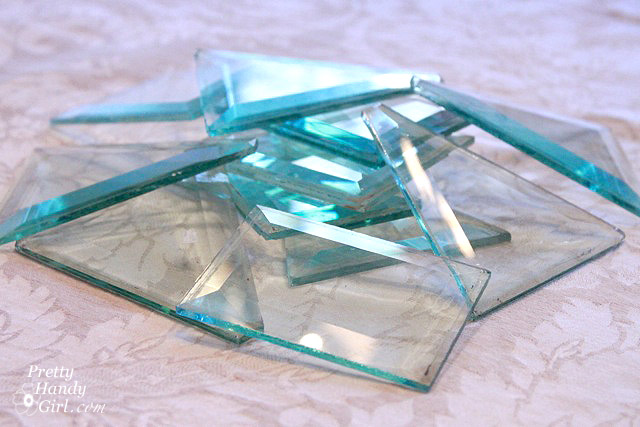
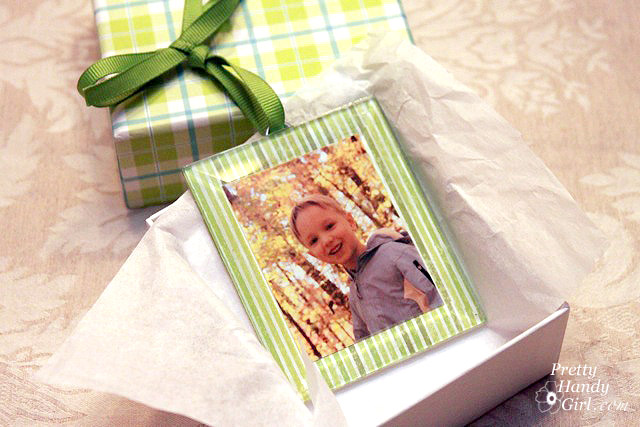
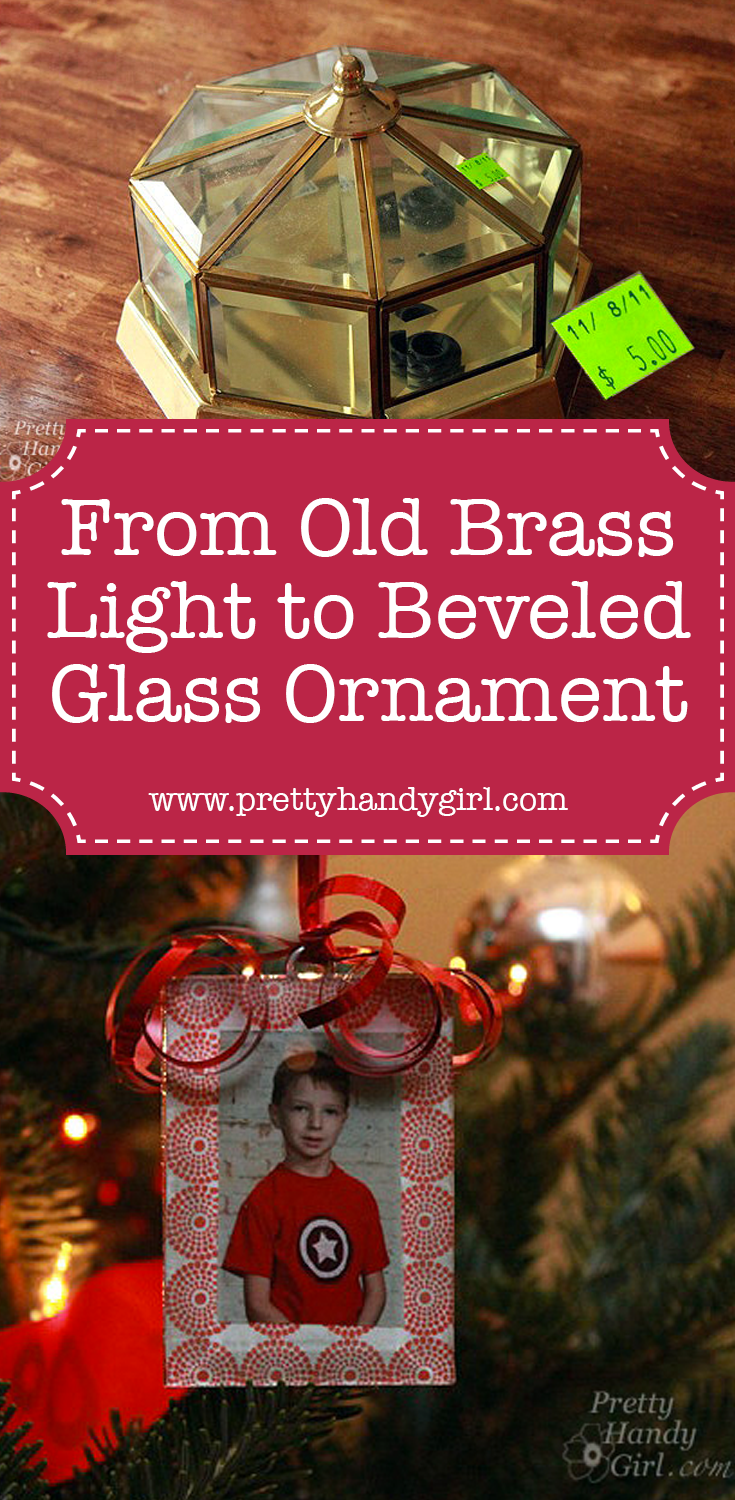
I had so much fun at the Habitat ReStore talk this past weekend. My favorite holiday decorations were these adorable beveled glass ornaments. Would you believe me if I told you that they began life as a dated octagon brass light fixture?

Well, they did! And here is the best part, for $5 you can score one of these fixtures at your local Habitat ReStore and make 16 ornaments from the one light!

Materials:

  • Beveled glass octagonal light fixture (the flimsier the brass the better)
  • Needle-nosed pliers
  • Wire cutters
  • Small flat head screwdriver
  • Gloves
  • Glass cleaner
  • Soft cloth
  • Scrapbook paper
  • Printed photos
  • Mod podge
  • Paint brush
  • Screw eyes
  • E-6000
  • Wax paper to protect work surface
  • Ribbon
  • Scissors


Instructions:

Put on your gloves for this first task! To free the beveled glass, you’ll need to poke, prod and cut at the brass surrounding the glass. Inserting a flat screwdriver will help to pry up the edges. As the edges come loose, cut into the metal with wire cutters, and pull it apart using needle-nosed pliers. All the while, use caution so as not to break the glass pieces.

After all the glass is free, clean both sides of the glass with windex and a soft cloth. Scratch off any dirt with your fingernail (or a razor blade).

Cut photos to fit inside the middle of the beveled glass piece.

Trace around the glass and cut a piece of scrapbook paper the same size as the glass.

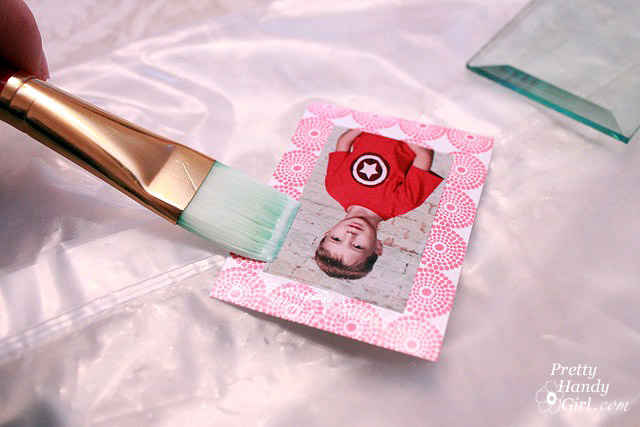
Coat the back of the photo with mod podge and center it on the scrapbook paper.

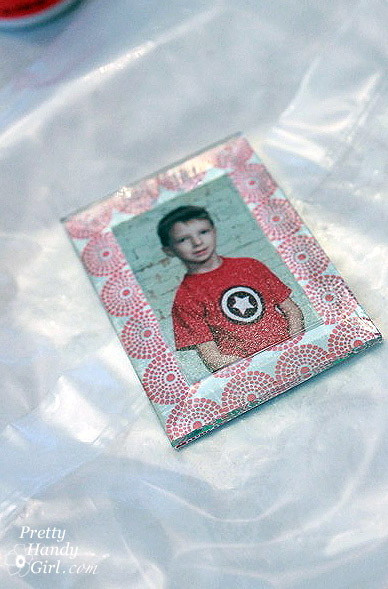
Gently coat the front of the scrapbook paper border with mod podge (do not paint mod podge onto the photo or streaking can occur.)

Press the flat side of the beveled glass on top of the scrapbook paper/photo.

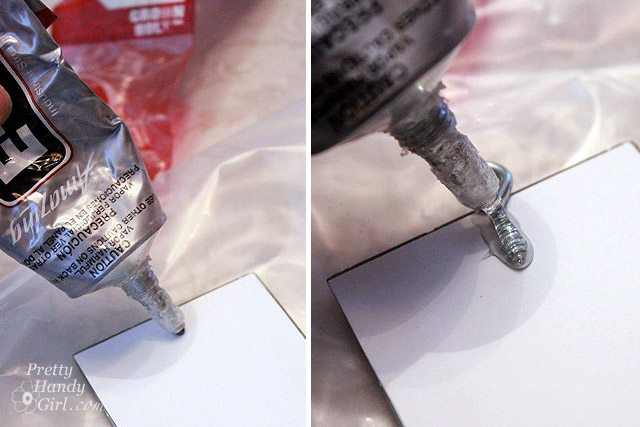
Flip the glass over and put a dollop of E-6000 at the top center of the scrapbook paper. Lay one screw eye into the glue, then cover the screw with a small dollop of E-6000 glue to secure the screw eye.

After the mod podge and E-6000 has dried, cut some pieces of ribbon and thread them through the screw eye. Make a loop with the ribbon and hang it on your tree!

Or give them as gifts to the Grandparents!

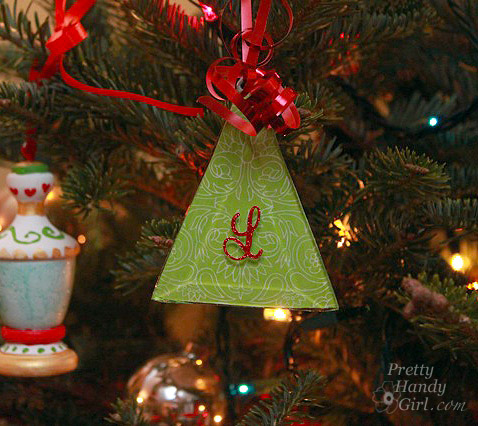
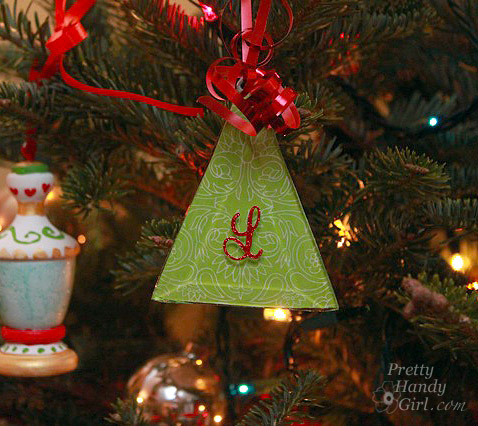
I made another ornament using scrapbook paper and stuck a monogram letter sticker on top of the glass. I also added a small quote on another ornament. The possibilities for this project are numerous!

I had to share with you a few other transformations that I showcased during the talk at the Habitat ReStore:

I took an old chandelier and flipped her over, coated her with primer, heirloom white spray paint and then added some distressing and finished with some antique gold Rub n’ Buff.

Now she’s a beautiful candelabra for our dining room table!

I used the canopy (round flat disk that attaches to the ceiling) as the base for the candelabra. When you take apart a light fixture, you can get creative by flipping and switching around parts and pieces.

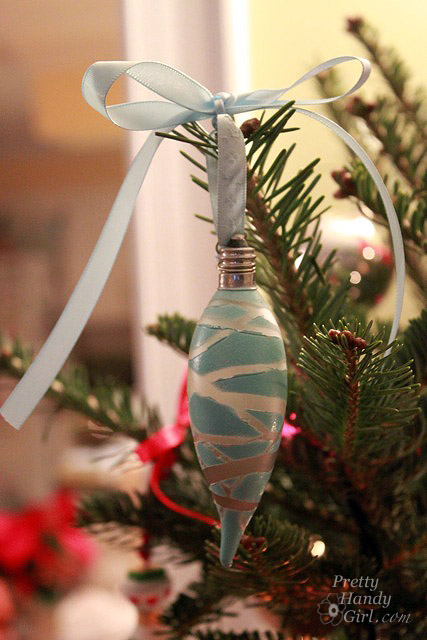
Old lightbulbs became adorable little ornaments with a few stickers and a coat of spray paint. My favorite is this clear bulb that I added a heart sticker to. When I peeled off the sticker a little heart shaped window remained. Peek inside to see the filament.

If you’ve ever wrapped an easter egg with rubber bands before dying it, you’ll recognize this pattern.

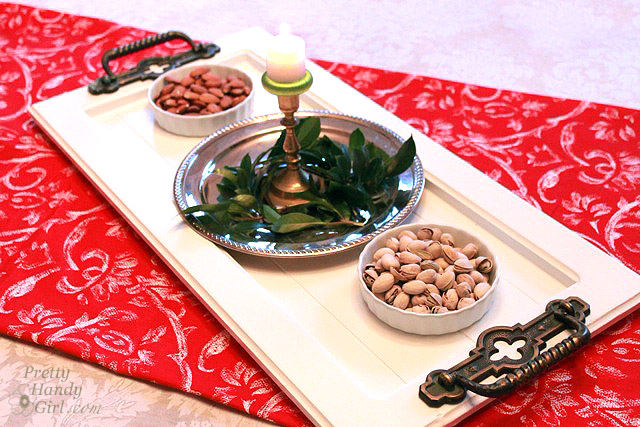
A $2 cabinet door and some chunky cabinet handles partnered to form a holiday serving tray. The handles also got a little Rub ‘n Buff for shine.

I’m sorry I don’t have the tutorials for you right now. Most likely at a later date, I’ll post them for y’all.

I have two announcements:

#1 – The winner of the RIT dye giveaway is: Judi! She said,  “Dye WOOD –really !!!! Can’t wait to see what all else you (and I) can dye !! Loving it !!”

RIT Dye

#2 – My son let me paint his cast like a candy cane! I used KILZ Clean Start (zero VOC) primer and a flat brush to give his cast the stripes. One of my facebook fans had the genius idea of asking Santa to sign it!


Let’s just hope that he can keep this cast for more than a week!


Linking up to Home Stories A2Z Tutorials & Tips TuesdaysCentational Girl’s Holiday Home Craft Link PartyNot Just a Housewife’s Show Me What Ya GotFunky Junk Interiors SNS


Pin for later!


Today is Friday! And you know what that means…it’s time for another Tool Tutorial Friday! Today I’ll be introducing you to the circular saw.


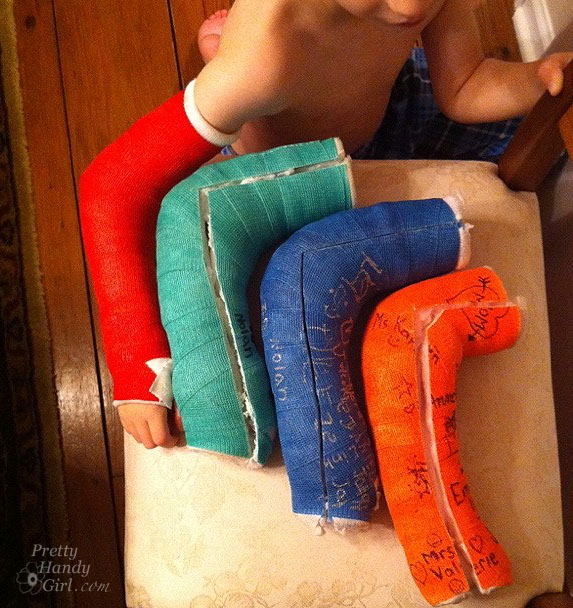
But first, how are you? I don’t know about your week, but I’ve had a busy one. If you follow me on Twitter (I’m not sure why anyone would), you would have been privy to the rainbow of color casts my son has been collecting. He received his 4th cast yesterday. But, who’s counting, right?! Anyway, I learned two things about casts in the process.

  1. Little boy arms will swell to adult proportions post surgery, but will eventually return to normal size…eventually. At that point, a new cast is desired to keep the arm from finding a way to wiggle out.
  2. If you put two brothers in the bathtub and leave the room for one nano-second they will find a way to water log a tightly plastic bagged and saran-wrapped cast that is merely 5 days old!

Mr. Green up there, he only lasted a mere 5 days! You could probably tell by the one signature on it. My mom is trying to convince us to paint white stripes around his current red cast to make it into a candy cane. Hee, hee.

And now let’s plug in some power and start this tutorial!

A circular saw is essentially a portable power saw that can make easy cross cuts like a miter saw. But, it can also rip long boards like a table saw. This little hand held bad boy is a necessity if you are working on an exterior project like a deck or a fence, or anything that is too big to put on the miter saw or table saw work surface. Trimming the varied lengths off newly laid deck boards would be near impossible without a circular saw.

Before I owned either a table or miter saw, this was my power saw. And this baby has cut a lot of wood in its life.

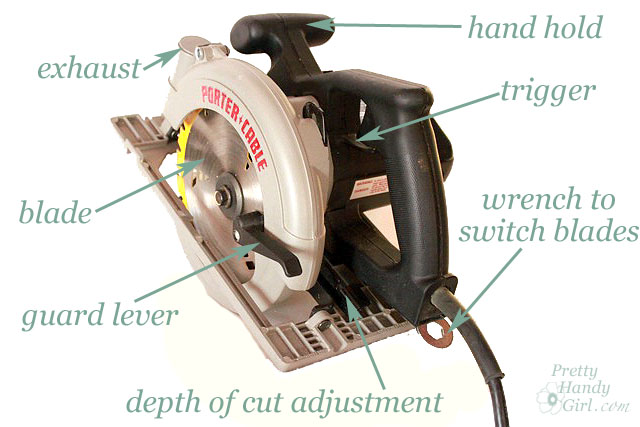
If you are familiar with circular saws, this particular model may look a little bit backwards to you. That is because this is a left-sighted circular saw. I think Porter Cable is one of the few companies (if not the only one) to make one. I am right handed, but for some reason, this saw seemed more comfortable to me. When I was shopping for my circular saw, I spent about an hour or so picking up, holding and imagining using the saw. What I liked about the Porter-Cable is that it had a smaller grip and I was able to span my hand width between the hand hole and the guard lever while cutting.

If you go shopping for a circular saw, spend some time holding them and see what feels most comfortable to you.

Circular saws range in price from as low as $30 up to $300 or more. They come in a variety of  sizes (5 3/4″ – 9″) which refers to the blade size. The most common size people buy is a 7 1/4″.

Before you make any cuts with a circular saw, you must set your depth of cut. If cutting through a board, set the blade about 1/8″ – 1/4″ lower than your lumber. Support your lumber on saw horses or a raised surface (4″ x 4″ posts on the ground work well.) It is imperative that you think through your cut before you actually saw a board. Make sure that your waste end will fall away from the saw after it is cut. Otherwise, the blade will get pinched between the boards and can kickback (see the example in the video.)

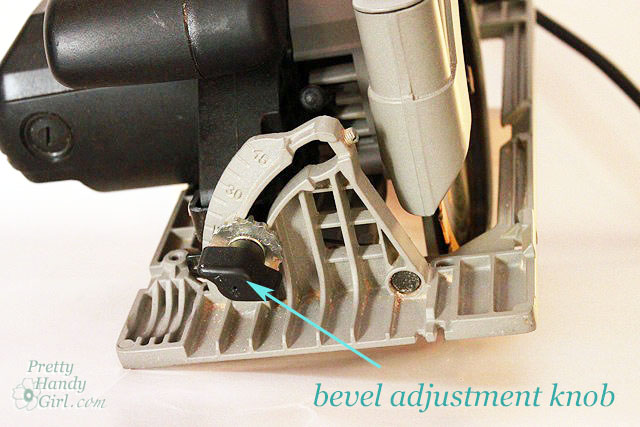
You can also change the bevel angle of your cut by adjusting the base of the saw after loosening the bevel adjustment knob.

As with any other power tool. Take the time to familiarize yourself with your power tool. Read the manual and only use a power tool when you are alert and not distracted.

DISCLAIMER

The viewer assumes all responsibility and liability associated with the hazards of woodworking. Pretty Handy Girl is not responsible for any errors or omissions that may be present in this tutorial. She also assumes no liability for any action or inaction of a viewer.

Please use extreme caution when using power tools. Read your tool manual thoroughly and wear protective safety gear. Take your time familiarizing yourself with a tool before using it. (If you are missing the manual, you can easily find it online by going to the manufacturer’s website or google your saw’s make and model + manual.)

Please recognize that I have tried to put together a basic circular saw usage tutorial to get you started. I have tried my best to show the safest way to use a circular saw. That being said, I am not a professional (I only play one on this blog ;-) .)


The holidays are at full throttle speed and my boys couldn’t be more excited. Myself? I still haven’t decorated the house — in fact — truth be told I let Pretty Handsome Guy and the boys bring in the tree and decorate it. But, I did want to get into the holiday spirit so I poured a little eggnog into my coffee (Dee-lish-ious!!!) and sat down to make a humorous holiday shirt for my eager little ones.

If you’ve ever used silk screens before you know how wonderful they are for making duplicates. Team t-shirts, family reunion shirts, signs, banners, gift bags, pillows and linens are only a few things that you could silk screen. But, getting fine details and creating a screen that has text on it was usually reserved for the professionals who had the proper equipment. Well, those days are gone! Plaid has developed a DIY silk screen kit that allows you to create a screen using any black and white design printed on your home computer using regular printer paper. No transparencies and no need to reverse your image! Plus, for those of us eco-conscious crafters, the simply screen inks are acrylic and non-toxic! The  Simply Screen kit retails for $39.99 and you can purchase the refill screen pack for $19.99. The kit can be found at Hobby Lobby or online at shop.plaidonline.com.

Plaid was kind enough to send me a kit to try. And thankfully, several bloggers (especially Crafts by Amanda and Mrs.Greene), worked out the kinks and shared their knowledge. Gotta love that creative blogger network ;-).

This video will give you all the tips and tricks you need to know to get a perfect screen exposure when creating a Simply Screen silk screen:

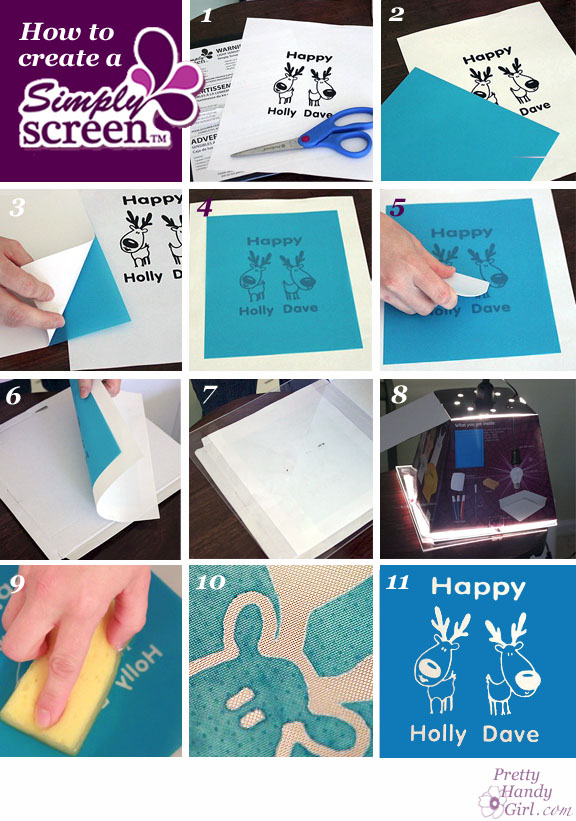
If you have trouble viewing the video, here are the steps to create the screen:

1. Print out your black and white design on regular printer/copier paper. Touch up any white spots with a sharpie marker.
2. Remove one screen from the black plastic envelope. Cut the screen down to size (leave at least 2″ on all sides of the design.) Put the unused screen back into the black plastic bag.
3. Peel the backing off the screen.
4. Flip it over and lay the sticky side onto your image.
5. Use the squeegee to firmly press down on the screen and to affix it to the design.
6. Turn the image and screen over so the screen is on the bottom. Lay it onto the bottom of the Simply Screen box.
7. Lay a piece of plexiglass or glass on top of the screen and printout.
8. Close the lid, turn on the light, and set your timer for approximately 25 minutes.
9. Turn off the light, remove the screen and immerse it in tepid water for 30 seconds. Gently rub the design with a sponge.
10. Continue rubbing both sides of the design until there is no blue emulsion in the graphic areas. The graphic should be a clean see-through image.
11. Dry your screen and follow the directions below to make your screen prints.


Printing Using your Silk Screen:

Now that you have learned how to create the screen, printing with it couldn’t be easier! This is truly the fun part.

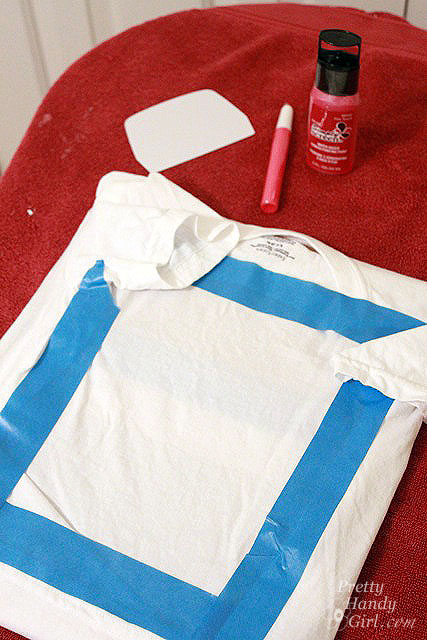
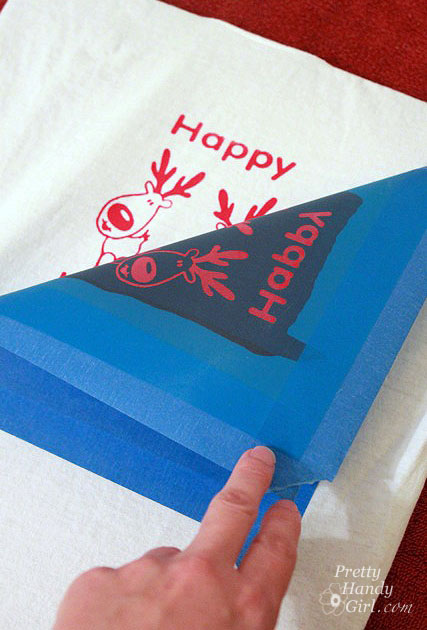
Start by taping your fabric to a piece of cardboard or foam board. If you are printing shirts, pillow cases, or anything that is double thickness, put the cardboard directly behind the layer you are printing on to protect from any ink bleeding through.

Position the screen where you would like the image to appear.

Tape the screen down with masking or painter’s tape.

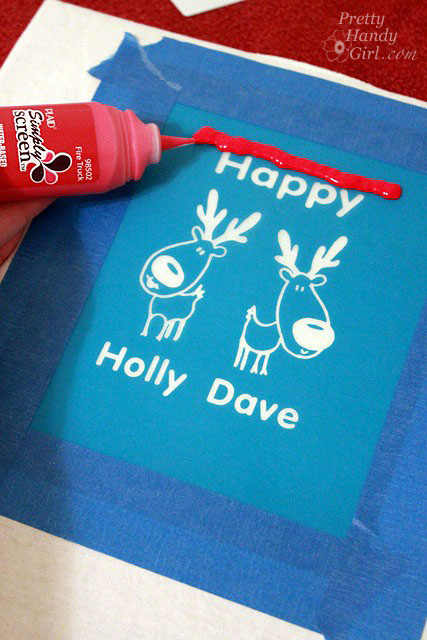
Run a thick line of Simply Screen silk screen ink at the top of your image.

Hold the squeegee at a 45° angle against the screen.

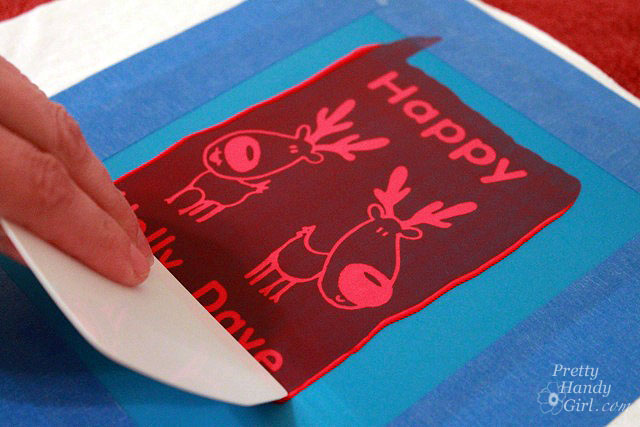
Press down firmly and pull the squeegee towards you. Focus on pressing the ink through the screen and scraping it off the screen at the same time.

Immediately remove your screen being careful not to get any ink on anything when you lift. Lay it down on the next item  you want to silk screen. (It is a good idea to clean the screen after every third impression, as the ink starts to stick around the edges and the image quality will decline.)

Let the ink dry.

Heat set the image with a hot iron. Wash on cold and air dry to protect your image.

I think this is the perfect kit for making holiday gifts! I’m on a big sew your own gift bag kick and I think I’ll make some more bags and screen print a graphic on it for gifts.

If you like my “Happy Holly Dave” design, feel free to download the printable pdf file and use it for your own personal use.

Or you could also download an earlier incarnation of the design with three reindeer!

Hope you all have a Happy Holly Dave! LOL!


Disclosure: This post has been sponsored by Plaid Simply Screen. I was sent a Simply Screen Kit and paid a small fee in return for writing a post about my experience using their product. The ideas and opinions are strictly my own. I will never let any compensation (monetary or free product) keep me from giving you (the reader) a straight up and honest review.

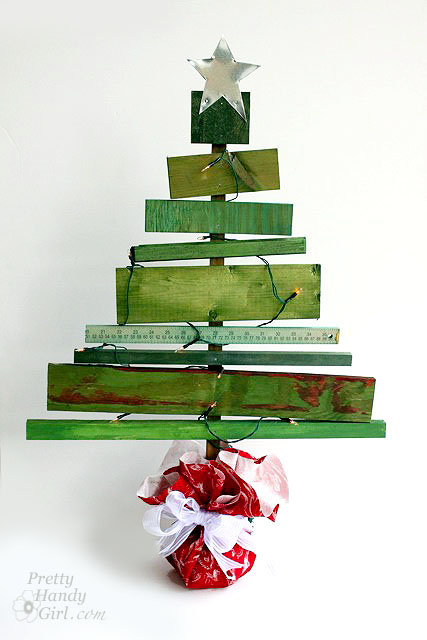
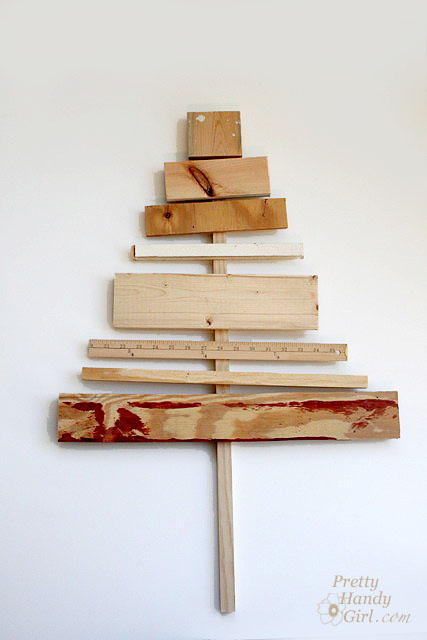
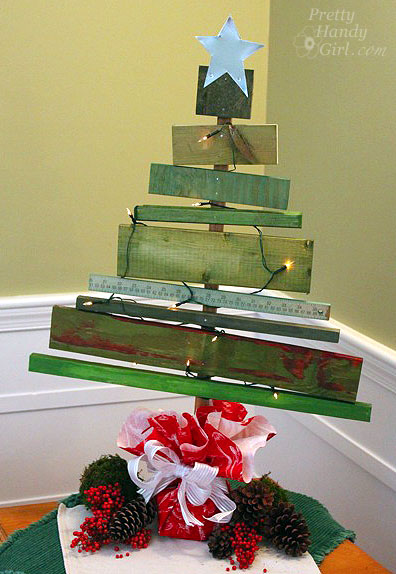
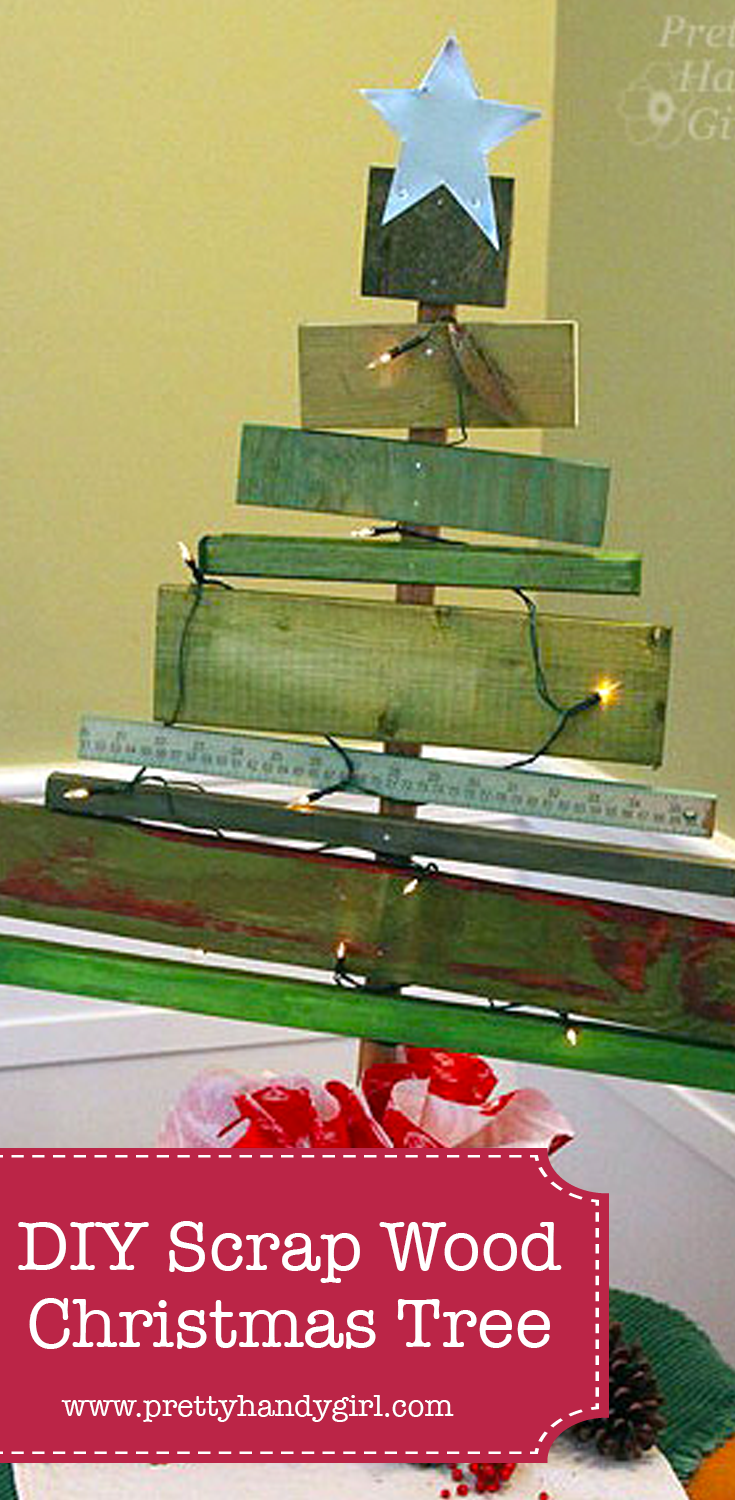
scrap_wood_christmas_tree

Holiday decorating is in full swing in my house. We bought our tree today and Pretty Handsome Guy and the boys decorated it today while I worked on the cute little scrap wood Christmas tree above.

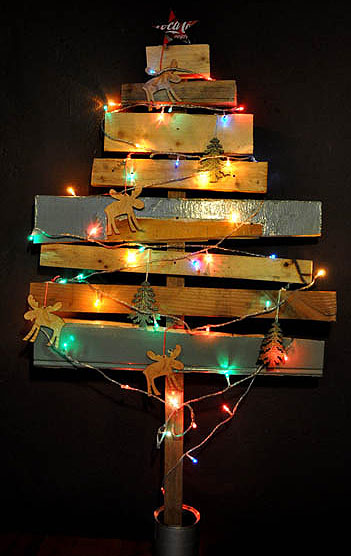
When I saw the scrap wood DIY Christmas Tree made by Creative Chaos, I fell in love and knew I had to make one too.

Having an ever growing scrap wood pile also helped convince me to make it.

I decided to try dyeing the wood scraps! You read that correctly, dye the wood. Did you know that you can use RIT dye to color more than just fabric?! Check out the RIT Dye website to learn more about all the techniques and materials you can dye. You will be amazed! Plus, RIT created a RIT Formula Guide that will give you 500 formulas to mix your own custom colors!

Seriously, that is an amazing array of colors!

Building the scrap wood tree is a super easy project that doesn’t take much skill. There is a fair amount of waiting time (waiting for the wood to soak up the dye and waiting for concrete to harden) but I’m sure you can find something more productive to do than watching cement dry.

Materials:

(I’ve included affiliate links for your convenience. I earn a small percentage from a purchase using these links. There is no additional cost to you. You can read more about affiliate links here.)


Cut your wood scraps to create a triangular form when stacked on top of one another. Cut one long strip to use as the tree trunk.

Dyeing the Wood:

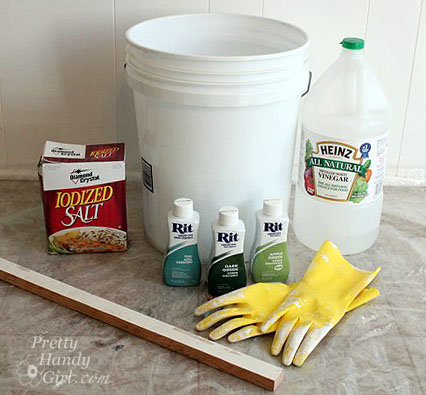
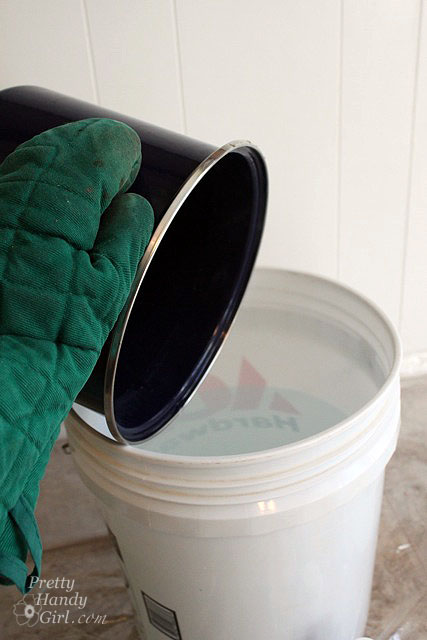
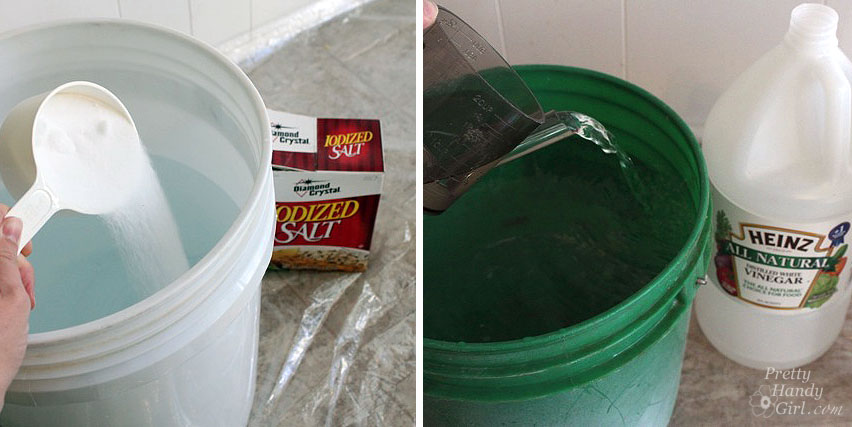
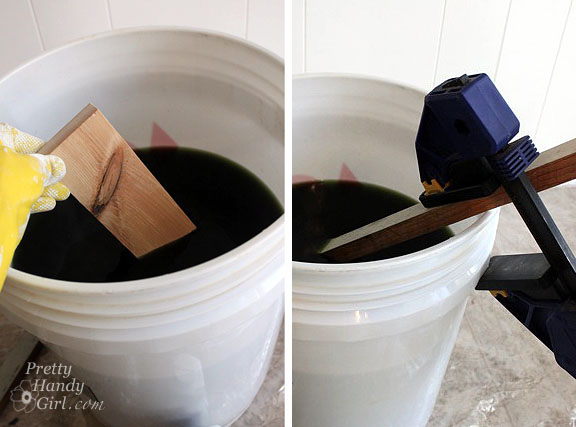
Lay out three 5 gallon buckets (or mix the colors one at a time and use the same bucket.) Set out the dye colors (dark green, apple green & teal) and salt or vinegar onto a plastic sheet. RIT Dye works best when mixed with hot water. Our water heater is set on a safe hot temperature so as not to burn our boys’ hands. Therefore, I decided to add a little bit of boiling water to my mixture to increase the temperature.

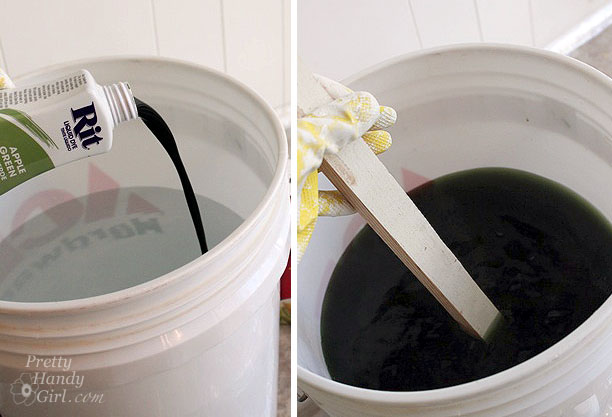
Follow the directions on the RIT container. I added 1/2  bottle of RIT Dye to 3 gallons of water (1/2 gallon of which was the boiling water.) Then mix in 1 cup of vinegar (or salt) in each bucket. (I tried both and didn’t notice any major differences between using salt or vinegar, so you can use either for dyeing wood.)

Put on rubber gloves. Stir until the dye is well mixed.

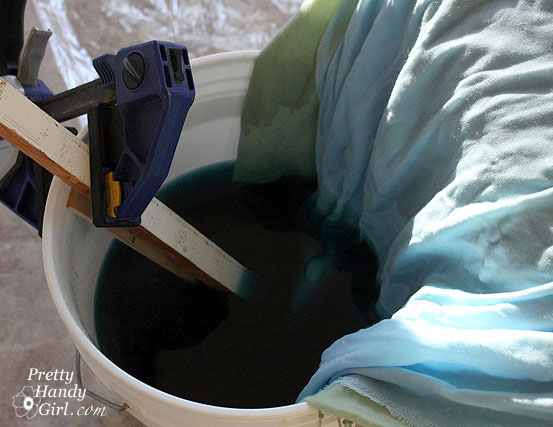
Split up your wood and dip each into the desired color. Because the wood will float, you may need to clamp a piece of wood to hold your larger scraps below the liquid. Then flip the wood to dye both ends of the scrap. The smaller pieces can be floated right side down for color absorption on the side you’ll see.

After 30 minutes remove the wood and let it dry. (Look at that scrumptious color! And the cool thing is that the grain still shows through.)

While you are waiting for the dye to dry. Stain the tree trunk strip by dipping a paper towel into Minwax Early American stain and rubbing it on the wood. Alternatively, you could stain the trunk with RIT Dye in a brown color.

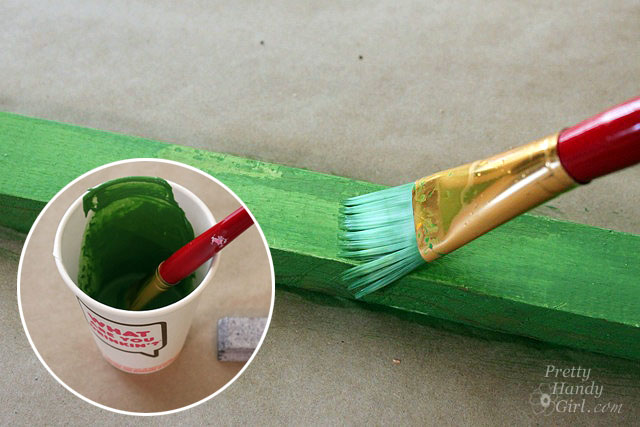
*A note about pre-painted or sealed scraps. The wood needs to be unpainted, unsealed, or unstained in order to accept the RIT dye color. I tried dyeing these two strips and obviously it didn’t work too well.

No worries though, I mixed up some green acrylic paint and some water and then painted them separately.


Building the Tree:

Position the scraps in the desired location on the trunk.

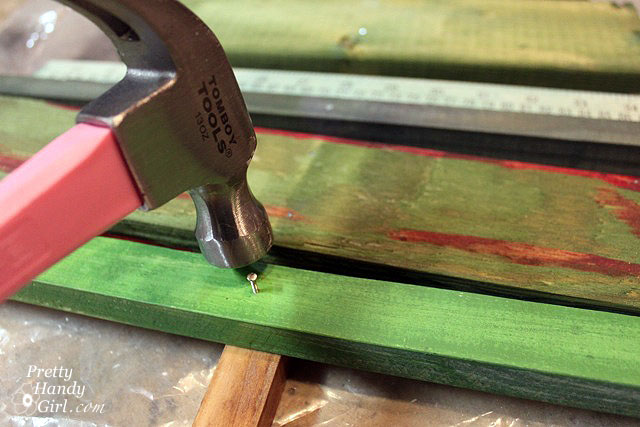
Gently hammer the scraps to the trunk strip with brad nails. Make sure the nails will go through the scrap and about halfway through the trunk.


Making the Cement Base:

*If you want to stake your tree in the ground, feel free to skip this step.

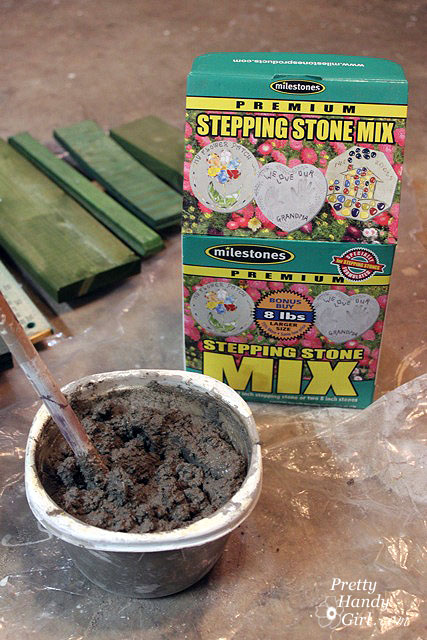
Wash out the plastic container. Fill the container with cement mixture from the stepping stones kit. Follow the directions on the package. (I ended up using only half the kit, so I halved the directions.) Slowly add water and stir the cement mixture until it is thick and heavy, but not crumbly.

When you have the right consistency, gently bang the container on the ground to get some of the air bubbles out and to level the top. Slide the tree trunk stake into the cement.

Level the tree from side to side and front to back. Then secure the tree with clamps (or other props) while it dries overnight.

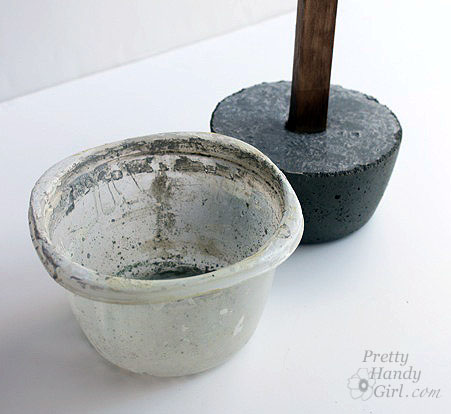
In the morning, squeeze the sides of the container to release the cement base. Remove the container and brush off any cement crumbs from the base.

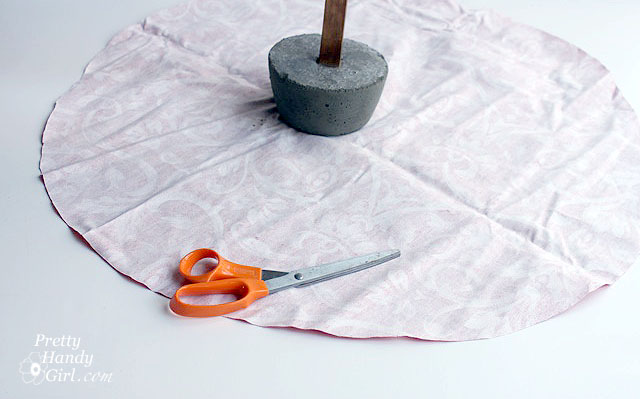
Cut a piece of fabric in a circle large enough to cover the base.

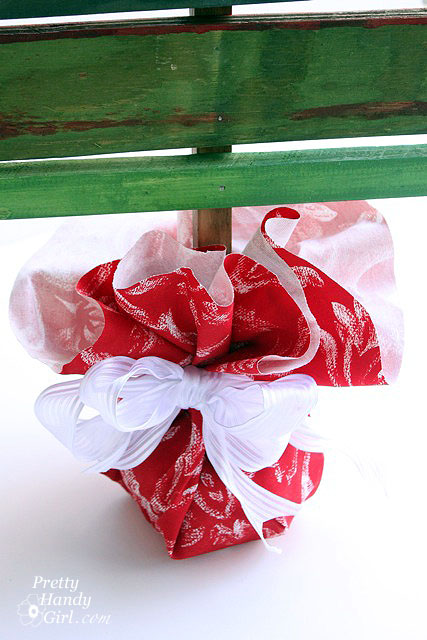
Gather the fabric up and tie it with a ribbon to secure it in place.


Adding the Star:

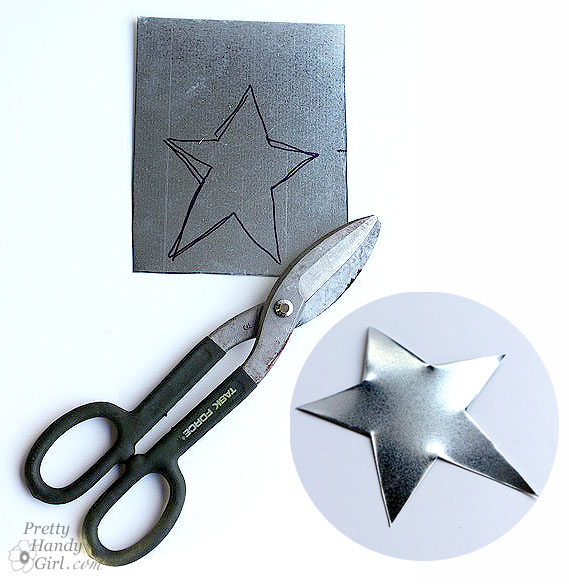
Trace a star shape onto a scrap of sheet metal (duct material) or a metal can. Cut out the shape using tin snips. Wear gloves to protect your hands from the sharp edges.

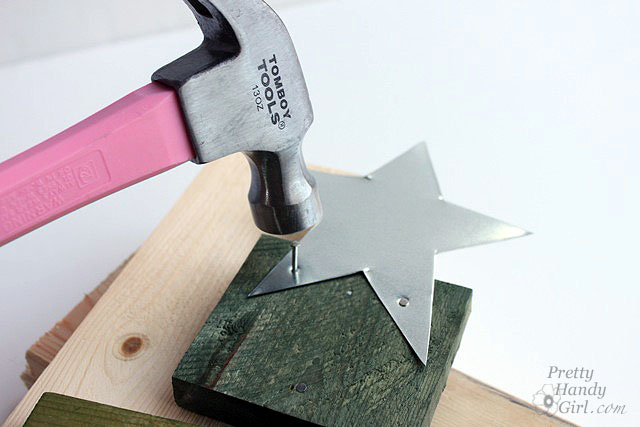
Position the star so it overlaps the top piece of scrap wood on the tree. Hammer two brad nails through the star and into the wood.

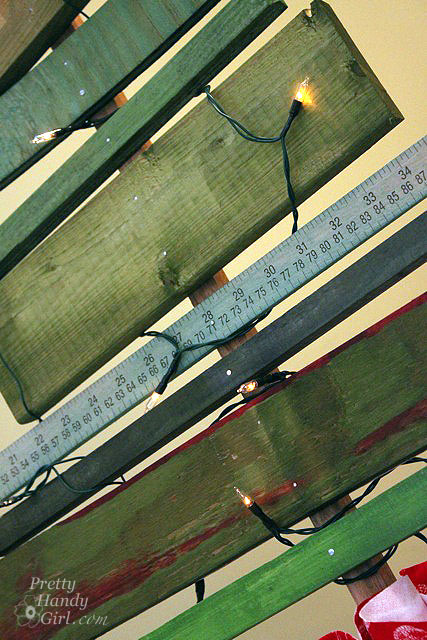
Decorate your tree with some holiday lights. (I found a set of battery powered LED lights at Target. They aren’t as bright, but it eliminates having to plug in a light cord and having a tripping hazard.)

I like the variety in color I got from using the three different colors of RIT dye. I am really loving my little table top tree. He kind of reminds me of a Charlie Brown Christmas tree, but I’m not sure why.


I have to tell you that I was so excited when I saw the color of the Teal RIT Dye, that I couldn’t resist throwing some old scarves into the bucket with the wood.

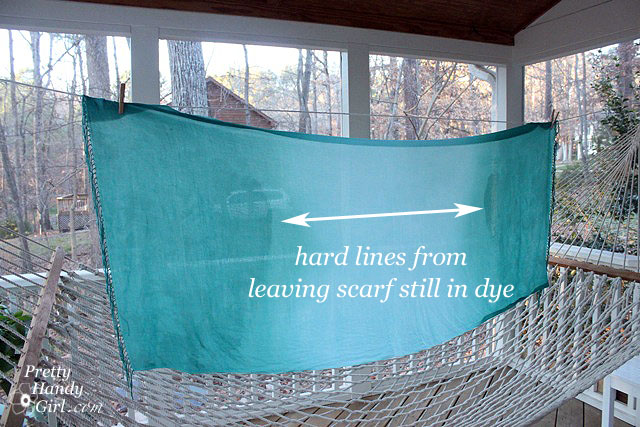
I had two scarves, one was light green and the other light blue. The green one never accepted the dye even after an hour of soaking. Obviously, the scarf was made of polyester, which will not accept dye. The light blue one came out beautifully. I attempted to recreate an ombré technique as described on the RIT Dye website, but didn’t read the directions until after the scarf had been sitting still in the dye for about 10 minutes. This gave me a sharp dye line, but it isn’t really noticeable when wearing it.  Next time I’ll know to keep dipping and moving the fabric.

This forgotten scarf has now been relegated to my wear almost everyday scarves!


Disclosure: This post has been sponsored by RIT Dye. I was sent several bottles of RIT Dye and paid a small fee in return for writing a post about my experience using their product. The ideas and opinions are strictly my own. I will never let any compensation (monetary or free product) keep me from giving you (the reader) a straight up and honest review.

Pin for later!