scrap_wood_christmas_tree

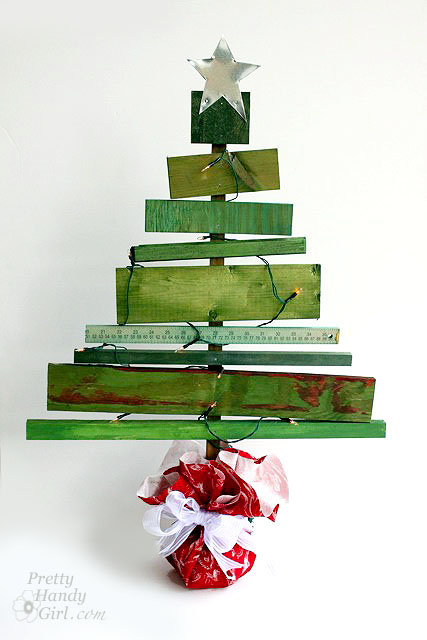
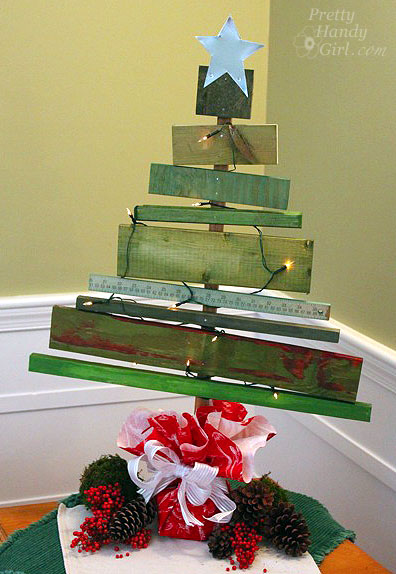
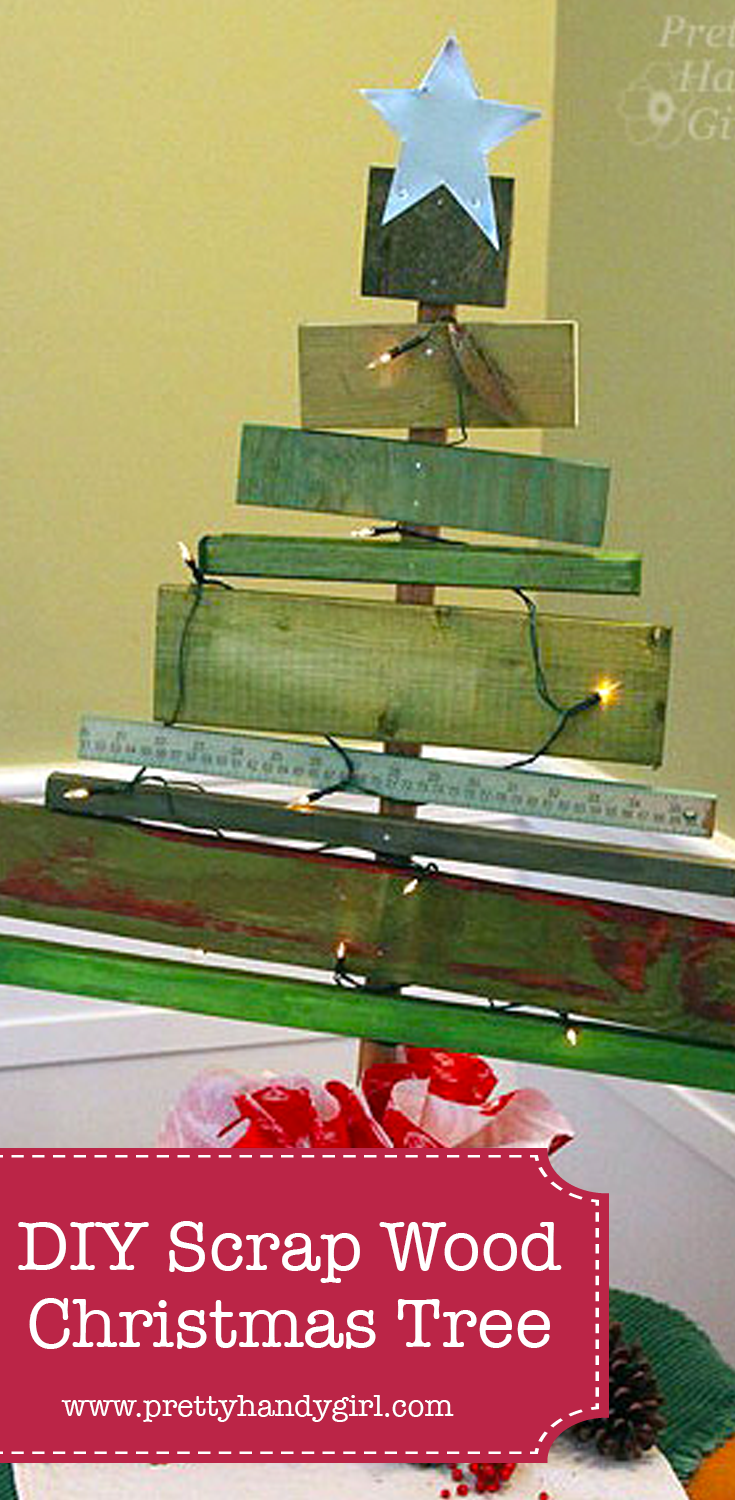
Holiday decorating is in full swing in my house. We bought our tree today and Pretty Handsome Guy and the boys decorated it today while I worked on the cute little scrap wood Christmas tree above.

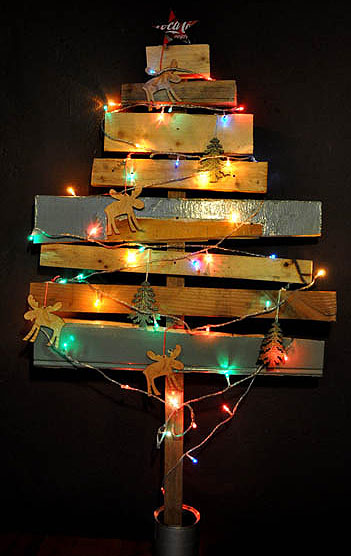
When I saw the scrap wood DIY Christmas Tree made by Creative Chaos, I fell in love and knew I had to make one too.

Having an ever growing scrap wood pile also helped convince me to make it.

I decided to try dyeing the wood scraps! You read that correctly, dye the wood. Did you know that you can use RIT dye to color more than just fabric?! Check out the RIT Dye website to learn more about all the techniques and materials you can dye. You will be amazed! Plus, RIT created a RIT Formula Guide that will give you 500 formulas to mix your own custom colors!

Seriously, that is an amazing array of colors!

Building the scrap wood tree is a super easy project that doesn’t take much skill. There is a fair amount of waiting time (waiting for the wood to soak up the dye and waiting for concrete to harden) but I’m sure you can find something more productive to do than watching cement dry.

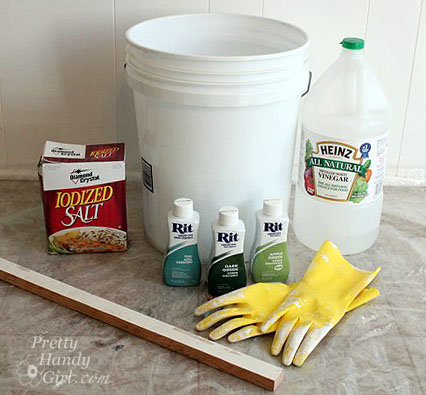
Materials:

(I’ve included affiliate links for your convenience. I earn a small percentage from a purchase using these links. There is no additional cost to you. You can read more about affiliate links here.)


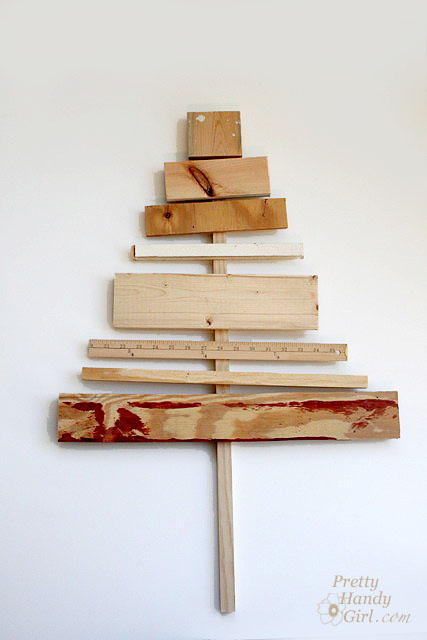
Cut your wood scraps to create a triangular form when stacked on top of one another. Cut one long strip to use as the tree trunk.

Dyeing the Wood:

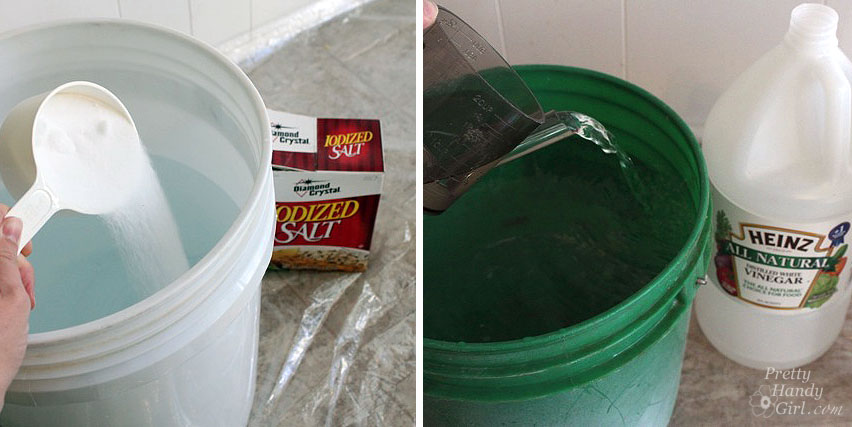
Lay out three 5 gallon buckets (or mix the colors one at a time and use the same bucket.) Set out the dye colors (dark green, apple green & teal) and salt or vinegar onto a plastic sheet. RIT Dye works best when mixed with hot water. Our water heater is set on a safe hot temperature so as not to burn our boys’ hands. Therefore, I decided to add a little bit of boiling water to my mixture to increase the temperature.

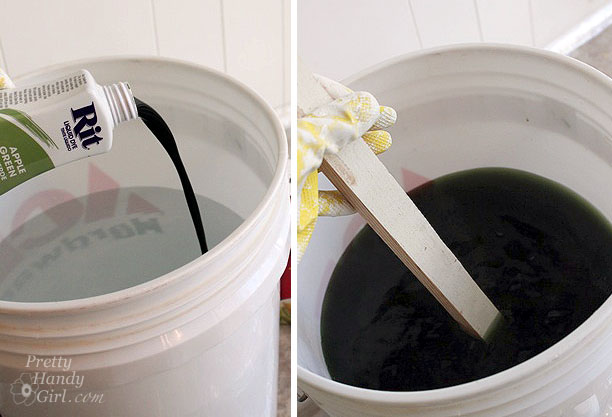
Follow the directions on the RIT container. I added 1/2  bottle of RIT Dye to 3 gallons of water (1/2 gallon of which was the boiling water.) Then mix in 1 cup of vinegar (or salt) in each bucket. (I tried both and didn’t notice any major differences between using salt or vinegar, so you can use either for dyeing wood.)

Put on rubber gloves. Stir until the dye is well mixed.

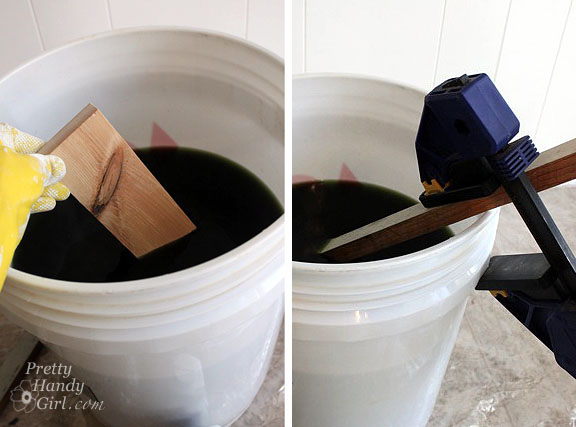
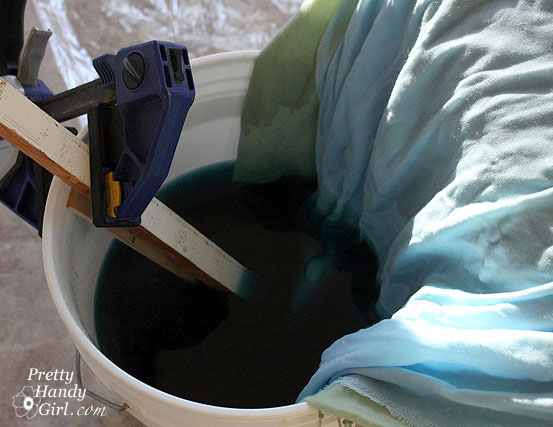
Split up your wood and dip each into the desired color. Because the wood will float, you may need to clamp a piece of wood to hold your larger scraps below the liquid. Then flip the wood to dye both ends of the scrap. The smaller pieces can be floated right side down for color absorption on the side you’ll see.

After 30 minutes remove the wood and let it dry. (Look at that scrumptious color! And the cool thing is that the grain still shows through.)

While you are waiting for the dye to dry. Stain the tree trunk strip by dipping a paper towel into Minwax Early American stain and rubbing it on the wood. Alternatively, you could stain the trunk with RIT Dye in a brown color.

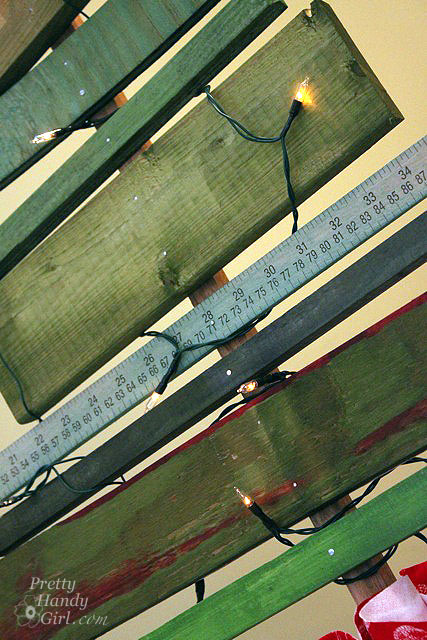
*A note about pre-painted or sealed scraps. The wood needs to be unpainted, unsealed, or unstained in order to accept the RIT dye color. I tried dyeing these two strips and obviously it didn’t work too well.

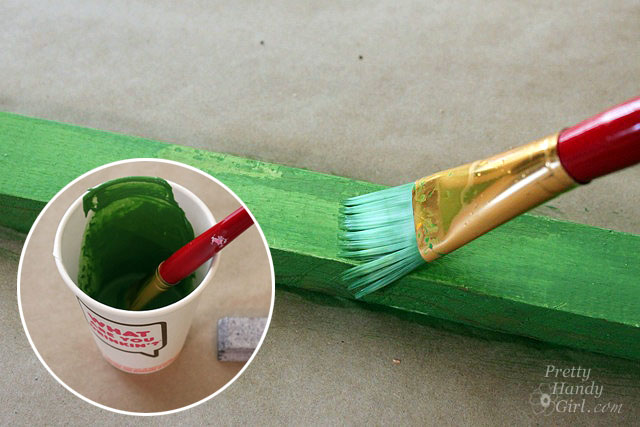
No worries though, I mixed up some green acrylic paint and some water and then painted them separately.


Building the Tree:

Position the scraps in the desired location on the trunk.

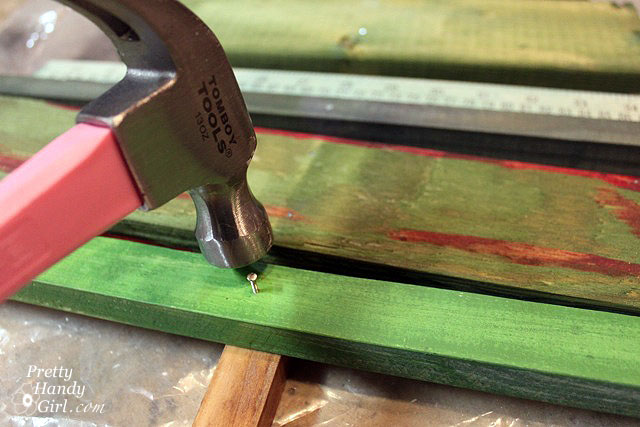
Gently hammer the scraps to the trunk strip with brad nails. Make sure the nails will go through the scrap and about halfway through the trunk.


Making the Cement Base:

*If you want to stake your tree in the ground, feel free to skip this step.

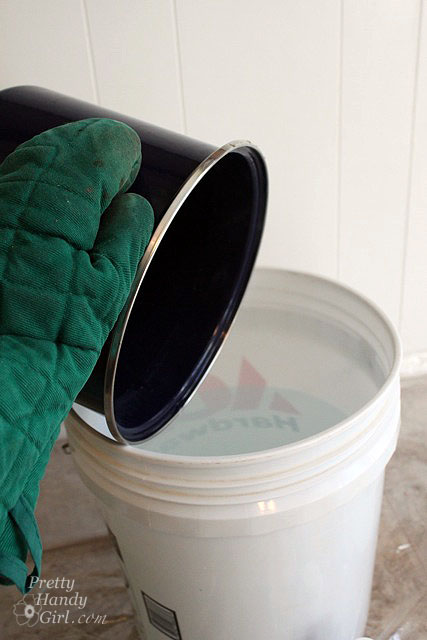
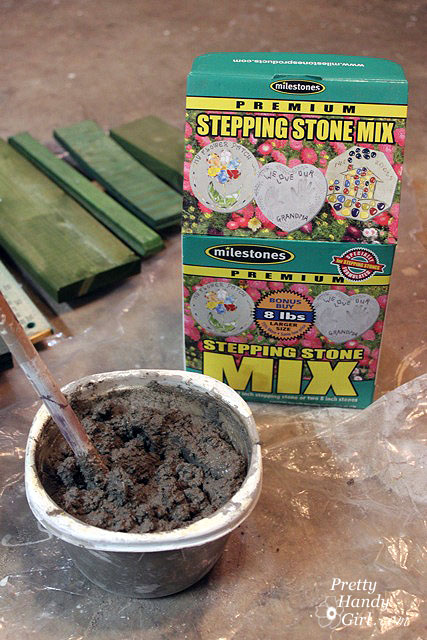
Wash out the plastic container. Fill the container with cement mixture from the stepping stones kit. Follow the directions on the package. (I ended up using only half the kit, so I halved the directions.) Slowly add water and stir the cement mixture until it is thick and heavy, but not crumbly.

When you have the right consistency, gently bang the container on the ground to get some of the air bubbles out and to level the top. Slide the tree trunk stake into the cement.

Level the tree from side to side and front to back. Then secure the tree with clamps (or other props) while it dries overnight.

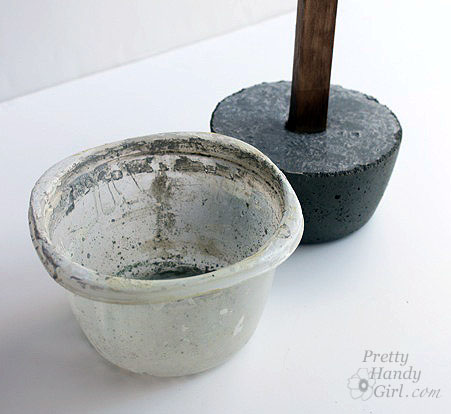
In the morning, squeeze the sides of the container to release the cement base. Remove the container and brush off any cement crumbs from the base.

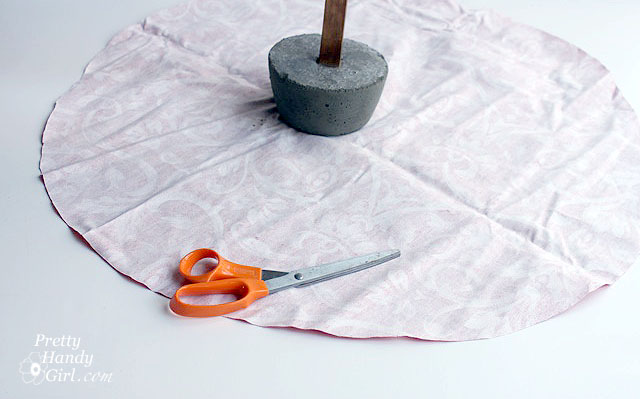
Cut a piece of fabric in a circle large enough to cover the base.

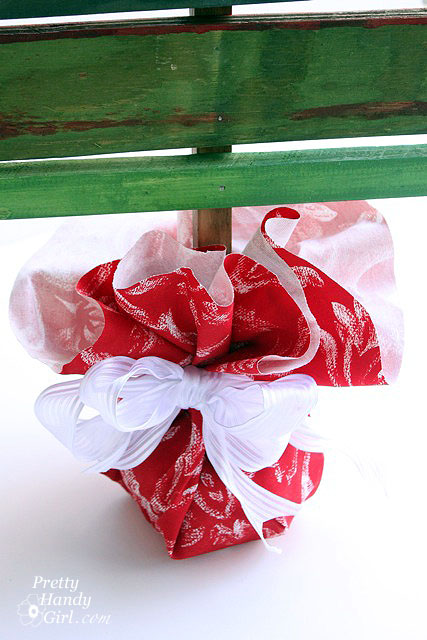
Gather the fabric up and tie it with a ribbon to secure it in place.


Adding the Star:

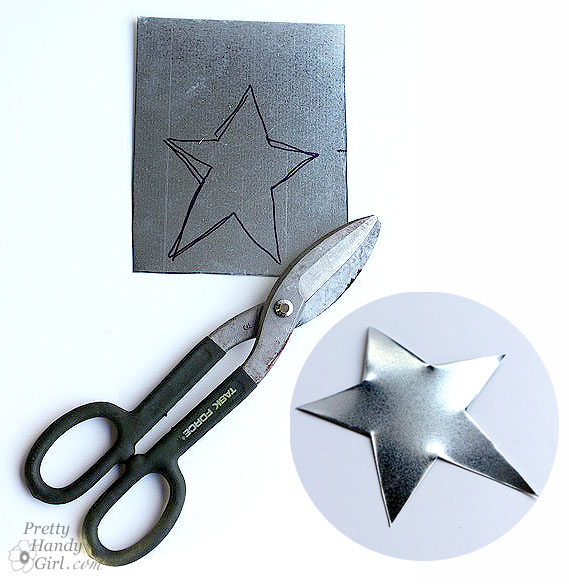
Trace a star shape onto a scrap of sheet metal (duct material) or a metal can. Cut out the shape using tin snips. Wear gloves to protect your hands from the sharp edges.

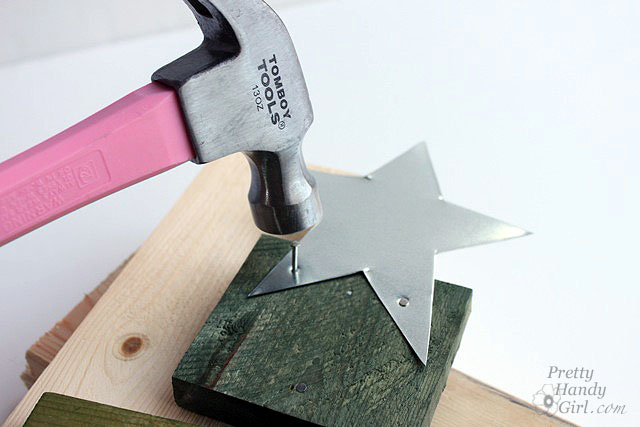
Position the star so it overlaps the top piece of scrap wood on the tree. Hammer two brad nails through the star and into the wood.

Decorate your tree with some holiday lights. (I found a set of battery powered LED lights at Target. They aren’t as bright, but it eliminates having to plug in a light cord and having a tripping hazard.)

I like the variety in color I got from using the three different colors of RIT dye. I am really loving my little table top tree. He kind of reminds me of a Charlie Brown Christmas tree, but I’m not sure why.


I have to tell you that I was so excited when I saw the color of the Teal RIT Dye, that I couldn’t resist throwing some old scarves into the bucket with the wood.

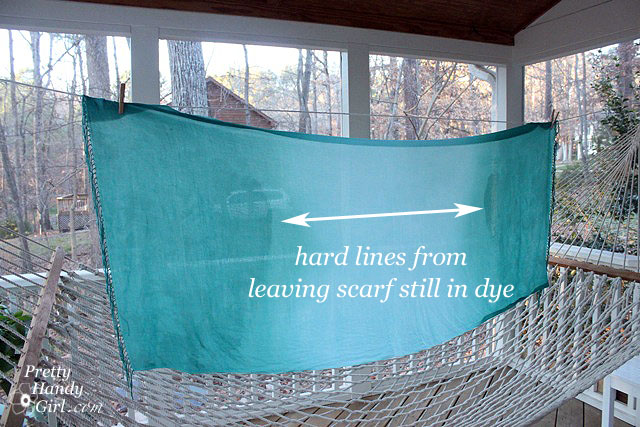
I had two scarves, one was light green and the other light blue. The green one never accepted the dye even after an hour of soaking. Obviously, the scarf was made of polyester, which will not accept dye. The light blue one came out beautifully. I attempted to recreate an ombré technique as described on the RIT Dye website, but didn’t read the directions until after the scarf had been sitting still in the dye for about 10 minutes. This gave me a sharp dye line, but it isn’t really noticeable when wearing it.  Next time I’ll know to keep dipping and moving the fabric.

This forgotten scarf has now been relegated to my wear almost everyday scarves!


Disclosure: This post has been sponsored by RIT Dye. I was sent several bottles of RIT Dye and paid a small fee in return for writing a post about my experience using their product. The ideas and opinions are strictly my own. I will never let any compensation (monetary or free product) keep me from giving you (the reader) a straight up and honest review.

Pin for later!

We had a great turnout at the Habitat ReStore demonstration on Saturday! Thank you to everyone who showed up. It was nice meeting some new friends. There will be another talk at 1 pm on Saturday, December 10th at the Cary, NC Habitat ReStore! I hope you can make it, because I’ll be showing how to turn some common ReStore items into holiday gifts and décor.

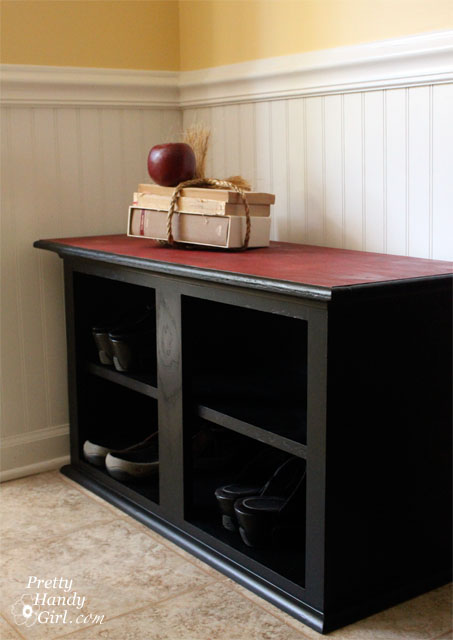
And now for the tutorial that you really wanted to see — but couldn’t make it to see — making a shoe storage bench out of an kitchen wall cabinet!

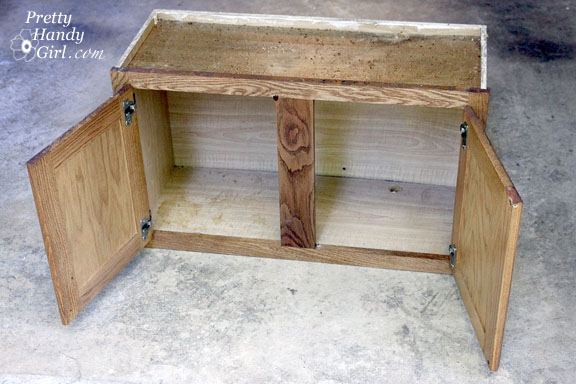
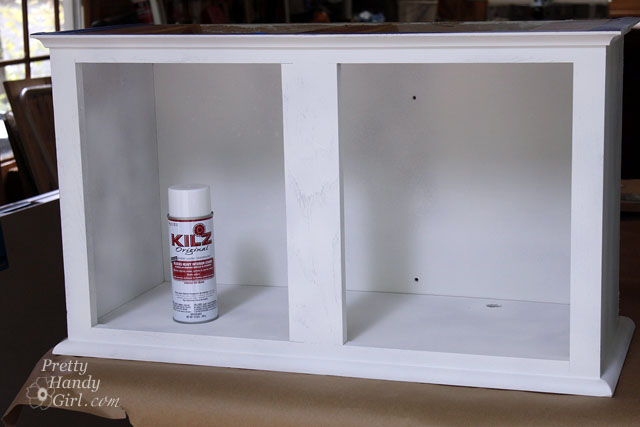
Wall cabinets that fit over your fridge or stove work really well for this shoe storage bench project. Ideally the cabinet will be 18″ in height (standard seat height). If it is shorter, you can build a base for your bench to raise it up a little.

It is more than likely that these cabinets will be coated with about 5 lbs. of grease. But, have not fear, I found THE BEST cleaner for removing grease. Hot water and ammonia! You must work in a well ventilated area when working with ammonia. Sponge on the ammonia and hot water concoction and wait about 10 minutes. Wipe off the cabinet and repeat until clean.

Materials:

  • Ammonia, hot water and a sponge or rag (to clean off grease)
  • Screwdriver
  • Hammer
  • Nail set
  • Miter saw
  • Pencil
  • Level
  • Tape measure
  • Wood putty
  • Sandpaper
  • Construction or thick wood glue
  • Primer
  • Paint
  • Paint brush
  • 2″ finish nails
  • 1 and 1/4″ finish nails
  • Quarter round moulding for base of cabinet
  • Cove moulding for top of cabinet
  • 1″ thick board (cut to fit inside cabinet dimensions)
  • 1×4″ pine firring strips
  • Plywood or pine board cut to fit 3″ wider and 1.5″ deer than finished dimensions of the cabinet (after moulding is added.)
  • Optional: Thin plywood to use as a filler strip


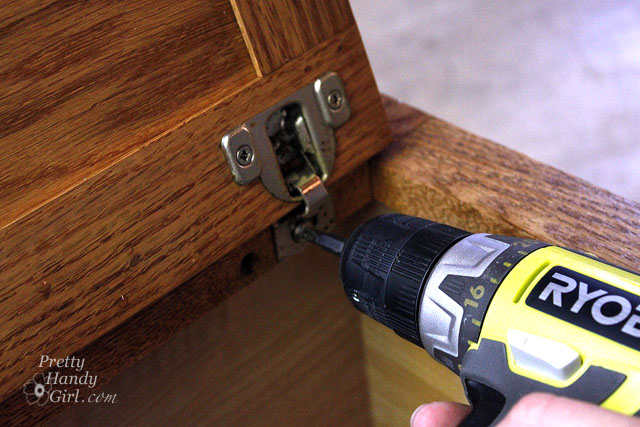
Remove all the hardware and the doors. Remove any nails that are poking out or hammer them flush with the wood.

Measure the inside depth of the top of your cabinet.

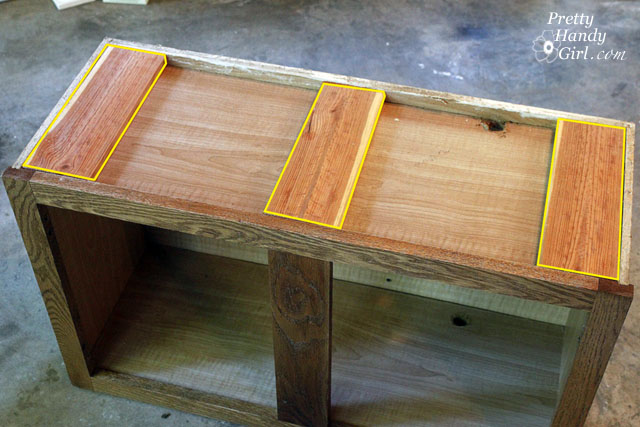
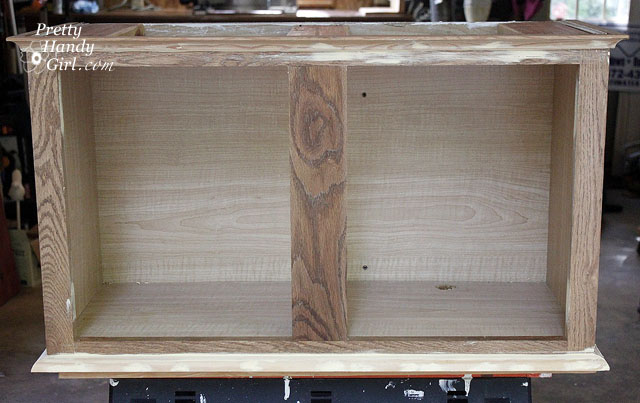
Cut three 1×4″ boards to sit on top of the cabinet and use for the bench support and to give your nails something to grip when attaching the bench top. (Without these supports it would be very difficult to nail or screw into the particle board cabinet without it flaking and chipping.)

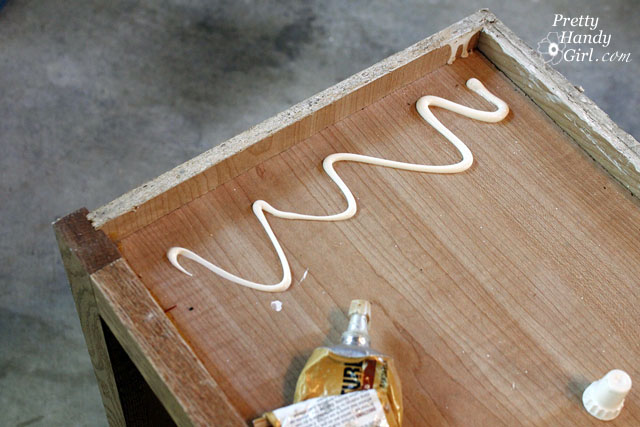
Use thick construction glue to attach the boards. (Glues that have a toothpaste consistency.)

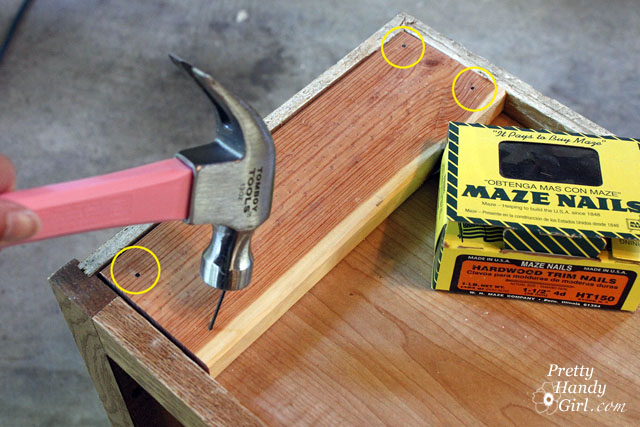
Nail finish nails into the boards at an angle to secure them.

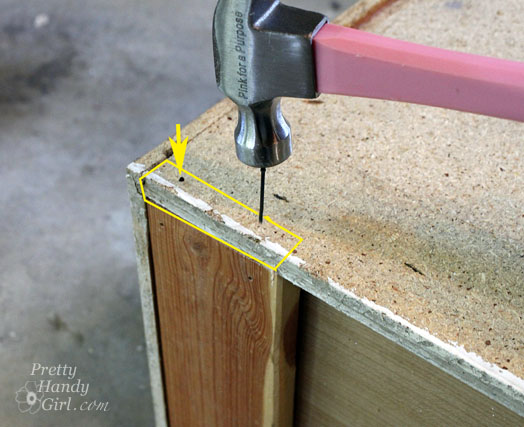
For good measure, nail two more finish nails through the back of the cabinet and into the ends of the support boards.

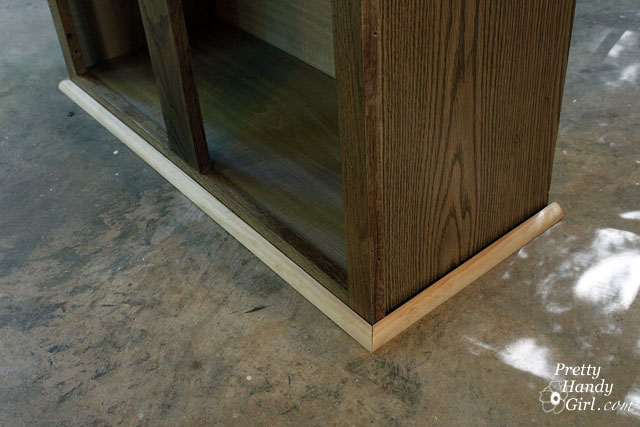
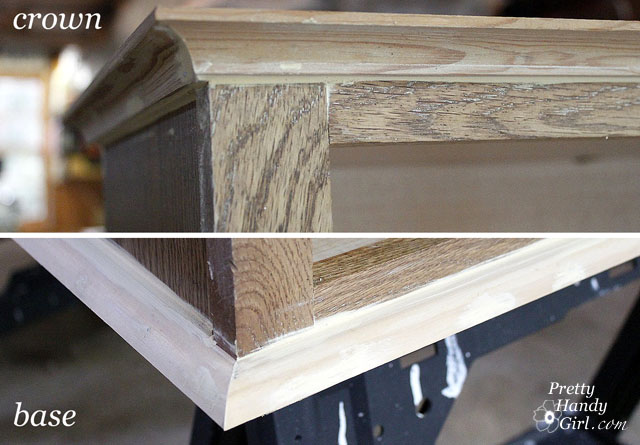
Measure your cabinet sides and front. Cut quarter round (convex shape) for the base of your cabinet and cove moulding (concave shape) for the top of your cabinet.

Here is a close up of the moulding I used for the base and crown of the cabinet.

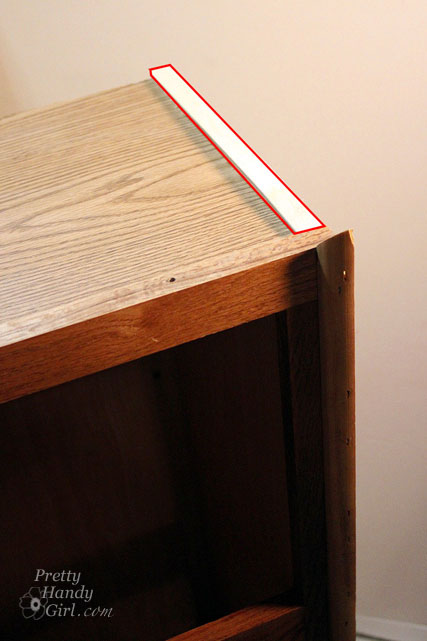
If the face frame of your cabinet juts out past the side, you’ll have a gap (see below). No worries, we can fix that!

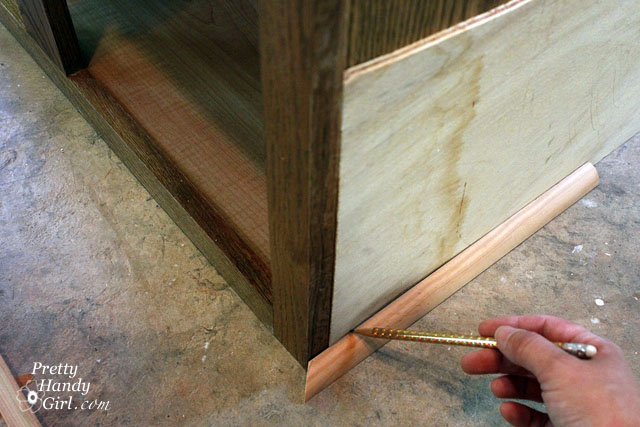
Slip a piece of thin plywood to fit behind the quarter round (and cove moulding). Draw a line at the top of your quarter round (and bottom of the cove moulding). Cut the plywood piece with a jig saw.

Glue the thin plywood strip onto the cabinet.

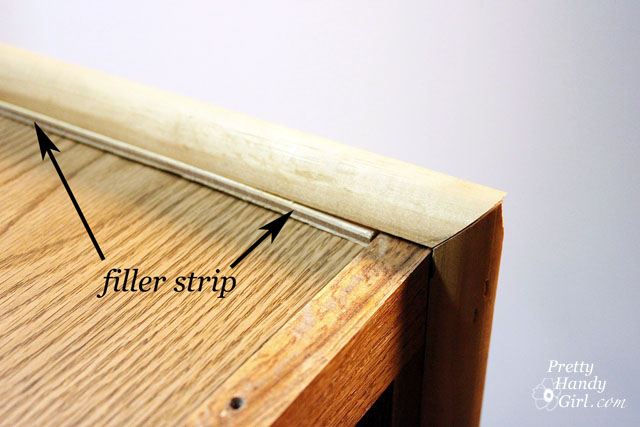
Rest your moulding on top of the filler strip.

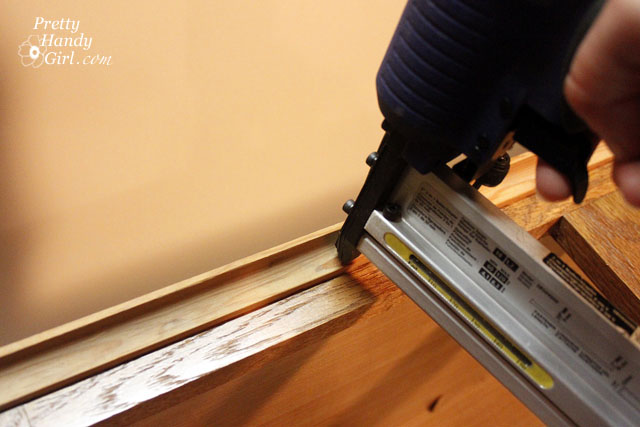
Predrill holes in your trim moulding, then hammer finish nails to secure the trim. If you are using a finish nailer to secure the moulding pieces, you won’t need to pre-drill.

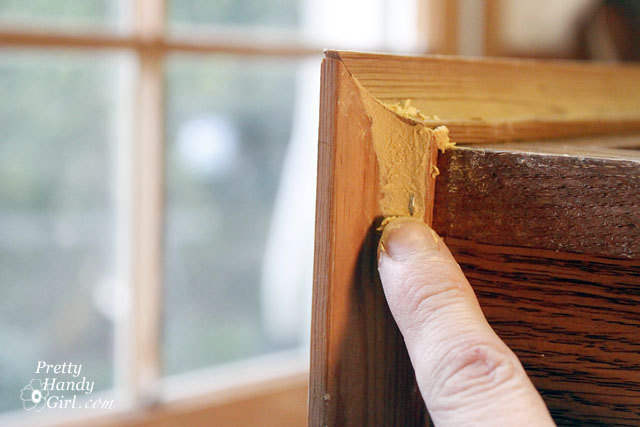
Fill any nail holes or cracks with wood putty.

Fill the seams of the filler strips with wood putty too.

Allow the wood putty to dry and then sand it smooth.

Your cabinet should look something like this:

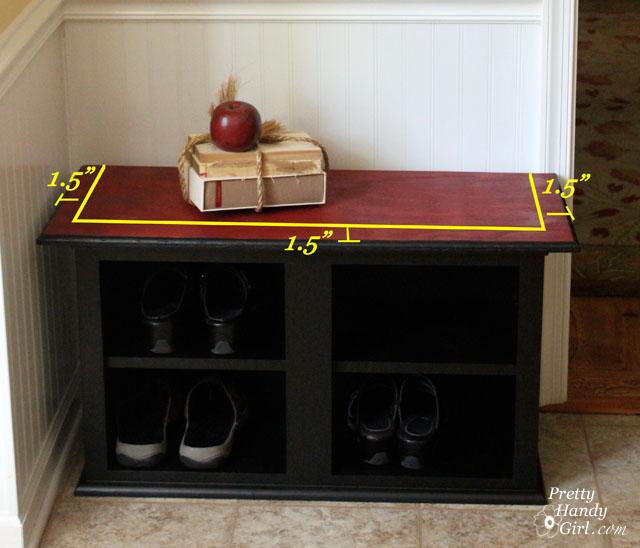
For the top of your bench, cut a piece of wood that is 3″ wider and 1.5″ deeper than the top dimensions of the cabinet (be sure to measure to the edge of the crown moulding.) Sand it smooth. Stain or paint the bench top.


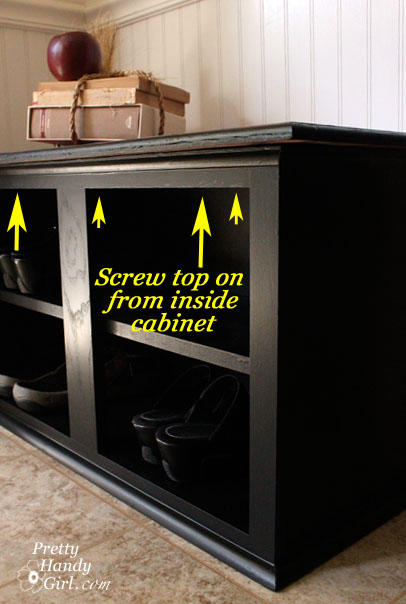
At this point, you can attach your bench top by screwing a few screws from inside the cabinet up through the support pieces and into the bench top.

*For demonstration purposes, the video will show how I attached the bench top with glue and finish nails from the top: Add some construction glue to the wood supports. Then, nail the top into the three support boards on top of the cabinet. Fill the holes left by the nails. And touch up the spots with stain or paint. Either way will work, but the screws from below will save you the work of adding wood putty and/or touching up the nail holes.

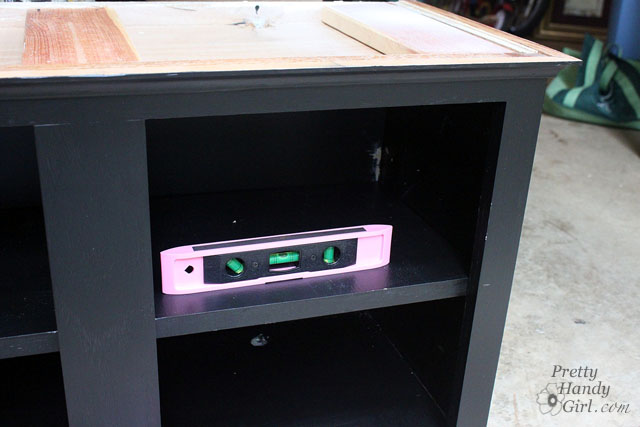
To install the shelf, level the board you cut to fit inside the cabinet (or shall I call it a bench since we are almost done!)


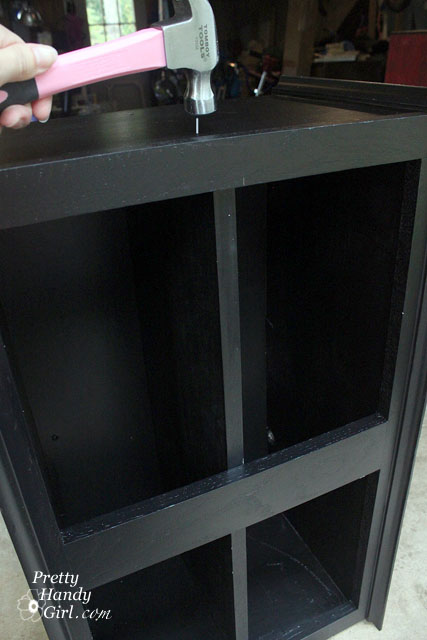
Use either “L” brackets inside the cabinet to hold the shelf or hammer nails from the side and into the ends of the shelf to secure it. Luckily shoes aren’t super heavy, so you can get away with using finish nails to hold the shelf in place.


Use a nail set to sink the nail below the wood surface.


Add a small amount of wood putty to the nail hole.


Gently sand the cabinet and shelf to scuff up the surface and give it a “tooth” for the primer to adhere to. Prime the cabinet and bench.


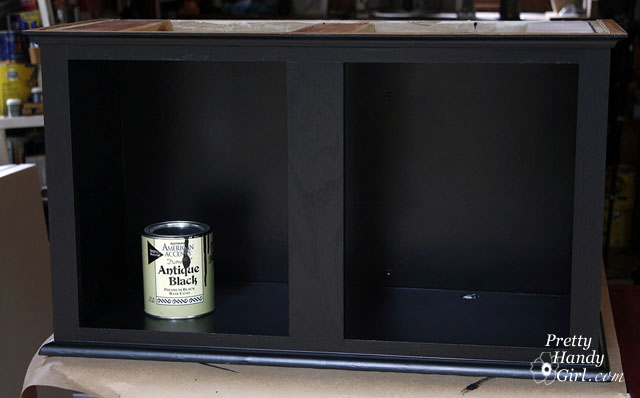
Paint the cabinet, shelf and bench.


Protect your bench with a few coats of polyurethane and you are done!


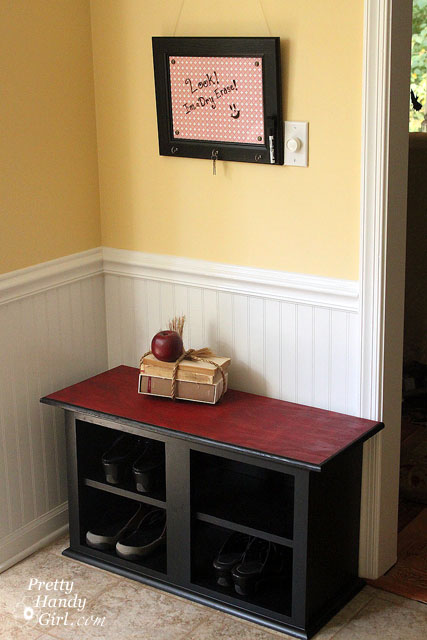
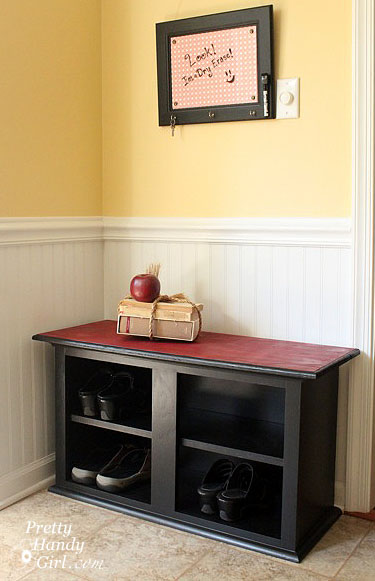
Room for about 8 pairs of shoes! If you wanted a larger bench or more storage, you could attach two cabinets side by side.


Here is the video from my Habitat ReStore talk. (I apologize about some of the background noise.)

By the way, thanks to my sponsors Bogs Footwear (boots) and Tomboy Tools (tool belt.) I need to lower that belt a little ;-). I was rushing in and just buckled it on me without adjusting it.


Sharing this tutorial with Home Stories A2Z Tutorials and Tips Link Party and The Shabby Creek Cottage’s Transformation Thursday

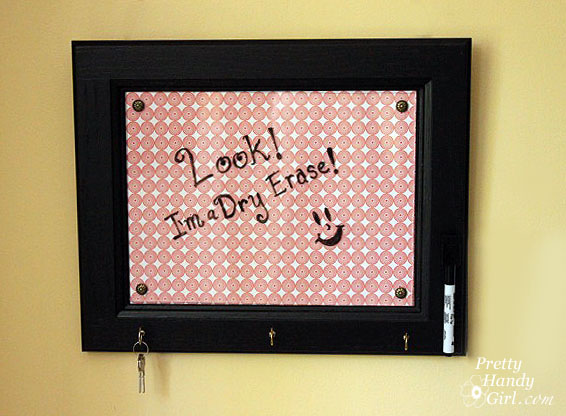
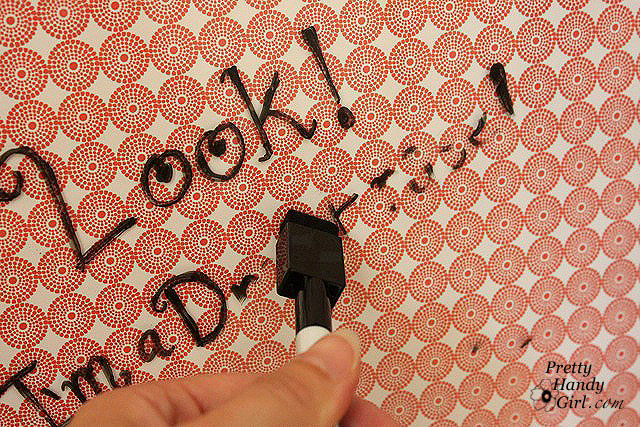
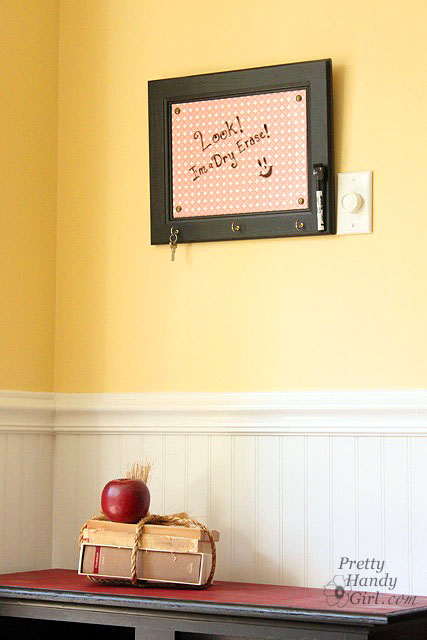
Happy Monday morning y’all! I’ve been working like a busy bee this past month. So many projects! I need to clone myself so one of us can work on the projects like this dry erase message board and the other can write the posts. (Luckily I had an extra hour yesterday thanks to switching back to standard time.)

One of the reasons I’ve been so busy is that I will be giving my first demonstration at the Raleigh Habitat for Humanity ReStore this Saturday at 1pm. If you are in the area, I’d love to see you. Here is the address and more information about the  ReStore. I will be demonstrating how I turned a truly nasty greased wall cabinet into this charming shoe storage bench.

I’m not the type who can throw something away, so when I removed the cabinet doors to make the shoe bench, I decided to salvage them and make message boards. The first one was transformed into a cute chalkboard frame.

The other one was turned into a — you guessed it —  a dry erase message board!  And of course (because I love you), I’ll share with you how I made it.


Materials:

  • Cabinet door (pre-primed and painted)
  • Plexiglass cut to the interior panel dimension
  • Scrapbook paper (choose a light color that dry erase marker will show up on top of)
  • 4 Nail head trim tacks
  • 3 Cup hooks
  • X-acto blade
  • Metal ruler
  • Sharpie marker
  • Drill and bits
  • Scrap of wood
  • Hammer
  • Needle-nosed pliers
  • Dry erase marker
  • E-6000 glue

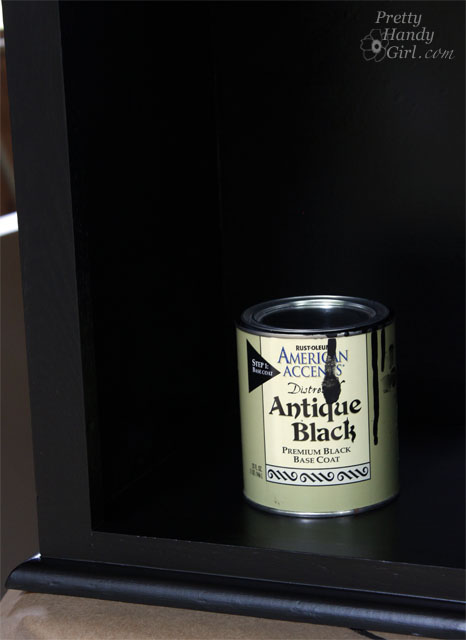
1. If you haven’t already: clean, prime and paint your door. It isn’t necessary, but if you want to give your cabinet door a new look, go ahead and paint it any color you like! The sky is the limit on color. I used American Accents Antique Black.

2. Now, cut your scrapbook paper to fit inside the cabinet door panel. As always, be sure you are using a fresh new x-acto blade and a metal edged ruler.

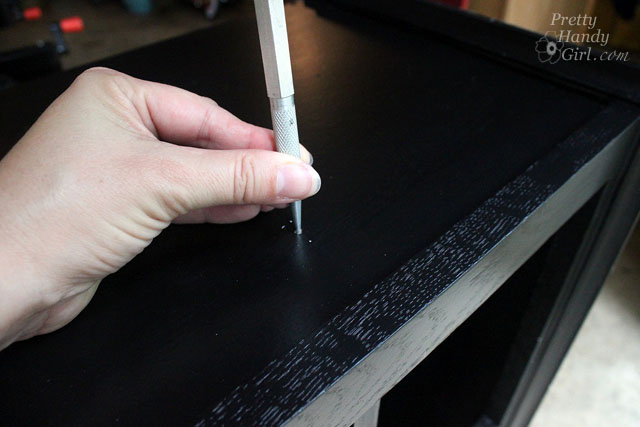
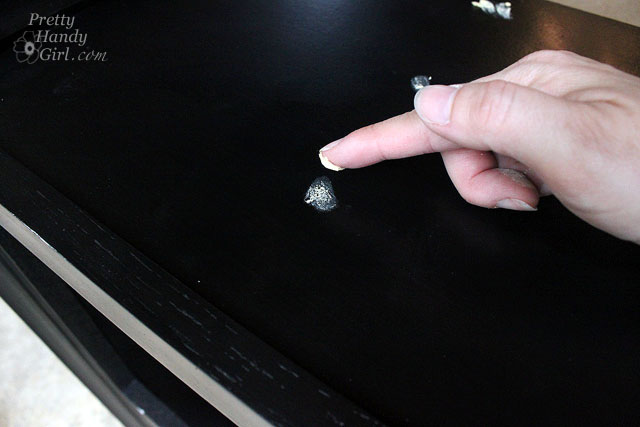
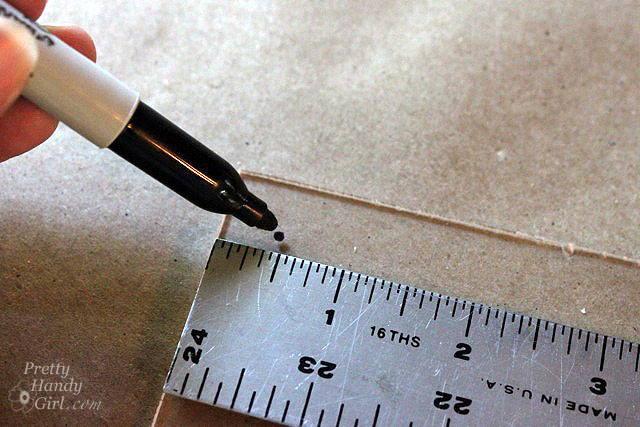
3. Next mark a dot 1/2 inch from the corners of the plexiglass.

4. Drill a small hole through the plexiglass at each dot. Use a drill bit that is slightly larger than the nail on your nail head tack.

5. Lay your scrapbook paper into the panel, then rest your plexiglass on top of the paper. (I purposely didn’t glue the scrapbook paper so I could change it out when I want a décor change.)

6. Set a nail head into each corner hole in the plexi. Hold the nail with the needle-nosed pliers as you hammer each tack into the cabinet door.

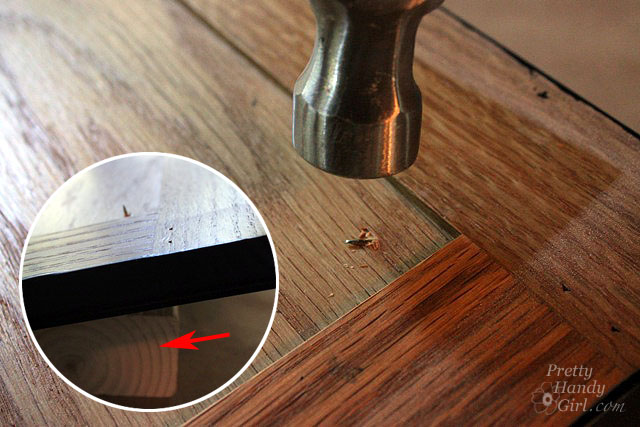
7. If your tacks go through the back, flip over the cabinet door. Set the piece of scrap wood (red arrow) under the nail head and hammer the point of the nail to bend it to the side (so no one gets poked!)

8. Use a ruler to mark where you want your cup hooks mounted. Pre-drill holes for your cup hooks using a drill bit slightly smaller than the cup hook screw end. Then screw them into the holes.

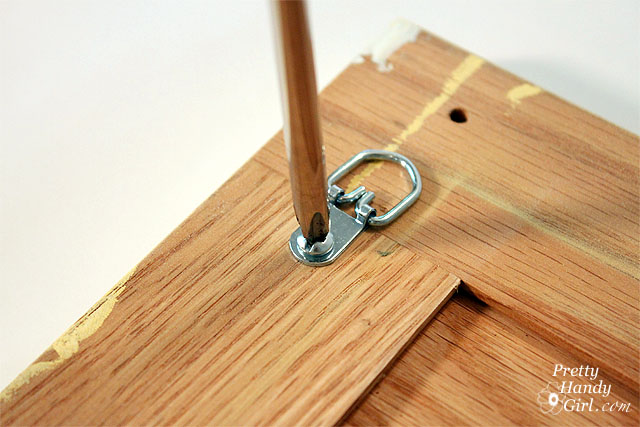
9. Attach D-ring hooks to the back of the door.

10. Attach a dry erase pen to the board using string. Or if you find a marker with a magnetic cap, you can glue a magnet to the board using E-600o. Now you can hang the marker back on the board when you’re done writing a message.

11. Hang that cute little dry erase board up on the wall! Did you see this and this tip for hanging frames that have two hooks? Genius!

That is how you can make a custom dry erase board out of an old cabinet door! I love how it matches the bench colors and can match anything I want it to by changing out the scrapbook paper. Shoot, I could probably put photos behind the plexi too!


Okay, so who is coming out to join me on Saturday? Please don’t let me show up and give a talk to the crickets. 😉


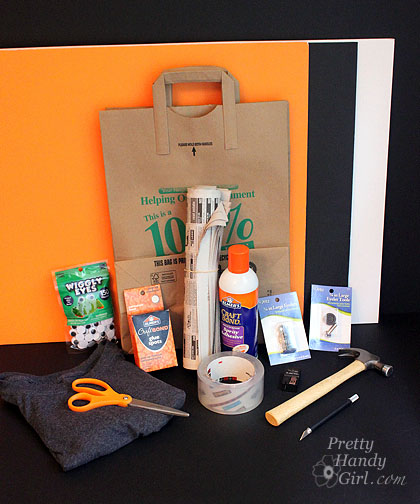
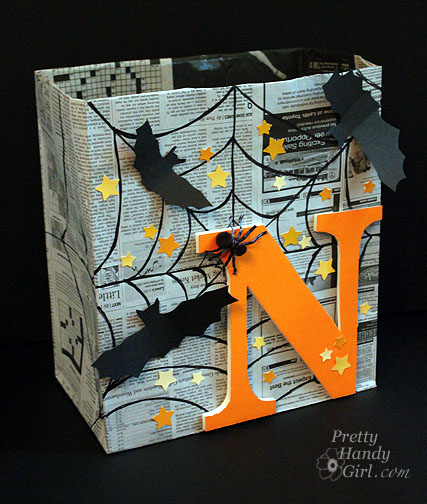
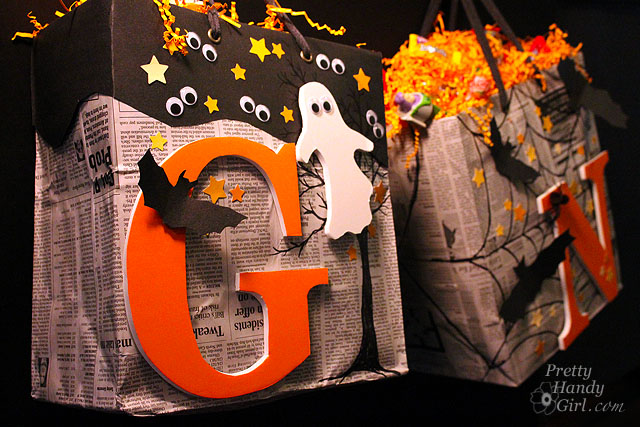
My kids like to raid our recycling bin. They make the most imaginative things out of milk jugs, strawberry pints and toilet paper rolls. In fact, my five year old has been making his own Halloween costume from paper bags and tape. So, when #CollectiveBias sent out a challenge to make trick or treat bags with Elmer’s Craft Bond Glue Spots and Elmer’s Foam Board, I knew right where to head for supplies: Walmart AND the recycling bin! I hereby invite you to join me (and my escort) as we gather the supplies for this project.

Materials:


Instructions:

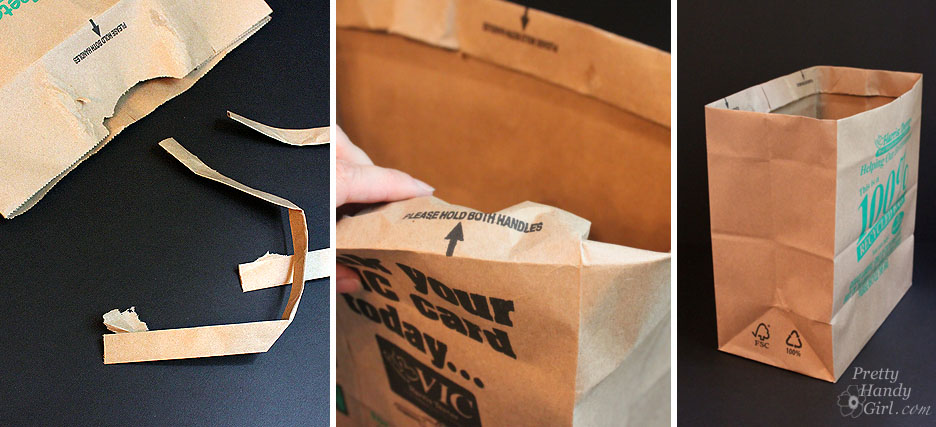
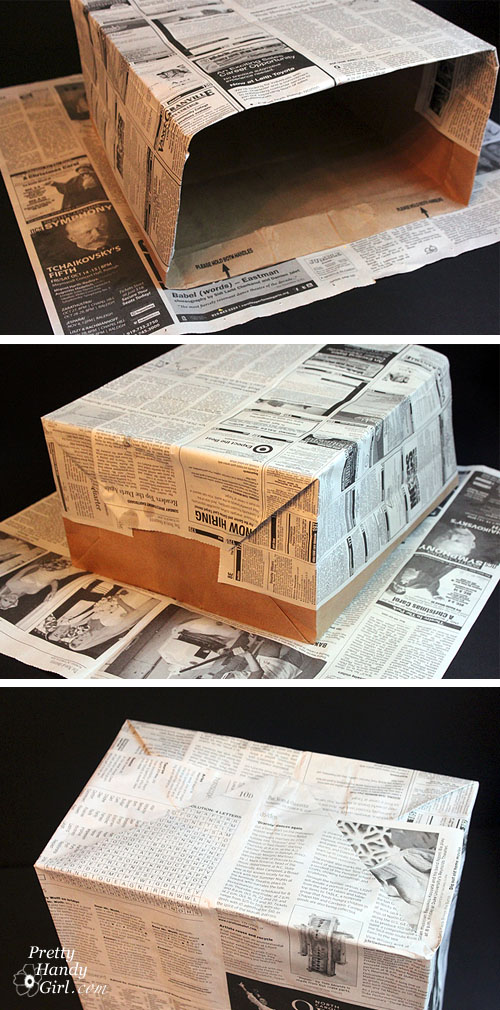
Start by removing the handles from the paper grocery bag and then cuff the top of the bag by rolling it under two times.

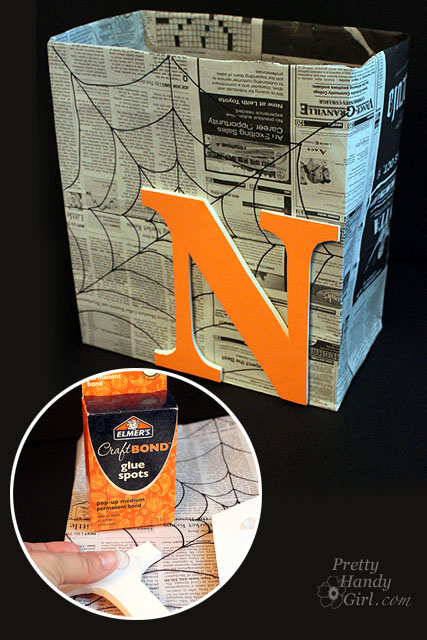
Pick out two sheets of newspaper (I used the obituaries. Truly Halloweeny don’t you think?!) and bring the paper bag and newspapers outside and spray them with spray adhesive.

It is important to wrap the paper bag with the newspapers as soon as possible for a maximum bond.

Wrap the bag neatly like a present with the newspaper. Use clear packing tape to tack any loose edges down. Also add a strip of packing tape to the inside of the bag cuff for extra support for the handle (should your child bring home pounds of candy!)

Take out your sharpie pen and draw lines in a spiderweb pattern on the bag.

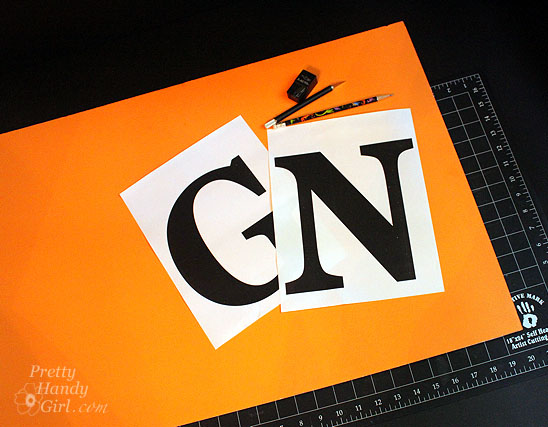
Set the bag aside and collect the orange foam board, x-acto knife (with a fresh blade), pencil and the letter print out.

Set the letter on top of the foam board. I usually line the edge of the letter up with the edge of the foam board for less material waste.

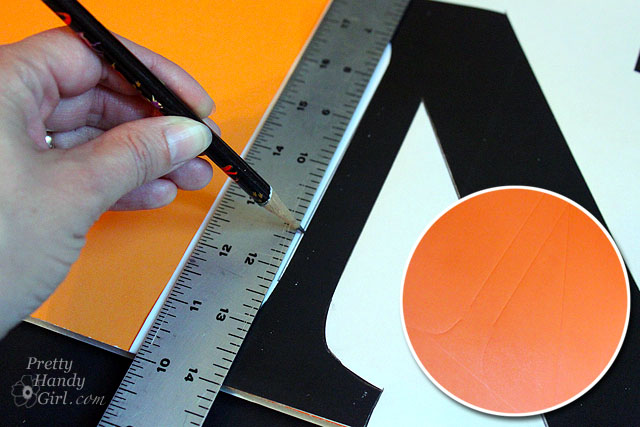
Press firmly with the pencil as you trace around the letter. When you remove the print out you should see an indented outline.

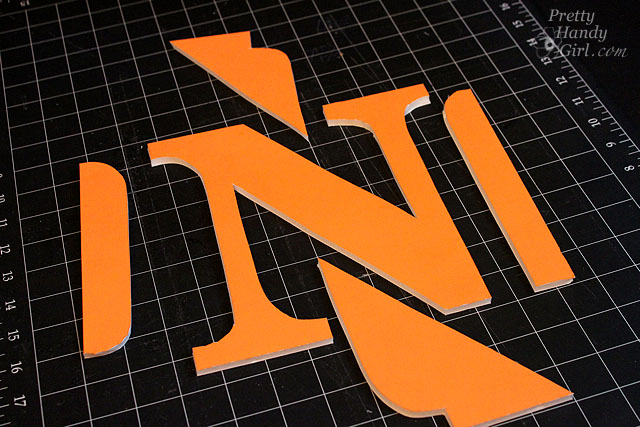
Using the x-acto knife, cut out your letter shape. Use a metal ruler to cut straight lines. If your knife starts to tug and pull at the foam board, put a new blade in.

Clean up any ragged edges with the x-acto knife.

Use a few Elmer’s Craft Bond glue spots to affix the Elmer’s foam board letter to the bag.

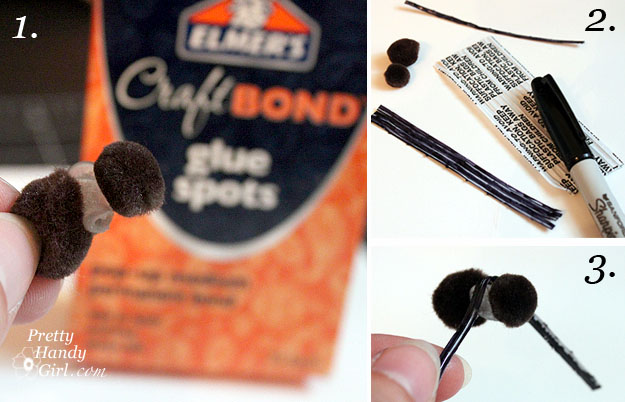
To create a little spider, glue two pom-poms together with another glue spot. If you have black twisty-ties you are good to go aren’t you special, you don’t have to color them. (I only had white ties so I colored them with the black sharpie.) Wrap four twisty-ties around the middle to create the spider’s eight legs.

Use another glue spot to glue the spider to the bag.

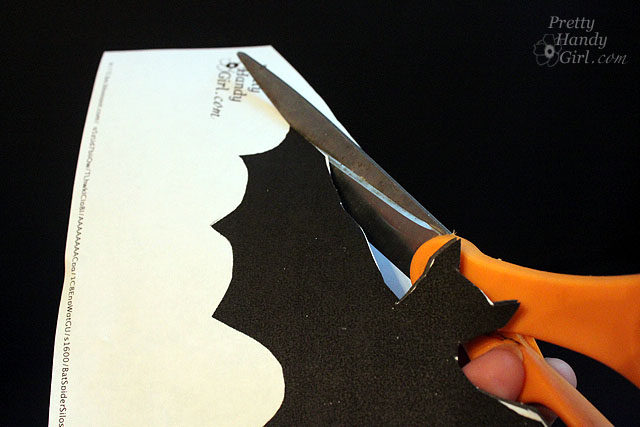
Print out a bat silhouette downloadable template and layer it on top of black poster board. Cut out a few bat silhouettes.

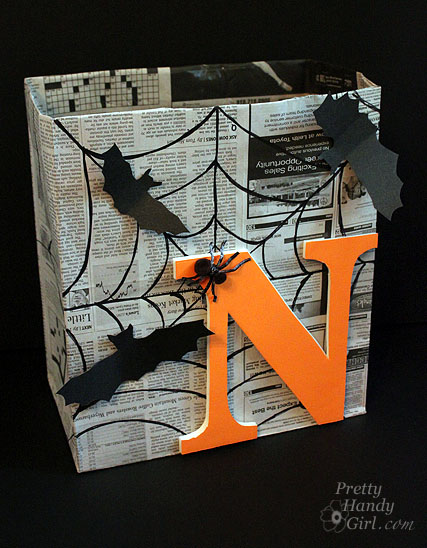
Use a glue spot on the center of each bat to glue them to the bag. Fold the bats wings up for more dimensional interest.

Add stickers (or pre-punched paint chip stars using Elmer’s Glue-All multi-purpose glue) to the bag.

I incourage you to decorate your bag anyway you like. Bust out your craft supplies for inspiration.

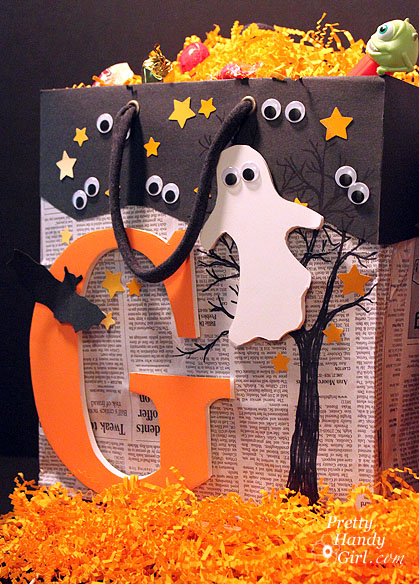
If spiders and bats aren’t your thing. How about spooks and spirits?

To add the handles, follow the directions on your grommet kit. 1. Punch a hole in the bag at the top of the bag using a hole punch. 2. Insert a long grommet through the hole. Lay a short grommet on top. 3. Hammer the grommets together using the metal rod tool that came with the grommet kit.

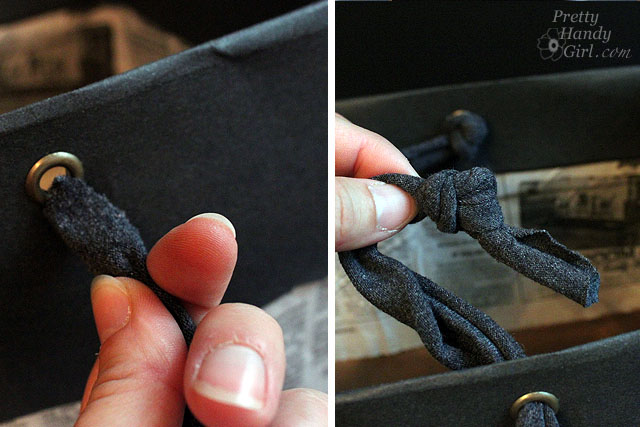
Cut off the sleeves from a t-shirt. Cut two 2.5 – 3″ wide strips. Then stretch the sleeve loop in opposite directions. This will make the shirt material roll.

After you have stretched and rolled the sleeve loops, cut them at the seam. Then thread each end through the grommets on the bag and tie a double knot on the inside of the bag.

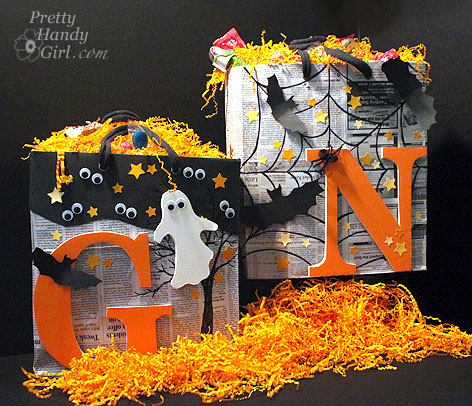
Now gather up your little trick-or-treater and give him this unique candy collection bag! My sons’ had the biggest smiles on their faces. Definitely worth the effort to make these bags.

This eency weency spider is my favorite!

Way more personalized than these generic plastic pumpkins, don’t you think?!

Which one is your favorite? I can’t decide, because I love them equally as much. Spook or Spider?

Eeeeeekkk, we can hardly wait for October 31st!

Disclosure: This project has been compensated as part of a social shopper insights study for Elmer’s #gluenglitter #CollectiveBias #CBias. The ideas and opinions shared in this post are purely my own from my own crazy creative head.

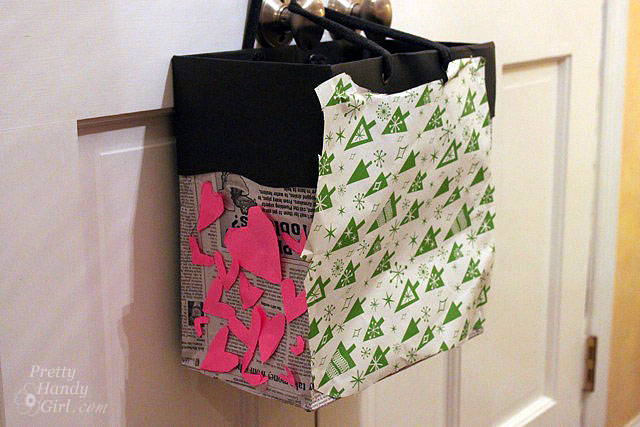
Follow up: Well, my youngest loves his bag so much that he told me, “Mom, we should decorate every side with a different holiday.” And that is exactly what he did today during quiet time. I just want to stop time and keep him five forever!
Our preschool silent auction is today. Every year I donate a one-of-a-kind birdhouse to be auctioned off. I never spend more than $3 on the birdhouse and usually buy the unpainted versions at Michael’s or ACMoore. Then I get creative by hand-painting a scene and add unexpected touches to the house – thus creating birdhouses with style.
2008 – Jardin da Girasoli de Vendere “Vendor of Sunflowers”

Painting sunny sunflowers and some green grass gave this birdhouse a sunny garden look. I added a gold spigot for the new perch. Using a spade bit in my drill, I cut a hole slightly smaller than the spigot, then simply screwed the spigot in place. For added stength I coated the threads with some E-6000. Can anyone guess what the roof tiles are made from? They are canvas shims! Those are the freebie scraps if wood that come with a painter’s canvas! Painting them bright red took the little birdhouse from cute to bidding war worthy!
2009 – Red & White Bird Silhouette Round House

I apologize right now for the condition of this picture! Obviously this is the only picture I took of this cute little abode. The birdhouse was a $2 find at my local Goodwill. The roof was detaching and it was painted an ugly 90’s hunter green and burgundy. I gave the house a good cleaning, then glued and nailed the roof back on. After a fresh coat of primer and white paint, I hand-painted the bird motif and the roof and base. The perch is a curtain rod screw (that holds the rod in the curtain rod bracket). Then she received a little green ribbon and a silver bell on the top. So simple, but one of my favorites!

2010 – Christmas Time, Snow and a Pinecone Roof
Another unpainted house picked up at Michael’s. This house got some serious head turning attention with a pinecone plank roof, white snow, glitter, and a stick for a perch. The tutorial to make this birdhouse can be found here.

The back has a large Christmas tree decorated for the holidays. I hope the birds appreciate it.

To protect all my birdhouses from the elements (should they really be “for the birds”), I coated them with a few coats of polyurethane.

I know that some of you might be thinking you can’t do this, but let me float some ideas for you. Instead of decorative painting try:
  • Mod Podge Wallpaper on the sides
  • Mod Podge Fabric to the sides
  • Use a stencil
  • Search the web for picture inspiration and trace it onto your birdhouse.
  • Use painters tape to create stripes
  • Let your little ones decorate the house with paint

So, how much do you think my pinecone roof birdhouse will fetch today? I hope more than $3!