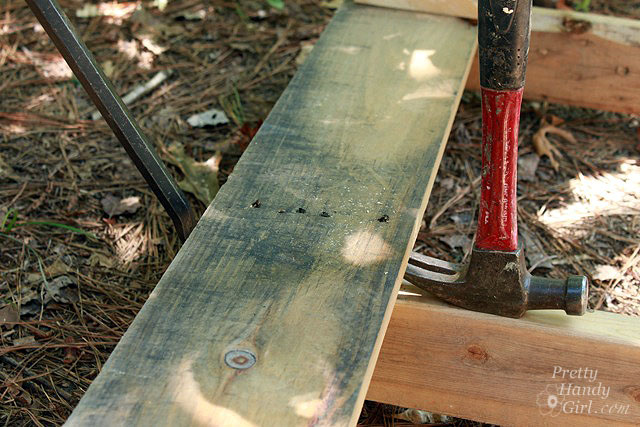
Pallet upcycling is all the rage today. But, if you’ve ever tried to actually remove wood planks from a pallet, you know that it is not an easy task. The nails that are used are typically spiral nails and are designed to really grip that wood. And if that’s not enough, they usually shoot 4-5 nails per joint. Sheesh, you’d think they were building a foundation for a 10 ton elephant. Okay, actually it is the foundation that has to hold tons of product as it is lifted by a fork lift. Which explains why harvesting pallet wood can be a labor intensive task.

I figured you’d appreciate it if I shared with you the quickest and easiest way I’ve found to salvage this beautifully rustic pallet wood. Read more

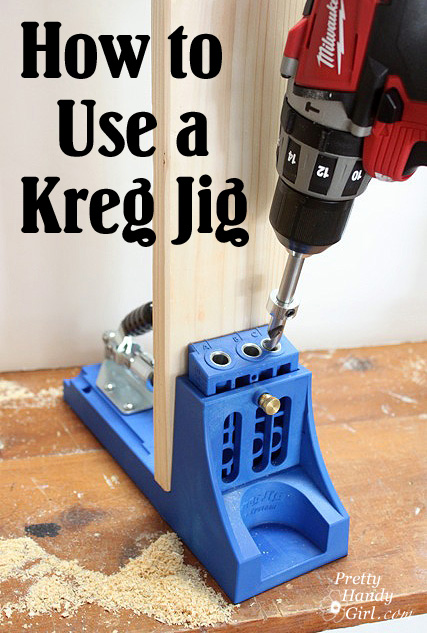
how to use a kreg jig

Hey, look at this! Tool Tutorial Friday is back! Today I have a great tool for creating strong joints when building with wood and furniture construction. Today I’m going to show you the simple tutorial for How to Use a Kreg Jig. If you don’t have one yet, you need to purchase one ASAP! This little tool is my go to for for building furniture, frames and just about anything that needs a tight joint.

(I’ve included affiliate links in this post for your convenience. I earn a small percentage from a purchase using these links. There is no additional cost to you. You can read more about affiliate links here.)

I use the K4 Kreg Jig  It didn’t take me long to figure out how to use it, but I know it would have been helpful to have a step-by-step tutorial when I was first learning how to use a Kreg Jig. For your convenience, this is a quick tutorial.

I was first introduced to the Kreg Jig by my friends Ana White and Rayan with The Design Confidential. These two DIY ladies opened my eyes to pocket screw joints. Be sure to check out their blogs for more tips from the masters!

The Basics on How To Use a Kreg Jig Read more

Today we’ll be learning about the Dremel TRIO! This smaller power tool fits comfortably in your hand. The tool is a cross between a  jigsaw, router, and regular dremel. Further, it has a rotating bit that cuts into drywall, wood, plastic, steel and alumimum (with the appropriate bit). With a quick change to a sanding bit, the TRIO can be used as a sander for smoothing fine details and edges. Finally, the TRIO is a router, but only with the small routing bits that come separately. In my opinion, the TRIO is good for small projects that don’t use hard or thick woods. Anything larger than 1/8″ and it is very difficult to control the tool. (Disclosure: I have not tried the TRIO with the hardwood and sheet metal bit sold separately, but I haven’t used it to cut hard woods.)

The Dremel Trio Rotary Tool can be purchased on Amazon (affiliate links.)

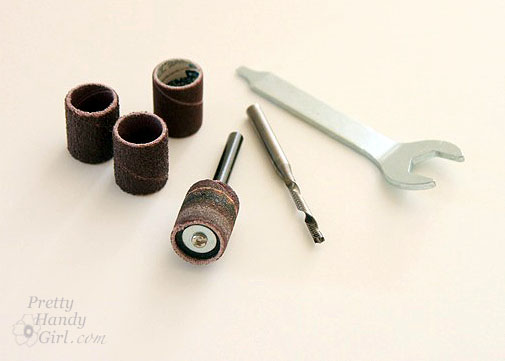
The TRIO comes with a cutting bit (I call it a scroll bit) and a sanding mandrel with three grit sanding drums (60, 120 and 240 grit). Plus, a wrench for loosening and tightening the collet.


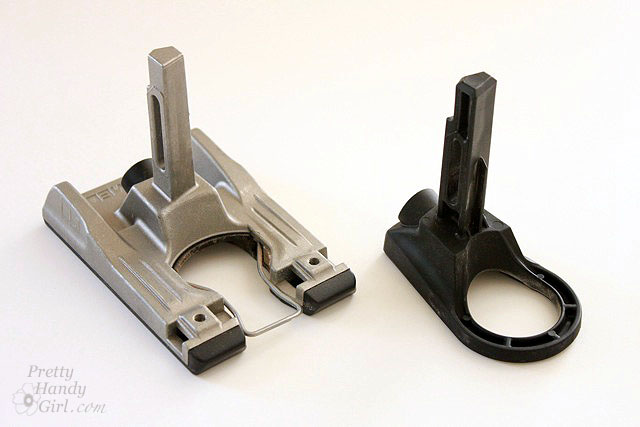
A regular baseplate and a compact foot baseplate are also included.

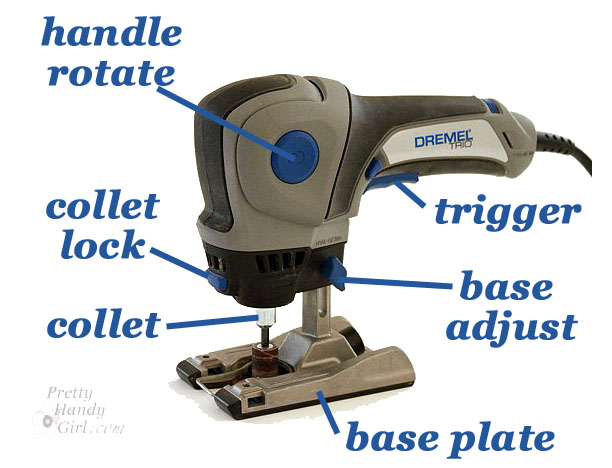
Below is the anatomy of the TRIO to help familiarize you with the tool.

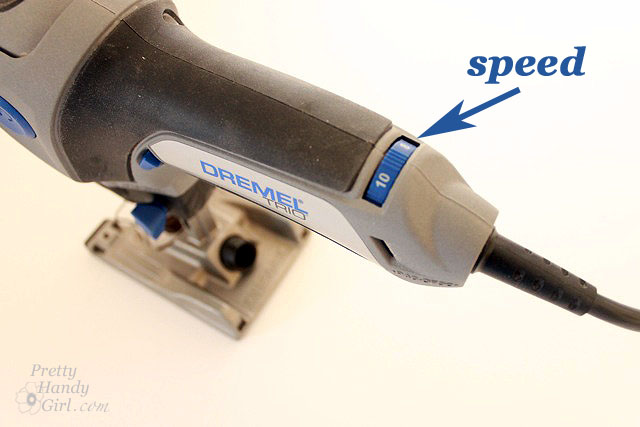
There is a speed adjustment on the handle of the tool. Typically you would leave it on 10 – 12 for cutting wood. A lower speed may be necessary when cutting plastic to avoid melting the material.

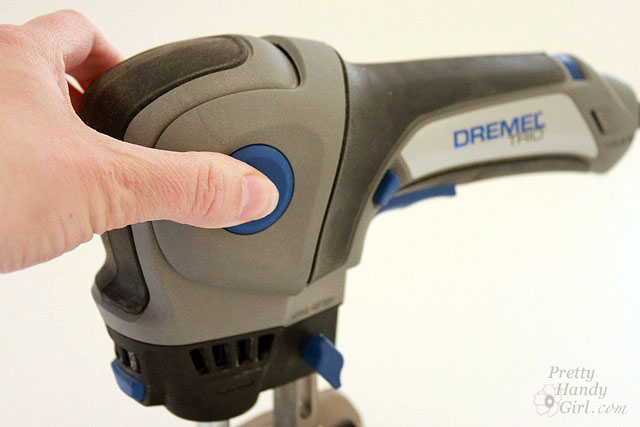
One of the nice features is that it can be use in a horizontal grip like a jigsaw. Or, simply press the button on both sides to …

raise the handle and use it with a vertical grip.

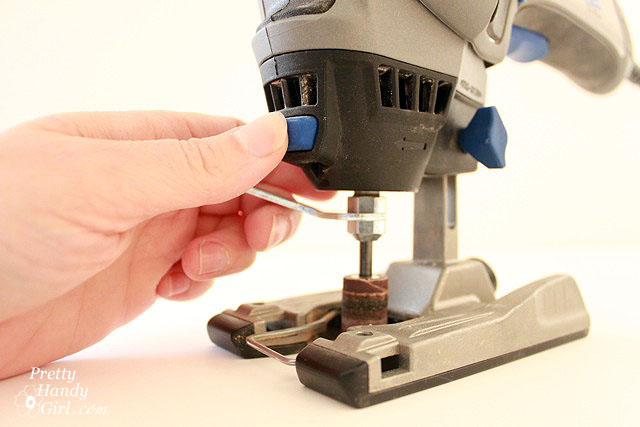
Changing bits is fairly simple but requires two hands (my photo is not 100% accurate). One finger pushes the button on the front of the TRIO to lock the collet. The other hand uses the wrench to loosen the collet.

Then, remove the bit. Insert the new bit and tighten the collet. (First by hand and then with the wrench.)

The TRIO does not come with router bits, but a Dremel 5-piece Specialty Router Bit Kit can be purchased for about $40 from Amazon (affiliate link.) There is also a tile cutting bit, piloted point cutting bit, and a hardwood and sheet metal bit (all available for separate purchase.)

Be forewarned that you CANNOT use bits for a regular dremel in the TRIO. The shafts are different sizes.

And here for your viewing pleasure is a video tutorial for using the Dremel TRIO:


How to Use a Caulk Gun

You know the old saying, “No question is a dumb question.” Well, I have to say that about this tutorial, “No tutorial is a dumb tutorial.”

I realize that a caulk gun isn’t a big scary power tool, and yet I still think learning how to use a caulk gun is a very valuable skill for any handy person.

So, let’s get right down to some Caulk Talk.

How to Use a Caulk Gun

A caulk gun is a necessary tool for any homeowner. Sealing gaps in siding, replacing the seal around the tub and shower surround when the old caulk gets dry and brittle is a must. Caulking around the trim around windows and doors will improve your homes energy efficiency and get rid of unsightly gaps. You can also use it for spreading construction adhesive and any other substrate that is sold in tube form. A caulk gun saves your hands from cramping, especially if you have a lot of caulking to do.

A basic caulk gun costs about $10 – $20, but you could buy a power version which run up to $200! Sheesh!

Starting a tube of caulk:

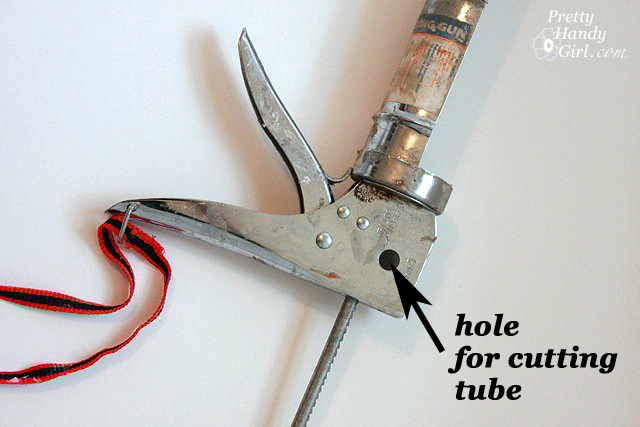
Cut off the tip of your tube by inserting it into the hole at an angle.

How to Use a Caulk Gun

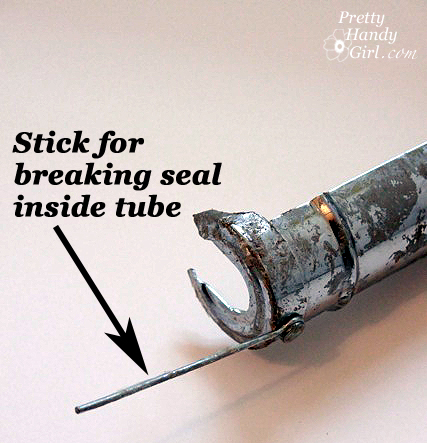
Poke the stick attached to the gun into the tube to puncture the seal.

How to Use a Caulk Gun

 Loading a caulk gun:

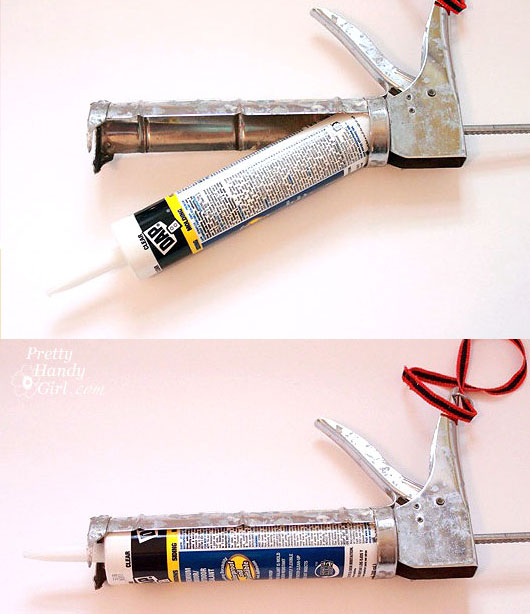
Pull the hooked rod all the way back. Insert your tube base first. Then tilt the nozzle end into the top of the gun.

How to Use a Caulk Gun

Rotate the hook so it is facing up and the teeth are facing down.

How to Use a Caulk Gun

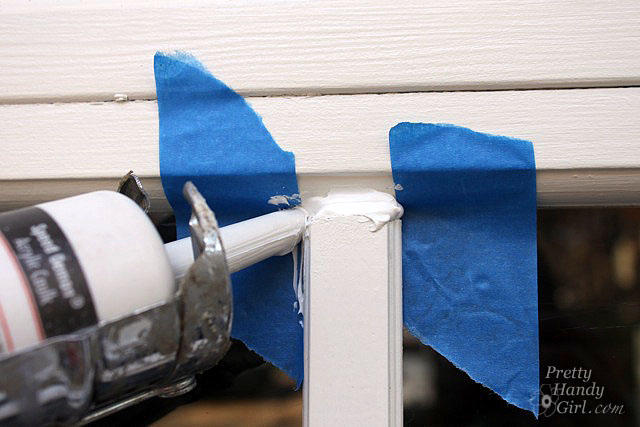
Pull the trigger and you’re good to go!

How to Use a Caulk Gun

Be prepared to pull the hook rod back when you finish or the caulk will continue to flow out of the nozzle.

How to Use a Caulk Gun

Watch these videos for more details on using a caulk gun (also called a caulking gun) and why it is important to fill any cracks or seams in your siding!

*Thanks to The Real Tim Jones for sharing the secret about how to cut and start your caulk tube! Tim is sooo right, I never knew about this until I saw his video!

And, if you want to find out how to keep your caulk from drying out in between uses, my friend Sandra at Sawdust and Paper Scraps has this tip.

Happy Caulking!

How to Use a Caulk Gun

Welcome back to another Tool Tutorial Friday! Before we begin I want to congratulate Wendy, who won the Tomboy Tools Magnetic Hammer! Wendy said, “Thank you for continuing your education for women on power tools! I learn so much from your posts. I’m also glad to know that my son wasn’t the only one with multiple arm casts! Pink hammer – cool.”  You are very welcome!!!

Now, on to the tutorial. Today I have a very important power tool that is a very neglected tool in my home. In fact, it is so infrequently used that I need some help from a more experienced handy girl. Anyone want to volunteer to write a guest tutorial on using a power vacuum cleaner? I could really use your expertise.
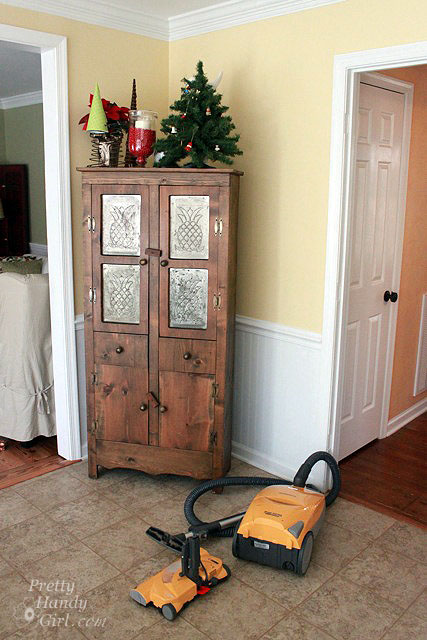
Or this equally valuable tool:
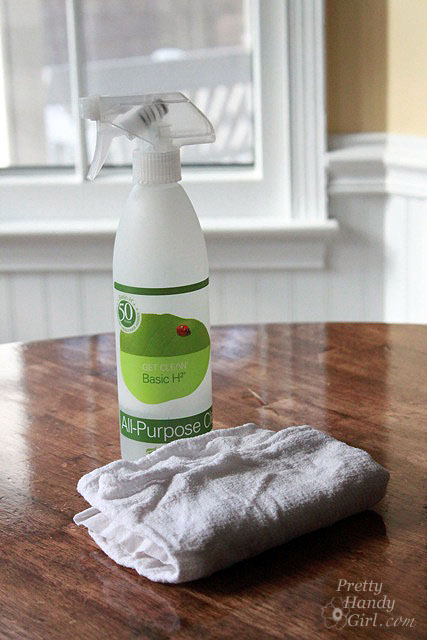
I have forgotten how to use it. Any help would be greatly appreciated. Anyone?

Well, I hope you don’t mind that instead of the usual tool tutorial friday, I’m going to give you a Holiday Home Tour instead. Get ready for this amazing tour of my utterly beautiful home! All decked out and ready for the holidays!

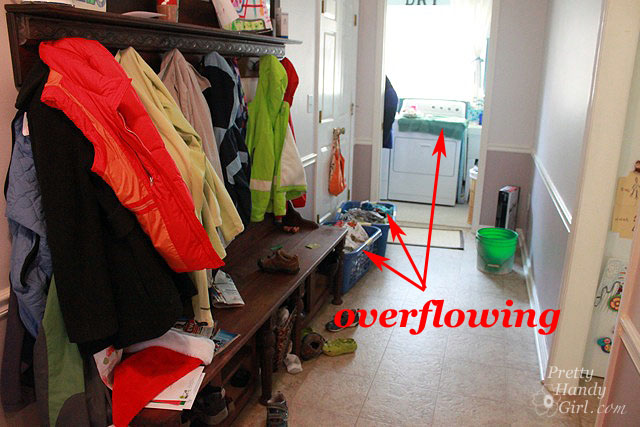
Welcome to my mudroom. I spent a lot of time decorating this room. You can see the holiday decor is so abundant it is essentially overflowing!
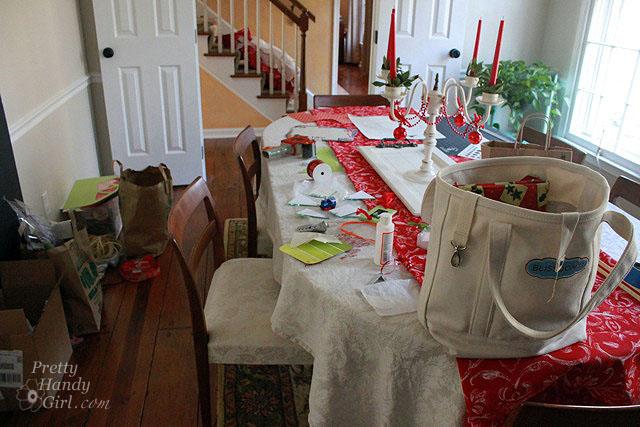
My dining room is decked out for the season with ribbons, glitter and glue. Even the advent presents are beautifully laid out (in the tote bag.) And I spared no expense when it came to decorating the walls. I used a unique combination of paper bags, boxes and ribbon to adorn them.
Follow me, right this way. Aren’t the garlands of fabric simply beautiful on our stairway? I just love the simplicity of the swags. Pink and silver running shoes add the perfect punch of color.

The kitchen has a child decor theme. Complete with reindeer food and some presents displayed on the counter. Rudolf would be thrilled to eat here.

The living room is decorated from floor to ceiling. I decided to go with a casual and convenient theme this year. When the holidays are over, all I have to do is open the blue bins (which double as a festive ottoman) and drop the decorations inside. Simply genius, don’t you think?!

I saved the best for last! This year I’ve decided to adorn the office with a new color theme. The browns and teals really bring out the holiday spirit! As do the loosely placed papers and items. Careful thought was taken into the placement and juxtaposition of each object on the desk. I think I really nailed this design.

If you haven’t guessed by now, today’s post is a “Keeping It Real” style post.

I’ve been so insanely busy with craft tutorials, Habitat ReStore lectures, broken arms, holiday preparation, gift purchases, and… oh, did I mention that Pretty Handsome Guy is away on business this week? So, you can imagine my life (and home for that matter) are in a state of disarray. So, I hope you’ll excuse me for the next few days as I take a little time to pull my home and life back in order and enjoy the holidays with the people that matter most to me (not that you don’t matter to me!)

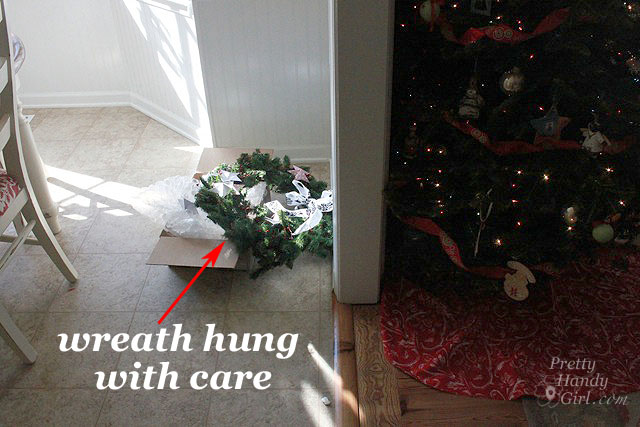
In all seriousness, I have accomplished one decorating feat: the tree! I think it looks pretty good if I do say so myself…except…what is that thing lying on the floor to the left of the tree?

Oh, why it is my wreath that has been hung with care!
I’ll be back on Monday with a very important guest. And then check in every day next week for my creative gift wrapping series. You won’t want to miss it!

In the meantime, Happy Holidays! And feel free to see how I decorated last year, aka Rustic Christmas Decor!

Sharing my eclectic decorating style with: Positively Splendid’s Saturday Seven and Funky Junk Interiors SNS

In other news, I have a big announcement to make: The first set of speakers have been announced for the SNAP 2012 conference! I am really excited to be working with such a fabulous group of women bloggers!

If you haven’t heard of it, SNAP is a big creative blog conference from April 19th – 21st near Salt Lake City, UT. I am truly honored to be asked to speak at SNAP and I can’t wait to share some motivational empowerment words with the attendees.

If you would like to enter to win a ticket to SNAP, there is a big ticket giveaway happening right now! From now until Christmas, SNAP will be giving away one ticket a day. So, head over to enter to win your ticket.

Feel free to read a little more about the SNAP conference. It is going to be phenomenal!