After working on this tutorial for what seems like days, I finally have the Hallway Storage tutorial for you!
Thank you all for being so patient. We’ve had a busy week at the Pretty Handsome Home. Lots of wood rot and drainage problems being addressed, plus an emergency trip to the pediatric dentist. (Warning: Look away if a chipped tooth and bloody lip might make you faint.)
Luckily, all is moving in a positive direction right now (teeth and home repairs).
Materials (to the best of my recollection):
2 – 1 x 10″ x 12′ pine boards (and had Lowe’s cut them in half leaving us with 4 – 1×10″ x 6’s)
3 – 1 x 10″ x 8′ pine boards
1 – 1 x 15″ x 8′ pine board (had Lowe’s rip it to 13″ wide)
1 – 1 x 15″ x 4′ pine board
2 – 4′ x 8′ pre-primed masonite bead board sheets (cut to size by Lowe’s)
1 box of 2″ screws
1 box of finish nails (used 1 1/4″ finish nails in my pneumatic nailer)
6 – 1″ x 2″ x 8′ pine edging strips
1 – 8′ piece of decorative shelf moulding
1 – 8′ piece of trim moulding for the top shelf
Primer
Paint (white for unit, aqua color for behind cube towers)
Caulk
Wood putty
Sandpaper
Triple Coat Hooks (eBay)
Baskets (Home Goods)
 |
Checking out with our 3 helpers leading the way.
I hope they have their allowance to pay for all this! |
Building the cube towers:
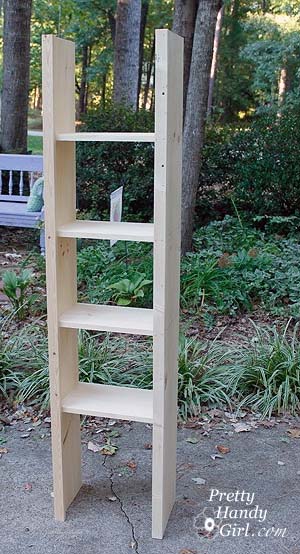
I mentioned that the hall storage cube towers were built using Ana White’s Land of Nod cube tower knockoff plans. Ana’s towers are 17″ wide by 13″ deep and 70″ tall. We shrank Renee’s to 15″ wide and 10″ deep to accommodate her narrow hallway. And we eliminated the top and bottom shelf and legs. So, if you want the tutorial for the towers, head over to Ana’s site.
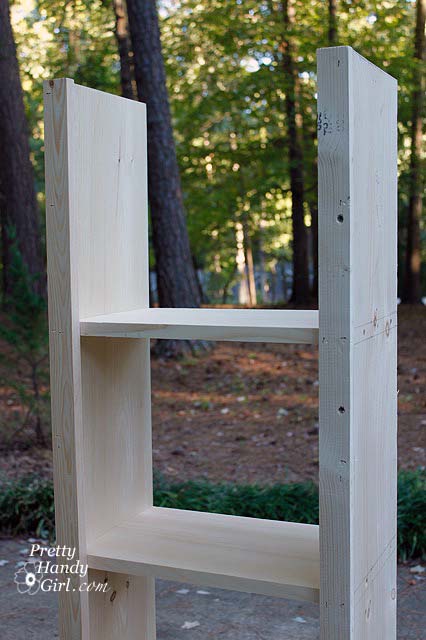
Here are two pictures of the towers after construction (before priming and painting):
 |
|
| Look at my Pretty Pregnant Girlfriend sanding and priming her new towers! |
|
 |
| We took the towers inside to make sure they would fit. While they were in Rene’s house, I traced the profile of the baseboards onto each tower. You can see how to trace profiles in this older post. Plus, we marked where the towers would fit against the wall (so Renee could see where to paint the wall.) |
 |
| See, perfectly traced profile! |
|
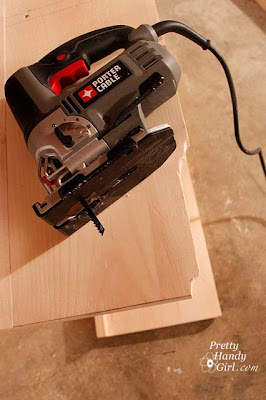
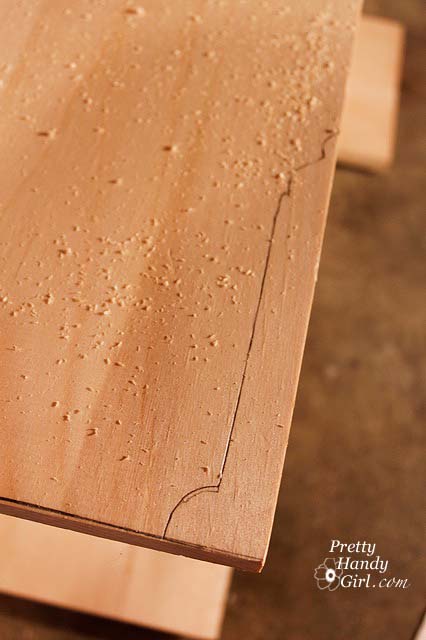
I used my jigsaw to cut out the profile on each side of the towers. I LOVE my new jigsaw. This machine really cuts through material like ‘butta’ (unlike my previous one, cough, cough Black&Decker.) Words of Wisdom: if you are going to buy a power tool, buy a tool that will work well and for years to come. (Yes, I learned this the hard way!)
|
|
|
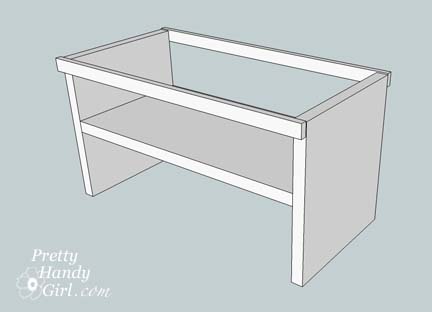
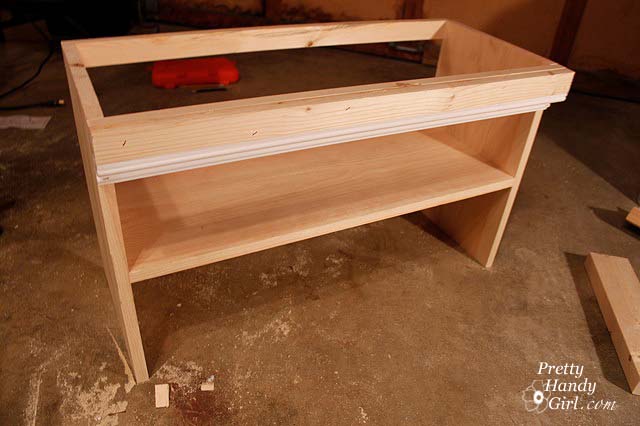
Building the shoe storage bench:
Our space dictated a narrow and shallow bench so as not to impede the traffic flow in Rene’s hallway.
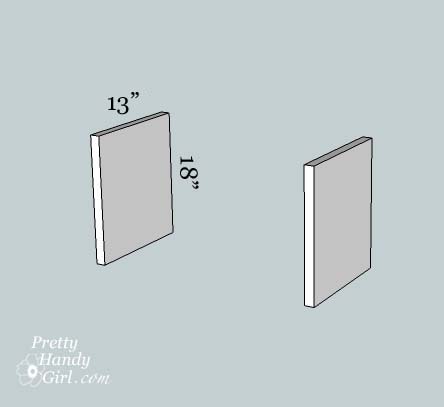
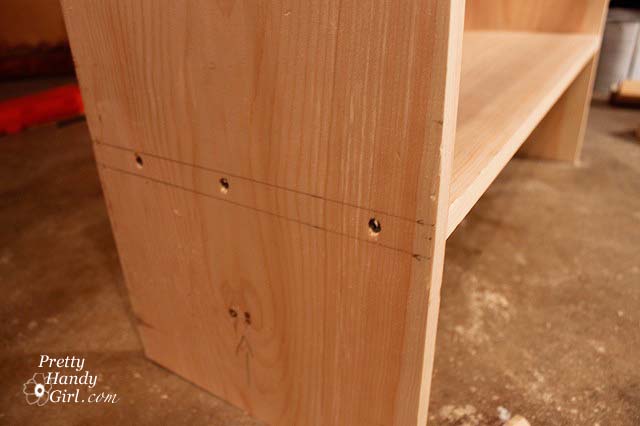
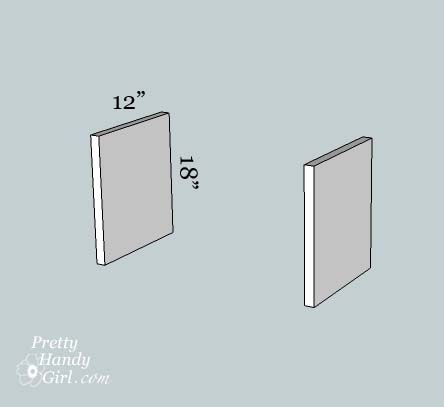
We started with two 1″ x 13″ x 18″ boards.
Then cut one 1″ x 30″ x 13″ board for the center shelf.
After drawing level lines where the shelf would rest, we pre-drilled our holes.
Then drove the screws in to secure the shelf
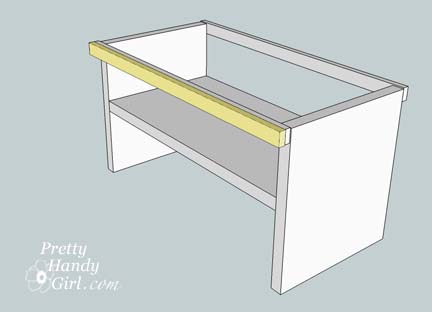
We cut 3 -1″ x 2″ boards to 30″ lengths, then secured one to the top of the bench using finish nails. (I used my pneumatic brad nailer, but you can use a hammer and nails if you wish.)
And then added another one to the backside top of the bench.
Next I nailed the third board on top of the front side so I had a double thickness of 1″ x 2″ boards.
This gave me enough depth to support the bench and attach a piece of
decorative shelf moulding below them (also cut to 30″ wide).

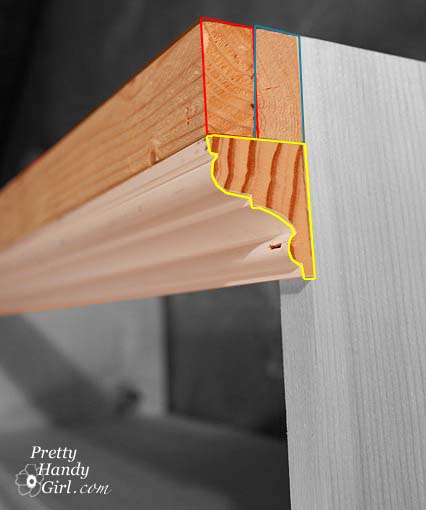
Here is a close up of how the trim moulding and 1″ x 2″ boards are stacked.
Finally we cut a board for the bench top: 1″ x 15″ x 30″. And our bench is essentially finished! (We left the top off until after the bench was attached to the cube towers and the wall.)
Installing the towers and bench:
After the towers and the bench were primed and painted with two coats of paint, we transported them back over to Renee’s house.
Renee had pre-painted the wall a pretty turquoise color at the back of the towers.
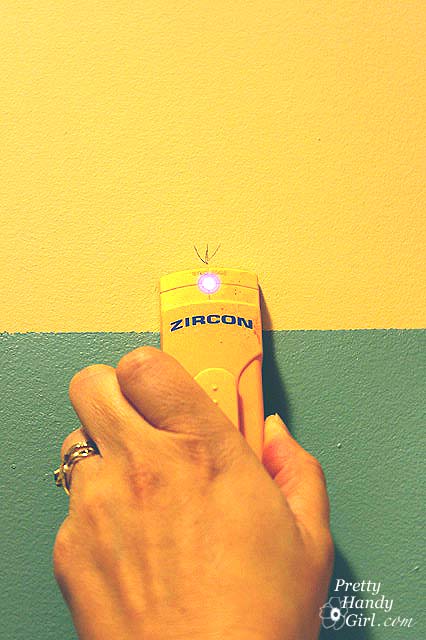
Now it was time to go stud hunting finding. I rely on two techniques for finding studs (and neither of them requires going to a singles bar!) First, I used my electronic stud finder. It takes some patience, but it gives me a good idea where the studs might be. To use the stud finder, I squeeze the buttons on the side of the gadget. Then s-l-o-w-l-y move the finder left and right over a 1-2 foot wall section. The light comes on when it detects something solid behind the drywall. Then I made a mark in the middle of the “lit” area.

Next I use the knocking technique. It almost helps to close your eyes for this. I will knock along the wall moving left and right. I’m listening for the knock to get higher pitch and sharper where the stud is. I can also feel less give in the drywall and it almost starts to hurt my knuckle because I’m knocking against a hard area where the stud is. You will most likely need a little practice to get a feel for finding the studs while knocking. Anyway, this gives me the idea where the studs are.
I’ve heard of using a third technique. Once you think you have located the stud. You can take a quilting pin and insert in into your drywall. If it goes in about half an inch and stops you have located a stud. If the pin can be inserted all the way to its head, you have hollow wall behind the pin.
Now that we had located the studs in the wall, we checked them by measuring between the studs. They are normally 16″ from stud to stud. And there should be a stud around the door and window frames.
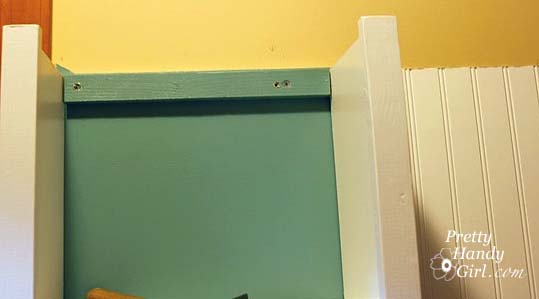
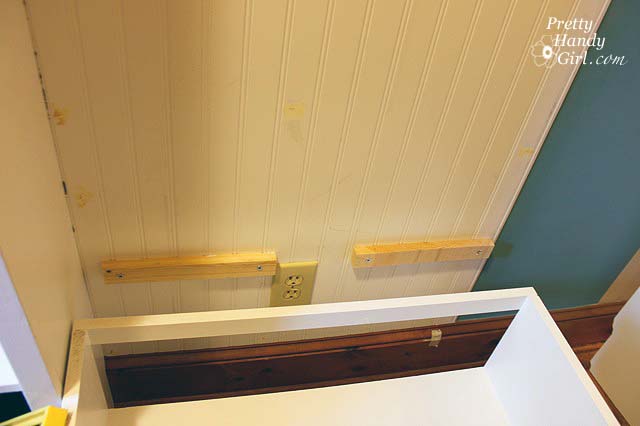
So, the studs have been found and marked. Next we cut four 15″ lengths of the 1″ x 2″ boards and painted them the same color as the turquoise wall. These will be our cleats for attaching our towers to the wall.
Then pre-drilled holes on the cleat where at least one stud is. Lined the cleat up with the top edges of our cube tower. Then drove the screws through the 1″ x 2″ cleat. The second hole was not into a stud. We decided not to use a wall anchor because there was enough strength from the one stud and drywall.
We repeated this for a second cleat under the bottom shelf of the tower. I apologize I don’t have a picture of this, but at this point we nailed through the top side of the bottom shelf and into the cleat to secure it to our wall. The top cleat was left as is for now.
Working from left to right on this unit, we nailed our 30″ x 60″ pre-cut (thank you Mr. Lowe’s Home Improvement) bead board to the wall.
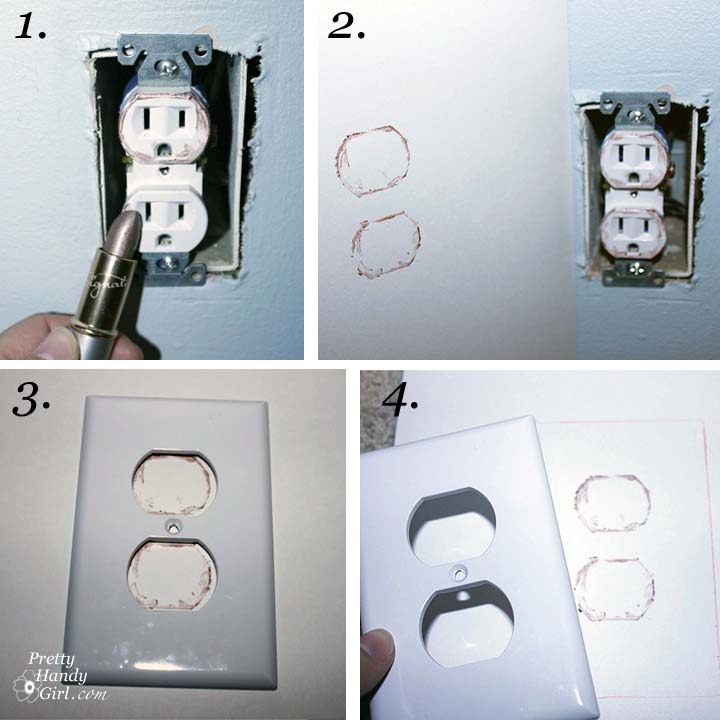
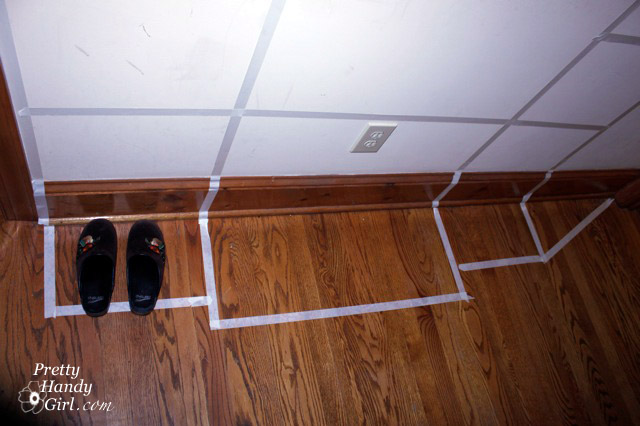
Cutting a Hole for an Outlet:
Here is an easy trick for marking where to cut a hole in your bead board. In our case, we had to cut a hole for an outlet. 1. Take the cover off your outlet. Use bright red or dark lipstick and rub it on your outlet. 2. Set your bead board in place on the wall and press in where the outlet it. When you remove it, you will have the outline of your outlets. 3. Use your outlet cover and line it up with the outlet. 4. Then trace around the cover.
We cut our hole slightly smaller than the outlet cover. After you put the cover back on, wipe off the lipstick.
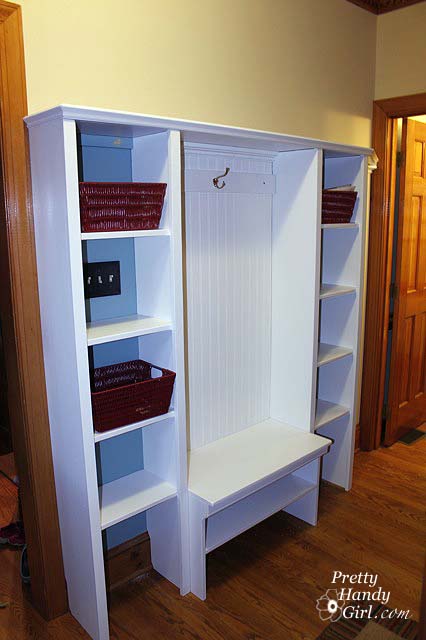
Then, we installed two more cleats though the bead board and at the same height of the bench. Sliding the bench back against the cleats, I used a few finish nails to nail the back of the bench to the cleats.
Before we put the bench lid on, we installed the second cube tower using two more pre-painted cleats in the same manner as the first tower. Then nailed through the sides of the bench and into the towers on each side.
Finally, we lined up the top of the bench and nailed it down into the wall cleats and into the bench sides and front.
The next step was to nail a 1″ x 10″ x 60″ board to the top of the towers and nailed down into the wall cleats to secure it to the wall. We added some decorative trim to the top board.
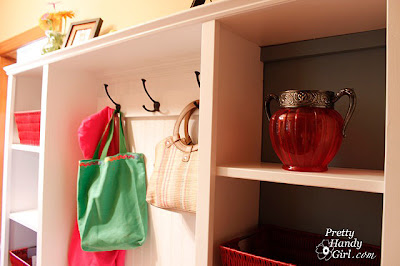
We cut a 1″ x 3″ x 30″ strip of wood to mount the coat hooks on. We also cut some more decorative shelf molding and attached it just under the top shelf and above the 1″ x 3″ hook board. Next we eyeballed our hooks and screwed them into the 1″ x 3″ boards.
To finish the built-in unit we caulked all our seams and filled the nail holes with putty. More details on this final step can be viewed in this post. Then covered the dried caulk and putty with paint.
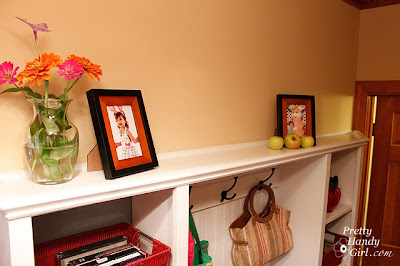
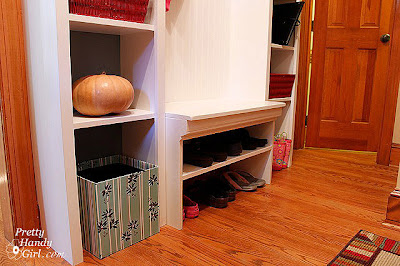
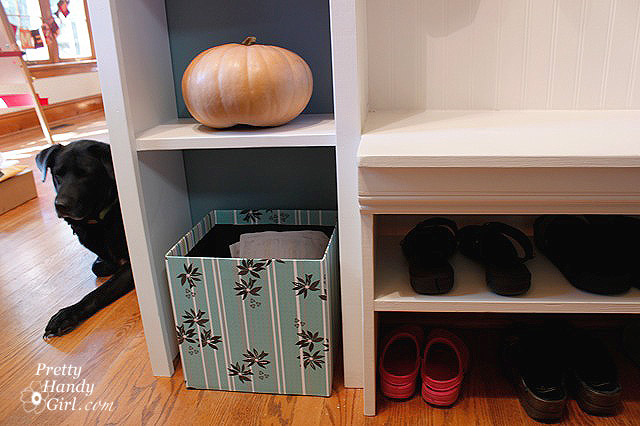
And we were done!
Approximately $300 (including the baskets & hooks) and 3 days of work produced this fabulous organizing built-in hall storage unit! You can see some of the close-up pictures in this previous post.
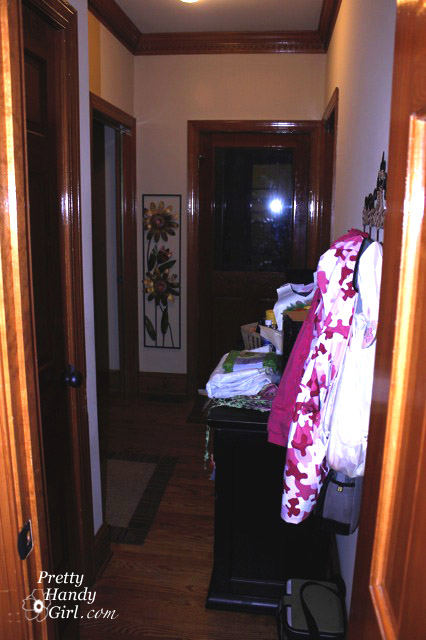
What do you think? Not too hard to create, was it? A little over a weekend and Renee had a storage system for her entry hallway. I can’t tell you how much our mudroom bench has saved my sanity
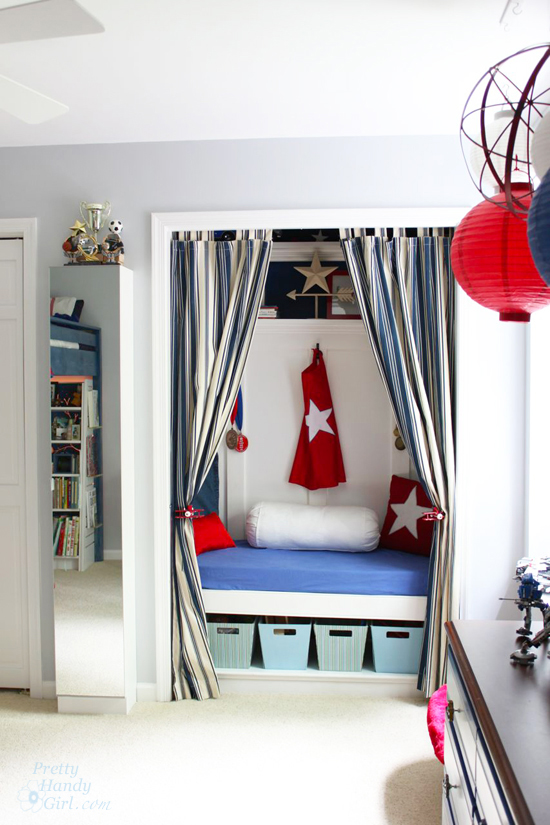
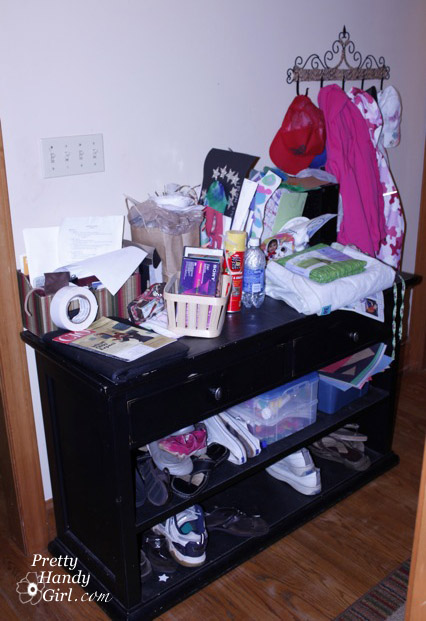
 I love finding unused space for storage. Nothing bothers me more than a wall that obviously hides a large void behind it. Or a built-in bench that could have been perfect for extra storage.


