I have a serious problem. I can’t bear to see a piece of furniture being thrown away. It could be the ugliest, most broken down chair and I still feel the need to save it from Mt. Trashmore. That was the case with “Daisy” this poor ugly chair that I found on the curb awaiting the trash trucks a few weeks ago. I threw her in the back of my car and brought it home.

Two missing parts

Only when I got home did I assess her condition. Moldy seat, chipping and peeling paint, structurally falling apart, cobwebs, missing parts…

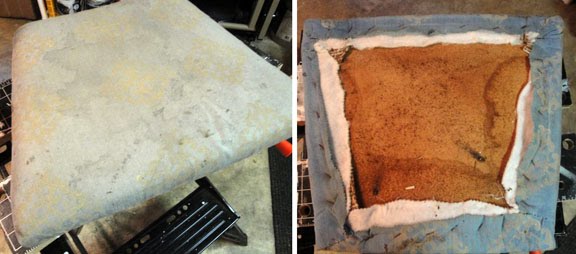
GROSS! Stained and moldy seat.

…and then a dead roach dropped out! Ewwww! I must be insane.  But, I still saw potential through all the disrepair.

This chair had some serious structural issues. I knew it was a case of tear her down and rebuild. This intro kept playing in my head the during the whole process:

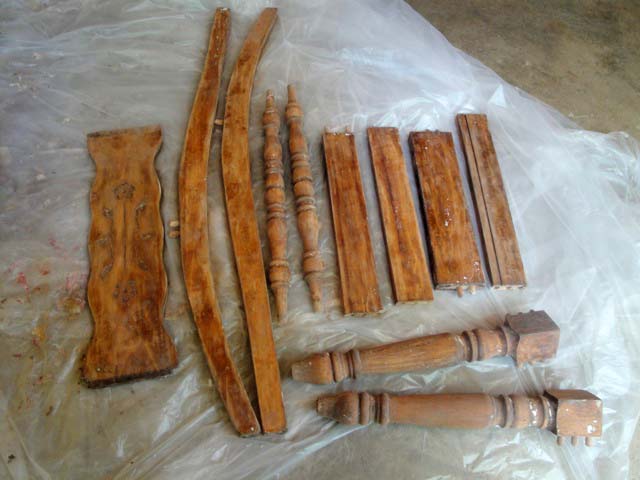
I pulled apart the chair (mostly with my bare hands and then with some assistance from a hammer.)

Until I was left with a skeleton of a chair.

I stripped the paint layers off the chair using the same technique as I did for this chair (see details here.) Unfortunately this chair had 5 layers of paint, therefore it took several hours and several re-applications of Citri-strip to get down to the wood.

If you remember, there were several missing parts on this chair. I had a lightbulb moment when I realized that I could used the spindles from the chair back for the missing parts to connect the legs.

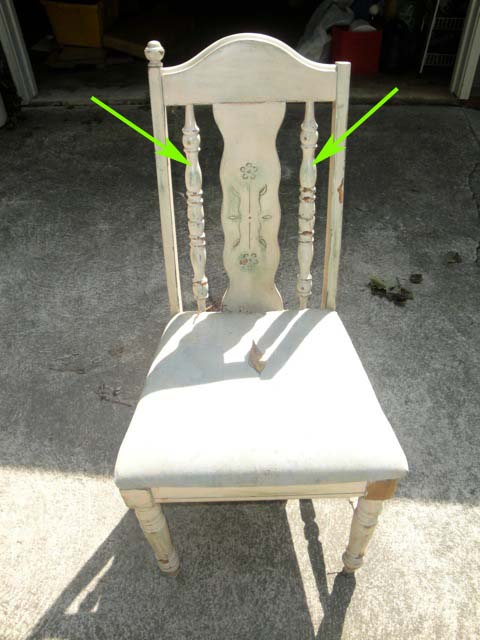
I removed the back spindles.
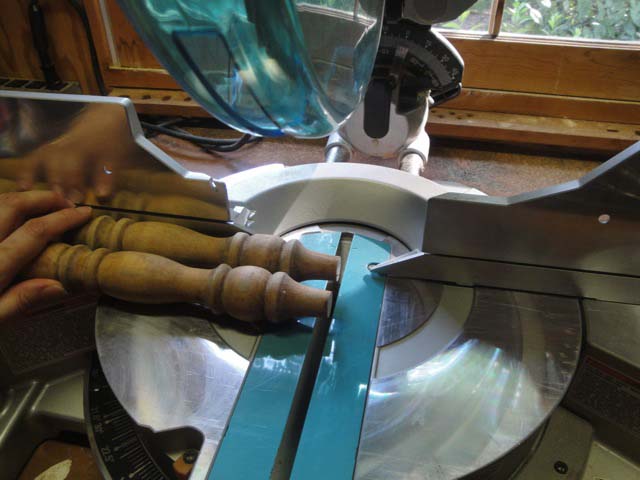
Almost a perfect size and I had two of them!

I cut down the spindles on the miter saw (but these could easily be cut with a hand saw).

And then notched the ends so they would fit into the holes on the legs. (I did have to enlarge the holes on the legs slightly using my drill and a 3/4″ spade bit.)

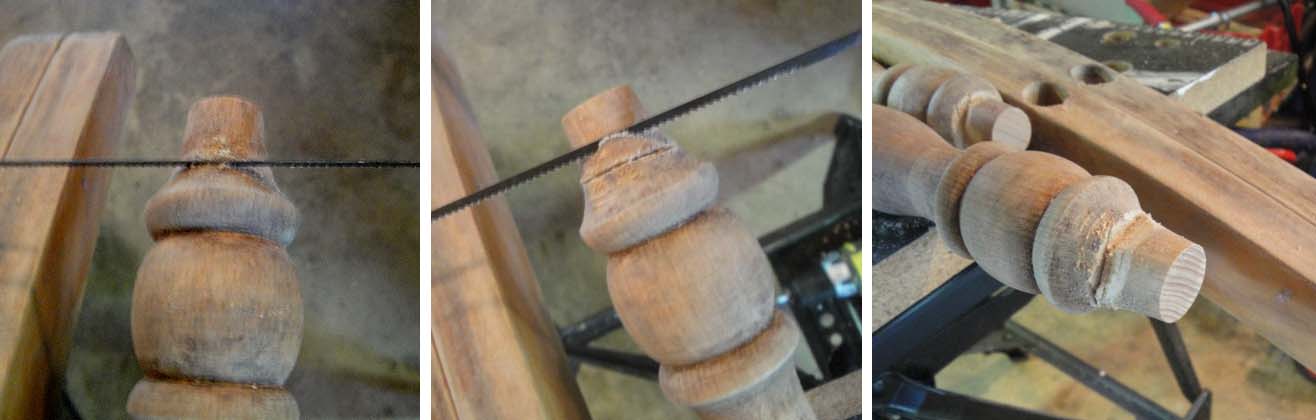
Notching the spindles. Cut around the diameter, then cut from the end in towards the first cut. Repeat on all sides.

After dry fitting all the pieces back together, I used Gorilla glue to glue the chair back together.

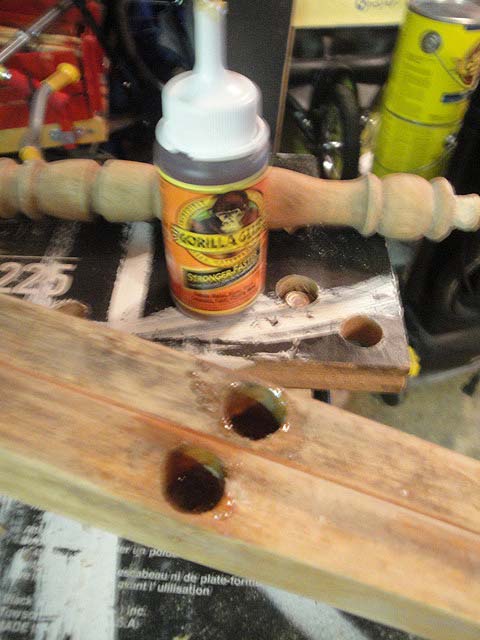
I clamped the chair tight by using rope to wrap around the chair.

Daisy had also lost one of her decorative corner finials. So, I bought two new finials at Home Depot for $5.

In order to screw on the new finials in, I had to plug the hole with wood. (As promised: a tutorial on filling holes in wood.)

I also filled the holes where the spindles used to be with wood putty.

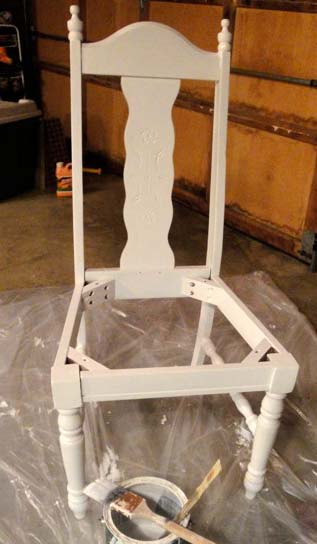
Next, I primed Daisy. Just a side note here, one reason the original five coats of paint on Daisy were peeling and flaking is that the proper prep work wasn’t done. No sanding to scuff up the glossy polyurethane and no primer. It is so important to sand (rough up your surface) and use a primer. If you cut corners here, you might as well kiss your beautiful finish goodbye in a few years. Especially if the chair is exposed to the elements.)

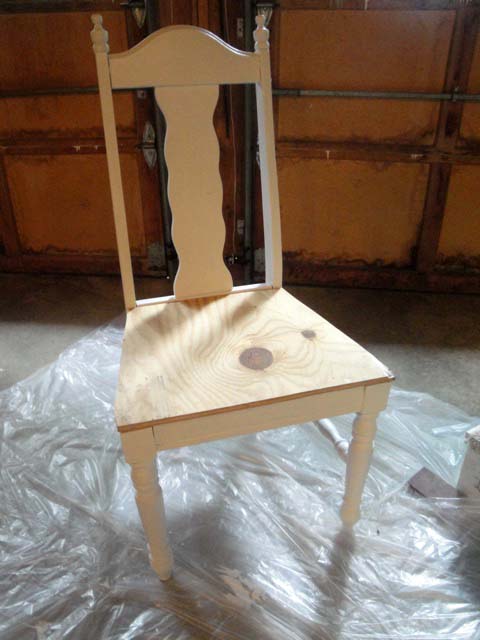
Finally, I added two coats of white paint (sanding lightly between coats.)

The chair seat was in really bad shape. Therefore I decided to cut a new one out of plywood using my jigsaw.

Trace old seat on plywood, use ruler to make straight lines, cut out seat using jigsaw.

I checked my fit and then re-upholstered my chair. Check out this post to see how to re-upholster a chair seat.

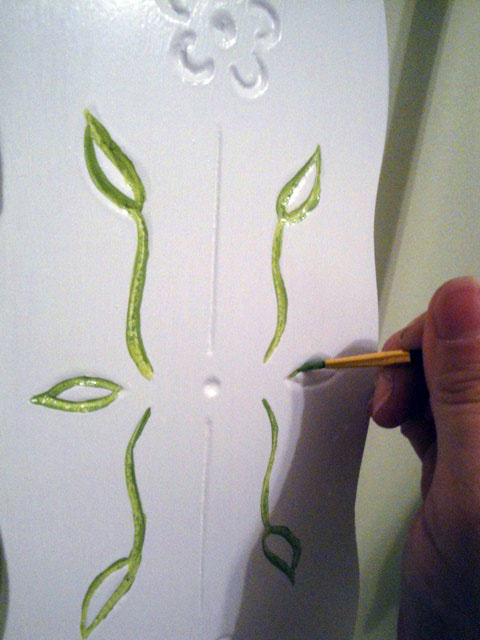
Then for the finishing touches or the frosting on the cake. You can definitely do this step! The inset carving controls your brush for you. Kind of like bowling with bumpers.

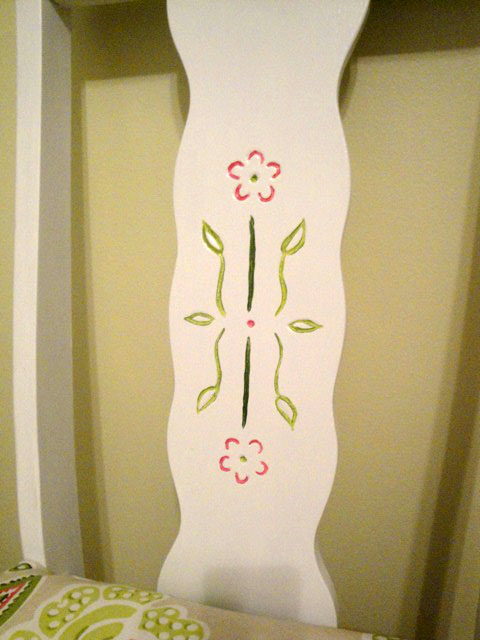
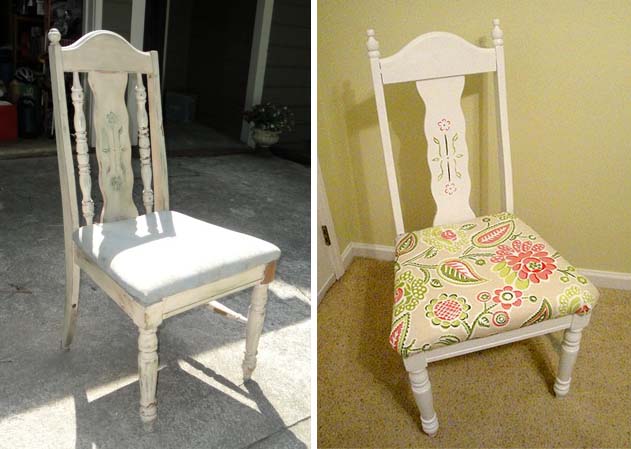
And my chair is finished. Isn’t she beautiful!

Hard to believe that 48 hours ago this chair was definitely worthy of Mt. Trashmore.

The chair is super solid now, and doesn’t move at all thanks to the Gorilla Glue.

How about one last look at the before and after pictures?

Want to see more furniture in my guest room? Take the tour here!


When I was 18, and bought my first car, and thought I was the coolest girl in town with a little zippy sportscar – sorry, just a little trip down memory lane.  My parents gave me my first tool kit. That tool kit is still with me today and I do use it a lot. The set has a series of sockets, crescent wrenches, interchangeable screwdriver bits, allen (hex) wrenches, needle nose pliers, and locking pliers.
 
That set got me through several repairs (both auto and home). Now, as a homeowner, I have found that there are a few more tools to have on hand.
You will likely want to look for a multi-piece set like this one:
This will give you a wide variety of tools for a low cost. If you want a deal, try shopping for these sets around Father’s Day or Christmas. The set above was listed on Amazon.com for approximately $50 – $60.
Regardless if you are buying these items in a set or separate, these are the tools I recommend:
Homeowner essentials:
  1. Hammer
  2. Screwdrivers – Phillips head and a flat (straight or slotted) head. Try to buy a small and medium size of each.
  3. Allen (Hex) Wrenches in several sizes
  4. Adjustable Crescent Wrenches – I suggest buying at least two. One 6″ and one 10″
  5. Slip Joint Pliers (handy for overall gripping)
  6. Needle-nosed pliers
  7. Vice grips (Locking pliers)
  8. Tape Measure
  9. Level – 24″ is preferrable
  10. Utility knife (mat knife)
  11. Safety glasses
  12. 12″ Handsaw
  13. Stud Finder
  14. Flashlight
  15. Pry bar (must have a flat sharp side and the other side a notch for pulling nails.)
  16. Tool box or case to keep all of the above in 
  17. My favorite DIY guide to my home: Home Depot’s Home Improvement 1-2-3 – the best $15 I ever spent!
 Screwdriver bits:
 

Last but not least, the most indispensable tool I’ve ever owned:
Cordless Drill with screwdriver bits and a small set of drill bits 

For Electrical DIY:
  1. Wiring instruction book or guide
  2. Wire Cutters/Strippers
  3. Electrical Current tester 
    • You only need the simple tester with two probes and an indicator light to test if the power is on. 
For the committed DIYer:
  1. Palm sander
  2. Carpenter’s square
  3. Staple gun
  4. Power Circular Saw 
    • Be sure to hold one in the store and feel how the grip feels in your hand. This is especially important as a woman with a smaller hand size. (more on power tool shopping in another blog post – coming soon!)
  5. Jig Saw
  6. Saw Horses or Folding Work Bench
  7. Clamps – A Variety of Adjustable Clamps and Clips

I hope this list gives you some good information so you won’t feel overwhelmed when buying tools. Definitely ask a sales person for help or opinions. Don’t tell them you are new at this. Ask them for the tool they would purchase if they were buying one for their shop. You should aim to buy a quality tool (especially power tools) that will last your lifetime. A cheap tool will either break or not have the power to do the job you need it to do. However, you don’t need to buy top of the line or break the bank to get a good tool.
Savings Tip: Many of the big box home improvement stores will usually price match tools that are priced cheaper at a competitor if it is the same make and model, plus take 10% off the price. Be sure to bring the ad with you or they will need to call or look up the price online.
 
Home Depots price guarantee:  
NOBODY BEATS OUR PRICES
If any competitor tries, we’ll beat their price by 10%. Guaranteed.*
*If you find a current lower price on an identical, in-stock item from any retailer, we will match the price and beat it by 10%. Excludes special orders, bid pricing, volume discounts, open-box merchandise, labor and installation, sales tax, rebate and free offers, typographical errors and online purchases.
Lowe’s price guarantee:
Everyday Low Prices, Guaranteed
We guarantee our everyday competitive prices. If you find a verifiable lower everyday or advertised price on an identical stock item at any local retail competitor that has the item in stock, we’ll beat their price by 10% when you buy from us. Just bring us the competitor’s current ad or we’ll call to verify the item’s price that you have found. Cash (charge card) and carry purchases only. Competitor’s closeout, special order, discontinued, clearance, liquidation and damaged items are excluded from this offer. On percent-off sales, Lowe’s will match the competitor’s percent-off offer. Limited to reasonable quantities for homeowner and one-house order quantities for cash and carry contractors. Current in-store price, if lower, overrides Lowe’s advertised price. Price guarantee honored at all Lowe’s retail locations. Labor charges for product installation are excluded from our price guarantee offer in our stores with an Installed Sales Program. Visit store for complete details.
Sear’s price guarantee:

If you find a lower price on an identical branded item with the same features (in Home Electronics identical brand and model number) currently available for sale at another local competitor retail store, Sears will match that price plus, give you 10% of the difference. Just bring in the original advertisement to a sales associate at the time of, or within 14 days after, your purchase. More fine print…

Happy Shopping!


Â