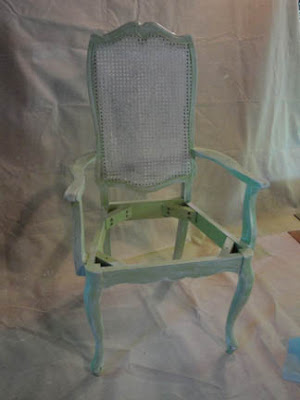
Today I’ll show you the painting technique I used on the chair I stripped yesterday.
Here is a list of suggested materials:
Tarp or drop cloth
Brush
Primer
Rubber gloves
Sandpaper (Fine & Medium grits)
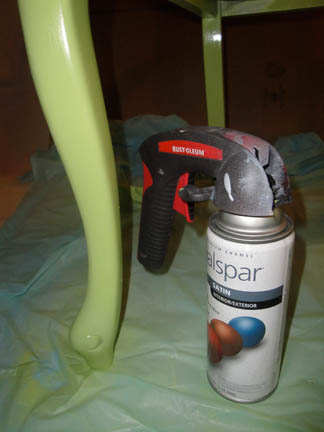
Spray paint (optional handle adapter to prevent hand cramps and spray on your fingers)
Dust mask
White paint
Brown acrylic paint or craft paint
Rag
Polyurethane
Floor protectors (chair glides)
Because I stripped and sanded the chair down to bare wood, I needed to prime the wood so it would accept the paint. If you don’t prime bare wood, then the paint will be absorbed into the wood and won’t leave a clean all over finished look. The primer is also a base that makes the paint stick to it easier. Primer is very good at adhering to lots of surfaces, including your skin. So, be sure to wear gloves or you may look like a reverse dalmatian for a few days.
I’ve used many different primers. Sometimes I use a spray primer and sometimes a liquid primer. Did you know that primer comes in different colors? And it can be tinted? Be sure to ask the paint department next time you are drastically changing the color of a room. They might be able to tint your primer close to the color you are painting so it cuts down on the number of coats you have to use.
For this project I used Bulls Eye water based primer that you paint on. You do not need much, we only had a big bucket left over from painting some rooms in our home.
Primer dries quickly, so work fast. It isn’t necessary to make it look perfect, just get a thin coating on all the wood surfaces and be careful to wipe off any drips.
After the primer dries (I used my box fan to speed the process,) you should lightly sand the chair to remove any burrs or drips. This also gives the primer a little scuffing so that the paint has something to grip to. Don’t sand so much that you go through the primer coat.
At this point you will need to “tent” off an area where you will be working. Spray paint will get everywhere if you let it. The good news is that usually the particles will dry in the air, but they will coat everything in the vicinity and will need to be wiped off. If you can spray outside, it will be better for your lungs, but be sure your drop cloth extends at least 4 feet out in all directions from the piece you are spraying.
Now comes the fun part! Grab your paint can in the color you have painstakingly chosen. I used Valspar Pistachio Satin finish in a spray can. I used to use Rustoleum, but it seems that my local Lowe’s has eliminated most of the Rustoleum brand spray paints and replaced them with Valspar. My suspicions tell me that it might still be the same paint but branded for Lowe’s.
I use light coats of spray paint about 8-10 inches away from the surface. The trick with spray paint is to use several light coats instead of trying to cover all at once. This will insure an even finish. You also don’t want to end or stop on the piece you are spraying. I use a smooth consistent sweep across the chair and then release the trigger after my spray has left the chair. If you stop on the chair, you will either get a shiny spot or drips where the extra paint has collected. Here is a graphic to show you how to spray your paint:

I used three light coats to cover this chair. I did sand VERY lightly between coats (using a fine grit 200 grit or higher) to make sure there were no rough spots and to add something for the next coat to adhere to. I also wipe off the chair after sanding with a damp rag. Just be sure to take your time to work up to your final color. This is the point where you may stop and say that you like the final results of your painting job. If you stop now, be sure to finish your painting job off with two coats of polyurethane.
I choose to add some more interest to my chair.
Milk Painting – Adding Depth and Interest
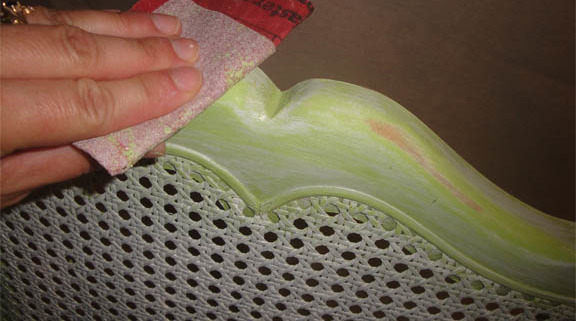
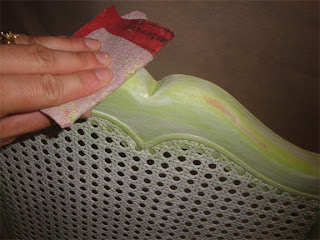
After the green spray paint layer has completely dried, I took the fine grit sandpaper (200 or higher) and gently roughed up the surface. Then I wiped off the whole chair with a damp rag and let the chair dry.
For this step I used some left over white latex trim paint we had lying around. I used a semi-gloss finish because that is what we had, but you can use any white paint you have left over. I dipped the edge of my brush into the paint and then wiped most of it off on the can. Then I lightly ran the brush over the chair in the direction that the wood grain would go. The green paint should show through your strokes. Only go over the area once, unless you really ran out of paint on your brush. If you put too much on the chair, or have areas with too much (see the left edge of the picture on the right below), you can take a wet rag or baby wipe to clean it off and try it again.

Once the whole chair has the milk paint technique, I let her dry. Once again, this may be the point where you stop painting. But, I really had more distressing in mind for this girl.
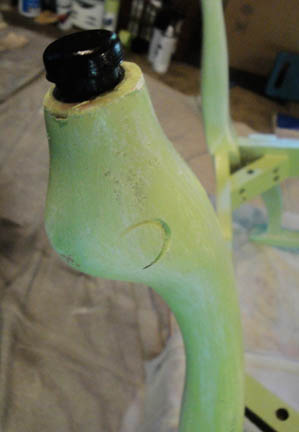
I wanted to let some of her age show through, so I grabbed some medium grit sandpaper (100 – 150 grit) and sanded some edges down to the bare wood. Think about any place on the chair that sticks out and might be rubbed and worn on an antique.
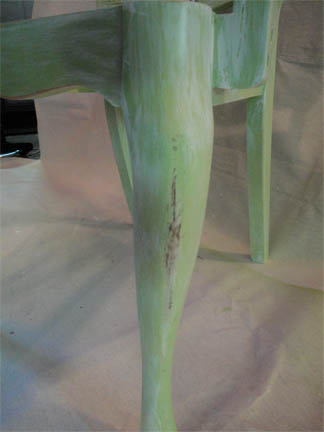
Unfortunately for me, the bare wood on my chair was a little too peachy colored next to the pistachio color paint, and I really liked the look of this leg that was sanded and had a darker brown area showing through. So, I decided to fake the darker brown wood look.

I wiped off the chair again with a damp rag and then ran up to grab some acrylic paint out of my art supplies. I chose the Raw Umber brown and squeezed a quarter size dollop onto my palette. Then I grabbed a clean rag and wrapped it around my finger. I dabbed my rag into the paint and made sure I didn’t have any globs on the cloth. Then I lightly ran the edge of my clothed finger over the edges of the chair where I had sanded.
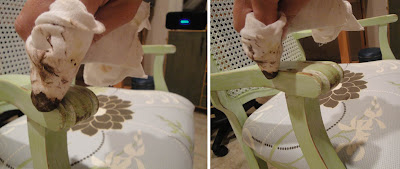
Uh oh, don’t peek at the fabric on my chair! That is the next step we will go over tomorrow. Plus, it wasn’t a good idea to paint with the fabric on my chair. Too many opportunities to drip or rub paint onto the seat.
Once I was done adding the brown paint, I let the chair dry. Next I took my fine grit sandpaper and sanded the whole chair lightly being careful not to sand off any paint. Wiped the chair down and let it dry.
I really liked the aged beautiful look that my chair had achieved, so I was ready to seal her with 2 coats of polyurethane. I used a water based poly and lightly sanded between coats. At this point you are probably sick of the sanding, but I am a sucker for smooth finishes. I love to caress finished wood and feel the baby softness under my fingers. Plus, this is the chair that I will spend many hours sitting in and working.
After the poly has dried, I do add floor protective legs to my chair. It protects our wood floors from damage. I’m really into protecting our wood (as you can probably guess.) Furniture glides or floor protectors are super easy to add. They go on just like nailing a nail. Be sure you have your glide centered on the leg and that you aren’t nailing it into any metal. Then gently tap it into the leg of your chair.


 Set the bottles in a tarped area or box.