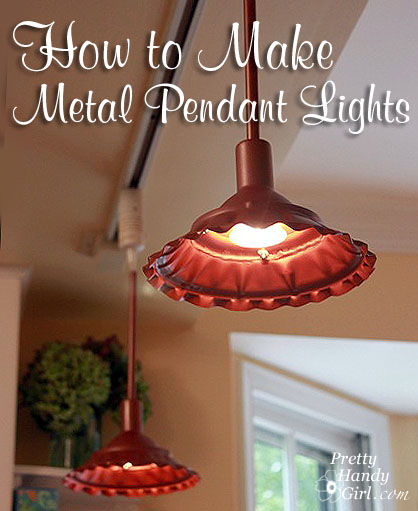
I admit it, I believe in UFOs. I’ve seen them, honestly! I even captured a picture of two of them, see:

Yup, we have two UFOs that are frequently seen in our kitchen. Why did I purchase and install them when we first moved in? I’ll never know. Don’t get me wrong, they aren’t horrible, but they just don’t go with the casual country vibe I want in my kitchen. Read more

The other day I showed you how to swag a chandelier. I think many of you fell in love with my sunny yellow light fixture (painted Summer Squash by Rustoleum.) Admit it, you fell for her!

I will tell you how you can get your own! It shouldn’t cost you more than $20 with materials!

Jump on over to Parentables to see how you can easily transform a brass chandelier (or any metal light fixture for that matter.) Beware, you may be spraying all of your home’s light fixtures after you see how easy it is.

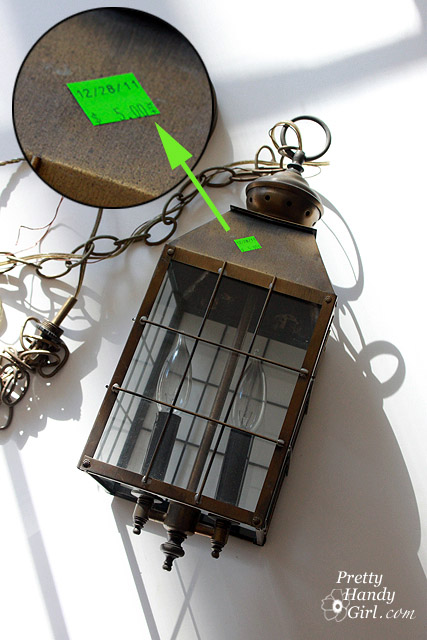
Thanks to my Facebook fan, Heather H., for the ultimate compliment on this lantern. She asked if I got it at Pier 1! Nope Heather, I got it at the Habitat ReStore and it found its way into my hands in this condition:

After a Women Build meeting at the Habitat ReStore a month ago, I spied that dusty relic. An old discarded hanging light fixture. I grabbed it and promptly paid $5 for it. Then I got to chatting with the clerk at the ReStore and absentmindedly walked out without my lantern. By the time I remembered, the ReStore had already closed. It was sad… it was tragic… I didn’t know when I’d be reunited with my light fixture because the ReStore is about 25 minutes away from my home. But, there is a happy ending to my story, my mother-in-law (who gives a good name to all MILs out there) offered to swing by the ReStore the following day to pick up my lantern for me. Hugs to her for reuniting us. But, I had to laugh at the look of skepticism she gave me as she handed over the dusty light. She couldn’t see its true potential, but I could.

How about you? Would you have passed this light fixture by? Or would you have seen the potential?

Well, next time you see a light fixture like that, grab it and I’ll show you how to transform it.

Materials:

  • Old lantern style light fixture
  • Pliers
  • Wire cutters
  • Two screwdrivers (at least one needs to be flat head)
  • Damp rag
  • Sandpaper
  • Plastic drop cloth
  • Kilz spray primer
  • Rustoleum Lagoon spray paint
  • Rub n’ Buff Gold Color
  • Paper towels
Difficulty: Easy
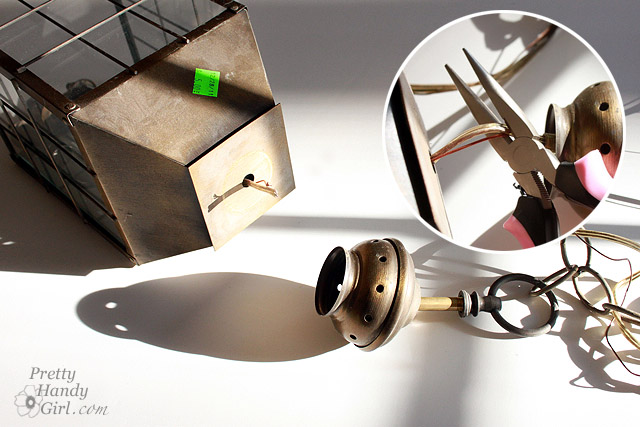
Step 1. Disassemble the lantern by unscrewing all the parts.

Step 2. Use wire cutters to cut the wire to the light housings.

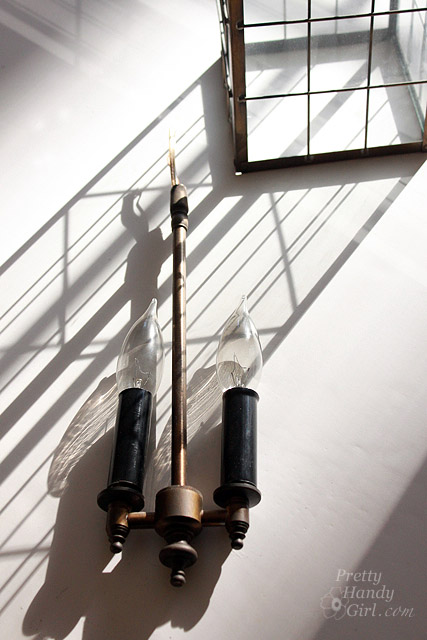
Step 3. Pull the light sockets, bulbs and lighting out of the lantern.

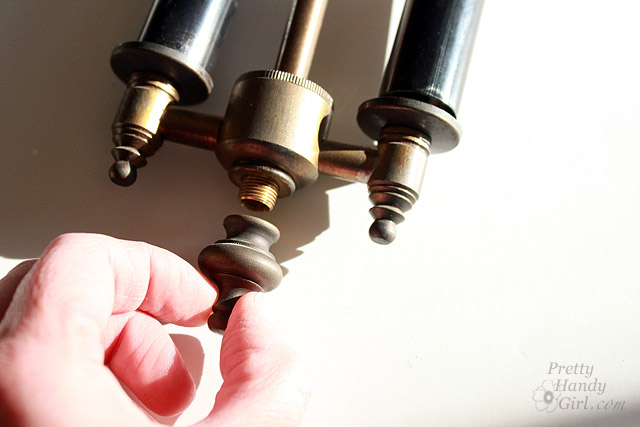
Step 4. Remove the finial from the bottom of the lighting and set it aside with the lantern. Discard or keep the lighting parts for some other project.

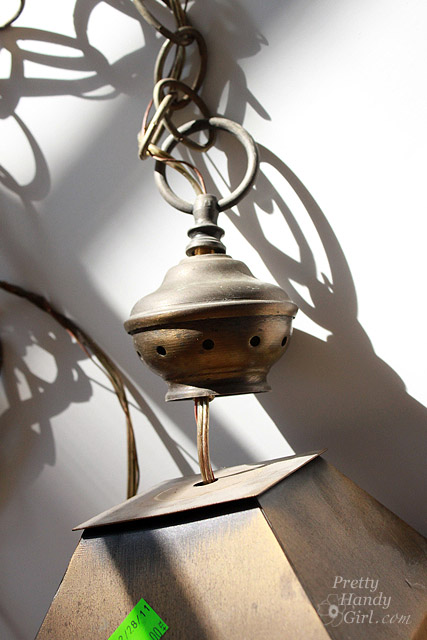
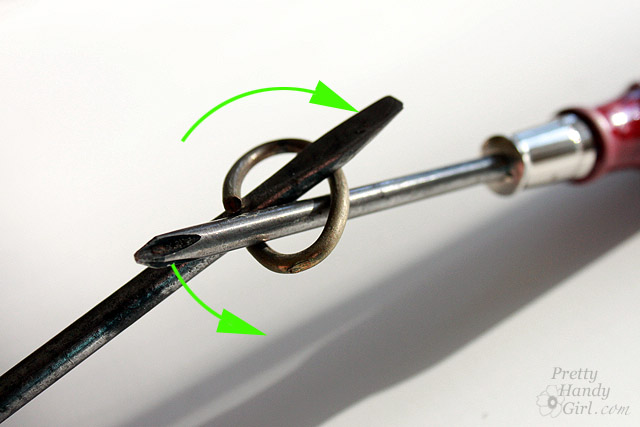
Step 5. If there is a chain attached to the lantern, insert the two screwdrivers into the link attaching it to the lantern. Rotate the two screwdrivers in opposite directions as shown to pry the chain link apart.

Step 6. Pry up the tabs on the lantern that are holding the glass in place. Remove the glass panels and set them aside.

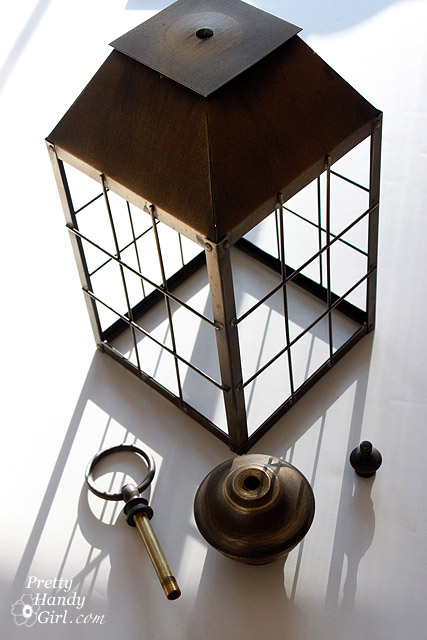
These are the parts that I kept for the lantern:

Step 7. Wipe all the parts with the damp rag to remove any dust and debris. Then scuff the lantern parts with sandpaper and wipe off any remaining dust.

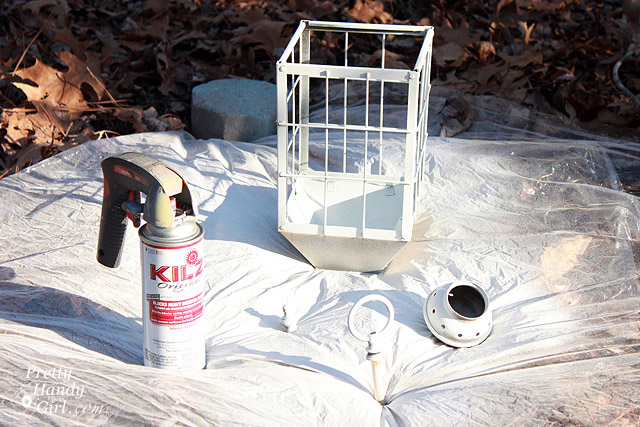
Step 8. Set the lantern and parts outside on the drop cloth.  Spray them with Kilz primer, flip the pieces over and spray again.

Step 9. When the primer has dried, inspect the lantern for any paint drips that need to be sanded smooth.

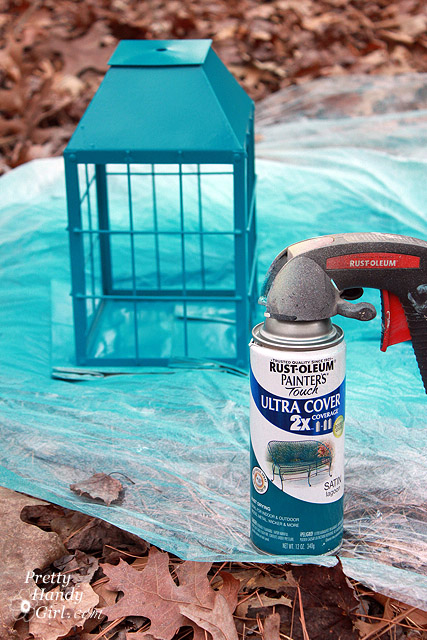
Step 10. Spray paint the lantern and parts with Rustoleum Lagoon. Flip everything after the first coat is dry and spray a second coat of paint.

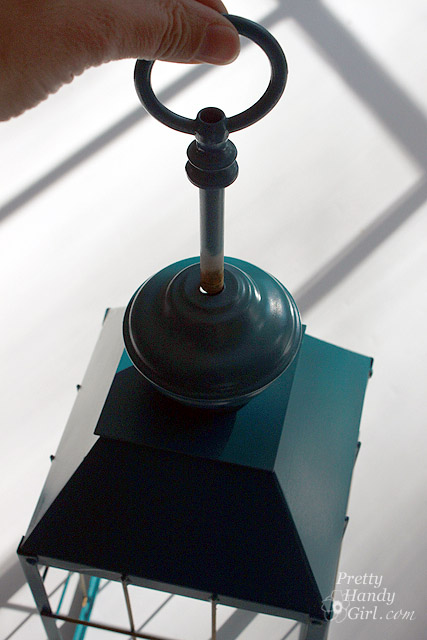
Step 11. After the lantern has dried thoroughly, reassemble the lantern.

Screw the finial onto the inside of the lantern where the lighting used to attach.

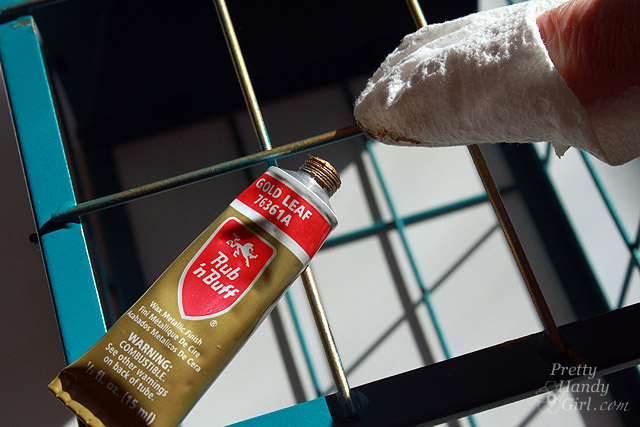
Step 11. Wipe a small amount of rub n’ buff on a dry paper towel. Rub it on the cross bars of the lantern.

Step 12. Clean the lantern glass with windex and a clean rag. Then insert the glass panels back into the lantern.

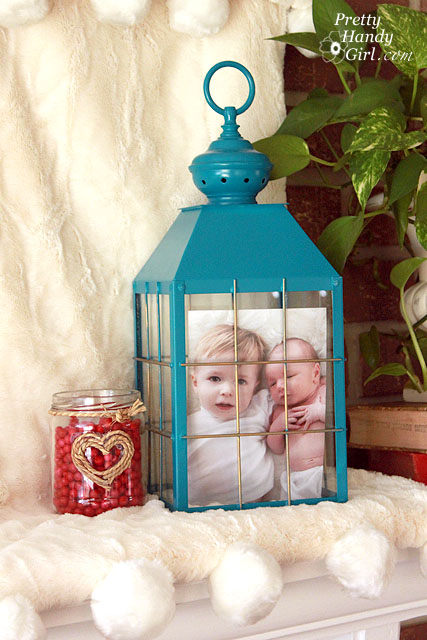
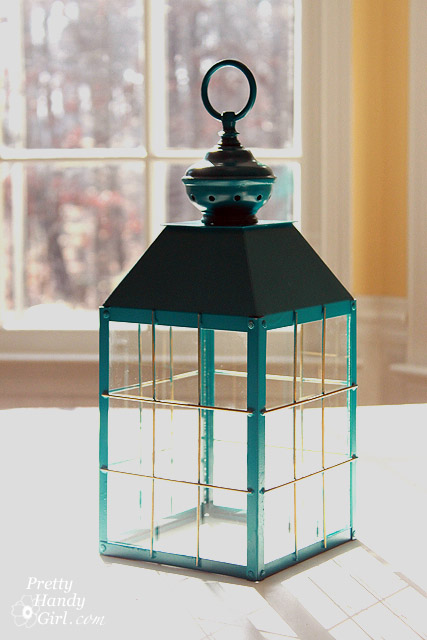
Admire your new aqua beauty!

The hardest part of this project was trying to decide where to display my lantern. I could see it in every room of our home!

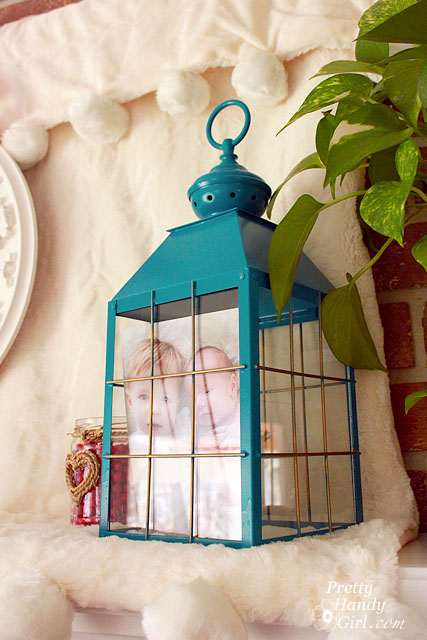
But, ultimately I gave it a place of prominence on our mantle. And included an old picture inside it.

Have you seen these old light fixtures? Could you ever guess that they could be turned into beautiful decorating gems?
Have a great weekend y’all. I hope you make a trip to your local Habitat ReStore and search for your own lantern.

I hope you’ll join Heather and some other friends on Facebook so you can see what I’m up to next!

Sharing with Tater Tots and Jello Weekend Wrap Up Party


Welcome to our second Wednesday in 2012! Today I have a special guest for you: Bri from The Modern Parsonage is here to show you how she created that truly fabulous chandelier you see up there. But, before we get to the tutorial, let me tell you a little about this handy gal (and her partner in DIY crime!) Bri and her husband moved into a home that was previously a Pastor’s family home. They dove head first into the process of renovating the home to be more modern and fitting for the hip couple of professors that they are.

The Modern Parsonage showcases the renovation process, from idea to finished product, tossing in snapshots of design inspiration and everyday life.You can follow them as they transform their home one room (floor to ceiling) at a time. Check out their Staircase renovation, bathroom update, and installing flooring projects.

Okay, take it away Bri!

Let me begin by saying that I started this project thinking I needed a ton of prep work, money, and time to transform a boring, brass light fixture into a show-stopping (if I do say so myself) chandelier. O ye of little faith, I say to my former self. This is a beginner’s project and requires so little skill that I would go so far as to call it a fool-proof way to jazz up even the most tired light or lamp for significantly less than the cost of a new fixture. (Read: under $75)

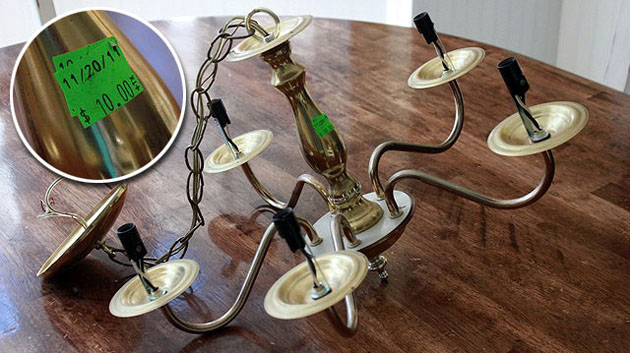
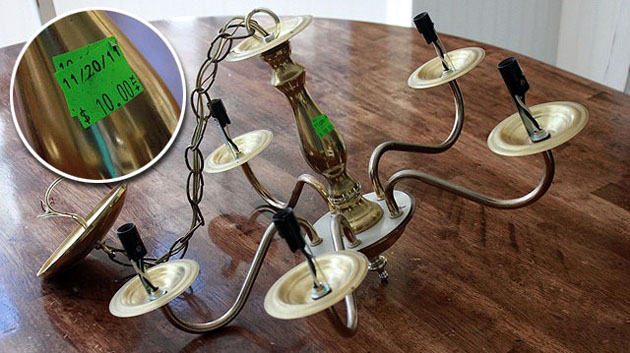
Start with a cheap chandelier. I found one on my local Craigslist for $25, but I would recommend scouring your hand-me-down shop of choice since these brass fixtures are often the standard for apartments or new builds.

Next, I did some research online and adopted a few misconstrued beliefs that I will now dispel. First, it is perfectly fine to spray paint the plastic-protected electrical cord that runs up the chain. I was not aware of that and wasted quite a bit of time figuring out creative ways to protect the cord while spraying the chain. Second, either fully remove the plastic “candles” or spray paint them the same color as the fixture. I did not know that these were removable and you can still see the tape lines from where I thought I had to cover parts of the plastic. Learn from my mistakes, people.

After you have chosen a diamond-in-the-rough light, acquire the necessary resources. You will need:

  • A drop cloth
  • A place to hang your light (I hung mine in the basement, but you can just as easily use a tree if the weather is nice)
  • Two cans of the spray paint of your choice (it is always better to have extra on hand because spray paint has tricky drying times and you don’t want to run out in the middle of the project). I used matte white and it was just the cheap Ace Hardware brand.
  • A ventilator or mask. Always necessary when messing about with spray paint.
  • 220 grit Sandpaper
  • Deglosser. (This is only if you want to be super thorough. I wiped my chandelier down with just soap and water and the paint adhesion was still great.)
  • Beading of your choice. I used roughly 750 beads and got them at Michael’s, but it all depends on your taste.
  • White string (I got DandyLine brand and it is super strong).

For the optional chain cover:

  • Fabric of your choice (double the length of chain you want to cover and 7 inches wide).
  • Fabric glue
  • Iron-on Velcro
  • Thread
  • Also, an iron, that’s pretty important.

Now it’s time to get down to brass tacks. Get it? Because it’s a brass light? Anyway, lightly run your sandpaper over the fixture. Do not press too hard or the metal will scratch. The goal here is to rough up the surface so that the paint can form a strong bond. Next, give it a good once over with a damp cloth (soap and water will do, deglosser if you’re thorough) to remove any dust, grease, or grime. Let the light dry completely.

Don your mask. You will look beautiful, I promise, but more importantly, your lungs will thank you. Find a good spot to hang your light and start spraying.

As you can see, I tried to bundle up the electrical cord in the plastic bag, but that caused a lot of problems, including bare spots of brass. I also taped off the tops of the “candles” instead of just removing them and covering the exposed wire. So yeah, just don’t repeat my follies.

Spray painting is best in short, quick bursts. Long, sweeping motions are not your friend. It will take many, many thin coats so don’t be surprised if you have to use the entirety of two cans.

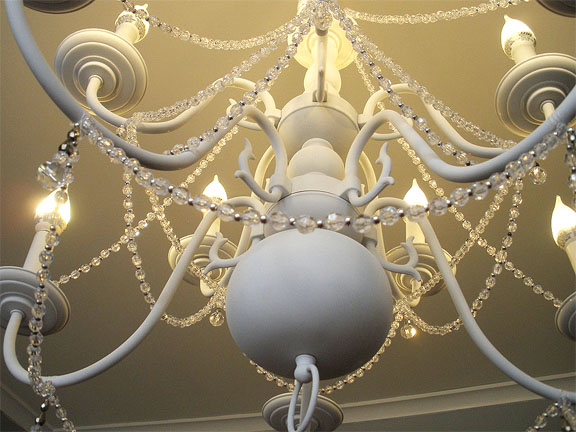
Once you have your desired level of coverage, let the light dry overnight. When the paint is fully cured, the real fun starts – beadwork. This part takes creativity and is really up to you. I did a lot of window-shopping for fancy-pants lights and finally decided I wanted a chandelier adorned with clear beads and small silver accents, embellished with teardrop crystals for extra pizzazz. I would say this is the longest part of the process; it took me about four hours to get all the beads strung and hung on the light.

With the hard part done, re-install or switch out your fixture (remember, black wire connects to black wire and white to white!).

At this point, if you’re happy with your light as is, you’re done! If you’re like me and have an awful chain and unpainted electrical cord, you may want to consider DIYing a chain cover. Much cheaper, totally easy, and no sewing machine required.

Begin with your fabric swatch and fold over about a 1/4 inch on each side, ironing the edges.

Apply a small line of fabric glue inside the seams to create a permanent hem. When the glue dries (15 minutes to a half hour), sew a running stitch on both long seams. I know this sounds complicated, but trust me, if I can do it, so can you. Pass the needle in and out of the fabric down the edges, knotting each end. (It allows you to scrunch the fabric, which is important.) Gently pull the knotted ends and push the fabric together to your desired length.

Once the scrunching is done, grab your iron-on Velcro and press it on. Run the iron over the whole cord cover to ensure a strong bond. Now all you have to do is wrap it around your chandelier chain, making sure the seam is on the least visible side, and admire!
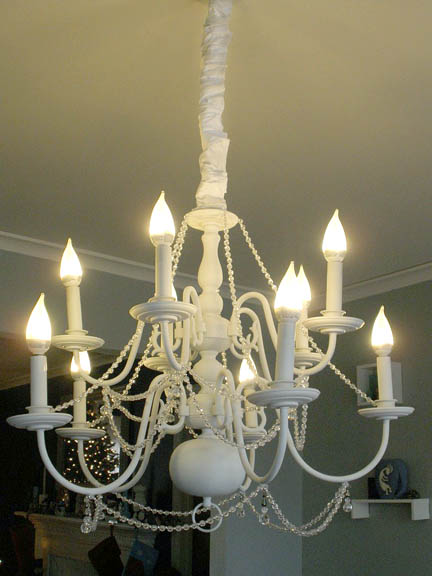
Isn’t that chandelier beautiful?! I know people would pay a lot of money to bring that chic lady home. Thank you so much Bri from the Modern Parsonage for letting us into her home for the tutorial.

Would you like to be a guest on Pretty Handy Girl? Read my open invitation here.

Spraypainted Bottle Vases

I have a real problem throwing away perfectly good glass jars and bottles. To me they are little craft gems waiting for me to transform them. With Mother’s Day and Teacher Appreciation coming up, I decided to turn some of our recycled bottles into cute gifts for Mom and my sons’ teachers.

Before you begin this project, I want to warn you to be flexible. The painting step has the potential to get messed up, but that doesn’t mean the project has to be a failure. I’ll show you how I fixed one of the bottles that didn’t turn out as I had planned.

Materials:

  • Glass Bottles or Jars
  • Spray Paint
  • Rubber Gloves
  • Plastic Bags
  • Masking or Painter’s Tape
  • Drop Cloth, Tarp or Plastic
  • Foam Stickers
  • X-acto Knife
  • Pencil
  • Embellishments: beads, transfer rub-ons, wire, fabric, ribbon, raffia, lace, or whatever you have lying around
  • Hot Glue Gun & Glue Sticks

Instructions:

Clean out the bottles/jars and let them dry completely. Save the lids if you want to cap off them off.

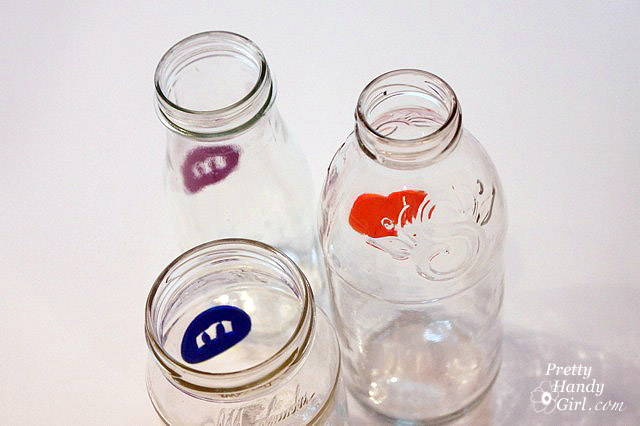
Select some foam stickers to use as a mask on your bottle.

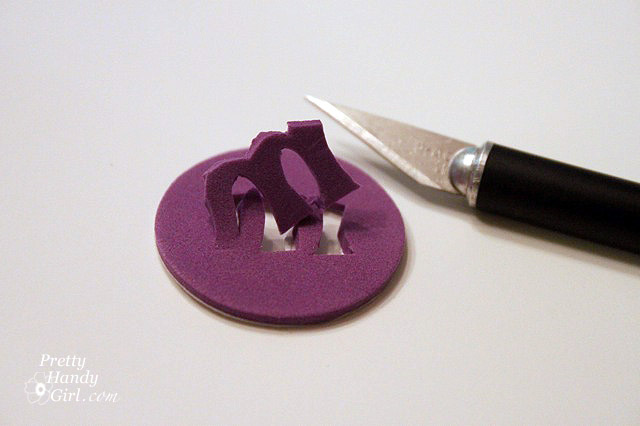
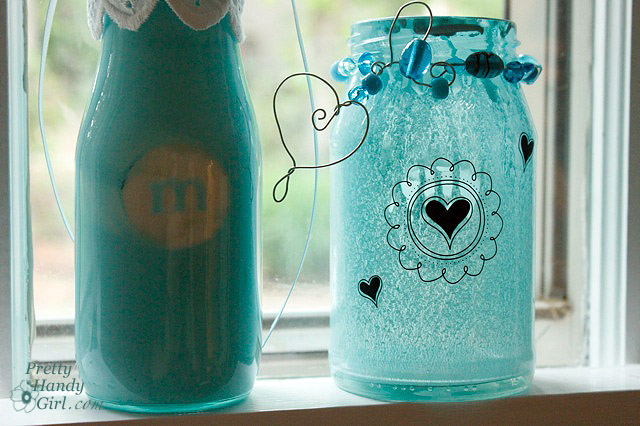
I chose a heart and then cut an “M” into a circle foam sticker using an X-acto knife. (Remember to cut your letters in reverse.)
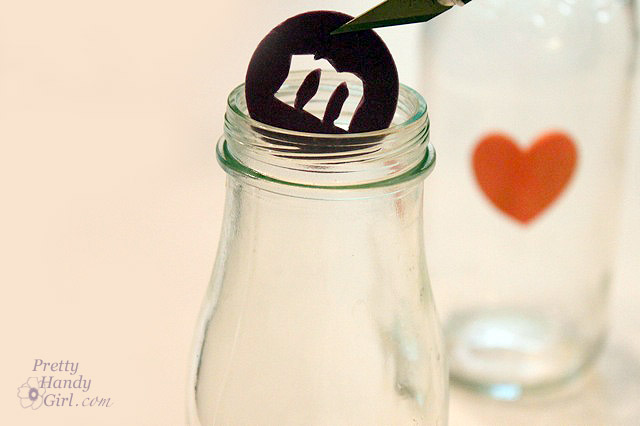
If the bottle neck is narrow, use the X-acto knife to feed the sticker into the jar.

Then use a pencil or stick to firmly press the sticker to the inside of the jar.

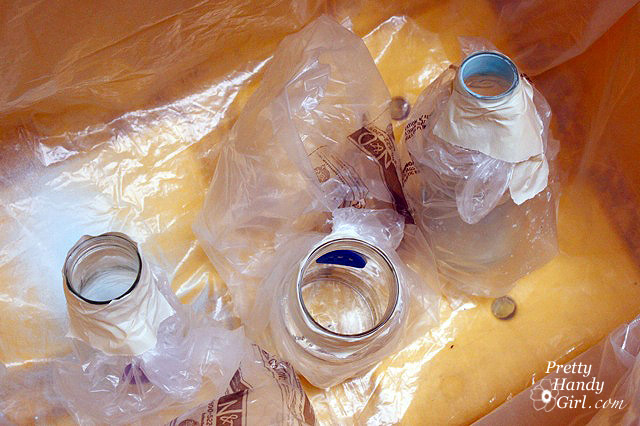
Wrap your bottle in a plastic bag and then tape the bag to the neck of the jar/bottle.

Set the bottles in a tarped area or box.

Put on some rubber gloves and insert the spray paint nozzle into the jar. Spray a layer of paint into the jar.

Wait a few minutes and repeat. The paint will be liquid, so rotate the bottles and jars to spread the paint around. Then turn the jars upside down to dry.

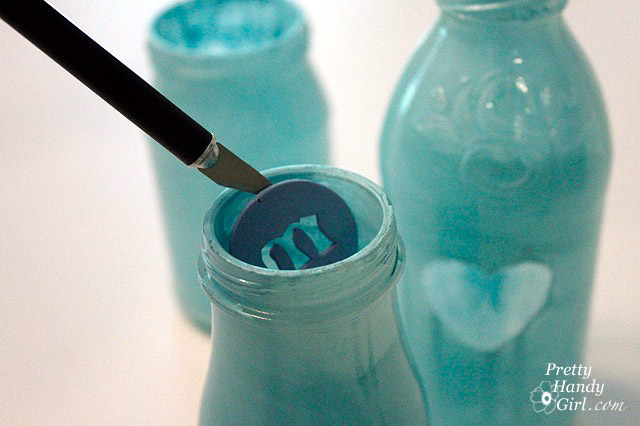
After the paint has dried (several hours), gently remove the foam sticker with the X-acto knife.

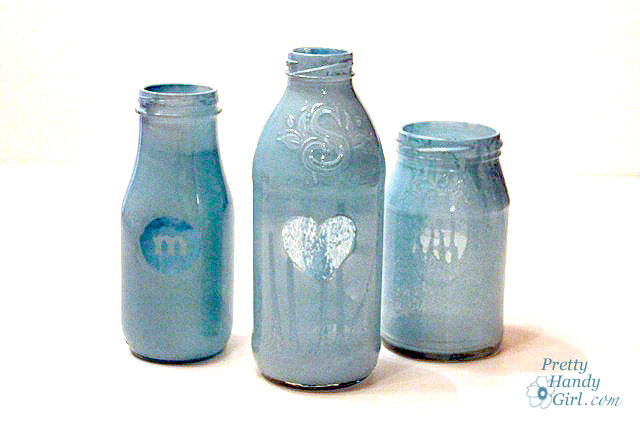
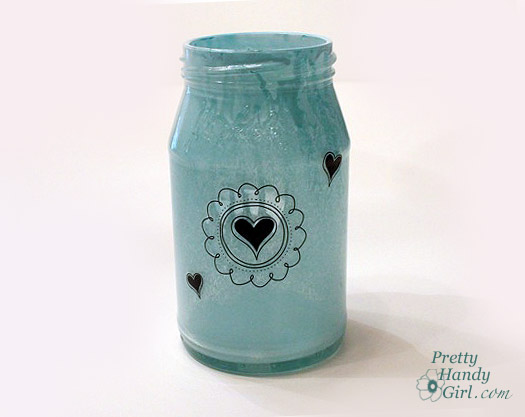
If a little paint has dripped into your masked area, you might be able to scrape it off with the X-acto. One of the stickers (jar shown on the right side below) didn’t adhere, and the paint bled underneath the sticker. But, no worries, it can easily been fixed.


Time to get out your embellishment scraps. Ribbons, lace, rub on decals, beads, etc. Anything goes!

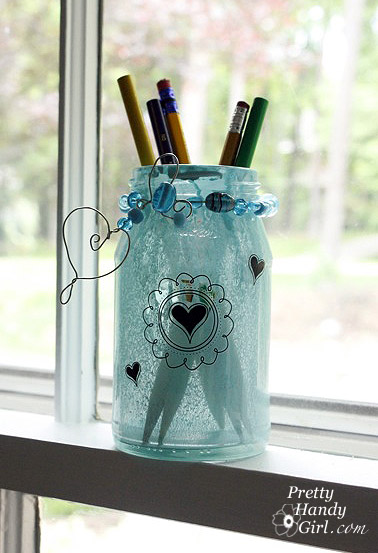
To fix the drippy paint jar, I rubbed on a few decals to cover the messed up heart mask.

I added some wire and beads to the collar. And presto, a cute pencil holder!

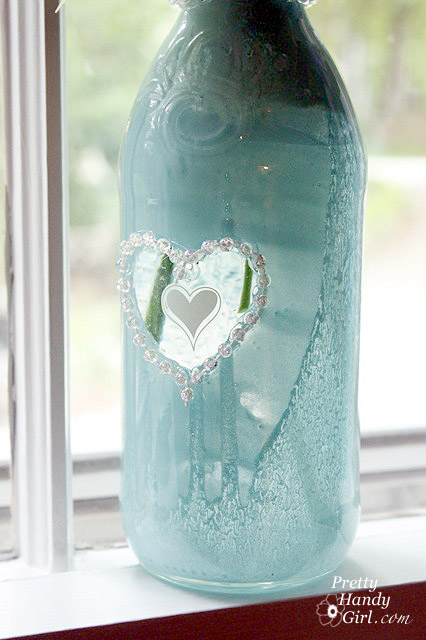
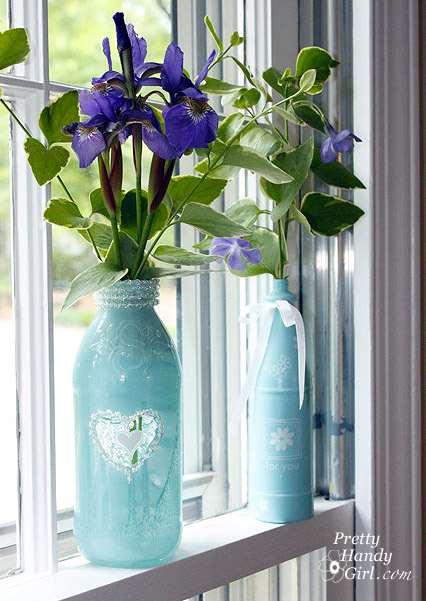
Use a hot glue gun to glue beaded string on your bottles. I added the trim around the collar and around the heart shape on this bottle. Then, I added another rub on decal.

And, voila, a beautiful flower vase!

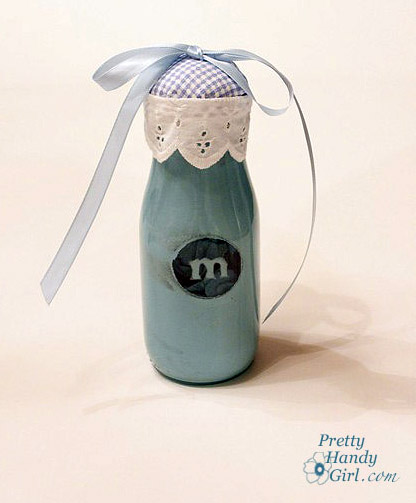
To create a cute bottle top, try gluing batting, fabric, lace and a ribbon to the lid.

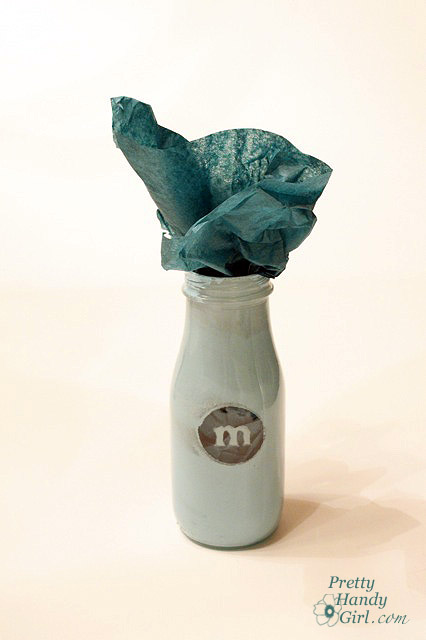
Wrap up a small present inside some tissue paper and inserted it the bottle. Or write a little heart felt note and slip it inside.

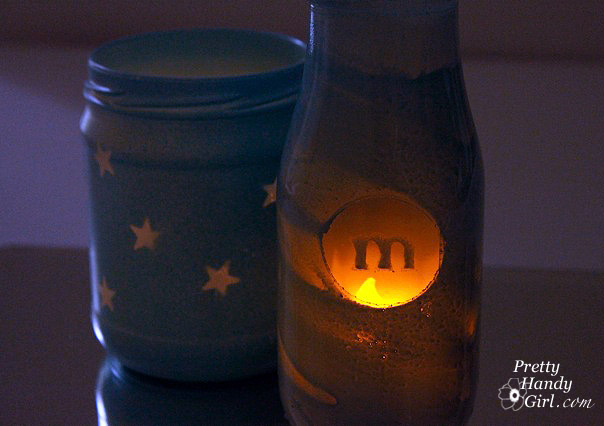
I included a battery powered tea light, it made a beautiful votive gift. The jars are so beautiful when lit up, don’t you think?

You can also try spraying the exterior of a few bottles. They don’t have the same shiny luminous look, but they will still be beautiful none-the-less.

Do tell me, what other ideas do you have using these glass jars and bottles? I’d love to hear!

Take a look at some other attractive ways to reuse recycled bottles and jars?