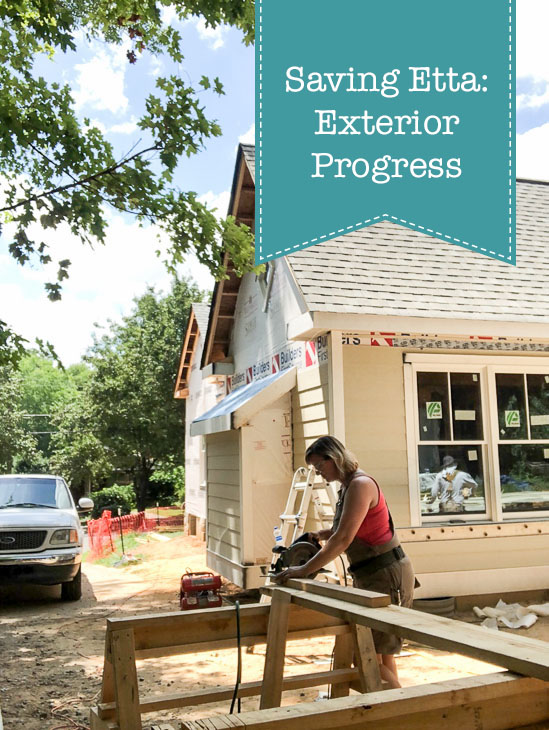
Saving Etta: Exterior Progress Update

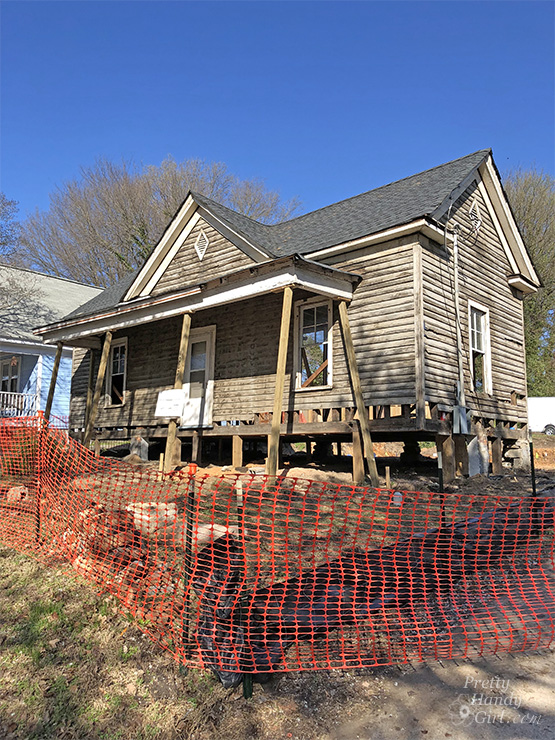
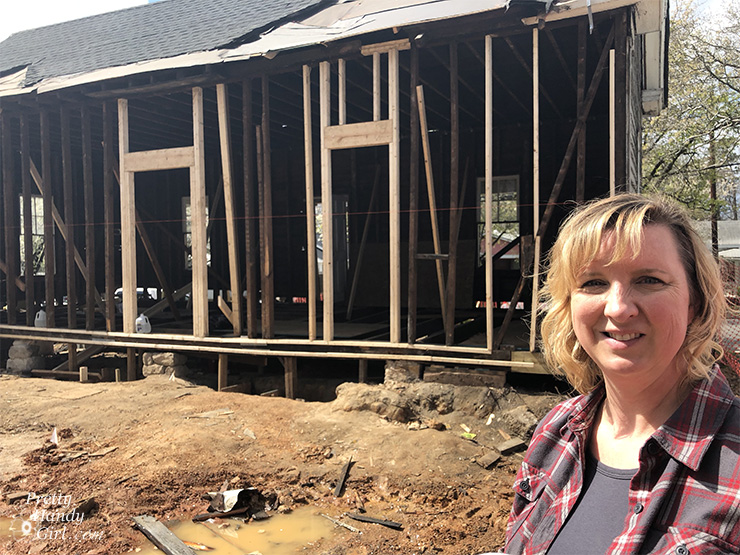
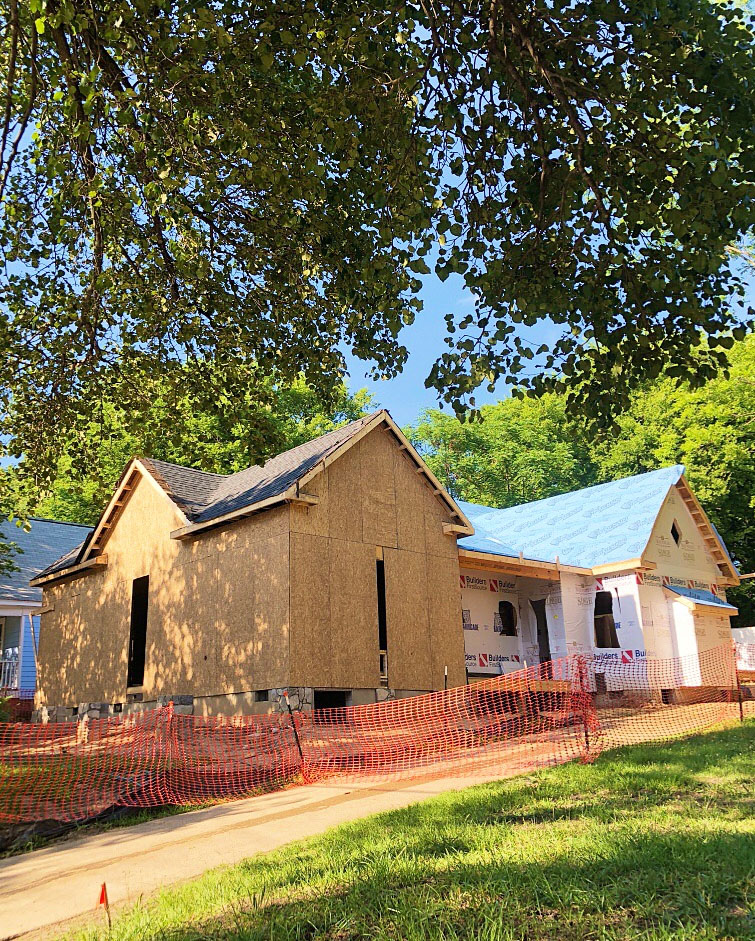
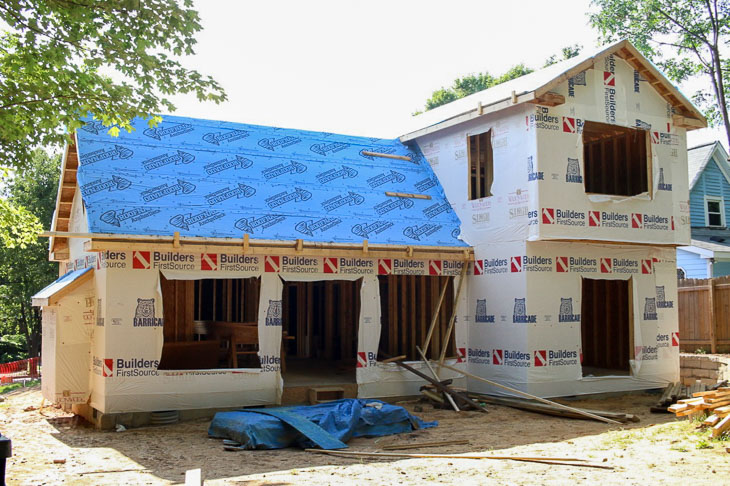
Things moved quickly on the Saving Etta Project after the framing was completed. It was a mad rush to get the house dried in. All the rain we had while digging the foundation continued after the framing was complete. Although the roof and synthetic underlayment helped, I still had to squeegee out the usual spots where water puddled in the house after the rain storms. I was anxious to get the shingles on so I could sleep better when I heard rain in the middle of the night.
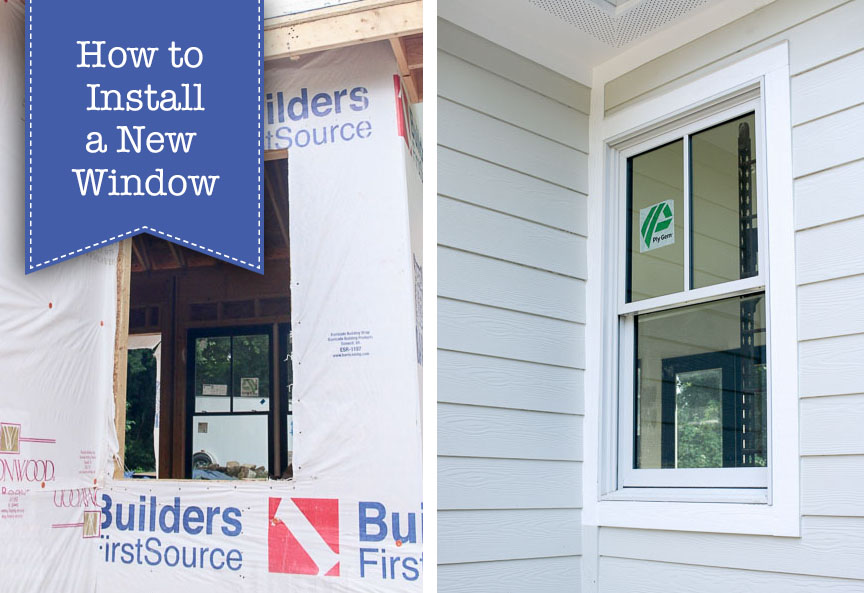
Adding Windows

(Did you know that Ply Gem sponsored the Saving Etta project by providing windows and sliding doors? I’m incredibly grateful and excited to show you the windows.) 

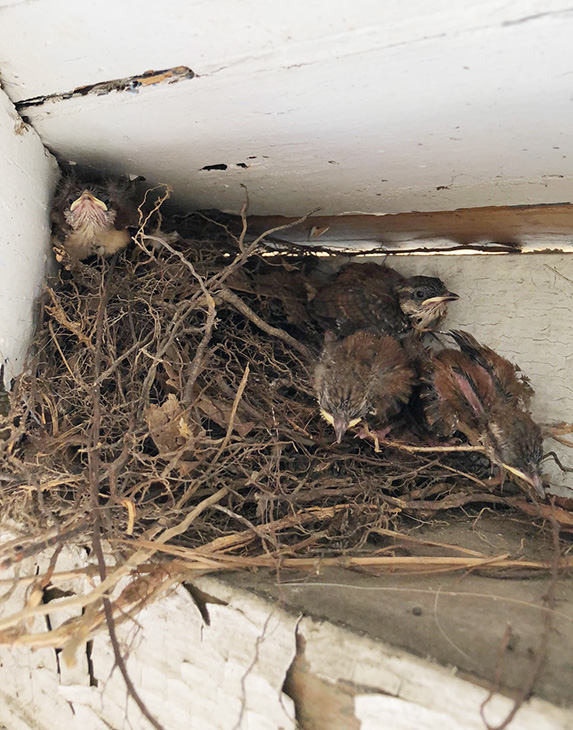
Speaking of sleeping better, I couldn’t wait to get the windows and doors installed so I could prevent birds, animals, (and anyone else) from wandering into the house at all times. (Funny but not funny story: even after the windows were installed, I found a couple of birds had made a nest in the upstairs bedroom. They flew in where the soffit vents were to be installed. Luckily I discovered them before they laid eggs.)

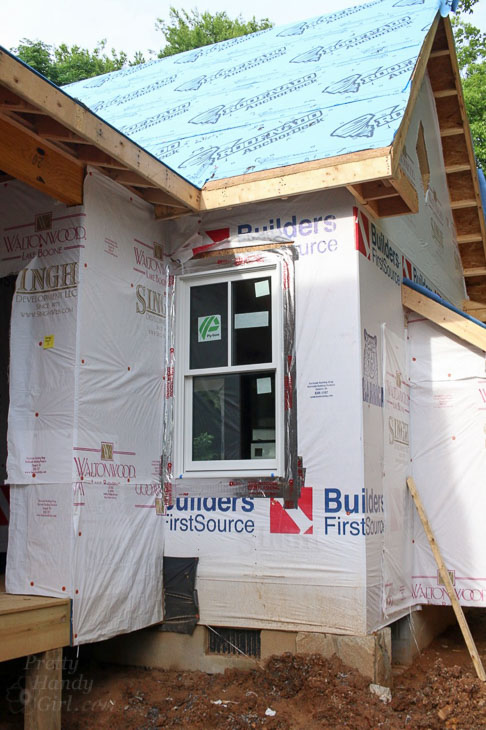
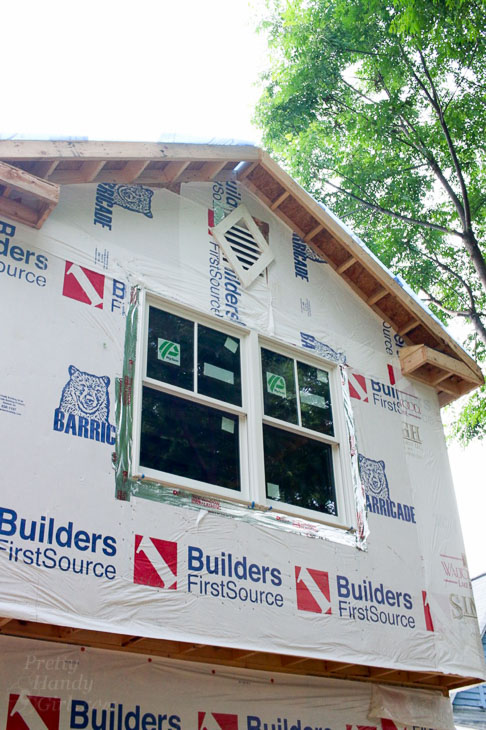
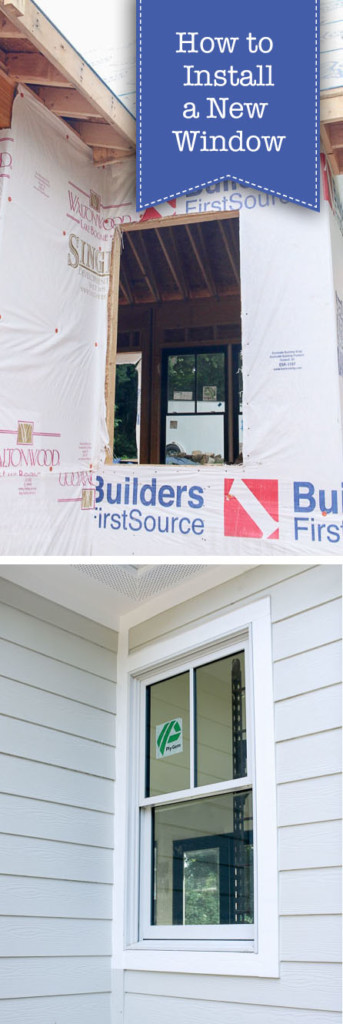
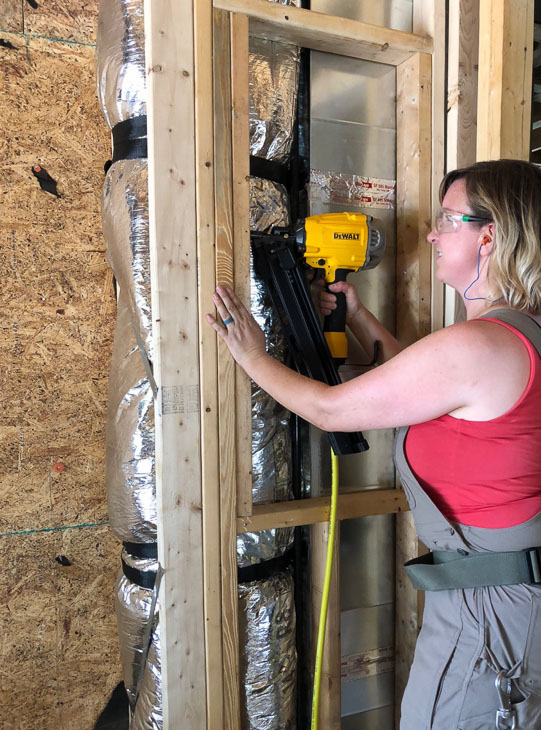
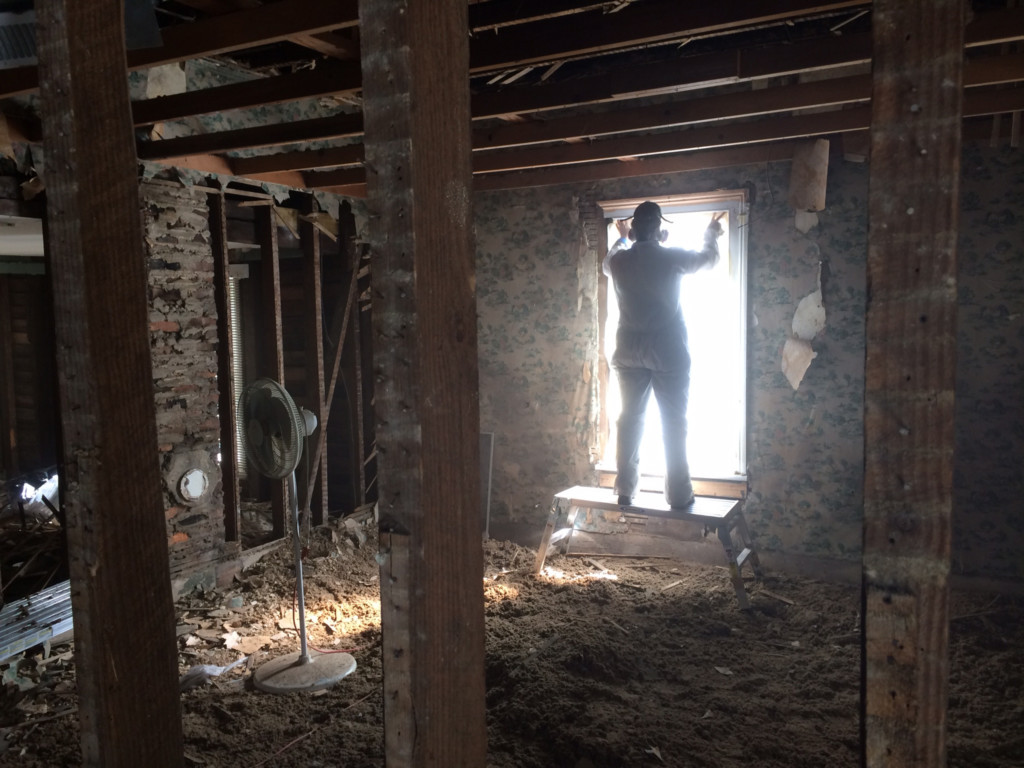
One morning I showed up to work and found my framers installing the windows in the house. It was a happy day! Although watching them insert the double windows into the second floor opening was a bit nerve wracking. But, of course they made it look easy in this video I shot:

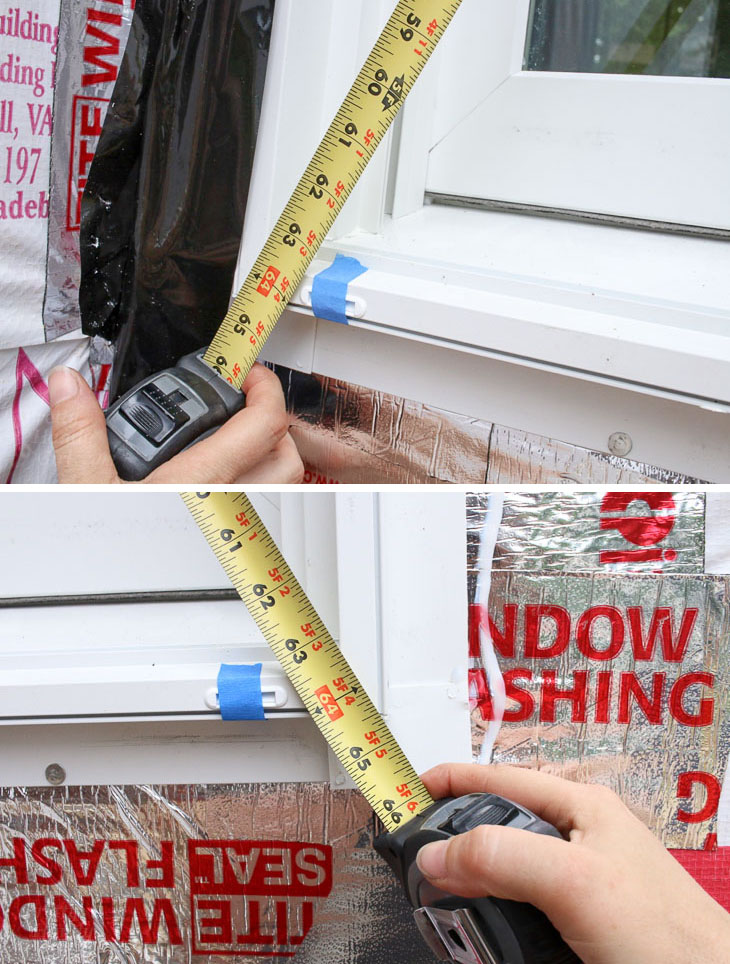
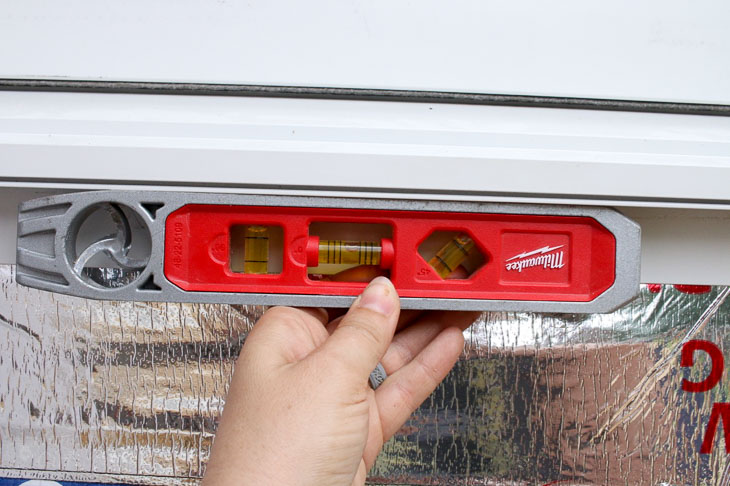
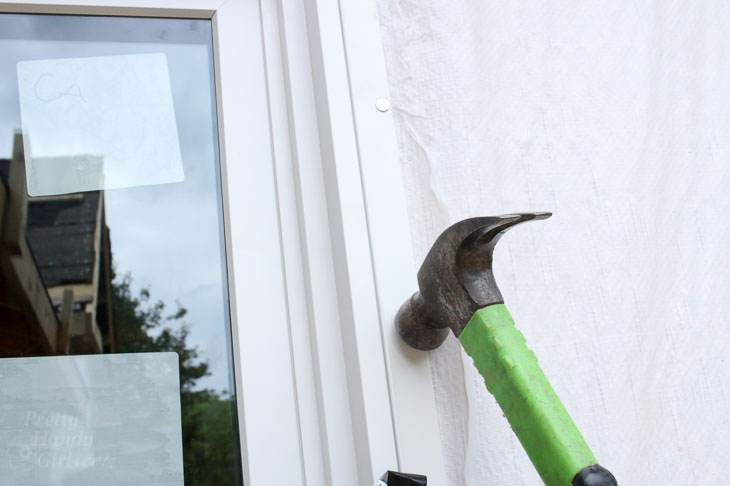
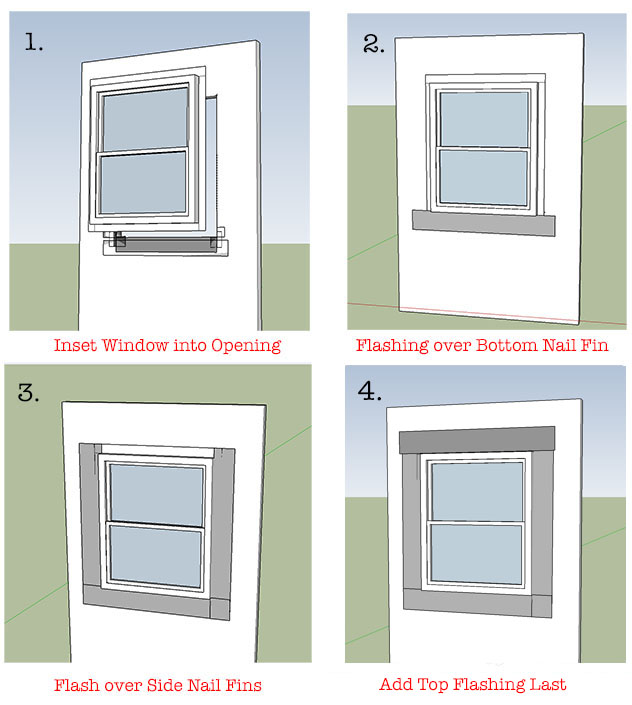
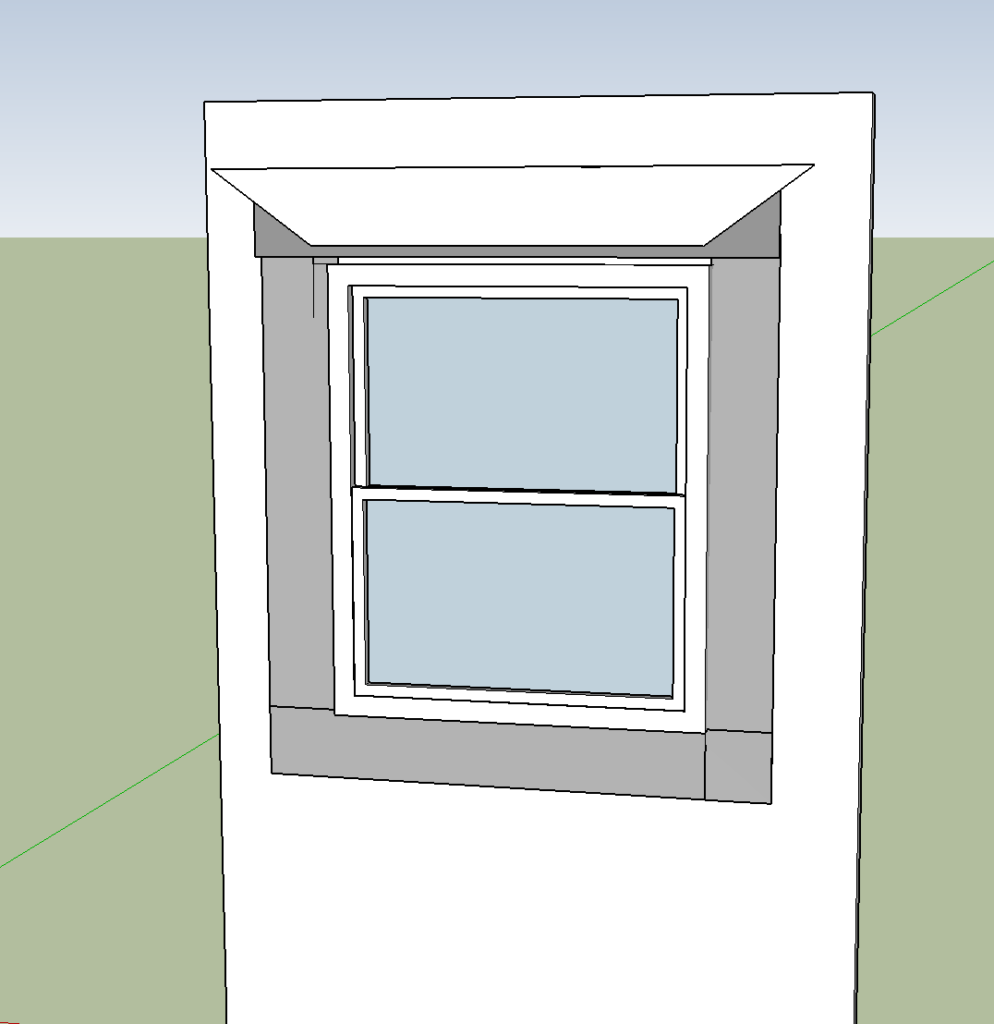
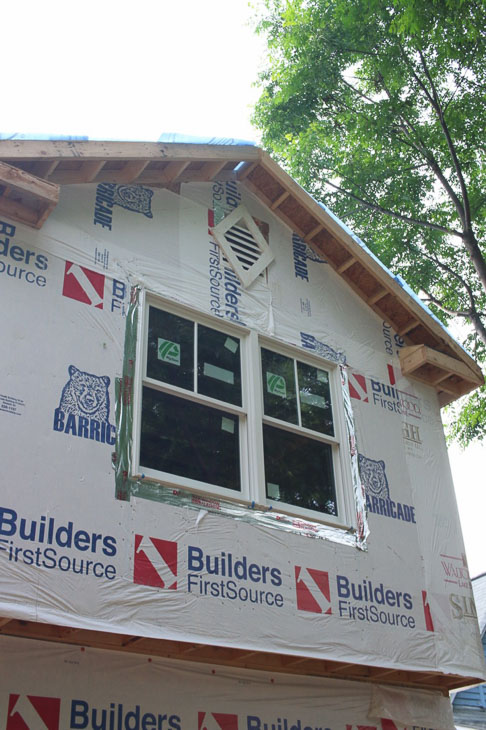
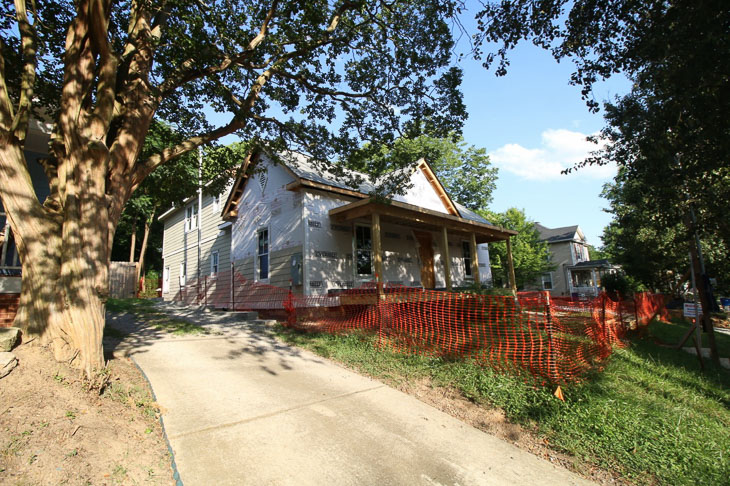
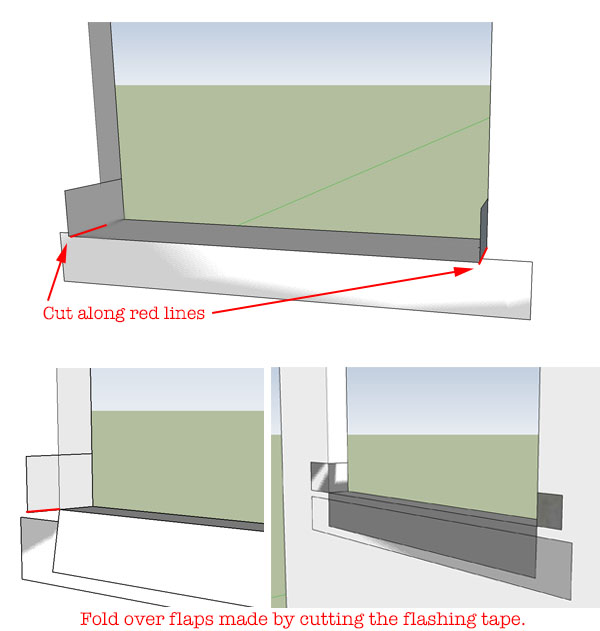
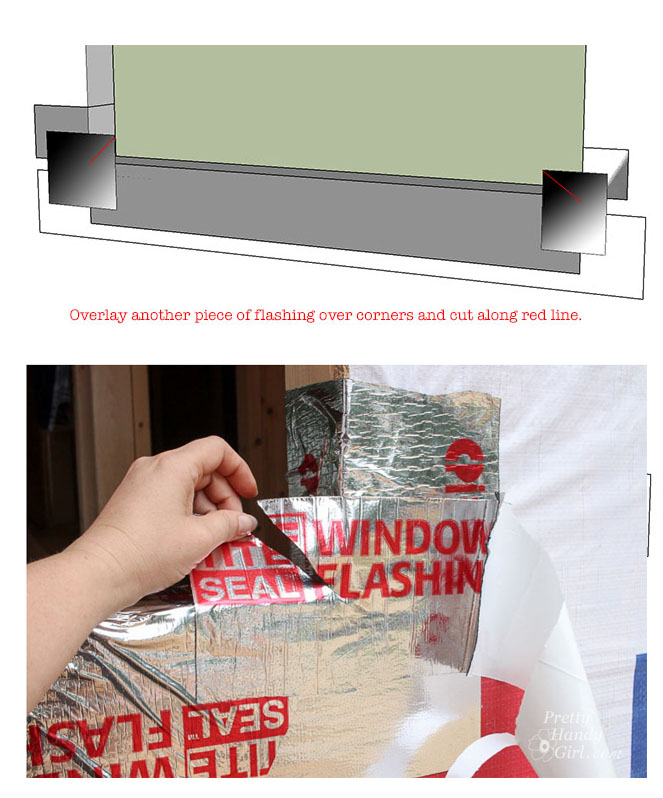
After all the windows were installed, they flashed the nail fins and prepared the house for siding. (You can learn how to install new windows by following this tutorial.)

The sliding patio doors were installed last.

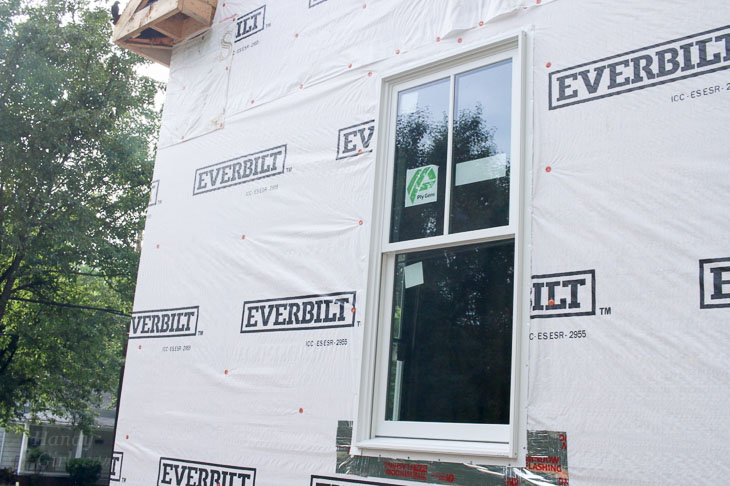
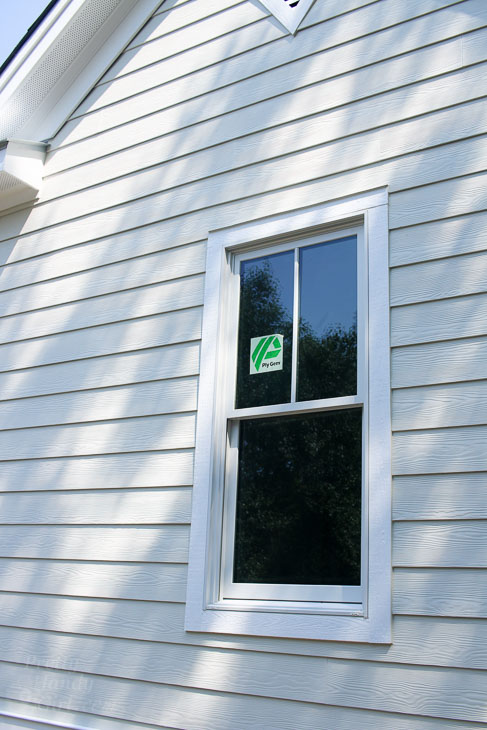
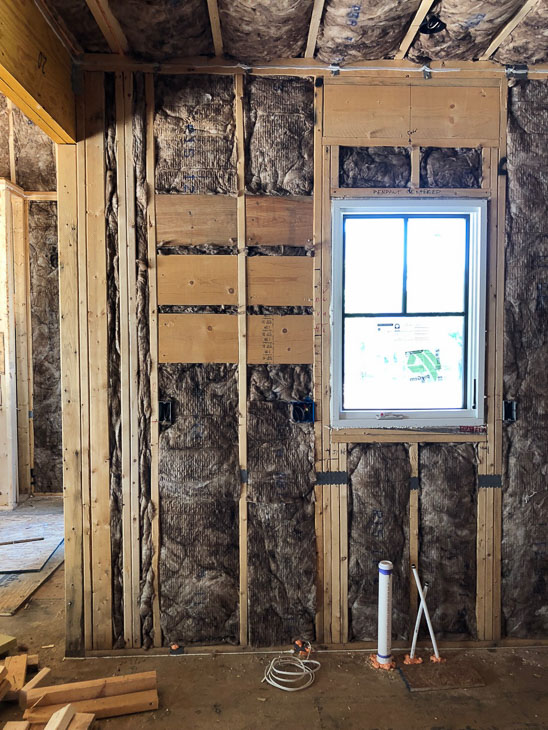
I am in love with these Plygem Mira Windows because they look like true divided light windows. The grilles are on the exterior of the glass creating a simulated divided light appearance. From a few feet away, you can’t tell they are replacement windows.

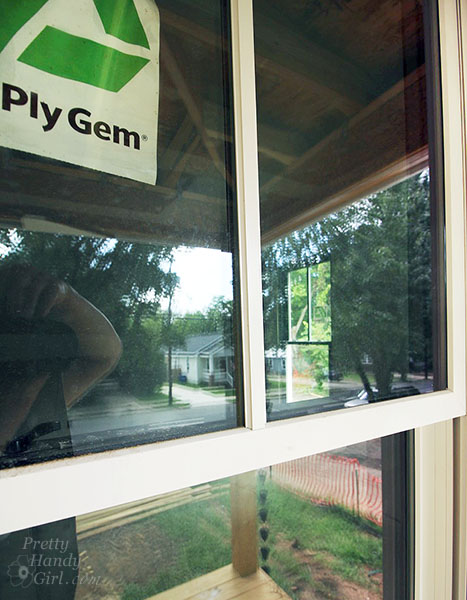
For a classic look, I chose white for the exterior, but for a more modern feel, the interiors are black. I can’t wait to see them once the drywall and trim has been installed and painted. They are going to look so sharp!

The windows slide smoothly up and down on their tracks. The original windows in the old portion of the house wouldn’t stay up and some were painted shut. They were in such bad shape I had to replace them. But, I knew I wanted the new windows to have something in common with the original windows: they are double hung (meaning the top window slides down too.) Did you know that double hung windows are actually designed to help cool a hot room?  Back in the day, all you had to do was lower the top window and raise the bottom to allow hot air to escape out the top, and cool air could come in the bottom. By putting a fan in the bottom window, you could increase this natural air conditioning of a room. Read more about this scientific phenomena in The Craftsman Blog.

The Plygem Mira windows also tilt in for easy cleaning. I wish we had these windows on our own house, because it would make cleaning a lot easier.

The other new addition to the exterior was the louver gable vents that match Etta’s original vents. I ended up building five new gable vents. The original three were in really bad shape and were falling apart. But, I used them as the template, knowing I’d never be able to find stock vents that matched the original diamond shape.

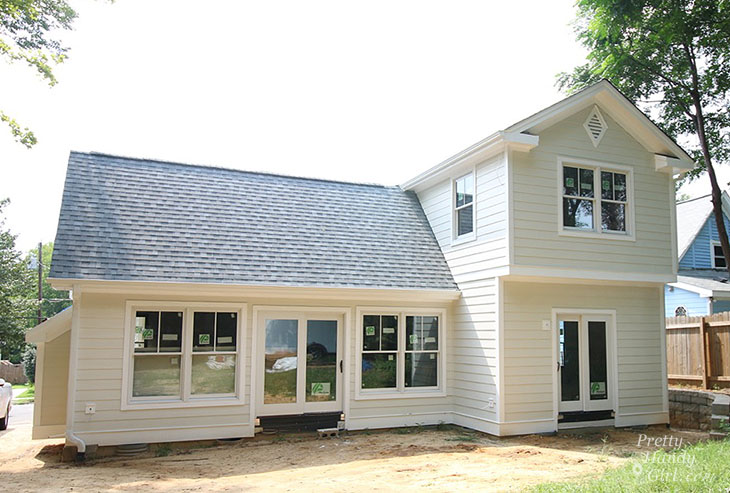
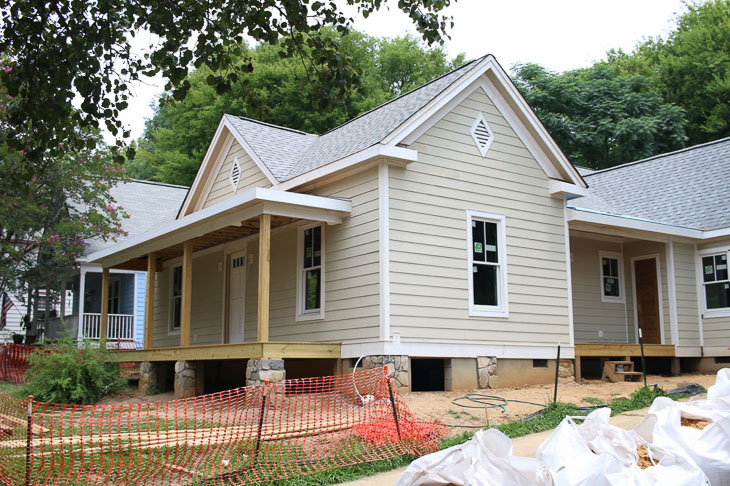
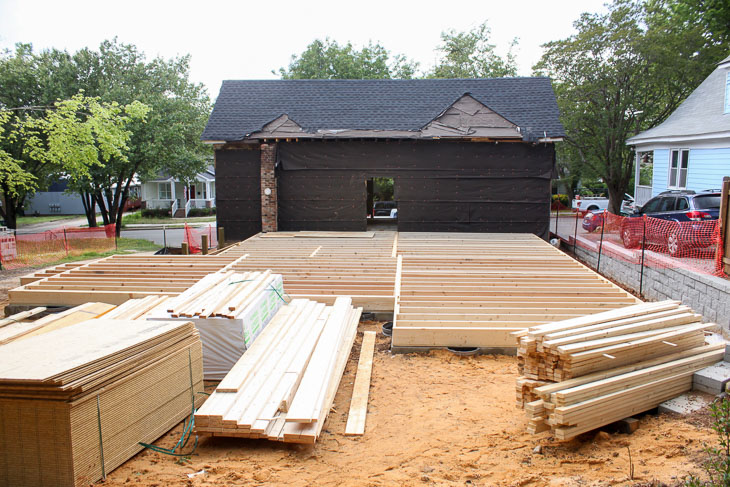
Adding the Roof, Front Porch, and Siding:

It had been my dream to add a metal roofing on the entire house, but I nearly choked when I got the estimate. The cost was almost 5 times the cost of asphalt shingles. (I’m not talking about cheap three tab shingles, the quote was for dimensional architectural shingles.) As a compromise, I decided to add metal roofing to the porch roofs and the fireplace bump out. The rest of the house would get light gray shingles to match the raw metal roof.

As quickly as I could get the roofers started, they arrived to install the shingles. In no time, the house was water tight (with the exception of the areas where the side porch roof met the asphalt shingles.) The front and side porch couldn’t get metal roofing until after the siding installation and after painting. This would eliminate the risk of anyone walking on the metal roof and damaging it. Until the metal roof was installed (at a later date) we had a minor leak during a strong thunder storm. But, otherwise, the house was water tight.

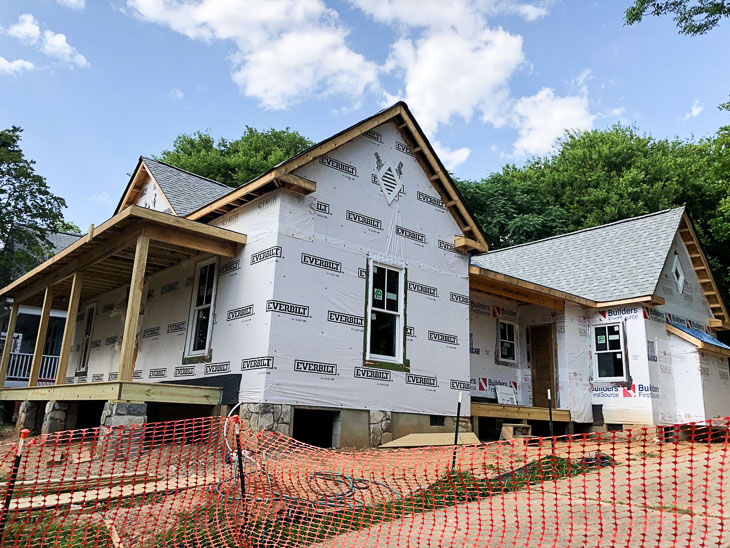
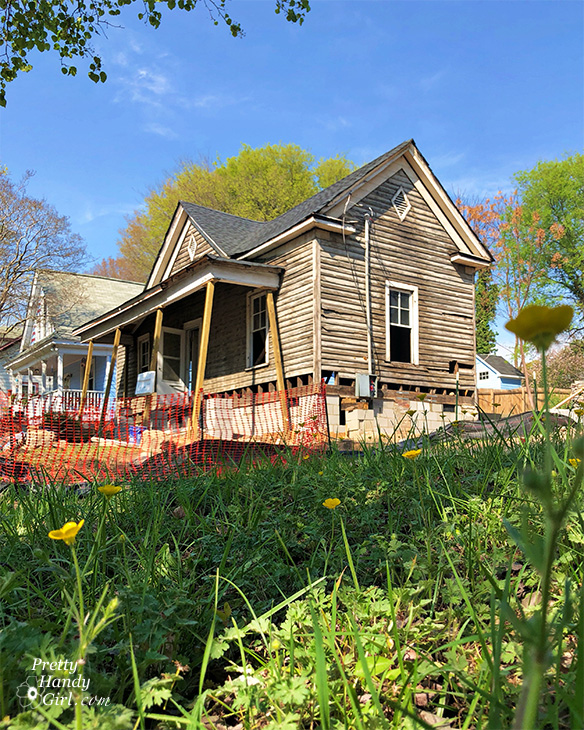
Hey look at that picture above! Did you notice the new front porch? The framers built it back in the same style, shape, and size of the original porch. Now that the front porch is properly built (and tied into the house), it’s no longer at risk of pulling away from the front. Plus, now we can flash behind the siding to prevent water from seeping under the siding or around the porch roof. Although this had been an added expense, I knew it was the right decision to make sure this house survives another 100 years.

Interior Work:

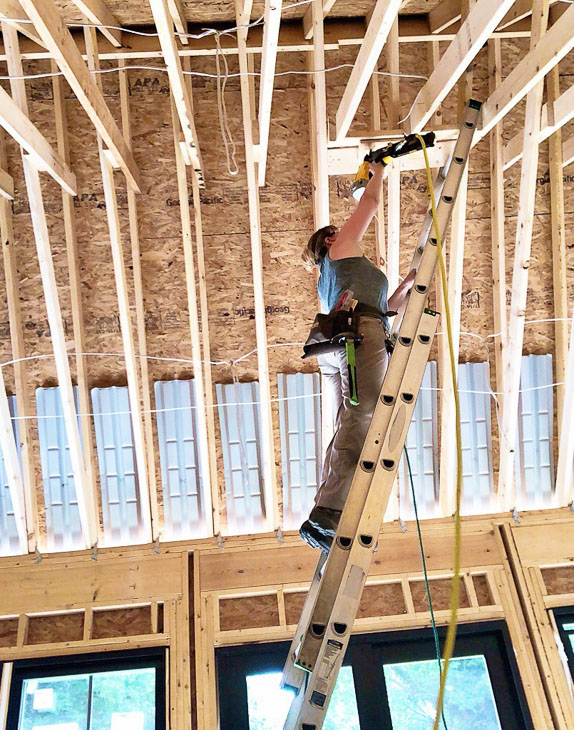
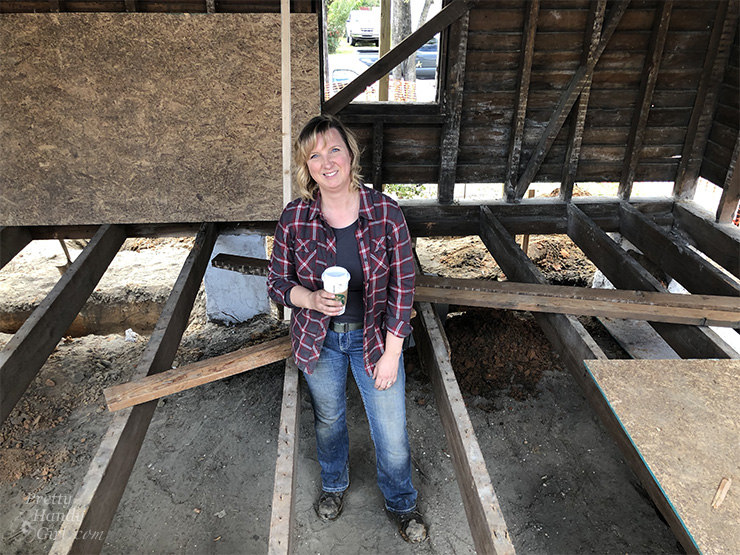
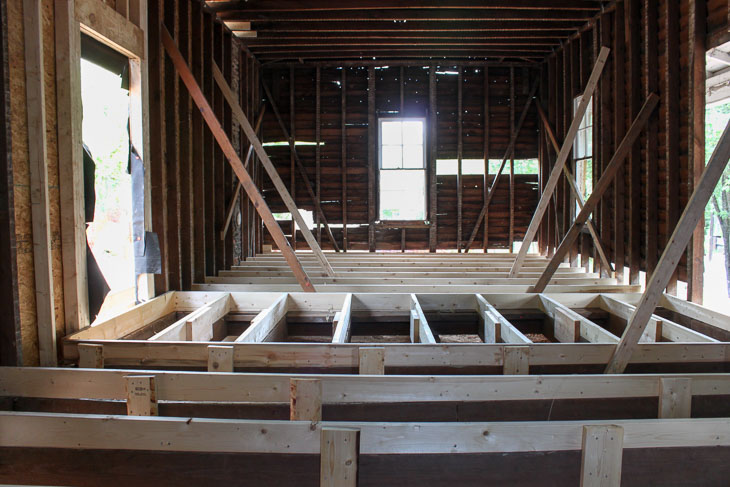
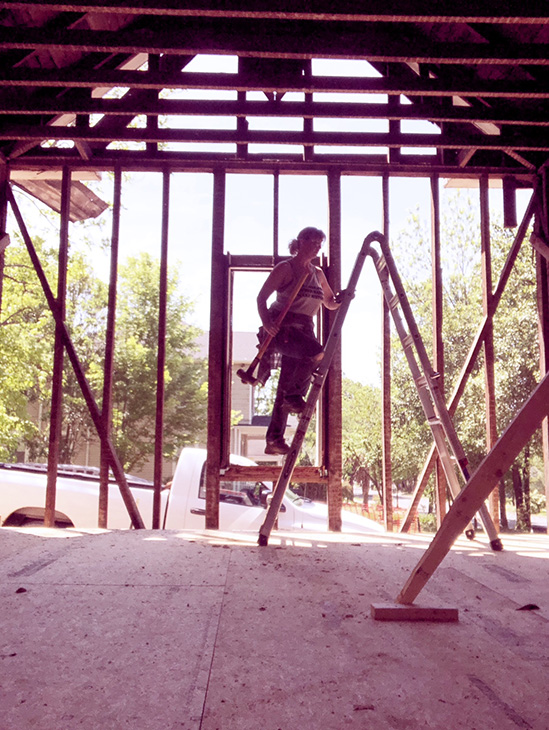
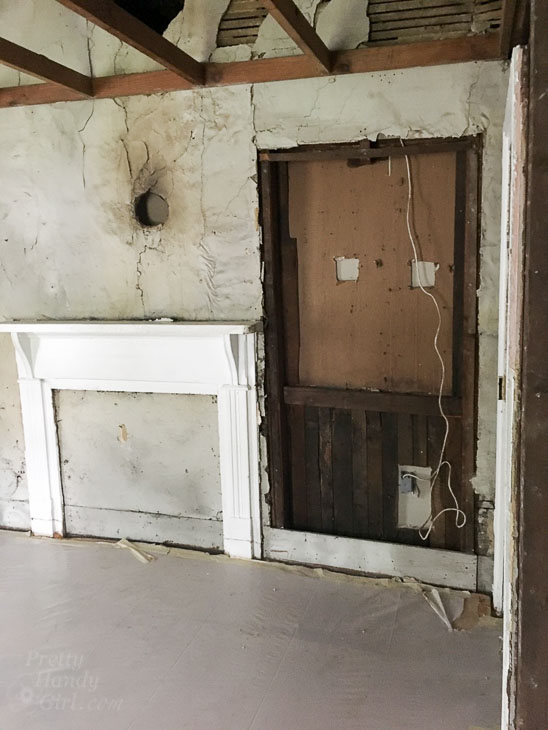
While the exterior work progressed, I worked inside adding blocking in the bathrooms for the shampoo niches. I also needed to add a flat block for the ceiling fan on the 14 foot ceiling in the living room. Normally my framers would be responsible for these little items, but they weren’t pointed out until my plumber and electrician mentioned it. And since the framers were on to another job, it was up me to get it done! I’m finding there’s a lot of these punch list items a general contractor has to tackle to keep the project moving forward.

I also took the opportunity to frame a space in the mudroom around the HVAC ductwork chase. This area will eventually have a shallow storage box and key hooks inside. It’s a little something special I made with salvage materials from Etta’s walls.

This was also the perfect time to add blocking for the floating shelves in the kitchen. It’s always easier to have blocking to secure to instead of trying to find the studs.

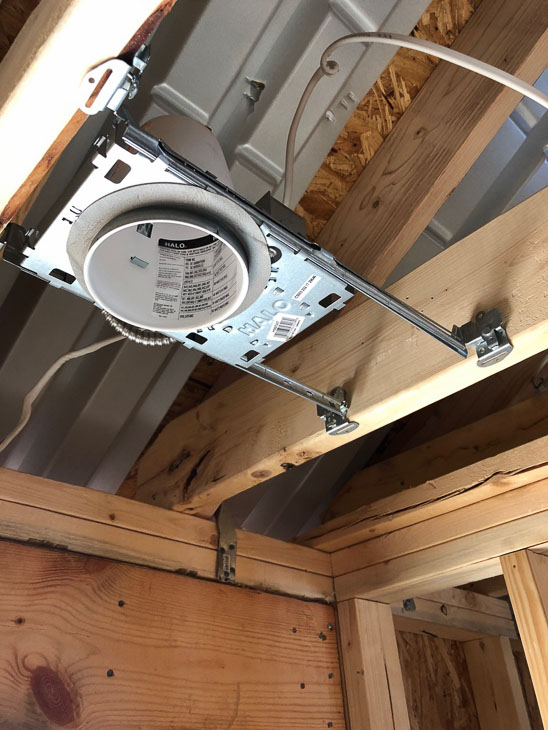
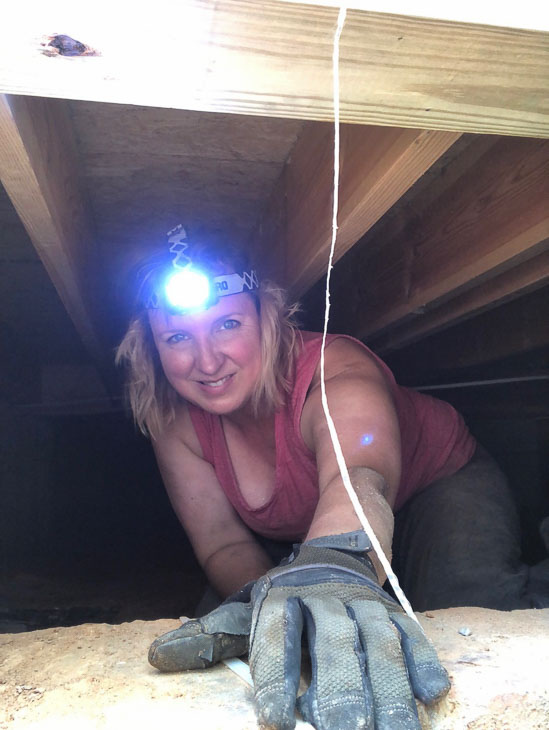
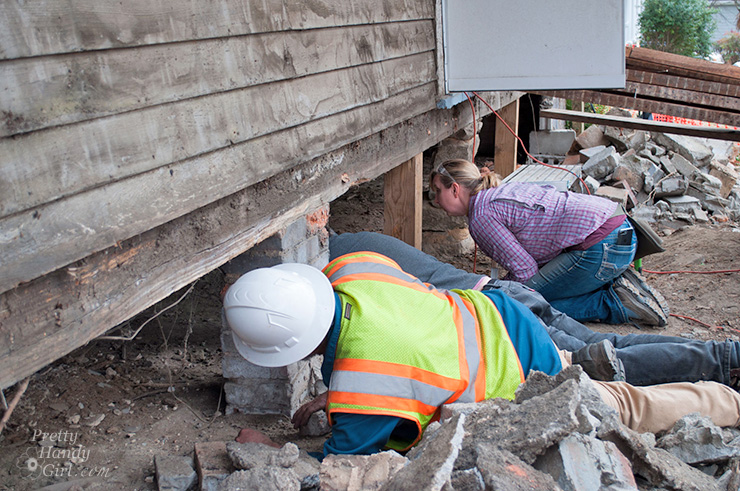
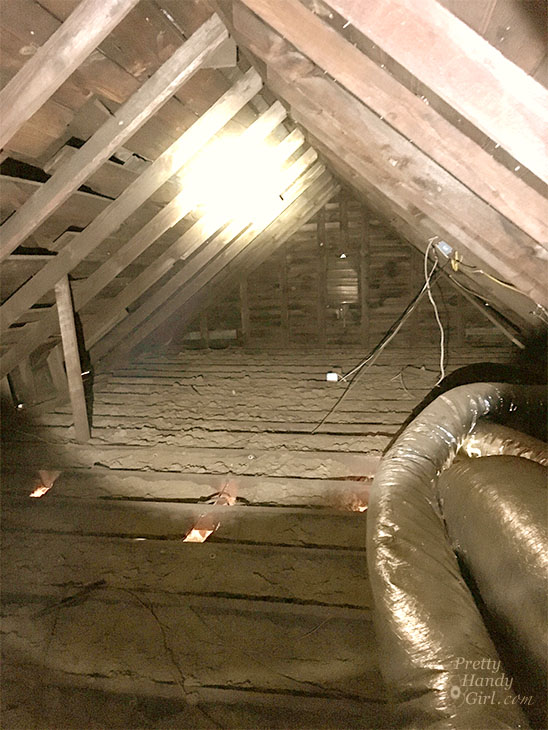
While I was adding all the blocking, my electrician, plumber, and HVAC contractors worked tirelessly running wires, pipes, and ducts.

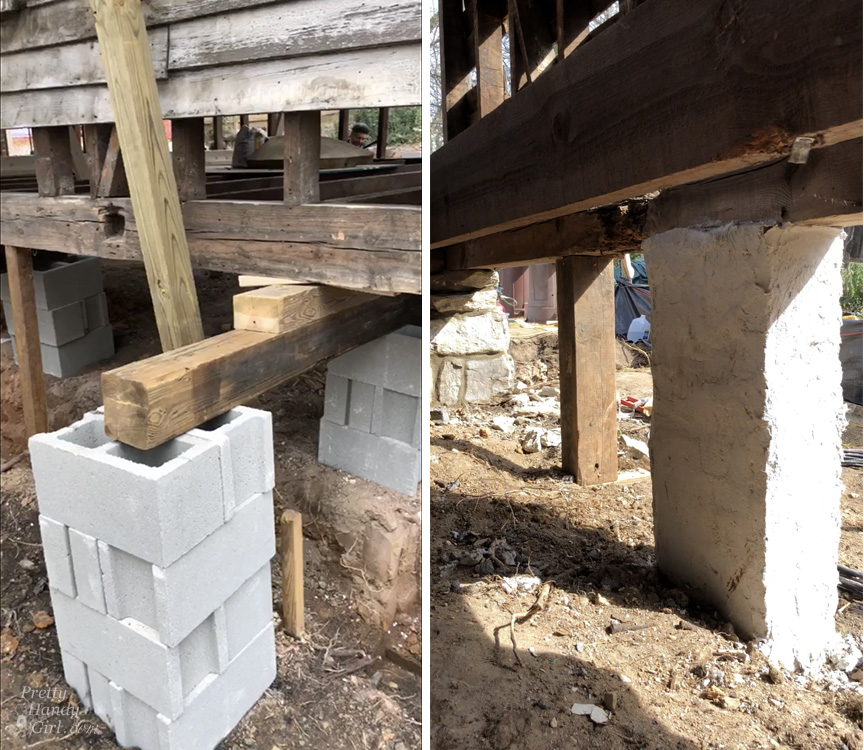
I definitely appreciate their hard work and the time they spent crawling under the house to get everything installed. After the lines were run, I did a little inspection of my own in the crawlspace before the city inspector came out. Just another day in the life of a general contractor.

Unfortunately our first rough in inspection was definitely “rough.” We failed all three inspections for relatively minor things. My subcontractors all came back and fixed the issues so we could call in a second inspection (which we did pass.) I won’t get into the nitty gritty of the inspections, but I will tell you that it’s true when you hear contractors complain about inspectors exerting their power. Regardless, I still believe in the importance of getting the proper permits and inspections when renovating your home.

Siding and Trim:

It’s amazing how much of an improvement the new siding and trim made to the house. As a reminder, this is the faded aluminum siding that was on the house when I bought it.

Saving Etta - The Story of Saving a House Built in 1900 | Pretty Handy Girl

And this is the original siding that was hiding under the aluminum.

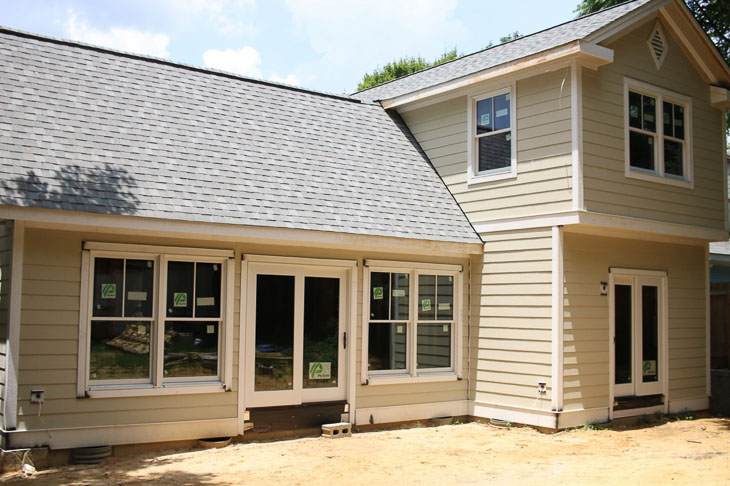
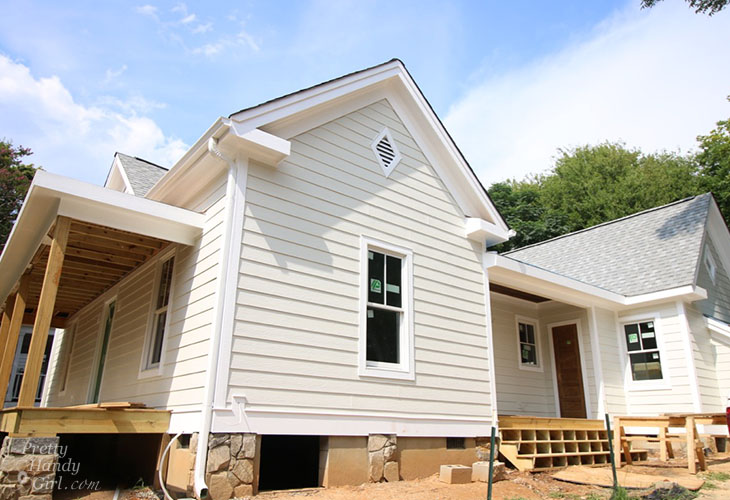
After the new fiber cement siding was installed, the house looked less “naked”. (I chose a woodgrain textured Allura siding over Hardie Plank because the wood grain texture was more prominent on the Allura siding and kept the look of old wood siding.)

The siding contractors worked for several days wrapping the house methodically, one side at a time.

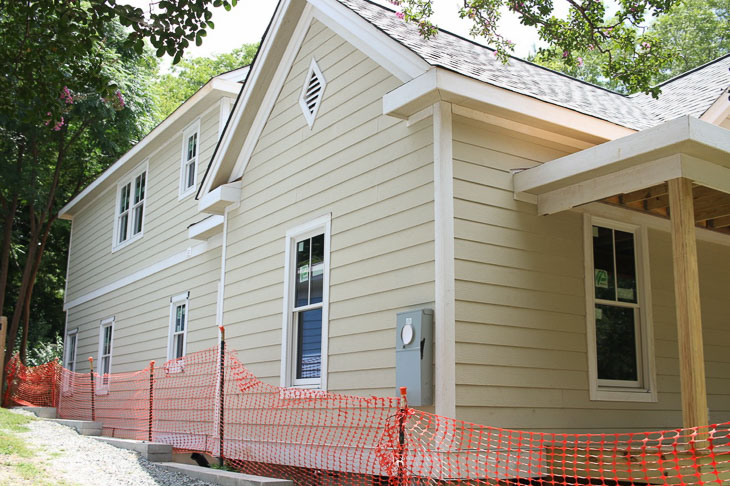
By the time they were done, Etta was looking like a new lady and I finally felt like I truly saved her.

Believe it or not, I still didn’t have a front door installed until days before the siding contractors were finished. The framers came back to complete a few small tasks and installed the front door.

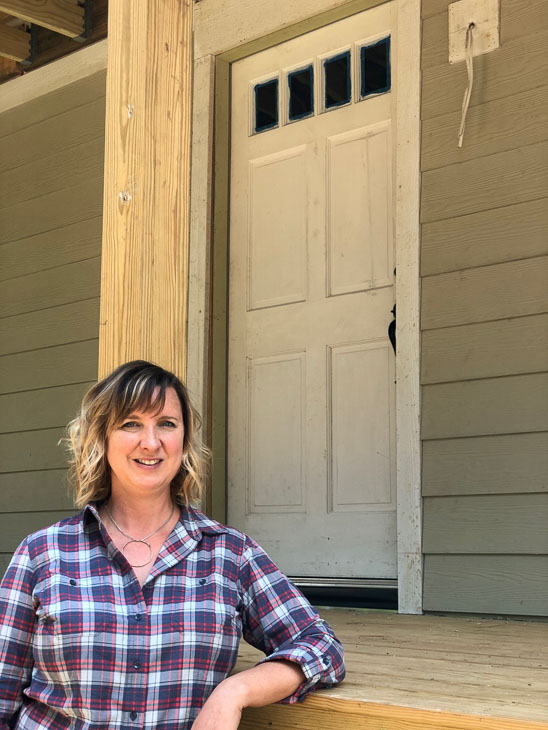
Do you remember this old door? Remember where I found it? I can’t wait to show you how I fixed the big crack in the panel.

Stay tuned to see what colors I chose for the siding, trim, and front door!

Disclosure: This post is a sponsored post for Ply Gem. It was written as part of their sponsorship of the Saving Etta project. I was not told what to write. All words and opinions are my own. I am very particular about the brands I work with, and only partner with companies that provide quality materials and/or services.

Saving Etta: Framing Progress

Last week I shared the demolition process at Saving Etta. After getting over the initial shock of being left with nothing but studs and a wonky foundation under the original house, I pulled on my boots (rain boots that is) and got to work building Etta back to her former glory.

The first order of business was to get rid of the skirts from the original pier and skirt foundation. On this type of building, the piers are the only thing holding up the house. The skirts are typically cinderblock walls that fill in the space between the piers. Truth be told, they aren’t even tied into the piers. Poor Etta barely had any piers that were in good shape. In fact we found some pretty questionable structural piers in the crawlspace. One “pier” was a giant bolder turned on its side. Another few piers made from bricks had crumbled into a red brick pile of dust.

A local restoration contractor (and friend of my demo contractor) stopped by to give me some direction on how to shore up Etta’s foundation. He was the first person who helped talk me down from the proverbial cliff when he said, “I’ve seen worse. It’s not in as bad a shape as you think.” His words were what I needed to hear to stay on track.

Once I had a clear direction and plans from my structural engineer, it was time to get to work. The demolition crew came back and supported the house with giant 6×6 beams so they could dig footer trenches under the house to prepare for a new foundation.

The back of the original house needed some new framing to address wood rot and a sagging band beam.


While the demolition crew continued digging out trenches for footers under the original house, I smoothed the crawlspace and dug out areas where the ground was too close to the floor joists. It was gratifying work knowing I was protecting the original floor joists from rotting. Little did I know we’d need to raise the interior floor, but I’ll tell you about in a few minutes.

By the time demolition was done, poor Etta looked worse than when I bought her. But to restore an old house, you have to strip back all the layers to get to the core and assess what can be saved and what needs replacement or structural support. At the time this photo was taken, I thought we could save some of the original siding and the front porch. Unfortunately, neither was worth saving in the end.

Remember those rain boots I put on? Well, the rain was a constant source of frustration for me as it filled the crawlspace area for the new addition. And it filled the hole we dug to find the water line so my plumber could hook up a temporary spigot for the concrete and masonry contractors. One weekend afternoon, I went downtown to see if the weather the day before had dropped much rain and was devastated to find a swimming pool in the back yard. My family came to my rescue and we spent several hours with buckets dumping the water out.

The other immediate problem that surfaced was the need to secure the neighbor’s driveway so it wouldn’t wash into my property. I spent thousands of dollars to put up a sturdy retaining wall (not in my original budget.) But, the piece of mind was worth the expense knowing it would also protect Etta from water runoff from the next door property. The wall provided its own set of headaches as I discovered I needed to retroactively apply for a permit. After providing several letters (one from me, one from the structural engineer, and one from the neighbor), the city finally approved the retaining wall. It felt like one more hurdle behind me.

The skies finally cleared enough to dry things out and allow the concrete contractors to dig the footers for the addition and fill them with concrete.

During the concrete pour, I had to add bolts to support three 6×6 piers for the side porch support. My framer was finishing up another job, so I took on this task.

My masonry contractor started soon after the concrete footers were approved. He made quick work of installing the block walls and piers.

After the mason finished building the foundation, I realized there was an error somewhere along the way and the addition was going to be 5 ½ inches taller than the old house. I chalk this up to my inexperience and take full responsibility. (Live and learn is my new motto.) Luckily my framer had a creative solution. We decided to raise the floor height in the old house. This would also solve the sagging floor issue and provide a level surface for new floors. I can’t even begin to tell you how important it was having a framer who was full of ideas to solve the myriad of problems that cropped up.

As the new floor joists were added on top of the old joists, I came to the realization that I couldn’t save the old siding. It was better to remove it, and add proper sheathing and house wrap to the old house. Not only would this protect the interior from drafts and moisture, but it would go a long way to cut down on the noise outside the house. (Pedestrians walking by, commuters, and a bus line all provide a fair amount of street noise.) I personally knocked down one wall of siding in the effort to save it for another use. I left the other two walls of siding to provide some strength to keep the exterior walls from racking. (Racking is when the top of the wall is forced in one direction while the bottom is held stationary or is forced in the other.) The rest of the siding would come off as the new sheathing was installed to prevent any damage to Etta’s remaining structure.

It was finally time to frame the new addition. On a side note, the term “addition” doesn’t seem to fit because usually an addition is less than the current square footage of a original house. In Etta’s case, the addition would be about three times the size of the house that was left.

The first floor walls went up quickly and it was a glorious sight seeing Etta’s new layout taking shape.

Along the way, I learned a lot about the latest building codes and how to fix small issues while framing.

As the addition took shape, the front porch kept popping up in my head. I struggled with the way it was built. One morning, my framer and I discussed the front porch and he convinced me it would be best to tear it off and rebuild it to code. I begrudgingly agreed with him and called the demo contractor back to remove the porch. But, like all other things in construction, there were some unforeseen delays.

The afternoon before the porch was to come off, I found a new family of birds living in the porch rafters. I couldn’t, in good conscience, move their nest. So, we pushed off the porch removal until the birds flew the nest. After they left the nest, the front porch came off and the framers added new exterior sheathing. It was thrilling to see the new house taking shape.

Want to see a video of the framing progress? Here’s a time lapse video and tour of the house during framing. Enjoy!

I hope you are enjoying the updates and progress reports at Etta. I’ll be back soon to share more updates.

Disclosure: The Saving Etta Project is sponsored by these amazing companies who believe in saving a historic home that would have otherwise been bulldozed. I am thankful for their kind support of this project.

Saving Etta Demolition update

Saving Etta: Demolition Update

Thank you so much for your comments on my last Saving Etta chapter. I might have mislead many of you into believing I wasn’t going to give you updates on the project. I will definitely be sharing updates and more posts about the Saving Etta project, I just need to put the elaborately written (and cliff hanger) chapters on the back burner for now. With that being said, I do need to get you caught up on the happenings at Etta.

Shortly after purchasing the house, I consulted with several professionals about how to fix the crazy rooflines in the back of the house. Meg, the architect, was completely blunt with me and told me the only way to “fix the rooflines” was to tear off the series of poorly built additions on the back of the house. I believe her exact words were: “You’re not going to like what I have to say, but I think you need to tear that whole mess off. But, go ahead and think about it for a while.”

I didn’t need to think long. Her honestly was a breath of fresh air. I had lost lots of sleep trying to figure out how to fix it all. The roof leaked; the floors sloped dramatically in the back (5 inches in 10 feet in one room); and those additions were built super close to the ground on dry stacked cinderblocks. Add in a drainage issue where large amount of water ran off the neighbor’s driveway and under the house every time it rained.

backyard debris

I told Meg that I agreed with her and begged her to take me on as her next client. I was at a stand still until I could get building plans to submit to the city. Meg began working on a new structure that would essentially stay within the footprint of the removed additions.

I waited for more than a month for the final architecture plans, but it was worth the wait because I trusted Meg completely (and I was in love with her preliminary sketches.)

At the time, I was considering pursuing a historic property tax credit from the state of North Carolina. Meg was careful to keep the original 1900 house walls in tact in an effort to meet the requirements for the tax credit. But, after submitting the plans to the state preservation office, they denied my request on the grounds that they didn’t like the size of the addition (we added a small second floor onto the addition) and they didn’t want us to add closets to the front bedrooms in the 1900 portion. My contact in the preservation office actually suggested buying wardrobes and putting them in each bedroom instead of a closet.

Both Meg and I agreed, buyers today wouldn’t appreciate a wardrobe instead of a closet. And, I was in love with Meg’s architecture plans the moment I saw them. I decided to part ways with the preservation tax credit. However, this didn’t mean I was going to walk away from trying to preserve as much of Etta’s character as I could manage.

After the architecture plans were complete, there was a lot of waiting until we got the permits approved by the city. Honestly, this was the most frustrating part of the project. The reviewers would deny my permit but their comments might as well have been written in another language. It took several emails and phone calls to finally nail down what they wanted before the permits could be approved. The length of time from submitting the paperwork to the day the permits were approved was three months! It didn’t help that I submitted my plans shortly before Thanksgiving and the reviews persisted through the Christmas holiday. I never realized how many paid holidays our city employees get until I had to deal with the delays.

While the plans were being reviewed by the permit office, I started gutting the kitchen, pulling carpet in the front rooms, and trying to get down to salvageable building materials. Early on I ran samples to our local environmental lab for asbestos and mold analysis. When those results came back positive, I turned the project over to an asbestos abatement team and subsequently a mold remediation team.

After the house was free of mold and asbestos, my family (and my friend, Sarah) helped with some interior demolition inside the house. While tearing out drywall, I discovered wall after wall of antique bead board behind the drywall. Plus, I found the original brick chimney. Demolition slowed down as I carefully salvaged the bead board and chiseled stucco off the old chimney. But, it was worth the time because otherwise these materials would have been torn down and sent to the landfill.

pretty handy girl sledgehammer exposed bead board

Finally, on February 9th, the city approved my plans. I called my demolition contractor and he and I met at the house to discuss the progression of removing the back half of the house. I’ve put together this short video of some of the highlights of the demolition process.

Hope you enjoyed the video! More updates to come soon.

Disclosure: The Saving Etta Project is sponsored by these amazing companies who believe in saving a historic home that would have otherwise been bulldozed. I am thankful for their kind support of this project.

Old newspaper

Saving Etta - One Woman's Journey to Save a House Built in 1900 | Pretty Handy Girl

Saving Etta: Chapter 20 – Just Like Me

This is the true story about a house built in 1900 that is in serious disrepair. It’s also the story about my journey toward becoming a general contractor and my attempt to save a home from being bulldozed. I hope you’ll follow along as I embark on a journey into the unknown perils and rewards of flipping a home in downtown Raleigh, NC.

If you are just joining the story, you may want to read all the Saving Etta chapters for more of the back story.

Be sure to follow me on Facebook and Instagram as I share live updates about this project I’m calling Saving Etta.

A special thank you to all the brands that are helping to save Etta!

Turning left, I stepped into the north parlor and marveled at the open space and airy feeling from the exposed ten foot ceilings. The closet behind the door had been removed and in the void was more vintage wallpaper. I looked up toward the ceiling and saw something that explained why the walls had been covered up. A gray swirling pattern on one wall was evidence of a long ago fire that must have left significant smoke damage.

An opening in the lathe and plaster the size of a door stood out from the rest of the gray walls. A doorway to the kitchen? Perhaps this was the original pathway to the kitchen from the parlor. It felt like Etta was letting me look back in time and see into her past.

I could not wait to get the wood floors cleaned off and sanded down. I knew they would look amazing with the tall ceilings, but first we had to get past the mold remediation. I prayed that the flooring under the MDF mold filled boards were in decent shape. But, I knew it was more likely there would be significant damage. Either way, I’d have to wait and see.

Later the same day, my husband Mike and I met at the house to do some much needed yard maintenance. My oldest son, Nathan, came along to mow the lawn (the one task I told him I’d pay him for at the house.) I unlocked the front door and invited them inside to see the changes that had been made since the asbestos abatement. Mike didn’t seem as enamored with the vintage wallpaper as I was. Continuing around the house, we stepped gingerly onto the scrap boards strategically placed over the floor joists in the kitchen. The bare earth of the crawlspace was a mere 12 inches or less below us. White PEX plumbing lines snaked beneath us like alligators in a swamp.

Mike said, “Whoa, was the floor supposed to come up?”

“Yes, I knew they’d have to do that,” I said. “But, I had no idea how close the floor joists were to the ground. There isn’t much of a crawlspace here.”

Next we walked into one of the bedrooms where I pointed out the bead board I had uncovered.

“I’m hoping to salvage as much as I can before demolition,” I explained.

Mike asked if I had salvaged any of the baseboards from the parlors. To answer him, I opened the last bedroom door and pointed to the myriad of doors, baseboard moulding, and fixtures I was storing for potential reuse.

Heading back to the front door, Mike and Nathan decided to get to work on the yard. I pulled down the attic stairs to prepare for an ascent into the attic.

“I’ll be up here measuring the height and pitch of the roof,” I told Mike. “Hopefully I’ll be back down in 10 minutes or less.”

While Mike and Nathan left to get the mower out of the truck, I suited up in Tyvek coveralls, gloves, and a dust mask. I decided to skip the goggles this time, knowing that I wouldn’t be disturbing much and the goggles would fog up instantly from the heat and humidity. Grabbing the floodlight and a scrap board, I headed up into the hot attic. I stood on the ceiling joists in the space over the back bedrooms. Aiming my flashlight toward the front of the house, I planned my route. Accessing the space over the front parlors was going to be a challenge. There was a small hole through the original roof, but it was about 4 feet above the joists I stood on. First I stretched forward laying on top of the giant foil HVAC ducts. Next, I shimmied through a hole in the roof and carefully dragged my body over the duct until I could crouch on top of the ceiling joists. The air was thick and motionless.

attic view

While in the attic, I needed to figure out the roof pitch, but first I wanted to explore the small section over the kitchen.  I made my way over the attic joists and noticed all the live knob and tube wiring. This type of wiring had long been outlawed due to its high risk of starting a fire. I hoped and prayed the one hundred year old wiring would last a few more weeks until it could be safely removed.

Crawling to the opposite side of the attic, I carefully placed a hand and knee on joists before moving forward. Soon I was staring into the opening of the attic space over the kitchen. Loose insulation stretched across the joists like a thick blanket of dirty snow. Several spots were devoid of insulation, and I could tell this is where the original lathe and plaster ceiling had fallen onto the drywall ceiling below. To my left, I spotted a wadded up piece of newspaper and reached for it. The paper was brown and very brittle and began to fall apart in my hands. Instead of trying to carry it with me (where it would surely disintegrate) I tossed the paper through one of the open plaster holes to the parlor below where I could retrieve it after leaving the attic.

Turning around, I began to make my way back into the attic space over the two parlors. When I reached the center of the attic, I carefully placed the scrap board beneath the peak of the roof. Balancing both feet onto the board, I slowly stood up to full height. The rafters and ridge beam were still several inches over my head.

“Wow, this is a tall attic,” I thought to myself.

I carefully extracted the tape measure from inside the tyvek suit and measured the distance between the joists and the ridge beam.

“81 inches. Not quite 7 feet,” I said aloud.

The ceiling joists beneath my feet were true 2×4 inch lumber (none of the current 1.5″ x 3.5″ lumber). They were definitely undersized for current building code, but were remarkably strong.

I pulled out my smart phone and opened the new clinometer app the architect had recommended. Holding the phone against the underside of the dusty roof rafters I read the display: 48 degrees. I jotted down the dimensions in my notes, being careful not to lean over and lose my balance on the small scrap of wood. I knew all too well what would happen, as I remembered a moment from my childhood when my parents were adding onto our family home.

My parents didn’t have much money when they decided to build out and up onto our tiny two bedroom house. Inviting friends over and paying them with beer and pizza was the only way they were able to build a house big enough for a family of five and a golden retriever. Friends would show up on the weekend and start to work on framing out the addition. Two new bedrooms were to be built on top of the detached one car garage.

The roof had been removed in preparation for building the second floor. The ceiling joists were spaced evenly over the original cinderblock walls, but the subfloor had not been laid yet. At the time, scrap lumber was laid in snaking walk ways on the ceiling joists during construction.

I was about 5 years old, but still remember standing in the garage and hearing my Mom scream. I turned around to see what had startled her. One of my parent’s friends had accidentally stepped between the ceiling joists and had fallen through the ceiling. Luckily an interior door beneath him was half opened. One leg dangled on one side of the door, and his other leg was on top of the door, stopping him from falling completely through the ceiling.

Growing up in a house under construction was never dull. There were always little moments reminding us that an ER trip was only a step away. These experiences taught me to proceed with caution on the job site, but they also gave me a sense of fearlessness. Today my risk taking is reined in by the thought of how something happening to me would affect my children.

I took a few pictures, then unzipped the Tyvek suit for a minute to tuck my phone and tape measure back into my pockets. For a second, the air felt good on my exposed skin, but I quickly zipped back up to protect myself from the insulation. By now I was sweating through every inch of my clothing under the hot tyvek suit. Retracing my steps, I carefully wriggled backwards blindly into the space over the bedroom. I breathed a sigh of relief as my foot settled on firm footing at the top of the attic pull-down steps. Sweat dripped down the small of my back as I made my way down the ladder and back into the living area of the house. Quickly stripping out of the tyvek suit, the air hit my skin and began to cool the sweat on my body. I could only imagine how hot the attic would be on a sunny day. The cloudy day had been a good opportunity to explore up there. I wadded up the suit and put it in a trash bag hoping to never have to put it on again.

Going in search of the old newspaper, I found it crumpled on the floor. As I gingerly pulled apart the layers, I spotted a 1972 date in one corner. It was exactly 45 years ago to the day! What are the chances of that? Using two hands, I carefully carried the paper out to the truck and set it on the back seat. If you saw me, you would have thought I was carrying an original copy of the Declaration of Independence.

Old newspaper

The yard was neatly mowed and looked much better than it had before. Mike was pushing the mower to the truck with a hot and sweaty Nathan lumbering next to him. Nathan seemed to be exhausted and struggling to catch his breath. He asked if he could wait for us inside while we finished up. We agreed and watched him suddenly sprint into the house. Mike and I laughed at the change in his energy level. Looking around the backyard, I marveled again at its size.

“This property is going to sell this house,” I said. “It’s such a rarity in a downtown location.”

“Yes, if we remove some of the trees and clean up the shrubby weeds, it will look amazing,” Mike said.

We headed to the truck to put the mower into the bed. Then I walked inside the house to find Nathan and lock the doors before leaving. As I called for Nathan, I barely heard a soft muffled reply.

“Where are you?” I asked.

He responded, “Up here.”

I could hear his voice coming from the attic. I’d forgotten to raise the attic stair again! Looking up into the dark, I saw Nathan perched on the joists, shoes kicked off, happily wiping insulation, dirt, (and who knows what else) off the plywood spanning a few ceiling joists. I was horrified to see he had no tyvek suit, no gloves, and no respirator on. I urgently told him to come down and explained he couldn’t go up there without my permission. And that he would have to wear safety gear before he did. His face fell and he angrily stomped out of the house. I watched him leave and my heart tightened. I knew how he felt. He didn’t like being told he couldn’t do something.  That sense of determination and fearlessness would take him far some day (as it had me.)

This adventure of trying to Save Etta would be a catalyst to something new, I could feel it in my bones. I just had to survive all the road blocks she had in store for me.

Dear Saving Etta Fans,

This will be the last Saving Etta chapter for now. It’s been difficult to keep up with writing the chapters, while also working on Etta (and keeping PrettyHandyGirl.com running.) I appreciate your patience between chapters, but it’s not fair for you to have to wait so long.

If you liked these chapters, I’d love to know if you would be interested in reading the rest of the story at a later date. I am entertaining the idea of writing a book about the whole process after Etta has been saved. Would this be something you’d be interested in reading in a published format?

In the interim, I’ll try to get you caught up on construction updates via tutorials and updates on the blog. You can always find updates by following me on Instagram and especially on Facebook as I try to share weekly videos and posts on those social platforms. Thank you all for your patience during this busy season in my life.

Sincerely,
Brittany Bailey, aka

If you are just joining the story, you may want to read all the Saving Etta chapters.

How to Install a New Window

Installing new windows on your home isn’t rocket science, but it is recommended that you have some construction experience before tackling this project. If you have the skills, the install should only take an hour or less. Today I’ll show you How to Install a New Construction Window in your home.

How to Install a New Window

Installing a New Construction Ply Gem Mira Window:

If you read my article on ordering new windows, you’re probably ready to install that new window. Today I’ll take the mystique out of this process. To install new windows (as opposed to replacement windows) you need to start with the correct rough opening. Ply Gem makes it super simple to figure out the rough opening size for your new window with their downloadable window size guides(This is a sponsored post in collaboration with Ply Gem Windows.) 

After your rough openings are cut and ready, it’s time to gather a few supplies.

Materials:

(I’ve included affiliate links for your convenience. I earn a small percentage from a purchase using these links. There is no additional cost to you. You can read more about affiliate links here.)

Instructions:

Check that the rough opening is level and plumb. If it isn’t, have some wood shims nearby to help adjust the window after it is set in the opening.

level and plumb rough opening

Cut the first piece of flashing tape slightly wider than the window width. Peel off the backing and attach it one inch below the window opening.

window rough opening

Cut a second piece of flashing tape about 8″ wider than your window opening. Center it on the sill of the window opening. Line up the inside edge of the tape along the inside of the framing (allowing the excess to hang out on the exterior side of the window (as shown below). Press the flashing tape along the sill and up the sides of the window. Cut along the corners of the excess tape. Fold the tape out and down, securing it to the outside of the house sheathing as shown below.

flashing new window for installation

Cut two smaller pieces of flashing tape to cover the corners of the tape you secured above. Cut a slit in the tape where it overlaps the opening. Fold the flaps into the window opening and press your hand firmly on all the tape seams to secure.flashing window around bottom of rough opening 
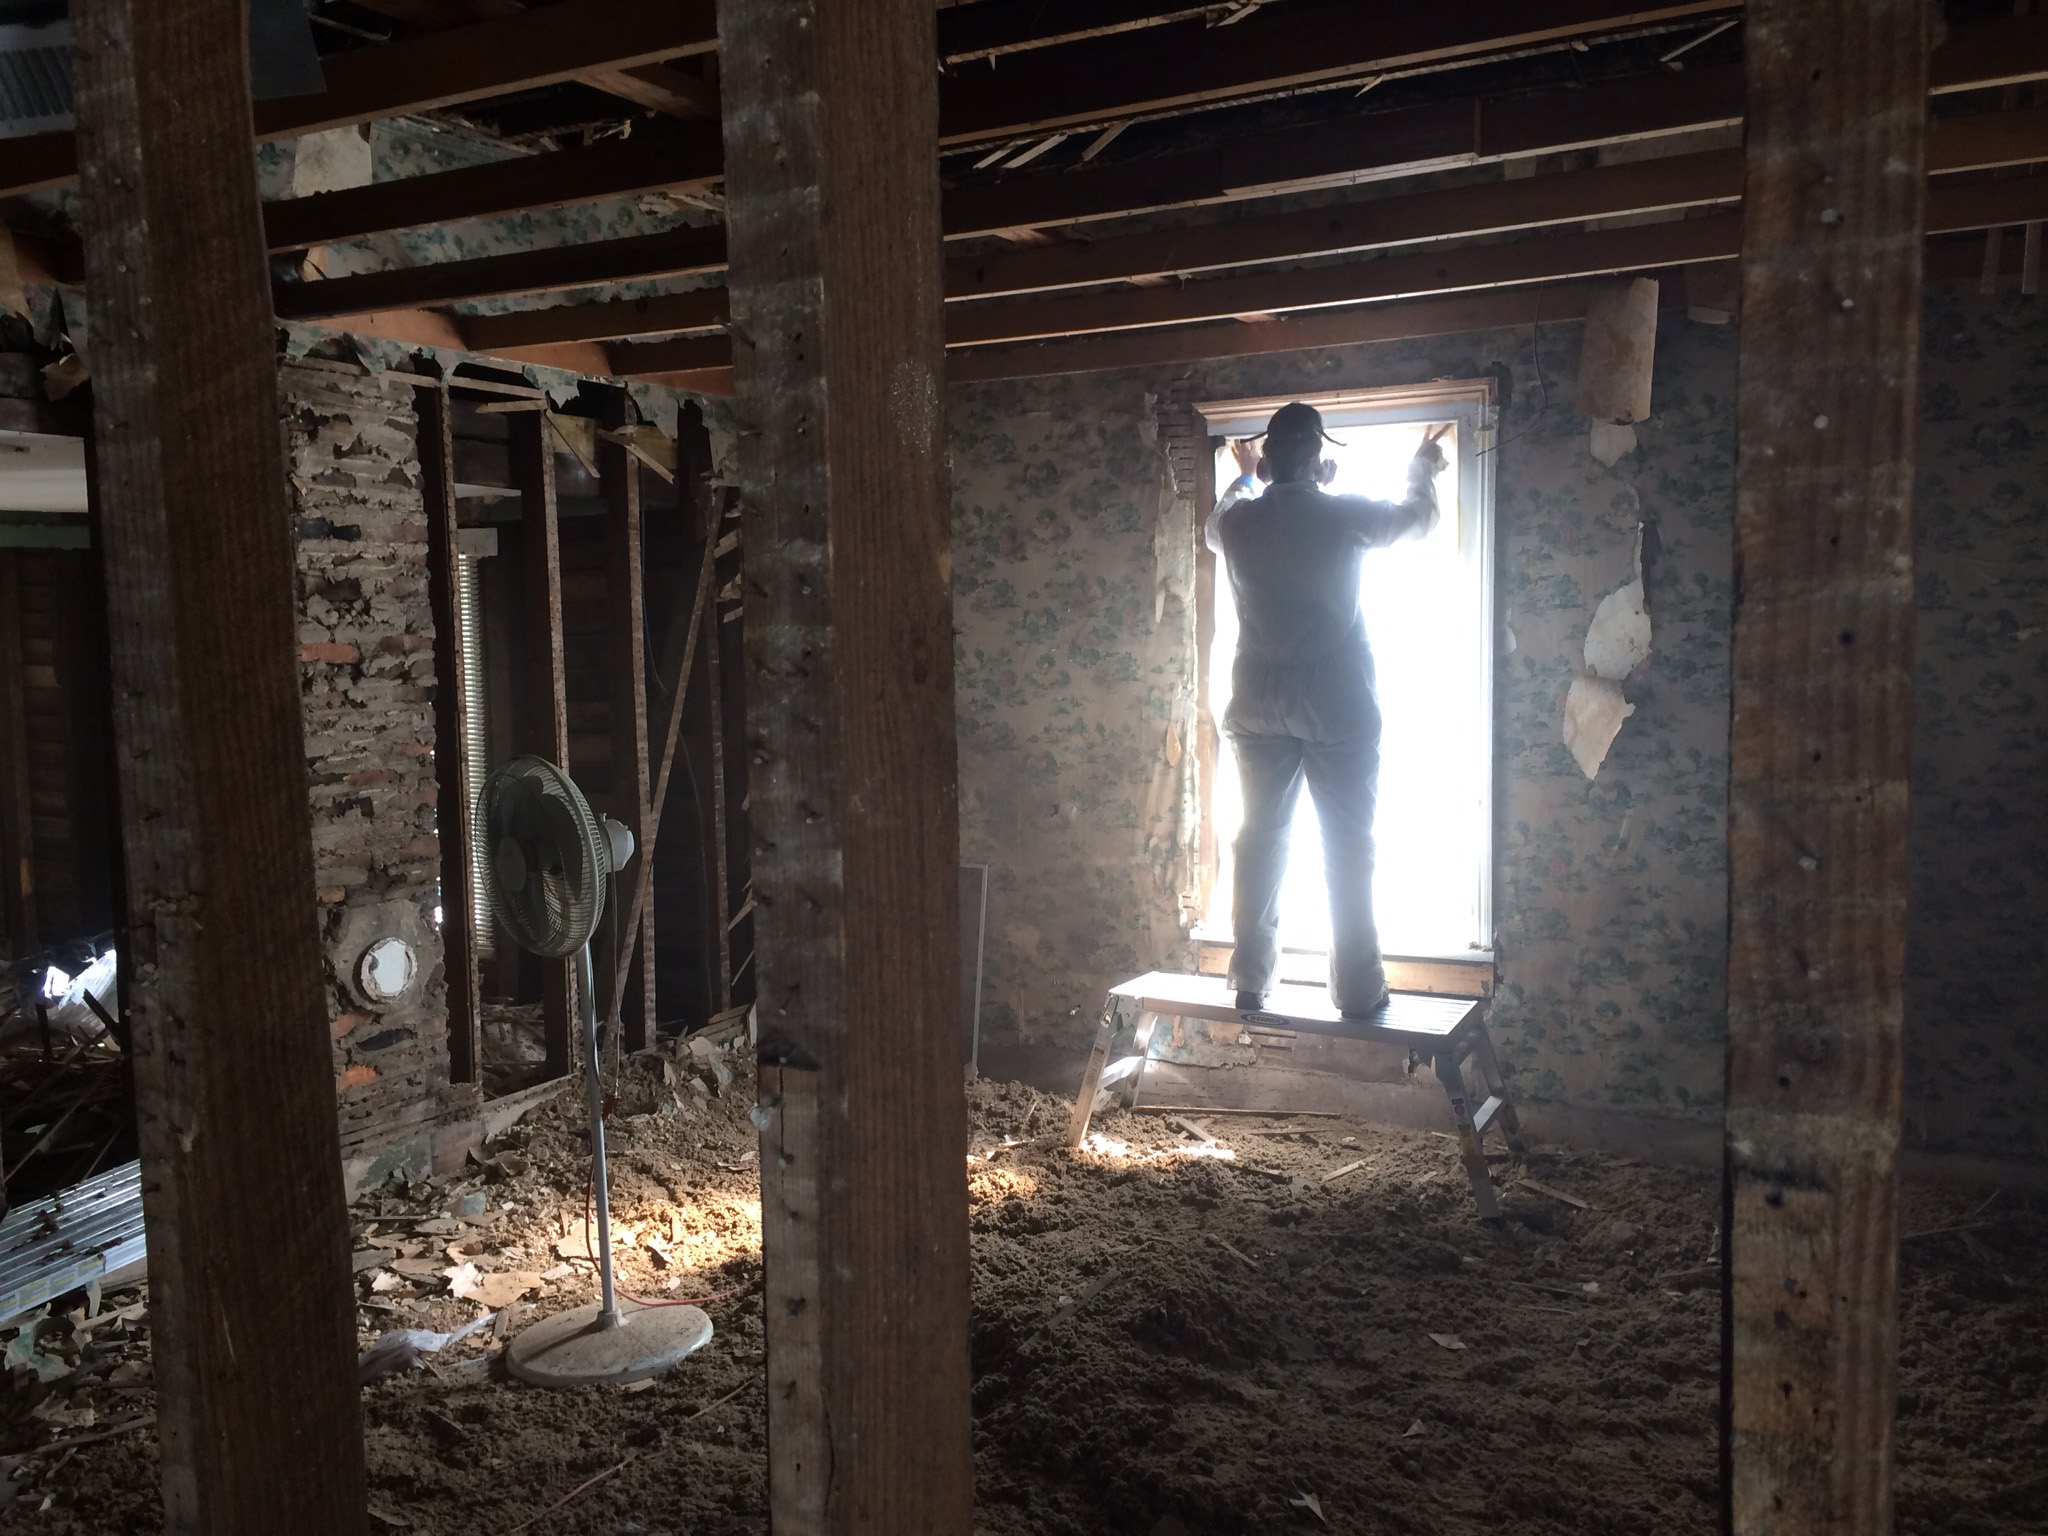
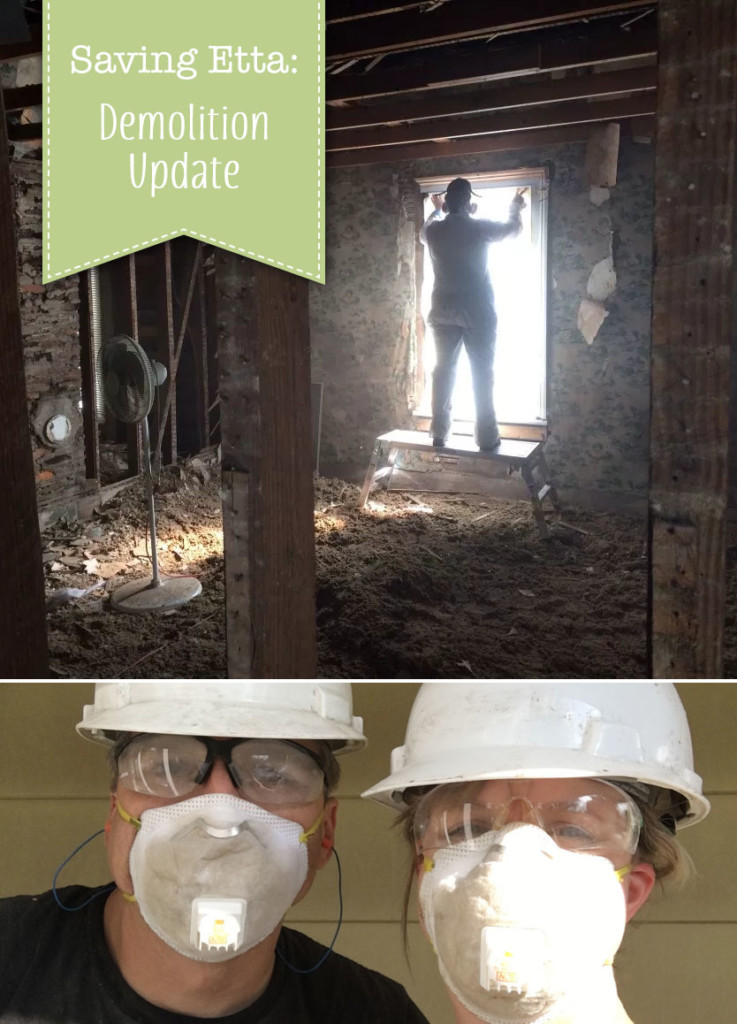
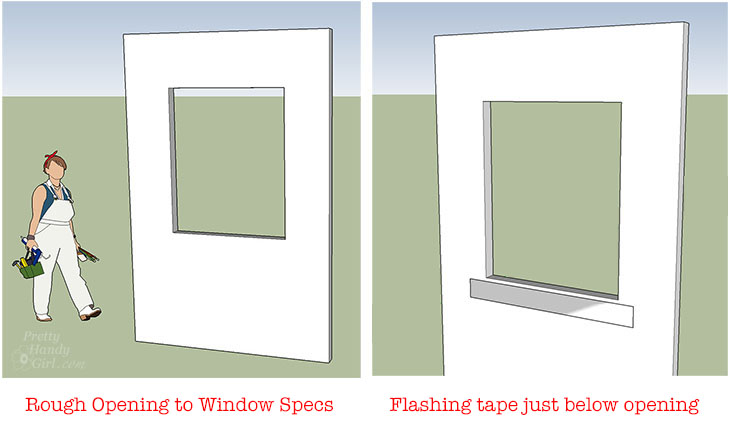
Time to install the window! Run a generous bead of silicone along the inside of the nail fin frame.  Be sure to add additional silicone at the diagonal corner seams of the nail fin.

Have an assistant help you lift the window into the rough opening from the exterior of the house. (For upper story windows, you can feed the window out from the inside of the house. Make sure one person is outside to prevent the window from falling.) Check the diagonal measurements of your window to make sure they are the same. This will indicate if your window is square or not.

check window diagonals for plumb and level

Use your level to check if the window is level and plumb in the opening. If not, make adjustments by inserting shims from the inside of the house.

Once the window is square, level, and plumb, secure it to the house sheathing with roofing nails. (For added weather protection, the nail fin should go over the Tyvek house wrap for the sides and bottom. Along the top, lift the house wrap and nail the fin directly to the house sheathing.) The top flap of Tyvek will be secured later.

Continue adding nails to every hole in the nail fin. Your window is now securely installed. Time to add the exterior flashing.

(2.) Cut another piece of flashing slightly wider than the width of the window. Remove the backing and press firmly over the bottom nail fin.

flashing new window

(3.) Cut two pieces of flashing slightly taller than the height of the window. Press the flashing tape over both sides of the nail fin (taking care to overlap it over the bottom piece of flashing.) (4.) Lift the top house wrap flap out of the way. Then add one piece of flashing on the top nail fin (again, take care to overlap the top piece over the side pieces.)

Let the house wrap flap overlap the top piece of flashing. Secure it in place with a piece of Tyvek tape.

Flap of house wrap overlaps top of window flashing.

Congratulations! Your window is installed and ready for trim and siding.

Tell me the truth, isn’t this one of the most beautiful windows you’ve ever seen? The grilles look great on this 1900 house.

New Plygem Mira Window Installed

Even up close, they look like true divided light windows. The grilles I chose are the 7/8″ SDL style grilles available on Ply Gem’s Mira Windows.

On the back of the house, I installed a bank of windows and sliding glass doors to maximize the view of the big yard. The homeowners will love all the natural light pouring in from their beautiful Plygem Mira Windows.

Plygem Mira doors and windows on cream house

If you like this tutorial, share the knowledge with a friend by pinning this image:

How to Install a New Window

Disclosure: This post is a sponsored post for Ply Gem. It was written as part of their sponsorship of the Saving Etta project. I was not told what to write. All words and opinions are my own. I am very particular about the brands I work with, and only partner with companies that provide quality materials and/or services.