Saving Etta: Kitchen Tile Update
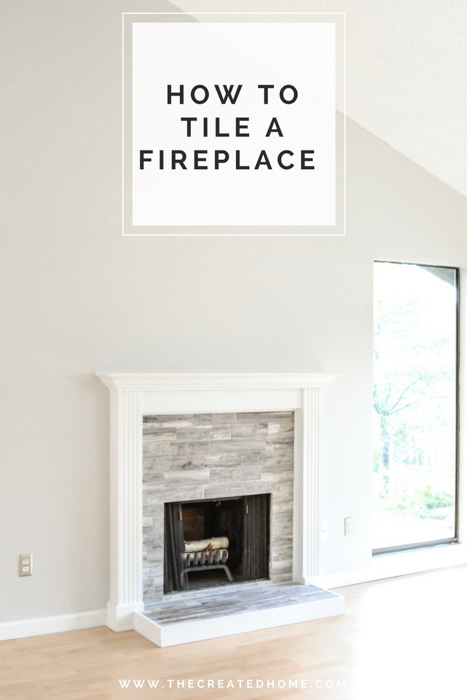
Saving Etta: Installing the Tile Backsplash & a Mistake I’ll Never Make Again

Last week you got to see how the range hood was installed (and how I averted disaster during the installation.) Today I’m sharing more kitchen updates. We’re going to dive into tiling a backsplash and one mistake I’ll never make again.

Before we get started, I want to give a big shout out to my sponsors! These brands came together to help me save Etta and I am incredibly grateful.

(I’ve included affiliate links for your convenience. I earn a small percentage from a purchase using these links. There is no additional cost to you. You can read more about affiliate links here.)

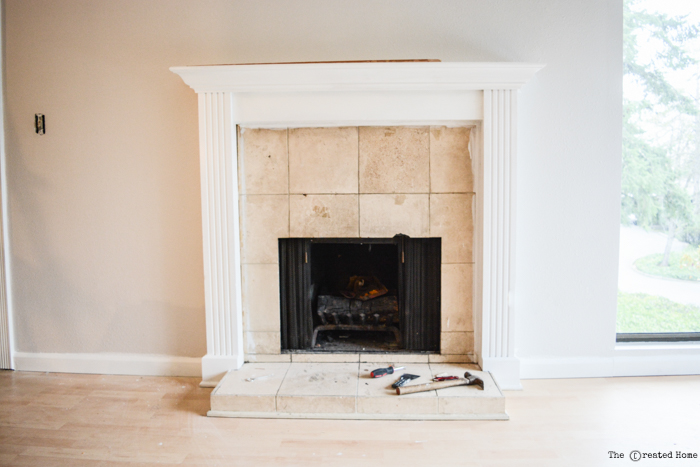
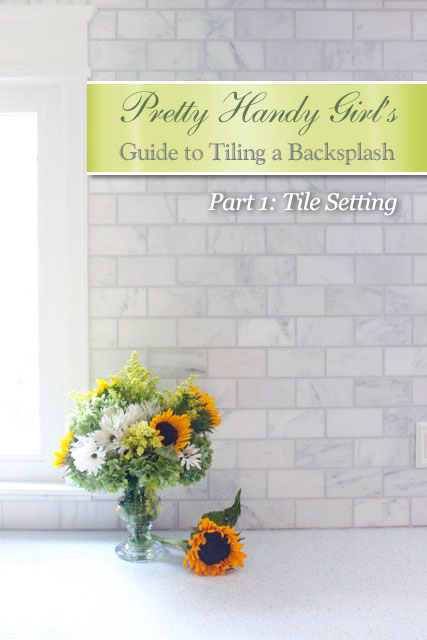
After hiring tile setters to lay the bathroom and mudroom floors, I chose to save some money by tiling the backsplash myself. After all, I consider myself fairly experienced at installing backsplashes after I tiled three walls in my own kitchen and wrote a tutorial to help you learn to tile.

Fall Decor in a Rustic Farmhouse Kitchen | Pretty Handy Girl

Light Fixture Installation Woes:

Shortly before tiling, my electrician joined me late one night to finish installing the light fixtures in the kitchen. My sons and I had already installed all the recessed can lights. But, I let my electrician handle the remaining fixtures. Especially because I was on a tight deadline to get the house finished and on the market before the holidays.

electrician hanging pendant light

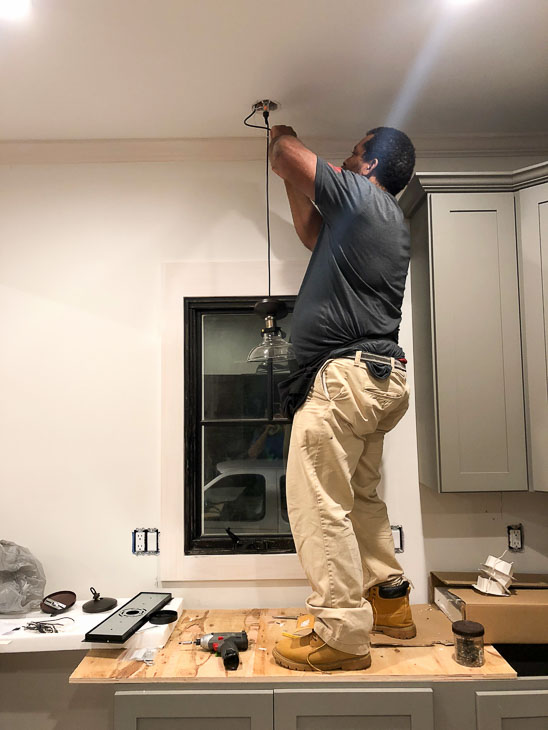
This guy standing on plywood at 9pm at night, is my knight in shining armor. Harvey has been my electrician for over six years and he’s helped me solve electrical problems on multiple occasions.  The thing I love most about him is he always pushes me to take on the smaller electrical projects myself. When I wanted to hire him to install a switch for an automatic door activated light in our pantry, he explained the process then left me with these parting words, “Call me if you get stuck.”

Most light fixture installations are straight forward and simple, but we had several issues with the lights I ordered for the Saving Etta house. One of them was missing parts to attach the hanging hardware to the canopy that attaches to the ceiling box. Harvey sent me to a nuts and bolts store. I kid you not, it was an obscure hardware store I never knew existed in Raleigh. Walking through the door, was like walking back in time. Picture Michael J. Fox stepping into the soda shop in Back to the Future. The gentleman working the counter looked at my light fixture parts and started searching through aisles of fasteners, nuts, bolts, screws, and who knows what else. Ultimately he found a nut that would work for our light. Hallelujah.

The gentleman took my credit card and I nearly laughed as he ran it through one of the old carbon copy credit card machines. If you’re too young to know what this is, I leave you this video for your education. For the rest of us, enjoy a trip back in time.

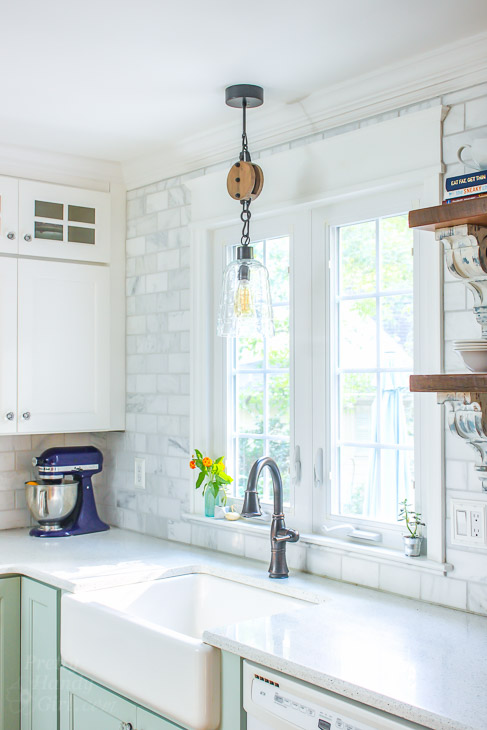
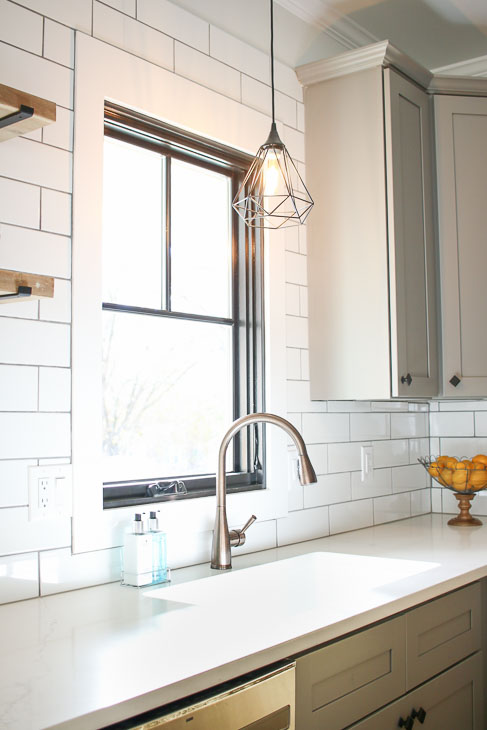
Back at the house, Harvey had finished installing the pendant light over the sink. But, something looked off. The pendant shade wouldn’t hang level no matter what we tried. Ultimately, I took it down and replaced it with a modern geometric pendant and pendant light kit from Lowe’s. In my opinion, the light is perfect for the modern farmhouse look I was envisioning for Etta.

Plygem mira window with facet pendant light and subway tile

Countertops:

After the cabinets and range hood were installed it was time to call the countertop fabricators. The owner arrived and took measurements, then he sent me to look at slabs in the local granite and stone warehouse. I took my youngest with me and we watched in awe as a huge robotic arm lifted giant slabs of quartz and granite for customers to view. You can join us as we are looking through the slabs in my Facebook Live video:

Can I share something with you? I’m not a big granite fan, although I saw some amazing slabs at the warehouse. Instead of granite, I chose a marble looking quartz. The quartz is called Carrara Venatino from Cosmos. I think Cosmos has it manufactured especially for them. If you like the countertops, you can see if there is a Cosmos distributor near you.

Liberty Lombard - cabinet drawer pulls

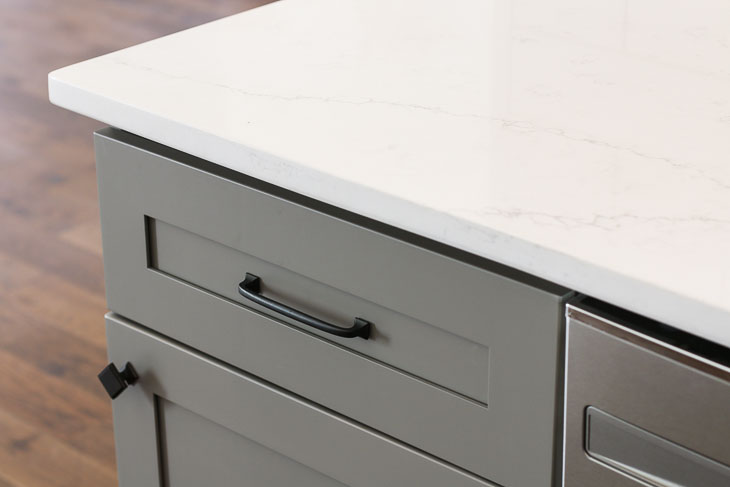
The countertops are one of my favorite finishes in the kitchen. I almost wish I had used them in our own kitchen instead of the recycled glass quartz countertops. My only complaint about the Carrara Venatino is it tends to scuff easily. Belt buckles and rivets leave gray lines that look almost like pencil marks on the edges. It’s not a huge deal as they seem to wipe off with a rag and some cleanser.

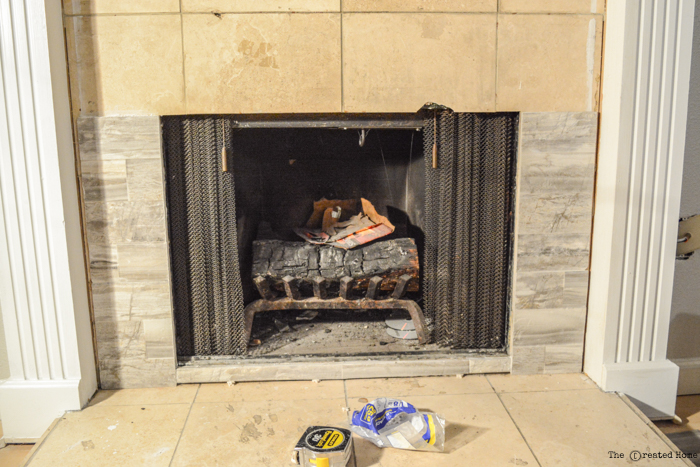
Tiling the Backsplash:

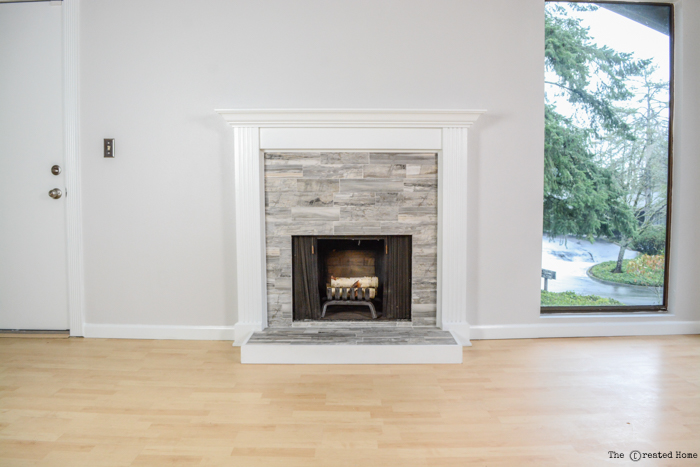
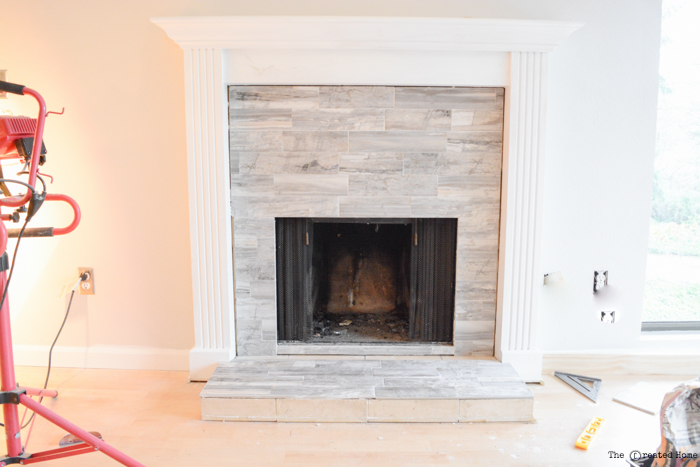
The backsplash turned out beautiful and definitely attracted a lot of attention in this open concept kitchen. I used Jeffrey Court 4″ x 12″ white subway tiles from Home Depot. The subway tiles have a timeless classic look and the larger size meant the install was a little faster than standard 3×6 subway tiles.

subway tile backsplash being installed

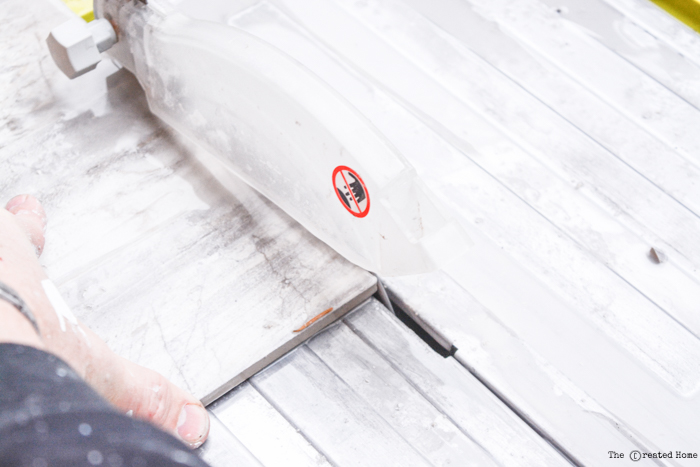
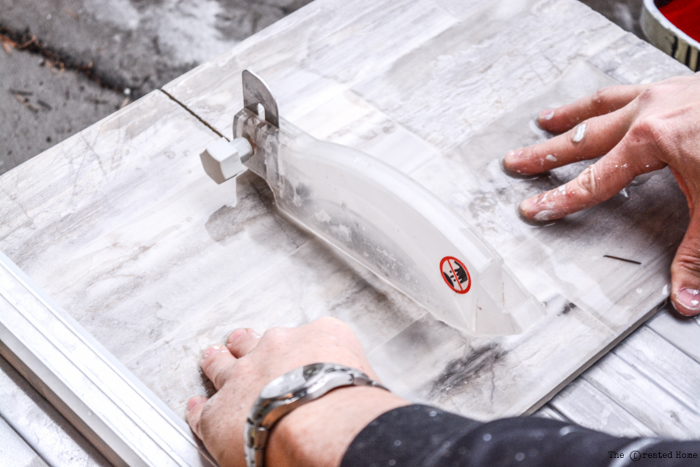
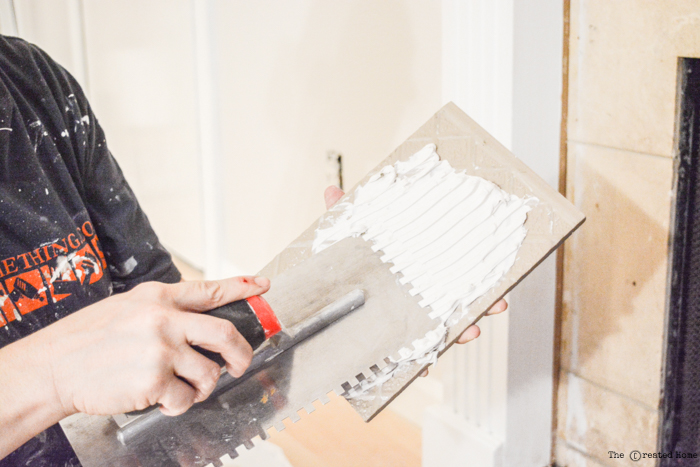
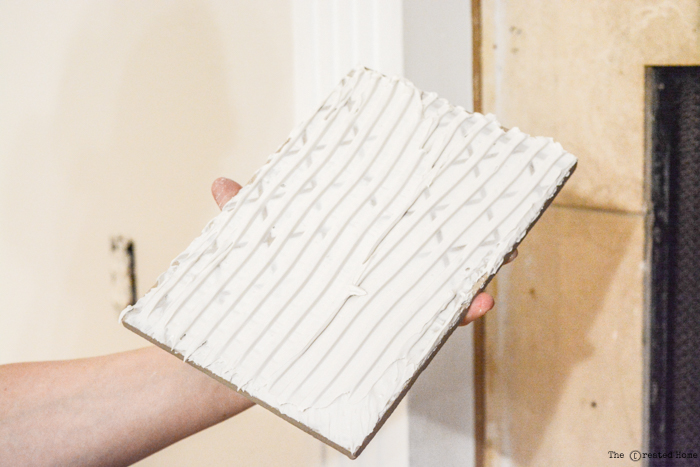
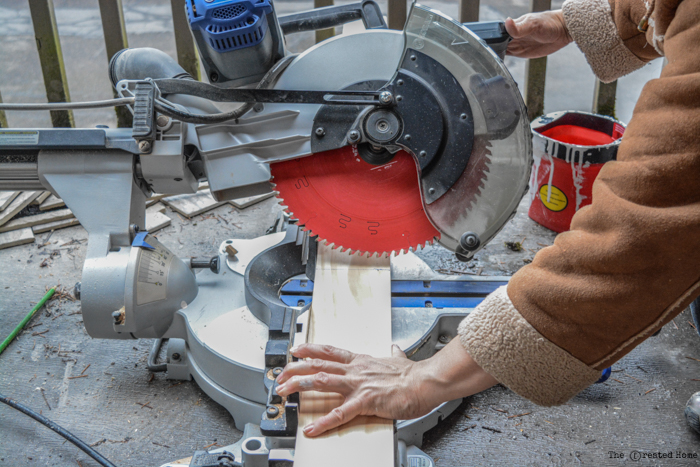
There were two particular evenings I stayed crazy late. I had to bust my butt to finish the tiling. Pretty Handsome Guy came one night to help, and brought Jersey Mike’s for dinner (see if you can spot my ingenious use of the trash as a faucet cover). The hubby got a crash course on using the wet saw and after about a dozen practice cuts, he finally got the hang of cutting tiles. (He still has to pick up some more skills before he can have the name Pretty Handy Guy. Have I mentioned he’s not the handy person in this marriage?) But, without his help I might still be tiling that backsplash! (Okay, that might be a bit of an exaggeration.)

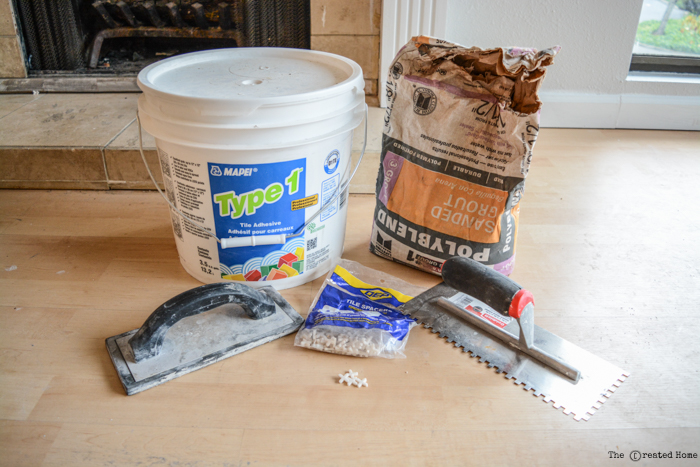
Tiling can be a solo job, but it really helps to have one person cutting the tiles and the other one setting them. Especially because the thinset will eventually harden. At least the hardening process was slowed by the cold temperatures inside the house and out. (We still didn’t have the gas hooked up for the heat yet.)

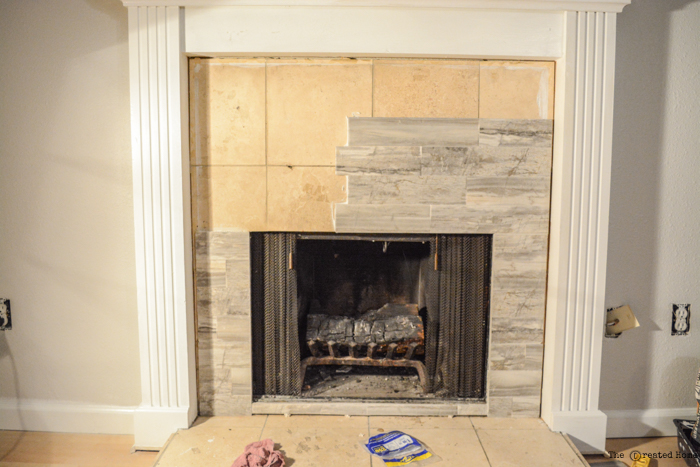
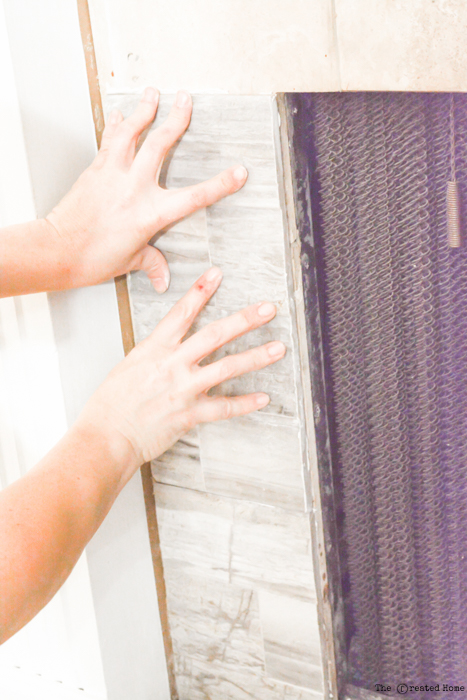
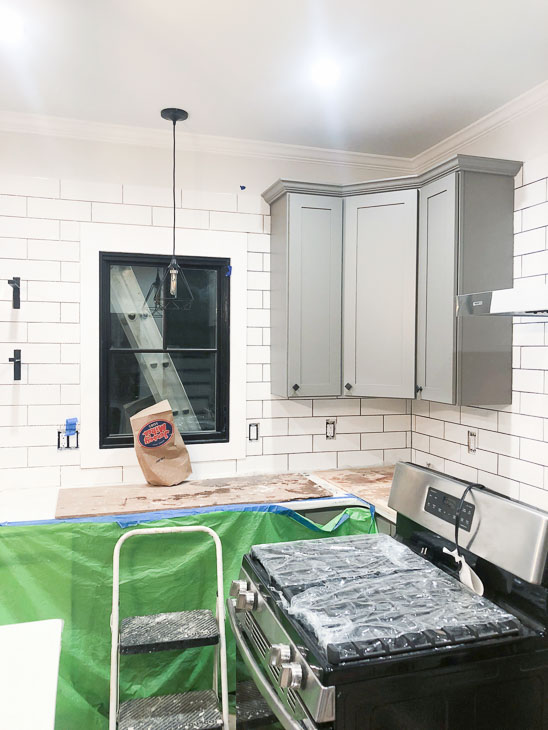
The second night I worked by myself until about midnight. By the time I left, I was cold, tired, and sore. Climbing up and down on top of countertops is tough work. But, also rewarding as you can see by this progress after the first evening.

installing subway tile with spacers

Installing Open Shelf Brackets:

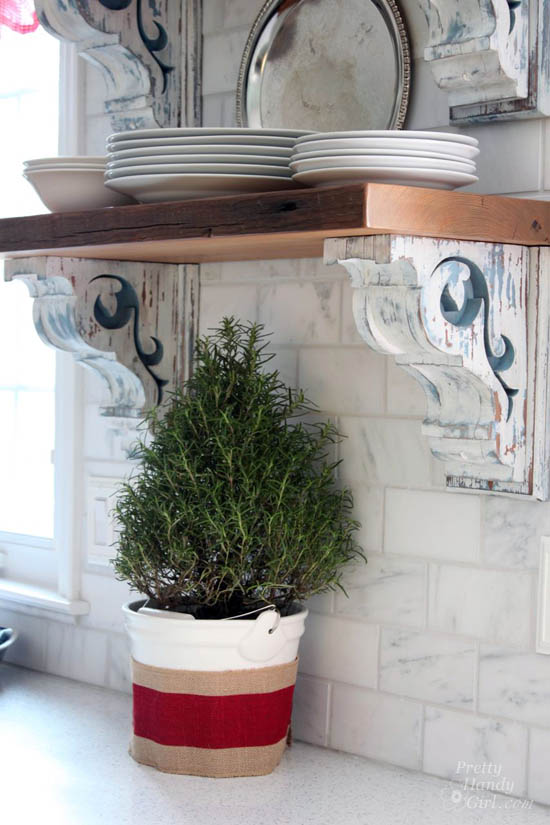
Having open shelving in the Saving Etta kitchen was a no brainer. In my own kitchen I have two open shelves and I love them! For my shelves, I installed corbel shelf brackets after the tile was installed.

DIY Aged Chippy Paint Technique | Pretty Handy Girl

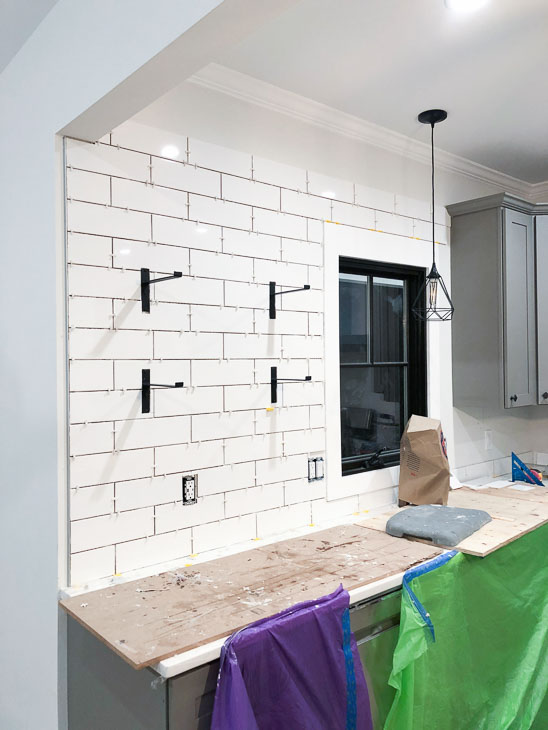
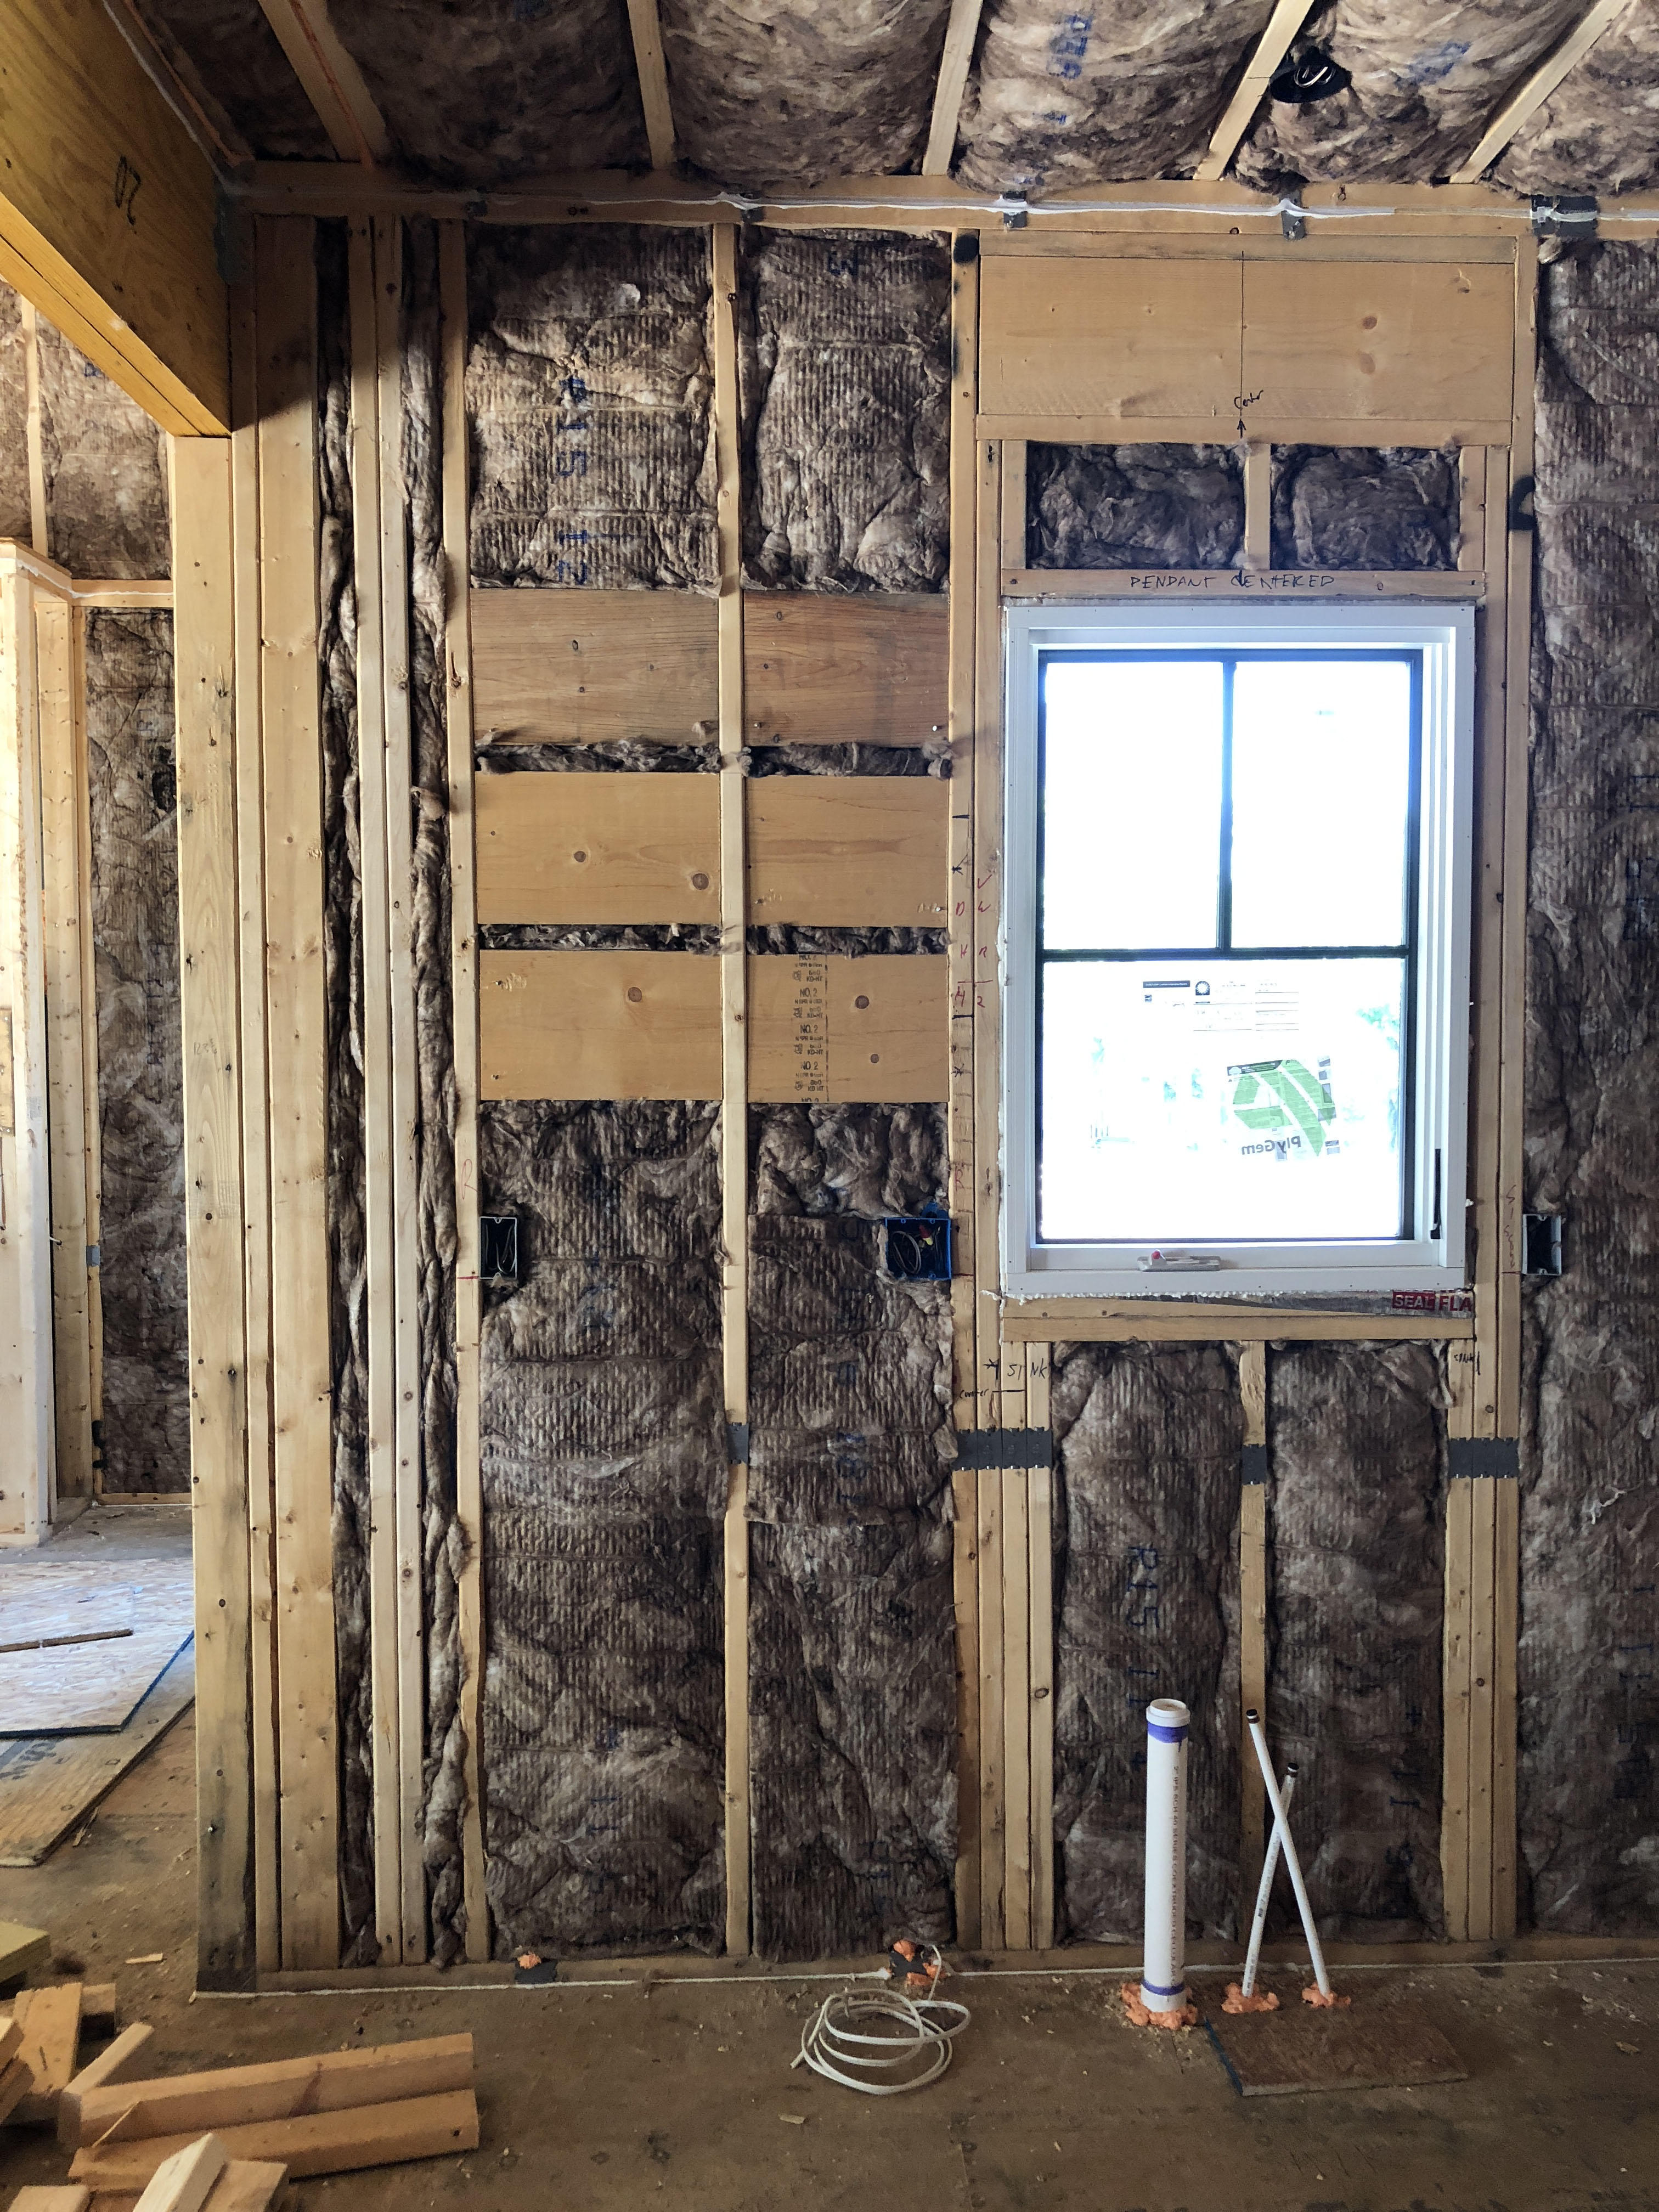
I was planning on doing the same at the Etta house. But, shortly before tiling I stumbled across a tile setter on Instagram who had installed the shelf brackets before tiling. Thinking this guy was a professional and knew what he was doing, I decided to try doing the same thing. After all, it would be easier to locate the studs and blocking before tiling. Truth be told, I had added blocking in the wall where the shelves were going to be mounted, and took a picture before the drywall was hung. (Smart, right?!)

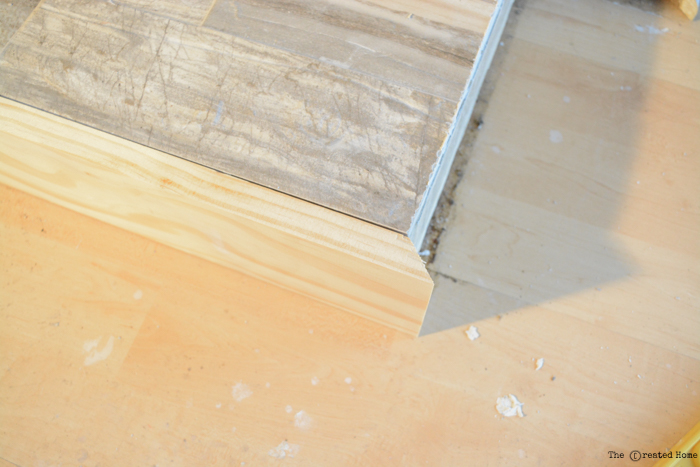
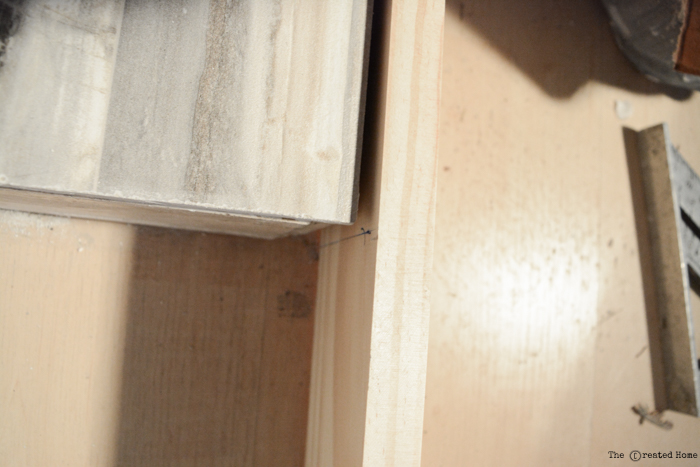
Continuing my claim of having smart ideas, I decided to put a paint stick behind the shelf bracket before securing it to the wall. This would insure the bracket would be at the same depth as the tiles. In theory it seemed like a good idea. Can anyone guess what my mistake was?

Subway tile next to shelf bracket

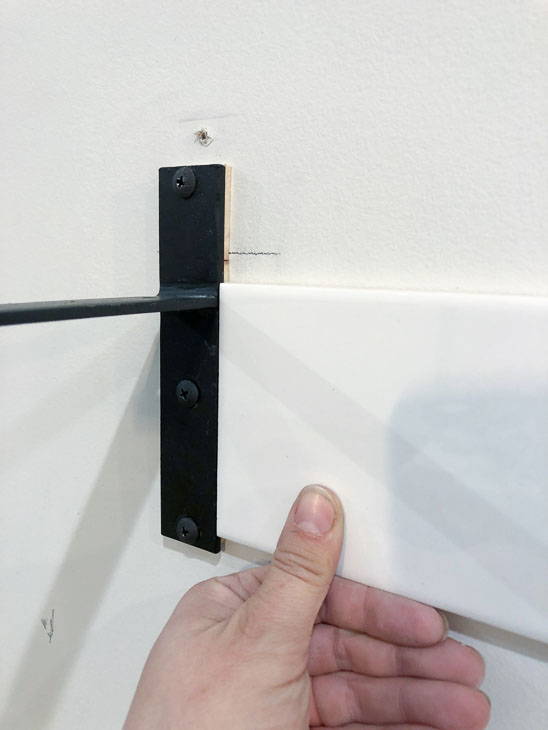
There were actually two issues. The first was I failed to allow for mortar thickness. Depending on the size notched trowel you use, the thinset can add anywhere from 1/8″ – 1/4″.  I guess I can be thankful at least I put something behind the brackets or they would have been horribly recessed.

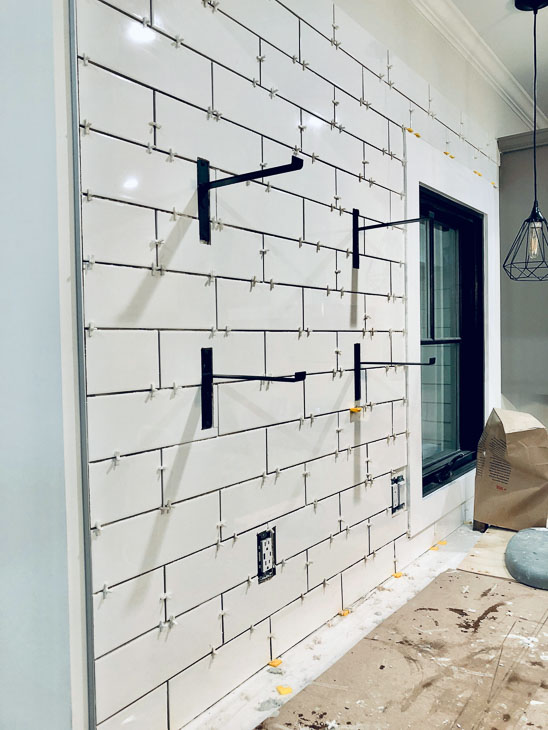
It wasn’t until I began grouting that I realized the second issue with installing the shelf brackets first: sloppy cuts.

tile around shelf bracket

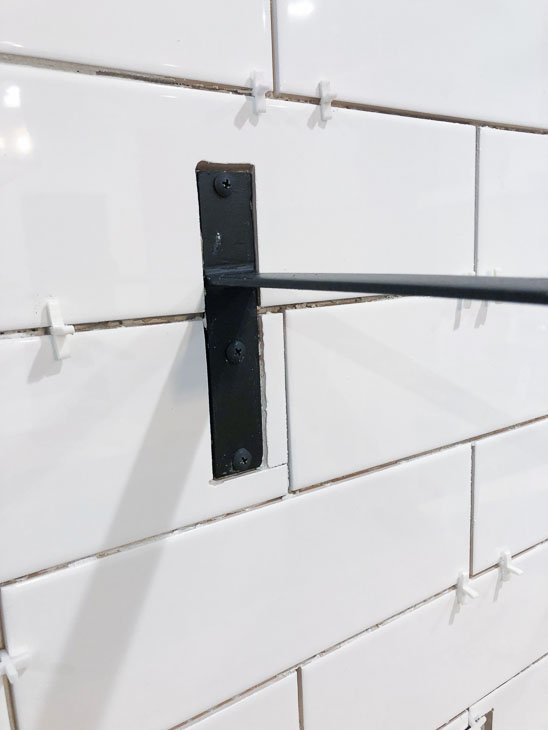
Cutting tiles is not like cutting wood. Where it’s fairly easy to cut shapes in wood, it’s not that easy with tiles. Making perfect 90˚ cuts into tile is tough. As you can see above, I had one tile that needed to be notched. The small leg on the right kept breaking. So I ended up piecing the tile around one of the brackets.

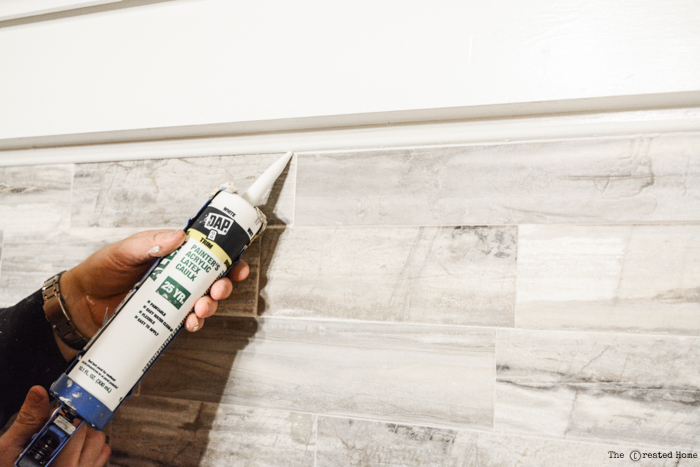
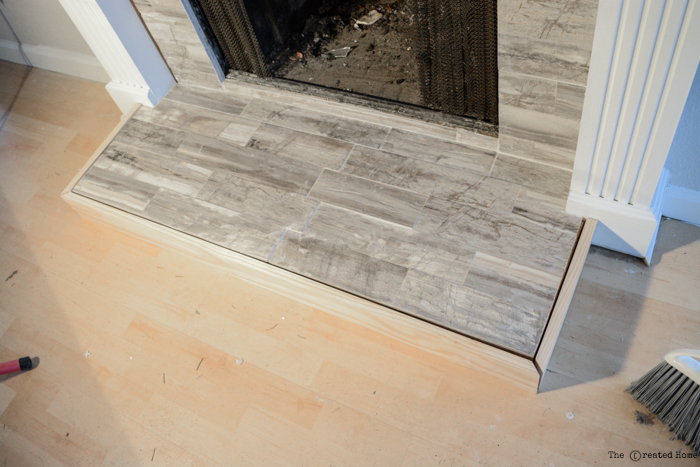
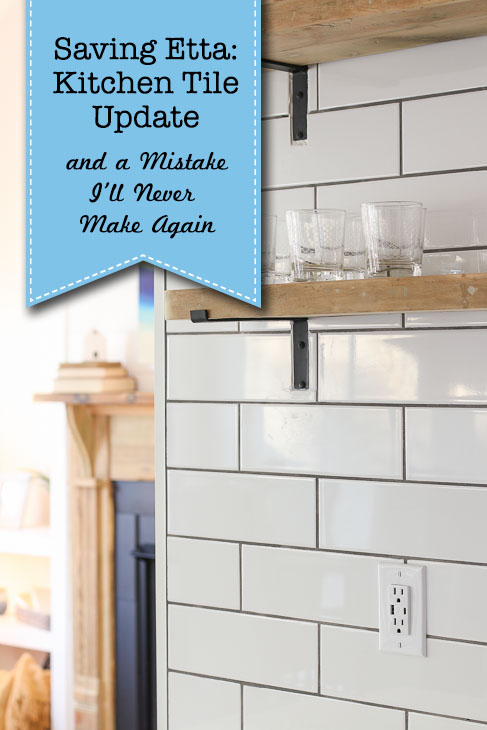
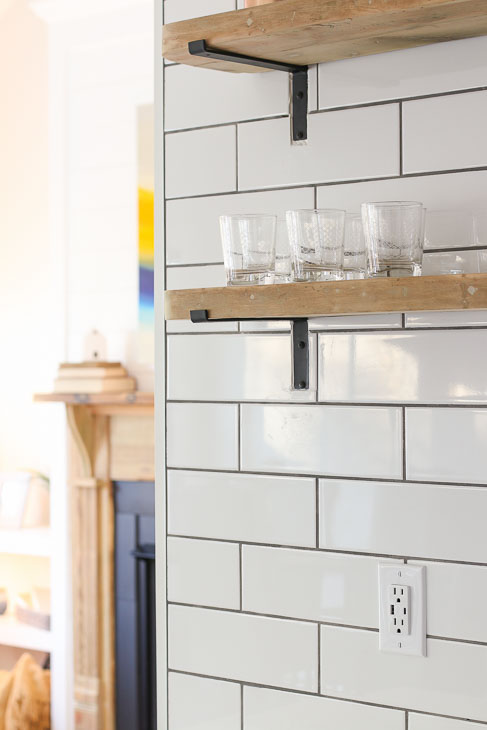
Next came the challenge of grouting around the brackets. After much mental exercise, I chose to put white caulk around the brackets to minimize the cut lines. The caulk hides some of the imperfections, but it still bugs me that they don’t look perfect. In DIY, there are plenty of opportunities to be creative and it also provides plenty of learning opportunities.

I will never make the mistake of tiling around brackets. Next time I will tile first and install the shelf brackets afterwards. (In case you are wondering, these are the brackets I used. They are sufficiently strong to hold shelves with glasses and dishes, but I wouldn’t use them to hold super heavy items like hand weights.)

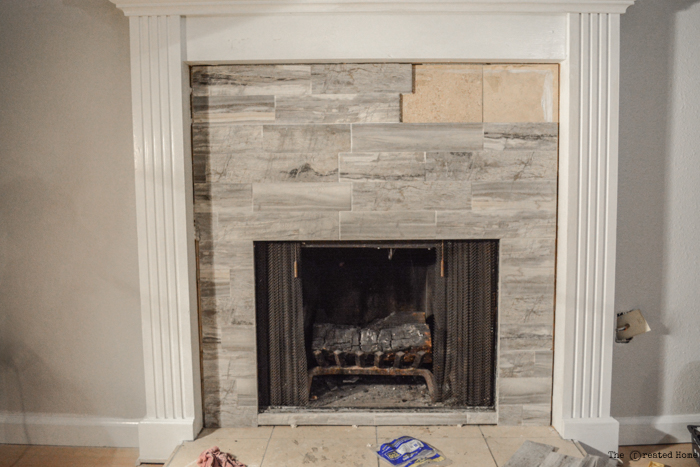
The next day I finished tiling around the range hood and was able to grout the wall with the open shelves (but needed to wait for the newly set tiles to cure overnight.) By the end of day three I had completely tiled and grouted the backsplash!

counter protected while installing shelf brackets

Despite the few cut tiles around the shelf brackets, I am pleased with the backsplash. I’m keeping you in suspense with the rest of the kitchen reveal until Friday. But, here’s a close up of the tiling around the brackets. It looks okay from a distance, which is all that really matters, right?

White subway backsplash open reclaimed wood shelving

Stay tuned, the next Saving Etta update will be the full kitchen reveal and I can’t wait to share it with you!!!

Disclosure: I worked with Jeffrey Court for Home Depot on this project. I was provided with the subway tiles for the kitchen backsplash. I will always let you know if I was sponsored or compensated. You should also note that I’m very particular about the brands I work with.

Avington Black & White Cement Tiles from TheBuilderDepot.com

How to Install Cement Tiles and Achieve Professional Results

How to Install Cement Tiles and Achieve Professional Results

If you’ve been browsing Pinterest lately or flipping through the pages of your favorite home design magazine, you’ve probably seen (and likely fallen in love with) real cement tiles. Cement tiles are trending, so much so that porcelain and ceramic lookalikes are popping up at most tile retail shops. The first thing you’ll notice about real cement tiles, is the price tag can be steep. What you probably don’t realize is cement tile can be a bit trickier to work with than standard ceramic or porcelain tiles. Don’t let this dissuade you, because today I’m going to show you how to install those beautiful authentic cement tiles and achieve professional results. Plus, because we’re friends, I’m going to share with you my affordable source for real encaustic cement tiles!

Cement Tile Look Alike on Bathroom Floor

Cement tiles purchased from most tile retailers can run upwards of $20 per square foot. But, I’m about to let you in on my secret tile source. Shhhh, lean close so I can whisper it in your ear. “TheBuilderDepot sells real cement tiles for less!”  In fact they sell more than just cement tiles and their prices can’t be beat! You might remember I used beautiful marble subway tiles from TheBuilderDepot when I was renovating my kitchen.) The Builder Depot offers popular tiles at a discount because they cut out the middle man. (Here’s a brief explanation on why their prices are lower than other retailers.)

How to Install Cement Tiles and Achieve Professional Results

Seeing those beautiful cement tiles and a great price prompted me to contact my friend at The Builder Depot and ask him about being a Saving Etta sponsor. He agreed but on one condition; he asked me to write a tutorial on How to Install Cement Tiles and discuss the pitfalls and risks associated with improper installation techniques. Apparently customers were unaware of the proper way to install cement tiles. In fact, even seasoned tile installers were making costly mistakes because they were treating cement tiles like ceramic and porcelain tiles. There is a big difference between them.

What’s the Difference Between Cement Tiles and Porcelain or Ceramic Tiles:

  • Ceramic and porcelain tiles are slick (often shiny) and aren’t absorbent on the surface.
  • Encaustic cement tiles are highly porous and absorbent from the surface to the base.
  • Porcelain and ceramic tiles can be grouted immediately after the thinset mortar has cured.
  • Cement tiles must be sealed before grouting or you risk the grout staining (or permanently sticking to) the surface.
  • Porcelain and ceramic tiles do not need to be sealed.
  • Cement tiles need careful handling to avoid staining and scratching the tiles.
  • Porcelain and ceramic tiles are forgiving and can stand up to a lot of abuse.
  • Encaustic cement tile patterns are created by pouring different colored clay baked into the tile. It’s not merely a coating.
  • Porcelain and ceramic tile patterns are applied in the glazes (painted on top of the tile).

Here’s a beautiful video showing exactly how encaustic cement tiles are made:

Now that you know more details about cement tiles, you can have a beautiful cement tile floor. But, you need to follow this tutorial closely. (Almost all these instructions will apply to installing cement tiles on a wall, so keep reading.)

Making Manzanita's tile shower niche cement tiles
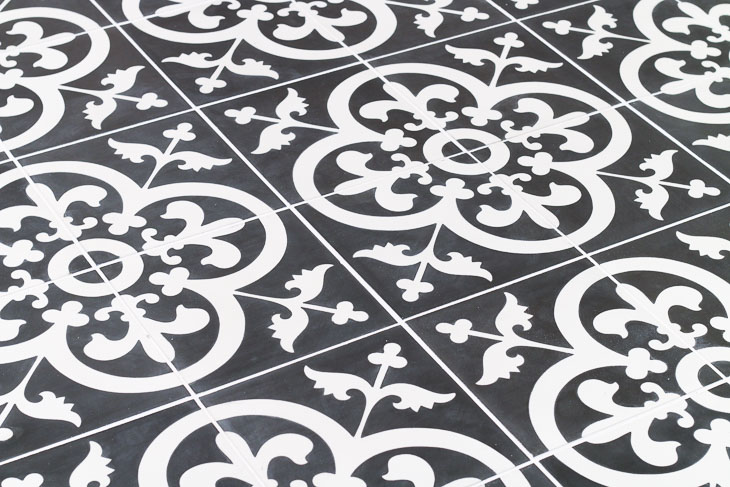
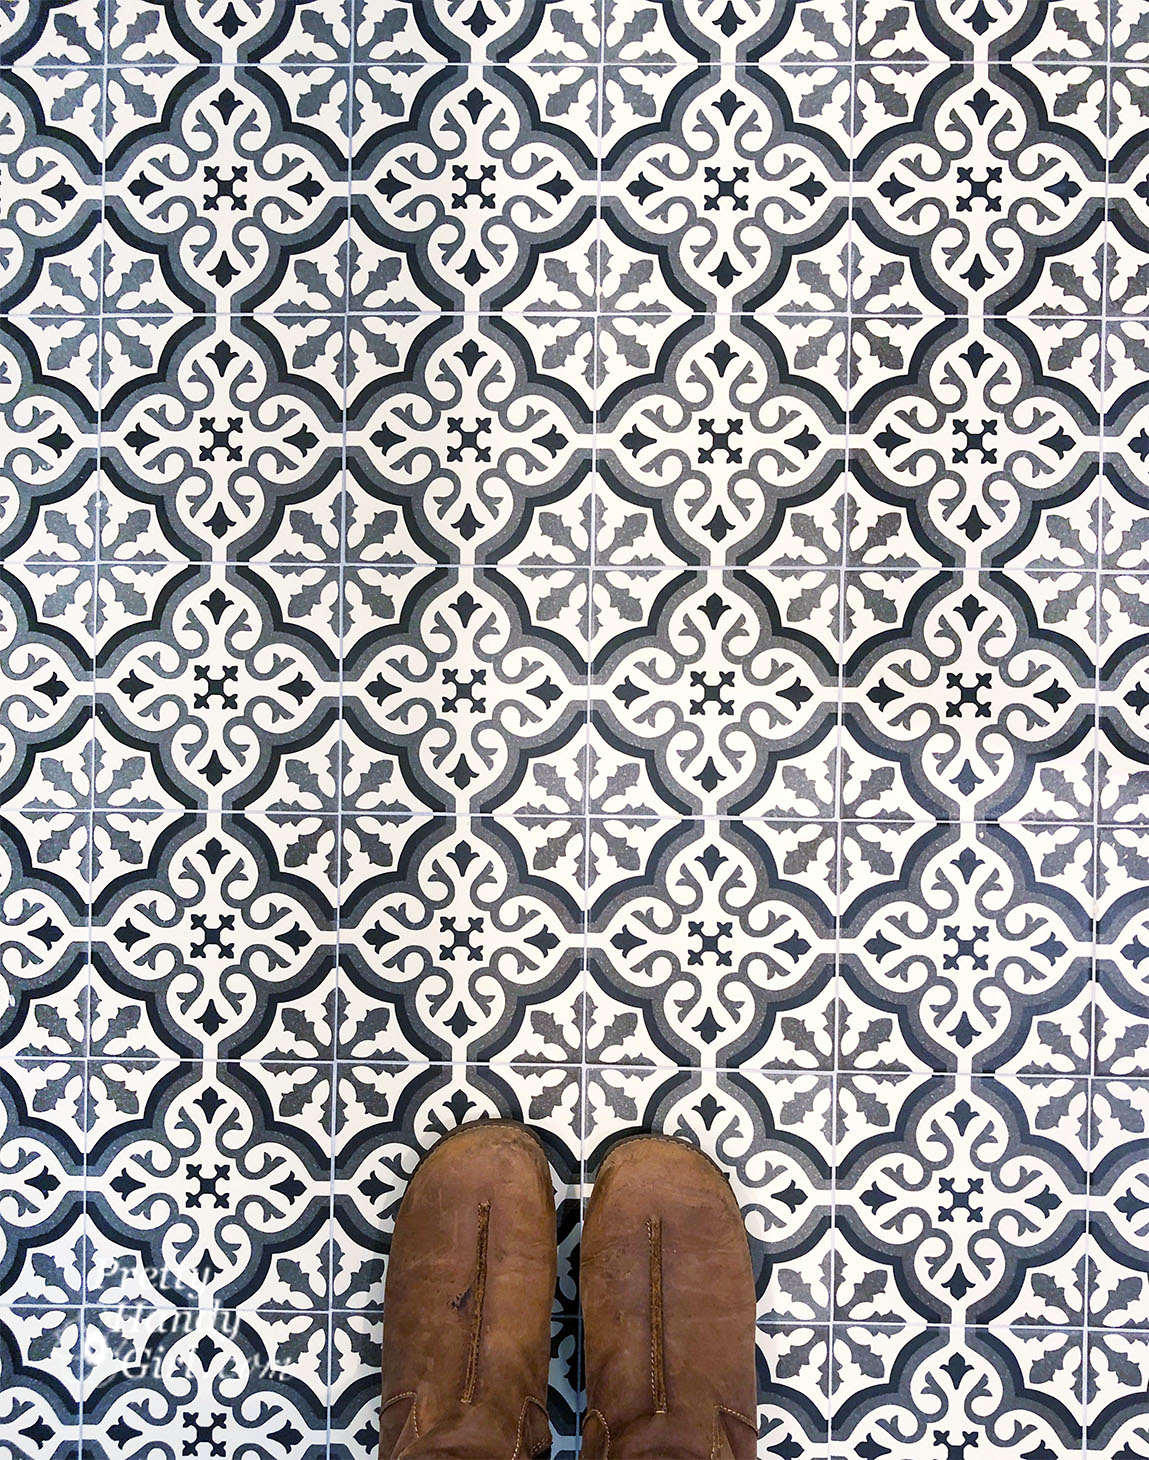
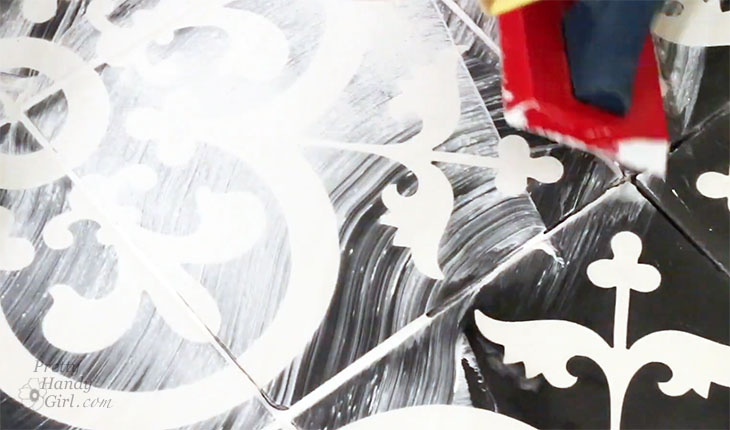
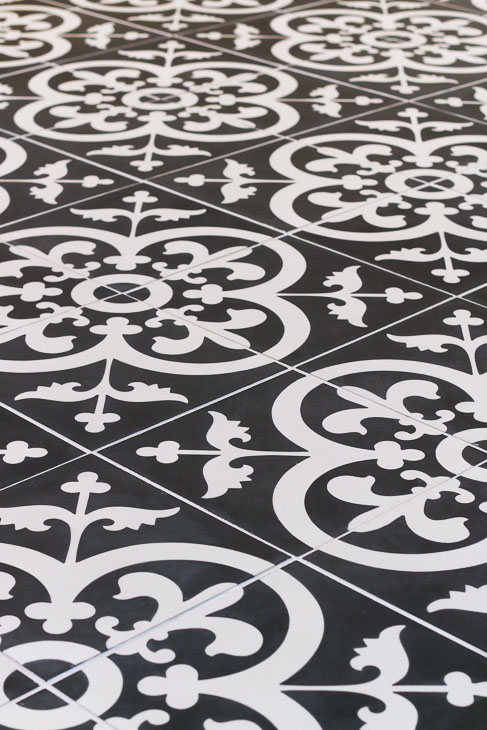
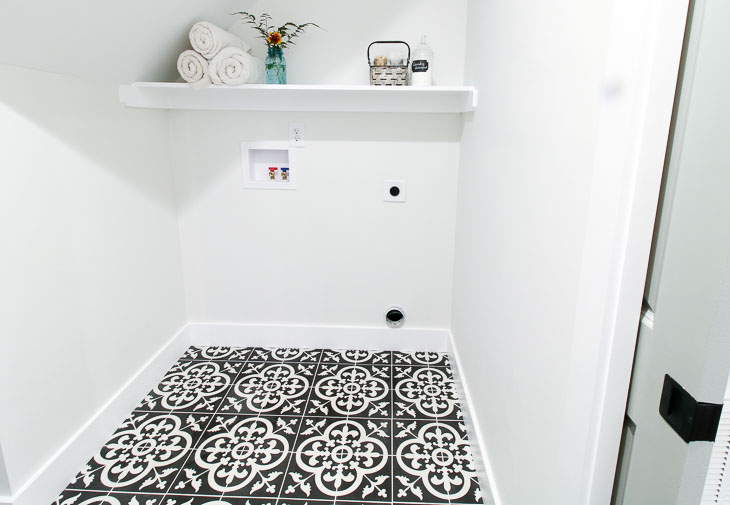
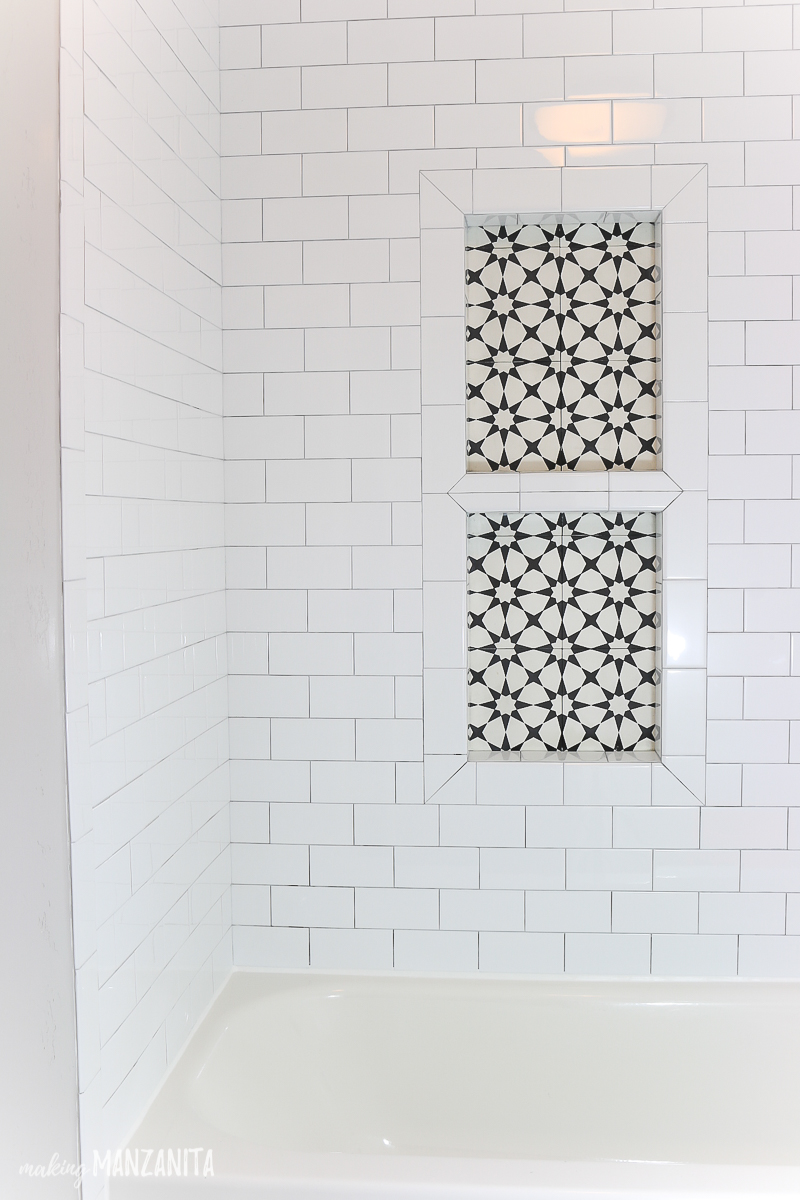
Check out this beautiful bathroom makeover with a Cement Tile Niche
by Making Manzanita

How to Handle Your Cement Tiles:

When you receive your cement tiles you’re going to be tempted to rip open the box and rub your grubby hands all over the smooth tiles (or am I the only weirdo that likes to stroke tiles?) Regardless, before you open the box, wash your hands. Cement tiles are EXTREMELY porous and will absorb oils and stain easily. Until you get to the sealing step, you’re going to have to handle these tiles with care (kid gloves wouldn’t be a bad idea.) Lest you think you can seal the tiles before installation, don’t try it. The tiles have to be porous to release moisture while the mortar is curing. If you seal it ahead of time, there’s a good chance your tiles will develop a ghosting appearance.

Cement tiles can scratch easily. Keep the packing material between the tiles until you are ready to install them. Don’t mark your tiles with a pencil or pen for cutting (unless you will be cutting off the marks.) Even faint pencil lines can’t be easily removed from the tile surface.

How to Prepare Your Floor for Cement Tiles:

(I’ve included affiliate links for your convenience. I earn a small percentage from a purchase using these links. There is no additional cost to you. You can read more about affiliate links here.)

Just like when you paint a room, you’ll get the best results if you take the time to prep your space before you begin.

Before laying tiles on your floor, you must put down a substrate to prevent future flexing that can lead to cracks in your grout or worse in your tiles. Typically tile installers will use cement backer board. But, because the cement tiles are so thick, I chose to use an uncoupling mat to reduce the finished floor thickness.

cutting uncoupling mats.

Measure and cut your mat (or cement board) with a utility knife. Dry fit the mats (or boards) before proceeding.

Whichever substrate you use, be sure to follow the manufacturer’s installation instructions. For improved waterproofing, you’ll want to cover seams with the recommended seam tape. For completely waterproofed floors, add seam tape around the perimeter of the room (as shown in this video.)

Installed uncoupling mats, finding center of room. Marking perpendicular lines.

Next find the center of your room and mark perfectly perpendicular guidelines to use as a guide when laying out your tiles.

Layout cement tiles starting in the center.

Dry fit the tiles with spacers in your room before you begin. Make any adjustments to the tile layout or pattern before you begin.

Dry run. Layout cement tiles before installation

How to Install Cement Tiles:

With your substrate installed, it’s time to install your tiles. Before we begin, make sure you have these tools and materials. A quick note on cutting the tiles. You can use a score and snap manual tile cutter for straight lines, but nothing beats a wet saw for angled and more complicated cuts. If you don’t want to buy a wet saw, you can rent one. Tile setting is a one person job, but it helps to have an assistant to speed things along by making cuts and mixing more mortar and grout.

Materials:

Instructions for Installing Cement Tiles:

Here’s a video I made to help you learn how to install cement tiles properly and keep them looking beautiful!

Mix your thinset mortar according to the package directions. (I usually try to achieve the consistency of peanut butter.)

Prepping Your Cement Tiles:

One of the most important tips for working with cement tiles is to soak them in water before installation. Allow them to soak for at least 30 seconds before laying them into the mortar. If you don’t soak them, the tile will absorb too much moisture from the mortar.

Soak tiles in water tub

Starting from the center of your room, apply the thinset mortar to a small area and use your 1/2” notched trowel to comb the thinset. Lay your tiles down. Lift one tile to check and see if the mortar is completely covering the back of the tile. If not, your mortar consistency may be too dry.

Avoid the temptation to lay more than a few tiles at a time.

Lay first four tiles in thinset mortar

After your first small group of tiles are set, insert spacers. Check to make sure the tiles are level and the same height. Then immediately clean any and all thinset off your tiles using a damp sponge.

Now you can move on to installing the next small grouping. Periodically check to make sure your tiles are lined up with each other and there are no lips between tiles. (Using these self leveling spacers will eliminate any lippage on tiles.)

After all your tiles are installed, block off the room and keep off the tiles for at least 24 hours while the thinset hardens.

How to Install Cement Tiles and Achieve Professional Results

Sealing Cement Tiles:

We’ve arrived at the most important step when installing cement tiles! You must seal the tiles before grouting them. Use a penetrating sealer made for porous stone or cement tiles. Before sealing, make sure your tiles (and the thinset for that matter) are completely dry. You can test the tiles for any remaining moisture by laying down a piece of plastic on the tiles after installing them. If there is moisture the next day when you lift the plastic, they aren’t dry enough. Wait for them to dry or you could risk discoloration of your tiles.

Clean the tiles by sweeping off any debris and clean with a ph balanced cleaner (a bucket of warm water with one drop of dish soap is a good cleaner.) Let the tiles dry. Wipe or buff with a rag.

Pour the sealer into the dish pan. Dip your pad applicator into the sealer liquid. Squeeze off excess sealer against the edge of the dish pan.

Apply sealer with pad applicator

Apply the sealer in thin coats working in one direction. Remove any excess sealer from the tiles BEFORE it dries. (See the streaks below? Those streaks and any puddling needs to be buffed off to avoid uneven drying.)

Avington Black & White Cement Tiles from TheBuilderDepot.com

Let the first coat of sealer dry completely. In fact you may want to take a break for 30 minutes or so between coats.

Buff off excess sealant from tiles.

Be prepared to apply many coats before your cement tiles are fully sealed. (My tiles needed 5 coats to seal them. Then I had to wait another 24 hours for the sealant to fully cure before grouting.) It may seem like a long process, but this insures the tiles will withstand regular use and resist stains.

After each coat of sealant dries, you need to test to see if the cement tiles are completely sealed. Drip water onto the tiles. If the water beads up, they are sealed. However, if the water absorbs into the tiles, add another layer of sealant and try the water test again later.

Water beading up on cement tiles means it's ready to grout.

Once your tiles are fully sealed, wait 24 hours before grouting.

How to Grout Tiles:

Because I work alone, it takes me a little longer to grout. To prevent my grout from hardening too quickly, I like to float my mixed grout container in a bucket of ice water to slow down the setting action.

Load up your float with fresh mixed grout. Holding your grout float at a 45 degree angle against the floor, spread the grout over the gaps between the tiles in a diagonal motion. Work in small 3 – 4 square foot areas. Then scrape any excess grout off the tiles using a clean grout float.

grouting tiles with grout float

Immediately wipe off any excess grout using a clean damp sponge. Ring out and refresh your sponge with clean water frequently.

It is imperative to get all the excess grout off the tiles or you risk the grout staining or settling into the tiles. Go ahead and move on to the next section, but go back to the previous tiles and buff off any haze with a dry rag.

Avington Black & White Cement Tiles from TheBuilderDepot.com

After the grout has cured, clean your floors with a pH neutral mild cleanser. Then apply one final coat of penetrating sealer. A new coat of sealer should be reapplied every 6-12 months for floors, and every 2-3 years for wall tiles.

Avington Black & White Cement Tiles from TheBuilderDepot.com

Cement Tile Maintenance:

To protect your beautiful cement tile floors, clean up any spills immediately. Never leave anything sitting on the floor that could stain or scratch your tiles. If your tiles get scratched or stained, you can use a fine grit sandpaper to sand off the stain. Just be sure to re-seal your tiles after sanding.

Still on the fence about installing cement tiles in your home? This is a good article breaking down the pros and cons of cement tiles.

A big thank you to The Builder Depot for providing the laundry room tiles for the Saving Etta project and for giving me excellent instructions for installing the cement tiles. What do you think? Do you love the cement tile look?

Laundry Room with Avington Cement Tile Floor.

I hope you found this tutorial helpful. Happy tiling!

How to Install Cement Tiles and Achieve Professional Results

Disclosure: The Builder Depot is a proud sponsor of the Saving Etta project.  I was provided with materials for this project. I was not told what to write. All opinions and ideas are my own.

 If you haven’t done so already, be sure to *subscribe to my YouTube channel!

Subscribe to my YouTube Channel

*My followers on YouTube get sneak peeks of some of the projects I’m working on, so subscribe today!


If you liked this post, you’ll also find these tile posts helpful:

How to Install Cement Tiles and Achieve Professional Results

How to Tile a Backsplash


How to Install Cement Tiles and Achieve Professional Results

How to Grout Tiles

How to Install a New Window

Installing new windows on your home isn’t rocket science, but it is recommended that you have some construction experience before tackling this project. If you have the skills, the install should only take an hour or less. Today I’ll show you How to Install a New Construction Window in your home.

How to Install a New Window

Installing a New Construction Ply Gem Mira Window:

If you read my article on ordering new windows, you’re probably ready to install that new window. Today I’ll take the mystique out of this process. To install new windows (as opposed to replacement windows) you need to start with the correct rough opening. Ply Gem makes it super simple to figure out the rough opening size for your new window with their downloadable window size guides(This is a sponsored post in collaboration with Ply Gem Windows.) 

After your rough openings are cut and ready, it’s time to gather a few supplies.

Materials:

(I’ve included affiliate links for your convenience. I earn a small percentage from a purchase using these links. There is no additional cost to you. You can read more about affiliate links here.)

Instructions:

Check that the rough opening is level and plumb. If it isn’t, have some wood shims nearby to help adjust the window after it is set in the opening.

level and plumb rough opening

Cut the first piece of flashing tape slightly wider than the window width. Peel off the backing and attach it one inch below the window opening.

window rough opening

Cut a second piece of flashing tape about 8″ wider than your window opening. Center it on the sill of the window opening. Line up the inside edge of the tape along the inside of the framing (allowing the excess to hang out on the exterior side of the window (as shown below). Press the flashing tape along the sill and up the sides of the window. Cut along the corners of the excess tape. Fold the tape out and down, securing it to the outside of the house sheathing as shown below.

flashing new window for installation

Cut two smaller pieces of flashing tape to cover the corners of the tape you secured above. Cut a slit in the tape where it overlaps the opening. Fold the flaps into the window opening and press your hand firmly on all the tape seams to secure.flashing window around bottom of rough opening 
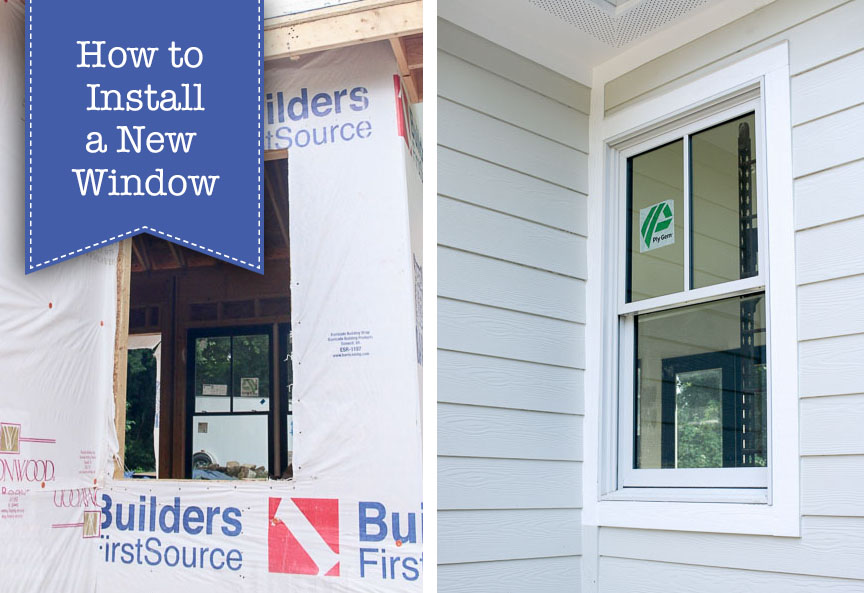
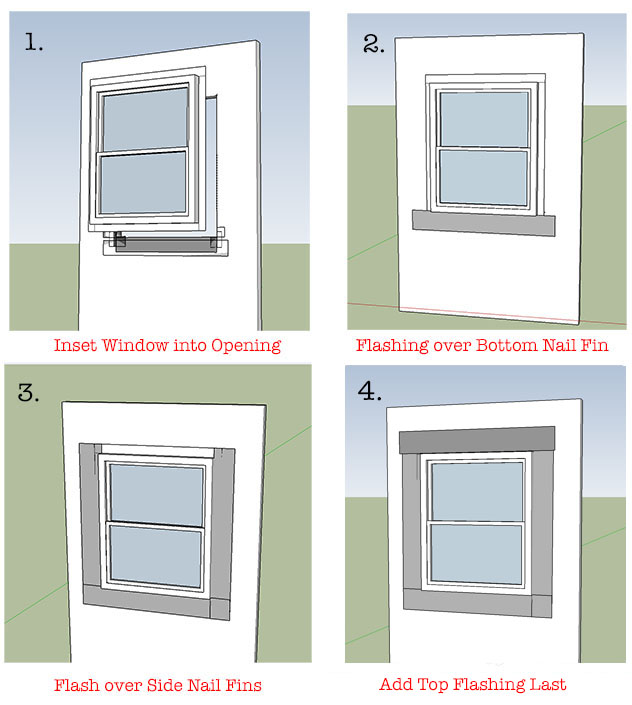
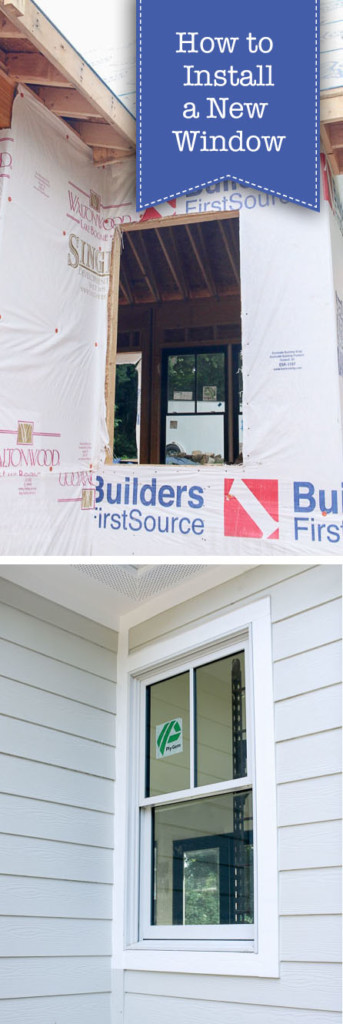
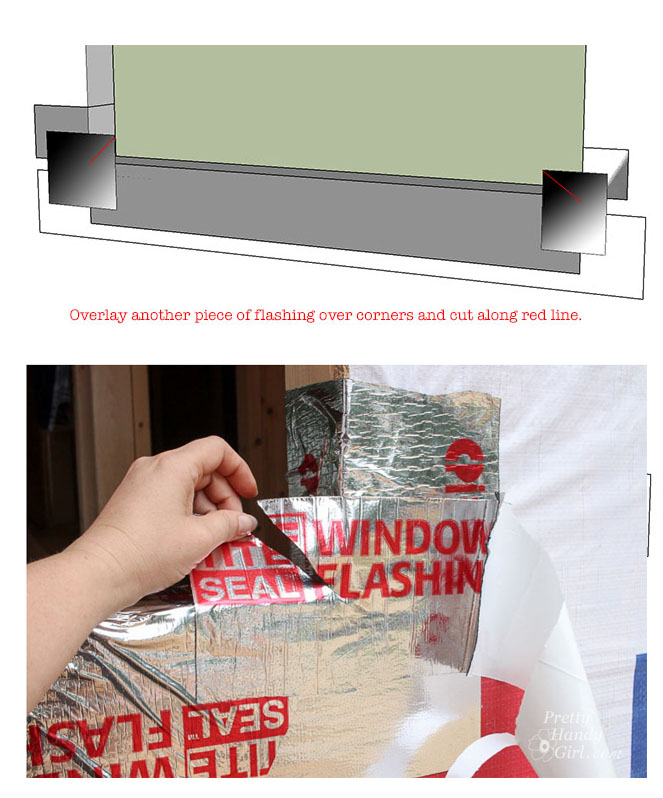
Time to install the window! Run a generous bead of silicone along the inside of the nail fin frame.  Be sure to add additional silicone at the diagonal corner seams of the nail fin.

Have an assistant help you lift the window into the rough opening from the exterior of the house. (For upper story windows, you can feed the window out from the inside of the house. Make sure one person is outside to prevent the window from falling.) Check the diagonal measurements of your window to make sure they are the same. This will indicate if your window is square or not.

check window diagonals for plumb and level

Use your level to check if the window is level and plumb in the opening. If not, make adjustments by inserting shims from the inside of the house.

Once the window is square, level, and plumb, secure it to the house sheathing with roofing nails. (For added weather protection, the nail fin should go over the Tyvek house wrap for the sides and bottom. Along the top, lift the house wrap and nail the fin directly to the house sheathing.) The top flap of Tyvek will be secured later.

Continue adding nails to every hole in the nail fin. Your window is now securely installed. Time to add the exterior flashing.

(2.) Cut another piece of flashing slightly wider than the width of the window. Remove the backing and press firmly over the bottom nail fin.

flashing new window

(3.) Cut two pieces of flashing slightly taller than the height of the window. Press the flashing tape over both sides of the nail fin (taking care to overlap it over the bottom piece of flashing.) (4.) Lift the top house wrap flap out of the way. Then add one piece of flashing on the top nail fin (again, take care to overlap the top piece over the side pieces.)

Let the house wrap flap overlap the top piece of flashing. Secure it in place with a piece of Tyvek tape.

Flap of house wrap overlaps top of window flashing.

Congratulations! Your window is installed and ready for trim and siding.

Tell me the truth, isn’t this one of the most beautiful windows you’ve ever seen? The grilles look great on this 1900 house.

New Plygem Mira Window Installed

Even up close, they look like true divided light windows. The grilles I chose are the 7/8″ SDL style grilles available on Ply Gem’s Mira Windows.

On the back of the house, I installed a bank of windows and sliding glass doors to maximize the view of the big yard. The homeowners will love all the natural light pouring in from their beautiful Plygem Mira Windows.

Plygem Mira doors and windows on cream house

If you like this tutorial, share the knowledge with a friend by pinning this image:

How to Install a New Window

Disclosure: This post is a sponsored post for Ply Gem. It was written as part of their sponsorship of the Saving Etta project. I was not told what to write. All words and opinions are my own. I am very particular about the brands I work with, and only partner with companies that provide quality materials and/or services.

How to tile a fireplaceHow to Tile a Fireplace

Hello Pretty Handy Girl Readers! Sarah here from The Created Home. Today I’m sharing how you can update and customize your fireplace by doing your own tile work. Don’t be intimidated, tiling is actually quite accessible for DIYers, and once you get the hang of it you’ll be unstoppable. You may even find that you really enjoy it!

As with any DIY, especially one you are new to, you will need to read all the way through to make sure you are familiar with the process and always take proper safety precautions. Use ear and eye protection when you are using a tile saw. Read the manual for your tile saw and make some test cuts to get the feel for using it.

Note: This tutorial will not cover the grouting step. The tile I chose for this project was close together and did not require grout. I’ll cover that in more detail in just a bit. To learn how to grout, read Brittany’s tutorial on grouting and sealing tile.

Materials:

(I’ve included affiliate links for your convenience. I earn a small percentage from a purchase using these links. There is no additional cost to you. You can read more about affiliate links here.)

tiling supplies

How to Tile a Fireplace: Make a plan

Entire tutorials can be written about how to choose and plan out your tile. There are a LOT of options out there. Bear in mind that a patterned tile will require more work when laying out, as the pattern needs to be visible and centered in the space. Example: In this fireplace I would have loved to use a cement tile look, but the tiles I found were 8″ and the sides of the firebox only allowed for 6 ½” (which would have looked awkward with the designs I liked.)

Ugly Before Shot:

tile fireplace before

A second thing to keep in mind is that knowing the square feet to be covered is only half the battle. Chances are you’ll have a number of small pieces to cut which will render some part of each tile unusable. It’s a good rule of thumb to always get 10 – 15% more tile than you need.

Once you have the tile you will need to plan your layout. Where will a row have to be ripped to fit? Where will the pattern repeat? What order will the tile need to be applied? For this project my husband and I spent just as much time making the plan as actually installing the tile.

Get to work:

For this project we chose to tile over existing tile, which was far simpler than removing what was there (even with the poor shape it was in.) If your tile doesn’t have adhesion issues this may be a great route for you. We tested the waters [tile] here and found that the damage to the existing tile was superficial, albeit highly unattractive.

damaged tile fireplace

Once you have a game plan it’s time to make your first cut. A tile saw (or wet saw) cuts much like a table saw, but it needs a constant source of water to keep the blade cool and the dust down. Keep a pail of water on hand to refill the saw as needed. Some tile saws can be hooked up to a water source via a hose.

tile saw wet saw

You will be covering the edges where the tile runs into the wood mantle surround with some sort of trim, so it’s not important that you are dead on with every cut fitting perfectly against that edge. This is also useful if you run into issues with things being out of square (which happens frequently). You can see in the photo below the tile does not fit snuggly, or uniformly along the far sides.

How to Tile a Fireplace

Using a Wet Saw: a few tips

I recommend using a tile saw rather than a snap cutter (which just doesn’t work very well). It can be intimidating at first, but go slow, use caution, and follow some basic rules to ensure a professional looking, safe job.

The first rule, is to keep those fingers away from the blade. Make your cuts slow and steady. Water should be flowing around the blade constantly as you gently push the piece through. You can avoid chipped ends by pushing the piece through very, very slowly as you reach the end, being careful not to force the blade. Too fast and the corner of your tile will likely chip off.

wet saw tile saw fireplace

Use your fence to make sure your cuts are straight. You may have to trim off ends if you tile is staggered, as ours was. Place the trimmed end to the outside, where it will be covered with molding.

How to Tile a Fireplace

How to Tile a Fireplace: adhering the tile

Tile adhesive comes either pre-mixed or in powder form. Pre-mixed is great for small jobs like a fireplace, but either route is fine. Use the notched trowel to spread the adhesive on the back of the tile piece, covering the entire back.

how to tile

The notches will leave tracks, like so:

how to tile

Position the tile where you want it and push firmly, wiggling it around a bit so those tile tracks fill and the tile is firmly adhered along every point to the fireplace.

how to tile a fireplace

If you are grouting between your tiles you will use spacers around each piece. The pieces we used required being set close together to mimic the look of the “preset” tiles. We used the adhesive to fill any small gaps that did show. Again, be sure to check out Brittany’s grouting tutorial if you plan to use grout.

how to tile a fireplace

Continue adding the tiles to the desired pattern. Be sure to account for how your final row will fit, as it will in all likelihood require cutting the tile crossway to fit correctly. The good news is you will be able to hide the seam at the top with some molding.

tiling over existing tile - How to Tile a Fireplace

This fireplace required tile down on the hearth as well, which meant notching around the mantle. To make those cuts be sure you are cutting the tile face up and draw lines to help guide your cuts. The blade will undercut a bit farther than your top cut, but it will be hidden underneath. You’ll quickly discover that most lines are not square, and probably have a gap something like this. Use some caulking to seam it all together and it will look just fine.

tiled hearth

Finishing the Fireplace: adding trim

Molding completes the finished product and hides those seams. Quarter round is a great option for the fireplace. Paint the molding to match the mantle. Attach by driving brad nails through the quarter round at an angle so it goes into the hearth. Caulk around the molding for a seamless look.

fireplace molding

Bonus Content: wrapping the hearth

The front of the hearth here had tile, and I decided the better look would be to wrap it in wood instead to tie it into the white of the mantle and break up the tile a bit. It’s the same look I created when we redesigned our own fireplace.

how to tile a fireplace

To create this look you will need a piece that is the same width as the height of the hearth front inclusive of the tile you just added. If you are lucky you won’t have to rip a piece down to fit.

The sides of that front can be square cut or mitered. To miter the front, cut one end at a 45 degree angle. I prefer to use the saw’s bevel function to get this cut nice and straight.

bevel cut

Place the piece against the front of the hearth and line up where it will sit.

miter cut hearth front

Mark the other end where the short end of the 45 will sit. This is easier and more accurate than simply measuring.

marking cut

It also helps to sketch the angle of your cut while the wood is in place to ensure you don’t cut the wrong way (it’s easy to do).

How to Tile a Fireplace

Cut 45˚ for the side pieces, then measure and make the 90 degree cuts. You can easily cut those back to fit, so cut a little at a time. Paint the molding. Attach by finish nailing the angles together, and then either nail or glue it to the face of the hearth. We used construction adhesive and clamps, letting them sit overnight.

Stand back and enjoy your hard work!

how to refinish a fireplace with tile

As you can see, not only are there a lot of options for refinishing a fireplace, there are a ton of options for tile itself. Tiling is a great way to go that doesn’t have to cost a lot of money. Our cost for this fireplace was just over $100.

When we started, this fireplace was far from the focal point of the home, as you can see . . .

fireplace before

. . .and here’s the dramatic finished look.

How to Tile a Fireplace

Now it’s your turn! Put those tiling skills to work and tile it up! In no time at all you’ll be chatting with company and casually mention, “Oh yes, the fireplace. did that. No big thing.” And don’t forget to share your before and after photos so we can all admire the transformation with you.

Happy tiling!

~See More of Sarah’s Projects~

Check out these other posts to up your tiling game!


Faking Wall-to-Wall Carpet with an Area Rug | Pretty Handy Girl

The closet renovation is coming along nicely, even though I’ve only been able to work on it in fits and starts. After I added a new light switch for the closet, I added any missing insulation. Then I filled any and all gaps with Great Stuff. This closet had always been very cold in the winter or super hot in the summer. I decided to climate control the closet as best as I could while the walls were open. Then I closed up the walls with sheet rock and painted the small closet. You would not believe how well sheet rock (aka drywall or wall board) insulates! When I added the last piece, it made a huge difference in the climate control in the room. Who knew?!

Every room we renovate, we like to leave little messages in the wall or on the floor. The boys and I had fun drawing before adding the carpeting.

Faking Wall-to-Wall Carpet with an Area Rug | Pretty Handy Girl

The closet dimensions are just under 5′ x 8′ which is perfect for an area rug. I wanted the closet to be as comfy and inviting as possible for the boys, so I settled on a super soft chenille shag rug.

I also purchased enough carpet padding from Lowe’s to line the closet floor. In the interest of climate control, I bought the thickest padding and opted for the Stainmaster brand to resist spills from seeping through to the subfloor.

Ready to get started Faking Wall-to-Wall Carpet with an Area Rug?

Materials:

Faking Wall-to-Wall Carpet with an Area Rug | Pretty Handy Girl

  • Utility knife
  • Scissors
  • Metal ruler or straight edge
  • Sharpie
  • Staple gun and staples (1/2″ – 5/8″)
  • Area rug large enough for your space
  • Carpet padding

Instructions:

Lay the carpet padding on the floor. Line up two edges and fold the other edges up against the wall.

Faking Wall-to-Wall Carpet with an Area Rug | Pretty Handy Girl

Use a pen to draw along the corner where the wall meets the floor.

Faking Wall-to-Wall Carpet with an Area Rug | Pretty Handy Girl

Cut the carpet pad to size. Read more