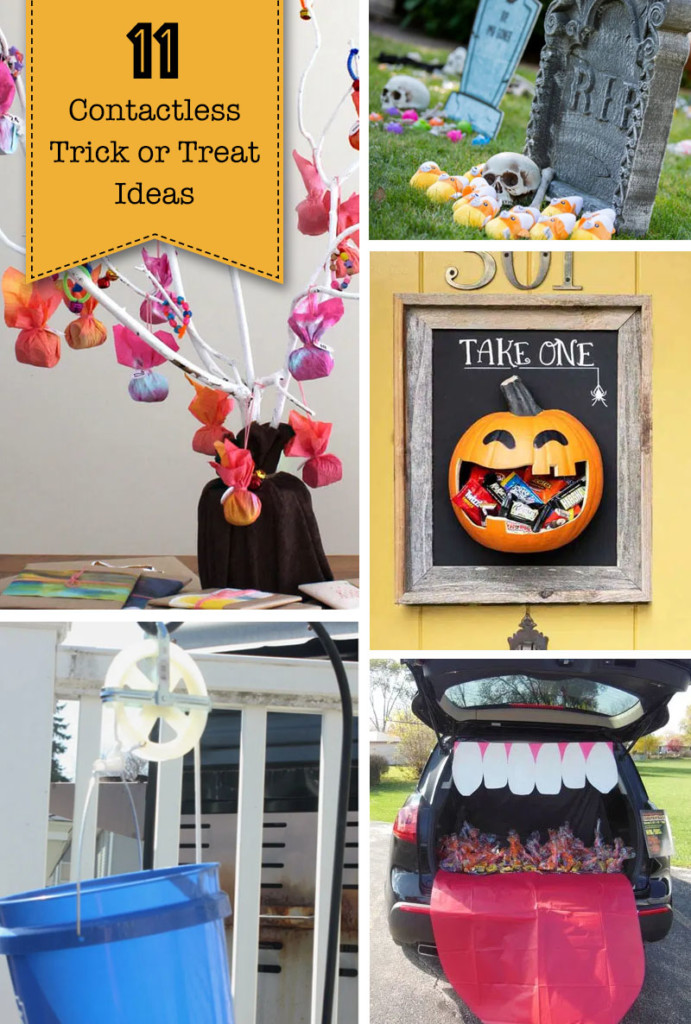
In the interest of saving Halloween, here are several ideas for contactless trick or treating!

11 Contactless Halloween Trick or Treat Ideas

11 Contactless Halloween Trick or Treat Ideas

Halloween is a mere two weeks away. Let’s get real, 2020 has been hard enough on the kids. Cancelling Halloween would be the biggest disappointment for our little ones. With that in mind, I’ve been scouring the web and my brain for some excellent contactless Halloween Trick or Treat Ideas. Here they are in no particular order.
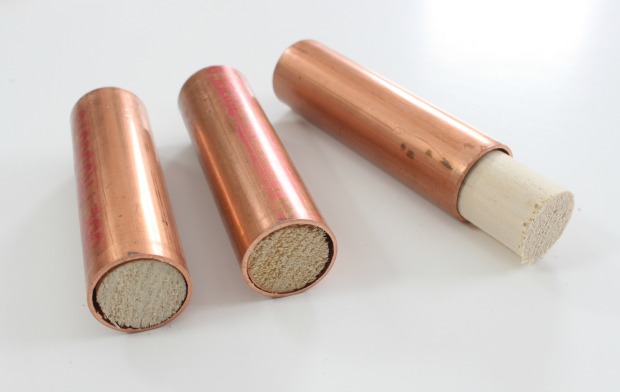
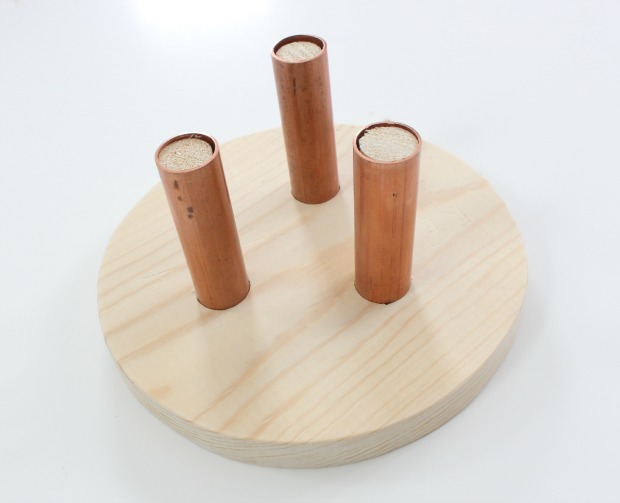
Ship Your Candy:

This Ohio Dad Saves Halloween with a Shipping Tube and Spray Paint!


Spooky Candy Chute:

Wicked Makers breaks out the spooky decor and a plumbing pipe for this Skeletal Candy Chute.


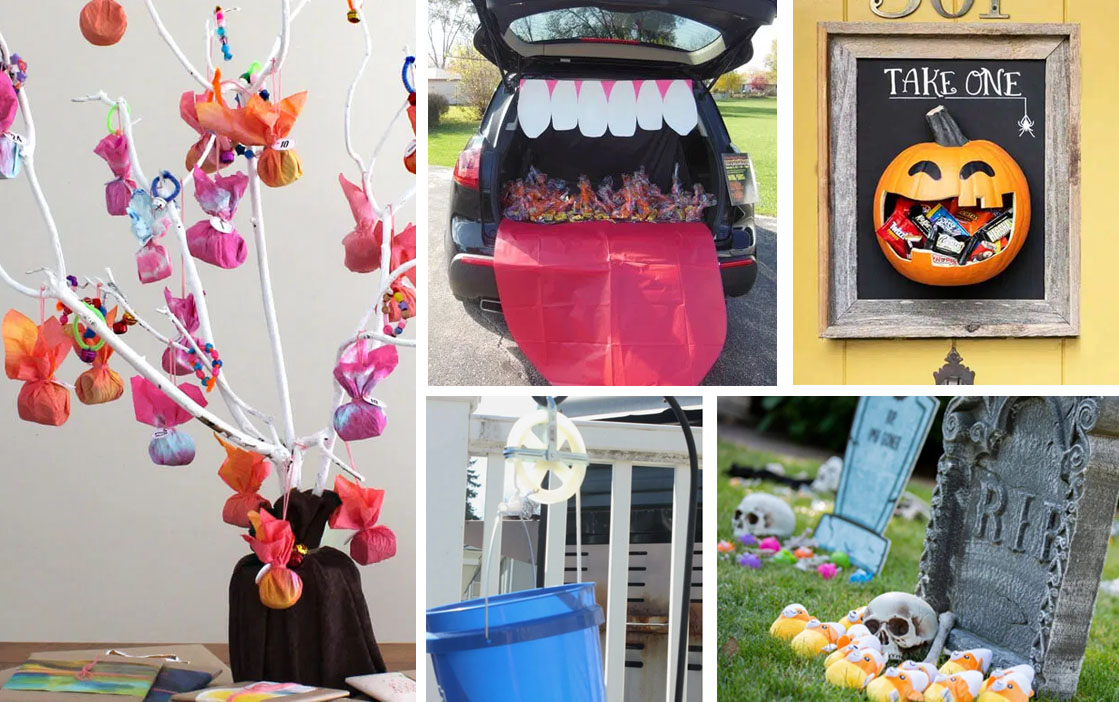
A Twist on a Scavenger Hunt: The Candy Graveyard

With a few props and pre-packaged candy, you too can create this fun Halloween Candy Graveyard.

Halloween candy Graveyard


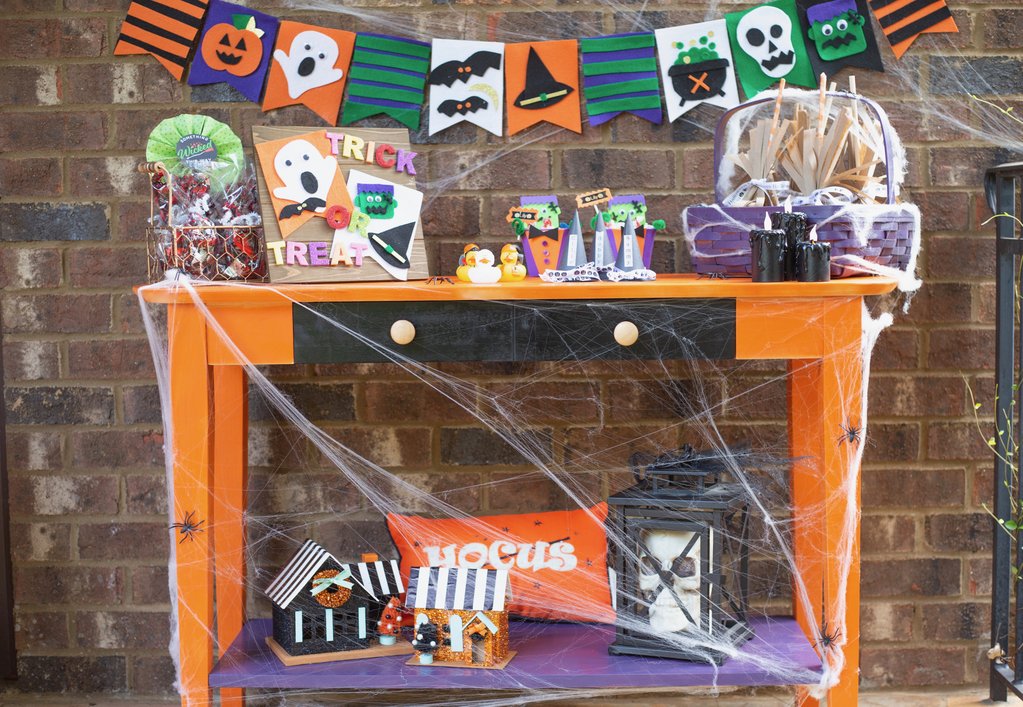
Table Halloween…Definitely Not!

Many of our neighbors are planning on leaving pre-packed treat bags on a table by their door. Craft Box Girls, upcycled this sofa table with a little spray paint to create a Halloween Decorated Treat Table.

DIY Halloween Trick or Treat Table


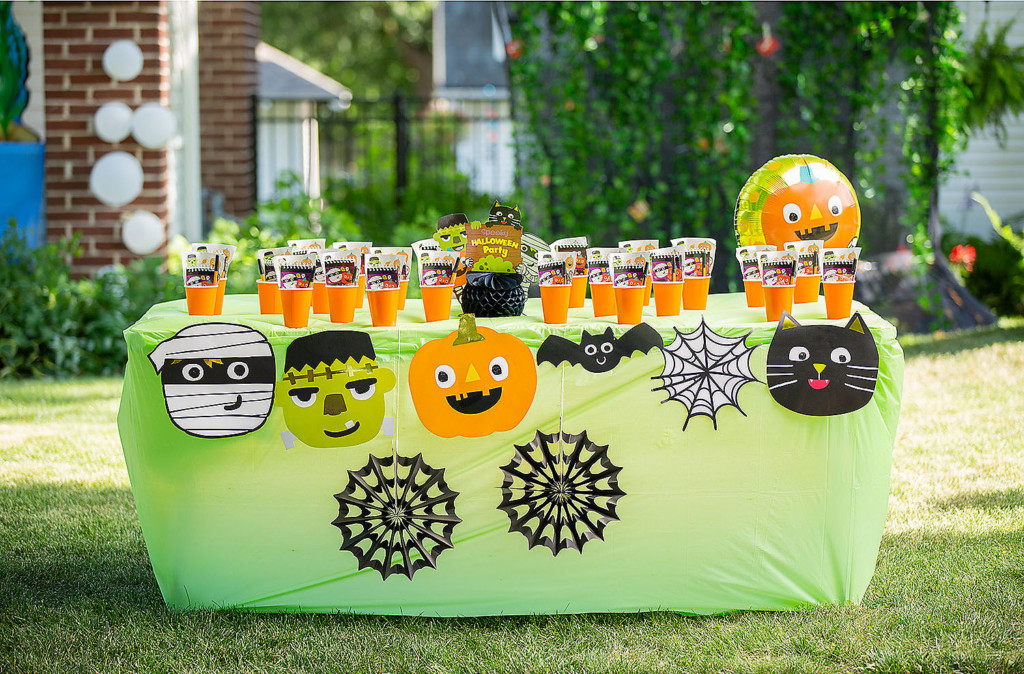
Easy Driveway Trick or Treat Table

If DIY isn’t your thing, you can take the easy path and gather a few supplies to create this driveway trick or treat table in no time.
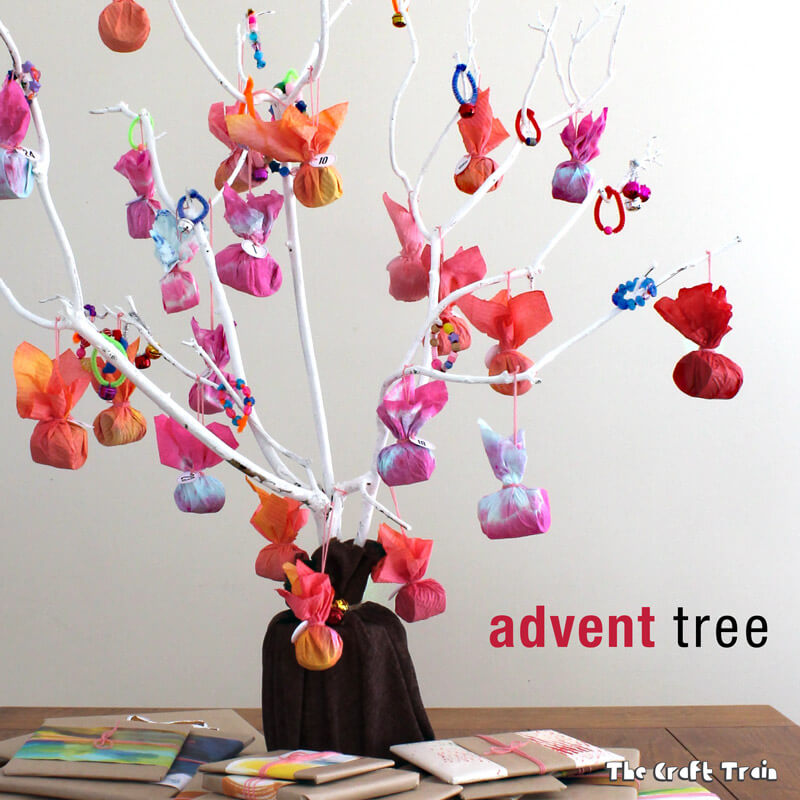
Easy trick or treat driveway table


The Giving Tree

If you have a tree in your yard with low branches, you can attach treat bags to the branches. Or cut a branch and add a few treat bags like The Craft Train did.
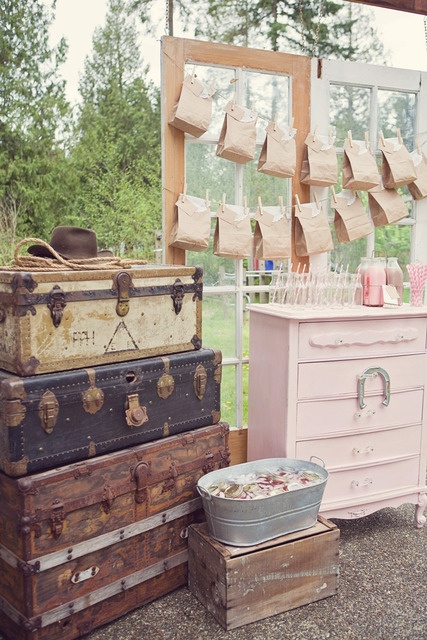
DIY Treat Tree


Hang Up Halloween

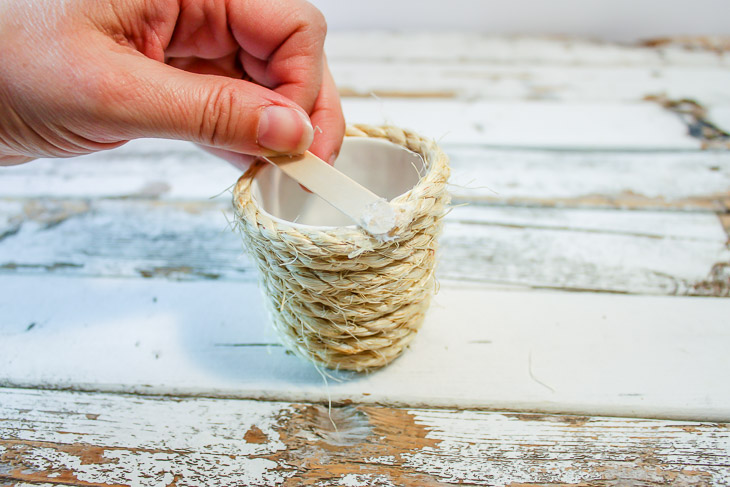
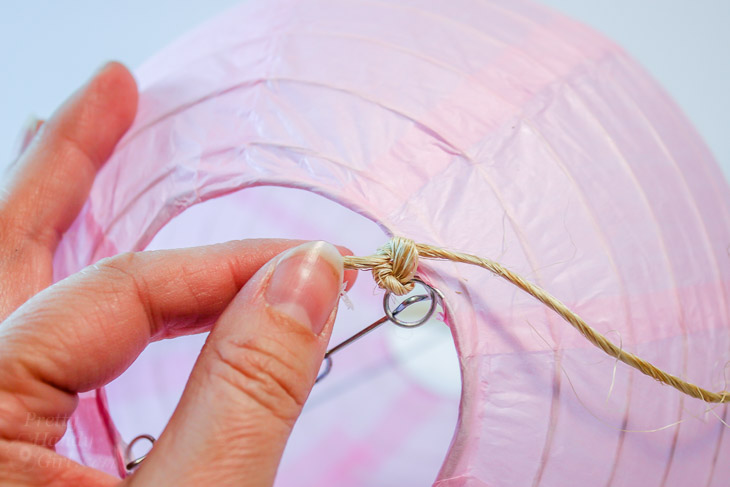
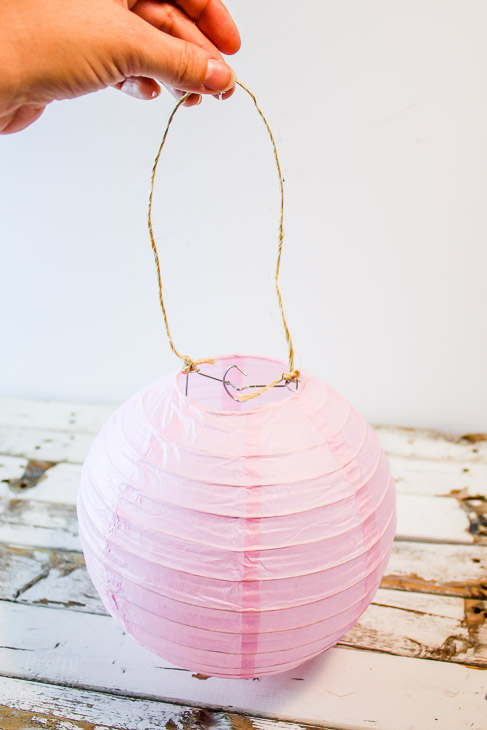
Let’s not hang up the idea of trick or treating altogether. Take a note from Little Sooti’s birthday favor idea and hang those treat bags out for the children to grab and go. You can attach them to the door, or on a clothesline between your porch posts. Get creative!
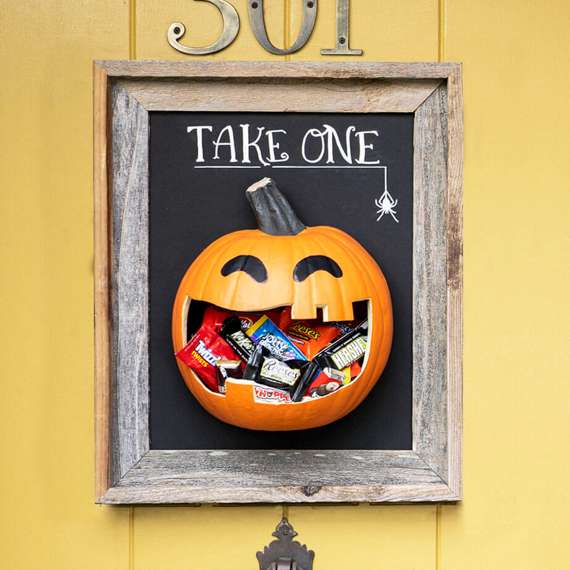
hanging treat bags on a line


Door Decor

Hershey comes to the rescue with this fun DIY Door Decor idea for a contactless treat dispenser.
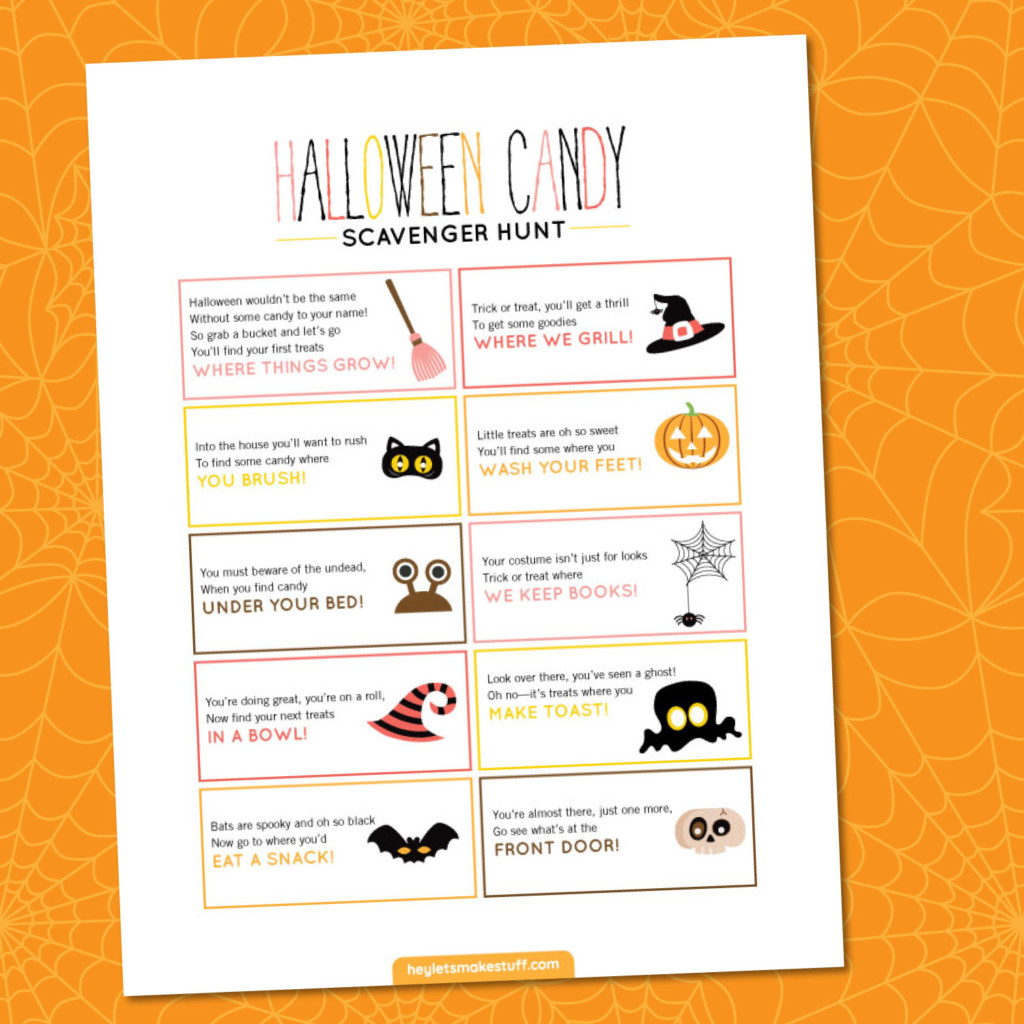
Contactless Door Treat Dispenser


Scavenger Hunt

If you don’t feel comfortable letting your kids trick or treat this year, I’ve got an idea for you! A Trick or Treat Scavenger Hunt from Hey, Let’s Make Stuff. Or you can adapt this idea to your front yard for trick or treaters. Simply give one clue to each kid to find their treats.

TRick or treat scavenger hunt


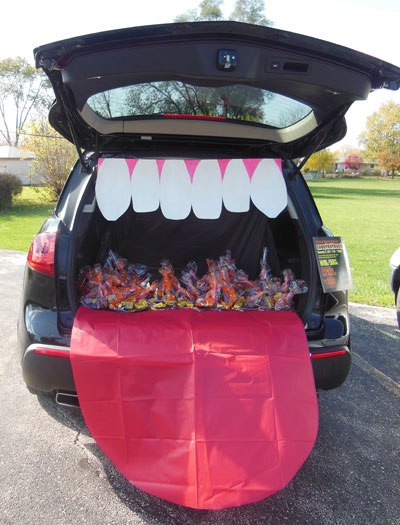
Is There Junk in Your Trunk

Trunk or Treat parties have been around for decades, but this year you can park it in your own driveway and open the trunk to your trick or treaters.
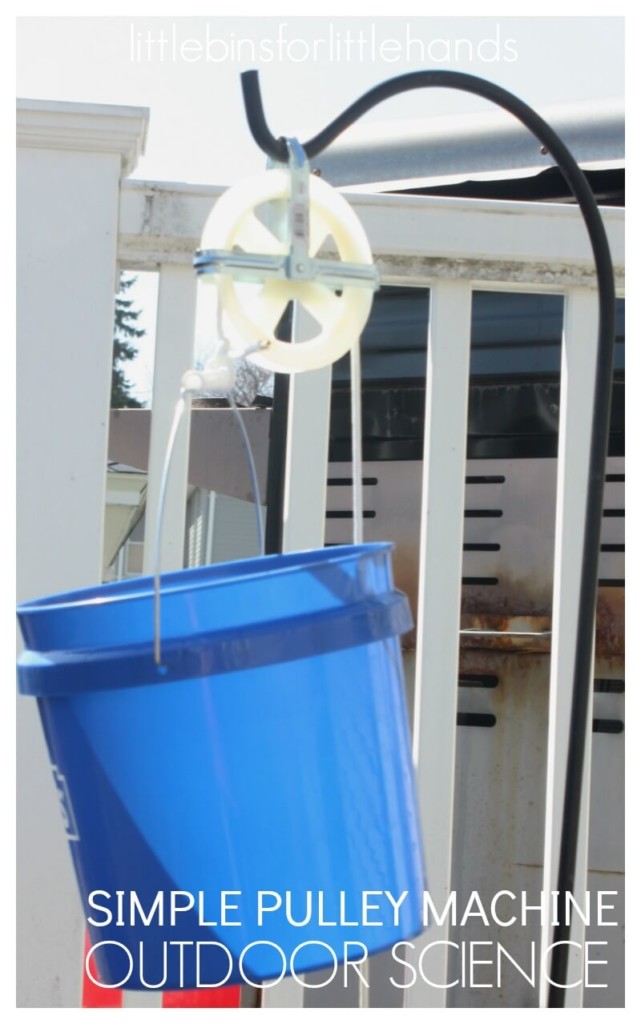
Trunk or treat for contactless trick or treating


Buckets of Fun:

If you have a two-story window over the front door, you could create a simple bucket and pulley system to deliver treats to the children. Keep the rope in your hands to keep it contactless for the kids. You might also consider wiping the bucket between trick-or-treaters. Don’t have a pulley? No problem, you can simply run a clothesline from the window to a stationary post (light post or fence post) and then loop the bucket handle over the line. Send it down to the trick or treaters (just be sure to attach a second line to the bucket handle so you can pull it back up).

Bucket on a Pulley for contactless trick or treating

How about you? Do you have any idea for a safer contactless Halloween? I’d love to hear them. In the meantime, pin this image and share this post with your friends so the kids can enjoy Halloween even during a pandemic.

11 Contactless Halloween Trick or Treat Ideas

Tutorial for making these DIY oilcloth, water resistant drink coasters for Summer!

DIY Drink Coasters - Water Resistant fabric and perfect for Outdoor Use and Summer Parties!

DIY Oilcloth Drink Coasters

Hi there!  I’m so thrilled to be back today with this super quick and easy project.  The weather in Seattle has been totally amazing lately and it’s got me thinking about summer.  And, summer entertaining is on the brain! This project will look great on your patios and outdoor spaces. Bonus, it’s totally water resistant too. Let’s take a mini-break and learn how to make these adorable DIY oilcloth drink coasters for gifting or entertaining.

What in the world is Oilcloth?

Oilcloth is a type of fabric.  It has vinyl on one side and kind of a soft mesh of cotton on the other side.  Vinyl has a slippery and plastic-like feel to it. The best part about vinyl is you can wipe it clean and it’s water resistant! This makes oilcloth a perfect fabric choice for outdoor items like tablecloths, COASTERS, beach bags etc.

The other great thing about oilcloth is that it just happens to be made in a multitude of funky patterns and bright colors.  This fabric was made for Summer!  When you get a minute – run a google search for ‘oilcloth fabric’ and you’ll see what I mean.  Such pretty patterns!

So this is the perfect little accessory for all those Summer fiestas and BBQ’ s you have in the works.  Or even for gifting away as little favors.  Tie a cute burlap string around them and presto! You have a lovely handmade housewarming gift.

Perhaps you own a pool or live near the beach?  Or know someone who does?  These coasters make a fantastic DIY gift idea for them.

Here’s the best part: these stylish oilcloth coasters took me 10 minutes to make – start to finish.

Materials:

(I’ve included affiliate links for your convenience. I earn a small percentage from a purchase using these links. There is no additional cost to you. You can read more about affiliate links here.)

Gather materials needed to make oilcloth drink coasters

  • Oilcloth Fabric – I chose these hot pink stripes from Fabric.com
  • Sewing Machine
  • Pinking Shears – these are simply scissors with a serrated edge.  They are used to cut a zig zag pattern in fabric to prevent fraying.
  • Tape Measure (for measuring your coasters to a perfect square)

Instructions:

Start by folding your oilcloth in half.  We need two exact squares to make one coaster (both front and back will be the vinyl, water-resistant side).

Fold your oilcloth fabric in half

Step 1:  Measure out a perfect square on your oilcloth fabric.

measure out your coasters using a tape measure or ruler

I measured approximately a 4 inch square coaster.  (It’s totally up to you on sizing. Most drink coasters are between 3-5 inches square.  For fun you can also cut circles instead of squares. Use a bowl or circle template to make a perfect circle.)

Step 2 :  Use your pinking shears to cut out your measured square.

Cut out the two squares of oilcloth fabric that you previously measured

Since your fabric is folded in half – you can pretty much cut two squares at once.  You can also use regular scissors here and even them with pinking shears after sewing.

Step 3:  Line up your two squares and sew them together vinyl sides out.

sew both layers or oilcloth fabric together

Use use small binder clips (another little sewing trick I use a TON) to hold your two pieces of fabric together while sewing.  I wouldn’t suggest using pins because the holes will be visible even after removing them.

A straight stitch is fine, but feel free to try something fun like a zig zag stitch.

Tips for sewing and working with oilcloth fabric :

Gently feed oilcloth through your machine so it doesn't stick to the presser foot

  • Because oilcloth is vinyl and kind of plastic feeling, it will stick under your presser foot.  To combat this,  use two hands to feed the coaster through.
  • An alternative is to purchase a Teflon presser foot – they are fairly inexpensive and won’t stick to the vinyl fabric as easily.
  • DO NOT IRON OILCLOTH.  It will melt and the mess won’t be pretty.  If your oil cloth is wrinkled, lay it out and throw some heavy books on top for a few days. This usually presses the wrinkles out.  Oilcloth also “releases” more wrinkles when warmed up a bit.  Therefore you can try laying it by a sunny window.  Don’t microwave your oilcoth. 🙂

Step 4:  Use your pinking shears to clean up the edges of your coasters

Even up the edges of your newly sewn coasters with your pinking shears

Simply snip along the edge without cutting through the seam to straighten and clean up the ends.

Guess what?  All done!  See how fast it was making these DIY oilcloth drink coasters?

These coasters look so cute and are perfect for Summer! Pin this image to share with a friend:

Tutorial for making these DIY oilcloth, water resistant drink coasters for Summer!

I don’t know about you, but I may need to mix up a batch of margaritas tonight.  I hope you guys enjoyed this tutorial!

Tutorial for making these DIY oilcloth, water resistant drink coasters for Summer!

If you enjoyed this tutorial, you might want to check out my tutorial on DIY frayed napkins.  They also make a nice gift and pretty setting for your tables.  And for even more inspiration – be sure to check out Brittany’s amazing backyard and patio reveal, what a beautiful space!

Outdoor Garden Patio Party Decorating Ideas | Pretty Handy Girl

You may also like this tutorial for making mosaic tile coasters

Mosaic Tile Coasters | Pretty Handy Girl

…or DIY personalized wood slice coasters.

I’ll be back here next month and I’m looking forward to connecting with you all again soon.

karen signature

~ See More of Karen’s Tutorials ~


karen from decor hintHello!  I’m Karen, the creator of the Home Decor and DIY Blog: Decor Hint . I’m a Native of the East Coast, but I currently live in beautiful Seattle with my hubby, our two wonderful children and our spunky wheaten terrier.

You can usually find me with some sort of craft in one hand and a coffee in the other. And I’m always rearranging furniture or moving lamps from room to room. I have a passion (read: obsession) for decorating, DIY, and gardening. In short, I love making my house into a home.

Like many, I’m inspired by what I see in home decor magazines, but I’m not so inspired by the price tags.  Consequently, I love finding and creating beautiful budget-friendly home decor items. In a head to head competition, I bet you’d never know the difference between the designer items and my DIY creations!  Many of my DIY projects focus on sewing, crafting, upcycling and organizing. Some of my favorite projects have been making pretty wreaths , sewing my own tassel hand towels, and crafting these trendy wood bead garlands . I can’t wait to inspire you and spark your creativity through my DIY projects.

You can always connect with me on Pinterest , Twitter or Instagram.

Easy to Make Hot Air Balloon Decorations | Pretty Handy Girl

This year I’m helping out with the school book fair decorations again. The theme for our fair was air travel. We made cute hot air balloons, clothespin airplanes, a giant “Welcome” word cloud, and cut out book clouds (tutorial to come soon.) We had the most fun making these adorable hot air balloon decorations using Chinese lanterns and Dixie cups.

Easy to Make Hot Air Balloon Decorations | Pretty Handy Girl

They cost next to nothing to make, but were a big hit with the kids. Ready to make your own hot air balloon decorations?

Materials:

(I’ve included affiliate links for your convenience. I earn a small percentage from a purchase using these links. There is no additional cost to you. You can read more about affiliate links here.)

Easy to Make Hot Air Balloon Decorations | Pretty Handy Girl

Instructions:

Assemble the Chinese lanterns.

Easy to Make Hot Air Balloon Decorations | Pretty Handy Girl
Pre-heat your hot glue gun. If you’ve never used a hot glue gun before or always get burned, read this article first!

Place one Dixie cup upside down on your working surface. Squeeze a dollop of glue into the center of the bottom of the cup. Place the end of your rope into the glue and wait a minute for the glue to harden.

Easy to Make Hot Air Balloon Decorations | Pretty Handy Girl

Add a little glue around the end of the rope. Fold the rope back and start to shape it around the center point. (Use a popsicle stick or tweezers to hold the rope as the glue cools. Do I as I say, not as I do.)

Easy to Make Hot Air Balloon Decorations | Pretty Handy Girl

Keep adding glue and wrap the rope around the center until you have covered the bottom of the Dixie cup.

Easy to Make Hot Air Balloon Decorations | Pretty Handy Girl

Add glue around the sides and wrap the rope around the sides of the Dixie cup. Be sure to firmly press the rope toward the bottom of the cup to avoid gaps.

Easy to Make Hot Air Balloon Decorations | Pretty Handy Girl
When the entire cup is covered, cut the rope and secure the end with more hot glue.

Easy to Make Hot Air Balloon Decorations | Pretty Handy Girl

Tie one end of sisal twine to the bottom of the Chinese lantern.

Easy to Make Hot Air Balloon Decorations | Pretty Handy Girl
Measure the length you want for the twine and cup to hang from the lantern and cut the twine. Tie the other end to the lantern. Fold the twine in half to find the center.

Easy to Make Hot Air Balloon Decorations | Pretty Handy Girl

Put a dollop of glue inside the bottom of the Dixie cup. Press the center of the twine into the glue. Let harden for a minute. Run glue up both sides of the inside of the cup and press the twine into the hot glue. Make sure to adjust the twine until the cup hangs level under the lantern.

Easy to Make Hot Air Balloon Decorations | Pretty Handy Girl

Once the hot glue hardens, you can hang your hot air balloon!

Easy to Make Hot Air Balloon Decorations | Pretty Handy Girl

It could be fun to prop little lego people into the baskets. Or add a tea light into the baskets and light them at night.

Easy to Make Hot Air Balloon Decorations | Pretty Handy Girl

Making Hot Air Balloon decorations is an easy craft project with big cuteness factor!

Easy to Make Hot Air Balloon Decorations | Pretty Handy Girl

Hope you find somewhere to hang these mini hot air balloons because they will bring a smile to your face.

PHGFancySign


cupcake tray carrier collage

Jaime here from That’s My Letter today sharing a DIY cupcake tray carrier.  It’s summer and that means lots of friends getting together for BBQ’s and outdoor parties.  You can’t show up empty-handed to party, so why not take along this cupcake carrier?  It makes the perfect display tray and portable carrier all-in-one, plus a very useful hostess gift too!

I filled this tray with 24 regular size cupcakes, chocolate on chocolate is the favorite around these parts.

cupcake carrier 2

The tray is a fairly simple build, the trick is to create space between the top board (with all the cupcake holes) and the base so the cupcakes have a spot to sit down into.

cupcake tray carrier detail

Keep reading and I’ll show you how to make these holes as smooth as possible without tearing up the plywood.

cupcake carrier 1

Materials:                                                    

  • 1- 1x2x8 pine board
  • ¼” plywood handy panel
  • ¾” circular wood dowel
  • ¾” square dowel (6′ total)
  • wood glue
  • pencil
  • measuring tape
  • 1 ¼” & 3/4″ finish nails
  • 2 1/8” hole saw
  • ¾” spade bit
  • circular saw, chop saw
  • finish nailer

cupcake tray carrier


Cut List:

  • 2 – 1×2 @ 17 3/4” (long sides)
  • 2 – 1×2 @ 14” (short sides)
  • 2 – 1×2 @ 8 ½” (handle supports)
  • 2 – ¾” square dowel @ 17 3/4” (long spacers)
  • 2 – ¾” square dowel @ 12 1/2” (short spacers)
  • 2 – ¼” ply @ 17 ¾” x 12 1/2” (top & base)
  • 1 – ¾” round dowel @ 17 ¼” (handle)

cupcake tray carrier step one

Step 1: Sketch grid as shown above onto one piece of ¼” plywood. The orange portion indicates where to drill 2 1/8” holes using a hole saw.

cupcake carrier draw grid

Step 2: Drill holes using 2 1/8” hole saw.  To make the holes as smooth as possible without much tear out begin drilling on the grid side about 1/8″ down.

cupcake carrier start hole

cupcake tray carrier step two


Flip the board over and find the center hole.  *Be sure board is hovering over edge of table.  Place hole saw bit into the center hole and finish drilling the hole.

cupcake carrier hole back


cupcake carrier hole complete

The circular plywood piece should pop through to the ground.   Repeat this process for all 24 holes.

cupcake carrier all holes

Sand the edges of the holes smooth.

Step 3: Attach long spacers to long side of top using glue and ¾” finish nails down through top.

cupcake tray carrier step three


Step 4: Attach short spacers to short ends using glue and ¾” finish nails.

cupcake tray carrier step four

Then attach base from underside using glue and ¾” finish nails.

cupcake tray carrier base1Step 5: Attach long sides using glue and 1 ¼” finish nails.

cupcake tray carrier step five

Step 6: Attach short sides using glue and 1 ¼” finish nails.

cupcake tray carrier step six

Step 7: Predrill ¾” holes into handle supports near top end, drill only about ½” deep into 1×2. Attach handle supports to tray using glue and 1 ¼” finish nails.

cupcake tray carrier step seven

Step 8: Insert handle in between supports. Glue and attach using 1 ¼” finish nails through ends.

cupcake tray carrier step eight

Fill all holes with wood putty then sand smooth.  Paint your cupcake tray carrier with semi-gloss or gloss finish for easy clean up of any messy frosting!

cupcake carrier 3

Hope you enjoy this fun small build project.

cupcake carrier title

This cupcake holder makes a great party accessory or gift idea too!

Jaime signature~learn more about Jaime~


Pin for later!


This DIY cupcake carrier makes the perfect display tray and portable carrier all-in-one, plus a very useful hostess gift too! | DIY cupcake carrier | DIY cupcake tray | Pretty Handy Girl #prettyhandygirl #DIY #cupcaketray


wood cake stand

Hello Pretty Handy Readers – Jaime here today from That’s My Letter to share a diy project that combines two of my favorite materials: wood and copper. I’m sharing how to make this wood and copper cake stand.

This is a fairly simple project that could be tailored to fit your style with paint or stain.  I choose to leave the wood natural, only sealing it with clear polyurethane, because I love the contrast of the wood against the chocolate frosting (and most cakes around our house are made with chocolate frosting!).

wood cake stand 2

The warm shiny copper is the star of the show here and can easily be found at any hardware store.

wood cake stand 1


Supplies:

wood cake stand supplies

  • 1×12 pine board scrap @ 10″l
  • 1×8 pine board scrap @ 7 1 /4″l
  • 3/4″ copper piping @ 12″
  • 3/4″ wood dowel @ 12″
  • pipe cutter
  • jigsaw
  • finish nailer & 1 1/4″nails
  • drill & 7/8″ spade bit
  • measuring tape
  • pencil
  • sandpaper
  • clear satin spray polyurethane

Instructions:

Step 1: Use a plate or other 10″ circular object to trace a circle shape onto 1×12 scrap.

wood cake stand step 1

Step 2: Trace both a large circle shape onto the 1×12 and a smaller circle shape onto the 1×8.  Then cut out circles using a jigsaw and sand edges well.  Spray with clear satin polyurethane before assembly.

wood cake stand step 2

Step 3: On the smaller circle draw another even smaller circle (about 4″ in diameter).  Make 3 equidistant holes with 7/8″ spade bit drilling only partially down into wood.

wood cake stand step 3

Step 4: Cut copper using pipe cutter into 4″ lengths.  Cut wood dowel to 4″ lengths and shove inside copper pipe.

wood cake stand step 4

Step 5: Place copper & wood sections into pre-drilled holes in smaller wood circle.  You can use some glue here. I chose to secure with a finish nail from the bottom as well.  Now center the larger wood circle on top and trace the copper pipes with a pencil.  Pre-drill holes into the underside of the top larger wood circle and attach the top (use glue if desired).

wood cake stand step 5

My copper pipes are very snug in the holes but I did use a little glue to be sure the wood doesn’t come off.

wood cake stand step 6

Maybe your next party needs a simple cake stand?  Good luck with all your diy projects.

Jaime signature


~learn more about Jaime~


Pin for later!

This wood and copper cake stand from Pretty Handy Girl is a fairly simple project that can be tailored to fit your style with paint or stain! | DIY cake stand | DIY wood projects #prettyhandygirl #DIYcakestand #DIYwoodproject