It’s Friday!!! But, it’s not just any friday. No, no, no. This friday I’m headed to the beach with some other mom friends. No kids, no husbands, NO BOYS, just us 5 mommas! I can’t wait.

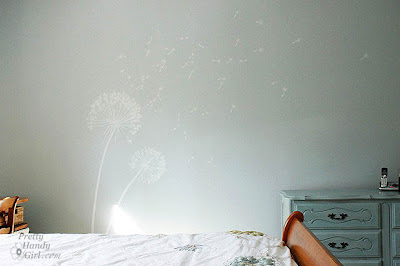
But, I promised to show you the graphic I painted on our bedroom wall. I know, I teased you as long as I could.

Pretty Handsome Boys #1 & #2, can you please pull back the curtains for the final reveal?

Dandelion Seeds

Floating Away

Dandelion Head

The Pair

Gentle breeze picks up…

…blowing in our bedroom suite. Peaceful restful. Ahhhh.

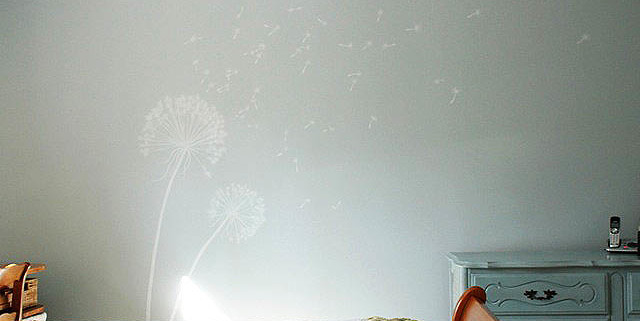
I painted the graphic in a few hours using a mixture of 1/3 of the wall color to 2/3 white ceiling paint. The tutorial is HERE. But, if you are hesitant to paint your own, check out Leen’s graphic dandelions HERE.


Because I tortured you with anticipation, I’ll give you a quick tour of our bedroom (a very quick tour because it is a very small bedroom).


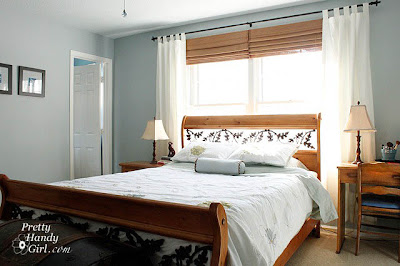
Our pottery barn sleigh bed (gifted to us by my sister) flanked by new curtains and blinds that I showed you how to hang this week.


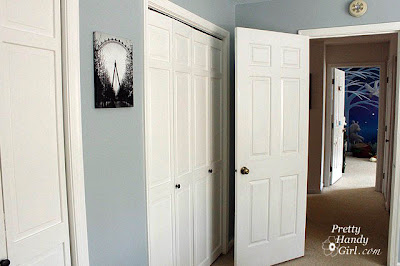
Thank goodness for two closets! Peeking into Pretty Handsome Boy #1’s room.
We painted a woodland mural in there.


A photo I took of the London Eye when Pretty Handsome Guy and I had a romantic getaway. I uploaded the file to CanvasPeople.com and gave it to my love for Christmas.


Sunprints made with my boys. So fun, so easy, so pretty!


And on the opposing wall, is the dandelion mural blowing seeds over the Craig’s List Dresser I refinished.
Ultimately, I want to add a wall quote over the dresser. But, Pretty Handsome Guy and I are still not agreeing on compiling quotes.

Visit thecsiproject.com

 Wash…Rinse…Dry…Repeat…Wash…Rinse…Dry…Repeat…

This is the story of my life. We are a family of four and yet, I wash three loads of laundry two times a week. That is six loads per week! Or broken down, it is 1.5 loads per person per week. Is this a lot for a family of four? Maybe I’m too clean? Regardless, with all the time I spend in the laundry room, I wanted it to be attractive.

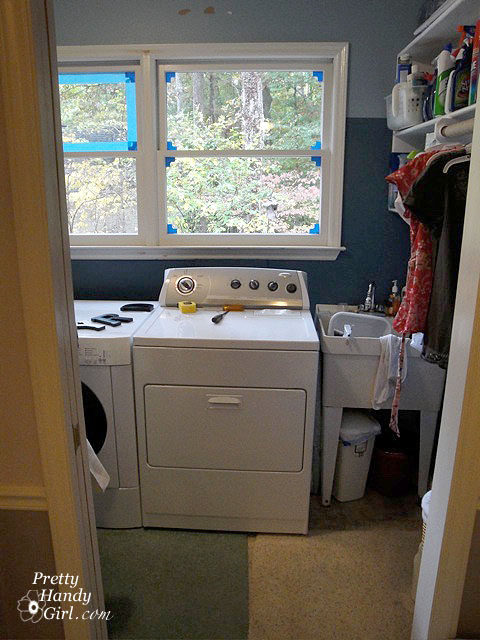
Our My laundry room looked like this right before we bought the house:

 
If you look up “blah” in the dictionary, you’ll see that picture.

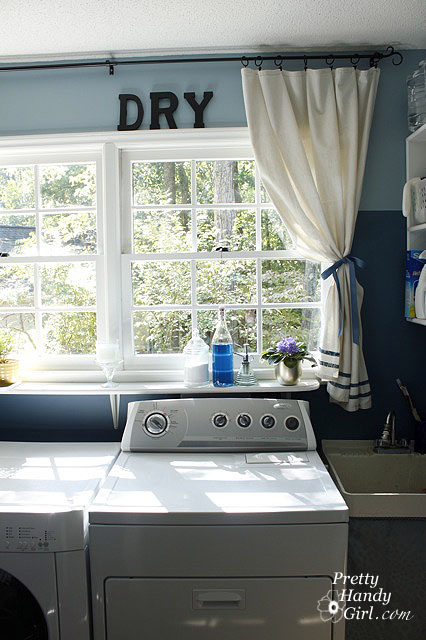
So, I set to work and painted dark blue on the bottom 2/3 of the room and the same color with some white mixed in to the top 1/3 of the room. I also painted the windows and trim a glossy white. It is amazing how much easier it is to dust a newly painted surface (a definite must in a lint-filled laundry room.)

Next, I bought several sections of peg racks and painted them the same color as the trim. I screwed them into studs, or

if there wasn’t a stud to screw into I used Toggler anchors:

Then I set forth to cloak the biggest eye-sore in the room, the utility sink. All I did was cut a curtain down to size and used double-stick velcro. Then I hot glued some roped cording to the top. Abra-ca-dabra, it was sufficiently hidden.

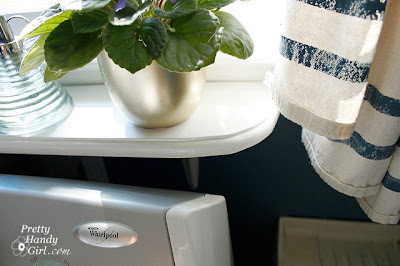
Next I cut a piece of 1″ x 6″ pine to the length of my two windows. I rounded the corners with my jig saw and then used a router to give the edge a decorative finish.

After painting the shelf to match the windows, I mounted it to the wall with metal shelf brackets.

This gave me a sunny spot to rest my plants…

…and laundry supplies (Oxy clean powder, liquid laundry detergent and water spritzer for ironing wrinkles).

I also hung some drop cloth curtains that I painted stripes on (tutorial to come);

added a few letters above the windows;

and now I have a laundry room that I want to spend time in!

This makeover was very low budget. I had the paint leftover from our master bathroom. And the sink cover was one panel on clearance at Target for $3. The letters were $1.50 each and the drop cloths were $5 each. The curtain rod was stolen from another room in our house. And the shelf was from my wood pile. So, all-in-all, I spent about $25.

Some day I’d love to install cabinets with doors on them to hide all the supplies. But, until that day, I’m happy with the transformation.

So, am I the only one doing loads and loads and loads of laundry?

Up on the rooftop click click click, down through the chimney with Good St. Nick!
AngledFireplace.jpg
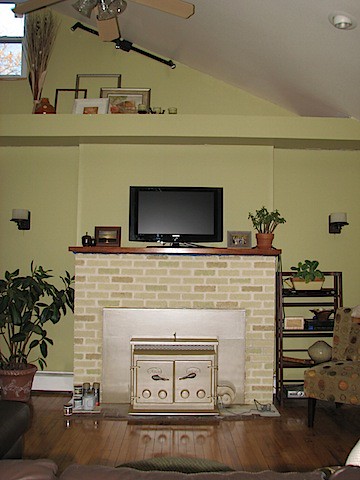
I think about this song when I gaze at my beautifully painted fireplace. That’s right, I said painted! Those bricks you see – well – they are bricks, but that isn’t their real color. It is faux painted!

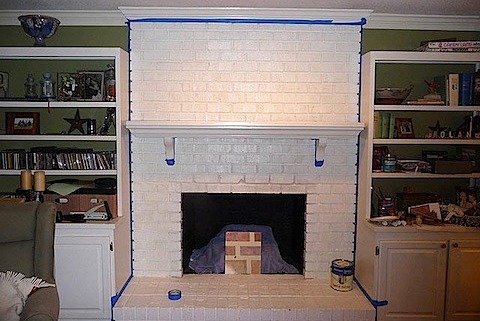
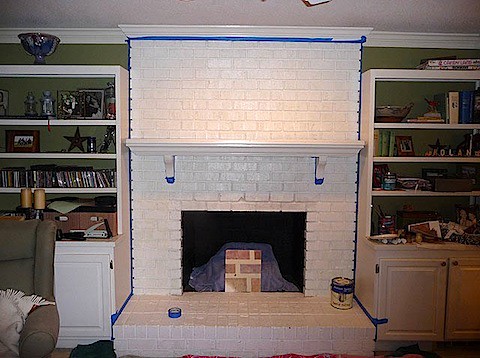
Last year this is what my fireplace looked like:
BeforeBrick.jpg

If you want to see how I did it, hop on over to Remodelaholic on Friday for the tutorial.

In the meantime, I want to share with you some other fabulously faux painted fireplaces. These three readers each contacted me after reading my post on faux painting brick and sent me photos of their fireplaces!

I think you will agree that they all did a fabulous job. Way to go gals!

“I came across your website looking for ideas on what to do with my painted white fireplace. After a year of living in the house, I couldn’t take it anymore. The layers of paint were too thick to strip and refinishing would have cost too much right now. So I gave your helpful hints a try. I am amazed how great it turned out. Next, get rid of the awful tiles and put in wood flooring. Thank you so much for posting your refinished fireplace and how-to.”
 
Thank you.
Pam Blackburn
Levittown, PA

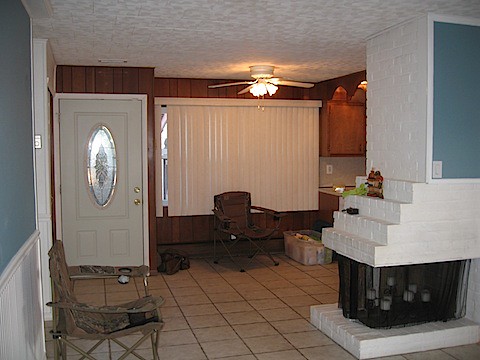
Pam’s Fireplace Before:
IMG_1548.JPG

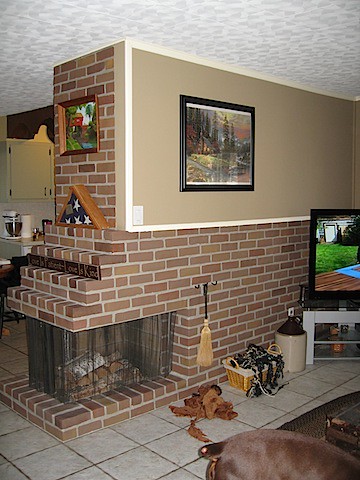
Pam’s Fireplace After:
IMG_2335.JPG

“Thought you’d be interested in seeing how your idea worked for me. Attached are before and after pictures. Thanks for your help – my fireplace looks awesome now – just have to buy a mantel.”
 
Louise Russell

Louise’s Fireplace Before:
127.JPG

Louise’s Fireplace After:
IMG00006-20101127-1535.jpg

And finally, Megan took her fireplace in a different direction. She had an ugly red brick fireplace and turned it into a light taupe beauty.

“I found your great blog on the internet a few weeks ago and just wanted to thank you for giving my husband and I the courage to paint the fireplace in our new house! You really gave us the confidence we needed to try and brighten up our fireplace on our own! Thank you so much!! We had been quoted $1200 to have the bricks refinished, and I ended up spending about $30 with your method! The attached “after” shot was taken before I was completely finished, but it’ll still give you an understanding of where everything was headed and how much of an impact your tutorial made on us! Thank you!!”

Megan Cahill

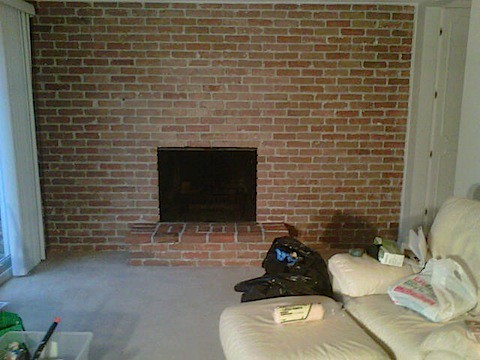
Megan’s Fireplace Before:
Living Room Before.jpg

Megan’s Fireplace After:
Living Room After.jpg

So what do you think? Are those amazing transformations or what? I think all three are definitely Santa-worthy now.

I can’t believe I’m about to show you my dirty little secret. But, I feel bad for my friend Sandra from Sawdust and Paper Scraps. She has some work to be finished in her master bathroom. So, I hope she’ll feel better after I share my awfully tiny and incredibly outdated bathroom.

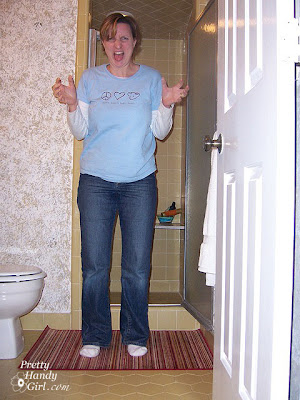
I’m warning you now, what you are about to see is disturbing. If you have children, please escort them from the room.

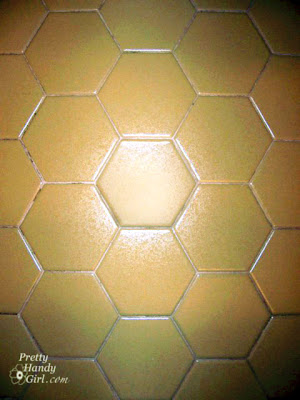
Exhibit A. Harvest Gold Tile
 Exhibit B. Jackson Pollock sponge paint and stamping
Exhibit C: Ugly Wall Cabinet on the Wall
Exhibit D. Outdated Oak Cabinet and Light Fixture
Exhibit E. Coffin-like shower.
 I know, SCARY, right?!

Pretty Handsome Guy and I knew that one day we would be gutting this bathroom. Therefore, we decided not to do anything to the bathroom knowing that it was going to be euthanized renovated at some point.

Well, after about a year, I couldn’t stand it anymore. As a surprise for Pretty Handsome Guy, I gave our teeny 1970’s bathroom a minor face lift while he was away on business. I spent about $100 to give us a calmer start to our morning.

First I took down that ugly wall cabinet. Then patched all the holes in the wall. I sanded the walls to remove some of the bumps from all the random paint. I painted all the trim a glossy white. And the walls got a fresh coat of Ralph Lauren Durango Blue. I chose a deep color to draw attention away from the harvest gold tiles.

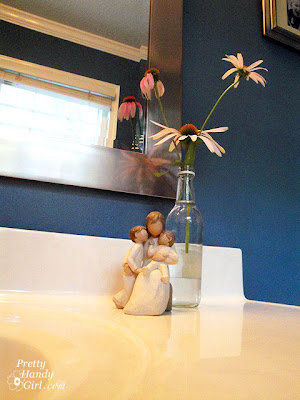
Then I hung some pictures…
…and a new mirror (bought on clearance at Target).

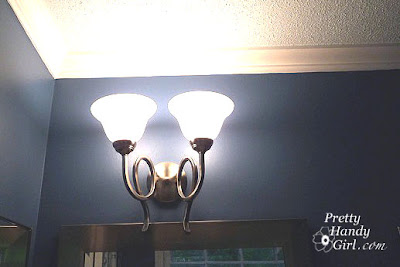
I ditched the Hollywood strip lights and replaced them with this very affordable Craig’s List find.

I really did not want to spend a lot of time on the vanity (stripping and sanding), so I roughed it up a little and put some Brazillian Rosewood gel stain on it. And left it for 24 hours to dry. Yup, that’s right, I didn’t wipe off the stain.

You know what else I didn’t do? I didn’t put a protective coating of polyurethane either!
I also didn’t bother staining the inside of the cabinet. This is so opposite to my DIY code of conduct! I’m usually a perfectionist and I do it right the first time or I don’t do it at all. But, as I said, this bathroom is slated for demolition one day, so why put a lot of time or money into it.
Finally I installed some new towel bars and put new knobs on the cabinet.
Okay, sure the ugly tile is still there. And the shower still looks like this.

But, we now have a bathroom that we can enter without the risk of leaving with a migraine.

I am able to live with the bathroom as it is, until the happy day when I can knock down some walls, haul out some outdated tile and build my dream master bathroom.

Here are my plans for this dream:

Existing Floor Plan: Luckily an old washer and dryer closet backs up to the other side of this bathroom. This will give us another 3′ of space along one wall!

Renovation Floor Plan:

And this is what I envision our bathroom will look like one day!

Thanks to Lori Gilder of Interior Makeovers, Inc., who somehow has a window into my mind to see what I want our master bathroom to took like. She posted these photos from her portfolio on Houzz.com. She’s a fabulous interior designer who lives in Beverly Hills. Check out her blog and portfolio.

Sooooo, do you have a room or a space that is hideous? But, you don’t have the time, money, or effort to give it a full renovation? Why not make a few frugal changes so you can live with it until you can DESTROY IT (and then rebuild it of course.) It is amazing what some paint, new towels, pillows and/or a few fixtures can do.
Hey guys, I’m a blog hoppin’ today. Michelle from Dream Home DIY and I are trading places.
Without further ado, take it away Michelle! 

Hello fellow Pretty Handy Girl followers!
I’m Michelle dropping by from over at Dream Home DIY where my sweet, southern beau and I chronicle life’s unexpected (but all together charming) surprises as first time homeowners.

Between leaky master bathrooms on move in day…

…a complete remodel of our living room floor plan just weeks later
(to include a still-in-progress archway)…
…and a front porch revamp with no shortage of new paint and stain…
It is safe to say that we hit the ground at a dead sprint!
“Date night” now consists of us, plus that nice gentleman behind the paint counter at Lowes, hashing out the pros and cons of semi-gloss vs. flat or the perfect shade of teal. And a romantic evening at home involves snuggling up on the couch, dreaming of all the ways we’ll transform this quaint starter home into our Forever Home…the place our future children will take their first steps and where a lifetime of memories will be made.
Together, two novice DIYers fumble, laugh, struggle, and triumph as we take this stark builder basic house and fill her with love…oh, and lots of paint, new fixtures, revamped floors, remodels, craft projects, furniture makeovers and more. And on a budget that might make a poor church mouse cry.
On the horizon?
A fabulous kitchen remodel, master bedroom and bath reconfiguration, new decks, landscaping, painting, furniture construction and re-facing, future additions, garages and so much more!!
One project that holds a very special place in my heart, is the makeover a very special mirror, gifted by my dear mother almost 10 years ago. Each year, around my birthday, my mother would pull out the largest JC Penny catalog I had ever laid my eyes upon and thumb through the pages stopping in the home décor section. Flipping the book so that I was now in control, she would simply ask, “What would you like your room to look like this year dear?” 
Through the years my tastes evolved from pretty princess to bold neon polka dots, but on my 15th birthday I was ready for a “grown up room” and my sweet mother gifted me this mirror.

When we purchased our new home, I wanted that mirror to hold a place of honor and the newly painted hallway seemed up for the task. But it no longer fit into my décor sense. Nothing a bit of spray paint can’t fix, right?
With a coat of paint and bit of glaze, this special mirror was ready to hang.


Incorporating personal treasures is an amazing and important way to make an empty house your memory filled home. We instantly feel cozy and are constantly reminded of those that we hold dear to our heart.