9 holiday storage hacks social media image

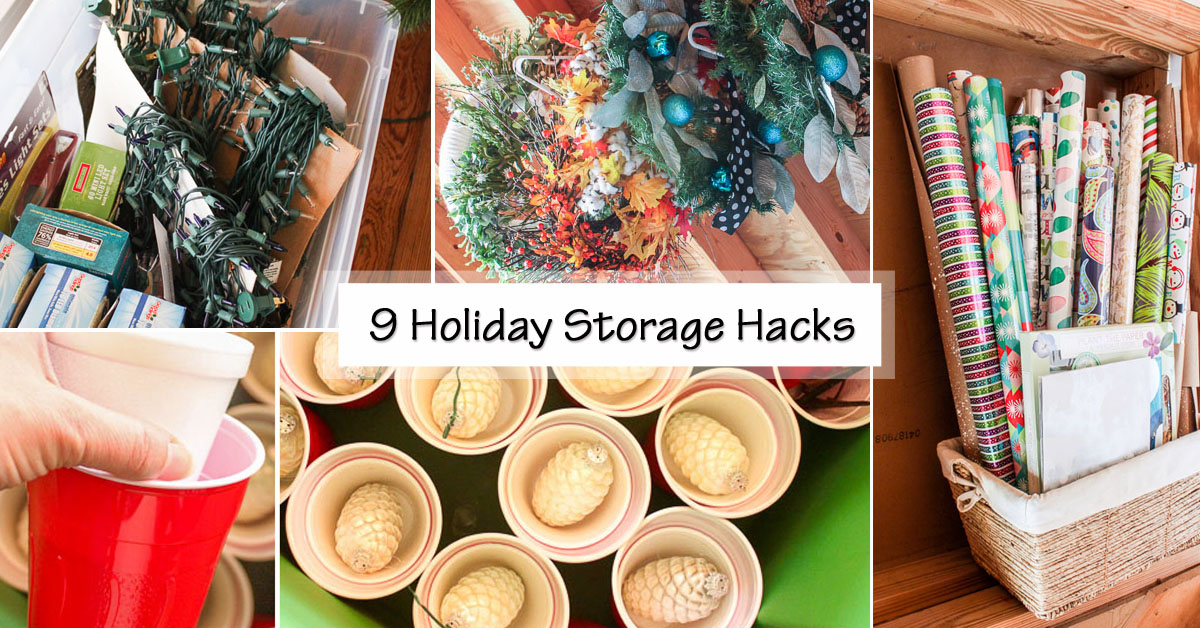
9 Holiday Storage Hacks

Now that Christmas is over, you’re probably in one of these two camps.

  • Camp #1: Christmas is over, time to pack everything away pronto.
  • Camp #2: Christmas is over, but I want to enjoy the decorations for a while longer. I’ll put them away in the new year.

Regardless of which camp you belong to, I have several Holiday Storage Hacks to help you store the holiday items for next year!

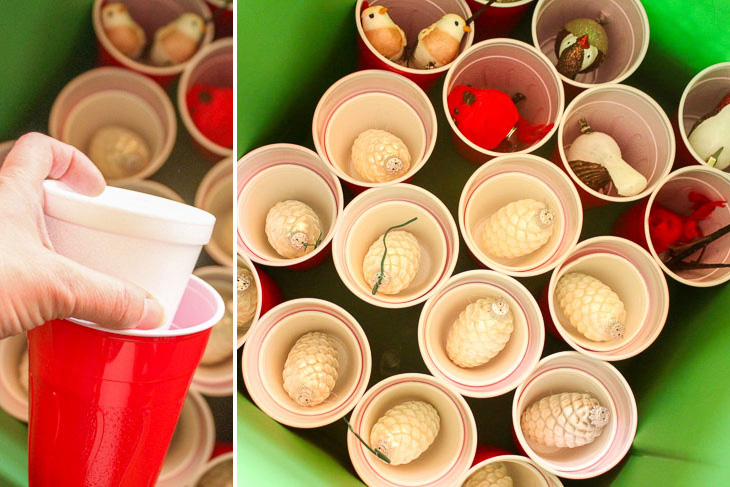
Plastic and Foam Cups:

There will always be ornaments to pack away after the holidays. Protect them from getting crushed or breaking by storing them inside individual disposable cups. For fragile ornaments, insert a foam cup inside the larger plastic cup before placing the breakable ornament inside. This gives a nice cushion around the ornament and creates a nice even layer in the bottom of your storage bin, which is helpful for the next hack.
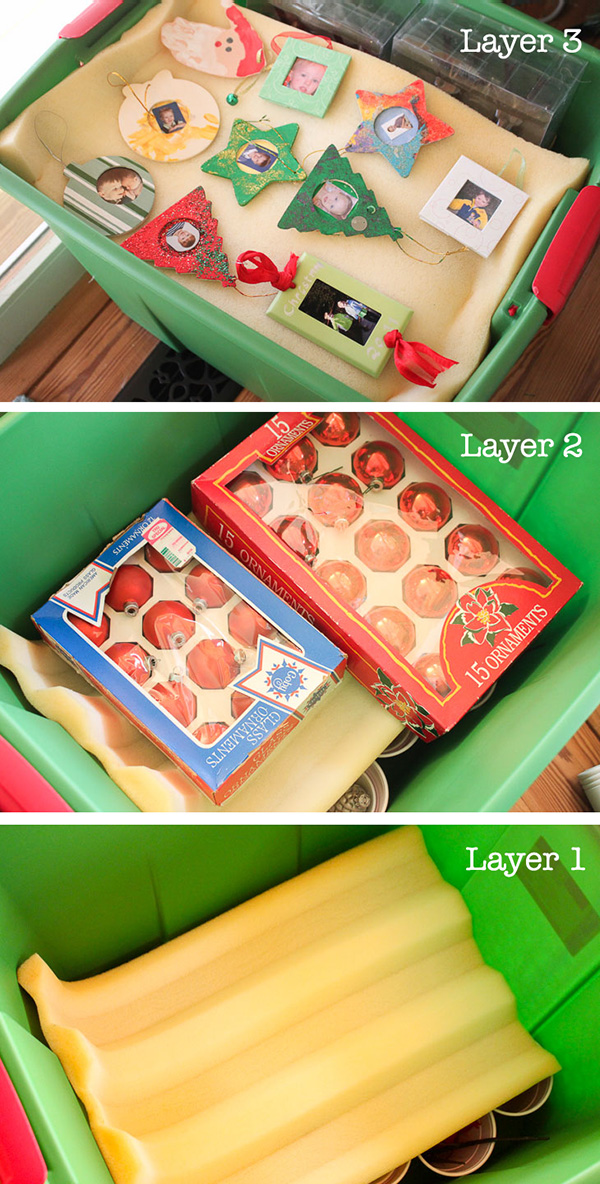
Storage Hacks for Holiday Decorations | Pretty Handy Girl

Lasagna Method:

Don’t just throw your ornaments in the bin. Start at the bottom of your bin and place a layer of ornaments stored in cups. (Easy to do if you use the first hack above!) Place a piece of foam over the cups and continue with a second layer of ornaments. Again, add another piece of foam, then place ornaments that lay flat or are very thin on top of that last layer of foam. They will be protected and ready to go for decorating next year.

Storage Hacks for Holiday Decorations | Pretty Handy Girl

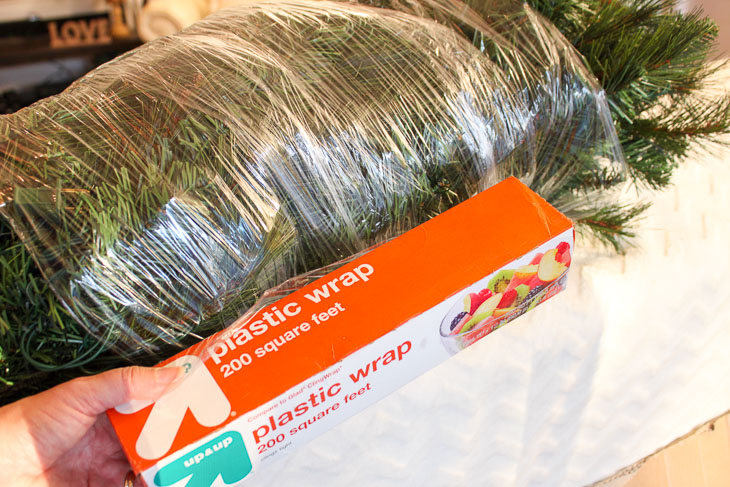
Saran Wrap the Tree:

Artificial trees can be cumbersome and messy when store them away. To neatly pack your artificial trees use a roll of plastic wrap to secure the branches together, making it easier to carry and store. Bonus, you might actually be able to get that tree back in the box you bought it in!

Storage Hacks for Holiday Decorations | Pretty Handy Girl

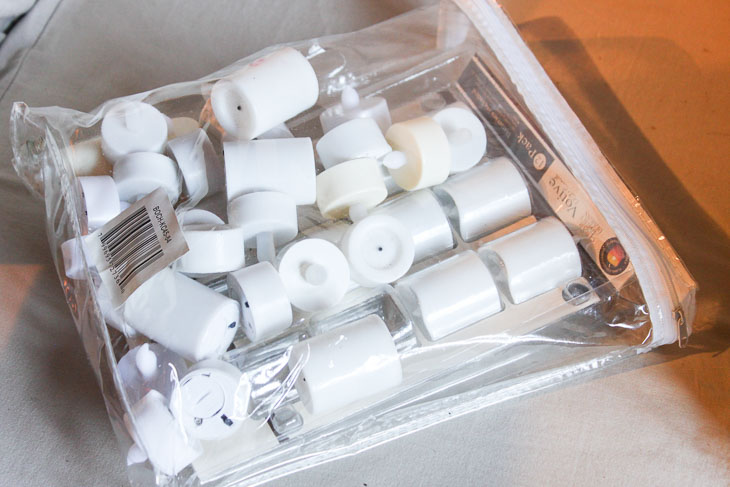
Linen Zipper Pouches:

If you have a collection of small tea lights and candles, use an old linen zippered pouch from your last blanket purchase. These are perfect for storing your tea lights, batteries, and other similar items until next year. The clear bag also lets you see exactly what’s inside.

Storage Hacks for Holiday Decorations | Pretty Handy Girl

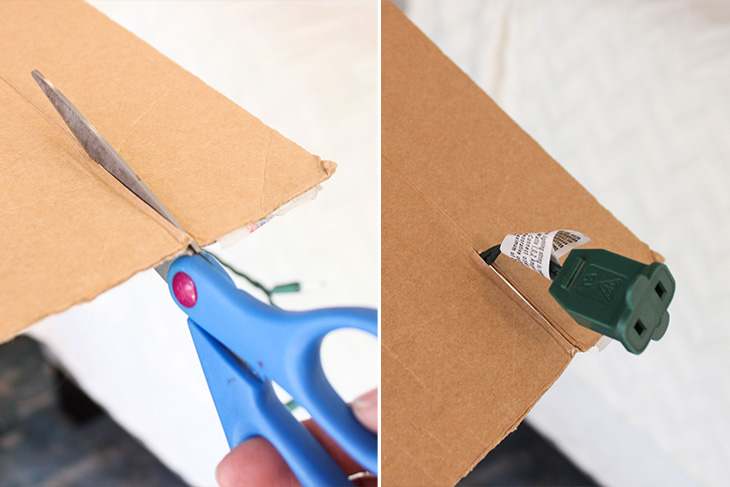
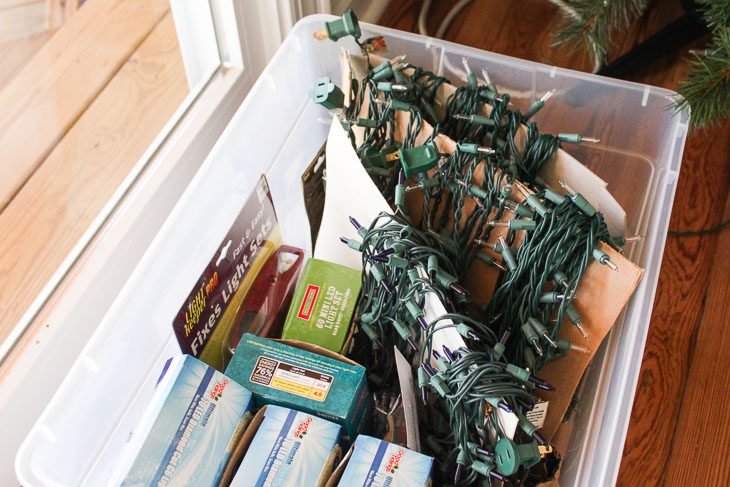
Cardboard Light Holder:

Do your lights get tangled up by the following year? This year put an end to the frustration by cutting out a large rectangular section of cardboard (shipping boxes or cereal boxes work great.) Make a small slit on one end to hold the end plug of your light strand. Wrap the lights around the cardboard to keep them secure and organized and ready to put up next year. This hack also allows you to store the strands upright to save on space. It may take a bit of extra time now, but will save you time (and curse words) next year!

Storage Hacks for Holiday Decorations | Pretty Handy Girl

Store Like Items Together:

I don’t know about you, but in the past my bins were filled with random holiday items. I struggled to find a particular item. To solve this issue, put similar items into one bin. Next year you’ll know exactly where all of the lights are in an instant. Label the outside of each bin to help speed through the decorating process.
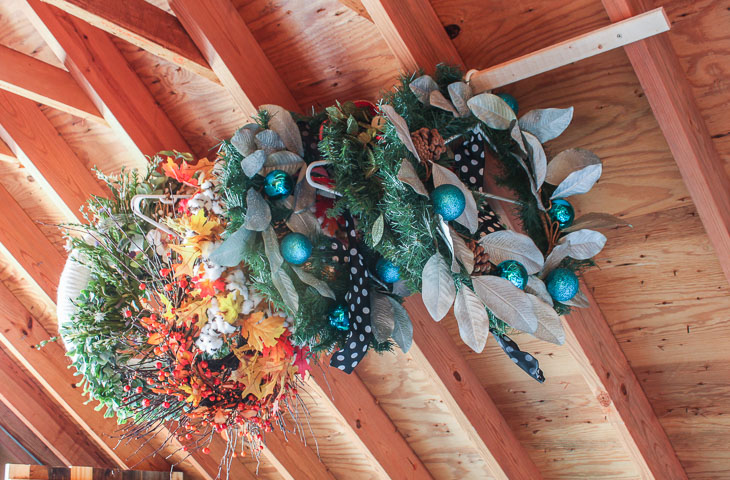
Storage Hacks for Holiday Decorations | Pretty Handy Girl

Hang Wreaths:

Wreaths are large and take up a lot of bin space. To store your wreaths, put them on hangers in an extra closet. If you don’t have closet space, nail a horizontal board to the rafters in your attic or garage and hang them there.
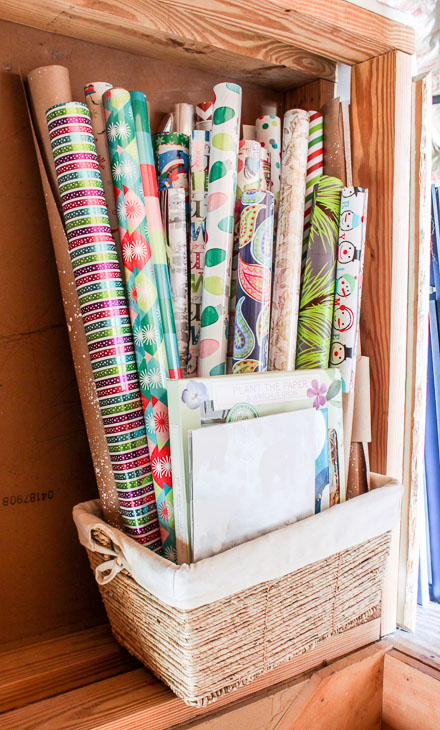
Storage Hacks for Holiday Decorations | Pretty Handy Girl

Gift Wrap Storage:

Gift wrap rolls are long and can be difficult to store. Use a bin or basket in the corner and store your gift wrap upright. This prevents the rolls from getting crushed and they are easy to grab next time you need to wrap a present. Feel free to store birthday and other holiday wraps as well.

Storage Hacks for Holiday Decorations | Pretty Handy Girl

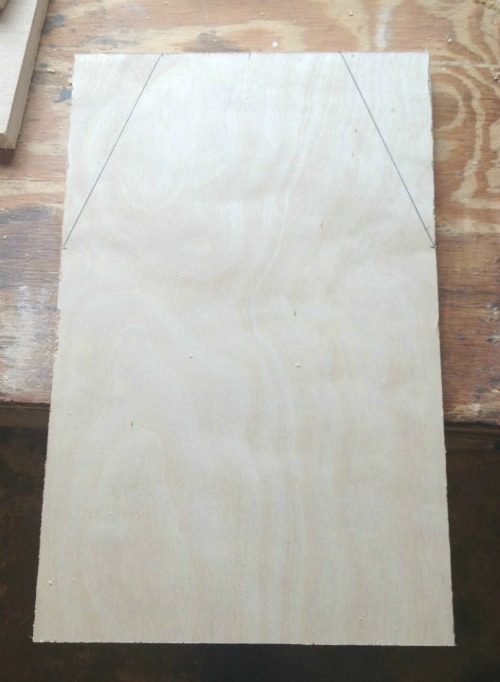
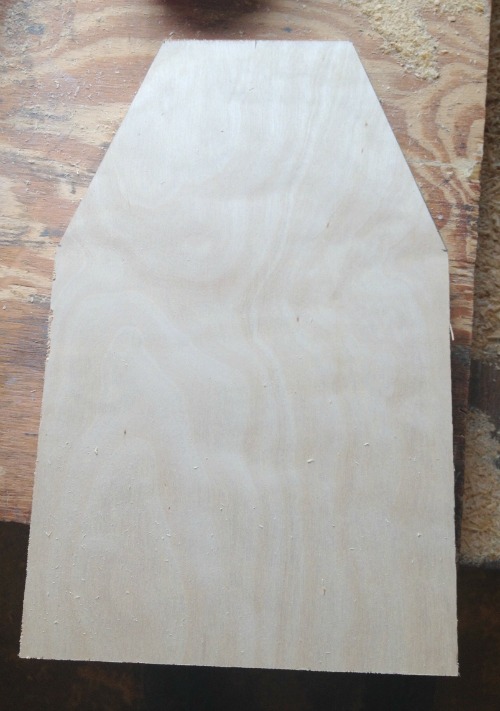
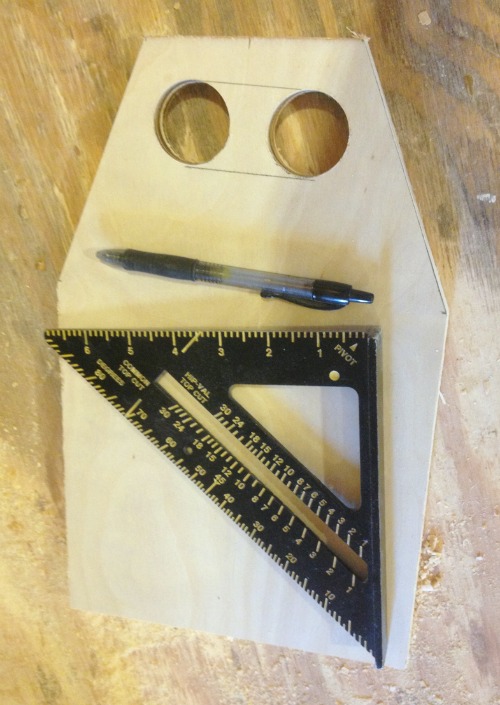
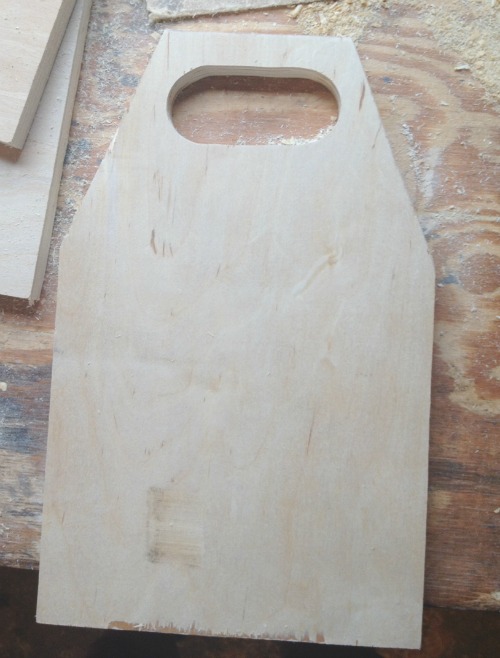
Or, create this under the bed gift wrap station like Her Toolbelt made:

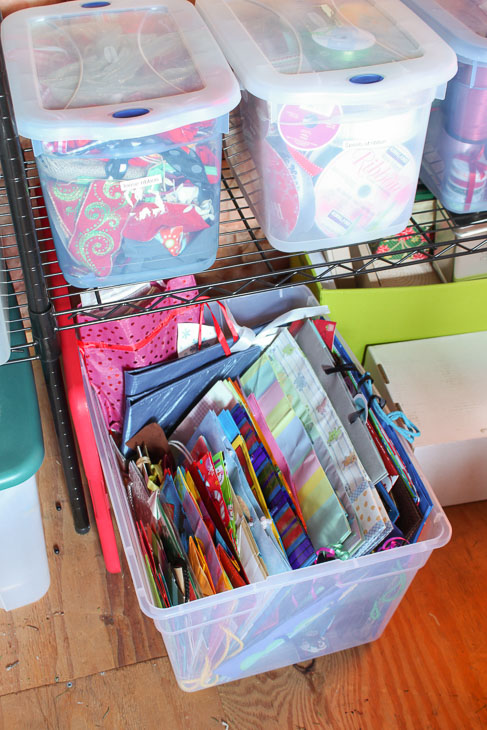
Bins for Gift Bags, Ribbons, & Tissue Paper:

Fold your gift bags neatly and place them inside clear storage bins. Organize by size or celebration and you’ll have a great place to go whenever you need to quickly wrap a gift. Use another bin for ribbon spools and yet another for scrap ribbons (never let those scraps go to waste.) The clear bins make it easy to grab the correct bin, no matter how last minute you’re putting the gift together.

Storage Hacks for Holiday Decorations | Pretty Handy Girl

There you have it! Holiday clean up doesn’t have to be stressful, just keep it organized and use these hacks to make your holiday decor last for years to come. Do you have any storage hacks for holiday decorations that you would add to this list? Please share them in the comments!

This cordless drill storage, together with the circular saw stand, make it easy to find the tools I need.

Keep all your drills and batteries in one place with this easy to make cordless drill storage box!Cordless Drill Storage Center

Keep your tools contained and extra batteries close at hand with this cordless drill storage center! It provides space for three drills, batteries and a charging station, so you can keep everything powered up and ready to go.

Hi there, Pretty Handy Girl readers! I’m Vineta from The Handyman’s Daughter, back with another tutorial for you! I have a series on my blog called Workshop Wednesday, where I share ways to make your workshop more organized and efficient. This month I’m bringing Workshop Wednesday over to Pretty Handy Girl with this Cordless Drill Storage Center!

I’ve found the best way to keep track of tools is to give each their own home. So far, I’ve built a circular saw stand and a sandpaper and sander storage unit, both of which have done wonders for my workshop’s organization.

Get the plans to build this sander and sandpaper storage unit at The Handyman's Daughter!

Now it’s time to give my cordless drills and batteries a home of their own!

Materials:

(I’ve included affiliate links for your convenience. I earn a small percentage from a purchase using these links. There is no additional cost to you. You can read more about affiliate links here.)

Cut list:

To save money, I used a melamine shelf left over from a previous project. It wasn’t pretty, but workshop storage doesn’t need to be! The shelf was 9 ¼” wide, making it the perfect size for my drills. Feel free to substitute your own 3/4″ material.

  • 1 – 9 ¼” x 17 ¾”
  • 1 – 9 ¼” x 16 ¼”
  • 2 – 9 ¼” x 12″
  • 2 – 9 ¼” x 8″
  • Cut a piece of 1/4″ plywood to 17 ¾” x 12 ¾” for the back.

Instructions:

Before starting this project, I drew a quick sketch on the whiteboard wall in my workshop. This is handy to have as reference during the building process! The back of the box is taller than the front in my original plan, but that detail isn’t necessary.

I drew a quick sketch of the cordless drill storage unit on the whiteboard wall of my workshop.

Drill pocket holes along one 9 ¼” side of the 8″ and 12″ pieces.

Drill pocket holes in each 8" and 12" piece for your cordless drill storage unit.

Attach the two 12″ pieces to the ends of the 17 ¾” piece with pocket hole screws. The two 8″ pieces should be spaced about 5″ apart in between the two 12″ pieces.

Attach the vertical pieces of the cordless drill storage box with pocket hole screws.

Drill three pocket holes into each end of the 16 ¼” piece. Set this piece on top of the 8″ center pieces with the holes facing up and attach it to the sides with pocket hole screws.

Attach the top of your cordless drill storage box.

At this point, your cordless drill storage box should look like this…

Your cordless drill storage box should look like this once the top is attached.

Add the 1/4″ plywood back with 1 ½” brad nails. (I used leftover whiteboard on mine.)

Attach the back to your cordless drill storage box with 1 1/2" brad nails.

To accommodate my two battery chargers, I attached an extension cord with two outlets to the back of the box.

Attach an extension cord with extra outlets to the back of the cordless drill storage box for battery chargers.

Now the Cordless Drill Storage Center is ready to be loaded up! Two drills and an impact driver each have their own slot.

Load up your cordless drill storage box!

The top holds two battery chargers and at least two extra batteries. Plenty of power for my next project!

The top of the cordless drill storage box fits two chargers and two extra batteries.

Now I can easily grab the tool I need and get to work!

This cordless drill storage box makes it easy to grab your tools and get to work!

The Cordless Drill Storage Center fits perfectly next to my circular saw stand. Much better than a jumble of tools on the shelf!

This cordless drill storage, together with the circular saw stand, make it easy to find the tools I need.

Don’t forget to check out my other Workshop Wednesday posts over at The Handyman’s Daughter!

Until next time!

 ~ view more of Vineta’s projects ~

How to build an easy scrap wood multiuse caddy

How to build an easy scrap wood multiuse caddy

Hey everyone!! It’s Shara here again from Woodshop Diaries to bring you a simple, versatile, and really fun project. It’s a scrap wood caddy!

I hesitate to put a label on what type of caddy it could be because you can carry whatever you want inside. Cleaning supplies, tools, craft knick knacks, gardening accessories — the possibilities are endless!

The size is easy to customize and you only need a few tools and some scrap plywood. If you don’t have any scraps, pick up a quarter sheet of 3/4” or 1/2” plywood at the lumber yard or big box store to make this.

If you’re ready to get building, here’s the plan:

Materials:

(I’ve included affiliate links for your convenience. I earn a small percentage from a purchase using these links. There is no additional cost to you. You can read more about affiliate links here.)

Cut List:

(Keep in mind: you can customize for different size scraps or for a larger or smaller caddy)

  • (2) pieces 3/4” x 8” x 19” (front and back)
  • (1) piece 3/4” x 8” x 17 ½” (bottom)
  • (2) pieces 3/4” x 8” x 8” (sides)
  • (1) piece 3/4” x 8” x 12” (middle divider w/ handle cutout)
  • (2) pieces 3/4” x 8” x 6 ½” (middle dividers)

Instructions:

Step 1: Cut out middle divider with handle

Cut your scraps to 8” wide to make the build easier. (If you don’t like 8”, you could make it another size, but the cut list will change slightly.)

Scrap wood DIY Cleaning Caddy

Take a piece of 8” wide x 12” tall and mark the center. Measure and mark 2” to each side of the center and 5” down. Draw diagonal lines to connect the marks as shown:

How to make a multiuse caddy

Use a miter saw to cut the diagonal corners off.

How to make a multiuse caddy

Draw a handle hole. To make this an easy task, drill two holes first (using a drill bit or hole saw) to get the blade in.

How to make a multiuse caddy

Then cut along your line.

How to make a multiuse caddy

Sand your edges smooth.

Step 2: Cut out the front and back sides

Cut two pieces of your plywood to 8” x 19”. Find the center of one of the pieces lengthwise. Flip the middle divider from step 1 upside down and center it on the 8″ x 19″ plywood. The top of the divider should line up 3” from the bottom of the plywood. Trace the diagonal cut out onto the plywood and cut out using a jig saw. Trace the same shape onto the second 8″ x 19″ plywood piece and cut out to match.

How to make a multiuse caddy

Step 3: Assemble the bottom

Cut the bottom piece* (8” x 17 ½”) and 2 side pieces (8” x 8”).

*If you are using 1/2” scrap plywood instead, be sure to add an extra 1/2” to the length of your bottom piece.

Glue and nail the pieces together as shown below. You can use hammer and nails, but a nail gun would be ideal to save time and prevent pieces from moving while you assemble.

How to make a multiuse caddy

Step 4: Attach sides

Glue and nail the front and back pieces from step 2 to the sides and bottom from step 3.

How to make a multiuse caddy

Step 5: Assemble the middle dividers

Cut the 2 middle dividers from the cut list (8” x 12”). Measure and mark the vertical centers of the divider pieces. Make sure that the piece with the handle is centered on the middle dividers. This will make your inside “compartments” the same size.

How to make a multiuse caddy

Glue and nail these pieces to the handle cut out piece from step 1.

How to make a multiuse caddy

Step 6: Add dividers

Slide the dividers into the box you made in step 4 and make sure to center it. Nail the dividers in place through the front and back of the caddy. You can add a couple nails in the bottom as well, just be careful that you don’t miss and have stray nails coming up through the bottom of your caddy.

How to make a multiuse caddy

Give your caddy a good sanding and it’s good to go. You can add paint or stain, but I left mine natural.

How to build an easy scrap wood multiuse caddy

This caddy could be used for cleaning supplies. . .

How to build an easy scrap wood multiuse caddy

. . . craft supplies. . .

How to build an easy scrap wood multiuse caddy

. . . tools or any small things you want to organize.

How to build an easy scrap wood multiuse caddy

Don’t you love a good scrap wood project? Me too! For more fun scrap wood projects, check out this DIY personalized lazy Susan made from 2x scrap boards, or this floating mirror shelf made from a scrap 2×4.

You may also like these simple scrap wood caddies:

Rustic Branch Handled Caddy

Mini Picket Fence Caddy

Until next time, happy building!

Shara's Signature

~ Read more of Shara’s tutorials ~

Make Your Own Chalkboard Front Drawers | Organized Pantry | Pretty Handy Girl

How to Use Vintage Rulers for Narrow Pantry Shelf Stops | Pretty Handy Girl

While configuring the new pantry, I knew I wanted to use up any and all available space to maximize storage. A shallow shelf took advantage of the 3 inches behind the door frame in the closet side of the pantry. To prevent items from tumbling off  these shelves, you can use thin slats of wood. But, I utilized Vintage Ruler Stops on the Narrow Pantry Shelves. Not only do the rulers prevent items from being bumped or knocked off, but they provide a rainbow of color.

If you remember, this was the pantry before:

And these are the plans I made to transform the pantry into something beautiful with more storage.

Installing Vintage Ruler Stops on Narrow Shelves:

(I’ve included affiliate links for your convenience. I earn a small percentage from a purchase using these links. There is no additional cost to you. You can read more about affiliate links here.)

Optional: Painter’s tape

Instructions:

Cut vintage rulers (or other thin wood material) to the width of the shelf cabinet box. Squeeze a line of Iron Grip Silicone Adhesive along the bottom edge of the shelf and about an inch up on either side.

Press the ruler into the glue and line it up with the bottom edge of the shelf.

Use painter’s tape or a few brad nails to support the ruler while the adhesive cures. Once the GE Iron Grip Adhesive cures it will hold the ruler firmly. Without the adhesive, brad nails will eventually work their way through the wood or fall out.

Repeat for the remaining shelves.

Make Your Own Chalkboard Front Drawers | Organized Pantry | Pretty Handy Girl

Your shelves are ready to load up with jars and cans!

Make Your Own Chalkboard Front Drawers | Organized Pantry | Pretty Handy Girl

I love the side storage that was reclaimed in the closet. That was definitely one of my biggest pet peeves about the old pantry — wasted space.

It’s amazing how many jars and cans I can fit on the side.


Make Your Own Chalkboard Front Drawers | Organized Pantry | Pretty Handy Girl

Do you have a pantry or closet that can use narrow shelves for additional storage? I bet you do ;-).

I’m really anxious to show you a sneak peek of the pantry renovation project. I’m not 100% done, but the finish line is close. This is a good spot to give you a pantry progress update and show you the process of turning a bi-fold door pantry into something with more functional storage, not to mention coolness factor.

This is where the project began:

That was our 6′ wide and 3′ deep pantry back in 2012 shortly after a small water leak left us with a gutted kitchen. After the restoration crew installed the new subfloor (because of the asbestos abatement), I took the ugly bi-fold doors off and fully intending to include the pantry in my complete DIY kitchen renovation. By the time I finished the kitchen renovation, I was exhausted and longing for a break. Four years later, this is where the pantry progressed until a few months ago.

Big difference right? Just kidding. I installed flooring and a new light fixture, but that’s it. I had dreams of making an open pantry and showed this sketch to my friend Sandra from SawdustGirl.com back in 2013.

Open Pantry Concept Sketch

She and I talked through some ideas and then I sat on the project for a couple of years. By this time I had revised my idea on the pantry and drew up a new sketch:

(Please don’t show that to my illustration professors. That’s one rough sketch there.)

The idea was to partition off the right hand side of the pantry and create a small closet with a door. To get the most storage possible, I moved over to SketchUp to draw out plans for the small closet.

Next it was time to cut the shelves out and get this project rolling.

Our dining room took over pantry duties as I began the framing process in the gutted pantry.

I’m sure you’re going to ask me why I didn’t remove the framing over the doorway. I decided to leave it in place because the door frame is made up of a large double header and the kids’ bathtub is directly over the header. Basically I didn’t want to risk the tub falling through the ceiling.

New wiring was run for two outlets on the left side and I moved an outlet down toward the floor on the right side.

You may remember when I showed you how to Add Energy Efficient LED light fixtures in recessed can lights. Those lights were the ones I installed on each side of the partition.

I tried to hire my favorite electrician to install a door frame switch for the light, but he explained how to do it and left without taking my money. (I owe him big time.)

In the end, I’m grateful for his advice and for pushing me out of my comfort zone. It wasn’t as hard as I expected.

Next up on the to do list was to build the cabinetry for the closet.

I constructed two boxes. One deep box for the back and a shallow box for the side shelves. I’m not going to show you how to build cabinets because Sawdust Girl does it so much better than I do!

After the boxes were built and painted, I carefully installed them into the closet. Some white caulk and trim moulding were added to give it a more finished look.

Next I built the drawer boxes for inside the larger cabinet box. Again, Sawdust Girl has the best instructions for building drawer boxes here. But, here’s a tutorial to show you how to finish off plywood edges.

Blum drawer slides (affiliate link) were used on the drawers, per Sandra’s suggestion.

Make Your Own Chalkboard Front Drawers | Organized Pantry | Pretty Handy Girl

Want to see the full reveal? Click here to see my Pantry Reveal with Hidden Wine Storage.

Make Your Own Chalkboard Front Drawers | Organized Pantry | Pretty Handy Girl