Seaside Theme Bathroom Refresh #LowesCreator | Pretty Handy Girl

Seaside Theme Bathroom Refresh #LowesCreator | Pretty Handy Girl

You know those projects that you complete 80% of the room and think to yourself, “This is good for now. I’ll do the rest in a day or two.” Yup, the boy’s bathroom was one such 80 percenter. I finally took the time to finish the last 20 percent of this bathroom makeover by giving it a refresh with some paint and new knobs.

The bathroom used to look like this:

Seaside Theme Bathroom Refresh #LowesCreator | Pretty Handy Girl

But, before that, it looked like this:

I find it comical that I took an underwater themed bathroom and gave it a seaside retreat feel. I guess you could say I pulled this big whopper from within the ocean and laid it out on the beach. LOL.

Let’s break it down now. Here’s how to paint a bathroom vanity so it will withstand the abuse of two young boys: Read more

Hanging Ceiling Art | Spheres & Lanterns | Pretty Handy Girl

Hanging Ceiling Art | Spheres & Lanterns | Pretty Handy Girl

It’s Monday, and I have a cure for the Monday doldrums! Let’s hang some fun colorful spheres and lanterns to lift your spirits!

I came up with a great way to hang lanterns and spheres from the ceiling (regardless of where the studs were.) Plus, I reduced the holes from 7 down to 4 in the ceiling.

This is a simple project, here’s what you’ll need:

Materials:

materials

  • 1 – 8′ long slim piece of flat moulding painted with ceiling paint
  • Tape measure
  • Pin
  • Pencil
  • Drill with drill bits
  • 2″ wood screws
  • Cup hooks
  • Finishing line
  • Paper lanterns and a sphere (or other objects to hang)
  • Scissors
  • Touch up ceiling paint
  • Small paint brush

Instructions:

Start by determining where you want to hang your art. Begin by knocking on the ceiling (or use a stud finder) to determine where your first stud is. Gently insert the pin until it stops (indicating a stud there.) Read more

How to Add Panels to Flat Hollow Core Door | Pretty Handy Girl

How to Add Panels to Flat Hollow Core Door | Pretty Handy Girl

When my sister brought me on to the Topsail Beach condo renovation, she had a laundry list of DIY projects she wanted me to complete. One of them was dressing up the hollow flat doors with moulding panels. She showed me a pin that led to One Life to Love’s DIY beadboard panel doors. After seeing the photo, I knew it would be a great DIY upgrade to make. But, we decided to use real beadboard (instead of beadboard wallpaper) because it had to hold up to the stress of being a rental.

To Begin:

Start by measuring and marking the doors to determine the size of your panels.

How to Add Panels to Flat Hollow Core Door | Pretty Handy Girl

Draw lines 5″ in from the top and two sides of your door.  Draw the bottom line  6″ up from the bottom. Finally, leave 5″ between the top and bottom panels.

How to Add Panels to Flat Hollow Core Door | Pretty Handy Girl

When marking your doors, use a pencil and level to draw your lines.

How to Add Panels to Flat Hollow Core Door | Pretty Handy Girl

After we had our panel measurements, Caitlin and I headed to Lowe’s. But, she refused to push me in the cart (party pooper!)

DIY Add Molding Panels Flat Door

We pulled some 4′ x 8′ beadboard panels and took them to the lumber cutting area. We gave the Lowe’s employer our measurements and asked him to cut the boards for us. While he cut our beadboard, Caitlin and I gathered the rest of our supplies.

Materials: Read more

DIY Aged Chippy Paint Technique | Pretty Handy Girl

DIY Aged Chippy Paint Technique | Pretty Handy Girl

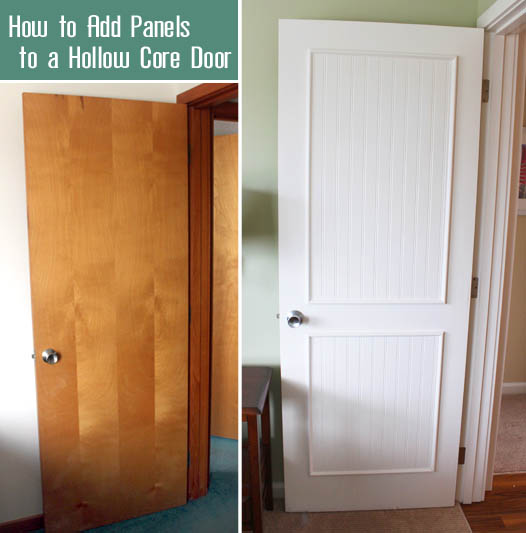
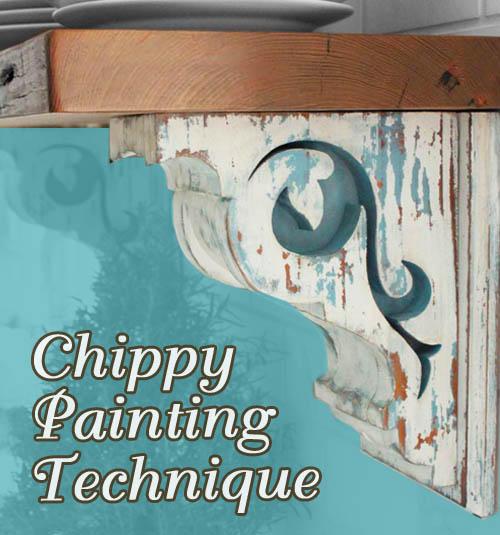
This is another one of those tutorials that I’ve been dying to share with you! Like sitting on my hands and anxiously waiting to type it out. But after taking 2 weeks off from blogging, I’m back and ready to give you this fabulous tutorial for achieving the aged chippy paint look on your next project.

DIY Aged Chippy Paint Technique | Pretty Handy Girl

Before I give you the chippy gritty, I want to give you the background story on those gorgeous corbels.

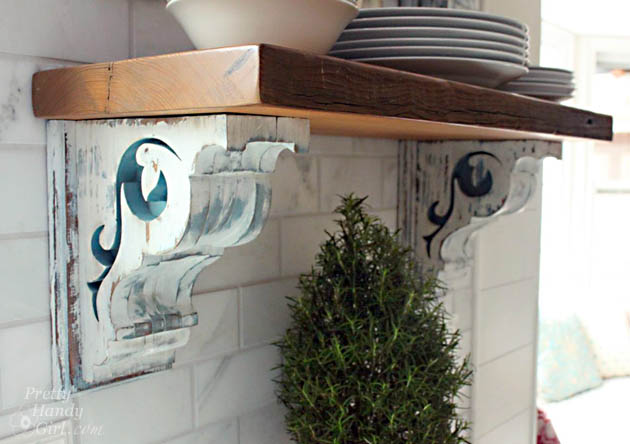
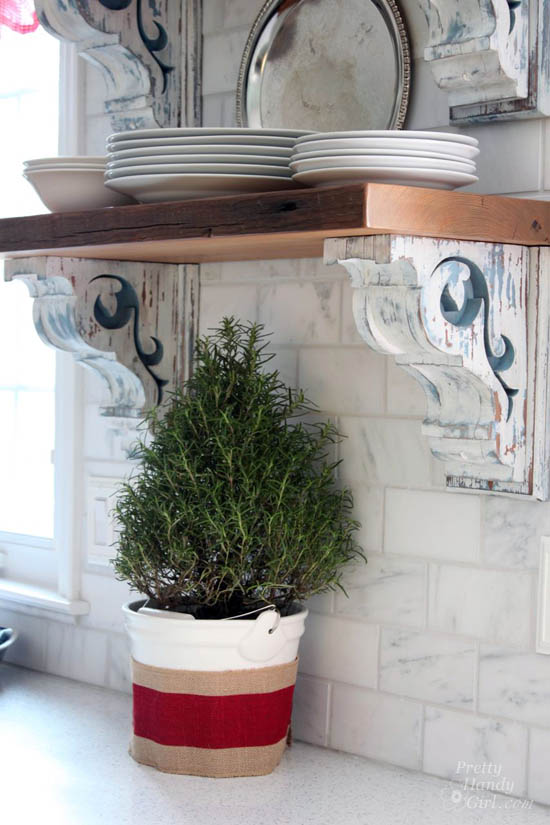
If you’ve been following along, I finally completed my 13 month kitchen renovation. The last task was installing two open shelves on the full tile wall. Finding the perfect corbels to use as shelf brackets was not an easy task. I scoured eBay, Craig’s List and salvage shops. I was really getting discouraged. That was when I met Garlan from Southern Accents Architectural Antiques at Haven. We talked for a few minutes and he showed me some of the corbels he had in his store. There were some wonderful old ones, but I felt a bit like Goldilocks. One was too tall. The other not big enough, but the biggest problem was that I needed four of them. Garlan showed me some new corbels that he had. He told me he has a guy that can duplicate any corbel design and can customize them to meet any size requirements. It was as if the heavens parted and angels sang! I was elated and couldn’t wait to find an image of a design I liked. But, again, the Goldilocks in me couldn’t find the “perfect” corbels. So, I opened up Adobe Illustrator and started to design my own unique corbels.

Chippy Paint Technique

PHG Corbel Design for Sa1969.com


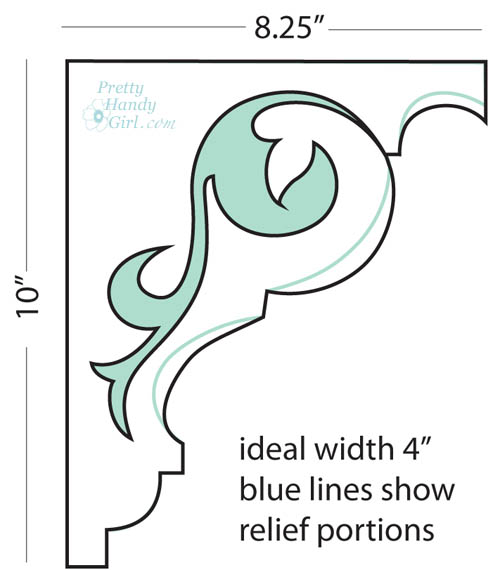
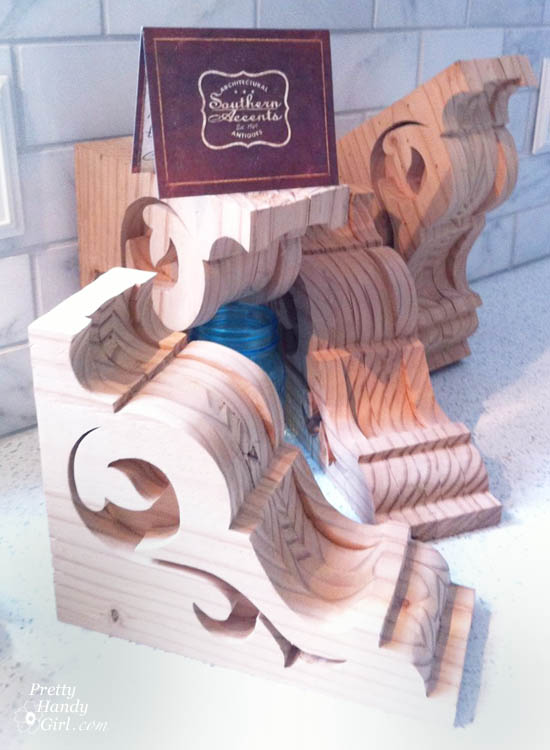
I designed a scroll pattern based off of one corbel I saw, but also added some relief portions inside the corbel. I sent the image to Garlan and a week later he sent me a picture of one of the corbels. It was love at first sight! I quickly approved the initial one and waited anxiously for the corbels to arrive. When I opened the box, they were beautiful and exactly as I had pictured them in my head.

Southern Accents Architectural Antiques corbels

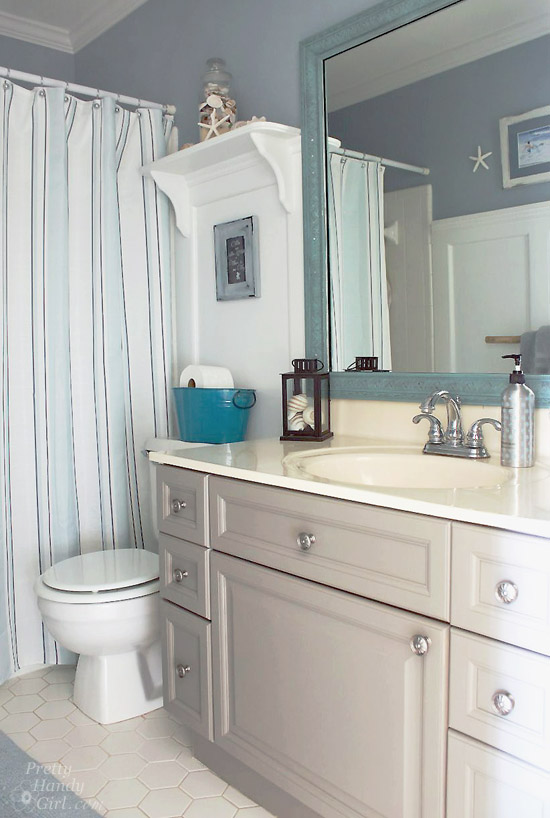
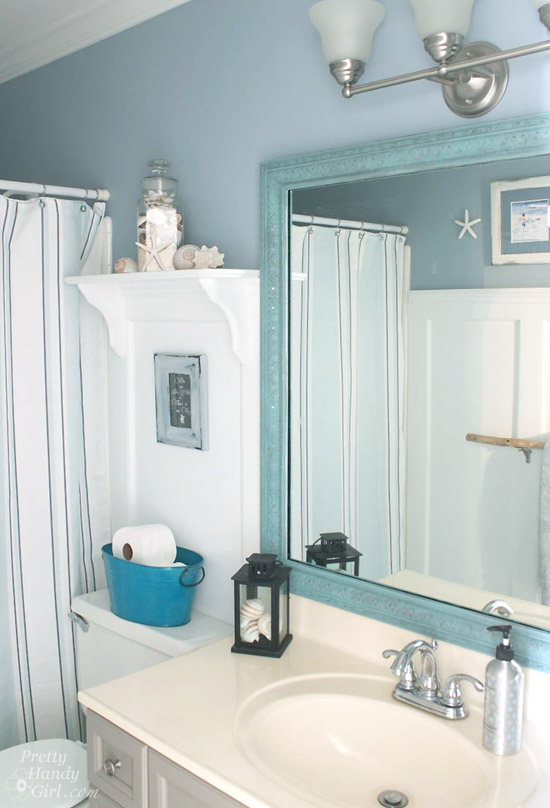
I set forth to give them an appropriate aged chippy paint look to fool people into thinking they were actually antique salvage. Here’s how I did it. Read more

How to Make Vintage Painted Oars | Pretty Handy Girl

Vintage painted oars are nostagic objects for me. They bring back memories of camp and watching crew teams rowing along the Schuylkill River in Philadelphia. So, when my sister wanted to find some oars to decorate the beach condo with, I jumped at the opportunity to make some. If you follow me on Instagram or Facebook you know that my sister Caitlin (of Symmetry Designs in San Jose, CA) and I have been renovating Diane Chamberlain’s Topsail Beach condo. The condo is a great size (three bedrooms) and located ocean front. That’s where the pros ended. Sadly the condo was stuck in the 80’s: teal carpeting, orangey wood trim and cabinet doors that were falling off. We converged on the property back in September to start the renovation process.

Before the trip, I whipped out these fun painted oars. They were easy to make, you could sooo do this!

(I’ve included affiliate links for your convenience. I earn a small percentage from a purchase using these links. There is no additional cost to you. You can read more about affiliate links here.)

Materials:

3Mâ„¢ Safety Products:

Instructions:

Clamp your 1″ x 6″ board to a work surface. Trace out the oar shape onto your board. You can use rulers and rounded paint cans or plates to trace the curves.

Put on your safety glasses, ear plugs and grab the jig saw.

How to Make Vintage Painted Oars | Pretty Handy Girl Read more