Pottery_barn_like_organizational_box

I love a challenge. If you hold an object up to me and ask me how it can be transformed, I can usually name a few different things. So, when the Elmer’s #Look4Less Challenge was introduced, I jumped at the opportunity!

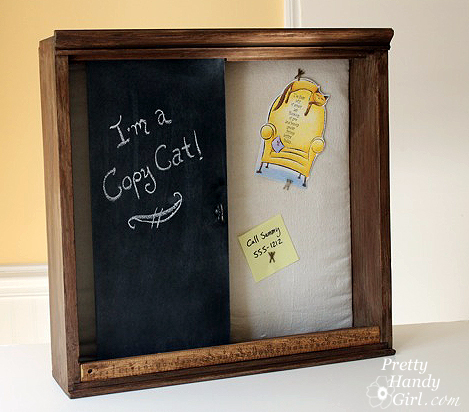
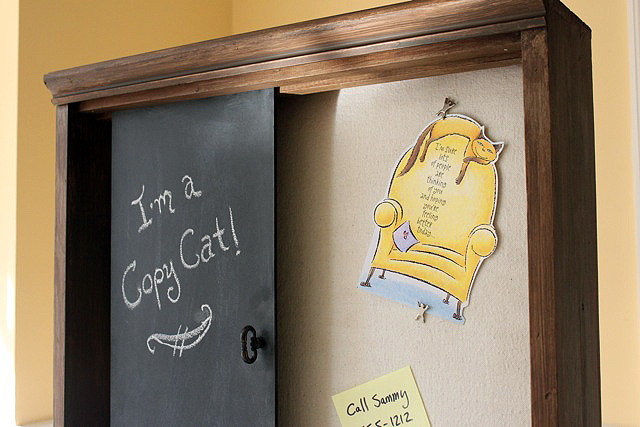
For this challenge I chose to recreate Pottery Barn’s Sliding Chalkboard Wall Organizer. I loved the idea of a sliding board and a bulletin board in the back. But, I especially loved the rustic wood look.

However, I wasn’t crazy about the price. (Obviously that didn’t stop the item from selling out!) So, if you want one for yourself, I’ll save you $100 and show you how to make your own!

My version cost approximately $30 (cost estimate based on materials used. If I used a 1/2 can of spray paint I calculated half the cost.) Personally, I spent about $10 out of pocket on this project because I had a lot of the supplies already. Plus, Elmer’s was kind enough to sent me some of the materials to make the project (shown as links below.)

Be sure to read the end of this post to learn how you can win your own Elmer’s materials!

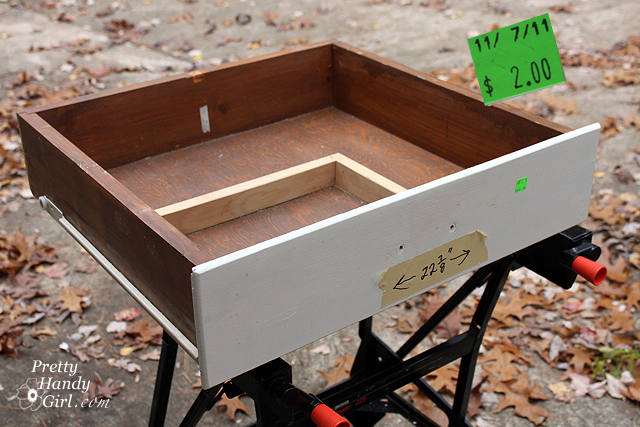
In addition to the new art supplies, I bought an old drawer to use for the structure of my organization unit. I paid — are you ready for this — two dollars at our local Habitat ReStore! Seriously, only $2 for the main component of my wall organizer unit.

Here is a list of the rest of the supplies I used:


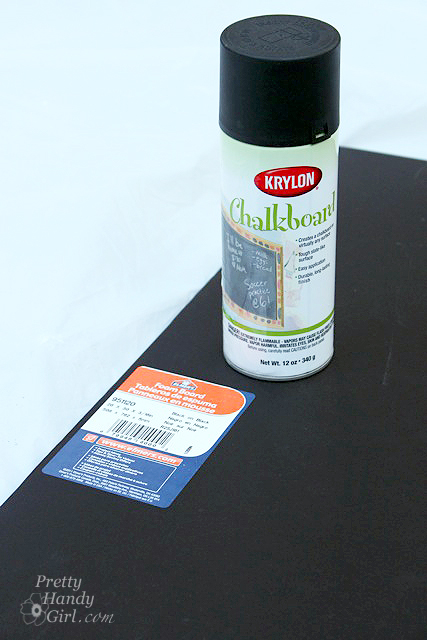
  • Krylon chalkboard spray paint
  • Drawer
  • Damp rag
  • Painter’s drop cloth
  • Batting
  • Wooden ruler
  • 1 Knob
  • Washers
  • Rustoleum brown spray primer
  • Behr glazing liquid
  • Valspar mocha glaze
  • Acrylic or latex paint (dark brown tester sample)
  • Acrylic or latex paint (light tan tester sample)
  • Wood putty
  • Saw
  • Hammer
  • Drill and drill bits
  • Handsaw
  • Brad nails
  • Finish Nail
  • Construction glue
  • Clamps
  • Pencil
  • Trim molding
  • 1″ x 1″ wood strips (or square dowels)
  • Duct tape

Prepping the drawer:

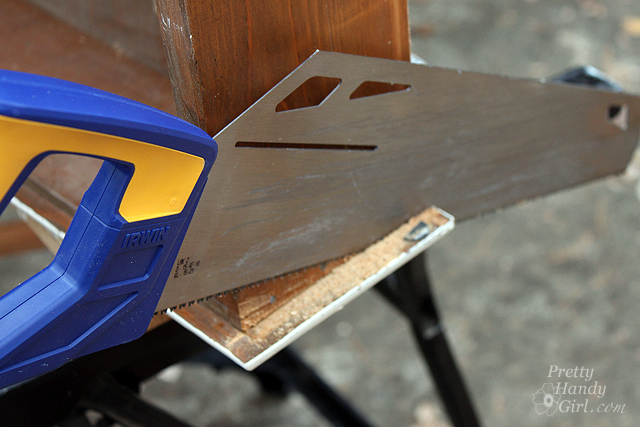
Remove any hardware from the drawer. Use a handsaw to trim off the sides of the face of the drawer. You want the sides to be flush with the sides of the drawer. The top and bottom of the face can extend beyond the drawer.

Orient the drawer so the face is now the bottom of the wall organizational unit. The rear panel of the drawer is now the top of the unit.

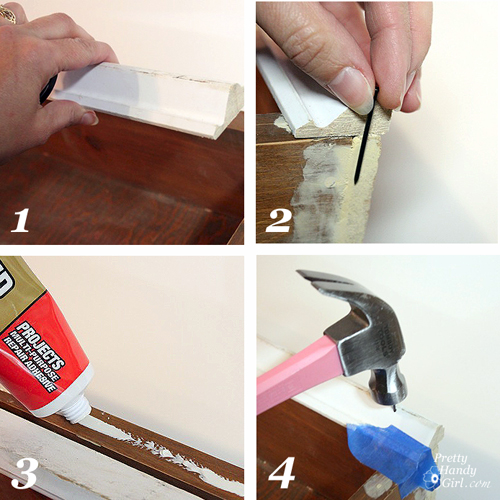
Add decorative trim molding to the top as shown:

  1. Cut decorative trim molding to the width of the top of the unit/drawer. (Check with your local Habitat Restore for inexpensive trim.)
  2. Choose a finish nail that is long enough to go through the molding and into the drawer. Drill a few pilot holes into the molding (to avoid splitting the wood when you hammer a nail into it.)
  3. Run a bead of construction glue on the top of the drawer. Lay the molding on top of the glue.
  4. Use finish nails to hammer through the pilot holes and attach the molding to the drawer.

Wipe off the drawer/unit with a wet rag.


Faux painting the unit:

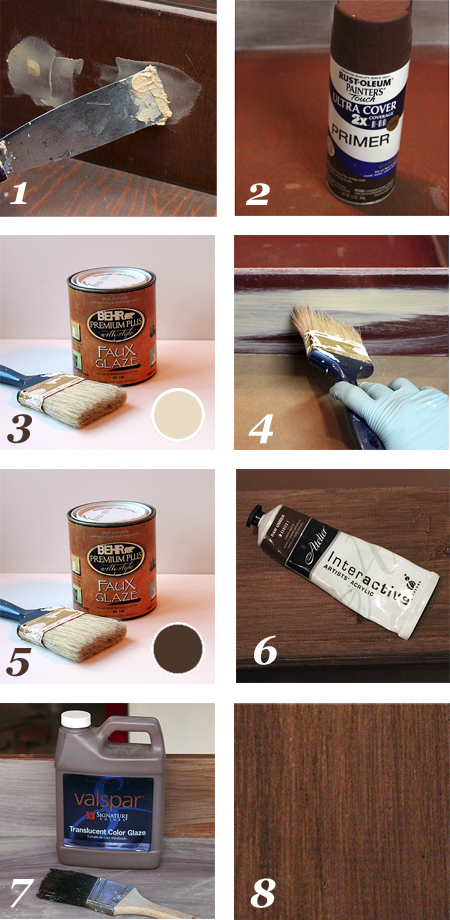
If you are dealing with a mixture of wood finishes (some paint, some stain), you will want to prime and paint your unit. I decided to give mine a faux rustic wood treatment (because I love that rustic wood look!) Here are the basic steps:

  1. Use wood putty to fill any holes or cracks. After the putty has dried, sand it smooth. Wipe off any dust from the wood using a damp rag.
  2. Prime the entire box (minus the back) with Rustoleum brown primer.
  3. Mix 1 part glaze to 2 parts light tan paint.
  4. Brush the mixture onto the unit using a tattered paint brush. Keep the strokes in long lines to mimic wood grain.
  5. Let that layer dry. Mix 1 part glaze to 2 parts dark brown paint.
  6. Brush it on the unit using the same technique as step 4.
  7. Finish up by brushing a coat of Vaspar Mocha glaze over the entire unit.


Creating the bulletin board:

After the glaze has dried, cut a piece of Elmer’s White Foam Board the dimensions of the inside of the drawer/unit.

Cut a piece of batting the same size as the foam board.

Cut a piece of painters’ drop cloth 2-3″ wider (on all sides) than the foam board.

Layer the drop cloth, then the batting and top it with the foam board.

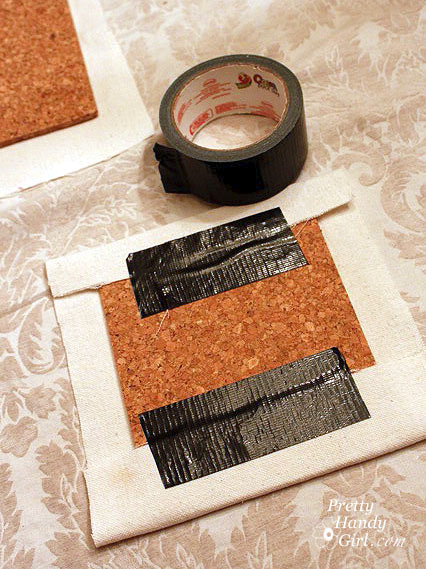
Wrap the edges of the drop cloth around the foam board and secure it with duct tape.

Add a few Elmer’s CraftBond Glue Spots Pop-up Medium to the back side of the foam board and press the board into the back of the unit. Instant bulletin board!


Adding a graphic letter to the bulletin board:

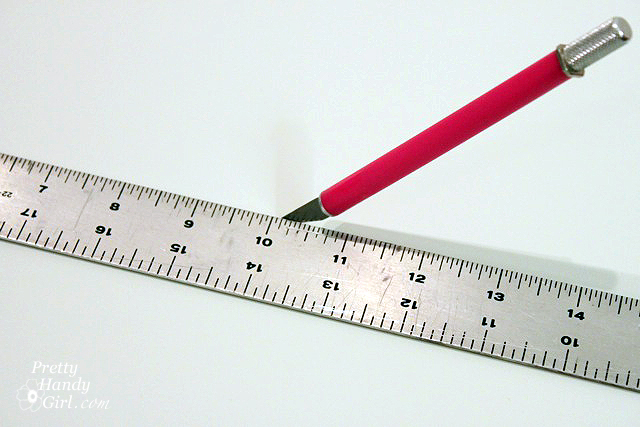
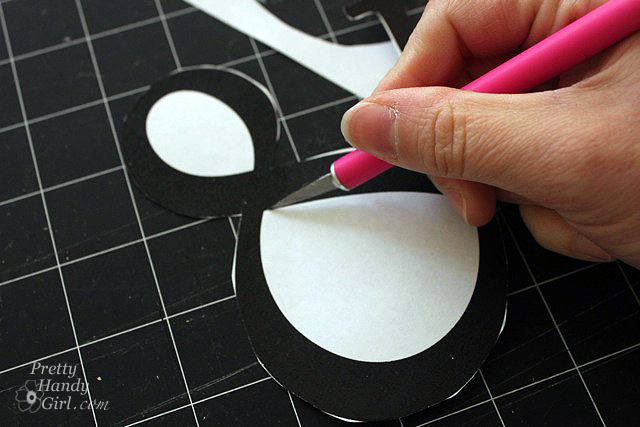
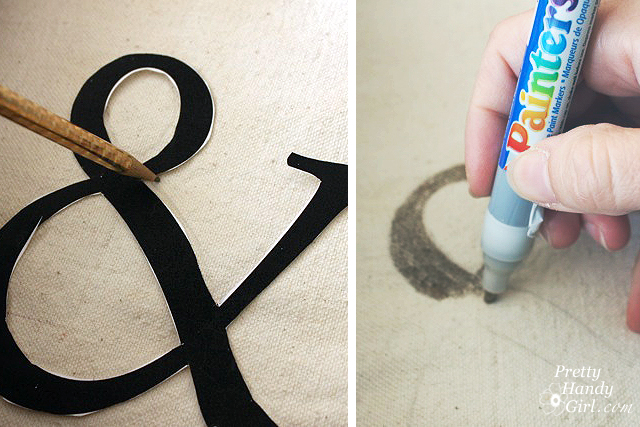
Print out a large letter, number or symbol. Cut out around the shape using an x-acto knife.

Position the cut out onto the bulletin board and trace around the edges lightly with pencil.Use an Elmer’s Painters gold paint marker to color inside the pencil tracing.


Creating the sliding chalkboard:

Cut the Elmer’s Black Foam Board the height of the interior of the drawer/unit and about 1/3 the width.

Spray the black foam board with the chalk paint. Add 1-2 more light coats per the directions on the can.

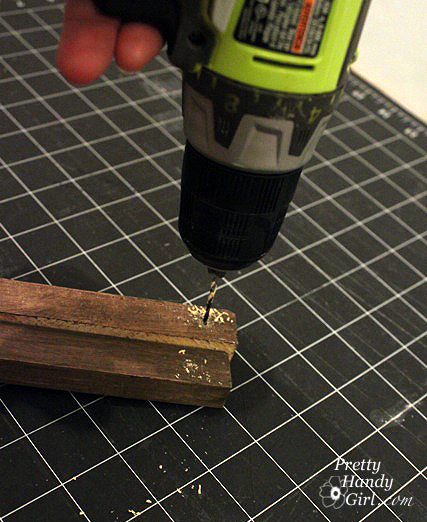
Measure the interior width at the top and bottom of the organizational unit. Cut two 1″ x 1″ strips of wood (or square dowels) for the top and 2 strips for the bottom. Drill a hole in each end of the strips.

Measure out 1″ from the bulletin board, on the bottom of the unit. Mark this location. Repeat for the top . Run a bead of construction glue onto the bottom of the wood strip and then adhere it to the bottom of the unit at the 1″ measurement mark.

Hammer brad nails into the predrilled holes. Repeat for the top of the cubby. (Two 1″ square strips are shown, but only install the back ones at this time.)

If the chalkboard paint has dried, rub a piece of chalk all over the board to season it. Wipe it clean with a dry cloth.

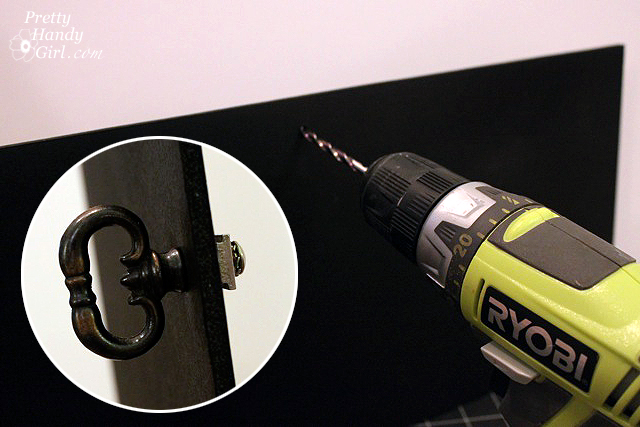
Drill a hole into the chalkboard where you want the handle. Feed the handle through. Add washers to the backside of the chalkboard if you need to take up some of the slack on the screw.

Insert the chalkboard into the wall unit and rest it against the first strip. Add the second strip in front of the chalkboard and attach it the same way you did above.

Be sure that the wood strips are not too snug against the chalkboard. The board should have enough freedom to slide back and forth freely.


Finishing touches:

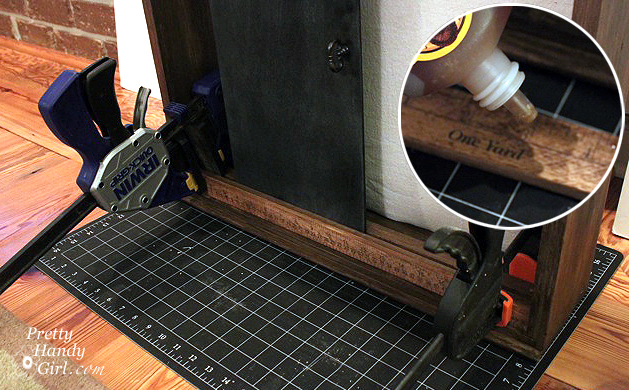
If you want to give your ruler some age, rub a walnut stain onto the wood. Let it dry. Glue the wooden ruler to the front of the wood strip on the bottom using construction glue.

Clamp the ruler in place and let it dry overnight.

Add your pushpins and a message to the chalkboard and enjoy your efforts! You just saved yourself $100!!! Woot!

If you want instructions for hanging the unit, check out this post on hanging objects on the wall (the right way) the first time.

I’m pretty pleased with my Pottery Barn copy cat. Not to be mean or anything, but I like mine better because of the ruler,

the decorative crown molding,

and most of all for the price!!!
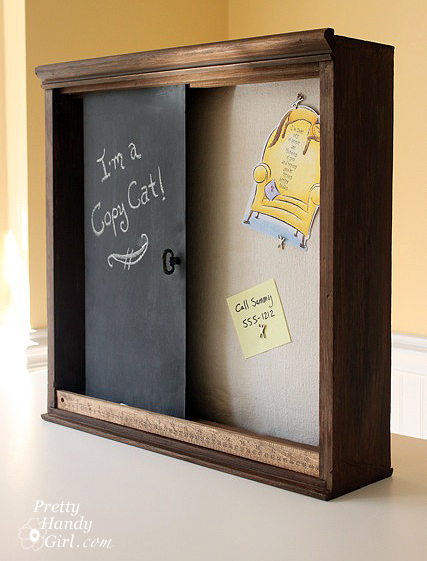

Do you like my Pottery Barn knock off? Or does it still look like an old discarded drawer to you?


Disclaimer: This project has been compensated as part of a social shopper insights study for Elmer’s #gluenglitter #collectivebias #CBias. I was paid a small fee and sent some Elmer’s products. However, the ideas and opinions expressed in this post are solely mine.

Sharing with Sawdust and Paper Scraps – Build{hers} Link Party

Did you like this post? Want to be notified when there are more fantastic tutorials by Pretty Handy Girl? Sign up to receive emails in your inbox:

Enter your email address:

Delivered by FeedBurner

Or follow me on Twitter or Facebook so you can be the first to know!


Happy Monday morning y’all! I’ve been working like a busy bee this past month. So many projects! I need to clone myself so one of us can work on the projects like this dry erase message board and the other can write the posts. (Luckily I had an extra hour yesterday thanks to switching back to standard time.)
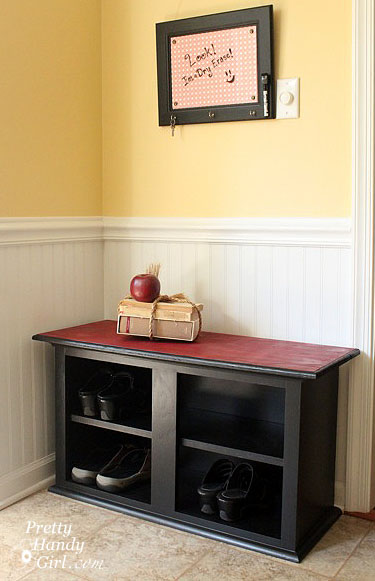
One of the reasons I’ve been so busy is that I will be giving my first demonstration at the Raleigh Habitat for Humanity ReStore this Saturday at 1pm. If you are in the area, I’d love to see you. Here is the address and more information about the  ReStore. I will be demonstrating how I turned a truly nasty greased wall cabinet into this charming shoe storage bench.

I’m not the type who can throw something away, so when I removed the cabinet doors to make the shoe bench, I decided to salvage them and make message boards. The first one was transformed into a cute chalkboard frame.

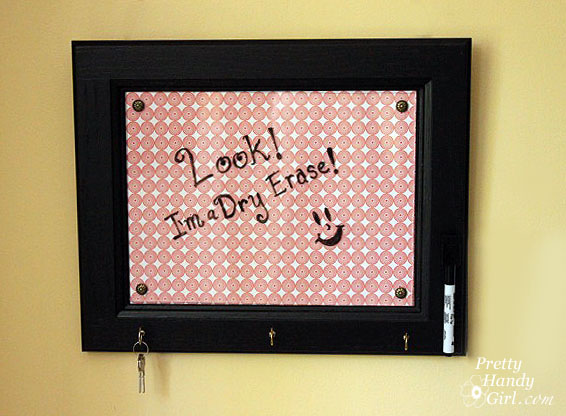
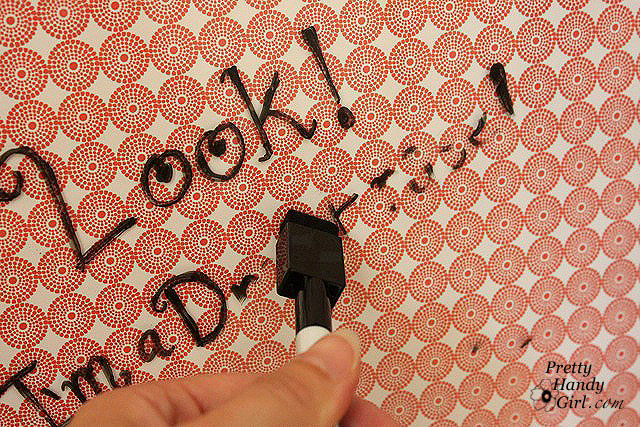
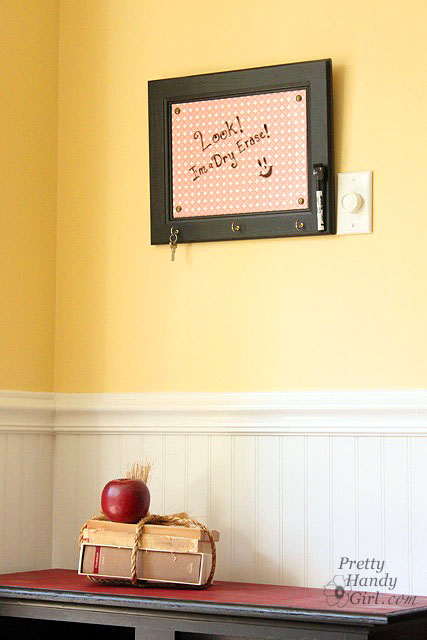
The other one was turned into a — you guessed it —  a dry erase message board!  And of course (because I love you), I’ll share with you how I made it.


Materials:

  • Cabinet door (pre-primed and painted)
  • Plexiglass cut to the interior panel dimension
  • Scrapbook paper (choose a light color that dry erase marker will show up on top of)
  • 4 Nail head trim tacks
  • 3 Cup hooks
  • X-acto blade
  • Metal ruler
  • Sharpie marker
  • Drill and bits
  • Scrap of wood
  • Hammer
  • Needle-nosed pliers
  • Dry erase marker
  • E-6000 glue

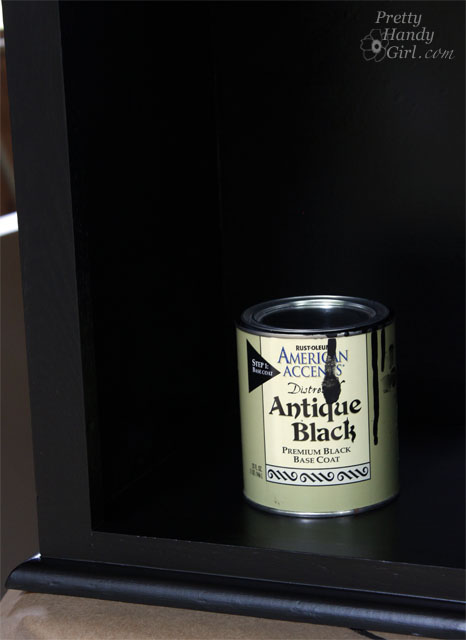
1. If you haven’t already: clean, prime and paint your door. It isn’t necessary, but if you want to give your cabinet door a new look, go ahead and paint it any color you like! The sky is the limit on color. I used American Accents Antique Black.

2. Now, cut your scrapbook paper to fit inside the cabinet door panel. As always, be sure you are using a fresh new x-acto blade and a metal edged ruler.

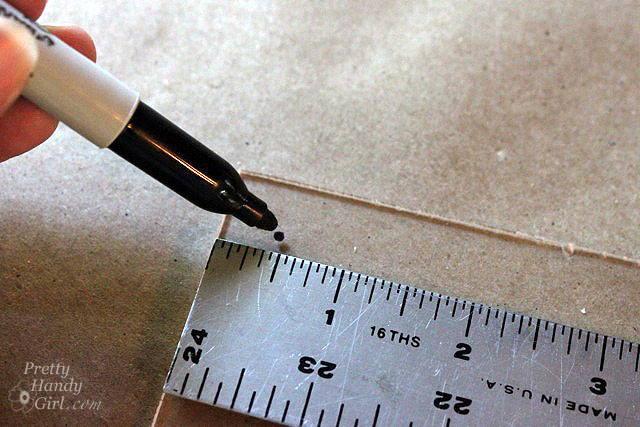
3. Next mark a dot 1/2 inch from the corners of the plexiglass.

4. Drill a small hole through the plexiglass at each dot. Use a drill bit that is slightly larger than the nail on your nail head tack.

5. Lay your scrapbook paper into the panel, then rest your plexiglass on top of the paper. (I purposely didn’t glue the scrapbook paper so I could change it out when I want a décor change.)

6. Set a nail head into each corner hole in the plexi. Hold the nail with the needle-nosed pliers as you hammer each tack into the cabinet door.

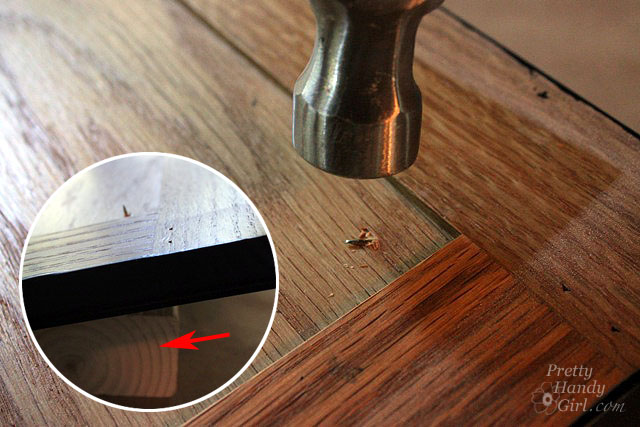
7. If your tacks go through the back, flip over the cabinet door. Set the piece of scrap wood (red arrow) under the nail head and hammer the point of the nail to bend it to the side (so no one gets poked!)

8. Use a ruler to mark where you want your cup hooks mounted. Pre-drill holes for your cup hooks using a drill bit slightly smaller than the cup hook screw end. Then screw them into the holes.

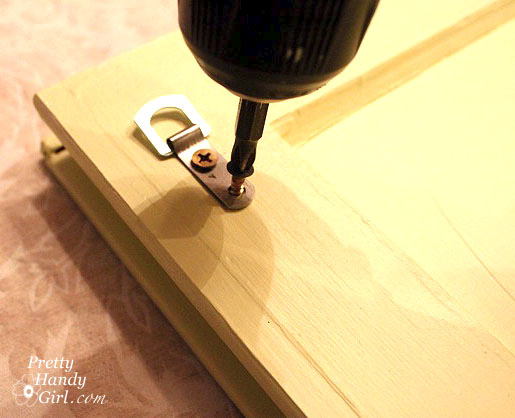
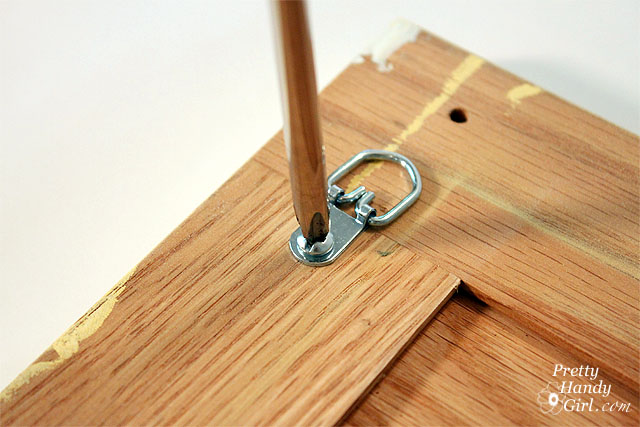
9. Attach D-ring hooks to the back of the door.

10. Attach a dry erase pen to the board using string. Or if you find a marker with a magnetic cap, you can glue a magnet to the board using E-600o. Now you can hang the marker back on the board when you’re done writing a message.

11. Hang that cute little dry erase board up on the wall! Did you see this and this tip for hanging frames that have two hooks? Genius!

That is how you can make a custom dry erase board out of an old cabinet door! I love how it matches the bench colors and can match anything I want it to by changing out the scrapbook paper. Shoot, I could probably put photos behind the plexi too!


Okay, so who is coming out to join me on Saturday? Please don’t let me show up and give a talk to the crickets. 😉


Artist Inspiration Board

Hey guys, today I’m dishing up a triple dose of posts for you. I’ve been busy, really busy, super busy! And you don’t know the half of it. As you are reading this, I’m on my way home from California. I flew out to surprise my little sister for her birthday. She and her husband are expecting their second child and I wanted to go all “Pretty Handy Girl” on their home ;-D.

First, you can read my tutorial for making this whimsical message center, from a curbside window, over at my friend Sandra’s blog,

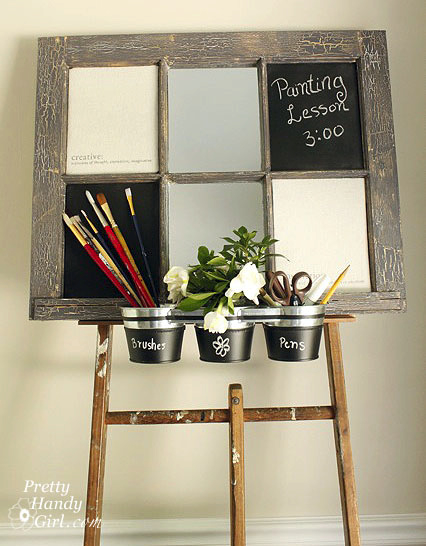
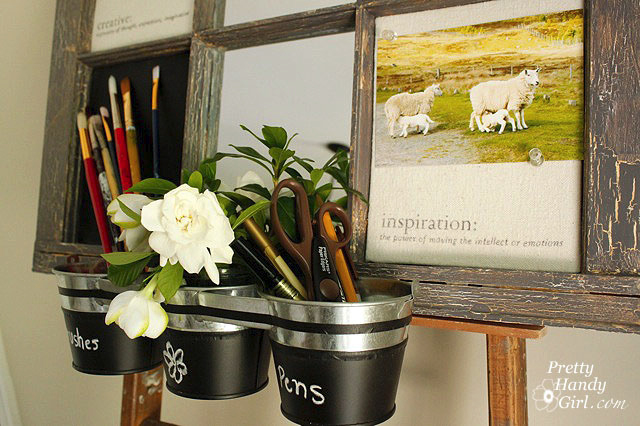
Then you can come back here and read about this Artist’s Inspiration board also made from an old window.

Finally, if you like what you see you can head over to Parentables to see an entire post on curbside transformations! You won’t believe some of the before and afters!

Okay, ready? Well, let’s get this show on the road.

Materials:

  • Old divided light windows
  • Foam core
  • Tin snips
  • 3M duct tape
  • Scissors
  • Primer
  • Chalkboard paint
  • Irwin mat knife (or x-acto knife)
  • Clear Caulk (window and door sealant)
  • primer
  • fine grit sand paper
  • Two colors of paint (gold and medium gray)
  • Crackle medium
  • Polyurethane
  • Foam double stick tape
  • mirror
  • ruler
  • mirrored glass
  • tin pots, buckets or recycled cans
  • drop cloth bulletin boards from THIS post

Prepping your window:

You will need to clean, prime and paint your window before beginning this tutorial.

Here is what I did during the prep phase: Cleaned the windows (I used a bleach solution because there was mold and mildew present.) I repaired the glazing that was cracked and missing. I used paintable caulk. No need to buy glazing.

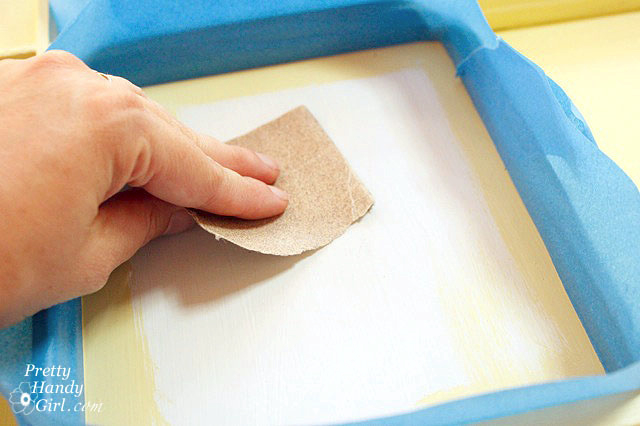
Prime the entire window, glass and all! Once the primer has dried, use the sandpaper to gently rough up the primer (especially on the glass. But, be careful not to scratch through to the glass.)

For the beautiful crackle finish on my window, I started by painting the window a metallic gold color.

When the gold had thoroughly dried, I coated the entire window with the crackle medium. Once that had dried, I painted a medium gray on top. That’s when the magic happens. The paint separates and reveals a hint of gold. It is important not to go back over the gray paint after you paint it on or you will get a gloopy mess!

I finished off the painting prep steps by applying two coats of water-based polyurethane.

Tutorial:

Measure all the individual window panes. Be sure to measure only the exposed glass.

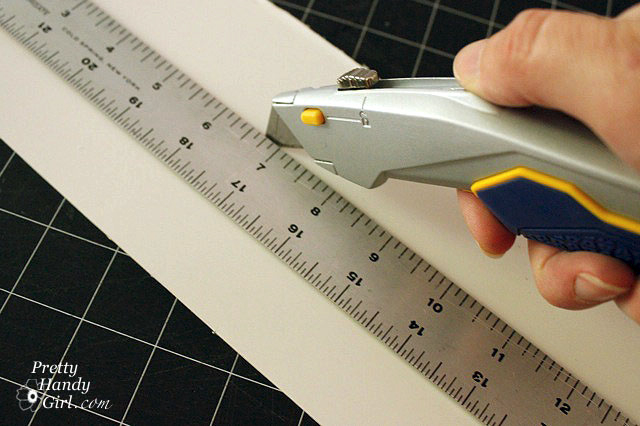
Transfer your measurements to cut 2 squares of foam core. Make sure your blade is sharp! Dull blades will drag and tear the inner foam.

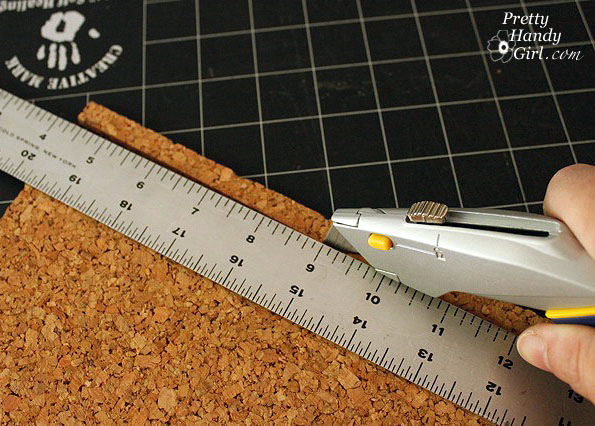
Next, transfer your measurements to cut two pieces of cork board. Cut the cork board with a ruler and mat knife.

Finally cut two pieces of mirrored glass to fit the remaining two panes (need help cutting glass? Have a professional do it, or watch Sandra’s tutorial HERE.)

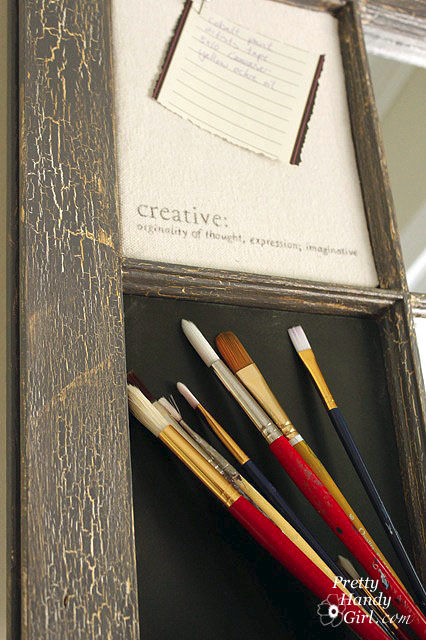
You should now have 2 pieces of foam core, 2 pieces of cork board (wrapped in drop cloth as I showed you the other day), and two pieces of mirrored glass.

Dry fit all the cut squares to make sure they will fit in the window openings.

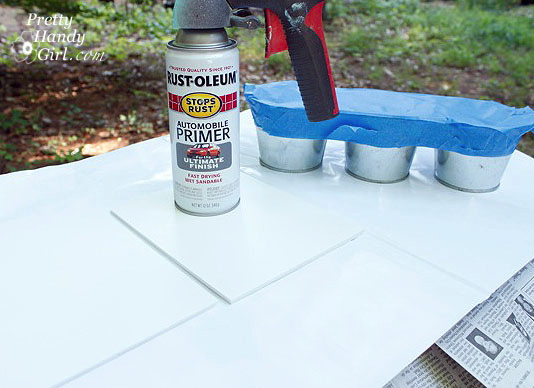
Take the foam core and tin pots outside. Spray them with primer.

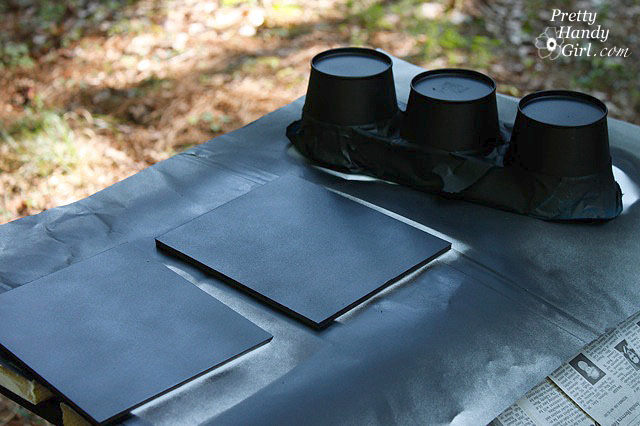
When the primer has dried, spray the foam core and buckets with a few coats of chalkboard paint.

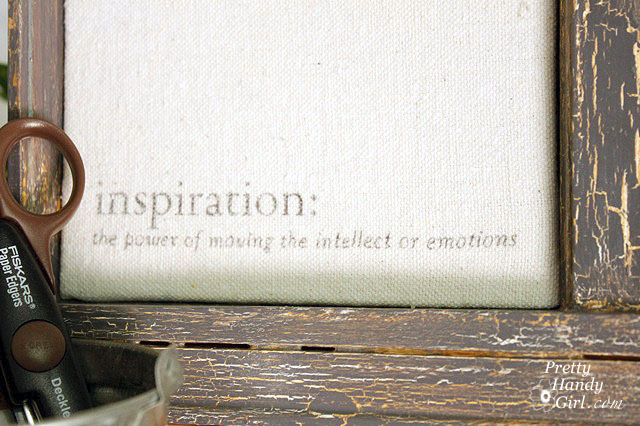
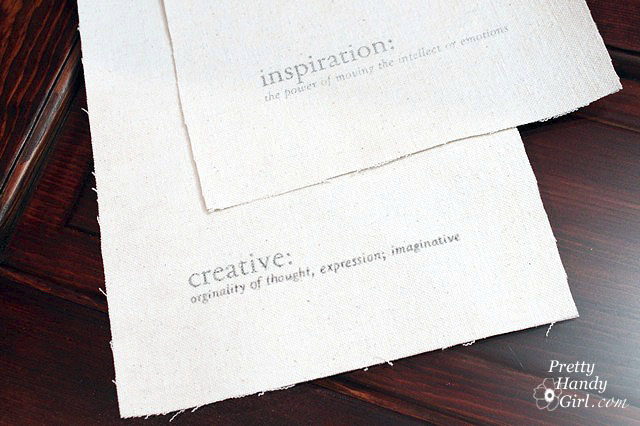
To view how to print onto painter’s drop cloth, refer to my tutorial here.

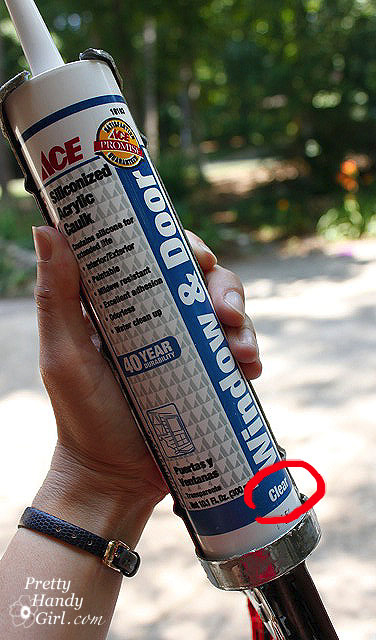
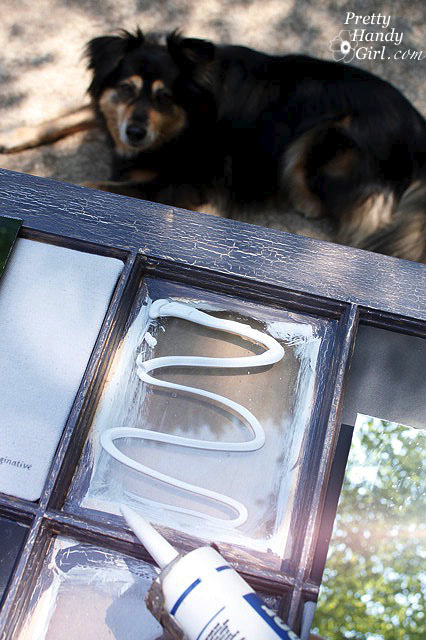
To attach the chalkboard foam core, mirrored glass, and drop cloth squares, you will need clear window and door caulk. Snip the top off at an angle. Insert a straightened coat hanger into the tip to puncture the inner lining of the caulk.

Put a fair amount of caulk onto each glass of the window. (Lazy supervisor in the background!)

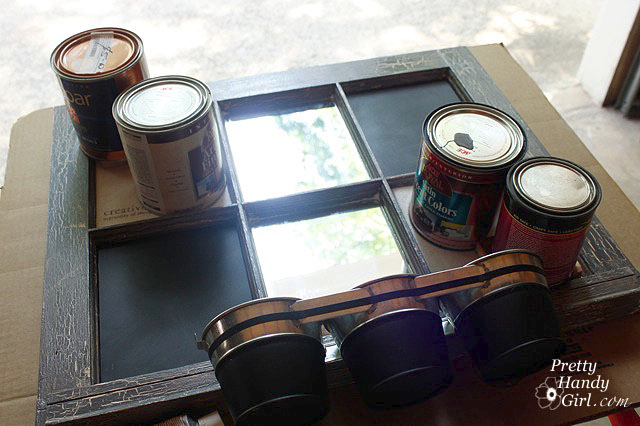
Press the individual squares into it. Weight the drop cloth squares (with paint cans) while they dry.

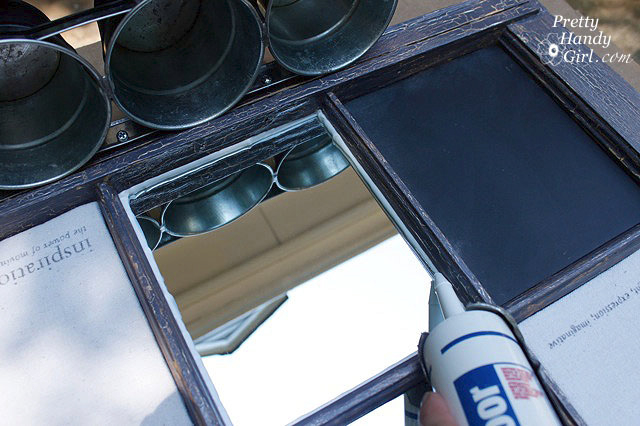
To secure the chalkboard and mirror sections, run a bead of caulk along the edges of the boards.

Use a damp paper towel to smooth and clean up the caulk edging.

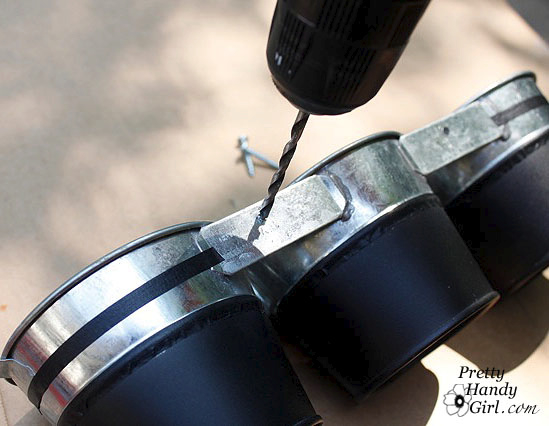
Once the caulk has dried, you can affix the tin buckets to the window. Drill holes through the bucket bracket or tin cans.

Attach a screw through the hole and screw it into the window pane.

To add a hanger to your memo center, flip the window over and measure down 3″ on both sides.

Use a drill to drive the screws into the D-ring style hangers.

I made this artist’s board to sell, but honestly I’m having a hard time parting with it. So, it may just find a home in my painting studio (aka Bonus Room). But, maybe you could convince me otherwise. How much would you pay for this one of a kind artist’s board? I keep thinking it is a real life version of Pinterest.

Don’t forget to view more of my curbside transformations.

I’m so excited to share this tutorial with you. I knew it could be done, but honestly I didn’t believe it until I tried it. When I saw THIS cute project over at Home Frosting, it got my creative wheels turning.

I asked Lesa for a few clarifications and she gave me the courage to try feeding drop cloth material through my printer. {gulp}

Printing on material is fairly easy to do if you have the right materials.

Materials:

  • Laser or ink jet printer (I only tried it on the laser printer, but it can be done on either.)
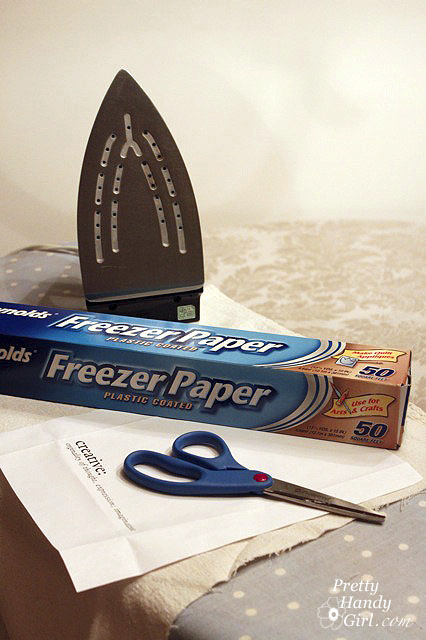
  • Reynolds Freezer Paper
  • Iron
  • Ironing board
  • Sheet of letter size paper
  • Scissors
  • 3M Duct Tape
  • Cork Board
  • Irwin mat knife
  • Painter’s drop cloth bleached and washed until soft

Start by creating your words that you want to print in Word or any other program.

Set your iron to preheat.

Tear off a sheet of Freezer paper slightly larger than letter-size paper. Cut the freezer paper down to 8.5″ x 11″.

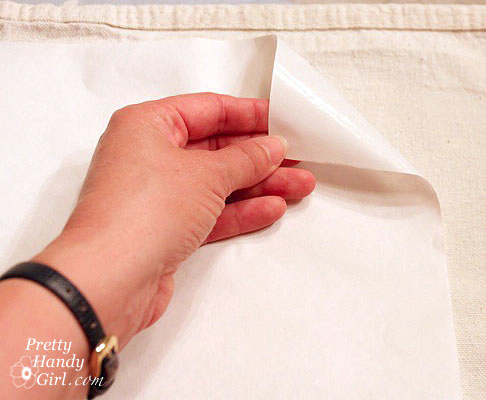
Lay the freezer paper shiny side down on the drop cloth.

Press firmly on the paper and move the iron around constantly for about 15 seconds. Let the freezer paper cool for a minute and test to make sure it is lightly adhered to the drop cloth. If not, iron a little longer.

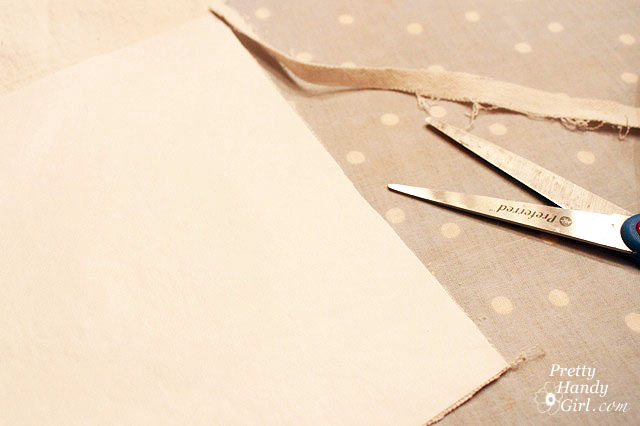
Now trim the edges of the drop cloth until it is the same size as the freezer paper.

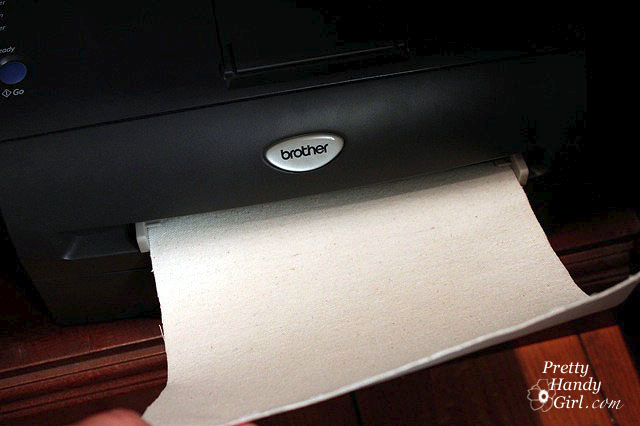
Take your freezer paper/drop cloth sandwich to the printer. If you have an individual sheet feed location on the printer, it would be best to use it. But, it can be done without. Print the document you created earlier.

Oooo, sooo pretty!!! I actually ran my “sandwich” through twice to get it darker, but it was still too faint for my liking.

If you have the same issue, you can go over the letters with a ball point pen.

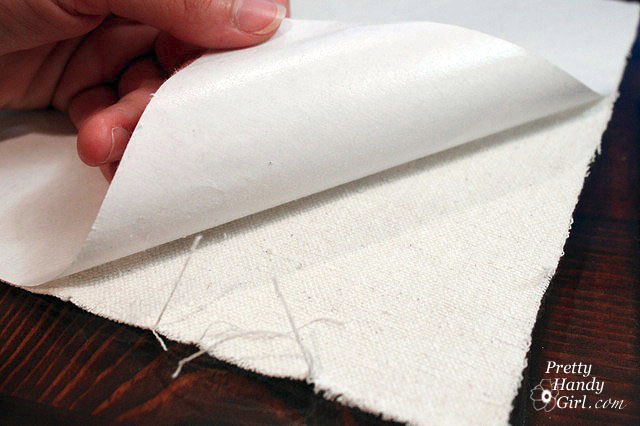
Peel off the freezer paper.

Now, cut your cork board. (If you are using the these cork boards in a window, be sure to pre-measure the individual window panes first.)

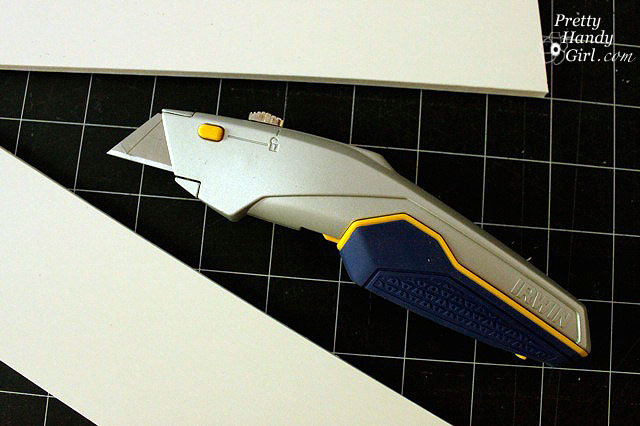
I have to tell you that Irwin sent me another tool to try. The mat knife. Their claims sounded outrageous, claiming it can cut better than other mat knives. “Whatever” is what I thought. But, as usual, they proved me wrong. I used the Irwin knife to cut BOTH cork board and foam core!

Have you ever cut foam core with a mat knife cleanly? Not me, until now.

I swear to you that Irwin has not paid me to say any of this. I just like their tools. I am waiting for an Irwin tool that I don’t like and then I’ll let you know what it is. But, I wouldn’t hold your breath.

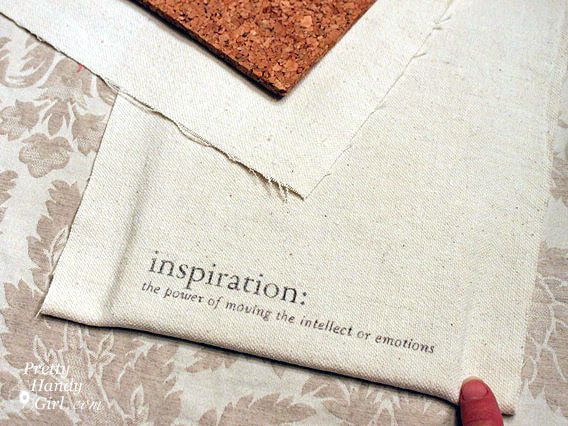
Line up the drop cloth where you want it with the cork board underneath. Fold one edge of the fabric over onto the back.

Secure it with the duct tape.

Pull the opposite side of the fabric and wrap it around the back. Continue until all the sides are taped to the back of the cork board.

And there you have it! A unique personalized cork board.

Want to see how to use the drop cloth bulletin boards in this Artist’s Inspiration Board?

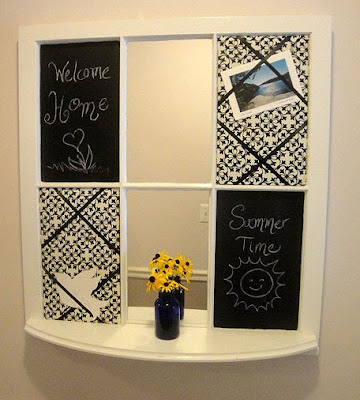
If you came by for my mudroom tour, you saw this message center made from a curbside window frame.

This was a super easy project and I built it in about 2 hours.

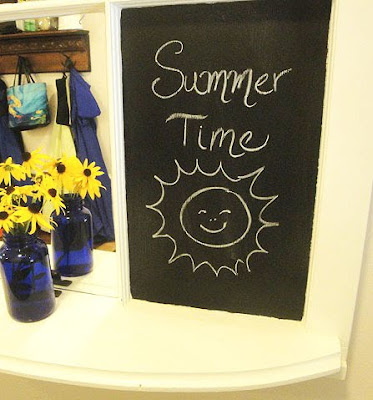
First, I gave the whole window a fresh coat of white paint. Then, I taped off the edges of the upper left and lower right windows and used 2 coats of chalkboard paint in those panes.

While the paint dried, I cut two pieces of foam core to size for the upper right and lower left panes. Then added some batting and wrapped the fabric around. I used a hot glue gun to attach the fabric to the back of the foam core. Then positioned the black ribbons on top and glued them to the back of the foam core as well. While the glue gun was still heated up, I ran a bead of glue around the edge of the window panes and inserted the two upholstered foam core pieces in place. (Pictorial directions for the upholstered foam core can be viewed here.)

Next, I had some leftover cheap mirror glass* that I used for the the mudroom coat rack. I used my glass cutter and cut those two panels down to size. Then I put some E-6000 onto the window pane and inserted my mirrored glass. To seal and hide the edges of the mirror, I used white bath and tile caulk around the edges of the mirror.

* Cheap Mirrored Glass Source: Find those $10 back of the door full length mirrors. Buy one at Walmart, Kmart or Target. Just peel off the glued frames and paper backing and cut your mirror pieces from it.

To build the little curved shelf, I actually already had the curved board leftover from another project. But, you can cut a piece of 1″ x 6″ with a jigsaw. Then use a router to give it a decorative edge. Then sand it, prime it and paint it.

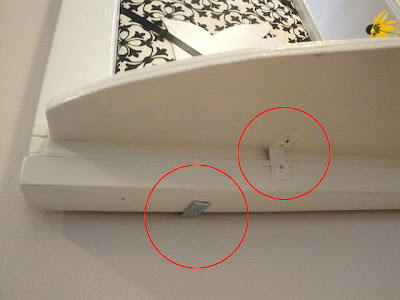
To attach the shelf, I used 3 L-brackets on the underside and painted them white to be less noticeable. I also nailed a piece of 1″ x 2″ (painted white) to the bottom of the window so I could screw the brackets into it.

Once the message center was finished and dry, I located the studs on our mudroom wall and hung the window with two L- brackets on the bottom (see pictures above) and one on top.

Now I have a cute place to welcome guests, hang postcards and birthday invites, and check for ORT (object remove from teeth) before heading out the door.