Backyard Patio Reveal | Pretty Handy Girl

Backyard Landscaping Reveal | Pretty Handy Girl

I’ve had many friends and readers ask if our backyard renovation was complete. Truth be told, it was finished right before Spring arrived. I wanted to wait for the plants to start blooming before taking the final pictures. Plus, I had to wait for the pollen and tree debris to stop falling all over everything. Tree droppings: it’s a real struggle here.

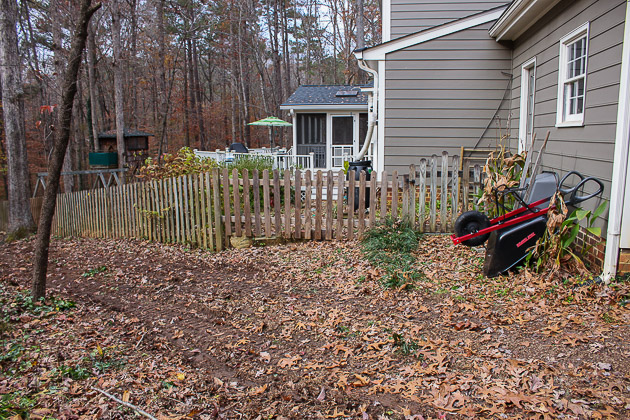
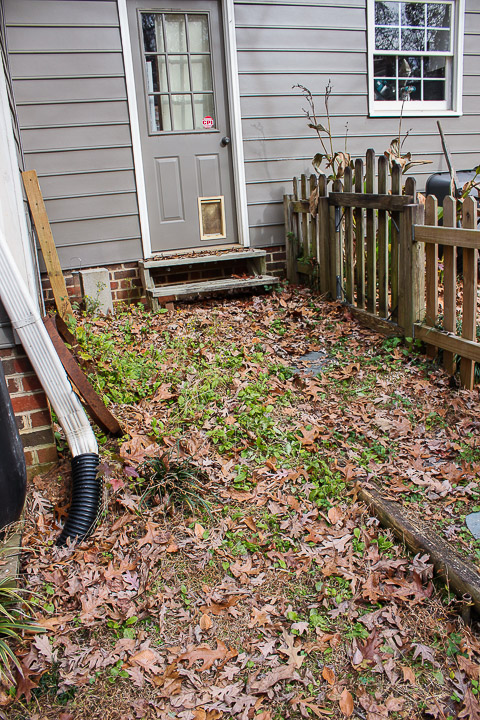
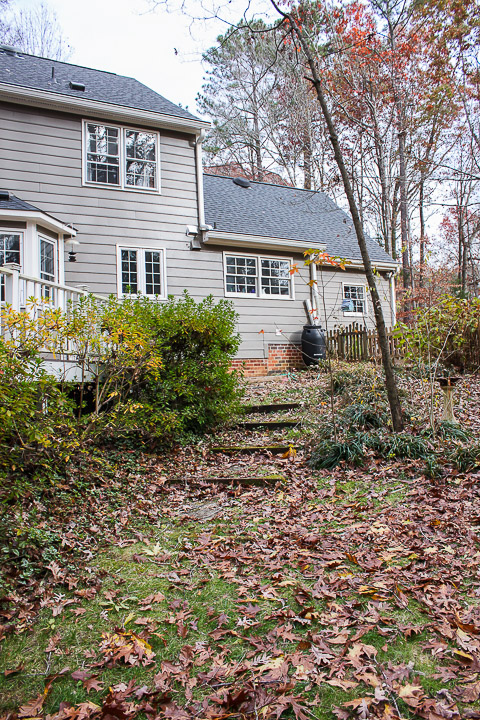
Currently the flowers are blooming and the trees have stopped bombing us. I can’t wait to show you the backyard landscaping reveal photos I took this week. Before I show you the amazing after photos, you probably need a reminder of what our sad yard looked like before:

Backyard Landscaping Plans | Pretty Handy Girl

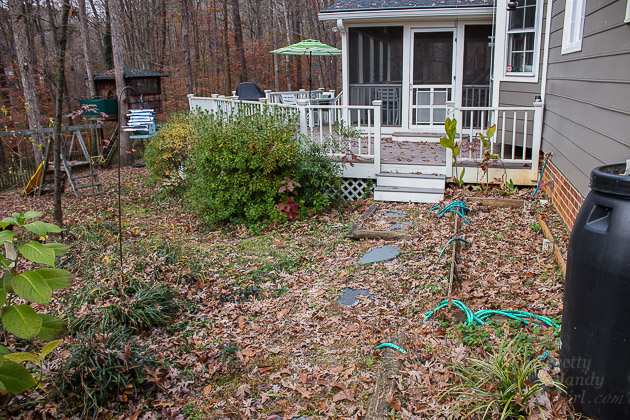
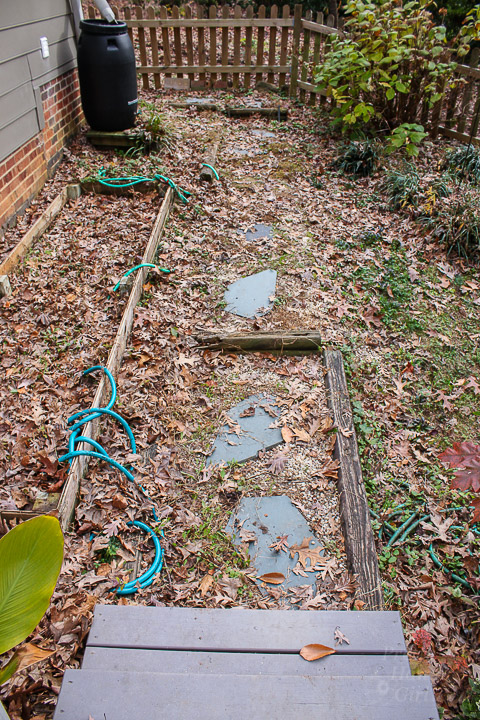
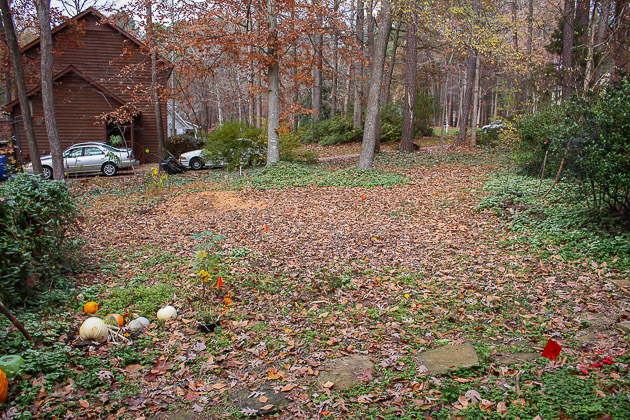
A mess, right?! My favorite lawn decor is the aqua hose for a pop of color. LOL.

Backyard Landscaping Plans | Pretty Handy Girl

Backyard Landscaping

Several homeowners before us installed rounded landscape timbers and pea gravel to stop the inflow of mud into the home. Unfortunately as the timbers rotted, the gravel spread outside the frames. In its place, a congregation of weeds sprang up. Frankly, I think the weeds were enjoying themselves more in our backyard than we were. It was embarrassing to invite friends to a weed-filled jungle with rotted timbers dotting the landscape. We longed for a backyard that was devoid of messy pathways, and was a usable space for entertaining. This past Autumn we decided a plan needed to be implemented to solve our landscape woes.

We contacted a local landscape designer who came highly recommended. She took my style and our desires into consideration when drawing up the plans.

Backyard Landscaping Plans | Pretty Handy Girl

After we had plans in hand, Belgard reached out to me about working with them. (It was uncanny how good the timing was.) I was more than thrilled to work with them since I already loved their products. (This is a sponsored post for Belgard.)

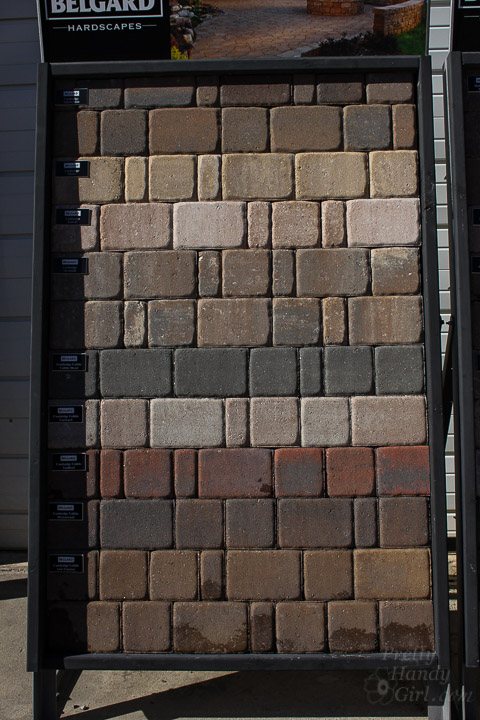
Several years ago (before I knew what a blog was), we had a Belgard pathway and circular patio installed near our front door. We love the look of those pavers. The Dublin Cobble has an old world feel and the color variation between the pavers gives them the look of old tumbled pavers. I watched the landscaping crew install the Belgard Universal Circular and was amazed by how quickly and easily the pavers fit together. To us, Belgard has always stood for quality landscaping hardscapes.

Update on Backyard Landscaping | Pretty Handy Girl

After the plans were drawn for our backyard, choosing the brand to use for hardscapes was easy. Deciding on the pavers and wall blocks was more difficult because of the large variety of Belgard products to choose from. In the end, we were able to merge formal and informal areas easily. The hardscapes compliment the style of our house and look like they’ve been here for decades.

Backyard Landscaping Plans | Pretty Handy Girl

Once we finalized our decisions, work began in our yard. As oftentimes happens, the yard went from bad to worse before it got better…a lot better! Luckily, I gave my full trust to Arbor Enterprises who completed the work. Now, if you’ll step this way, I’m thrilled to take you on the tour of our new yard (without a speck of mud or rotten timbers anywhere!)

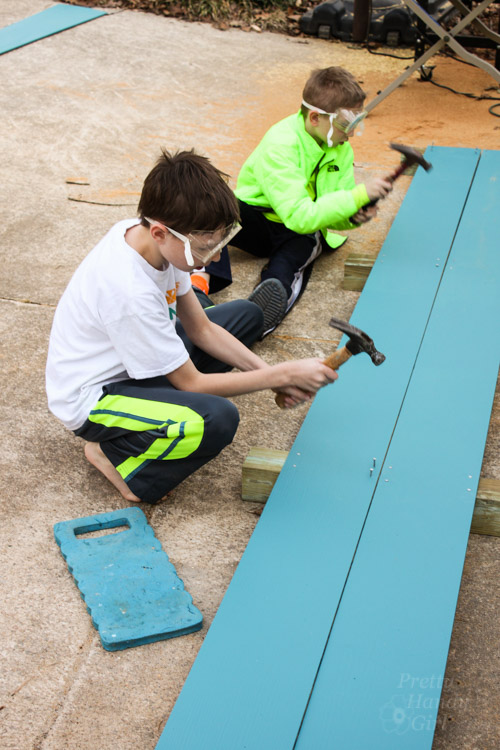
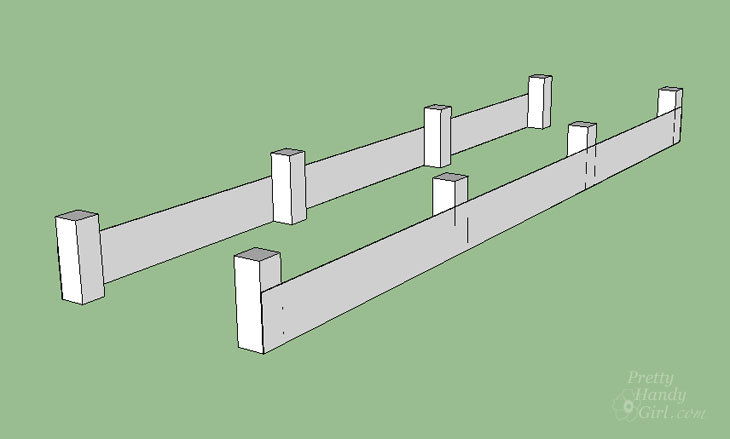
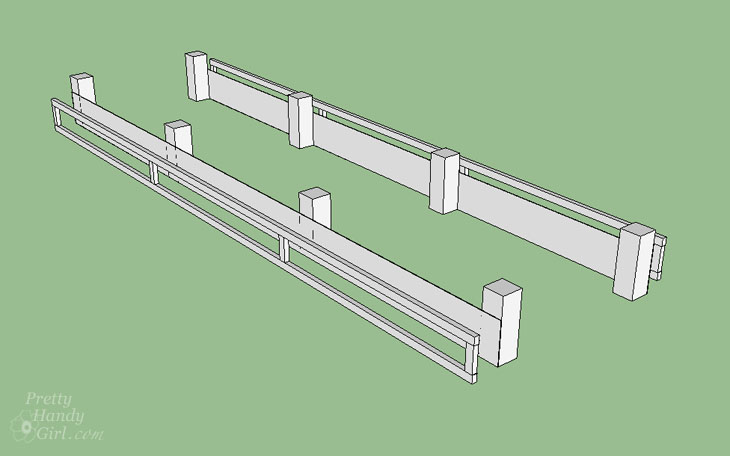
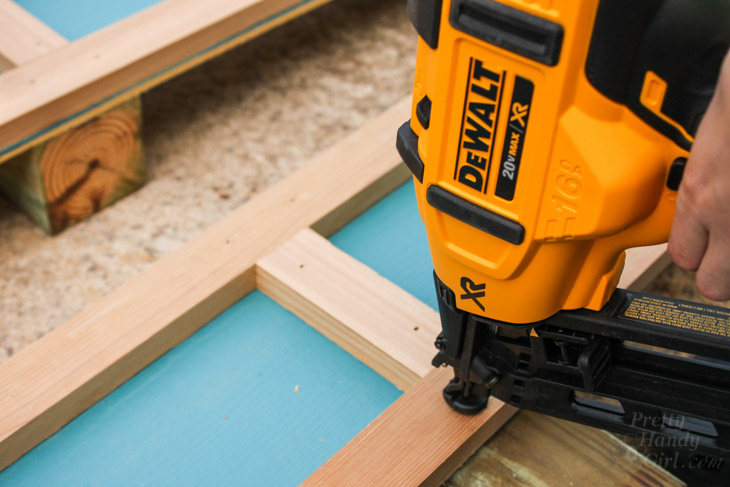
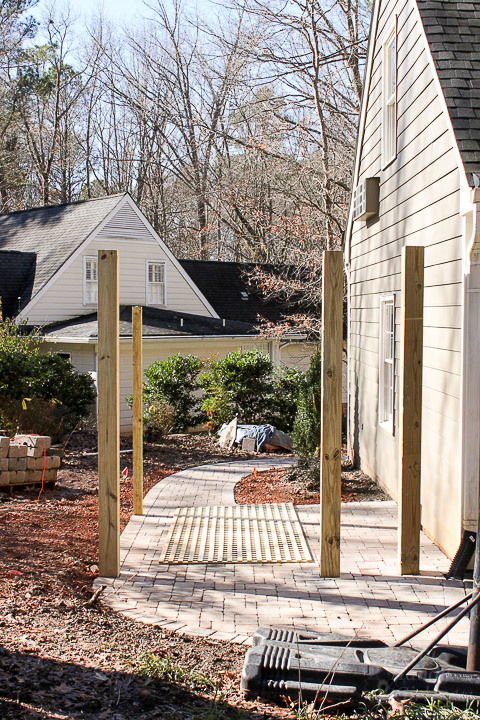
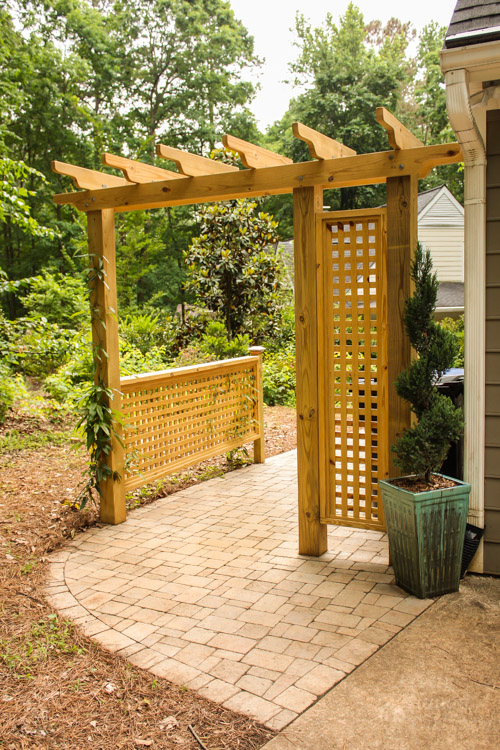
One of my favorite projects, was this giant pergola I built to screen the trashcans.

Backyard Landscaping Reveal | Pretty Handy Girl

Can I be completely honest? I used to dread taking out the trash at night because I could never see the path clearly and worried that a copperhead might be waiting for me.

Backyard Landscaping Plans | Pretty Handy Girl

Not anymore! The beautiful walkway provides a clean and even walkway. Nothing is muddy. The trashcans don’t get dirty every time it rains. And there are no random shadows that make me think SNAKE!

Backyard Landscaping Reveal | Pretty Handy Girl

Best of all, our guests pull in the driveway and no one notices the trash cans!

Backyard Landscaping Reveal | Pretty Handy Girl

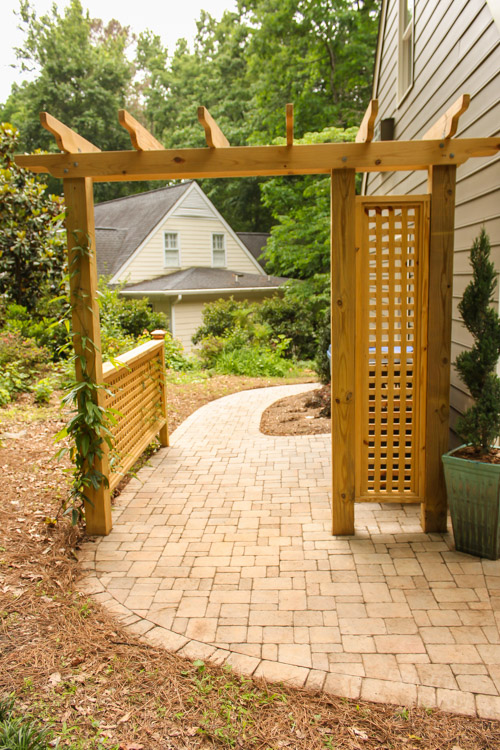
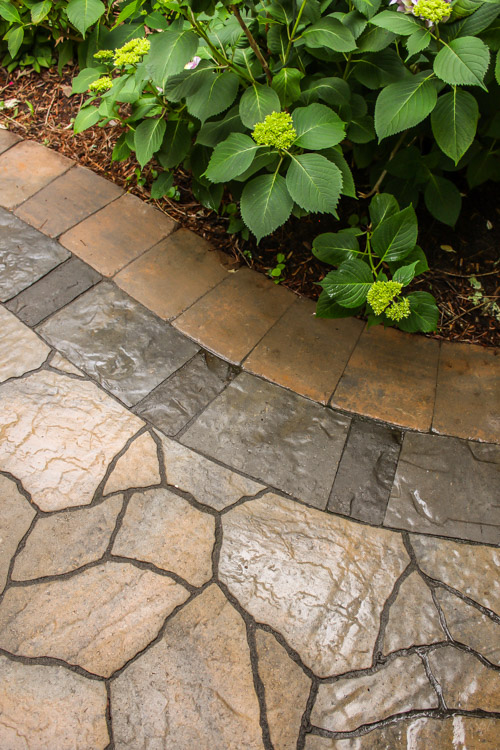
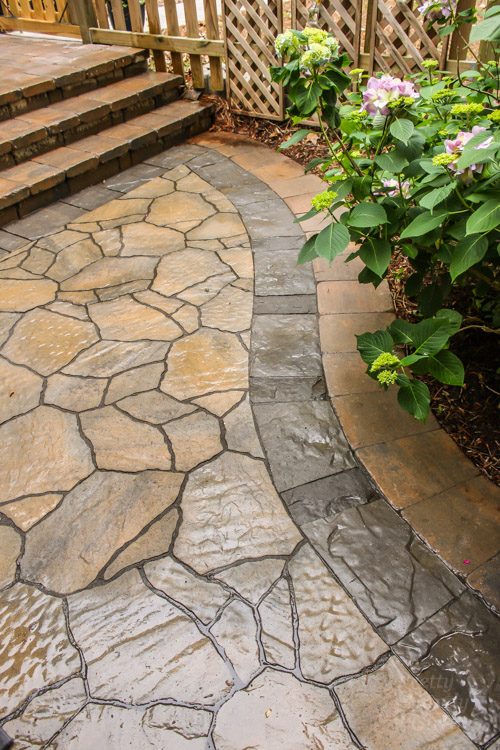
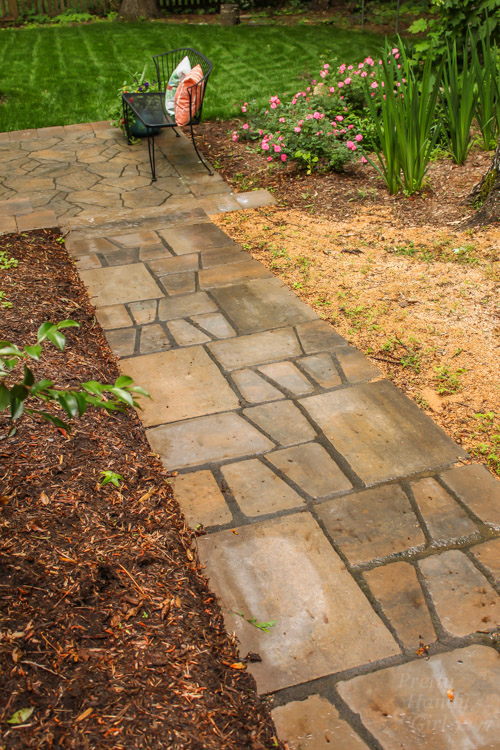
We decided to use the Dublin Cobble (Fossil Beige) pavers on this side to match the front walkway. They fit together leaving a consistent joint. Everything is smooth, even and gorgeous.

Backyard Landscaping Reveal | Pretty Handy Girl

About that joint—when installing pavers, ask for polymeric sand in the joints. The sand forms a membrane that prevents weeds from growing in and it won’t wash out. But, water still permeates the joints.

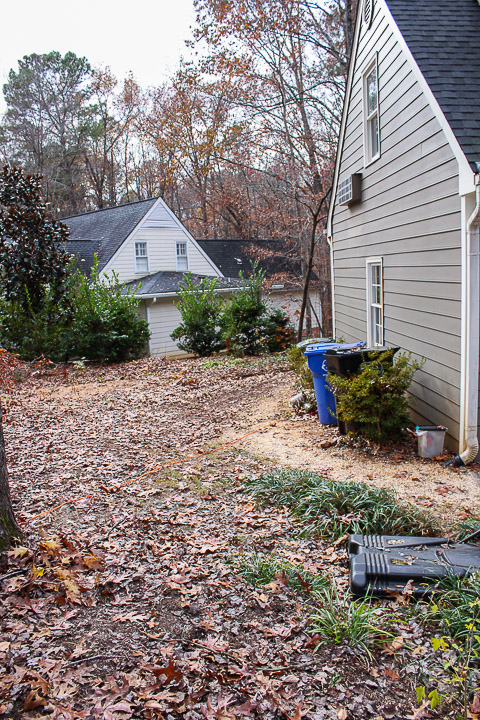
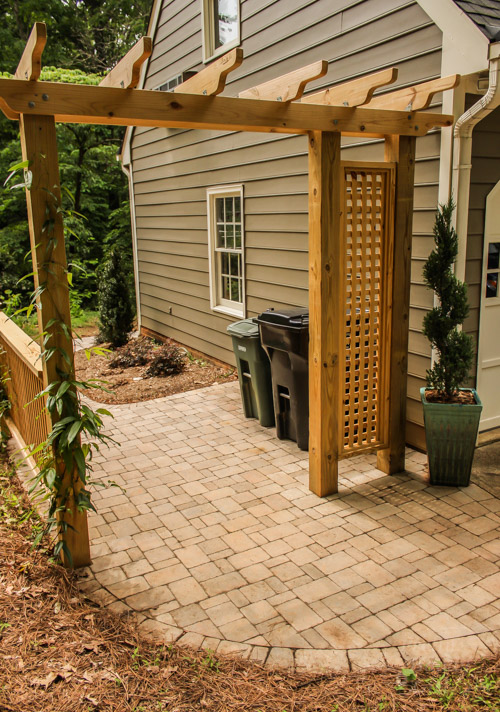
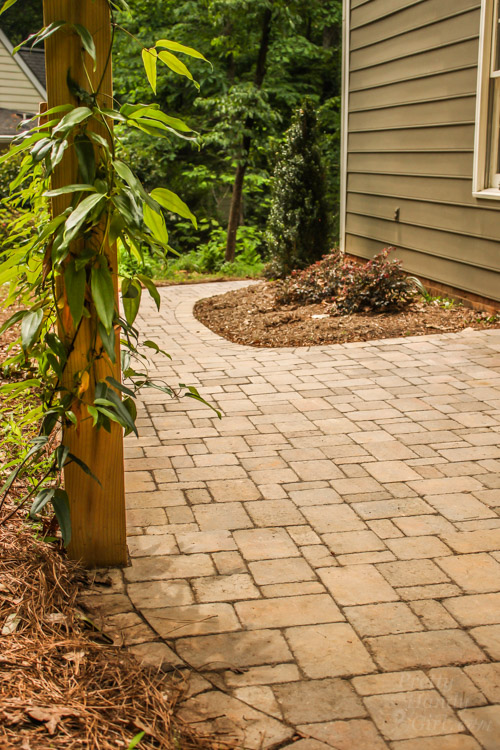
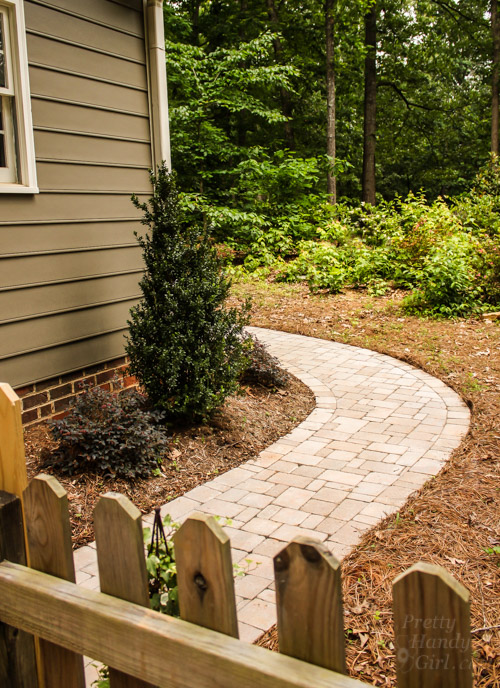
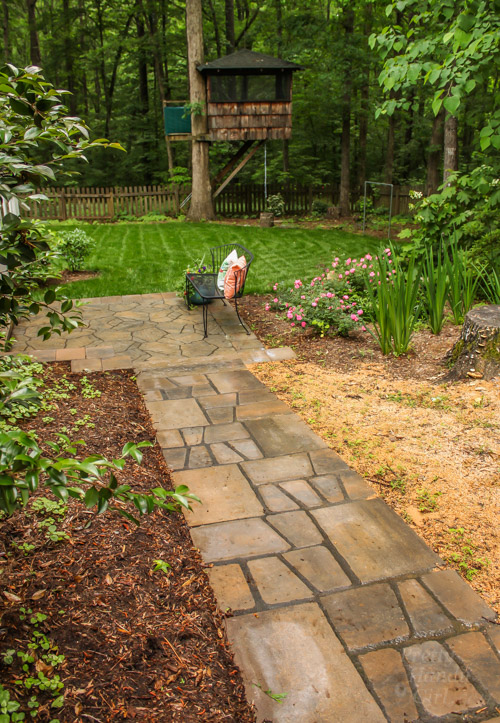
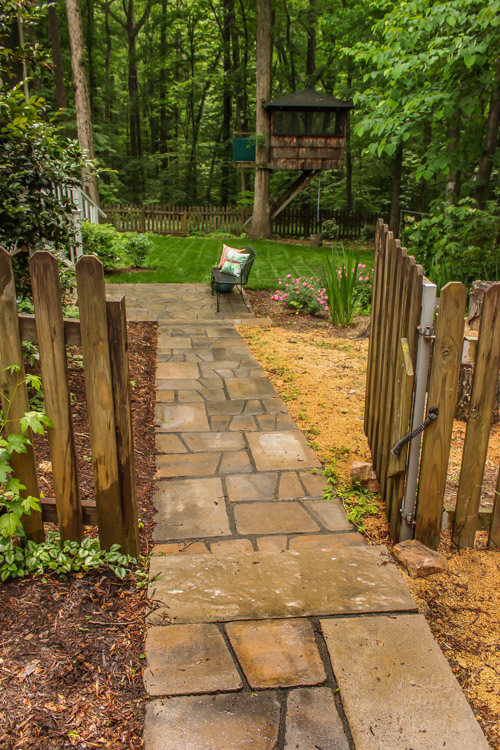
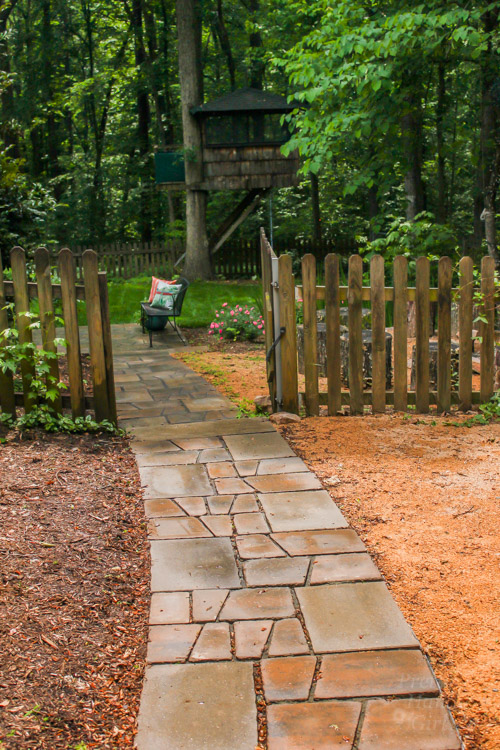
Walking around the side of the garage to the back yard is no longer an exercise in avoiding rocks and mud puddles.

Backyard Landscaping Plans | Pretty Handy Girl

We have a safe and clean place to walk. It’s a nice invitation for guests to come around back for some drinks and burgers.

Backyard Landscaping Reveal | Pretty Handy Girl

Backyard Landscaping Reveal | Pretty Handy Girl

This spot was previously a big sliding mess of earth dotted with weeds.

Backyard Landscaping Plans | Pretty Handy Girl

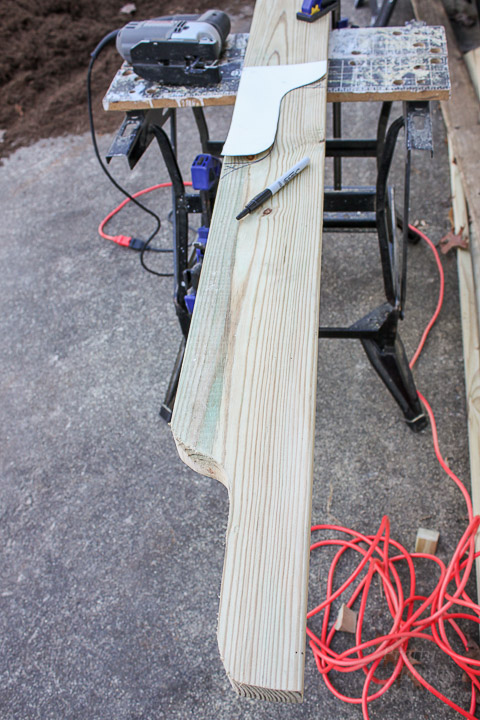
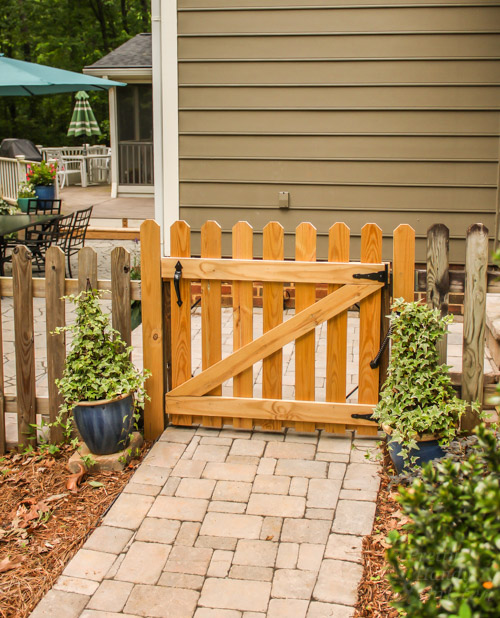
After the new pavers were installed I rebuilt the gate and made it rock solid!

Backyard Landscaping Reveal | Pretty Handy Girl

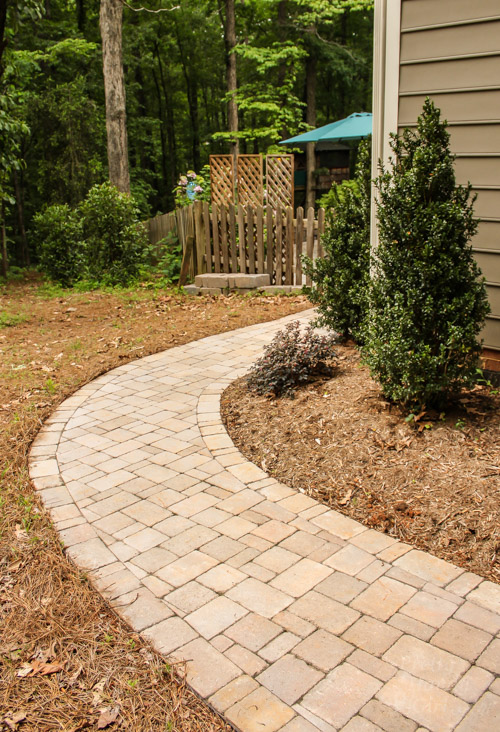
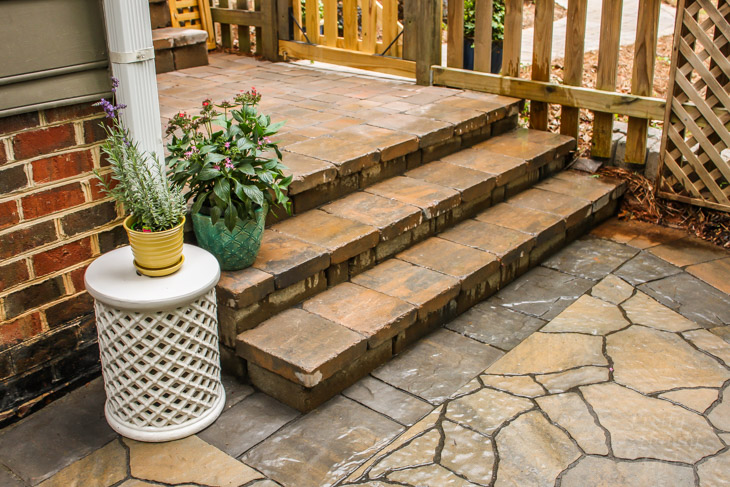
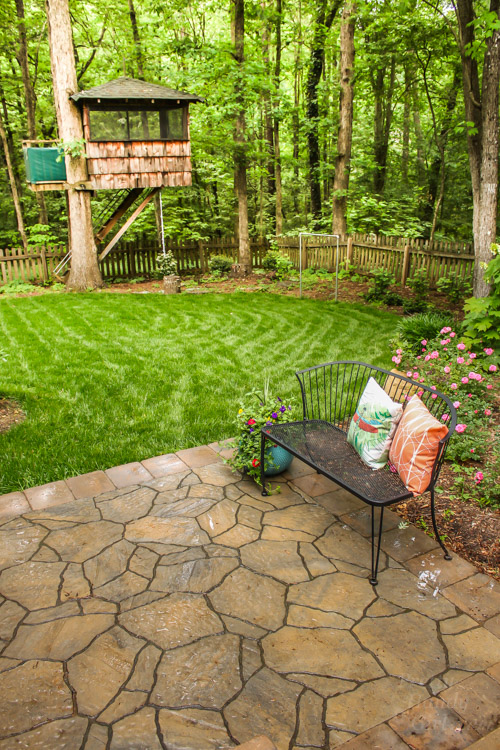
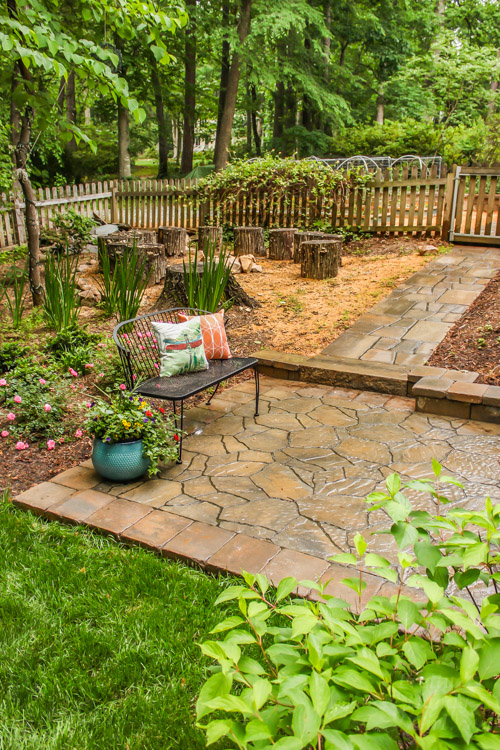
The landscapers installed the pavers and steps down to the patio. I have some plans for this little spot. Tune back in on Friday to see what I’m up to!

Backyard Landscaping Reveal | Pretty Handy Girl

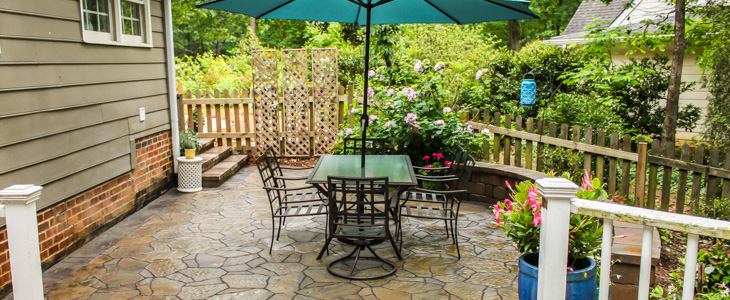
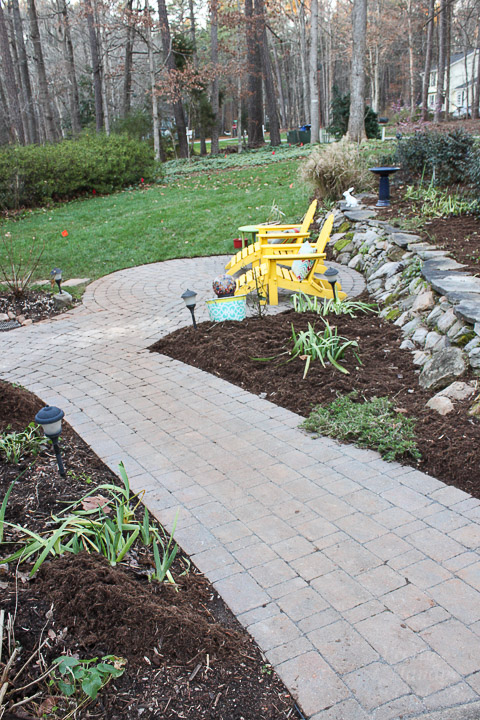
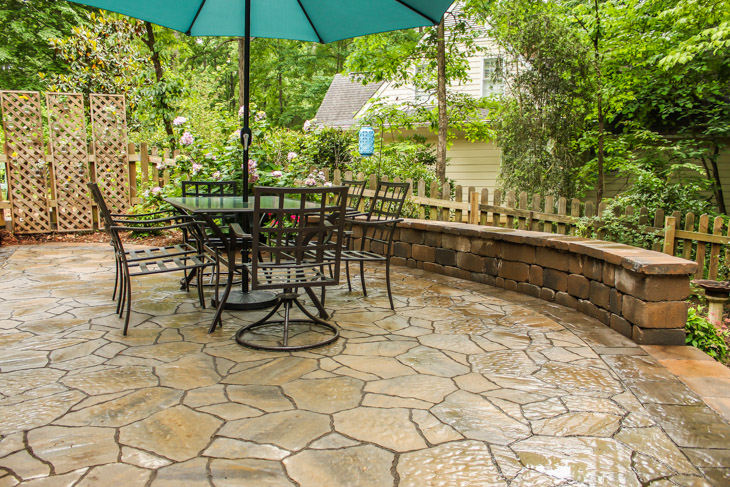
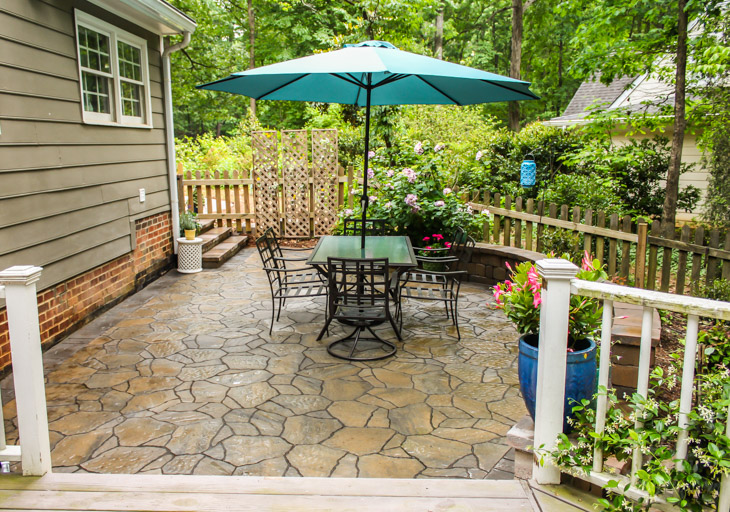
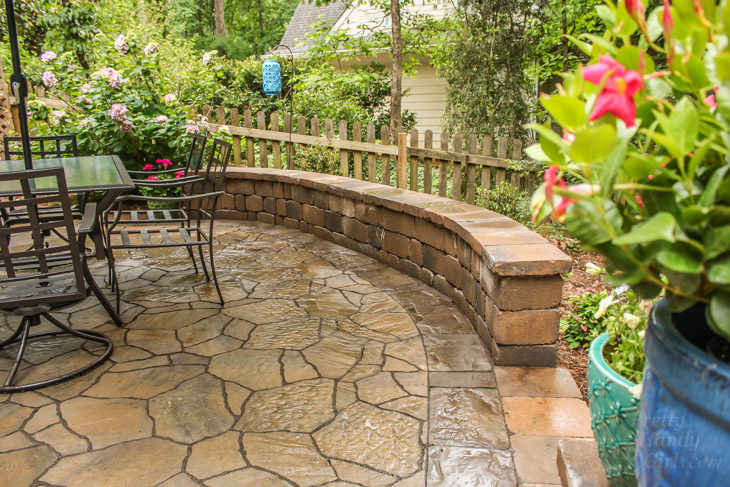
I love how the landscapers bordered the Mega Arbel (Smoky Mountain) patio with Mega Lafitt (Belgian Stone) and Tandem Wall Caps (Shelby Blend). It adds a beautiful design element.

Backyard Landscaping Reveal | Pretty Handy Girl

Backyard Landscaping Reveal | Pretty Handy Girl

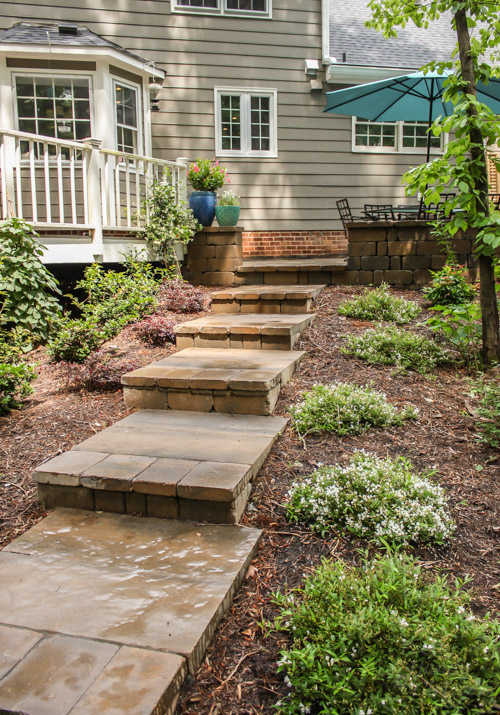
This is by far the biggest change and our new favorite spot in our backyard.

Backyard Landscaping Reveal | Pretty Handy Girl

Backyard Landscaping Reveal | Pretty Handy Girl

Remember the before?

Backyard Landscaping Plans | Pretty Handy Girl

And the Ahhhh-fter! I love the Mega Arbel random pavers. It adds a beautiful design to the patio and is a change from the methodical pavers on the pathways.

Backyard Landscaping Reveal | Pretty Handy Girl

If you have a keen eye, you’ll notice I removed a section of the railing to open it up to the patio.

Backyard Landscaping Reveal | Pretty Handy Girl

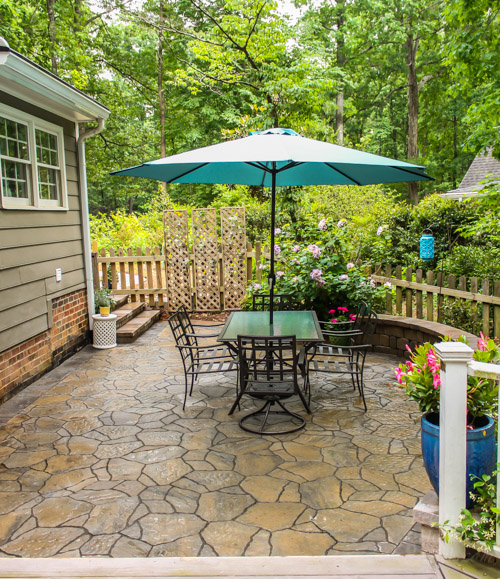
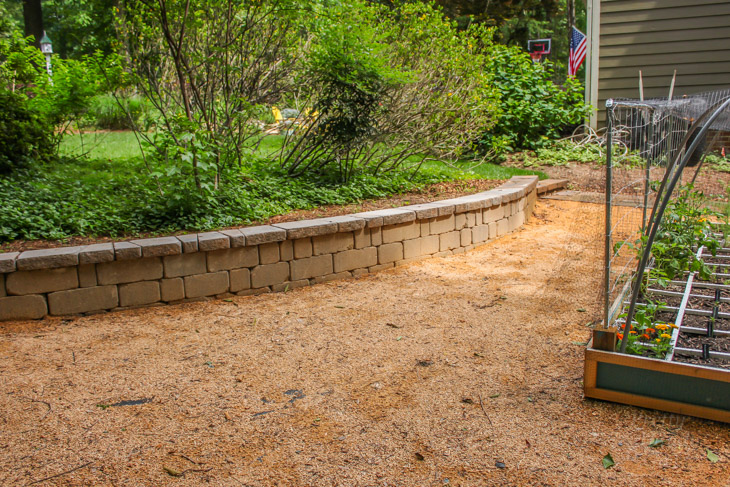
One of the ideas the landscape designer had was to add a seating wall framing the edge of the patio. The Keystone Stonegate wall blocks (Colonial Blend color) fit together easily for a permanent and sturdy structure. You can see how it was constructed in the progress post.

Backyard Landscaping Reveal | Pretty Handy Girl

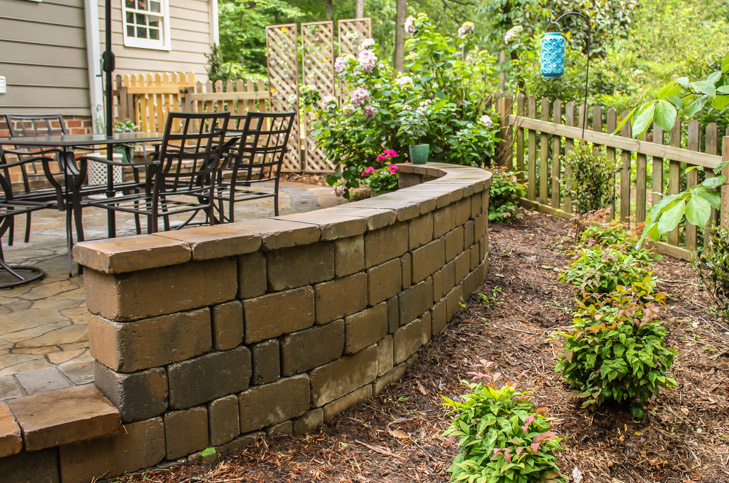
This will add lots of extra seating during parties.

When the caps were first delivered, they were not what I had wanted. The landscaper had substituted the Tandem caps for Keystone Country Manor caps. I didn’t like the texture on the edge of the Keystone caps and worried people would scrape their legs on the edges. She gave in and went back to the Tandem caps and I was a happy girl.

Backyard Landscaping Reveal | Pretty Handy Girl

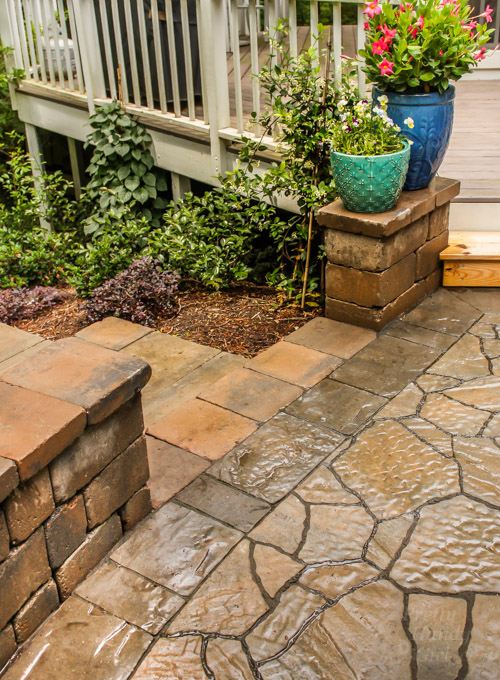
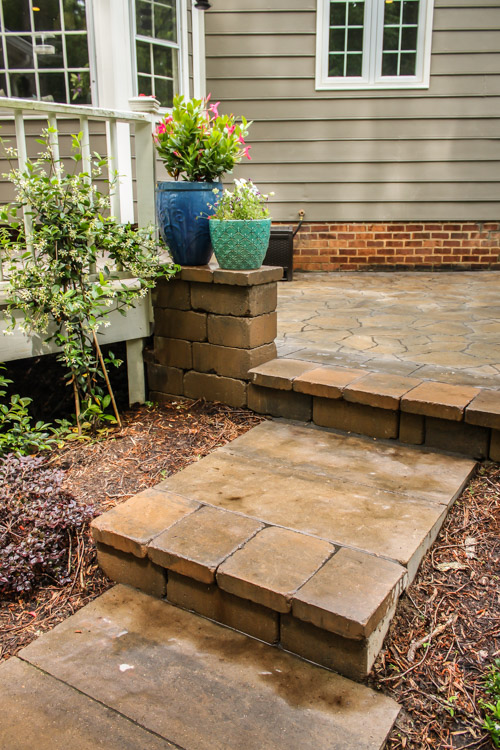
To frame the opening that leads to the yard, I requested a small section of wall on the side closest to the deck.

Backyard Landscaping Reveal | Pretty Handy Girl

Backyard Landscaping Reveal | Pretty Handy Girl

Do you remember what the yard looked like from this angle? The railroad ties had rotted from the inside and were a hazard to walk on.

Backyard Landscaping Plans | Pretty Handy Girl

The Belgard Granika steps (Cotswold Mist color) were instrumental in creating a permanent solution for travel from the patio to the lower lawn. Each step is composed of two Granika steps, plus Keystone Stonegate wall blocks with Tandem wall caps. This was a design decision I made after seeing the two Granika steps on their own.

Backyard Landscaping Reveal | Pretty Handy Girl

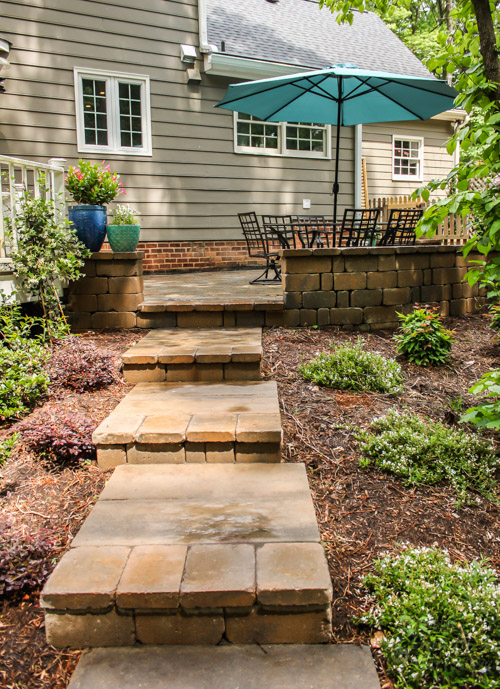
Each Granika stone weighs 275 pounds. So, you can imagine my hesitation to ask for any changes. But, ultimately I knew I wanted the steps to tie in with the patio and the idea to nose the steps with the same materials as the seating wall seemed like the right decision.

Backyard Landscaping Reveal | Pretty Handy Girl

This also allowed us to deepen the steps and make the transverse to the grass more gradual.

Backyard Landscaping Reveal | Pretty Handy Girl

You should have seen how muddy the yard got during construction.

Backyard Landscaping Plans | Pretty Handy Girl

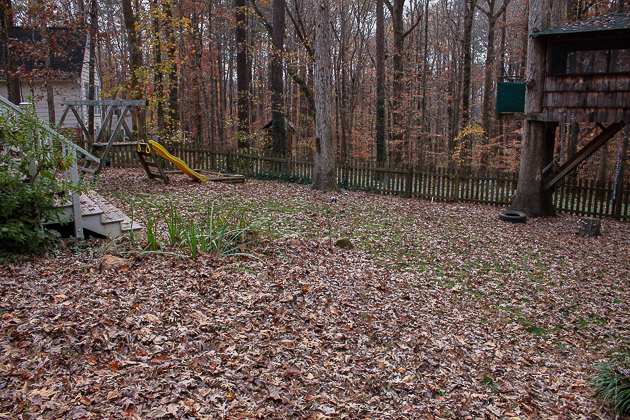
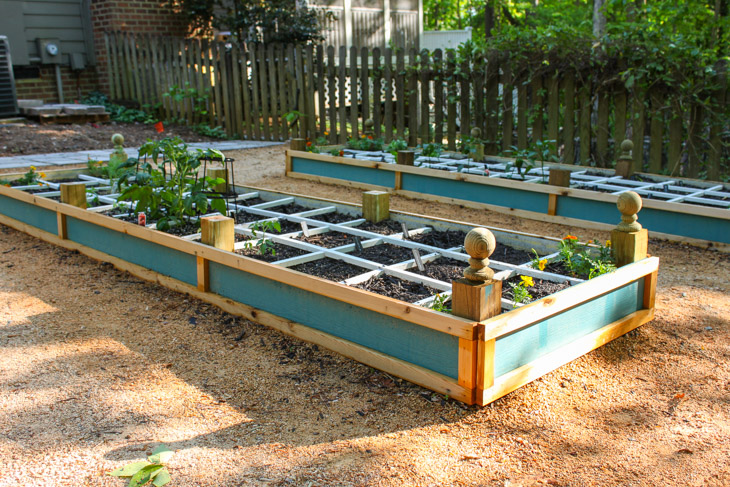
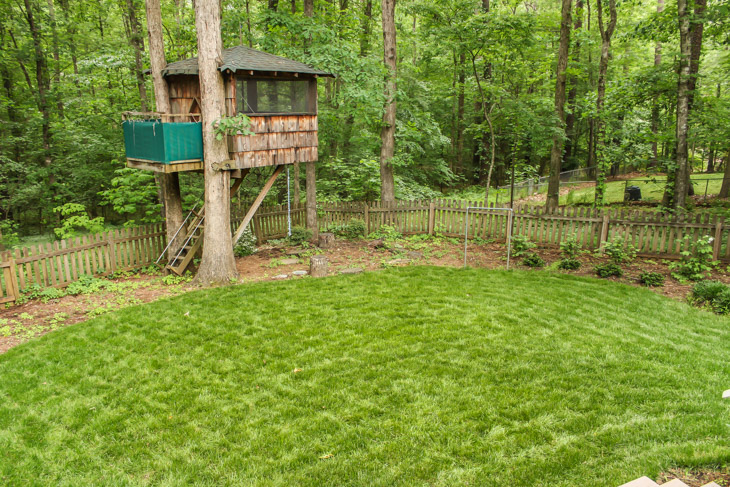
We had a big mound leveled where a tree used to be. This was all in preparation for an area that we could play soccer, badminton and more yard games.

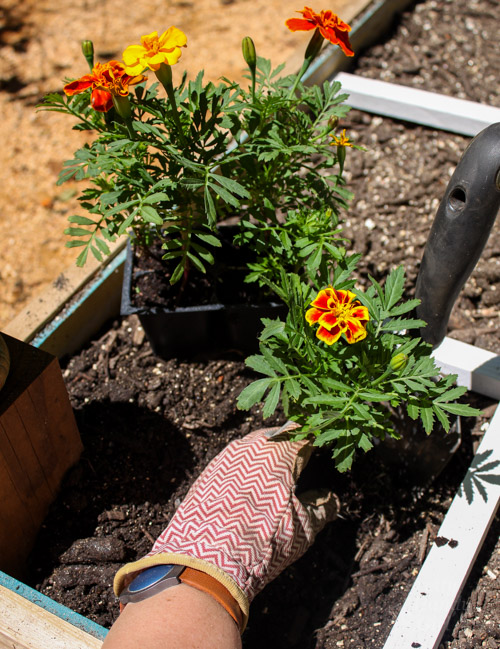
The perimeter of the yard received many new plants and a new sod lawn.

Backyard Landscaping Reveal | Pretty Handy Girl

These are just a few of the beauties that are blooming right now. I  was pleasantly surprised when little lilacs started popping up after Winter. The designer also called for several viburnum shrubs in the plans. I can’t wait for them to get huge and covered in big white snowballs!

Backyard Landscaping Reveal | Pretty Handy Girl

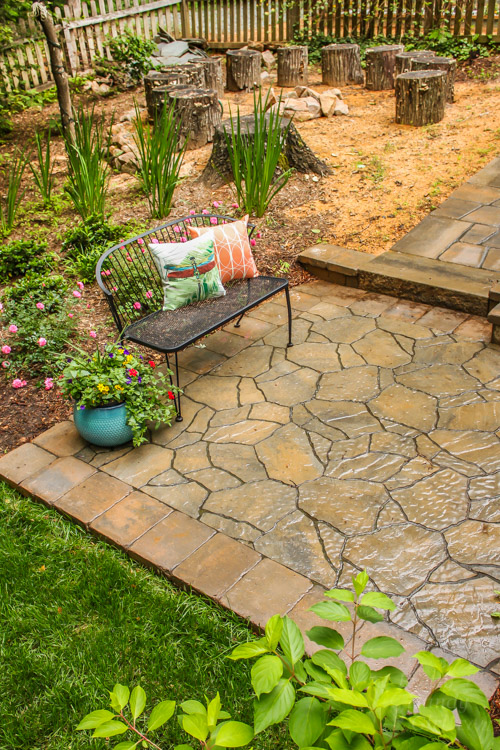
On the other side of the yard is a small patio landing spot using more Mega Arbel and Tandem wall caps.

Backyard Landscaping Reveal | Pretty Handy Girl

Backyard Landscaping Reveal | Pretty Handy Girl

The firepit area got a much needed leveling and we had the blue stone slabs removed. Previously, I worried that someone might trip and fall into the fire pit.

Backyard Landscaping Plans | Pretty Handy Girl

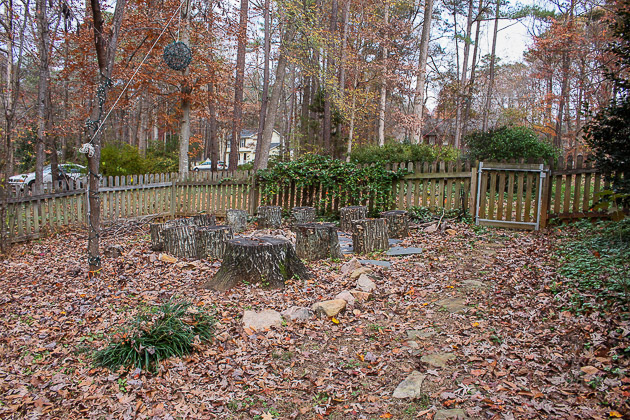
The landscaper recommended Chapel Hill grit around the fire pit area. I’m still not sold on it because some of the grit has washed away and the weeds are popping up in spots. But, overall it’s a big improvement.

Backyard Landscaping Reveal | Pretty Handy Girl

The walk way to the firepit was also a welcome improvement! Previously this was a muddy mess that meant there was lots of tracked mud in the house.

Backyard Landscaping Reveal | Pretty Handy Girl

The walkway was my brainchild. These pavers are actually the wall caps the landscaper ordered. Yes, you heard that right, they are the Keystone Country Manor caps. We also used two more Granika steps to help soften the slope.

Backyard Landscaping Reveal | Pretty Handy Girl

They provide a less formal path that fits in perfectly with the rustic fire pit area.

Backyard Landscaping Reveal | Pretty Handy Girl

I think Belgard needs to name this new pathway design after me. What do you think about the Brittany Walkway or Bailey Pathway? LOL.

Backyard Landscaping Reveal | Pretty Handy Girl

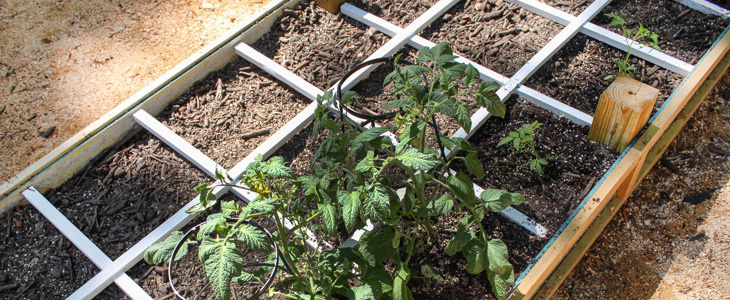
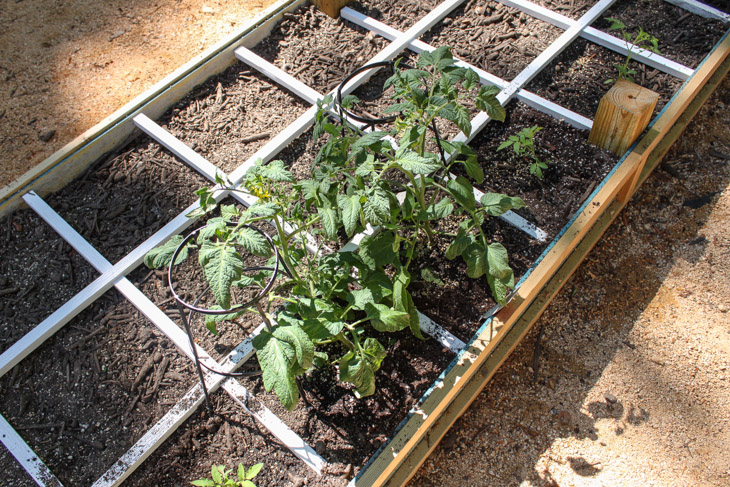
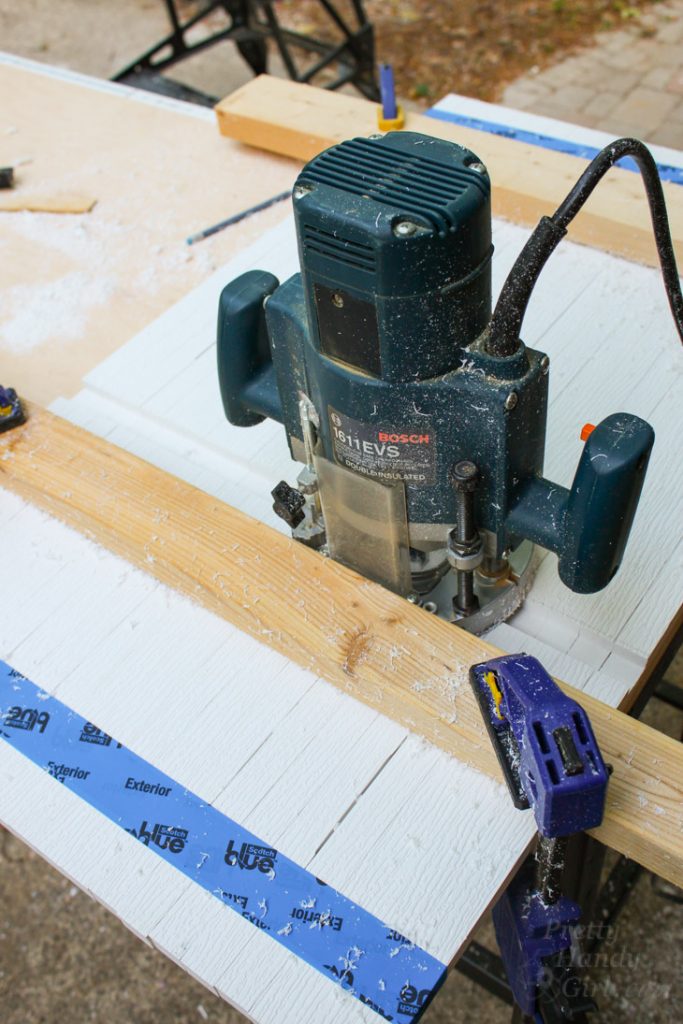
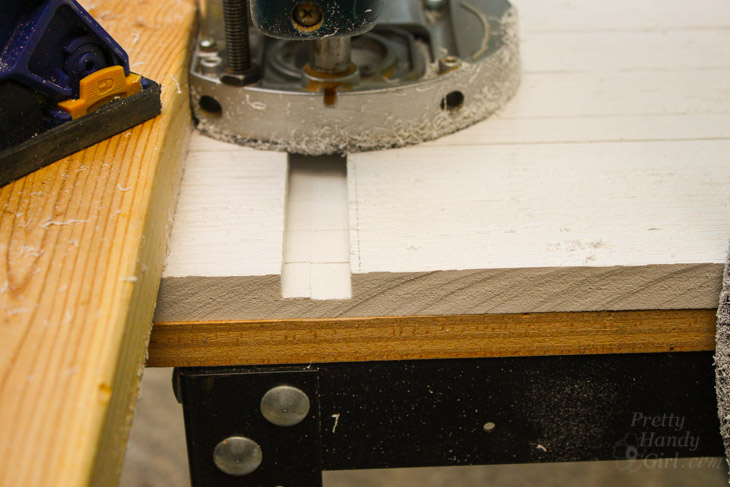
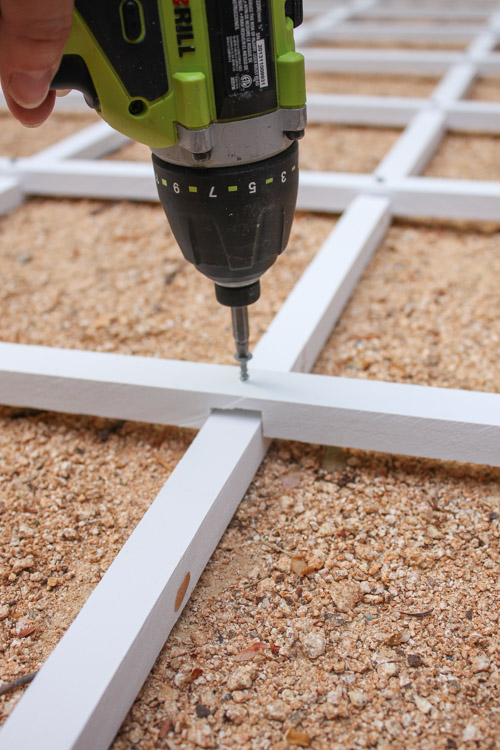
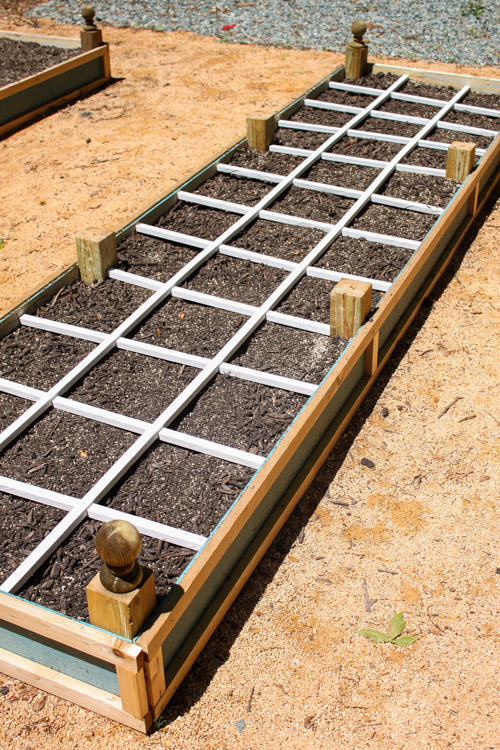
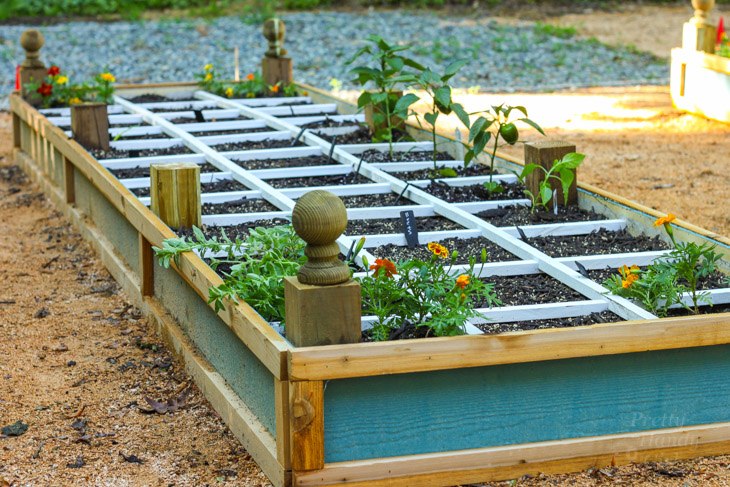
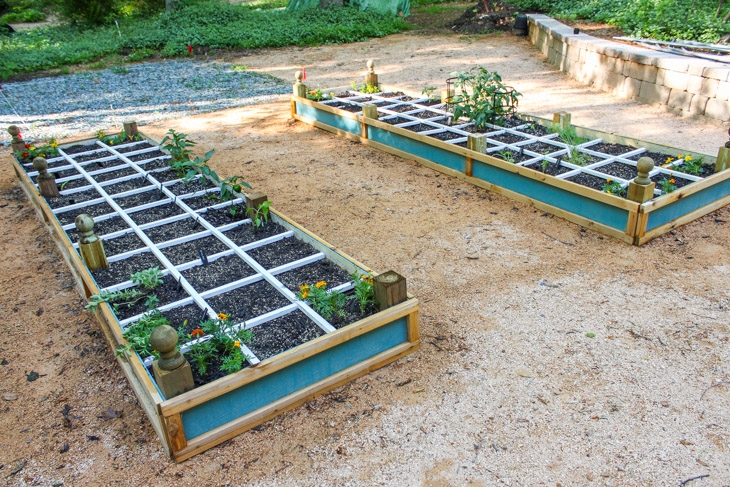
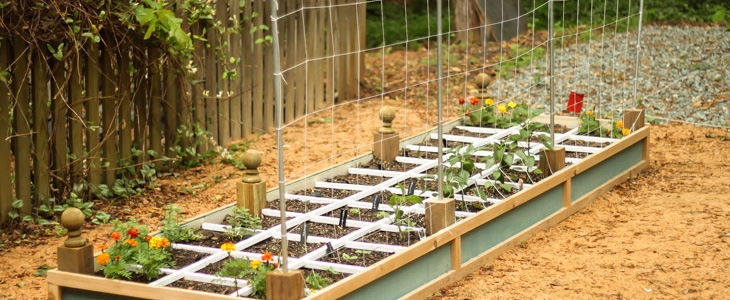
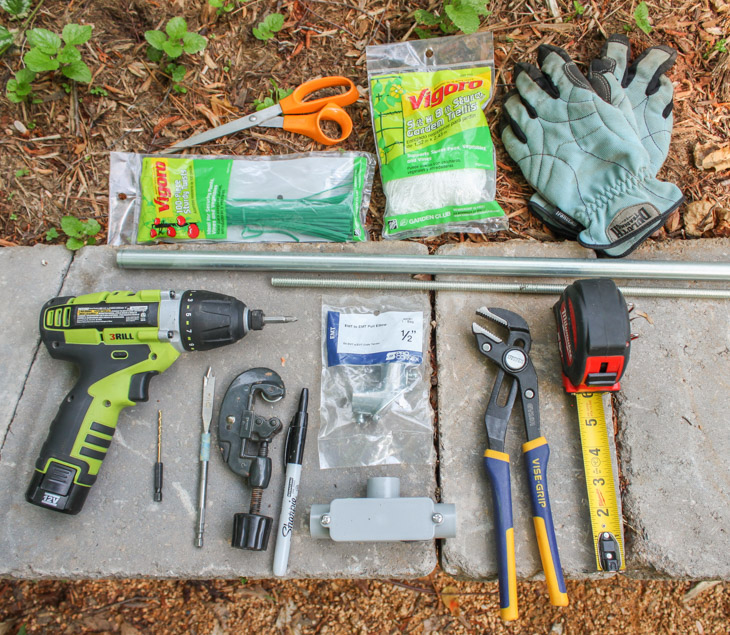
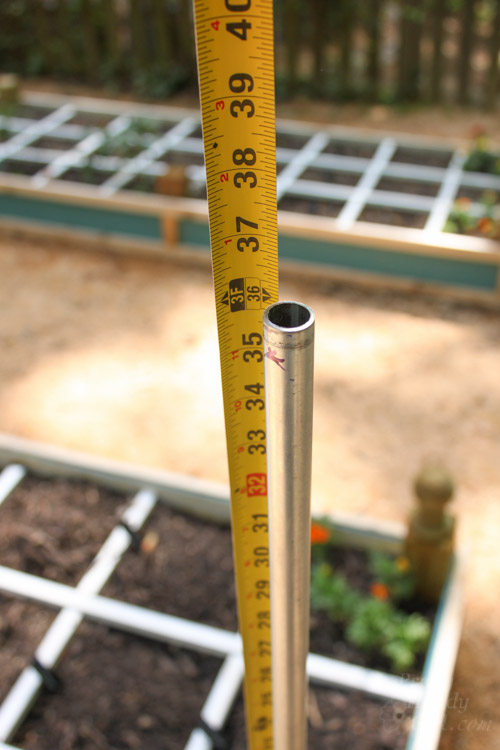
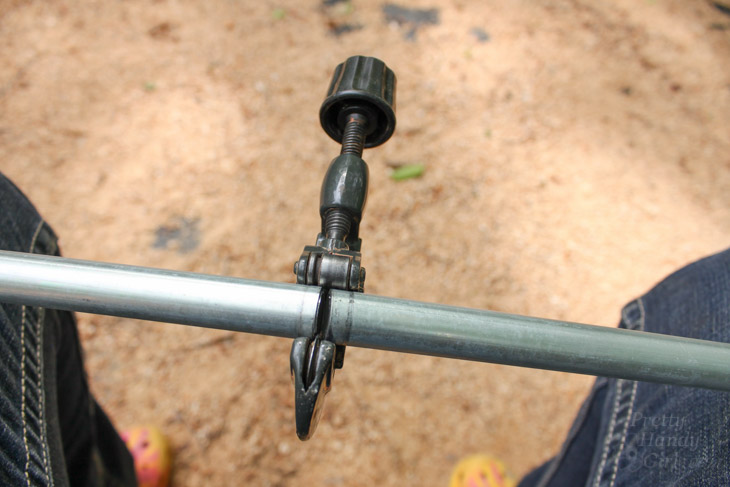
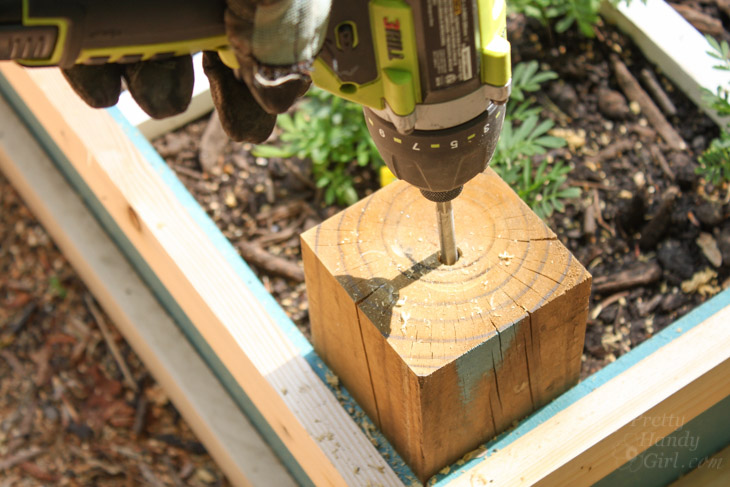
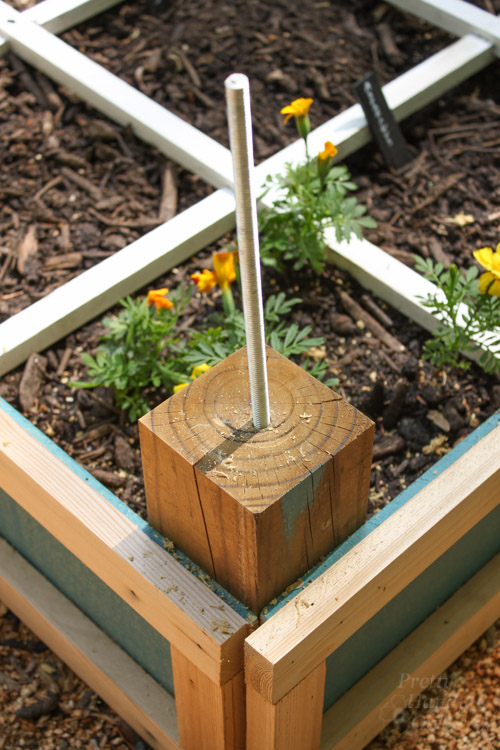
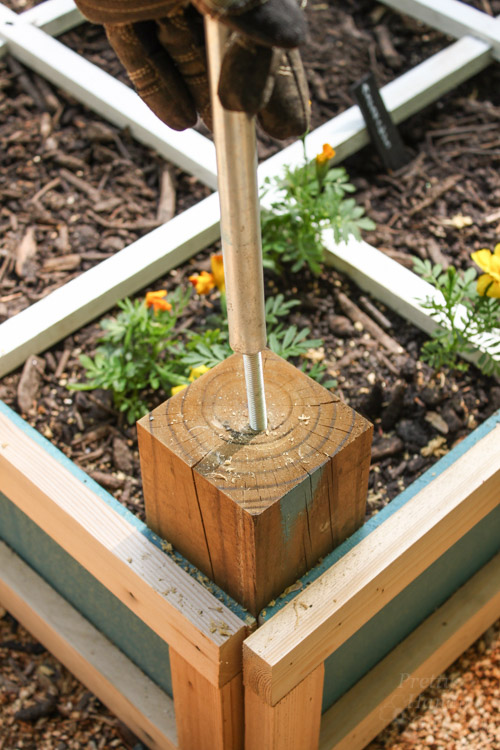
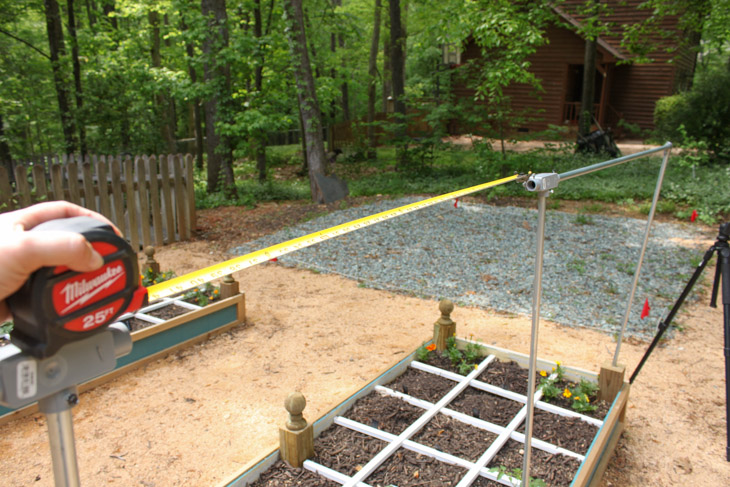
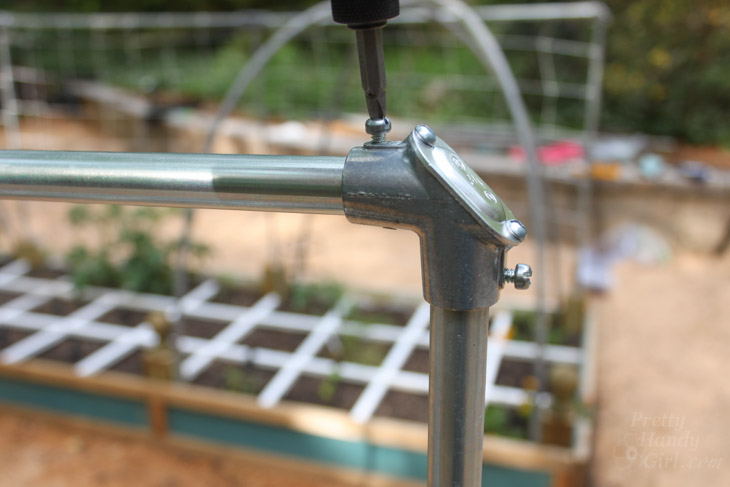
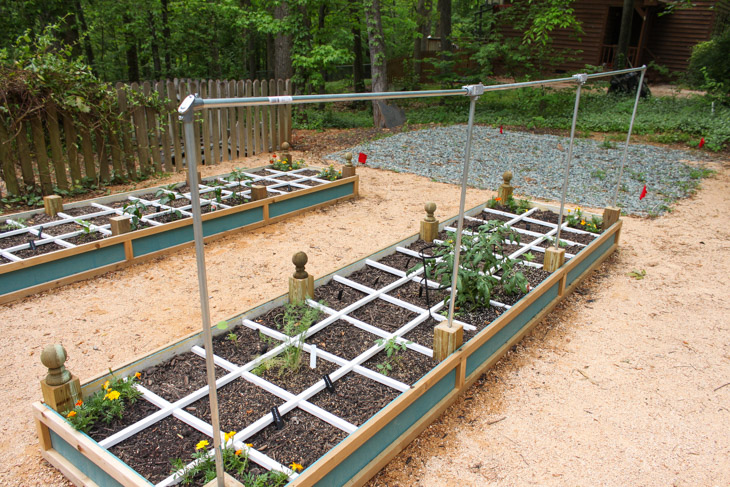
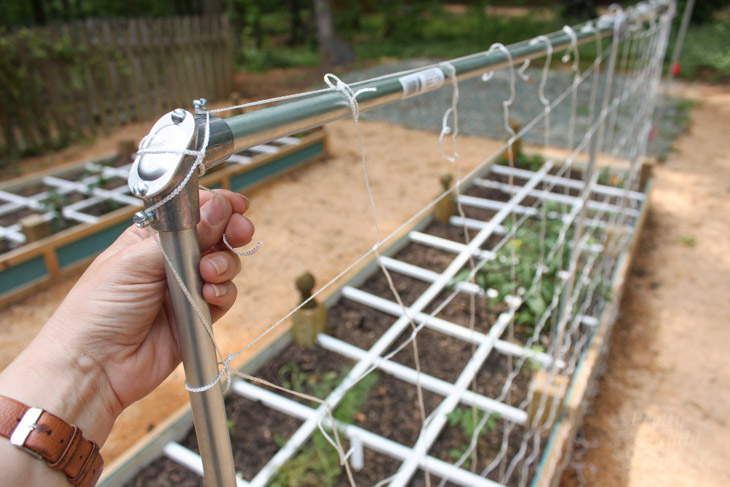
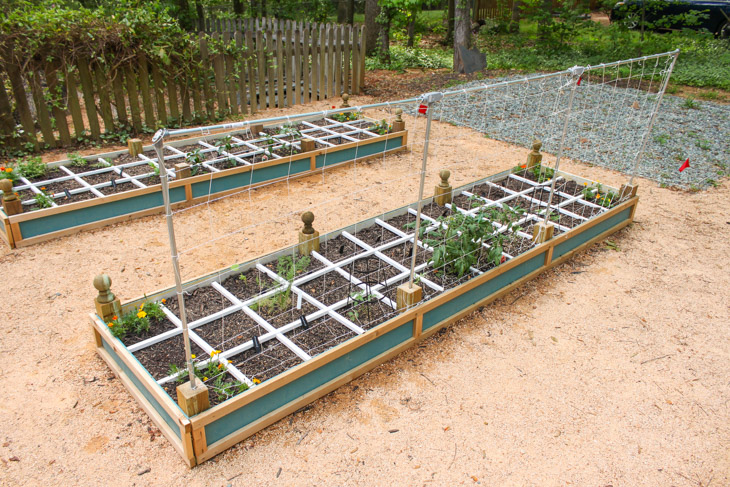
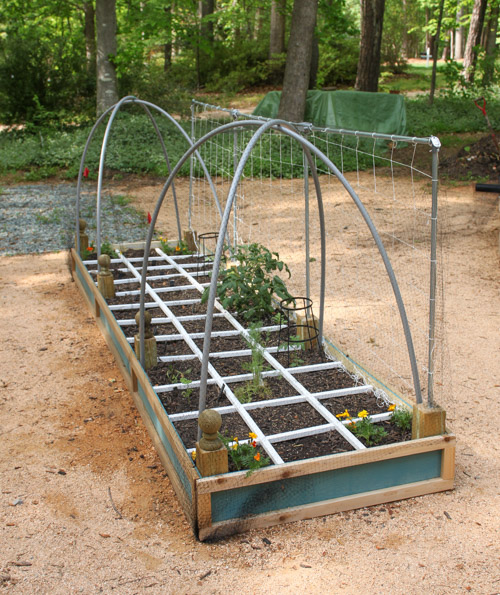
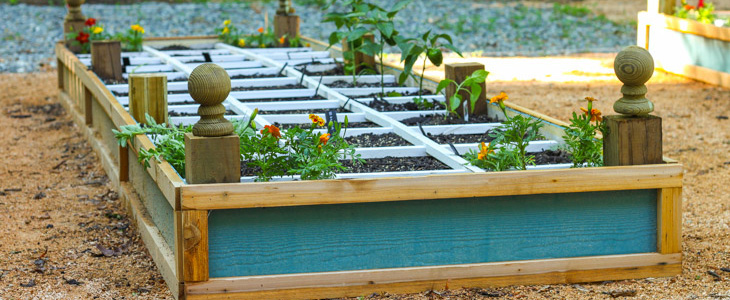
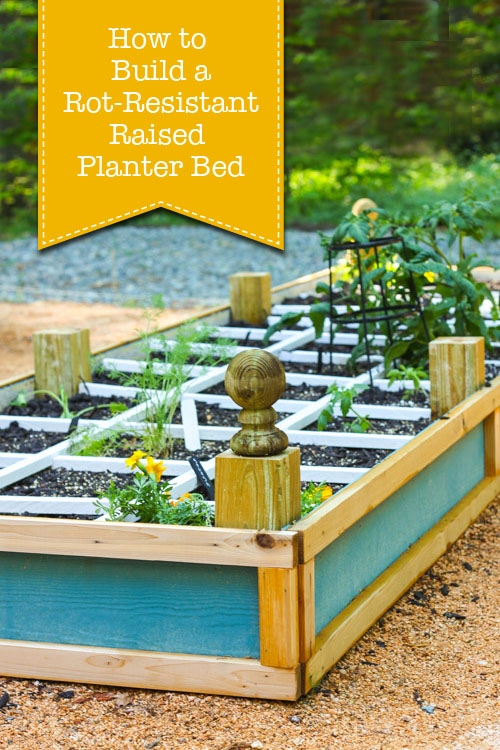
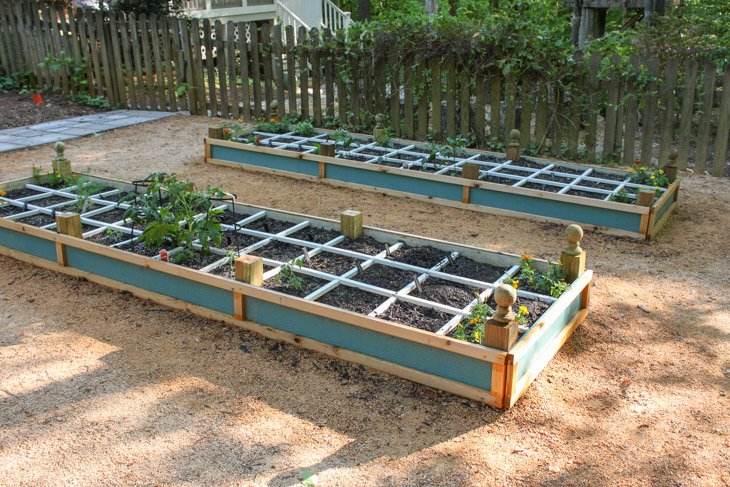
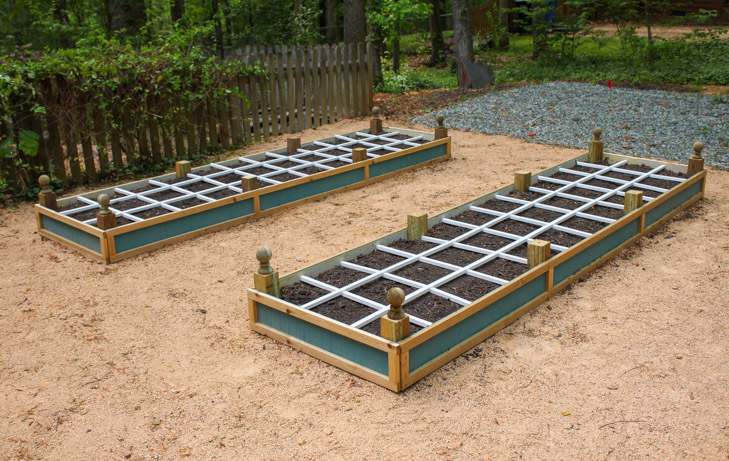
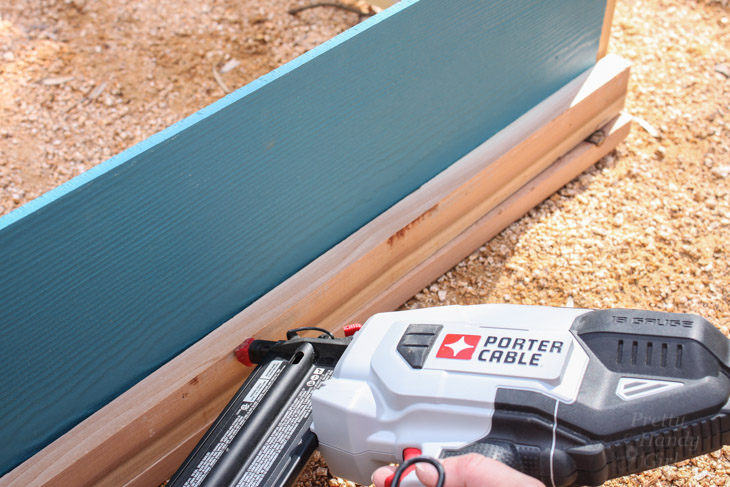
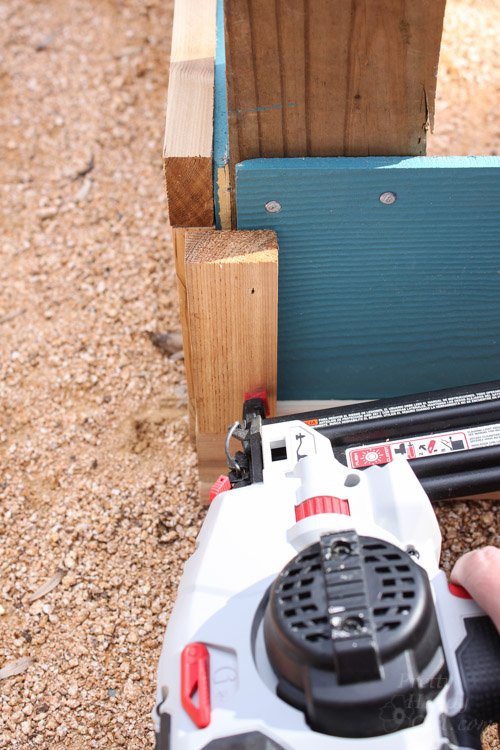
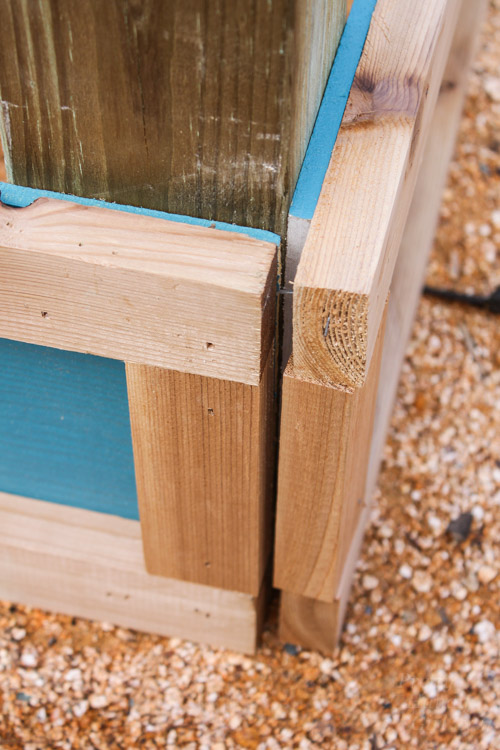
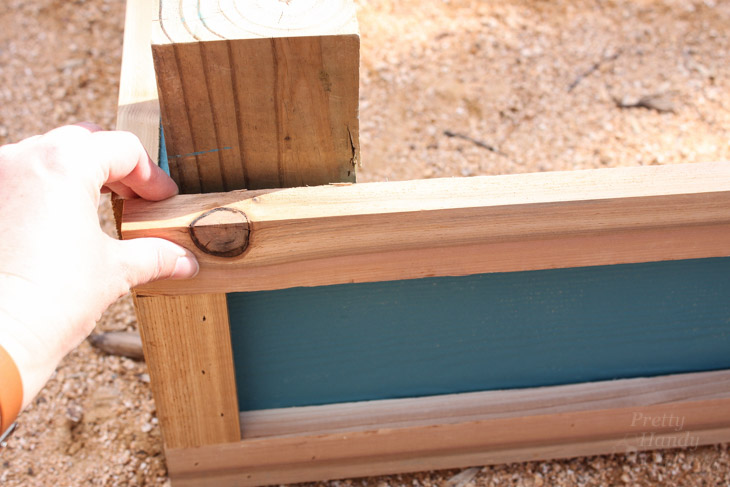
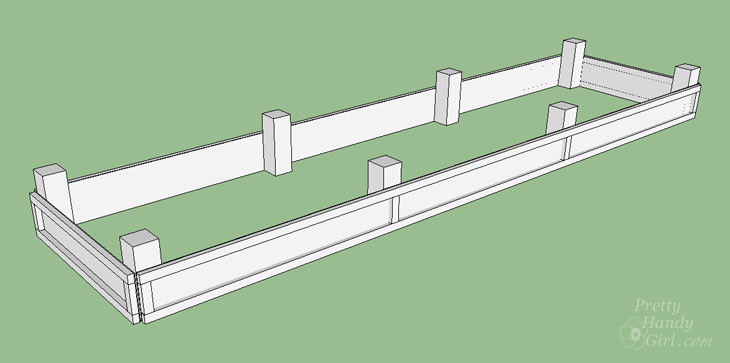
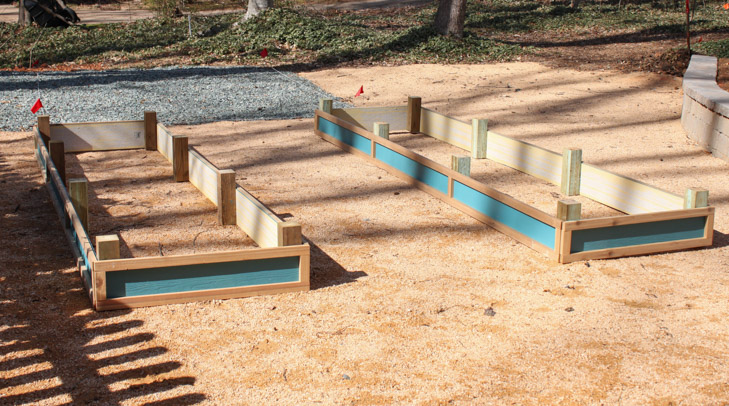
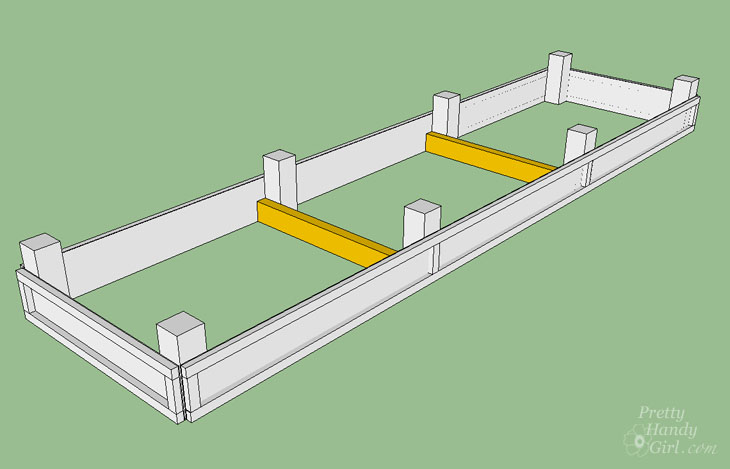
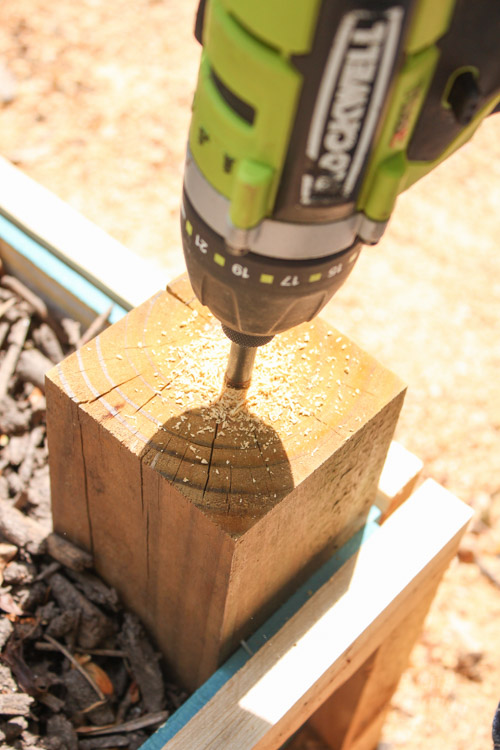
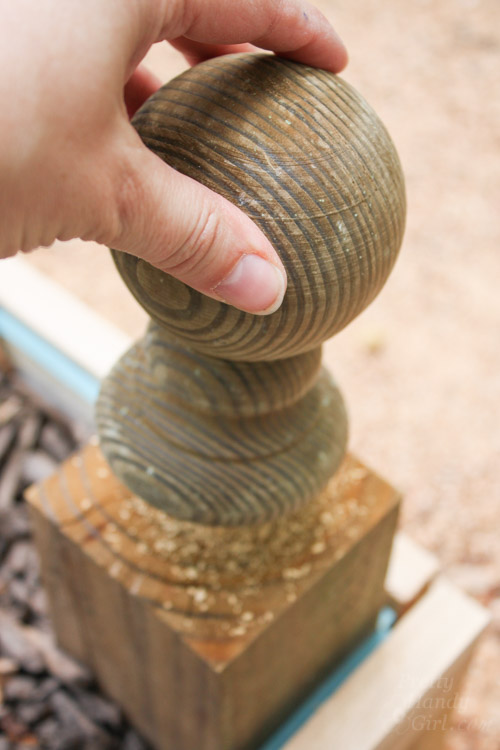
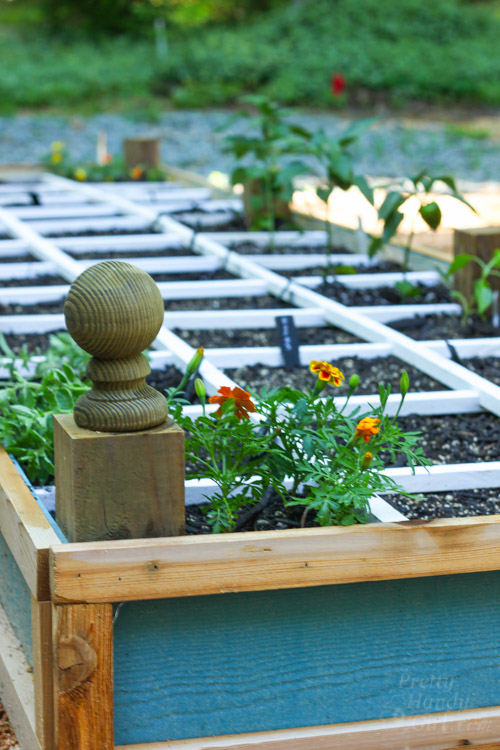
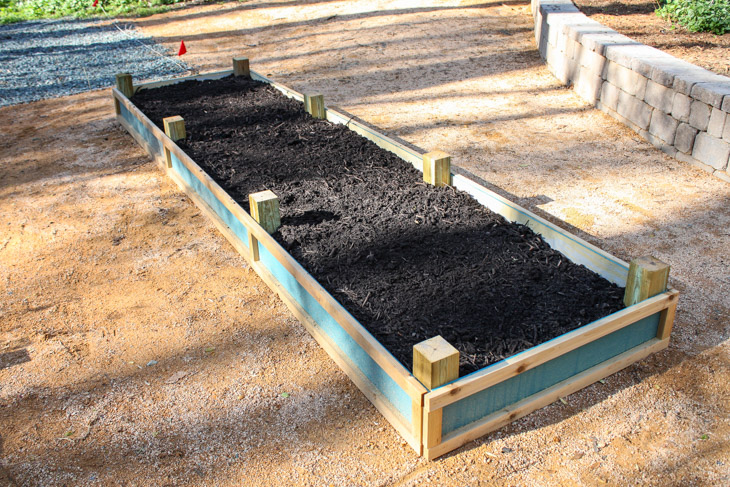
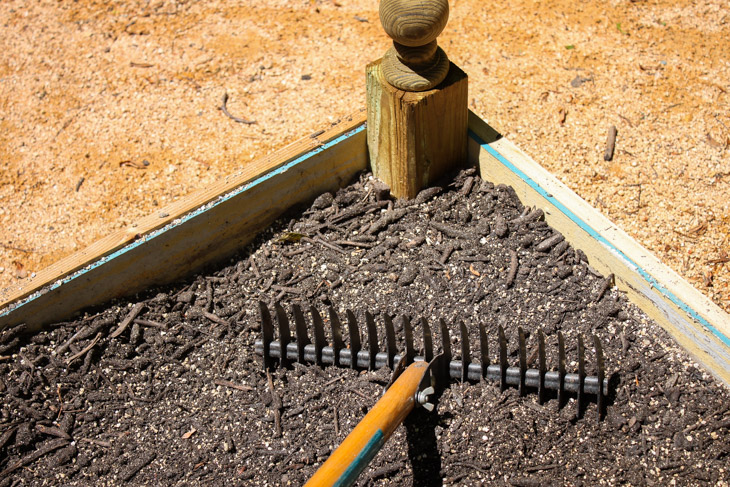
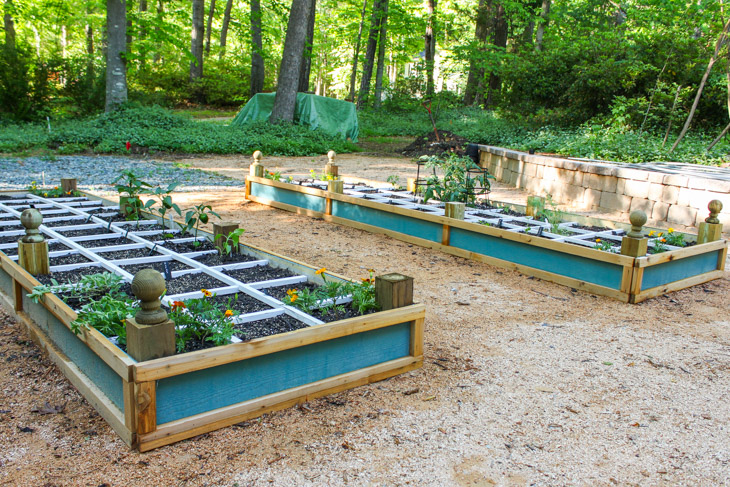
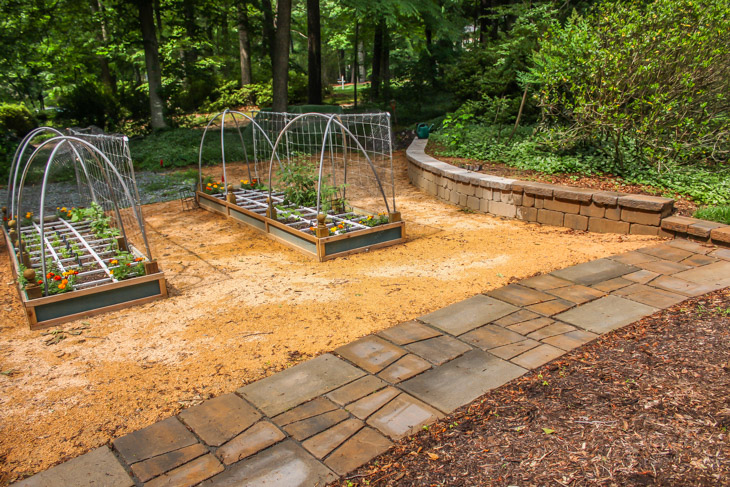
You have seen some of the garden area in my recent tutorials to build a rot-resistant planter and a budget-friendly trellis.

This spot was a barren sloping landscape before. It’s hard to tell from this photo, but there was a decent slope to the land.

Backyard Landscaping Plans | Pretty Handy Girl

The landscapers leveled out the spot and installed Belgard Stonegate blocks for a retaining wall and used the Keystone Country Manor caps here. (Don’t tell my landscaper, but she was right. I’ve sat on this wall many times and it doesn’t scrape my legs. ;-D)

Backyard Landscaping Reveal | Pretty Handy Girl

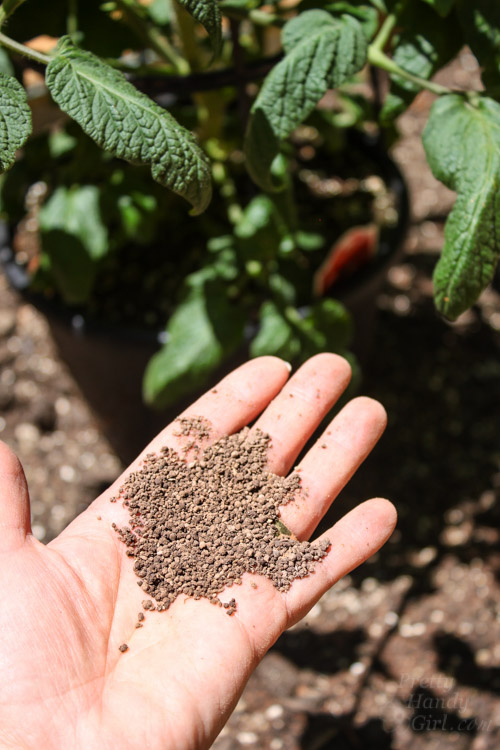
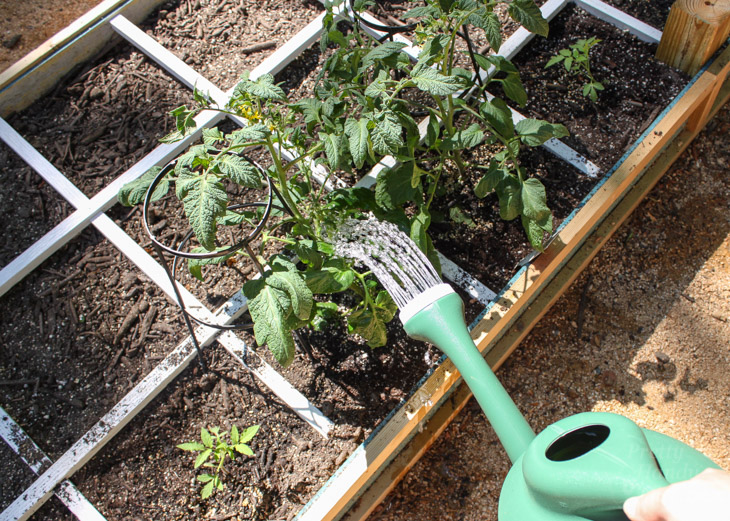
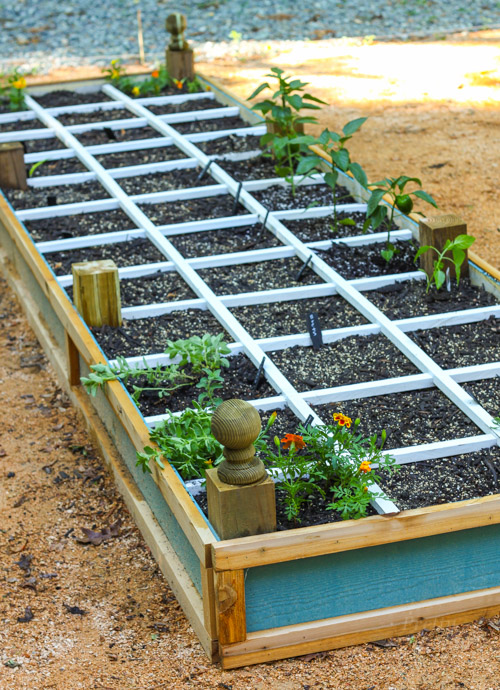
This was the perfect spot to build my garden beds. They get plenty of sun and my vegetables are growing fast!

Backyard Landscaping Reveal | Pretty Handy Girl

This concludes the tour of our yard. I hope you get some inspirations for your home. If you need more ideas, you can order a Belgard idea book.

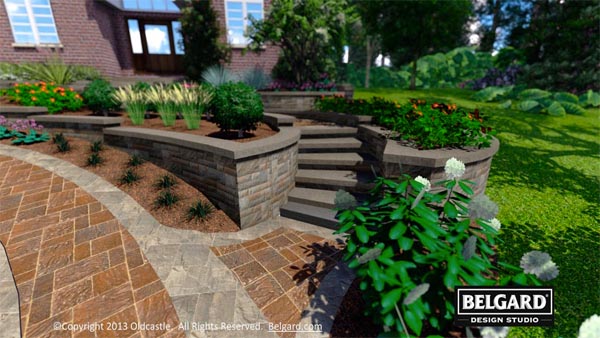
Belgard also has a 3-D Visualizer that can help you visualize your own space with the new hardscapes. You can upload your own photo or work with a Belgard authorized contractor and have them give you a visual look at your new space before you even break ground! How helpful is that?!

Belgard 3-D visualizer | Pretty Handy Girl

It’s time for me to kick you out now. I have some party planning to attend to. It’s time to invite some friends over to enjoy our new outdoor entertaining spaces.

See ya’ later!

PHGFancySign

Disclosure: This is a sponsored post for Belgard. I received complimentary products in exchange for writing a post about Belgard. I was not told what to write. All opinions are my own. As usual, I am very particular about the brands I work with and will always tell you if you are reading a sponsored post.


How to Build a Square Foot Gardening Grid that Won't Rot | Pretty Handy Girl

How to Build a Square Foot Gardening Grid that Won't Rot | Pretty Handy Girl

As I mentioned before, I am trying my hand at Square Foot Gardening. If you’ve never heard about this style of gardening, do some research or check out this book on Square Foot Gardening (affiliate link). The basic premise of the Square Foot Garden plan is that you plant in squares instead of rows. This makes it easier to plant more variety and cuts down on excess watering and weeding.

How to Build a Rot-Resistant Raised Planter Bed | Pretty Handy Girl

While looking at ideas for creating a grid, I was struck by how many of them will rot after time. I prefer building things that will last forever! This square foot grid won’t rot and won’t deteriorate over time. I used readily available PVC house trim for my grid and it should last an eternity!

How to Build a Square Foot Gardening Grid that Won’t Rot:

To build the grid, rip PVC house trim boards into 1″ strips. on your table saw.

Route out grooves at 1 foot intervals into the cross pieces.

How to Build a Rot-Resistant Raised Planter Bed | Pretty Handy Girl

The grooves should be 1″ wide and no deeper than 1/2 the depth of your PVC trim boards.

How to Build a Rot-Resistant Raised Planter Bed | Pretty Handy Girl

Lay out your grid and secure the cross pieces at 1 foot increments with 1″ screws.

How to Build a Rot-Resistant Raised Planter Bed | Pretty Handy Girl

To fit the grid in the raised planter bed I built, I cut the 4′ and 8′ cross pieces 7″ shorter to fit between the posts.

Now you have a Square Foot Gardening grid using material that also won’t deteriorate or rot! Just be sure to lift from the middle of the grid and don’t force it into the planter. The PVC boards can still snap at the grooves. (Especially when impatient 12 year olds are involved.)

How to Build a Rot-Resistant Raised Planter Bed | Pretty Handy Girl

So far, my plants are very happy. Everything I’ve planted is thriving and sending up shoots.

How to Build a Rot-Resistant Raised Planter Bed | Pretty Handy Girl

I can’t wait to harvest my first vegetables. I’ve been on a healthy eating kick after reading Eat Fat, Get Thin (affiliate link) by Dr. Mark Hyman. I must say, I feel amazing. Most of my aches and pains are gone! I’ve lost 8 pounds so far (which is saying something after the SNAP conference that was sponsored by Lindt chocolates. I may or may not have indulged in handfuls daily.)

How to Build a Rot-Resistant Raised Planter Bed | Pretty Handy Girl

Hope you enjoyed this tutorial! Check out more of my gardening tutorials here.

You may also like this ultimate guide to composting!

How to Compost - Magnificent Garden Soil| Pretty Handy Girl

PHGFancySign


Pin for later!

How to Build a Vegetable Trellis on a Budget | Pretty Handy Girl

How to Build a Vegetable Trellis on a Budget | Pretty Handy Girl

Recently, I showed you how to build these rot resistant planter beds. They are definitely working well for me. Many of my seeds have sprouted and they look very happy. Soon I’ll need a trellis to support the tomatoes, peppers, cucumbers and beans. With that in mind I set about trying to find the most cost effective way to build a trellis that would be strong and also rot resistant.

I found the idea to use electrical conduit while reading Square Foot Gardening (affiliate link). However, unlike Mel’s plans, I needed to create a structure to span my longer bed. Plus, I didn’t want to drill holes into the exterior of my planter bed. My design for building a vegetable trellis uses support from the corner 4×4 posts.

Ready to learn How to Build a Vegetable Trellis on a Budget? I thought so, grab your frugality and let’s get building.

Materials:
(contains affiliate links)

materials-build-trellis-supports

Choosing a location for your Trellis:

If you made the rot-resistant planter bed that I designed, you’ll have 4″x4″ posts to use to support the trellis. Be sure to rotate or select the North facing side of your planter bed to locate your trellis. Then your non-climbing plants won’t be overshadowed by the climbing vines.

If you have different planter bed, you can secure the conduit to the sides with straps like these. Or simply hammer the conduit into the ground enough to secure the trellis.

Instructions:

Measure and mark your conduit to the height you prefer your trellis to be.

conduit-height-36in

I chose 36″ heights because it will sit on top of a 12″ post, making it 48″ off the ground.

transfer-measurement-to-conduit

Use a pipe cutter to cut the conduit to size.

pipe-split-cut

If you’ve never used a pipe cutter you’ll find this short video tutorial I made helpful:

Using a 3/8″ spade bit drill into the 4″x4″ posts against the edges of your planter bed. Drill into the post at least 5″ deep.

drill-3.8-hole-into-corner-posts

Drop the threaded rod into the hole.

insert-12in-threaded-rod

Slip your first conduit pipe over the threaded rod. Repeat for the remaining vertical supports.

slip-conduit-over-threaded-rod

Attach one of the corner connectors to the first or last upright conduit.

attach-angled-conduit-connector

Set the T connectors on the middle supports. Measure the horizontal distance between the vertical supports.

measure-space-between-veritcal-supports

Cut your conduit and test fit them in the connectors.

Secure the horizontal top conduit to the corner connector.

tighten-screws-on-conduit-connector

Secure the other horizontal pieces between the remaining connectors.

How to Make a Budget Vegetable Trellis | Pretty Handy Girl

Remember that I suggested you purchase the set screw T connectors from Amazon (affiliate link). If you can’t find those connectors, you’ll have to drill your own holes and make your own set screws.

drill-hole-into-conduit-3-way-connector

The trellis support poles should look like this:

installed-conduit-supports

Wrap the trellis netting around the top and side supports of your trellis. Tie the netting onto the supports making sure the netting is snug.

slip-vine-netting-over-conduit-supports

Now you’re ready to grow some vines!

budget-trellis-supports

As your plants grow, gently tie them to the trellis with twisty ties.

gently-tie-plants-to-trellis

To protect my beds from wildlife, I bent pvc conduit (affiliate link) into hoops and draped wildlife netting on top of the bed.

wildlife-netting-over-planter-bed

So far this seems to have protected my plants from fruit and veggie nibblers.

hand-on-wildlife-netting

Do you have a garden? How do you keep the critters away from your fruitful harvest?

PHGFancySign

How to Build a Vegetable Trellis on a Budget | Pretty Handy Girl

How to Build a Rot-Resistant Raised Planter Bed | Pretty Handy Girl

I’ve wanted to start a vegetable garden for three years! Each Spring something comes up and it doesn’t happen. This year is the year, I told myself. I’m going to build Raised Planter Beds that are rot-resistant (because who wants to build anything that has to be re-built after a few years. Not me!) Luckily, the spot I had in mind gets plenty of sunshine throughout the day.

I spent some time researching and pricing the materials for this project. My criteria was:

  • Rot-resistant
  • Minimal chemicals for rot-resistancy
  • Easy on my budget
  • Attractive to look at

These Raised Rot-Resistant Planter Beds check off all those requirements!

How to Build a Rot-Resistant Raised Planter Bed | Pretty Handy Girl

The main material for the beds is fiber-cement siding aka Hardi-Plank. The material is a cement-based product meant for exterior application on houses. It is also bug-resistant which means it should hold up to an apocalypse.

The one negative about fiber-cement siding is that it is very flexible and cannot be used without a structural support. To solve that problem I decided to add a beautiful cedar trim on the outside of the siding. And internally, I created support with pressure-treated 4×4’s and an internal 2″x4″ pressure treated support. (These are the only chemical-treated lumber I used in this build. If you are concerned about leaching, you can prime your lumber before using it in your planter bed. Instead of priming, I chose to plant flowers closest to the posts and plant the vegetables further away.)

How to Build a Rot-Resistant Raised Planter Bed | Pretty Handy Girl

Are you ready to learn how to Build your own Rot-Resistant Raised Planter Beds?

How to Build a Rot-Resistant Raised Planter Bed | Pretty Handy Girl

Before we get started, let’s thank the guys at EcoScraps for sponsoring this post.

How to Build a Rot-Resistant Raised Planter Bed | Pretty Handy Girl

What? You haven’t heard of EcoScraps? This company is awesome! They are saving the planet one bag of garden product at a time. Seriously, Dan and Craig (the founders) were in college at an all-you-can-eat buffet and were disgusted by all the wasted food. They devised a plan to convert restaurant scraps and waste into natural and organic compost soils and plant food. In 2017, EcoScraps will keep 75 million pounds of food from landfills by turning it into compost (aka black gold for your garden.) You rock EcoScraps!

You can read more about their products when it’s time to fill that beautiful planter bed you built. Right now, let’s get building!

(I’ve included affiliate links for your convenience. I earn a small percentage from a purchase using these links. There is no additional cost to you. You can read more about affiliate links here.)

Tools & Materials:

Cut List:

  • 2 – 8″ x 12′ hardi-plank cement siding
  • 2 – 8″ x 3′ hardi-plank cement siding
  • 12 – 1″ x1 1/2″ x 5″ cedar trim
  • 4 – 1″ x1 1/2″ x 38″ cedar trim
  • 4 – 1″ x1 1/2″ x 12′ cedar trim
  • 8 – 4″ x 4″ x 12″ pressure treated posts
  • 2 – 2″ x 4″ x 3′ pressure treated lumber

Preparation:

Cut your lumber per the cut list above. Cut your Hardi-Plank siding to size. (Note: You may want to use an old blade or a masonry blade in your saw for cutting. The cement siding can dull your blade.)

Paint your siding the color of your choice. I used Calypso Blue by Benjamin Moore. Allow the siding to dry.

How to Build a Rot-Resistant Raised Planter Bed | Pretty Handy Girl

Instructions for Assembly:

Line up four 4″x4″x12″ posts on the ground. Lay your hardi-plank siding on top of the posts. Line up the siding with the bottom of the posts. Space one post at each end and the two posts in the middle. The middle posts will line up at 4′ and 8′

Nail the siding to the 4″x4″ posts. (Or enlist your little laborers to do it for you. LOL.) Be careful not to nail the nails too deep or it will crack the cement siding.

How to Build a Rot-Resistant Raised Planter Bed | Pretty Handy Girl

Repeat for the opposite side.

How to Build a Rot-Resistant Raised Planter Bed | Pretty Handy Girl

Lay out the cedar trim pieces on top of the siding.

How to Build a Rot-Resistant Raised Planter Bed | Pretty Handy Girl

Nail the 12′ lengths of cedar trim to the top and bottom.

How to Build a Rot-Resistant Raised Planter Bed | Pretty Handy Girl

Nail the 5″ pieces on the sides and at the 4′ and 8′ mark (where the posts are.) See diagram below:

How to Build a Rot-Resistant Raised Planter Bed | Pretty Handy Girl

You should have the two sides of your planter bed completed now.

How to Build a Rot-Resistant Raised Planter Bed | Pretty Handy Girl

Position the two sides 3′ apart. Line up the 3′ section of hardi-plank siding against the edges of the 4×4 corner posts.

How to Build a Rot-Resistant Raised Planter Bed | Pretty Handy Girl

Nail the siding to the corner posts.

How to Build a Rot-Resistant Raised Planter Bed | Pretty Handy Girl

Line up one of the 1″ x 38″ pieces of cedar on the bottom of the siding. Nail it into place with finish nails.

How to Build a Rot-Resistant Raised Planter Bed | Pretty Handy Girl

Next, nail the 1″ x  5″ cedar trim pieces over the ends of the siding and into the adjoining sides of the planter bed.

How to Build a Rot-Resistant Raised Planter Bed | Pretty Handy Girl

You may have a slight gap, but that’s okay. I won’t tell anyone if you don’t.

How to Build a Rot-Resistant Raised Planter Bed | Pretty Handy Girl

Position the remaining 1″ x 38″ piece of cedar trim at the top of the siding and secure with finish nails.

How to Build a Rot-Resistant Raised Planter Bed | Pretty Handy Girl

Now that the one end is secured, repeat for the opposite side.

Your bed should look like this:

How to Build a Rot-Resistant Raised Planter Bed | Pretty Handy Girl

How to Build a Rot-Resistant Raised Planter Bed | Pretty Handy Girl

Before filling the planter beds with dirt, you must secure two 2″ x 4″ x 36″ support pieces inside the planter with 2 1/2″ wood screws.

How to Build a Rot-Resistant Raised Planter Bed | Pretty Handy Girl

The support pieces are installed at the 4′ and 8′ location inside the planter. This prevents the sides of the planter bed from bowing out.

How to Build a Rot-Resistant Raised Planter Bed | Pretty Handy Girl

For a decorative touch (and for adding trellis supports later) drill a hole into the 4×4 posts of the planter bed.

How to Build a Rot-Resistant Raised Planter Bed | Pretty Handy Girl

Add a finial post cap to the corner posts.

How to Build a Rot-Resistant Raised Planter Bed | Pretty Handy Girl

Will you look at that handsome planter bed!

How to Build a Rot-Resistant Raised Planter Bed | Pretty Handy Girl

Tips for Planting Your Garden:

Your raised beds may be well built, but what you fill the beds with is equally important for a successful garden. I was recently introduced to EcoScraps and love that they re-use food scraps to create their own Natural and Organic plant foods, compost and soils (now available at Lowe’s and Walmart.)

Fill your planter with good quality compost. Ideally you’ll want to use EcoScraps Raised Bed Garden Mix. (Because I needed a lot of compost, I chose to buy it from our local county yard waste facility by the pick up truck full. Consequently, I had to mix in several bags of vermiculite to improve the soil quality in my beds.)

How to Build a Rot-Resistant Raised Planter Bed | Pretty Handy Girl

Time to feed my little baby veggies!

How to Build a Rot-Resistant Raised Planter Bed | Pretty Handy Girl

The EcoScraps Tomato, Herb & Vegetable plant foot can easily be spread by hand around your plants…

How to Build a Rot-Resistant Raised Planter Bed | Pretty Handy Girl

…or you can work it into your soil before planting.

How to Build a Rot-Resistant Raised Planter Bed | Pretty Handy Girl

Add your plants to the raised bed.

How to Build a Rot-Resistant Raised Planter Bed | Pretty Handy Girl

Water the plants and soil well. Water daily until the plants are thriving. Then keep an eye on them and water when the soil starts to dry.

How to Build a Rot-Resistant Raised Planter Bed | Pretty Handy Girl

Do you see those pretty sections? I’ve utilized the Square Foot Gardening method (affiliate link). If you are a Square Foot Gardener, you’ll appreciate the tutorial I wrote to create those grids that won’t rot.

In my squares, I have some sections that are started from seed and others that were purchased as plants. Plus, there are a few self-starter plants from my compost pile! Hello, pumpkins.

How to Build a Rot-Resistant Raised Planter Bed | Pretty Handy Girl

For more information on using EcoScraps, check out these tips for using EcoScraps and how the product is made.

You’ll also love these ideas for building and utilizing raised garden beds.

How to Build a Rot-Resistant Raised Planter Bed | Pretty Handy Girl

What do you have growing in your garden?

How to Build a Rot-Resistant Raised Planter Bed | Pretty Handy Girl

Stay tuned for another gardening tutorial!  Here’s a tutorial to make vegetable trellis supports for all my climbing vegetables on a cheap budget! And don’t forget to read how to make the grids that look pretty and won’t rot.

You may also like this ultimate guide to composting!

How to Compost - Magnificent Garden Soil| Pretty Handy Girl


PHGFancySign

Disclosure: This is a sponsored post for EcoScraps. I was compensated for my time and for writing about EcoScraps. I was not told what to write, all opinions are my own. As always, I am extremely particular about the brands I work with. Only my favorites make it to the pages of this blog.

Build a Pergola with Trellis to Screen Your Trash Cans | Pretty Handy Girl

One of the design elements that our landscape designer proposed was Building a Pergola Trellis to screen our trash cans.  As soon as I saw the magazine clipping that she gave me, I was in love with the idea.

WoodMagazine.com Photo of Pergola

Clipping from WoodMagazine.com

I decided to make a few modifications to the plans and simplify the construction using Simpson Strong-Tie® fasteners. (I chose to partner with Simpson Strong-Tie® in the form of a sponsored post on this project .) This is a DIY project that requires some extra muscle for a few steps. Be sure to recruit someone to help with lifting and holding. Building a Pergola Trellis is a build that can be accomplished over a weekend. Ready to get building?

Tools & Materials:

(I’ve included affiliate links for your convenience. I earn a small percentage from a purchase using these links. There is no additional cost to you. You can read more about affiliate links here.)

Lumber:

  • 3 – 6″x6″x12′ posts
  • 1 – 4″x4″x8′ post
  • 2- 2″x6″x12′ beams
  • 6- 2″x6″x3′ cross beams
  • 1 – 2″x6″x8′ top rail
  • 2 – 4’x8′ window pane lattice sheets
  • 9 – 1″ x 1″ x 8′ boards
  • 6 – 2″ x 4″ x 8′ boards
  • Download and Print Edge Profile Template

Instructions:

Set three 6×6 posts into holes dug deep enough to go below frost level (check with your local frost level to determine if you need to set the posts deeper.) Holes should be approximately 12″ in diameter.

Build a Pergola with Trellis to Screen Your Trash Cans | Pretty Handy Girl

Dig a fourth hole 8″ wide for the 4×4 post.) This is the support for the side railing section and should be located approximately 8′ behind the left side pergola post. Set all posts into the holes on top of 6″ drainage rock. Then fill the rest of the hole with Quikcrete following directions on the bag for mixing and curing times (approximately 2-3 days).

Build a Pergola with Trellis to Screen Your Trash Cans | Pretty Handy Girl

Use a jigsaw to cut the ends of the 2″x6″x12′ beams. You can use this printable profile template.

Build a Pergola with Trellis to Screen Your Trash Cans | Pretty Handy Girl

Use the same profile to cut the six 2″x6″x3′ cross beams. Rotate the template 180 degrees to save lumber. Read more